
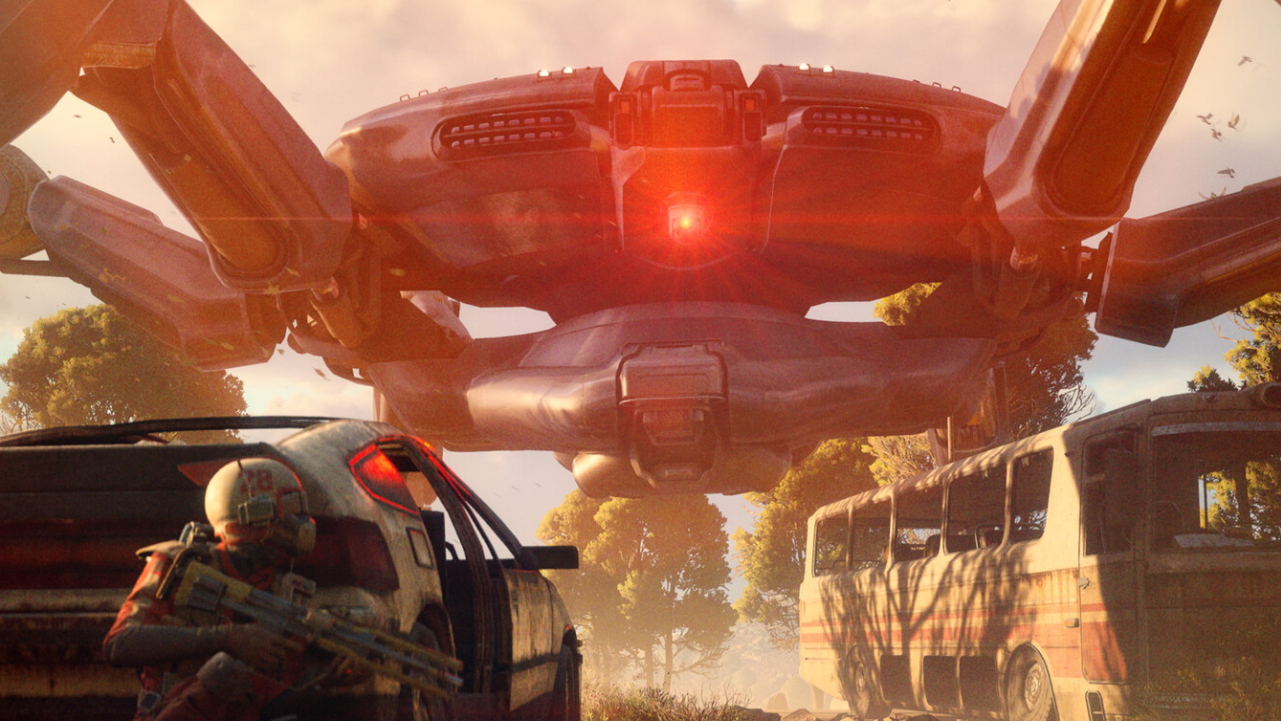
The Queen is Arc Raiders’ headline boss: a six-legged ARC that anchors Harvester events and soaks up an absurd amount of damage. That makes a simple question surprisingly hard to answer: how much health does the Queen actually have?
The short version: the Queen’s total health pool sits in the low‑to‑mid 30,000s, but that number drops sharply if you stay on weak points. Effective health can fall into the low 20,000s or even below when you chain crits on legs, head, or core. On top of that, a damage bug with Blaze Grenade Traps can erase her in seconds, completely bypassing the intended health budget.
Queen health numbers in Arc Raiders
Multiple community measurements and in‑game testing converge on two key figures for the Queen’s durability:
| Health context | Approximate value | What it represents |
|---|---|---|
| Nominal / full body health | ~33,800–34,000 HP | Estimated total HP when you hit armored areas and spread damage |
| Effective HP on weak points | ~21,000 HP | Approximate damage needed if you consistently hit weak spots (legs, head, core) |
These numbers explain why experiences vary so much. Squads that spray into her armored dome and torso can burn through huge amounts of ammo and Wolfpack grenades without seeing a phase change for minutes. Groups that focus fire her legs, exposed joints, and head can drop her in a fraction of the time, with the same gear.
Why “22,000 HP” and “33,000 HP” both circulate
Two different health claims show up again and again:
- “The Queen has 22,000 HP.”
- “The Queen has ~33,000 HP.”
Both have a basis in how Arc Raiders calculates damage.
- The ~33k number lines up with treating the Queen as a traditional tank boss: you’re hitting a lot of armored surfaces, you’re not always on a weak spot, and you might be splitting damage across body parts and summoned ARCs. In that scenario, total damage dealt before she dies clusters in the low 30,000s.
- The ~21–22k number is closer to her effective health once weak‑point multipliers are included. If you strip armor from legs, hammer exposed yellow joints, and stay on the head or visible core whenever possible, the total “raw damage” you need to see her fall is much closer to the early 20k range.
That’s why some players report putting 30,000+ points of “damage” into the Queen without killing her: end‑of‑match XP and score summaries roll several actions into one number. Damage to ARCs, time on surface, looting, killing raiders, and other actions all contribute to XP; it is not a pure “HP removed from Queen” readout. Looking at those screens alone overestimates how much health she actually soaked.
Weak points and effective health
The Queen’s armor is not uniform. Certain areas take much more damage than others, which is where the big difference between ~34k and ~21k HP comes from.
| Hit zone | Armor | Damage behavior | Impact on effective HP |
|---|---|---|---|
| Main body (dome, torso) | Heavily armored | Lower damage per shot, high resistance | Feels like fighting a 30k+ HP boss |
| Leg armor | Armored outer plating | Normal damage until plates break | Required step to expose leg weak points |
| Exposed leg joints (yellow) | Weak point | Significantly increased damage | Rapidly cuts down “practical” HP when focused |
| Head / face area | Partly armored, partly weak | High, consistent damage with precision shots | One of the best places for launchers and snipers |
| Core (visible when exposed) | Primary weak point | Highest damage multipliers | Fastest way to bring her from “smoking” to dead |
This uneven armor is why Wolfpack grenades and heavy weapons feel so inconsistent. Dumping Wolfpacks into her dome barely moves the health bar. Landing them on her head or exposed joints burns through phases in minutes.
Practically, that means the Queen’s “real” health for a disciplined squad is the weak‑point figure: around 21k effective HP. The 30k+ experience mostly comes from spreading damage across bad hit locations.
How the Blaze Grenade Trap bug breaks those numbers
On paper, a boss with ~34k HP should demand high‑tier anti‑ARC weapons and coordinated focus fire. In practice, one gadget currently ignores that math almost entirely: the blue‑rarity Blaze Grenade Trap.
Blaze Grenade Traps are bugged and doing far more damage than intended to both ARCs and players. When attached correctly to the Queen—threaded into the gap between “head” and body, or stuck on the underside—and then manually detonated, a single trap can burn through her entire health pool in a few seconds.
The interaction works because:
- The bugged Blaze Trap deals extremely high damage per tick.
- Those ticks appear to apply directly to critical hit volumes on the Queen’s model.
- The damage is sustained over time, so she never gets a chance to recover or shift away from the burning zone.
The result: a boss balanced around 20–30k effective HP dies in what feels like one action. Players are currently using this to farm Queens for loot and XP in three to five minutes per Harvester event, which is wildly out of line with the fight’s intended attrition‑based pacing.
How much damage you actually need to plan for
When planning a loadout, it helps to think in terms of damage budgets rather than the abstract HP number.
| Scenario | Target HP budget | What you need |
|---|---|---|
| Playing “honestly”, mixed accuracy | ~30k–34k | Plenty of anti‑ARC ammo, multiple heavy weapons, several Wolfpacks |
| Disciplined team, good weak‑point focus | ~20k–22k | One or two strong heavy weapons, Wolfpacks on head/core, manageable ammo drain |
| Using Blaze Trap exploit | Functionally irrelevant | One Blaze Grenade Trap placed correctly, then detonated by gunfire |
To translate that into practical planning:
- If you’re going in blind with randoms, assume the higher budget. Bring an anti‑ARC launcher (like Hullcracker equivalents), extra rockets, and multiple Wolfpacks. Expect a multi‑minute fight where other players may waste shots on the torso.
- If you’re coordinating with friends, build around the weak‑point number. Assign roles: one player strips leg armor, another locks in headshots with a sniper, and others time Wolfpacks for exposed joints.
- If you decide to abuse Blaze Traps while they still behave this way, the fight turns into a positioning puzzle instead of a DPS check: get behind her, stick the trap, shoot it immediately before she shakes it off.
Why the Queen still feels tougher than the raw HP suggests
Even with clear health estimates, the Queen often feels more oppressive than “a 34k HP bag of metal” should. There are a few reasons for that.
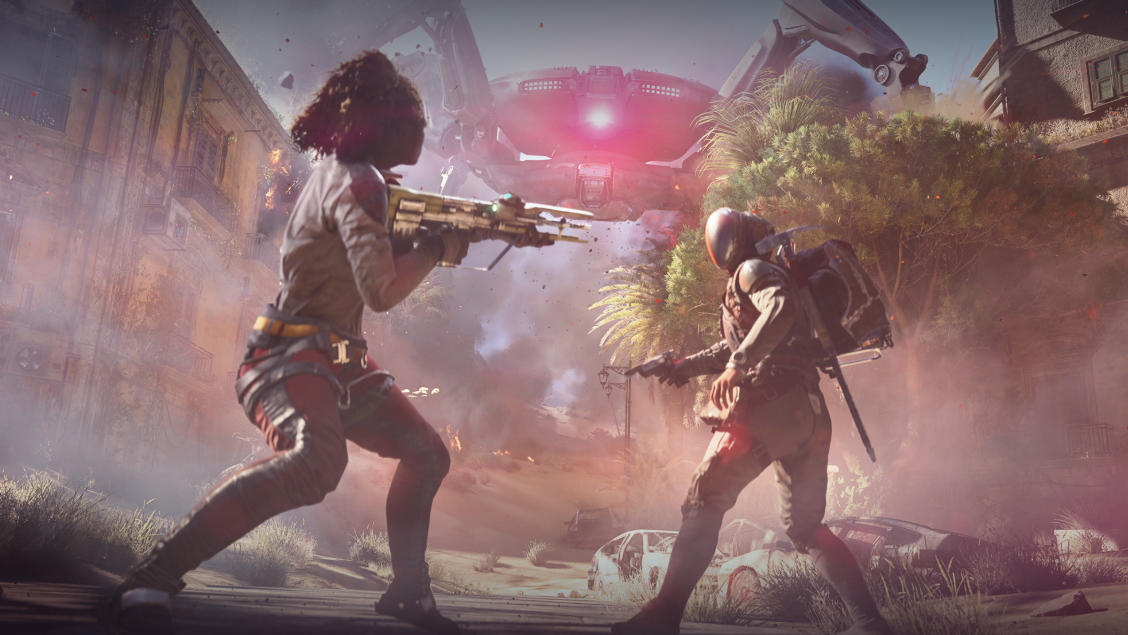
- Threat level and moveset. She sits at an “Extreme” threat level, with mortars, a sweeping laser, EMP pulses, and ground slams. The constant pressure forces players off weak points and into cover, stretching the fight.
- Environmental hazards. Mortar and rocket impacts leave burning zones that linger on the ground and can damage you through walls and windows if they land close enough. Missteps here cost medkits and time.
- Adds and PvP pressure. The Queen rarely fights alone. Lesser ARCs and opportunistic raiders use the chaos to push your position, forcing you to split attention and damage away from her health bar.
- Ammo economy. A boss with this HP pool in a PvE-only game is straightforward. In an extraction shooter, every extra rocket you fire at armored plates is one more resource you might lose if another team third‑parties the encounter before you can extract.
That combination means the “true” difficulty of the fight comes less from the number printed on a spreadsheet and more from the friction around landing 20–30k effective damage under pressure. The Blaze Trap bug is so popular precisely because it bypasses that friction entirely.
The Queen’s health in Arc Raiders is best understood as a range: roughly 34k if you let her armor do its job, closer to 21k if you stay disciplined on weak points, and essentially zero if you lean on the current Blaze Grenade Trap bug. Planning around the higher number keeps you safe; playing to the lower number is where the fight starts to feel fair.