
PowerToys’ Advanced Paste started life as a clever clipboard formatter. With recent updates, it has turned into a small AI router that can talk to multiple model providers, including models that run entirely on your PC.
The key to that flexibility is the “model provider” concept. Once you add one or more providers in PowerToys Settings, the Paste with AI option can switch between them on demand.
What model providers Advanced Paste supports
Advanced Paste now understands both online and local AI backends. The supported providers are:
| Model provider | Type | What it’s for |
|---|---|---|
| OpenAI | Online | Direct access to OpenAI models via API keys and usage-based billing. |
| Azure OpenAI | Online | OpenAI models hosted on Azure with enterprise-style endpoints and billing. |
| Mistral | Online | Mistral AI’s models exposed through their own API. |
| Google (Gemini) | Online | Google’s AI models such as Gemini through Google Cloud APIs. |
| Azure AI Inference | Online | Various models deployed on Azure’s AI Inference endpoints. |
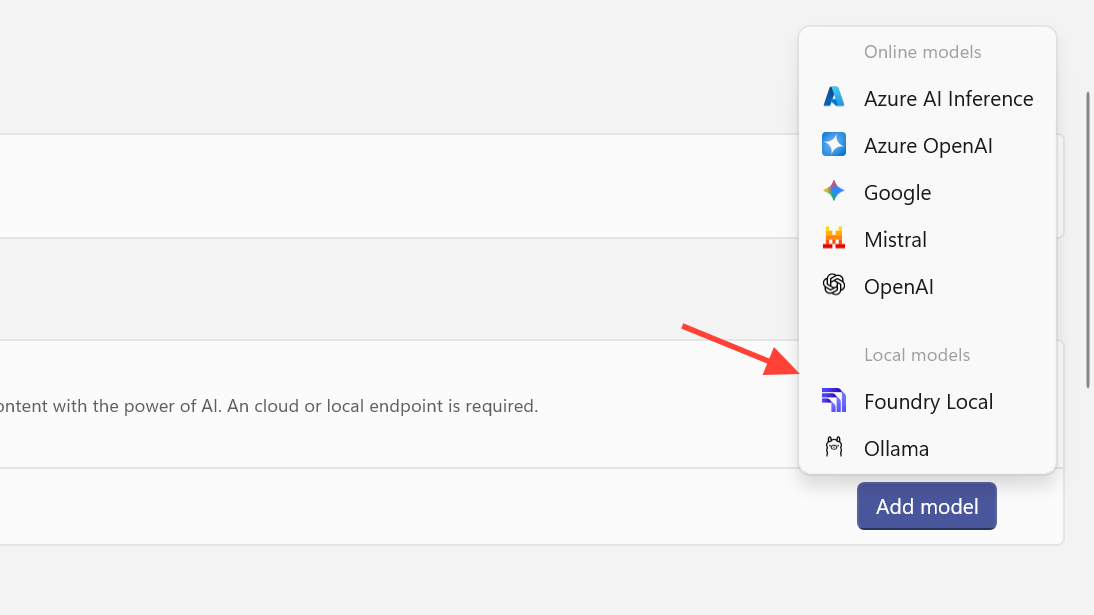
| Foundry Local | Local | On-device models managed by Foundry Local, using your PC’s NPU when available. |
| Ollama | Local | Open-source local models managed by the Ollama runtime on your machine. |
For online providers, you pay in API usage. For local providers, you trade network calls for CPU/GPU/NPU load and keep data on your device.
How Paste with AI uses model providers
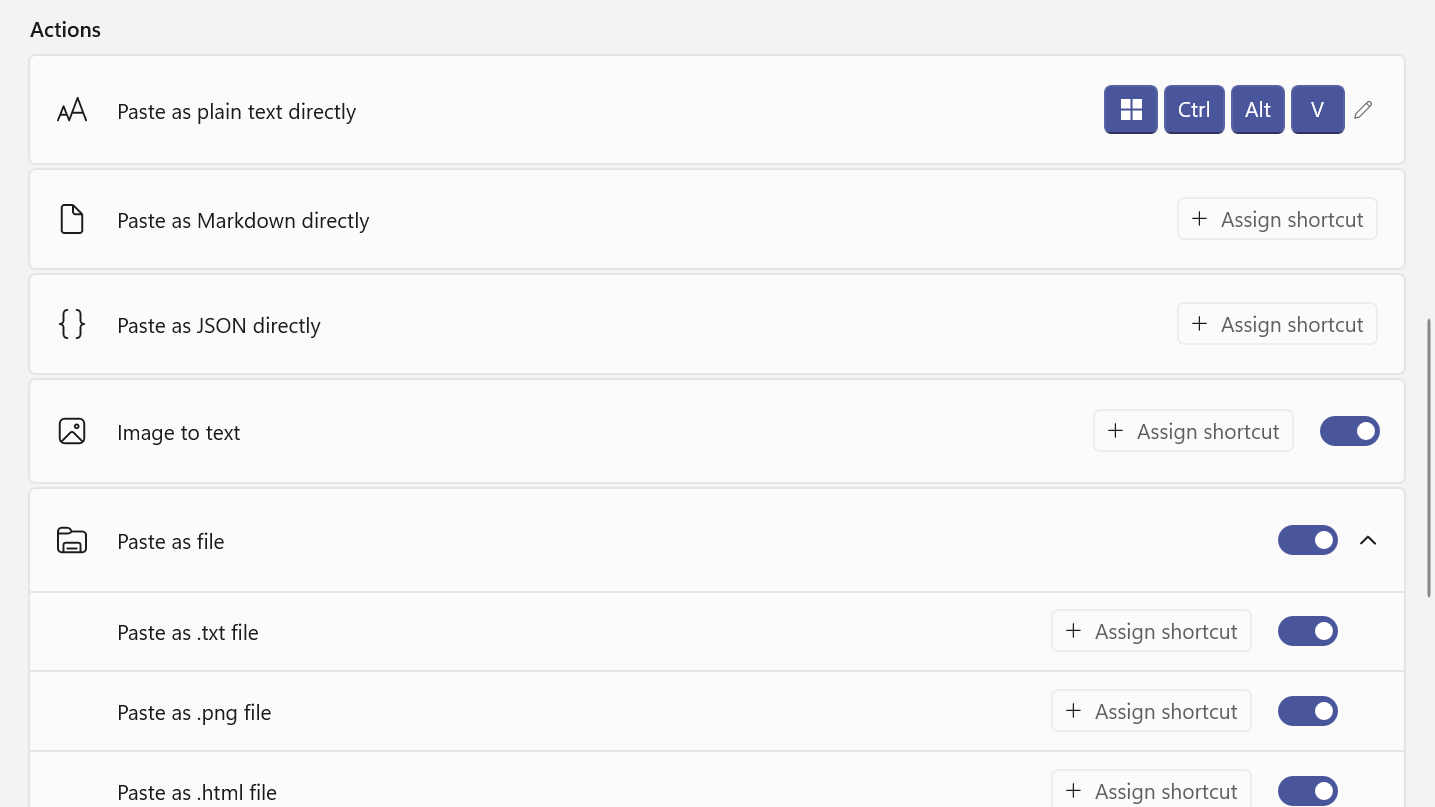
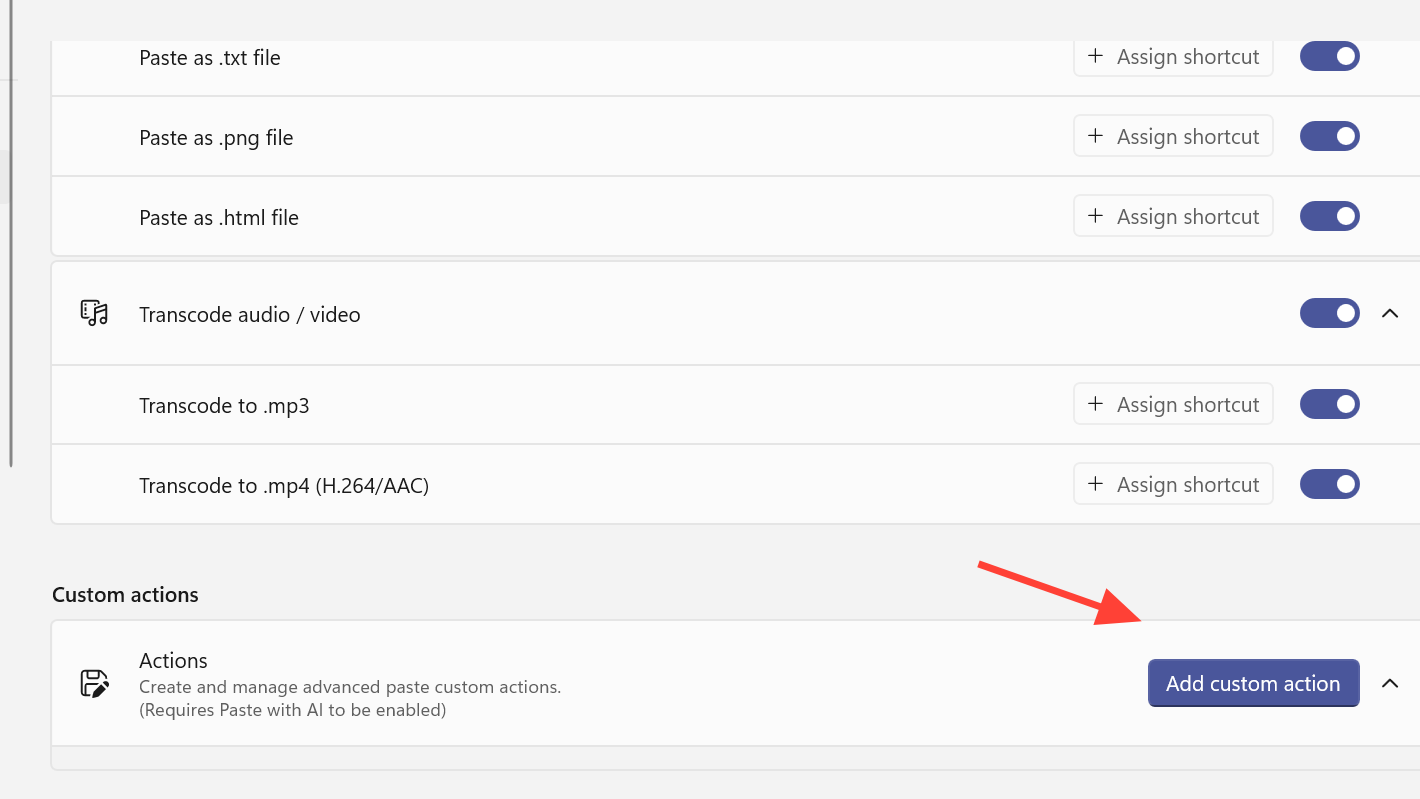
Advanced Paste always runs its basic clipboard tricks locally. Formatting as plain text, Markdown, or JSON, creating .txt, .html, or .png files, and transcoding media to MP3/MP4 all stay on your machine even when AI is turned off.
Paste with AI adds a separate path. When you trigger it, Advanced Paste:
- Reads the current clipboard contents (text, and in some cases images or other inputs).
- Sends that data plus your prompt to the active model provider.
- Receives back a transformed version, such as a summary, translation, or reformatted snippet.
- Shows a preview and lets you decide whether to paste the result.
When you configure multiple providers, the Advanced Paste window exposes a model selector so you can pick between OpenAI, Azure, Gemini, Mistral, or a local backend like Foundry Local or Ollama before sending anything.
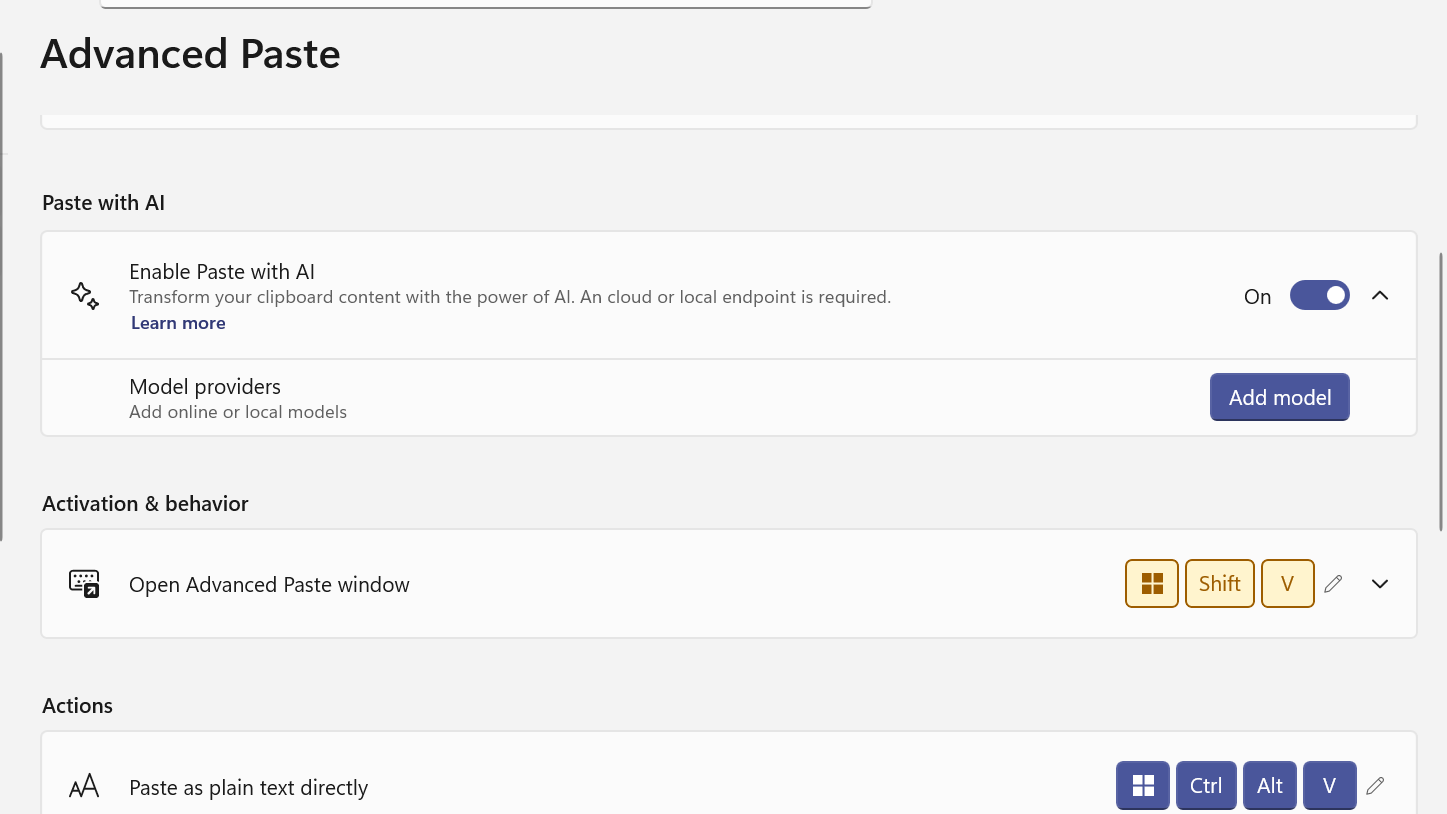
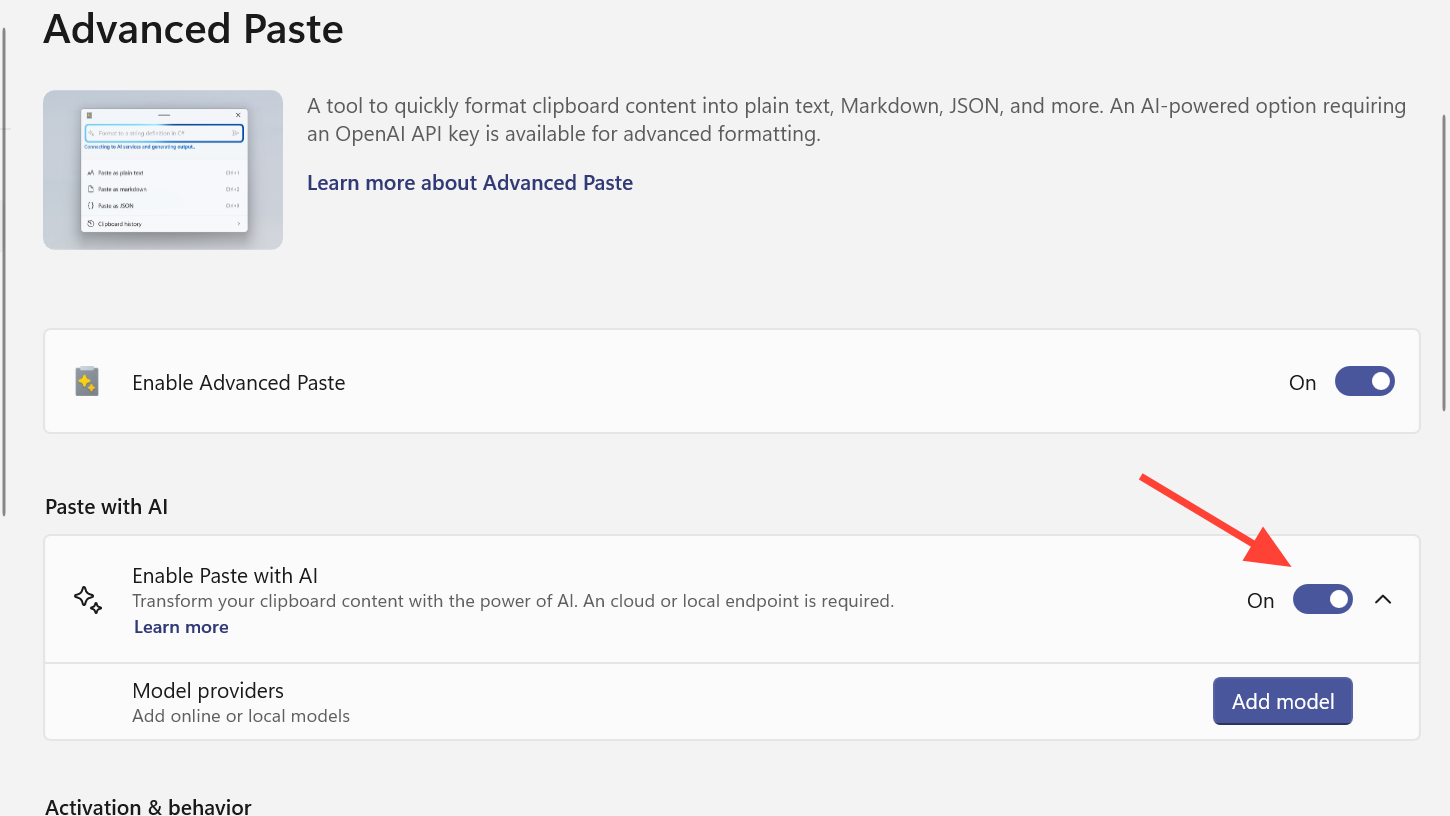
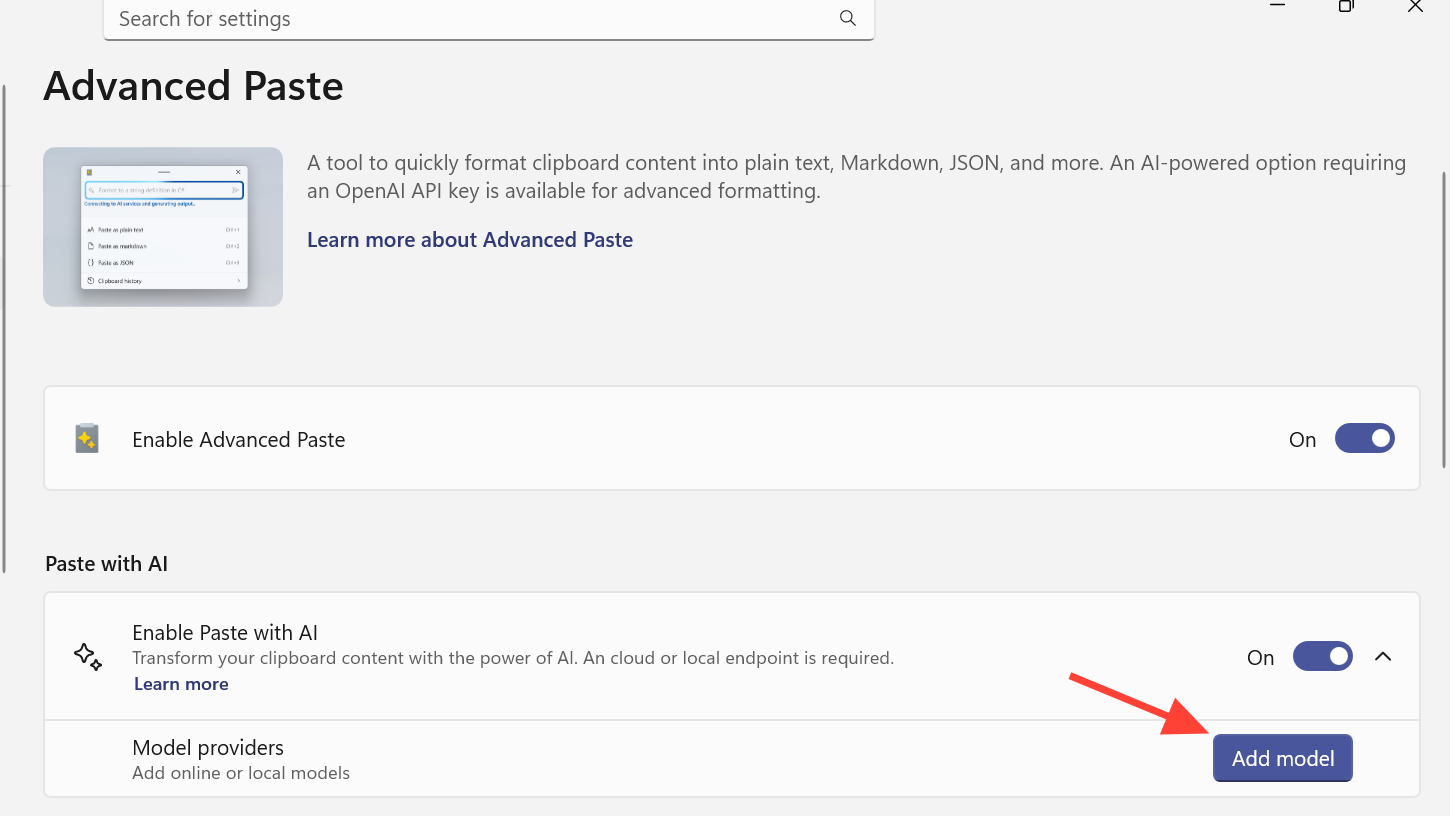
Enable Advanced Paste and Paste with AI
Before you can add a model provider, Advanced Paste itself needs to be active.
Step 1: Open PowerToys on Windows and go to the Advanced Paste section in the sidebar.
Step 2: Turn on Advanced Paste if it is disabled. This unlocks the global shortcut and the module’s settings.
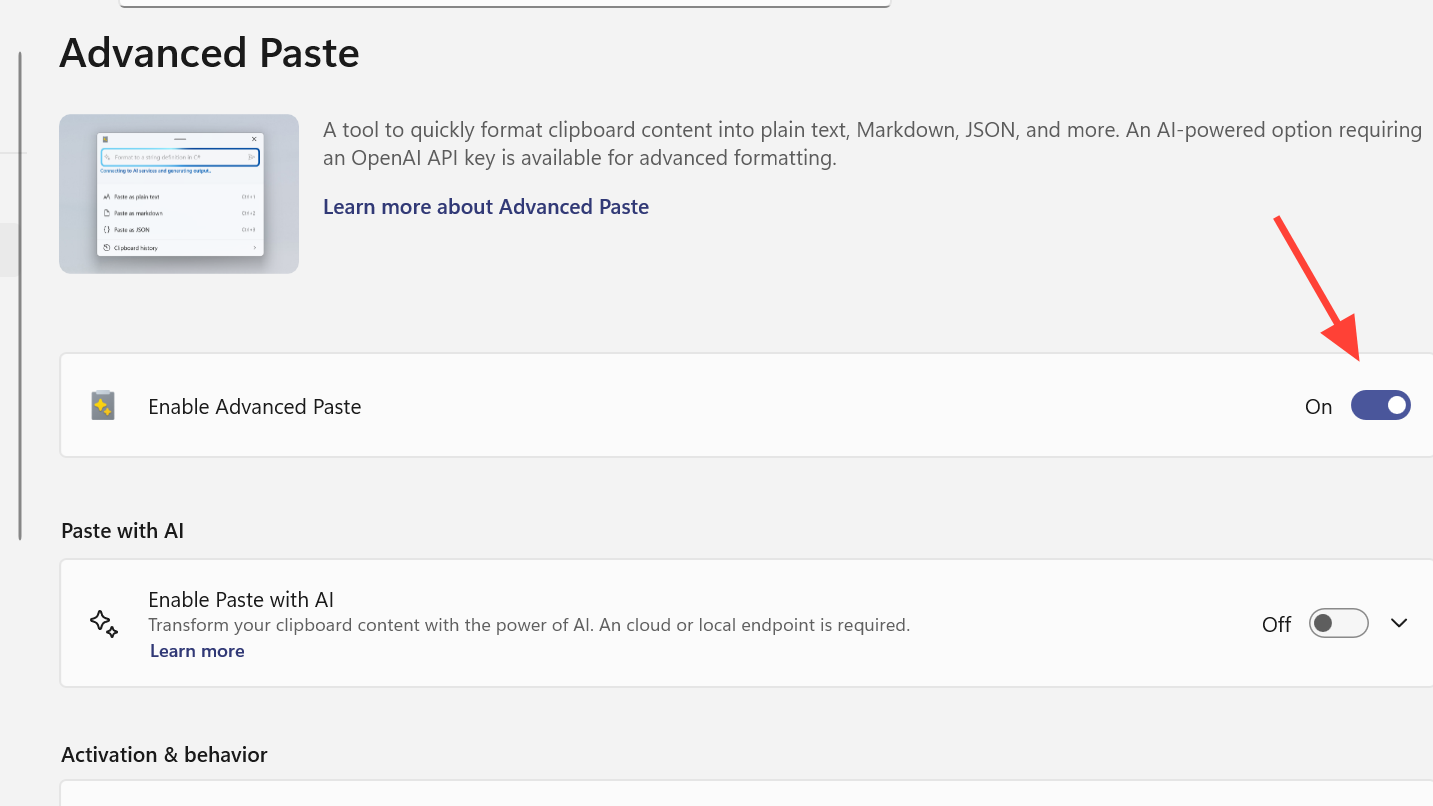
Step 3: Enable the Paste with AI option. Without this toggle, model providers will not be used even if configured.
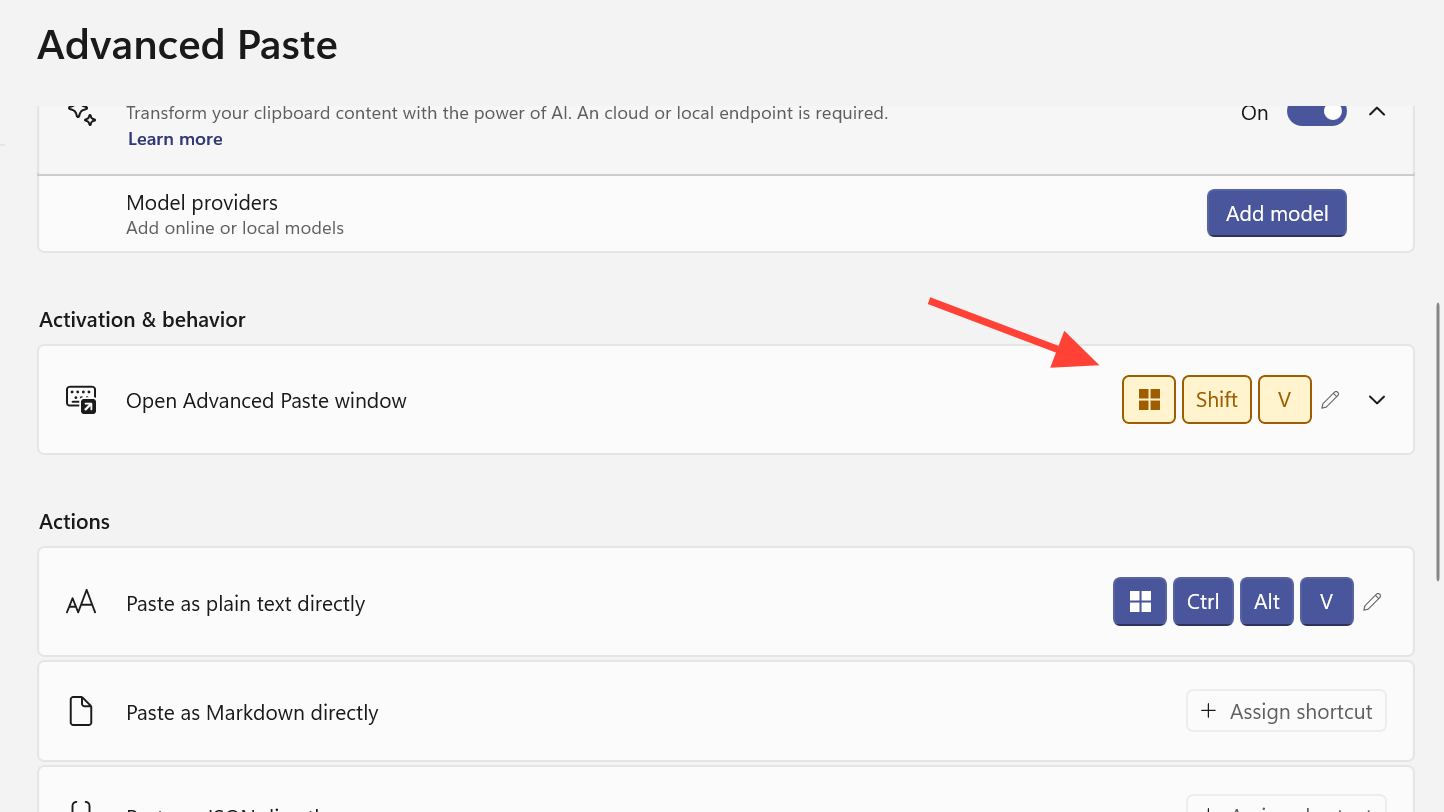
Step 4: Confirm or customize the shortcut to open the Advanced Paste window. By default it is Win + Shift + V. You can also define direct shortcuts for “Paste as plain text”, “Paste as Markdown”, and “Paste as JSON”.
Ctrl + V as the activation shortcut, but overriding the core paste key tends to break habits and can confuse other apps. Leaving it alone is safer.Adding a model provider in PowerToys
Model providers live under Advanced Paste’s Settings. Each entry represents a different backend configuration.
Step 1: In PowerToys, open Advanced Paste settings.
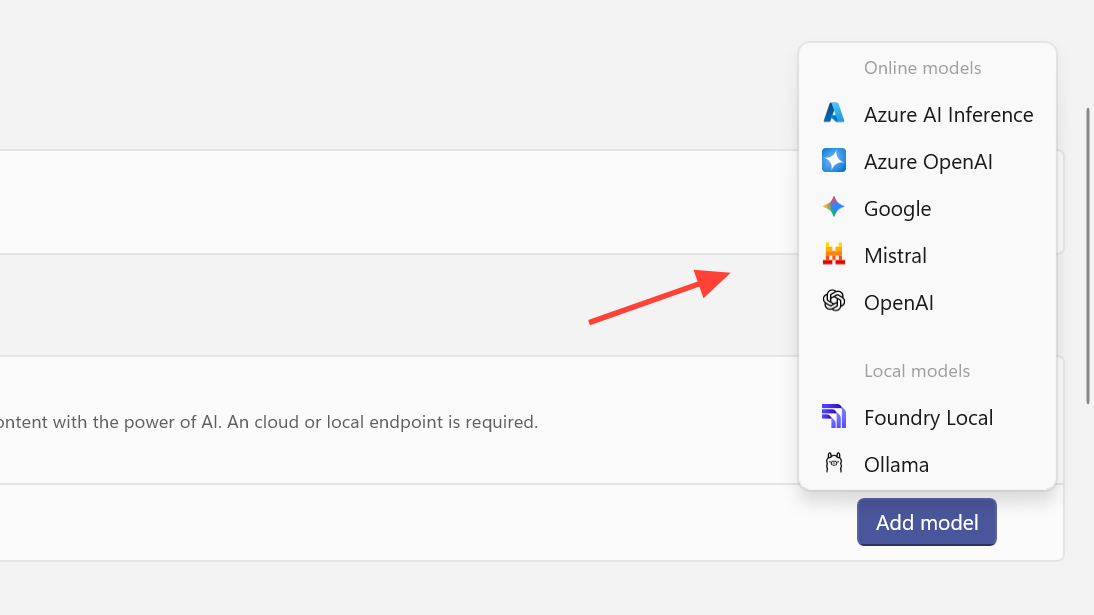
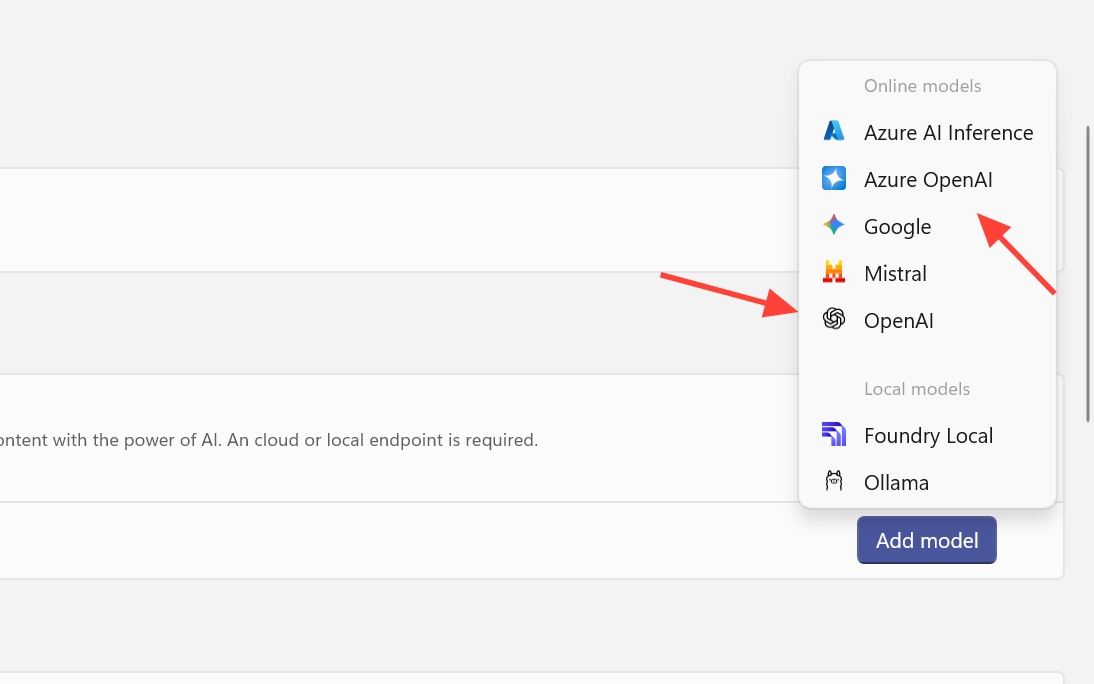
Step 2: Find the Model providers area and select Add model. This opens the Add model provider dialog.
Step 3: Use the dropdown to choose the provider type you want to configure, such as OpenAI, Azure OpenAI, Mistral, Google, Azure AI Inference, Foundry Local, or Ollama.
Step 4: Fill out the required fields for that provider:
- For online providers you typically enter an API key, an endpoint URL (when needed), and any required configuration such as a project or deployment name.
- For local providers such as Foundry Local or Ollama you normally point to the model or runtime on your machine and provide any extra options requested by that runtime.
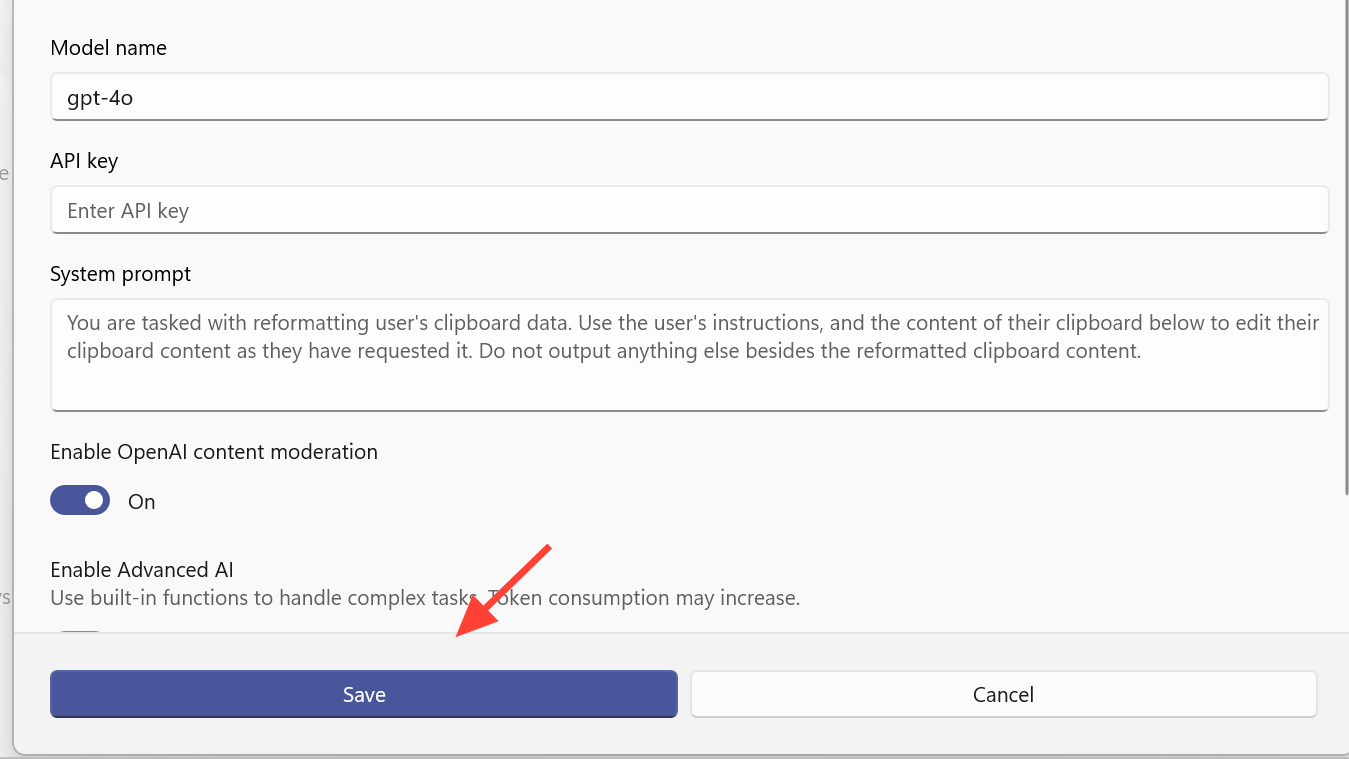
Step 5: Select Save. The provider now appears in the Model providers list and becomes selectable in the Advanced Paste UI.
Online providers enforce their own quotas. If Paste with AI returns an API key quota exceeded error, the selected account has no remaining credits and you need to top it up or switch to a different provider.
Configuring specific providers
Configure OpenAI and Azure OpenAI
OpenAI and Azure OpenAI are configured separately, even though they expose similar models.
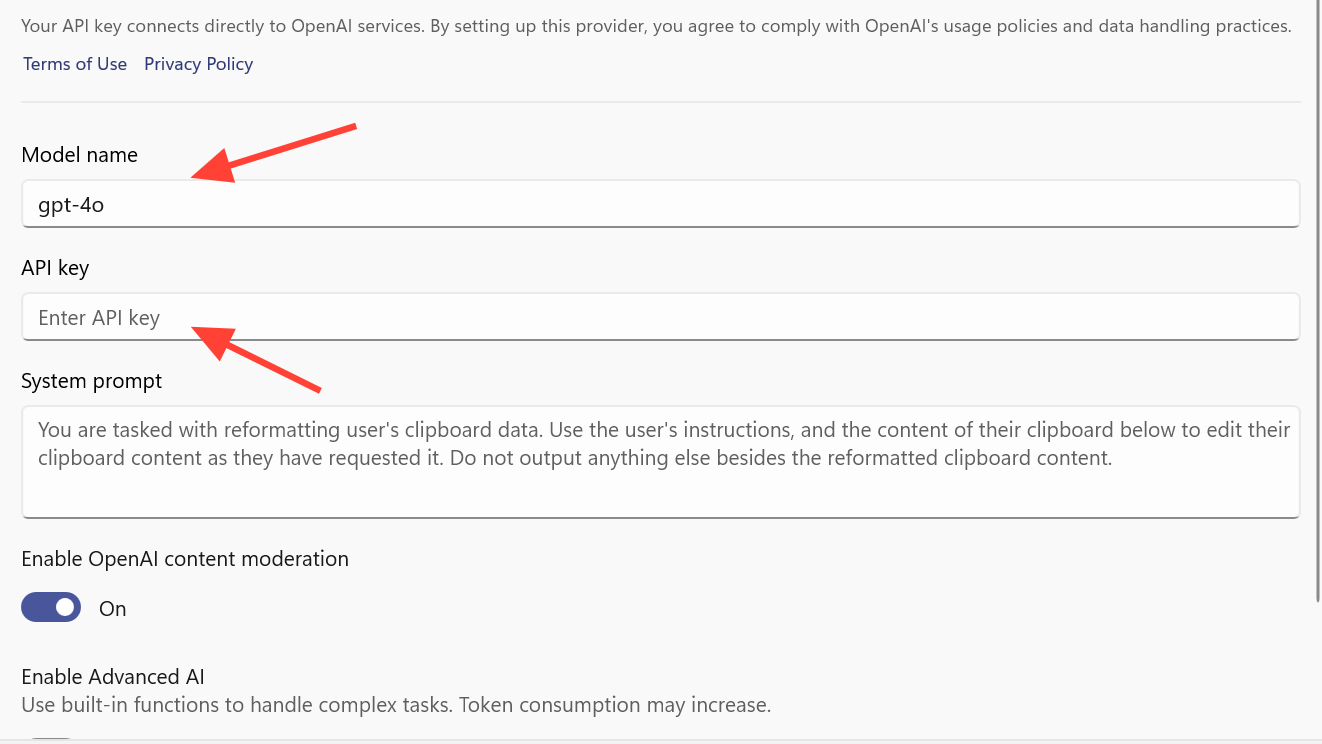
Step 1: In the Add model provider dialog, choose OpenAI or Azure OpenAI.
Step 2: For OpenAI, paste a valid API key and optionally refine settings such as the endpoint if you’re using a custom base URL. For Azure OpenAI, provide the API key and the Azure endpoint URL.
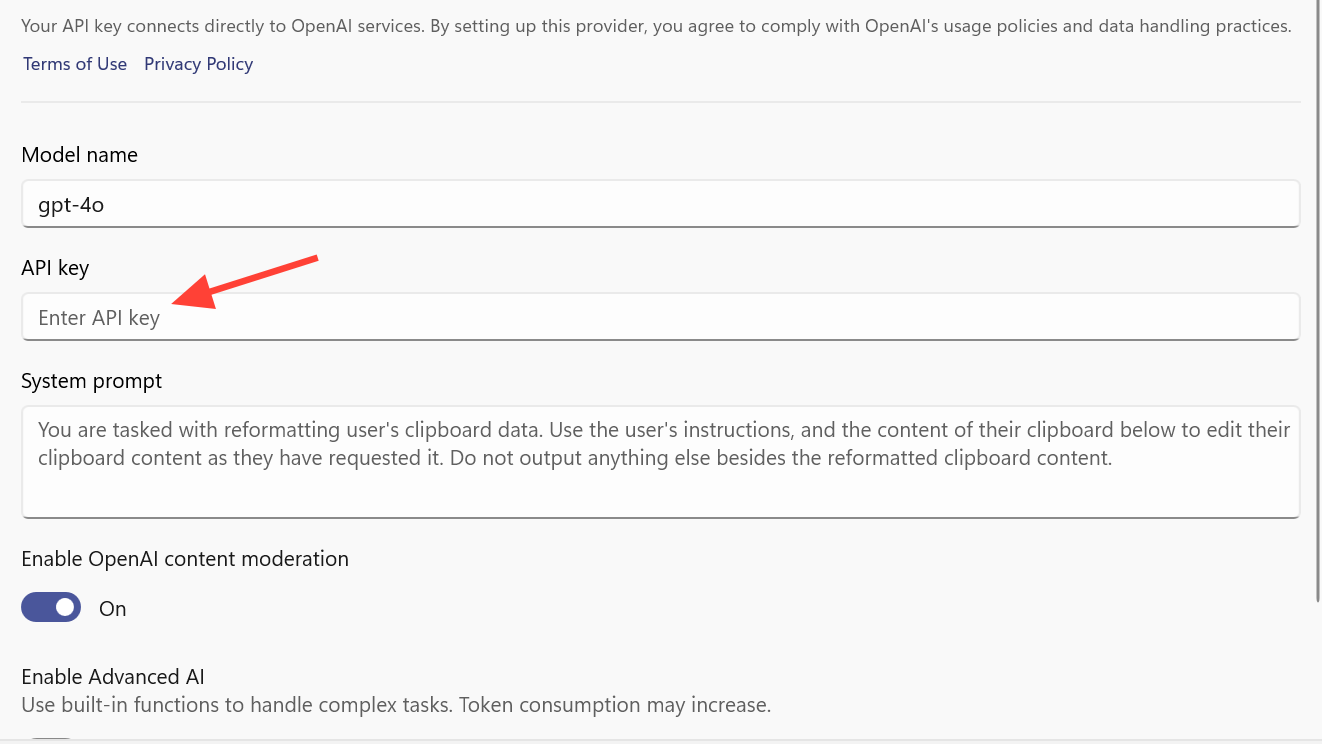
Step 3: Select Save to register the provider.
When OpenAI is the chosen provider, Advanced Paste can optionally use Semantic Kernel to chain multiple AI steps, which unlocks more advanced scenarios like taking images from the clipboard and generating file output instead of only returning text.
Configure Google (Gemini), Mistral, and Azure AI Inference
These three fall into the same pattern: each is an online API service backed by its own billing.
Step 1: In Add model provider, pick Google, Mistral, or Azure AI Inference.
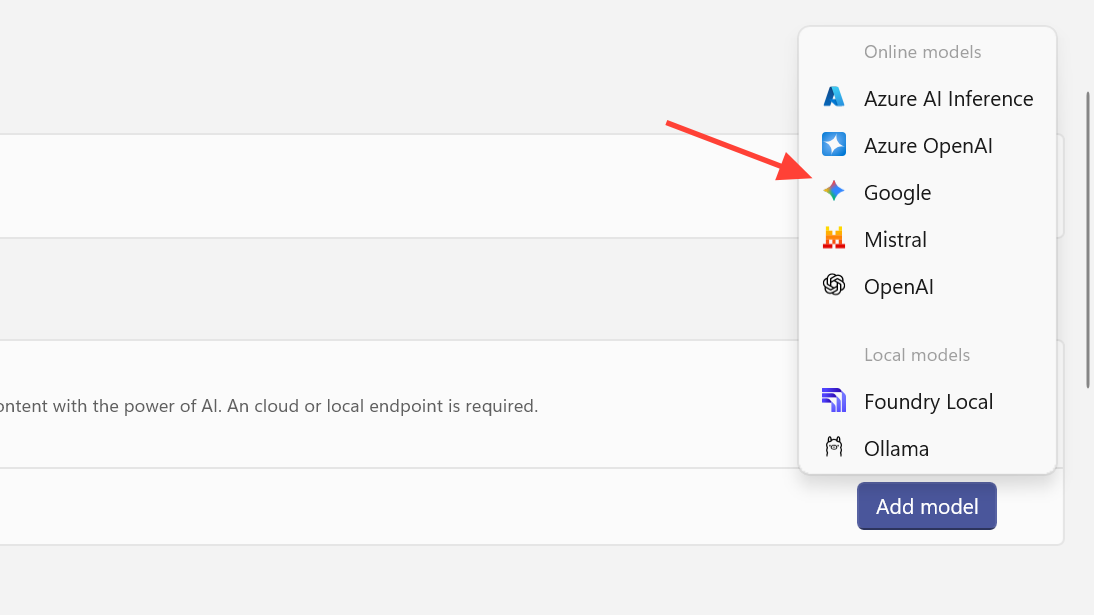
Step 2: Enter the API key issued by that service. If the dialog prompts for an endpoint URL, paste the endpoint corresponding to your deployment or project.
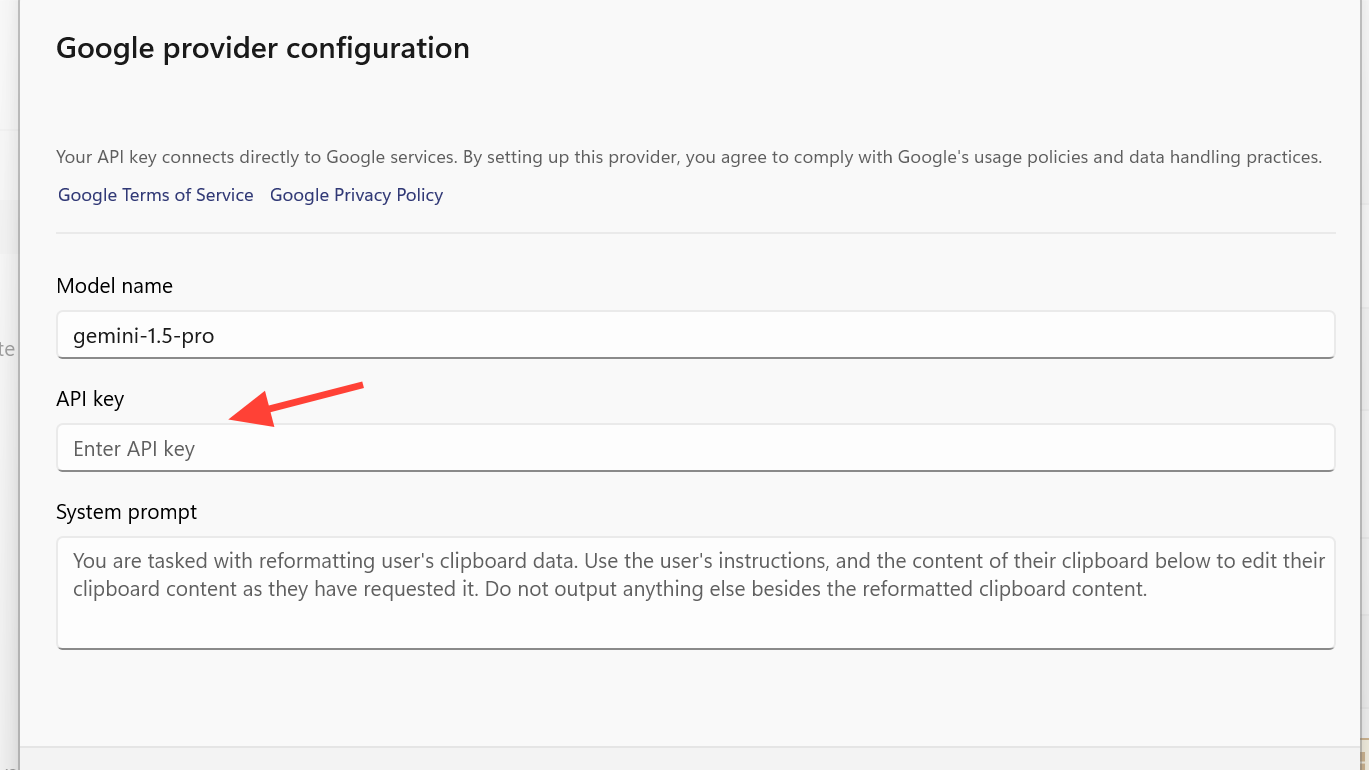
Step 3: Save the configuration. The models behind these services become available for Paste with AI and can be switched to from the Advanced Paste window.
Each of these providers bills separately, with their own pricing tiers.
Configure local providers with Foundry Local and Ollama
Local providers are what turn Advanced Paste into an on-device tool. Foundry Local and Ollama both run models on your own hardware, including NPUs in newer Windows PCs.
Step 1: Install the local runtime you want to use:
- Download and set up Foundry Local from the Foundry Local documentation.
- Install Ollama by following the instructions on the Ollama documentation site.
Step 2: In PowerToys, open Add model provider and choose Foundry Local or Ollama.
Step 3: Provide the required details. This typically includes a model identifier or path and any extra configuration requested by the local runtime.
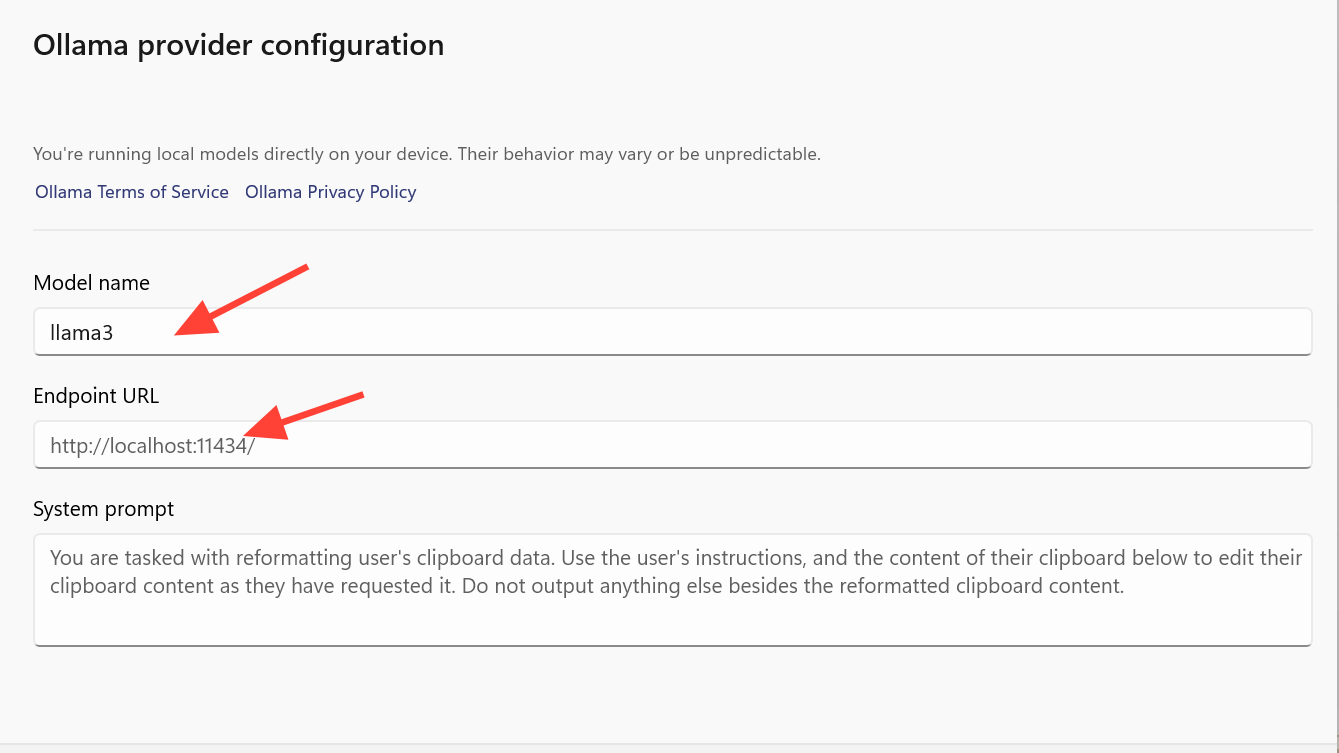
Step 4: Save the provider. It now appears alongside your online providers in the list and in the model selector.
Once a local provider is active and selected in Advanced Paste, actions like translation or summarization can run without any cloud traffic. That avoids API costs and keeps clipboard contents on your device, at the expense of local compute load.
Using multiple model providers in the Advanced Paste window
With at least one provider configured and Paste with AI enabled, the Advanced Paste window becomes your control center.
Step 1: Press Win + Shift + V (or your custom shortcut) to open Advanced Paste.
Step 2: Check the preview of your current clipboard contents. Recent updates surface that content directly in the window, so you can verify what will be sent.
Step 3: Use the model selection dropdown to choose which provider should handle this run. You can switch between OpenAI, Azure, Gemini, Mistral, Foundry Local, Ollama, and any other configured provider without touching Settings again.
Step 4: Either type a one-off prompt, such as “Summarize in three bullet points,” or pick one of your saved custom actions if you’ve configured them.
Step 5: Trigger Paste with AI. Advanced Paste asks the chosen model provider to process the clipboard contents and then shows the output for review before inserting it into your app.
Using multiple providers this way makes it easy to route sensitive data toward local models while keeping cloud models for heavier or higher-quality transformations.
Managing custom AI actions
Advanced Paste supports custom actions that bundle a prompt and, optionally, a keyboard shortcut. These sit on top of whatever model provider you pick.
Step 1: In Advanced Paste settings, scroll to the Actions section.
Step 2: Click "Add custom action" at the bottom to create actions for tasks you repeat often, such as “clean up formatting”, “translate to English”, or “rewrite to be more formal”. Each action stores the prompt text and can be mapped to a shortcut.
Step 3: When you use Advanced Paste, choose a model provider first, then trigger one of these actions. The action’s prompt is sent to the selected provider along with the clipboard content.
This separation of “what the model should do” from “which model runs it” is where model providers really pay off. You can keep your prompts the same while testing different backends or moving from OpenAI to a local Ollama model without recreating workflows.
Advanced Paste has moved from a simple formatting helper to a small, configurable AI front end for Windows. Adding model providers is the step that unlocks that flexibility, whether the destination is OpenAI, Azure, a Gemini deployment, or a local NPU on your laptop. Once the providers are configured, switching between them becomes a one-click decision every time you paste.