Being able to see the time in different time zones quickly can come in handy in several situations. For instance, you may be working with people located in different time zones, or want to connect with clients, friends, and family across the world. Whatever the reason, you can add multiple time zone clocks to the Windows 11 taskbar easily from the Windows 11 'Data and Time' settings page.
Method 1: From the Settings page
- Open the Settings app using the
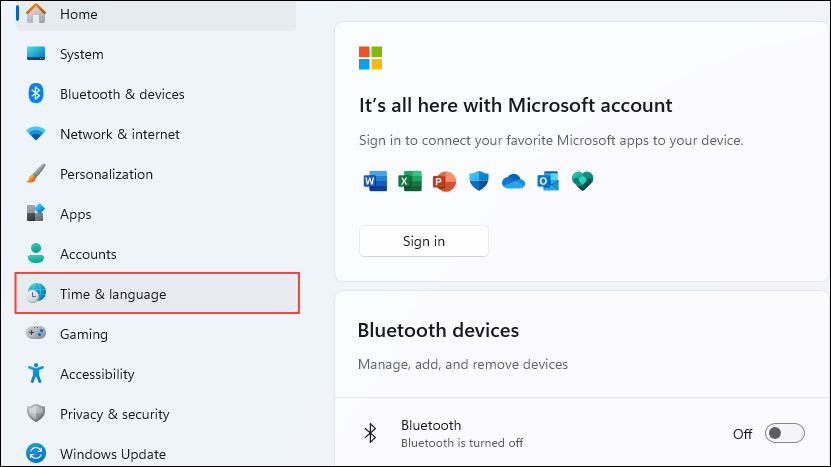
Win + Ishortcut and click on 'Time and Language' on the left.
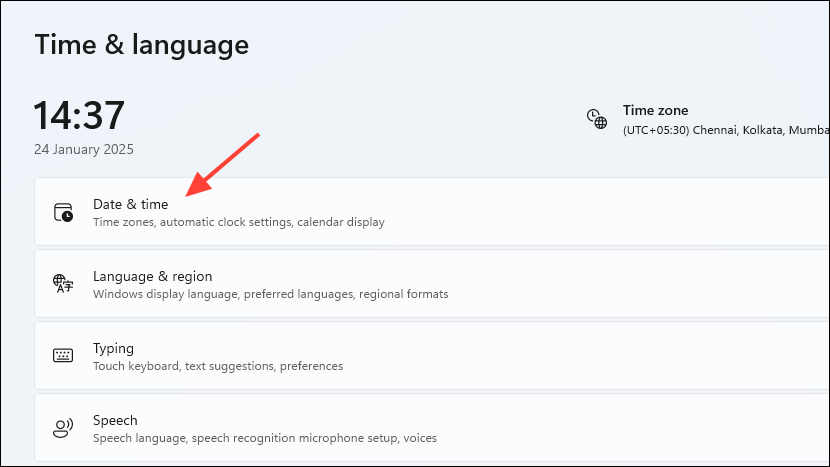
- Then click on 'Date and Time' on the Time and Language page.
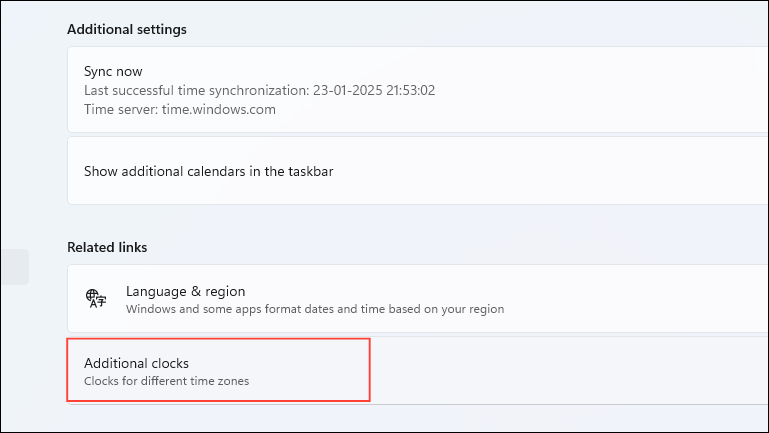
- Scroll down to the bottom and click on 'Additional clocks'.
- Now, click on the 'Show clock 1' checkbox to enable it and select the time zone for which you want to add the second clock.
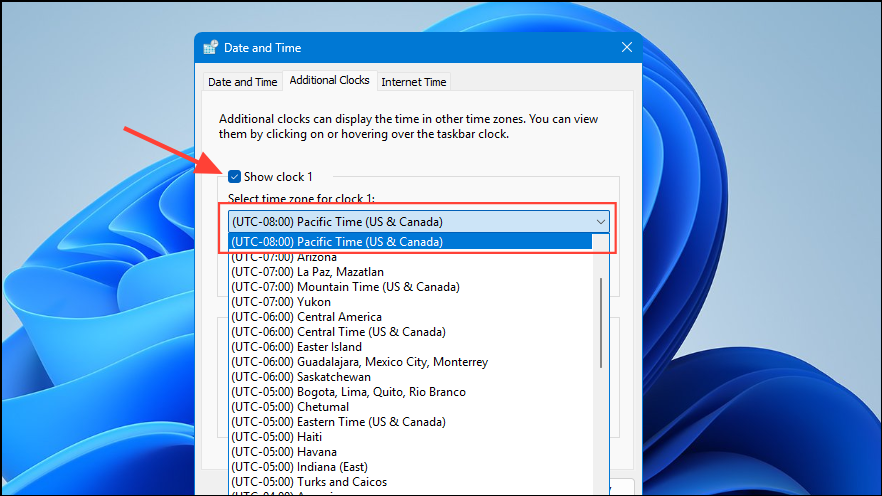
- Add a name for the second clock and click on the 'Apply' button before clicking on OK.
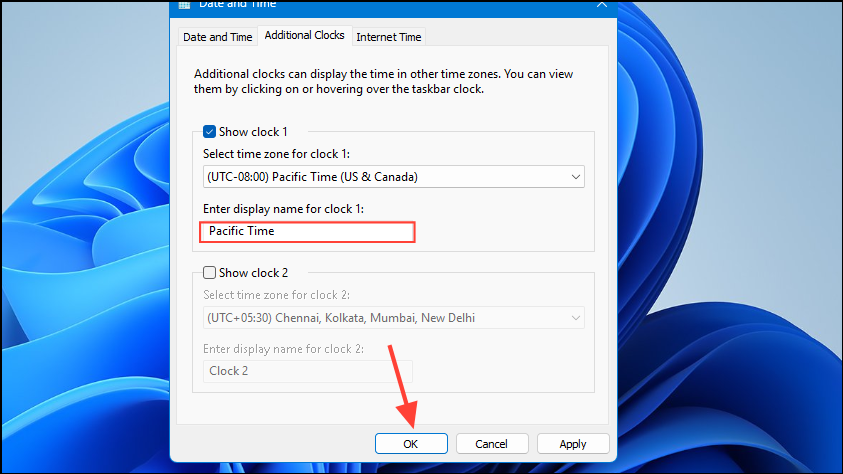
Note: If you want, you can add another clock by following the same steps by clicking on the 'Show clock 2' option.
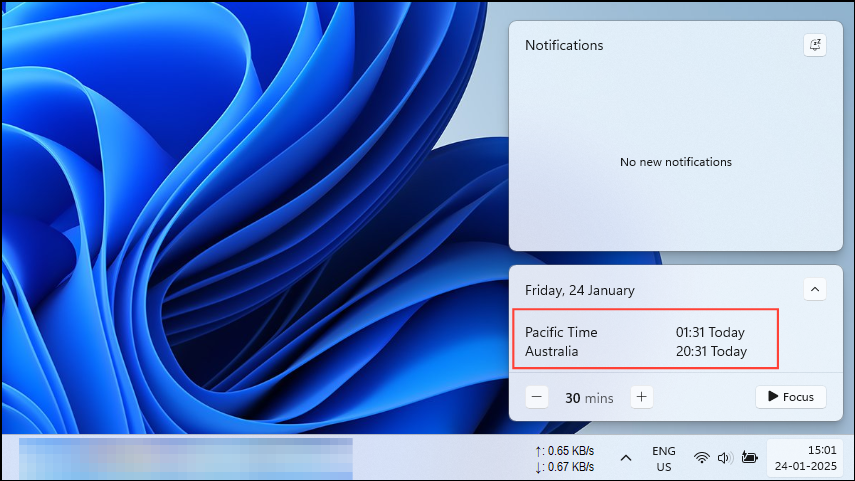
- Now, when you click on the time displayed on the right in the taskbar, a pop-up will appear showing the additional clocks from different time zones. You can also view the additional clocks by hovering your cursor over the default clock in your taskbar.
Things to know
- You can add up to three different time zone clocks to the Windows 11 taskbar at a time.
- Windows 11 also lets you add additional clocks using the Clocks app, but these do not appear on the taskbar. However, you can add them to the Start menu.
- You can remove the additional time zone clocks from the taskbar at any time by opening the Date and Time page in the Settings app and unchecking the clocks you want to turn off.

