
The Phantom encounter in Where Winds Meet is a four-phase gauntlet that pulls in upgraded versions of bosses you have already met: Murong Yuan, Zheng E, Dao Lord, and River Master. It serves as the final trial for the Gambit Beneath the Shimmer Jianghu Legacy quest and later unlocks as a repeatable Supreme Freedom Campaign Challenge with its own reward track.
Four-Phantom boss structure and rules
The fight triggers when you approach the stranger waiting in the pagoda during Gambit Beneath the Shimmer. Once it begins, you have to clear four consecutive phases, each one a “Phantom” version of an earlier boss:
- Phantom: Murong Yuan
- Phantom: Zheng E
- Phantom: Dao Lord
- Phantom: River Master (Feng Yi)
Each Phantom uses a more aggressive spin on their original boss patterns. The key rules are simple and punishing.
- If you fall during any phase, the entire encounter resets.
- The order of the four Phantoms is randomized every new attempt.
- There is no persistent debuff on healing inside this arena.
This design forces you to be comfortable with every style rather than memorizing a fixed sequence. A single mistake, especially on higher difficulties, can mean a one-shot or a failed run, so consistency matters more than speed.

Rewards and repeat attempts with Phantom: Dao Lord challenge
Finishing Gambit Beneath the Shimmer does more than close out a story thread. It also unlocks the associated Supreme Freedom Campaign Challenge in Velvet Shade, Kaifeng City, where you can re-run the four-Phantom fight as “Phantom: Dao Lord” and spend Energy for targeted rewards.
| Reward category | Examples from the Phantom: Dao Lord Campaign Challenge |
|---|---|
| Set gear | Rainwhisper Set, Moonflare Set (all pieces except Greaves) |
| Echo and stones | Gear Echo: Fieryheart, Attunement Stone: Fieryheart, Oscillating Jade |
| Consumables and notes | Crimson Leaves Chest, Stonesplit: Might Tips, Inner Way Note: Custom Chest |
| Cosmetics and progression | Appearance: Sovereign’s Solitude Casket, Coins, Character EXP |
The Campaign version keeps the same four-phase structure and random order, so any habits you build while clearing Gambit Beneath the Shimmer translate directly into farming runs later.
Preparation and build choices for the Phantom fight
The gauntlet punishes weak gear and sloppy defense more than most encounters. A short setup checklist helps smooth the run.
- Bring fully upgraded gear for your level. Four health bars’ worth of damage and Qi to chew through makes raw output important. Weapons, armor, and accessories should all be upgraded to whatever tier your current progression allows.
- Use a hybrid martial art setup. There is no built-in healing debuff here, so pairing a damage weapon like Strategic Sword or Infernal Twinblades with a sustain option such as Soulshade Umbrella or Panacea Fan lets you conserve consumables.
- Practice deflects and dodge timing. Every Phantom leans on clean, readable patterns. The fight strongly rewards perfect deflects and measured dodges over panic rolling or button-mashing.
- Enter with full healing and consumables. Craft and carry as many healing items as your inventory and level allow. Treat them as backup for mistakes rather than a primary strategy.
- Configure Divinecraft Tools. Well-tuned Divinecraft Tools provide steady chip damage and can push bosses into Execute faster. Enabling the auto-use option in the settings means you do not have to divert attention mid-combo.
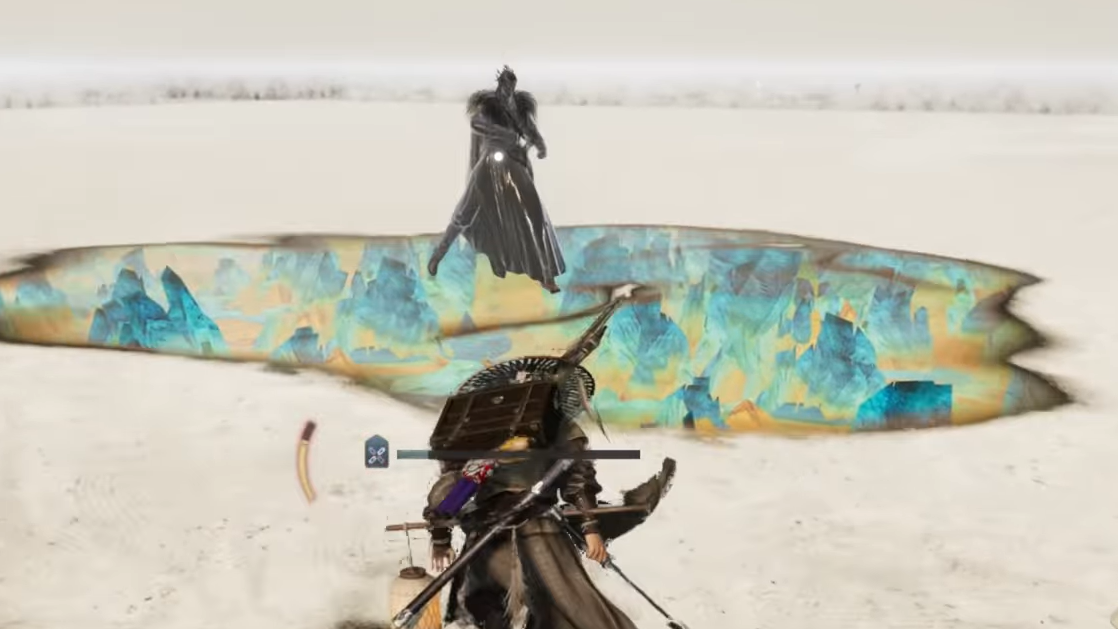
Phase 1–4: Phantom: Murong Yuan
Phantom: Murong Yuan mirrors her original Phase 1, but with more aggression and slightly tighter timing. She is a mobile sword fighter who lives on dash-ins and multi-hit close-range strings.
- Game plan. Treat this as a deflection test rather than a damage race. You want short, safe punishes after each deflected combo, not extended strings.
- Movement. Staying in motion makes it easier to read her dash lines and avoid getting clipped by lateral lunges. Walking or light strafing is usually enough; save full dodges for hard reads or red/gold signals.
- Combo pauses. Her deadliest follow-ups often come after a subtle pause mid-string, turning what looks like a recovery window into a delayed strike or an unblockable finisher. If her sword stays raised, assume another hit is coming.
- Skill choice. Long wind-up tools such as Dragon’s Breath or stationary Charged Attacks are risky. Either delay them for clear stun or exhaustion windows, or swap them out for more responsive skills.
Murong Yuan will usually feel like the “fairest” of the four Phantoms. Use this phase to settle your timing and momentum for the gauntlet rather than trying to finish her as fast as possible.
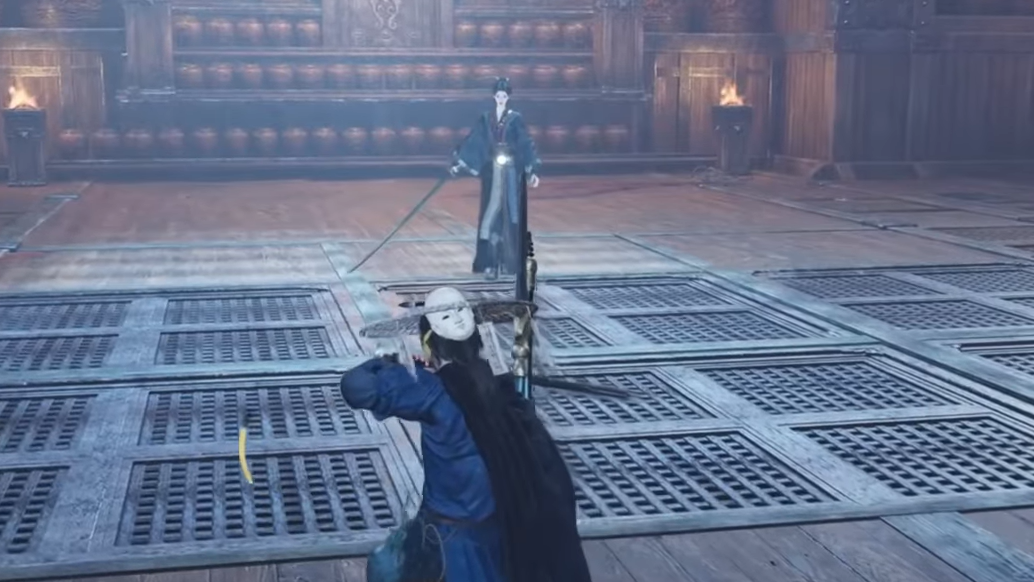
Phase 1–4: Phantom: Zheng E
Phantom: Zheng E mixes his original Phase 1 melee patterns with Skybound Spears from Phase 2. The result is a layered fight that forces you to juggle deflection and positioning.
- Deflection focus. Most slashes and many projectiles can be parried. Successful deflects drain Qi quickly and set up big Execute damage once he is exhausted.
- Skybound Spears. The spear rain cannot be deflected. When this move starts, reposition with sideways movement instead of backing away, which keeps the boss and projectiles in your field of view and makes dodge windows easier to read.
- Maintain mid-range. Standing too close makes his rapid melee harder to track; staying too far encourages more spear summons. A medium distance gives you time to identify which pattern he is starting.
- Avoid panic dodges. Zheng E frequently punishes repeated, rhythm-less evasion. Commit to single, well-timed dodges or deflects rather than spamming inputs.
Once his Qi breaks, Zheng E takes a meaningful chunk of damage from Execute, so routing the phase around Qi depletion is more efficient than chasing raw HP damage.
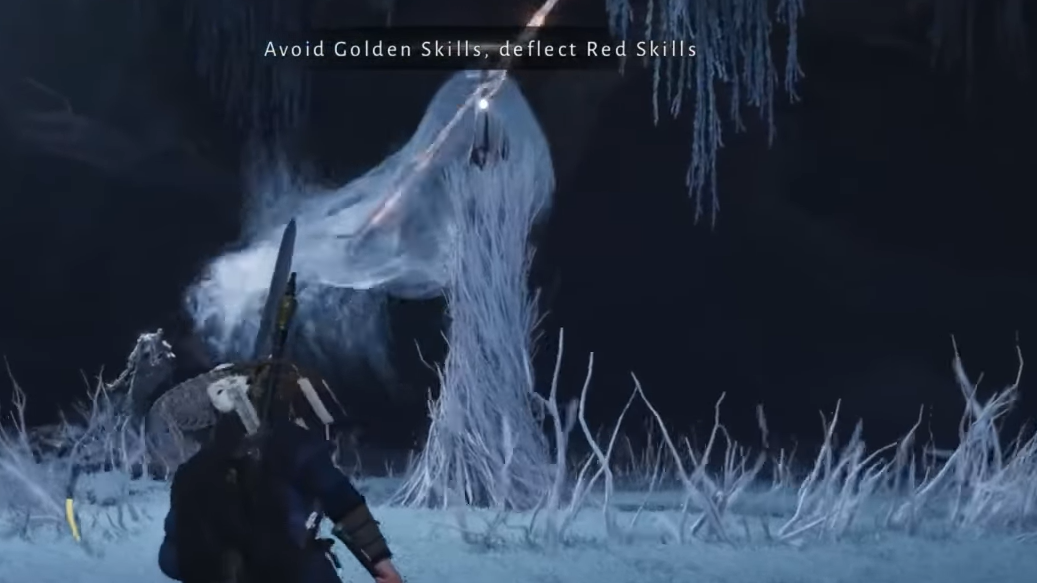
Phase 1–4: Phantom: Dao Lord
Phantom: Dao Lord is the most technically demanding of the four because of the Blind status effect tied to many of his attacks. He carries over all Phase 1 moves from the original Dao Lord fight, with Blind layered on top.
How Blind shapes the phase
Blind reduces your vision and makes precise reactions harder. However, it can be partly mitigated.
- Close-range positioning. Staying near the boss keeps his body and weapon motion visible even when your screen is obscured, which preserves many of your usual timing cues.
- Pattern memory. This phase favors players who internalize rhythm. Counting beats between swings and learning combo cadences is more reliable than chasing what you can see through the visual noise.
- Audio cues. Many of his heavier moves have distinctive audio tells. Use those to supplement your timing when Blind is active.
- Golden Body usage. The Golden Body martial art is a strong panic button when Blind stacks up. It lets you survive pressure long enough for the debuff to fade without surrendering the attempt.
Ranged strategy option for Phantom: Dao Lord
There is also a safer answer that avoids much of his melee pressure entirely: ranged weapons.
- Vernal Umbrella. The charged airborne light attack from Vernal Umbrella lets you hover and strike from above. This keeps you out of reach of many spear and hook attacks and dramatically lowers the chance of being hit and Blinded while still chipping away at his health and Qi.
- Panacea Fan. Panacea Fan provides ranged damage from a comfortable distance, again limiting exposure to blind-inducing hits. It lacks the hovering safety of Vernal Umbrella but still lets you play keep-away.
Key Phantom: Dao Lord moves to recognize
Several patterns are worth learning in detail because they account for a large share of his damage and Blind buildup.
- Skittering Sweeps. Dao Lord stands up, spear in hand, then rushes in a circular arc and spins around you multiple times, hitting on each rotation before ending with a large ground slam. A faint white pulse on the spear just before the rush is your cue to prepare a deflect. Once you nail the first parry, repeated deflect presses will carry you through the rapid spins. The slam has a slightly longer wind-up; when one of your deflect attempts does not connect, be ready to dodge back to avoid the explosion that fills most of your Blind bar.
- Blinding Thrust. He leans dramatically backward with the spear before lunging forward and jamming it into the ground near you, triggering an explosion that Blinds targets in range. The exaggerated lean is the tell; parry as soon as you see him start to snap forward.
- Dagger Throw. From range, he may throw three volleys of knives, each a trio crossing the arena. Staying mid to close range discourages this move. If it happens, look for a bright white flash near his body for each volley and tap deflect, or dodge on that pulse.
- Four-Fold Stab. At point-blank range, he can fire off three very quick, short stabs followed by a longer spear thrust. If you are trapped in melee, commit to three rapid deflects at the start, then wait for him to lean back again and parry the final thrust only after he drops low to the ground.
- Sweeping Strikes. He tilts to the side, rushes you, and sweeps the ground twice with the spear, followed by a third sweeping hit after a brief rotation. Standing your ground works better than kiting. Deflect the first two sweeps in quick succession, then parry again once his rotation animation is almost complete.
- Jumping Cross. Dao Lord slithers toward you, low to the ground, then rears up and finally leaps into the air for a downward cross slash. Deflect twice when he rises from the low posture, then watch for the full backward lean in midair and parry as he comes down.
- Overhead Combo. He turns away, hiding the first swing behind his body, then whips an overhead slash toward you, followed by a mirrored swing from the opposite side. Focus on the golden tip of the spear above his head when his back is turned and deflect the moment it appears. The second hit is easier to read since he faces you directly; parry roughly half a second after the first.
- Slithering Grab (Gold). A golden, unblockable state where Dao Lord preps a grab and slides around the arena. Contact during this window means heavy damage and instant Blind. This is the one move you must avoid outright. As soon as you see the tell for the gold attack, backdash once or twice to get out of his path and wait until the state ends before re-engaging.
Once you are comfortable with these patterns, Dao Lord becomes far less chaotic, even with Blind in play.
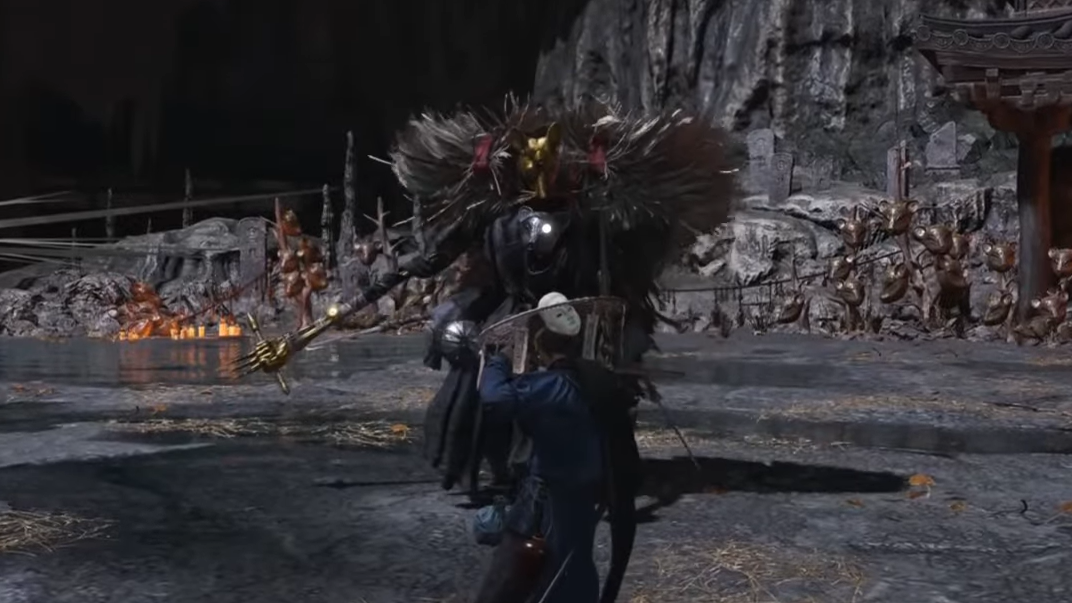
Phase 1–4: Phantom: River Master (Feng Yi)
Phantom: River Master presents Feng Yi using his Phase 2 moveset but without Dragon King abilities. He fights with a massive blade, favoring slow, heavy swings and deceptive timings.
- Tempo and deception. Many of his attacks start slow, then delay or “float” before impact. Reacting on the first motion often makes you parry or dodge too early.
- Stamina management. Several swings cover wide arcs or produce area-of-effect impacts. Keeping enough stamina for one or two emergency dodges matters more than squeezing out extra hits.
- Punish windows. When he whiffs a heavy swing, his recovery is long. Step in for two to three quick hits, then reset your guard rather than trying to drain a full chunk of health in one go.
- Parry discipline. Do not “parry on instinct.” Wait for clear impact cues—the moment the blade is about to meet your character—rather than the start of the animation. Mis-timed deflects against his delayed swings can easily lead to one-shot deaths at high difficulty.
River Master is usually less about memorizing many patterns and more about learning to stay calm through long, dramatic wind-ups.

General boss fundamentals that matter more here
The Phantom gauntlet is essentially a stress test for the game’s core boss mechanics, and broader habits from other fights are useful here.
- Center your play around parries and dodges. Most boss attacks in Where Winds Meet are parryable unless marked with gold, which forces a dodge. Perfect parries build control over the encounter and open Execute windows that cut phases short.
- Delay Execute to the end of exhaustion. When a Phantom’s Qi is broken, they become exhausted for a short period. Use that full window for your best combos, then trigger Execute right before the state ends so you get both combo damage and the Execute hit.
- Reserve Energy for late-game Campaign challenges. Campaign bosses, including the Phantom: Dao Lord challenge, require Energy to claim repeat rewards. Progressing the story into late-game first makes each Energy spent more valuable in terms of gear and Talents.
- Use companions when the game allows it. In other boss contexts, NPC companions can draw aggro, add extra damage, or provide healing. The Phantom fight itself is framed as a solo skill check, but the same mindset of using allies smartly applies throughout the rest of the game’s high-end content.
Once you treat the Four Phantoms as a single, long boss with four distinct personalities—Murong Yuan’s pressure, Zheng E’s parry tests, Dao Lord’s vision denial, and River Master’s delayed power swings—the encounter stops feeling like four separate walls and becomes one consistent problem you can learn to solve.