
Fleets turn Arcane Odyssey into a management game running in the background. Once they’re set up, ships sail, fight, trade, and explore on their own while you do anything else, quietly generating Drachma, Renown, followers, and items.
The tradeoff is that the system is dense and badly explained in-game: followers gate ship slots, captains eat up deckhand space, and a few wrong task choices can tank Strength and cause ships to desert. Handled correctly, though, a fleet becomes one of the strongest long-term progression tools in the game.
Fleet unlock requirements and first steps
Fleets unlock late into the Bronze and Nimbus Seas loop, not at the very start of the game.
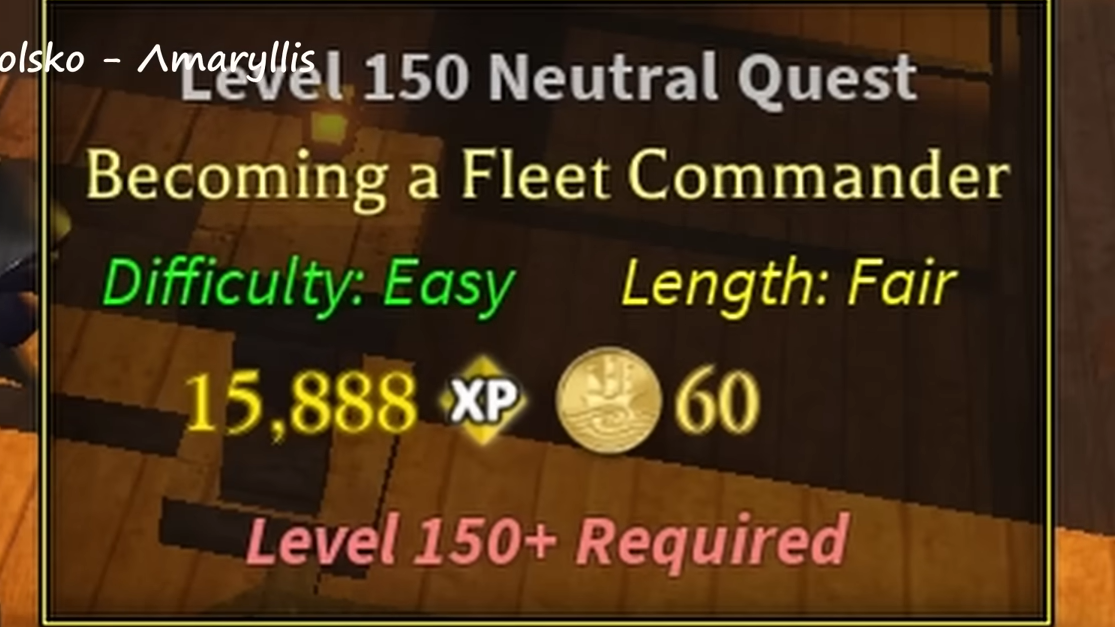
Step 1: Reach level 150 on your character. This is a hard requirement; fleet content is not available earlier.
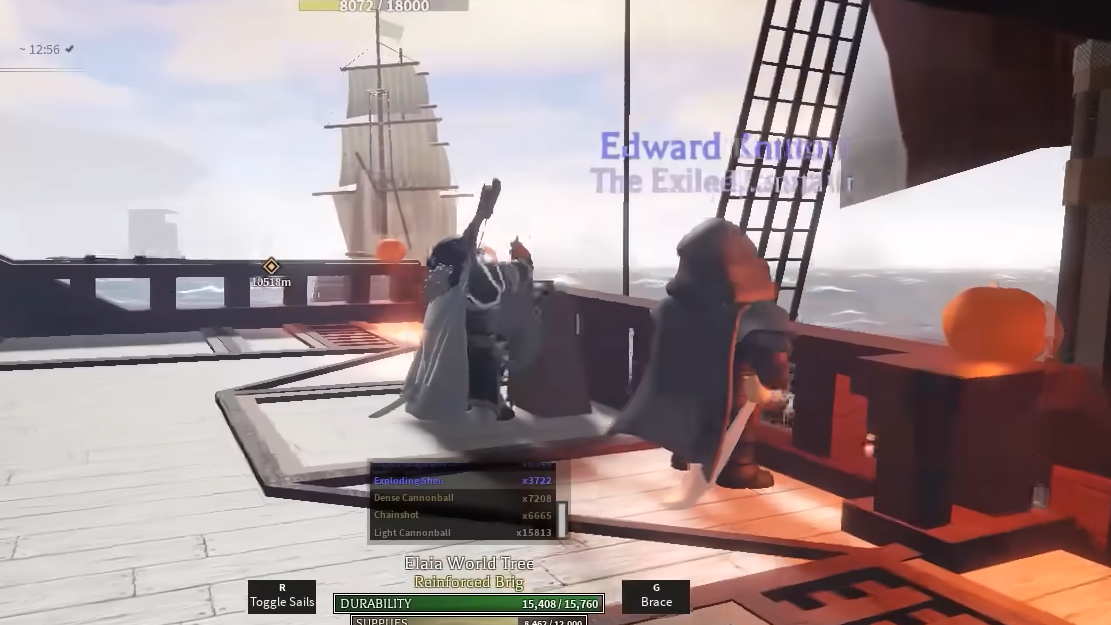
Step 2: Talk to Edward Kenton (sometimes referred to in dialogue as a quartermaster) and accept the quest “Becoming a Fleet Commander.” This quest introduces the feature and tasks you with sinking and recruiting a basic ship.

Step 3: Complete the quest by sinking the required sailboat and choosing to add it to your fleet when the prompt appears. This unlocks the Fleet UI under your ship menu, including the Fleet Info panel and task system.
That first ship is usually weak, but it gives you a foothold to start earning followers and Drachma passively while you learn the interface.
Followers, Drachma costs, and ship types
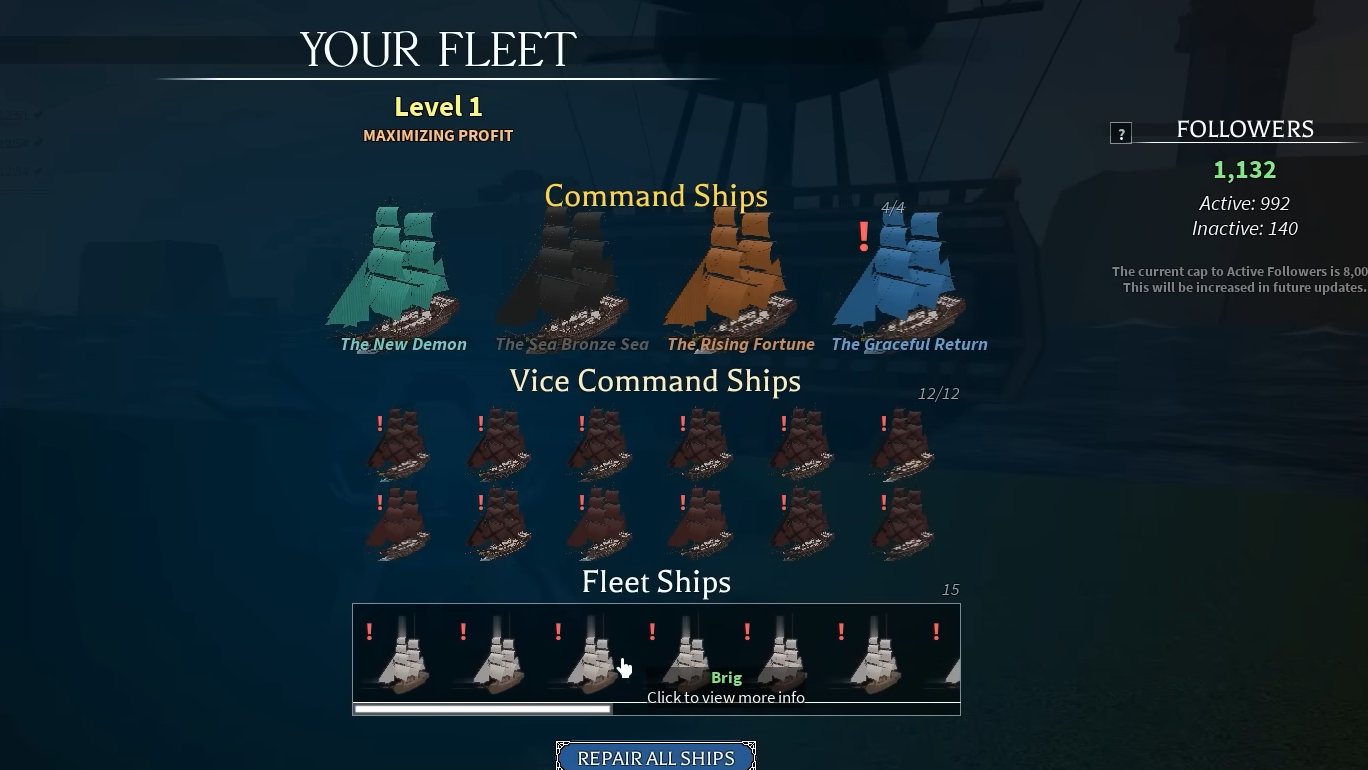
Every ship you recruit has two visible costs: a Drachma fee paid up front, and a permanent drain on your pool of inactive followers. Followers behave like a population cap; when they’re tied up by ships, they can’t be used again until that ship deserts or is dismissed.
| Ship type | Minimum Drachma cost | Followers required |
|---|---|---|
| Sailboat | 100 | 5 |
| Caravel | 250 | 8 |
| Ketch | 750 | 14 |
| Brig | 1200 | 32 |
How you get followers. Followers come from sinking NPC ships with your cannons and mortars. Higher-tier ships award more followers. The fleet log shows how many you gained since the last report, and Fleet Info splits them into active (currently tied to ships) and inactive (available to spend on new ships).
Why Brigs dominate late game. Brigs have much higher durability and output than smaller hulls, but they cost 32 followers each. Many high-level players eventually transition to fleets made entirely of Brigs for command, vice command, and fleet slots, using smaller ships only as a stepping stone while followers are scarce.
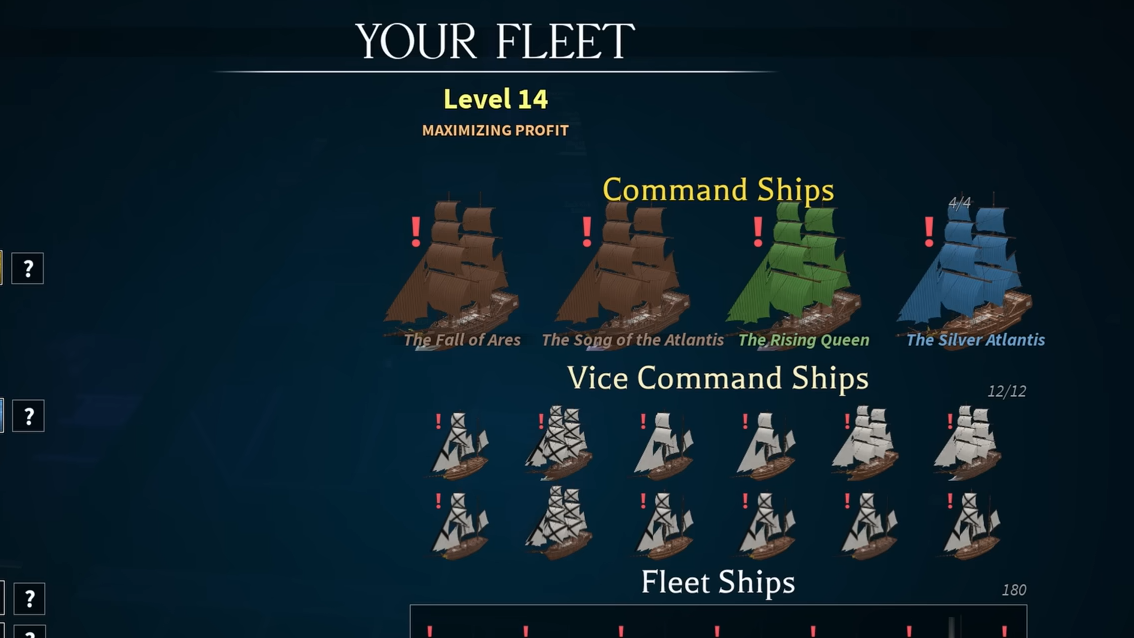
Command ships, vice command ships, and fleet ships
The Fleet UI separates ships into three roles that matter for efficiency.
Command ships are the four ships you actually assign tasks to. When you set “Patrol,” “Trading,” or “Recover,” you’re configuring command ships. They directly consume Strength, Food, and Supplies, and are the main drivers of income and follower gain.
Vice command ships are support ships linked to each command ship. They behave like efficiency upgrades: by filling these slots with strong hulls (usually Brigs), you increase the effectiveness of that command ship’s task without assigning more tasks. A common endgame target is twelve Brigs in vice command slots, three backing each command ship.
Fleet ships are additional ships that boost overall fleet stats further. Exact scaling is opaque, but they effectively raise fleet performance once command and vice command lines are filled, especially when you stack more Brigs and Ketches here.
Because every hull consumes followers, the broad pattern is simple: prioritize four good command Brigs first, then fill vice command with Brigs, and only then start padding fleet ships.
Strength, Food, Supplies, and why ships desert
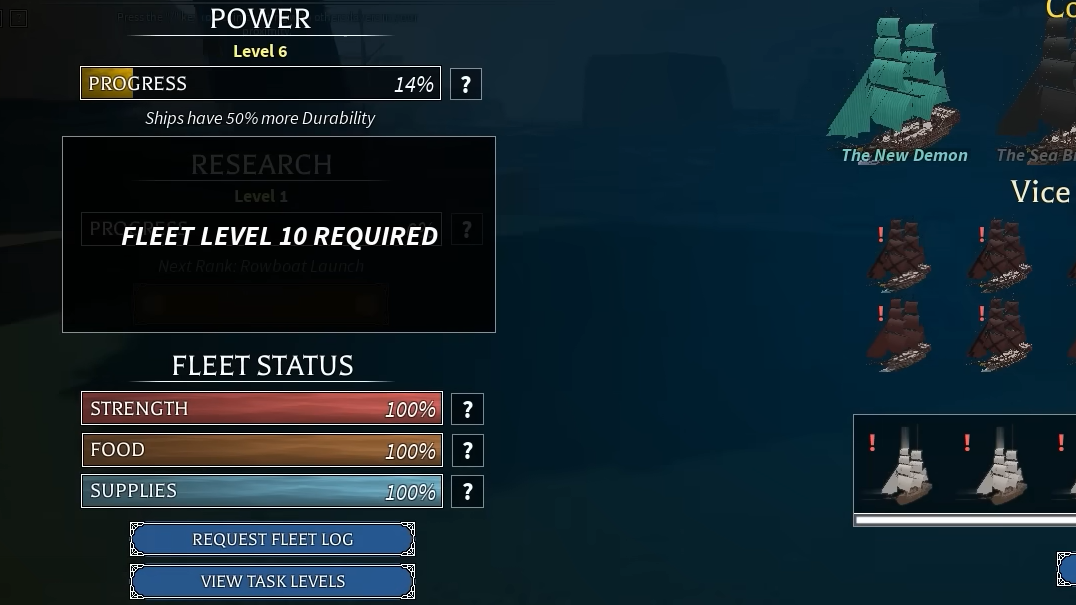
All fleet tasks revolve around three meters shown in the Fleet Info panel: Strength, Food, and Supplies. These represent morale, provisions, and repair materials across your entire armada. Letting any of them drop too low is the fastest way to lose ships.
Strength measures how much sustained work the fleet can do before crews burn out or ships are too damaged to continue. Tasks like Patrol, Plunder, Trading, and Conquest consume Strength each cycle. Recover tasks refill it.
Food keeps crews from deserting due to starvation or low morale. Active tasks drain Food over time, and low Food dramatically increases the chance that ships leave your fleet.
Supplies cover repairs and munitions. When Supplies are low, the game is more likely to flag ship loss or failures during log rolls, and desertion risk goes up.
Once any bar gets close to empty, desertion rates spike. Below roughly 30 percent, ships—including vice command ships—become noticeably unstable. Keeping both Strength and Food comfortably above 50 percent is a safe baseline; Supplies can dip a bit lower if you’re willing to pay Drachma to restock manually.
You can pause the fleet entirely if things get bad, which stops further consumption and prevents additional desertions until you’re ready to repair and resupply.
Fleet tasks and what they actually give you
Each command ship runs a single task at a time. That task decides not only the rewards, but also which meters are consumed and which are restored.
| Task | Primary outcome |
|---|---|
| Exploring | Sealed chests, equipment and gear; reward rarity scales with task level |
| Recover | Restores Strength (and passively stabilizes Food/Supplies across the fleet) |
| Plunder / Patrol | Drachma, Renown, followers, plus Food and Supplies from raided ships |
| Fishing | Fish, with quality improving as the task levels up |
| Harvesting | Reagents and catalysts for brewing and crafting |
| Trading | Spices, enchantment scrolls, cannonballs and strong Drachma income |
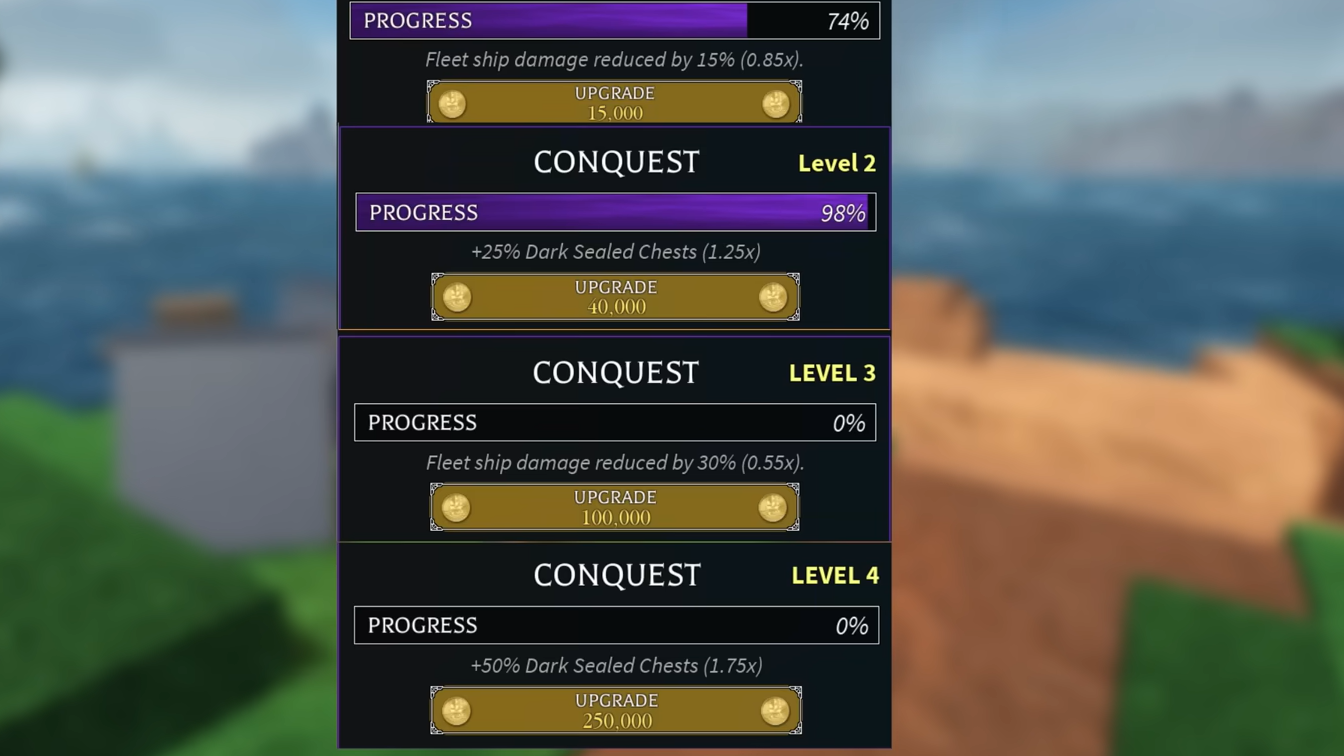
| Conquest | Dark Sealed Chests from Dark Sea expeditions, with elevated risk and Strength drain |
The Fleet Log summarizes what each cycle produced: total Drachma, followers gained, task experience, and any items or chests. You can force a log early with the “Request Fleet Log” button, subject to a short cooldown, if you want to see the latest payout immediately.
Every task has its own experience bar. Completing cycles fills that bar; when it reaches 100 percent, you can spend Drachma to rank the task up. Higher task ranks increase reward quality and contribute to your overall Fleet Level. At Fleet Level 5, Conquest unlocks, allowing Dark Sea runs. At Fleet Level 10, Research rewards include a “Fleet Raven” upgrade that lets you change command tasks remotely without sailing to each captain’s island.
Best fleet layouts for passive income and stability
Most of the friction in fleet management disappears once you pick a stable layout and stick with it. A few patterns stand out as both efficient and simple to maintain.
Three Recover, one Patrol (beginner-friendly, stable)
This layout is built to maintain itself with minimal attention:
- Command Ship 1: Recover
- Command Ship 2: Recover
- Command Ship 3: Recover
- Command Ship 4: Patrol or Plunder
The three Recover ships continuously refill Strength and help stabilize Food and Supplies. The single Patrol/Plunder ship does all the work: raiding criminal ships, generating Drachma, giving you Renown or bounty-aligned rewards, and pulling in new followers. With enough Vice Command Brigs backing these four ships, Strength usage and recovery even out, so your bars hover near full without manual intervention.
This is an excellent layout if you want to log in, request your fleet paycheck, and forget about it for long stretches.

Two Recover, one Patrol, one Trading (profit-skewed)
For Drachma-heavy runs, especially once you’re comfortable paying for supplies manually, a more aggressive configuration makes sense:
- Command Ship 1: Recover
- Command Ship 2: Recover
- Command Ship 3: Patrol or Plunder
- Command Ship 4: Trading
Here, Recover ships each “fuel” one work ship. One Recover cycle generally covers the Strength drain of one active task, so pairing Recover with Patrol and Trading keeps Strength between 90 and 100 percent for large fleets. Trading delivers the highest consistent Drachma payouts over time, especially at higher task levels, and can also drop valuable Mystic scrolls at level 5 and beyond.
Because this layout leans harder on Food and Supplies, it works best if you’re willing to shore up logistics yourself.
Step 1: When Fleet Info shows Food or Supplies trending low, sail to any Fleet Captain you have access to.
Step 2: Talk to the captain and use the option to purchase supplies or food directly. Expect to spend a few thousand Drachma on each refill.
Step 3: Periodically repair your own ship as well, since fleet damage often mirrors the kind of combat your tasks are running in the background.
High-profit setups often fund themselves easily: even after repair and resupply costs in the 3,000–7,000 Drachma range per cycle, a two-task layout with Trading can net 20,000 or more per log, and significantly more once your fleet is large and fully brick-built.
Conquest and Dark Sea farming
Conquest is unlocked once your Fleet Level reaches 5 by upgrading other tasks. It sends a command ship into the Dark Sea to retrieve Dark Sealed Chests.
On paper, Conquest looks like a direct upgrade over Exploring: higher risk, but with rarer chests and high-value loot. In practice, the Strength cost is heavy, especially for young fleets, and the Drachma payout is lower than Trading at a similar investment.
One Conquest cycle at level 1 typically yields multiple Dark Sealed Chests and some Drachma, but Strength usage is high enough that you may need three Recover ships running at once to fully offset it. That leaves only a single command ship for profit tasks. For many players, that tradeoff is worth it only when they specifically want Dark Sealed Chests rather than gold.
A reasonable hybrid for late game is:
- Command Ship 1–3: Recover
- Command Ship 4: Conquest
This configuration focuses the fleet entirely on Dark Sea expeditions, with three ships acting as a permanent support staff, keeping Strength high enough that the Conquest ship doesn’t slowly grind the fleet into desertion. It’s slower for money than Trading, but very strong for chest accumulation once you already have a large Drachma reserve.
Where deckhands, loyalty, and Fleet Captains fit in
Fleets sit on top of the deckhand system you’ve been using on your personal ship. Deckhands now matter for two reasons: ship stat bonuses and Fleet Captain roles.
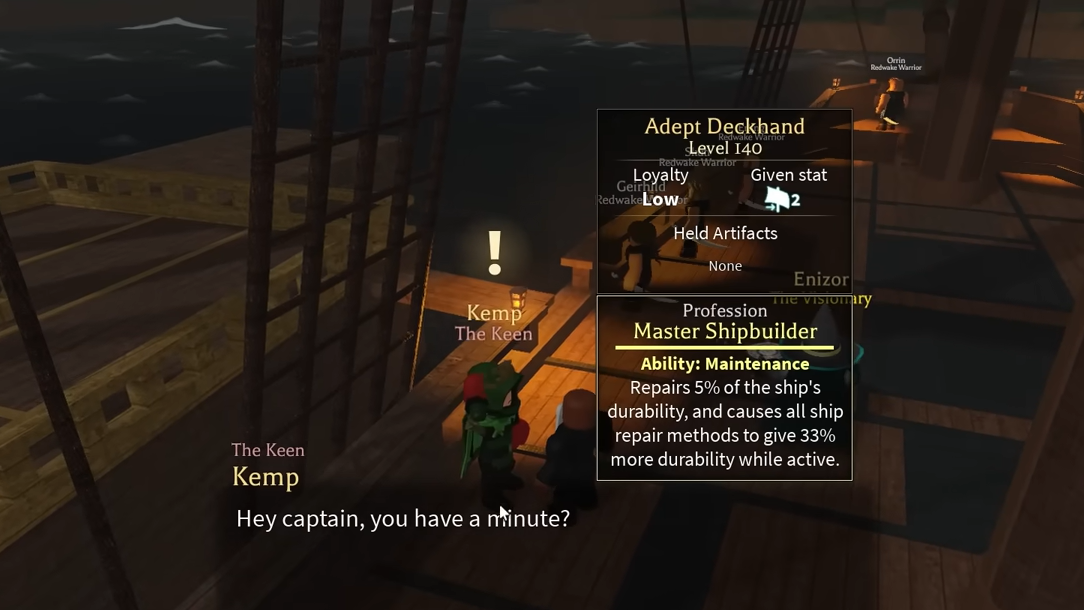
Recruiting deckhands. Deckhands can be hired in major towns and islands like Redwake, Palo Town, Ravenna, Frostmill Island, and Sameria. Each one has a style, gear preferences, and base stats, and they immediately boost your ship when assigned.
Loyalty and gifting. Each deckhand has a loyalty score that rises when you give them items they like. Items matching their look and archetype work best; higher-rarity equipment with strong modifiers gives bigger loyalty jumps. You do not need to max-level a deckhand to unlock fleet roles — only their loyalty tier matters.
Dedicated tier and Fleet Captains. Loyalty is divided into tiers, with Dedicated near the top. Once a deckhand reaches Dedicated (around 1400+ loyalty), they become eligible to serve as a Fleet Captain. Command ships require Fleet Captains to function; without one assigned, you cannot set tasks on that ship.
Fleet Captains periodically send you messages about where they are docked in the world. To change a command ship’s task, you must either sail to their island and speak to them or, once unlocked, use the Fleet Raven upgrade to change commands from anywhere.
Deckhand slots are limited. Assigning a deckhand as a Fleet Captain consumes one of those slots; dismissing a Fleet Captain without an open deckhand slot means losing that character permanently. If your deckhand roster is already full of high-quality roles, you might need to sacrifice a maintenance or cannon deckhand to free space for a captain, then rebuild that support role later.
How to capture ships for your fleet
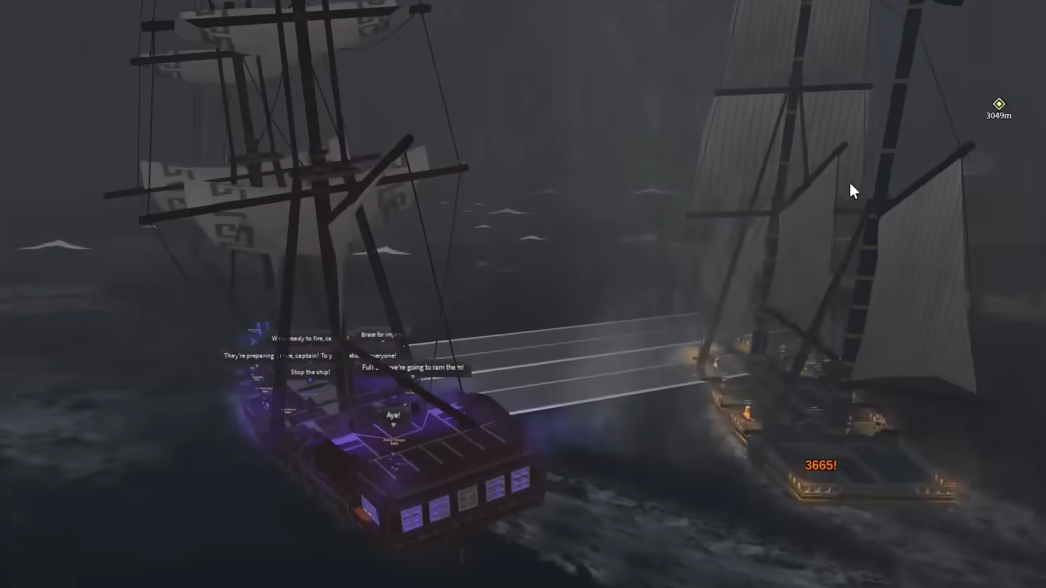
After fleet unlock, almost every significant NPC ship you sink can become part of your armada—if you can afford it.
Step 1: Sail into an area with NPC shipping lanes. Merchant convoys and Brigs are prime targets once you can handle their firepower.
Step 2: Engage using your own ship’s cannons and mortars. Ensure the final blow is dealt by your ship weapons; this is what awards followers and enables capture.
Step 3: Once the enemy ship sinks, watch for the pop-up that offers to add it to your fleet for a Drachma price. The amount scales with the hull type, durability, and weapon quality of the ship you just defeated.
Step 4: Check your inactive follower count. If you have at least the required number (5, 8, 14, or 32 depending on hull), confirm to recruit the ship. If not, sink more ships first to build your follower pool.
For long-term progression, targeting Brigs and Ketches is usually the most efficient. Many players sink small ships purely for followers, only choosing to recruit when they see a Brig with good durability and cannon loadout.
Task leveling, Fleet Level, and the Fleet Raven
Every time a command ship completes its task cycle, it adds experience both to that specific task and to your overall fleet.
Task ranks. In the Fleet Info panel, each task has a percentage progress bar. When that bar hits 100, you can spend Drachma (for example, 15,000 for early ranks) to upgrade it. An upgraded task yields higher-quality loot and pushes your Fleet Level up.
Fleet Level. This is a global measure of how developed your armada is. Higher Fleet Levels unlock key milestones:
- Level 5: Conquest task (Dark Sea runs) becomes available.
- Level 10: Research task upgrades grant access to the Fleet Raven.
Fleet Raven. Once unlocked through Research at Fleet Level 10, the Fleet Raven lets you send orders to your captains from anywhere in the world. Instead of physically traveling to Sameria or another island every time you want to switch a ship from Patrol to Trading, you can open the interface and dispatch a raven to carry the command. That turns task juggling from a sail-intensive chore into a quick menu change and makes it much easier to experiment with layouts on the fly.
Handled with a bit of planning, fleets in Arcane Odyssey shift from a confusing late-game checkbox into an always-on income stream. Focus first on hitting level 150 and finishing the commander quest, then push for your first Brig and a four-ship command line backed by Recover. From there, the rest is math: keep Strength, Food, and Supplies healthy, push Trading or Patrol as far as your risk tolerance allows, and let your armada quietly pay for your next big upgrade while you’re off chasing myths in the Dark Sea yourself.