
Cloning a hard drive on Windows 11 is essential when you need to back up your data, upgrade to a larger drive, or migrate to a new computer. Unlike simply copying files, cloning creates an exact, bootable replica of your hard drive, ensuring a smooth transition without any file compatibility issues.
Although Windows 11 doesn't include a native tool for disk cloning, several third-party applications make this process straightforward. In this guide, we'll explore how to clone your hard drive using DiskGenius, a free and user-friendly tool that not only clones disks and partitions but also offers backup and data recovery features.
Download and install cloning software
To begin, you'll need to download and install DiskGenius or another cloning tool of your choice. DiskGenius stands out for its ease of use and comprehensive features.
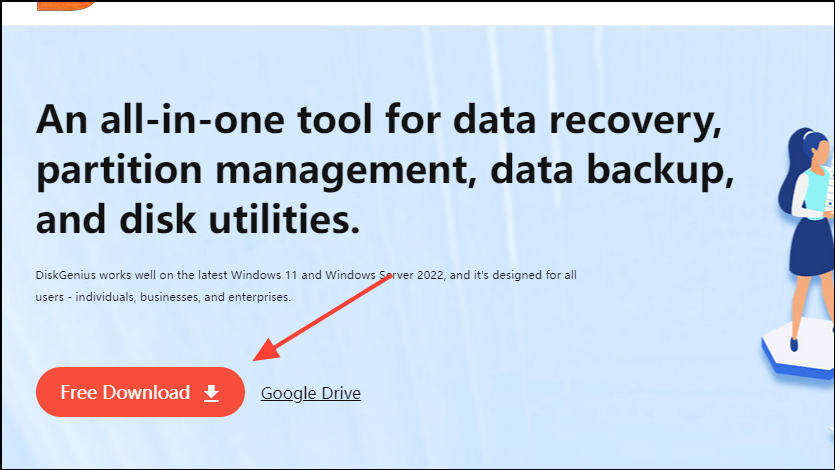
Step 1: Visit the DiskGenius official website and click the 'Free Download' button to get the software.
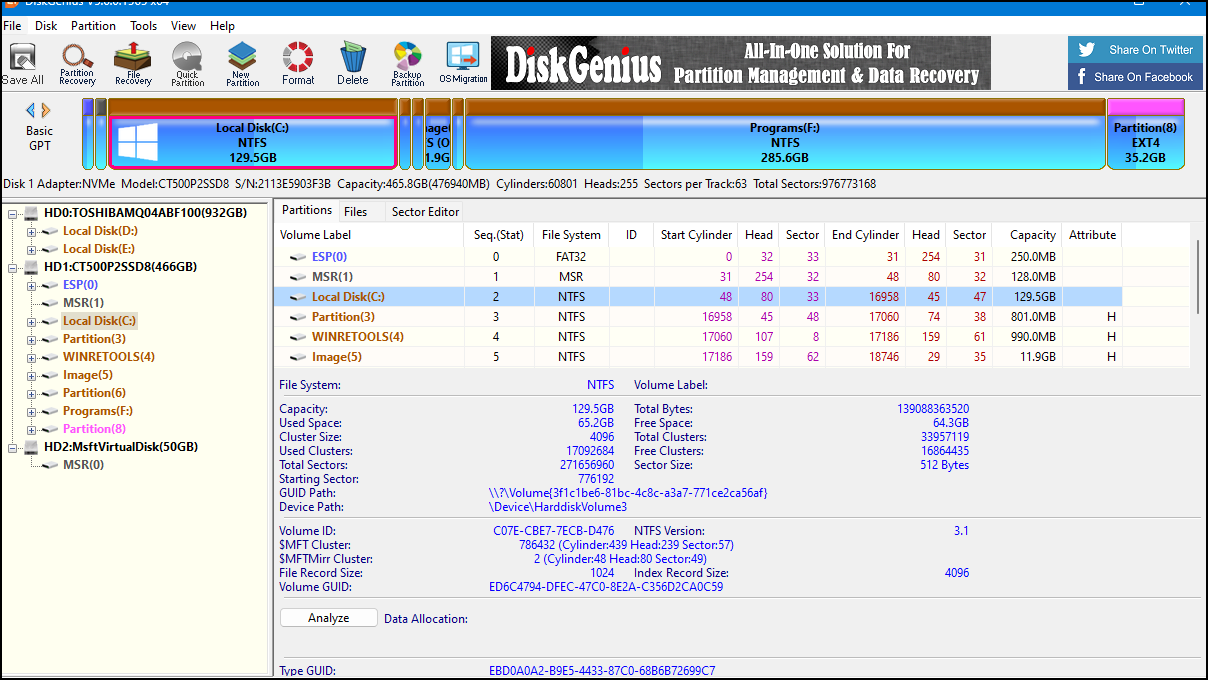
Step 2: After downloading, install DiskGenius on your PC and launch the application. You'll see an interface displaying all your drives, including their formats, sizes, and other details. Now you're ready to start the cloning process.
Clone your hard drive
Before proceeding, connect the target hard drive to your computer. You can install it internally or use a USB adapter. For laptop users, a USB-to-SATA adapter is often necessary. Ensure the new drive is recognized by your system and has enough space to accommodate all the data from the source drive.
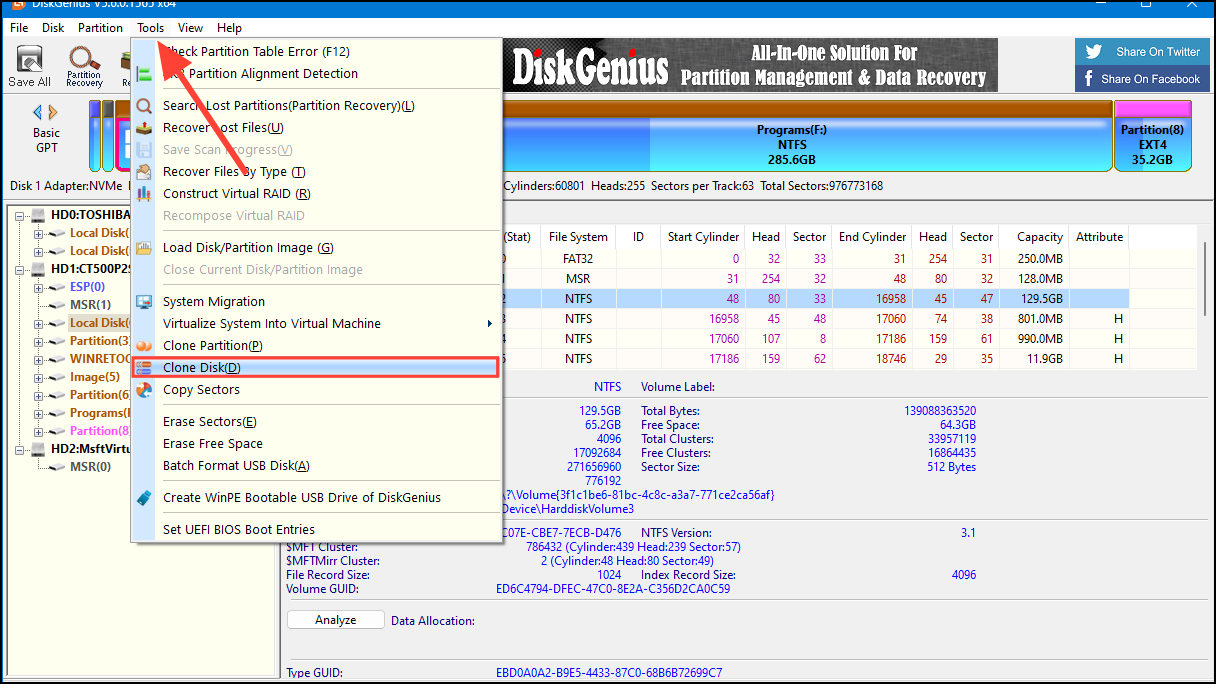
Step 1: In the DiskGenius window, click on the 'Tools' menu at the top, then select 'Clone Disk' from the dropdown options.
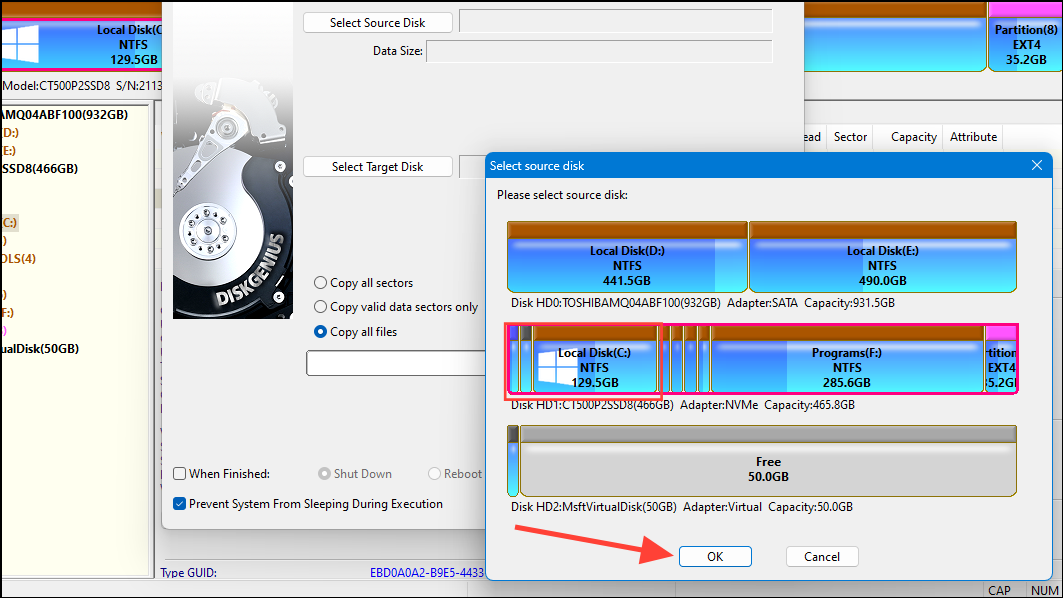
Step 2: A 'Clone Disk' dialog box will appear prompting you to select the source disk. Choose the drive you wish to clone by clicking on it, then click 'OK'. For most users aiming to clone their system disk, this will be the C drive.
Step 3: Next, select the target disk where you want to clone your data and click 'OK'. This could be another internal drive or an external disk. Make sure the target disk has sufficient free space to hold all the data from the source disk.
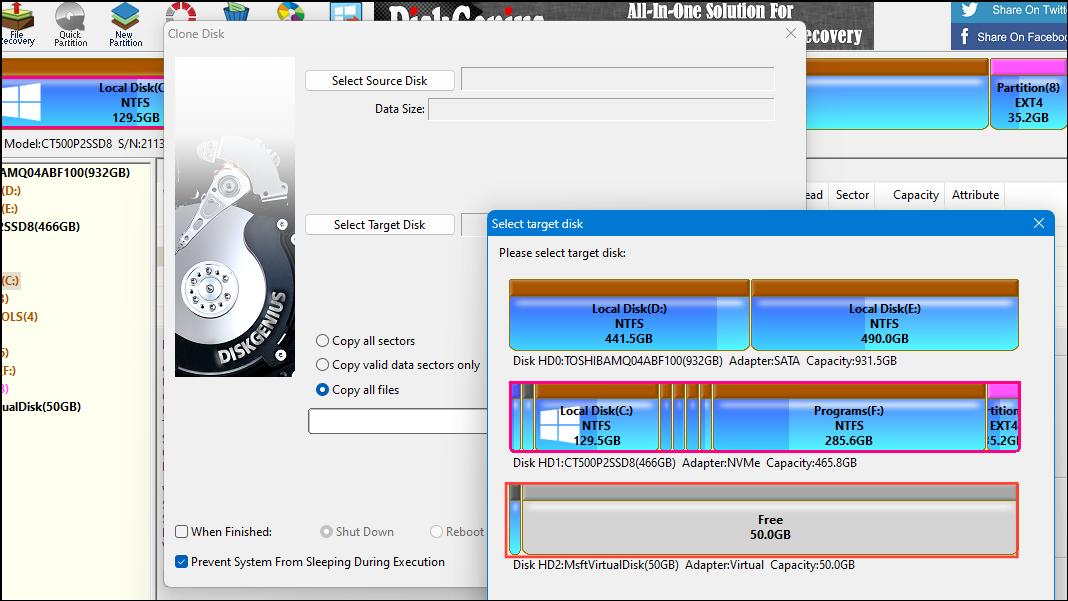
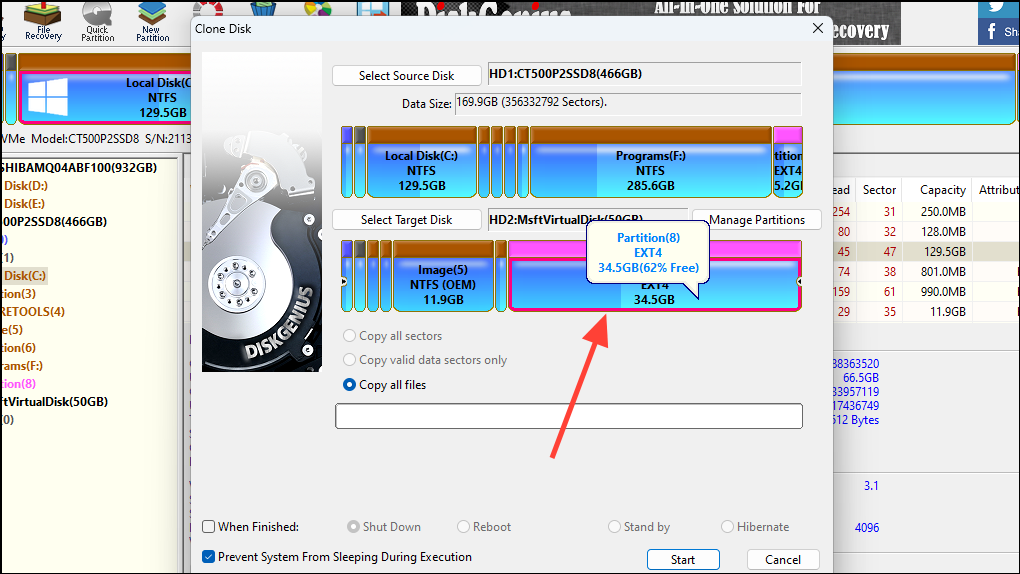
Step 4: If the target disk doesn't have enough space, a prompt will appear allowing you to select which partitions to clone. Choose the desired partitions by clicking on them.
Step 5: Alternatively, to clone specific partitions, click on the 'Tools' menu and select 'Clone Partition'. This option is useful if you're interested in cloning only certain sections of your disk.

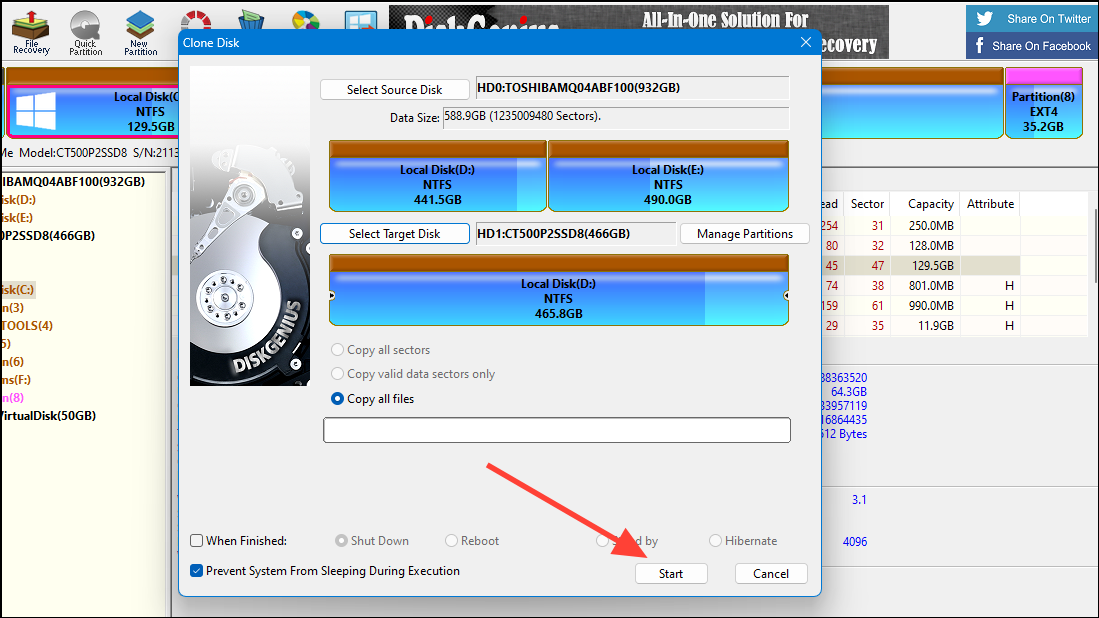
Step 6: After setting up the source and target disks or partitions, click the 'Start' button to initiate the cloning process. DiskGenius will display a warning message; review it and proceed if everything is correct.
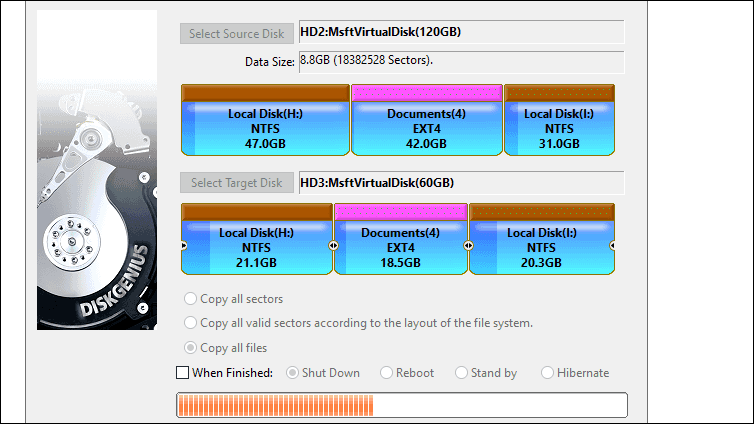
Step 7: Wait for the cloning process to complete. The duration will depend on the size of the data and the speed of your drives. Avoid interrupting the process to ensure a successful clone.
Clone a hard drive with bad sectors
If your source drive has bad sectors and is not fully accessible, you can still attempt to clone it. DiskGenius provides options to handle bad sectors by skipping them during the cloning process, allowing you to recover as much data as possible.
Step 1: Connect both the problematic source disk and the target disk to your computer.
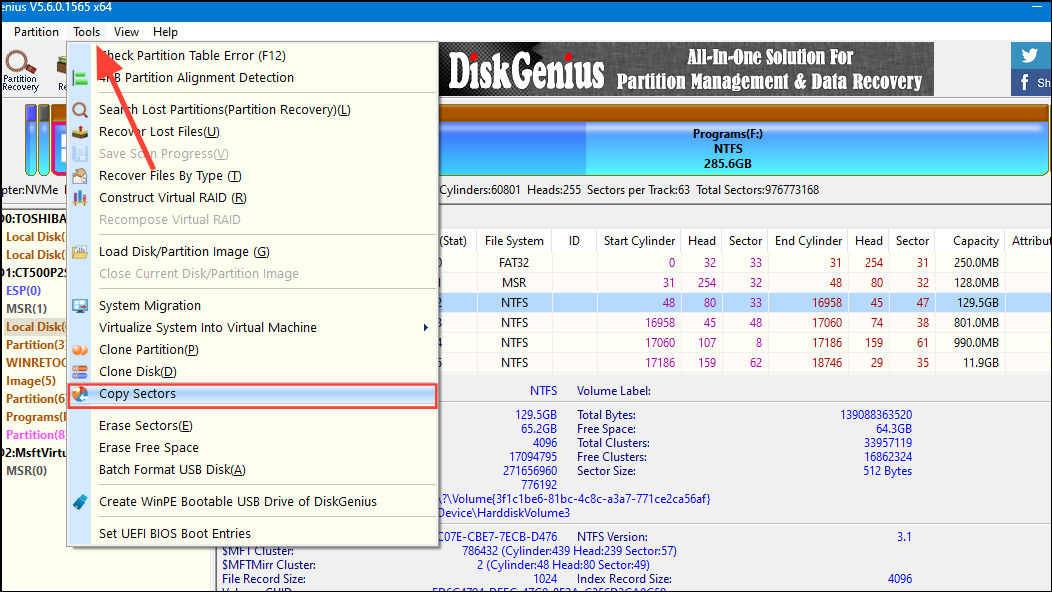
Step 2: Open DiskGenius, click on the 'Tools' menu, and select 'Copy Sectors'. This feature is designed to handle disks with bad sectors.
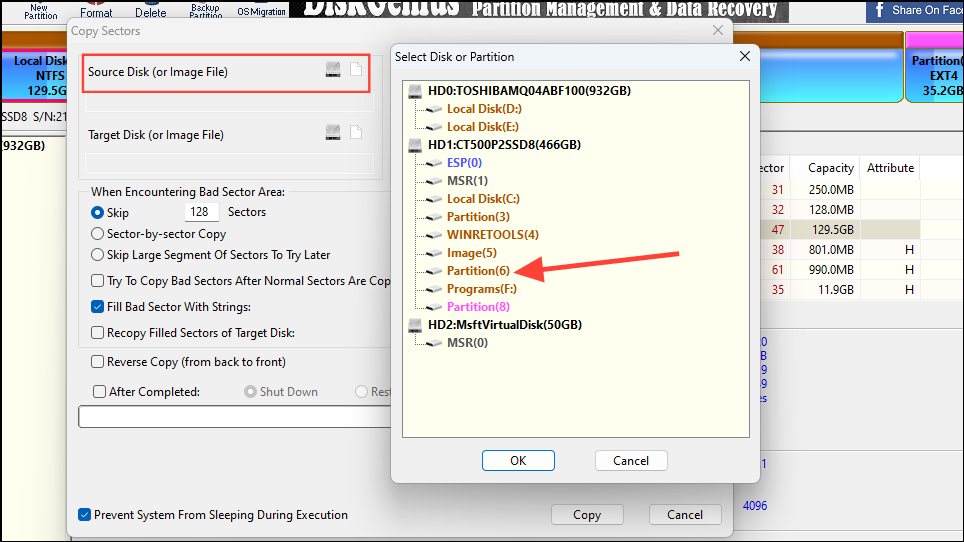
Step 3: In the dialog box, click on 'Source Disk' and select the disk with bad sectors, then click 'OK'.
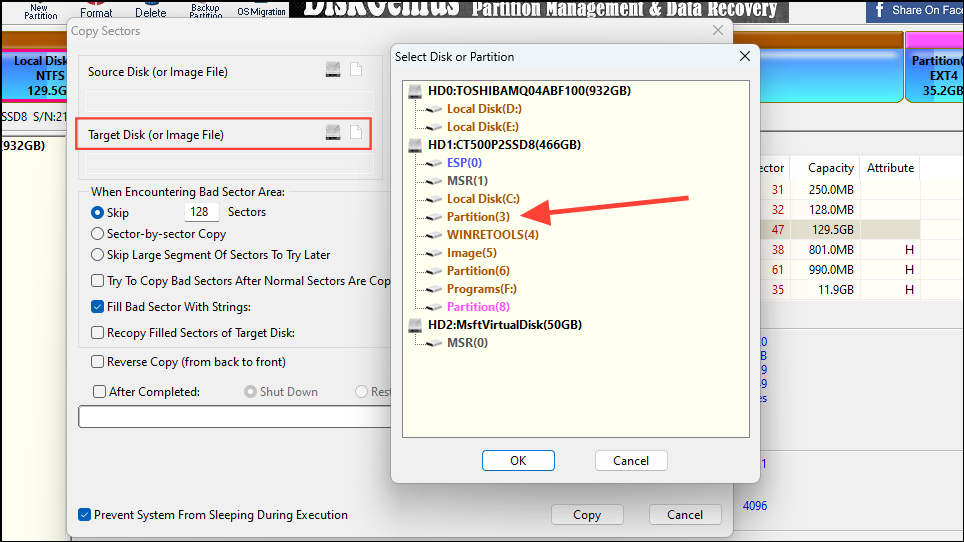
Step 4: Click on 'Target Disk' and choose the destination disk where you want to clone the data.
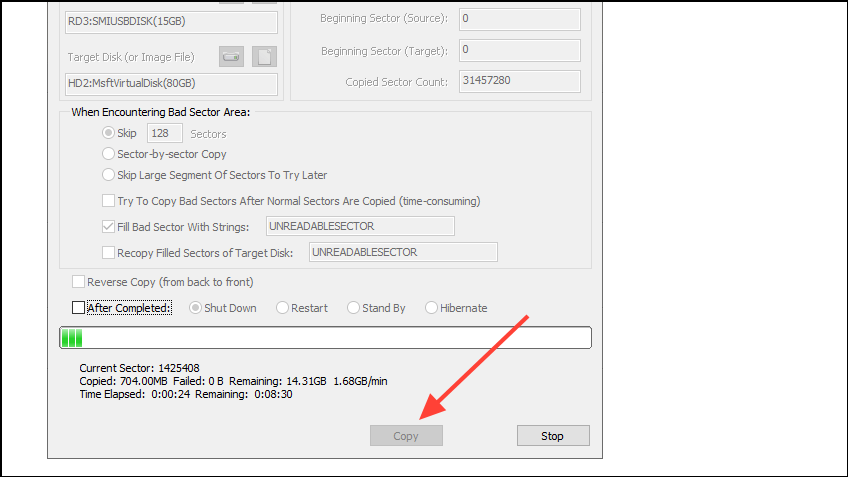
Step 5: Decide how you want DiskGenius to handle the bad sectors. You can opt to skip copying specific sectors, copy sectors one by one, or skip larger sections with multiple bad sectors. Select the option that best suits your situation.
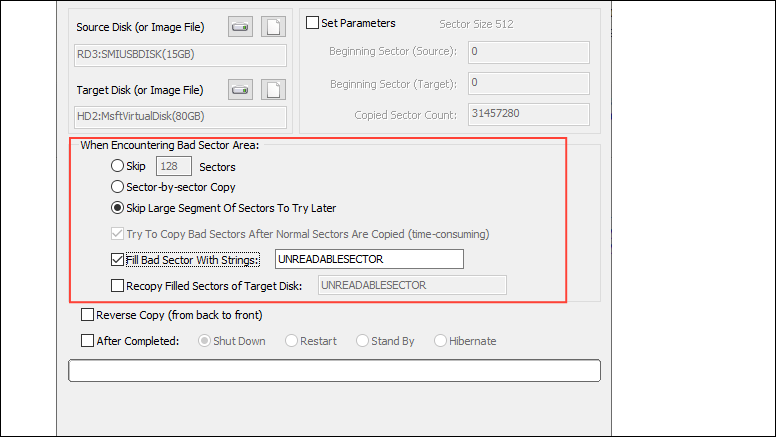
Step 6: Click on the 'Copy' button to start the sector-by-sector cloning process. Be prepared for a potentially lengthy operation, especially if there are numerous bad sectors or if you're copying sectors individually.
Cloning your hard drive is a practical solution for data backup, upgrades, and system migration. By following these steps with DiskGenius, you can create an exact replica of your drive, ensuring your data and system configurations are preserved.