
The Hidden Bunker on Spaceport turns a standard Arc hunt into a shared, server-wide race. One lobby works together (or doesn’t) to unlock a sealed underground complex, then scrambles to siphon data from its terminals for XP and trial progress.
The “Download Data during Hidden Bunker” trial is built around this one map condition. It’s long, chaotic, and heavily dependent on how other raiders behave, but the actual mechanics are straightforward once you see them broken down.
How the Hidden Bunker event works on Spaceport
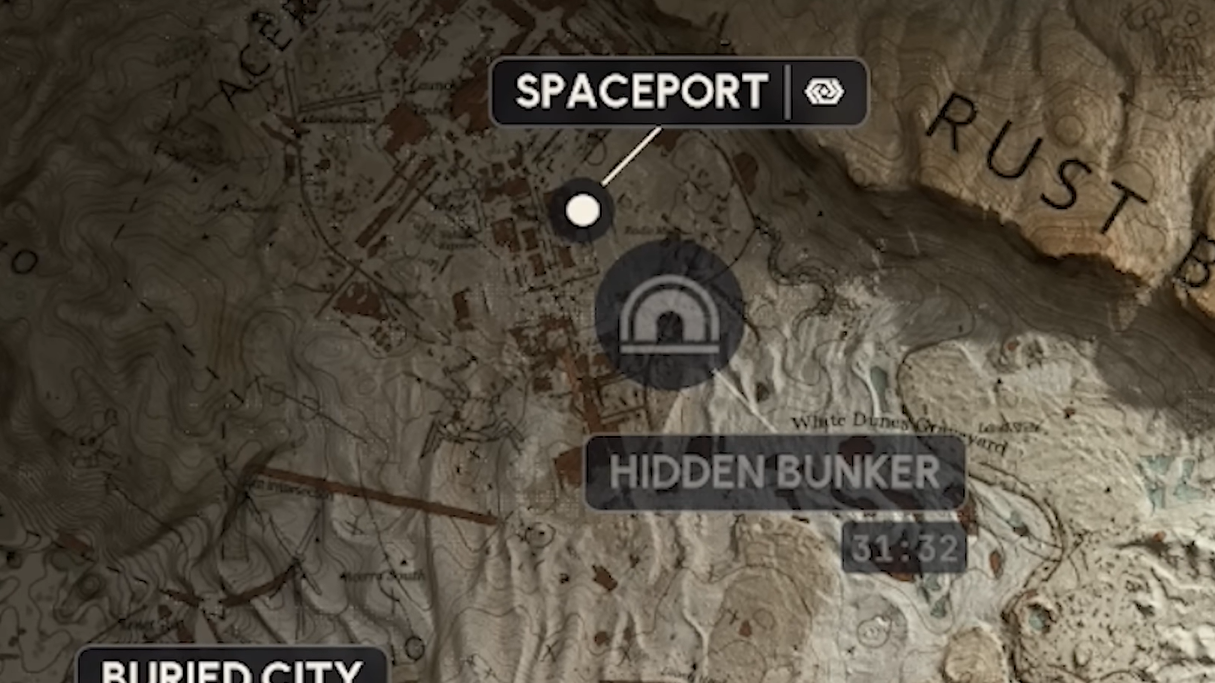
The Hidden Bunker is a special map condition that only appears on Spaceport. When it’s active, a dedicated button and timer show up on the Play screen. If the Hidden Bunker icon is yellow, the event is live, and you can queue for it; if it’s grayed out with a countdown, it’s scheduled to start soon.
Inside the raid, everyone in the lobby shares a single progress state. Four rooftop antennas must be brought online somewhere on the map. Once all four are complete, a server-wide message announces that the Hidden Bunker has opened, and a set of doors in the southwest corner of Spaceport unlocks. From that point on, the focus shifts underground to the data download terminals.
The bunker layout and the core logic of the event stay the same from run to run, but antenna spawn locations, other squads’ behavior, and enemy patrols keep each attempt slightly different.
Requirements and recommendations before you queue
Hidden Bunker runs are tuned for raiders who already have some time in the game.
- Level requirement: At least level 15 is recommended so you can participate in the associated “Download Data during Hidden Bunker” trial and make the run worth the time.
- Loadout: Bring solid mid- to long‑range weapons and a way to disengage, like smoke grenades, since the bunker entrance is usually covered by Bastions, Bombardiers, and other Arc.
- Traversal tools: A zip line or two is effectively mandatory if an antenna spawns on top of high structures like the control tower or trench tower roofs.
- Matchmaking choice: Solos tend to be more cooperative; squads often turn the bunker into a PvP choke point. If you only care about trial progress, solo queue is safer.
Even in cooperative lobbies, expect heavy resistance from Arc while moving between objectives. Treat the event more like a long raid route than a quick side activity.
Step 1 – Activate the four antennas on Spaceport
Step 1: After loading into Spaceport with the Hidden Bunker condition active, open your map and look for four antenna icons. One spawns roughly to the north, east, south, and west of the map, always on rooftops. Mark their general positions and plan a route that hits at least one or two of them yourself, in case other players ignore them.
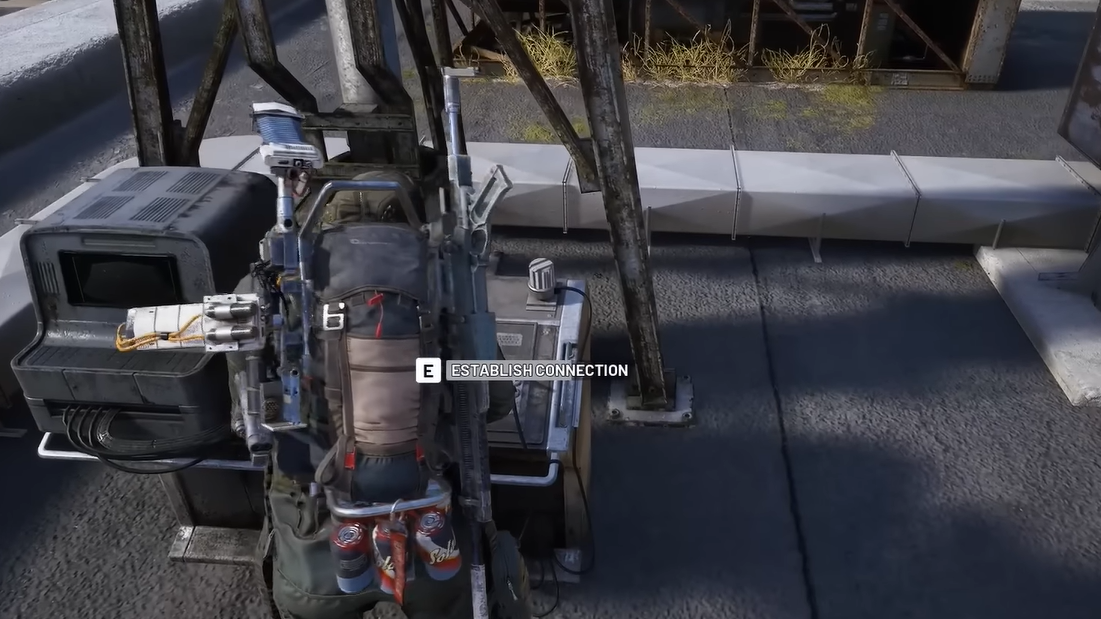
Step 2: Reach an antenna by climbing or using a zip line. At the base, you’ll find a small terminal. Interact with it once to begin “establishing a connection.” This immediately spawns a wave of Arc — typically a Hornet and a Wasp — right on top of you.
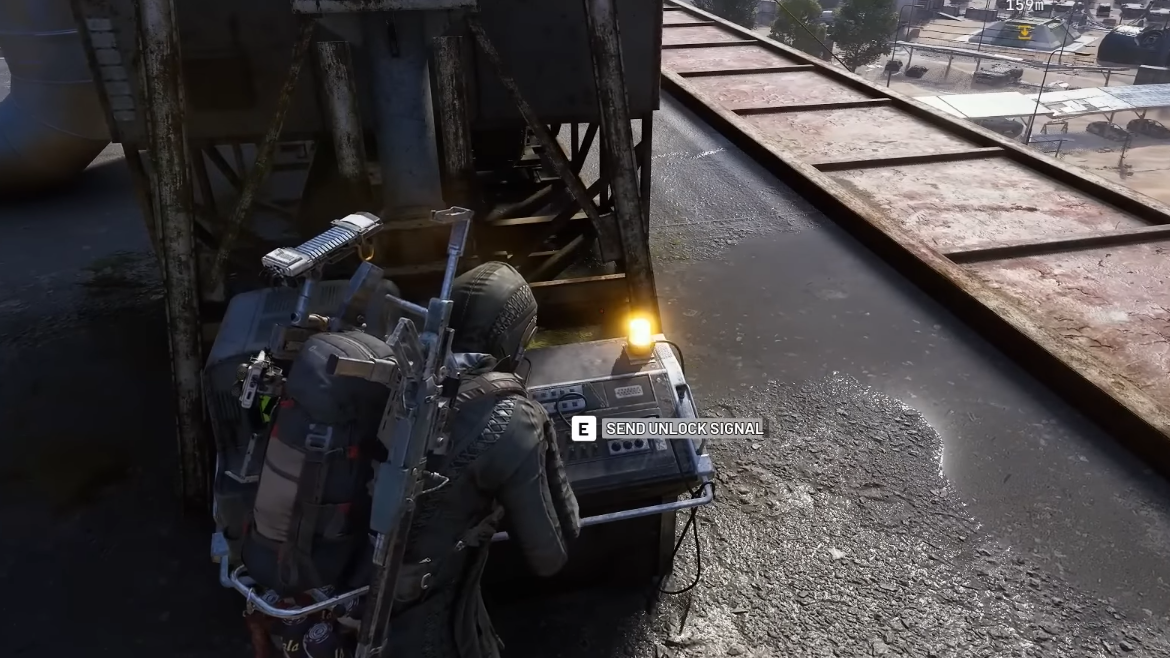
Step 3: Clear the spawned enemies and stay near the antenna while the connection completes. After a short delay, the terminal becomes usable again. Interact a second time to send the unlock signal. When this finishes, a broadcast message announces to the entire lobby that one antenna has been activated.
Step 4: Repeat with additional antennas as needed. You don’t personally have to do all four; any squad in the lobby can finish them, and every successful tower sends another global notification. When the fourth antenna is complete, everyone sees a message along the lines of: “Attention all raiders, Hidden Bunker is now open.”
At that point, the event shifts from a map‑wide scavenger hunt to a focused scramble around the bunker entrances.
Step 2 – Find the Hidden Bunker entrances
The Hidden Bunker sits in the southwest corner of Spaceport, between Fuel Processing and Fuel Lines. Zooming in on the map reveals three light‑gray service roads in that area; the main bunker door is along the middle path, with an alternate entrance at the eastern end of the southern path.
Step 1: Once the server message announces the bunker is open, head toward the area between Fuel Processing and Fuel Lines. Tagging the right spot will often label the ground as “Hidden Bunker” and the door itself as a generic door, which helps you zero in on the entrance in cluttered fights.

Step 2: Approach carefully. The bunker perimeter is almost always guarded by heavy Arc, including Bastions and at least one Bombardier, plus smaller units. Choose whether to sneak in through cover or coordinate with nearby raiders to clear the patrols before you attempt to push through the doors.

Step 3: Use whichever entrance is safest in the moment. Multiple squads can funnel in from different directions, so visibility and positioning matter as much as raw firepower.
Once inside, the environment shifts to a dark, multi‑room underground facility with scattered loot, Fireballs, Pods, and the global focus of the event: the data download terminals.
Step 3 – How the data terminals work
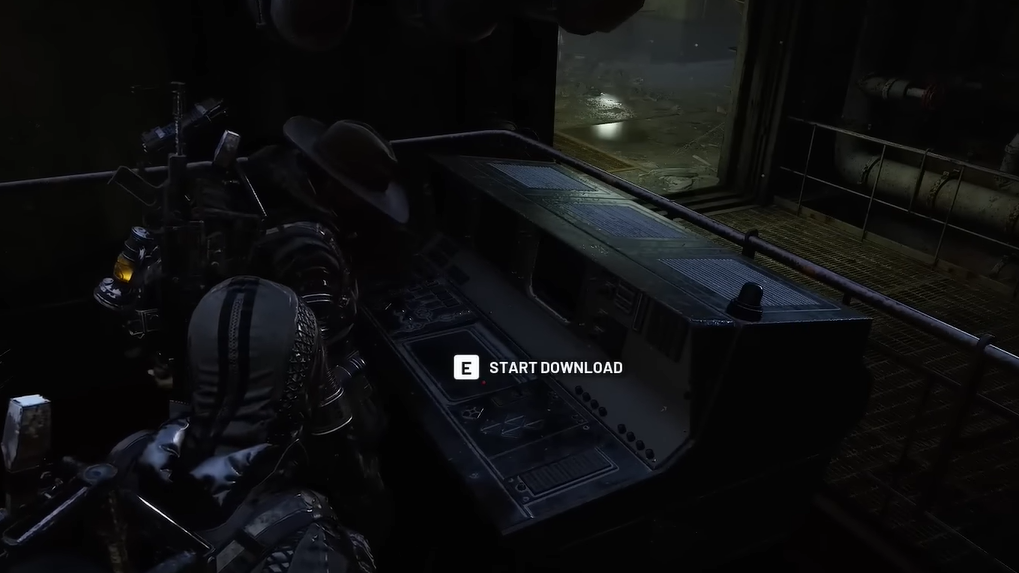
Eight computers inside the Hidden Bunker drive both the XP reward and the trial. Each one loops through a simple state machine represented by a colored light on a beacon above the terminal.
| Light color | Terminal state | What you can do |
|---|---|---|
| (Light off) | Idle | Ready for someone to start a download. |
| Yellow | Downloading | Download in progress, stay close or it will fail. |
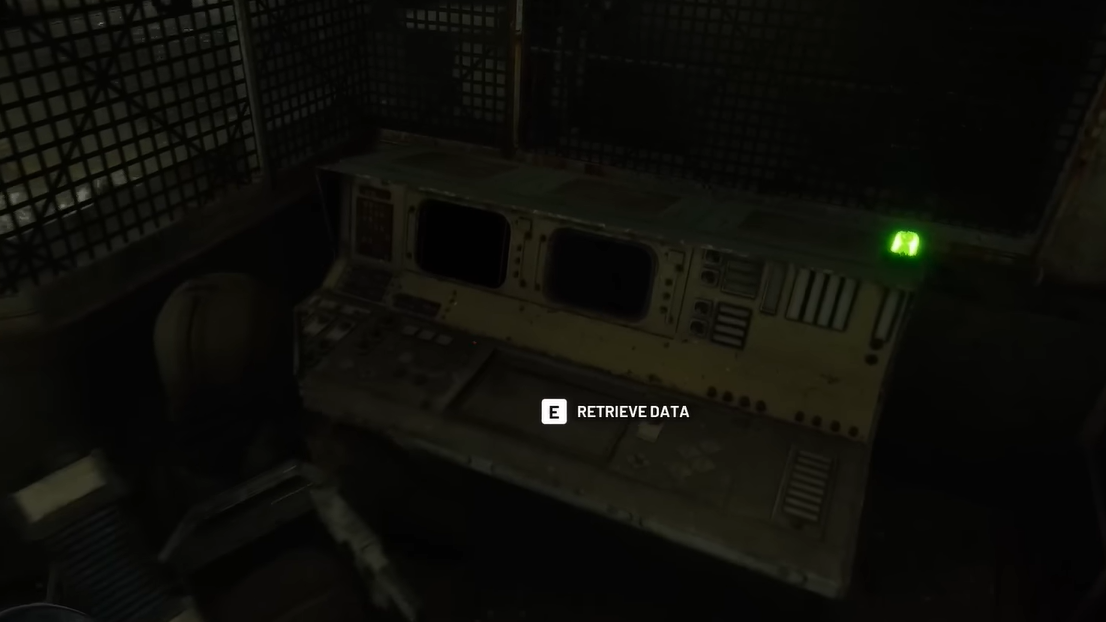
| Green | Data ready | Interact once to retrieve data and earn XP/trial points. |
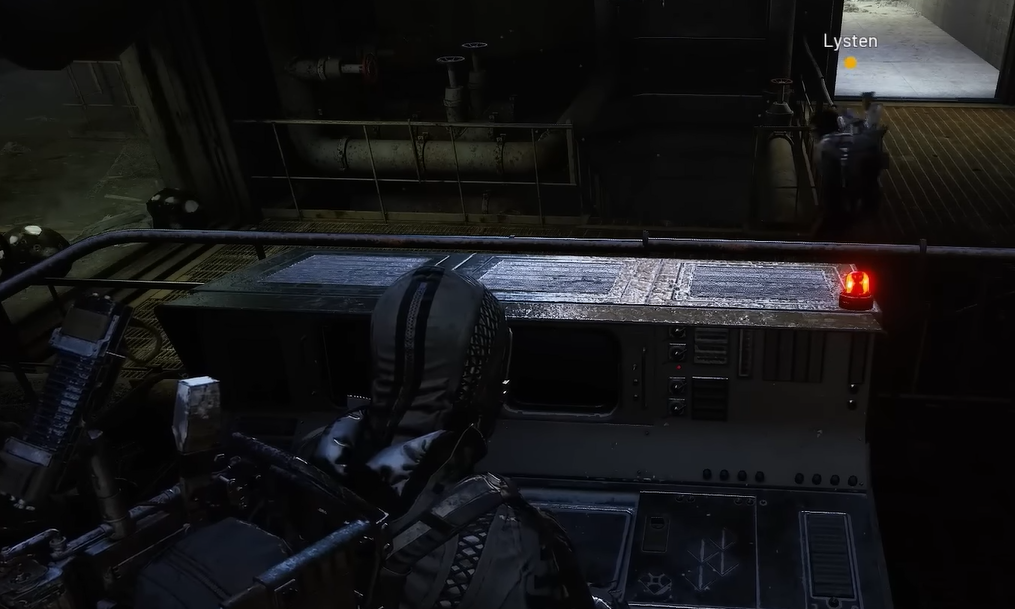
| Red | Cooldown / blocked | Either a failed download or post‑retrieval cooldown; wait for the light to go off again. |
There are seven of these beaconed terminals on the lower floor of the bunker and one on the upper level in the main control room. Every player can retrieve data from each terminal once per raid. Multiple players — even from different squads — can pull data from the same terminal during a green window.
Each successful retrieval grants 500 XP and a chunk of trial score. The maximum trial score from the event is reached by collecting data from all eight terminals, for a total of 6,400 trial points.
Step 4 – Download and retrieve data from all eight terminals
Step 1: On entering the bunker, clear any immediate enemies and quickly scan for a computer with a red beacon light. If a prompt appears when you approach, you can start a download. Interact once to kick it off; the light switches to yellow to show the process has started.
Step 2: Stay close to the terminal while the yellow light is on. Moving too far away or getting knocked out of range cancels the download and flips the beacon to red. If that happens, you have to wait for the cooldown to end (light off) and start again, or let someone else in the lobby handle that cycle.
Step 3: When the light turns green, interact with the terminal again to retrieve the data. That one terminal now permanently counts for your character or squad; you cannot get another data piece or trial credit from it during that raid, even if it cycles back through its states.
Step 4: Move through the bunker and repeat the process for all eight beaconed computers. You do not need to personally start every download. If another raider has already triggered one, simply wait for the beacon to switch from yellow to green and then take your turn grabbing the data. Everyone standing near the console during that green window can pull their own copy.
Step 5: Keep an eye on the colors. After some time in the green “data ready” state, the terminal shifts to red (cooldown) and then eventually cycles back to off. That loop allows late‑arriving squads to still get their downloads, but it does not reset your personal completion for that console.
Once you have eight successful retrievals, your trial progress for that run is effectively capped out. At that point, the only thing left to do is leave alive.
Step 5 – Extract to lock in XP and trial progress
Trial points and XP from the Hidden Bunker aren’t banked until you successfully extract from the raid.
Step 1: After finishing as many terminals as you need (or can safely reach), start planning a route back to an extraction zone. Consider whether other squads are likely to ambush you near the bunker exits, since many players treat this area as a PvP hotspot.
Step 2: Use tools like smoke bombs or other crowd‑control gear to break the line of sight with Arc patrols and enemy raiders on the surface. The event’s timer is generous — typical runs leave substantial time on the clock after completing the bunker — so don’t rush into a bad fight on your way out.

Step 3: Call in and complete your extraction. Once you’re off the map, XP from each successful data retrieval and the accumulated trial points are added to your account. Hitting the 4,000 trial‑XP threshold in a run unlocks the epic reward tied to the “Download Data during Hidden Bunker” trial.
Solo vs. squad strategies for the bunker
The underlying mechanics don’t change between solos and squads, but the social dynamics do.
- Solo matchmaking: Randoms in solo runs are often more focused on finishing the bunker event than on PvP. You’re more likely to see loose lines forming at green terminals and players waiting for each other to grab data before moving on.
- Squad matchmaking: Premade teams frequently camp the bunker entrance or wipe other squads inside, under the assumption that the underground complex is packed with unique loot. In practice, the visible loot is modest, and the main value is trial progress, but that doesn’t stop the fights.
Whichever queue you choose, open mic or quick text callouts help. Simply telling other raiders that you’re only there for terminals and happy to share tends to defuse some of the tension around choke points.
Is there a deeper Hidden Bunker puzzle?
The community has treated the Hidden Bunker like a multi‑step ARG. Players have tried collecting data in specific orders, synchronizing all eight terminals so their lights are green at the same time, staying in the flooded pool room until the raid timer expires, revisiting antennas with data in hand, and hunting for extra buttons or secret doors.
None of those experiments has produced any confirmed extra unlocks so far. The only consistent, verifiable function of the bunker terminals is to award 500 XP per data retrieval and to feed the weekly trial. The unusual layout, the central “orb” in the control room, and the long map timer all hint at potential future use, but for now, there is no proven secondary quest or hidden loot room tied to the data.
That could change with future updates, but as it stands, if you go through the trouble of opening the bunker and draining every terminal, the reward is XP, trial progress, and whatever standard loot you pick up along the way.
Once you understand how the rooftop antennas, bunker entrances, and terminal states fit together, the Hidden Bunker stops feeling like a mysterious puzzle and becomes a predictable — if still chaotic — XP farm. Treat other squads as potential allies until they prove otherwise, track which computers you’ve already used, and prioritize extraction over chasing rumors, and the “Download Data during Hidden Bunker” trial turns into one of the most reliable ways to spike your trials score on Spaceport.