
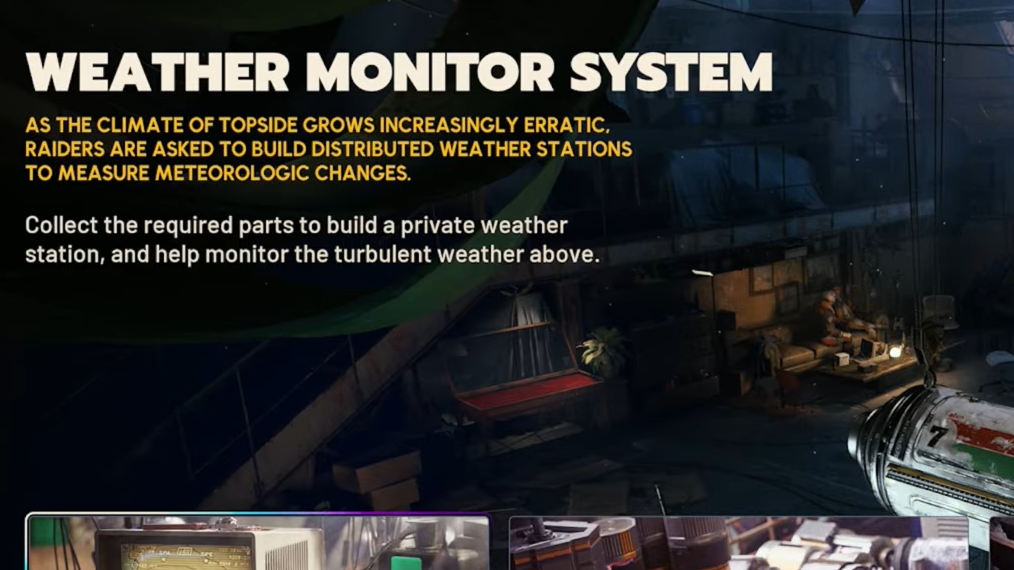
The Weather Monitor System is a permanent project added to Arc Raiders with the Shrouded Sky update in February 2026. Like the earlier Trophy Display project, it has no expiration date, so you can chip away at it across multiple raids without pressure. The project tasks you with donating materials across five sequential stages — each themed around a meteorological concept — to help Speranza track the increasingly dangerous weather conditions on Topside, including the new hurricane map condition.
Quick answer: You need to complete five donation stages (Atmospheric Pressure, Sunlight, Precipitation, Humidity, Temperature) by submitting specific materials through the Projects menu on your Raiders tab. Finishing all five rewards you with 250 Raider Tokens and the Anemometer backpack charm.\
How to access the Weather Monitor System project
Open the Raiders page from your main menu and navigate to the Projects tile — it's the fourth icon. The Weather Monitor System sits in the bottom right of the Projects menu. You can submit items directly from your inventory or from materials collected on successful raids. Progress carries over through Expeditions, so you won't lose any completed stages after a reset.
A practical consideration: since the project does not include any blueprint rewards, there's a strategic argument for delaying completion until after an Expedition wipe. The stage rewards — consumables, weapon parts, and crafting components — are more useful on a fresh character than on a fully geared raider. The 250 Raider Tokens, however, are account-level currency, so they're valuable regardless of timing.

Stage 1: Atmospheric Pressure
The opening stage requires only basic materials that you'll accumulate naturally through normal scavenging.
| Required Material | Qty | Where to Find |
|---|---|---|
| Plastic Parts | 25 | Basic material from scavenging containers or recycling items |
| Metal Parts | 15 | Basic material from scavenging containers or recycling items |
| Arc Alloy | 5 | Looted from destroyed Arc machines or their husks |
| Oil | 3 | Mechanical loot areas, or recycle grenades, mines, Coolant, Motors, Synthesized Fuel |
Rewards: 5 Durable Cloth, 5 Great Mullein, 5 Antiseptic, 3 Vita Shots
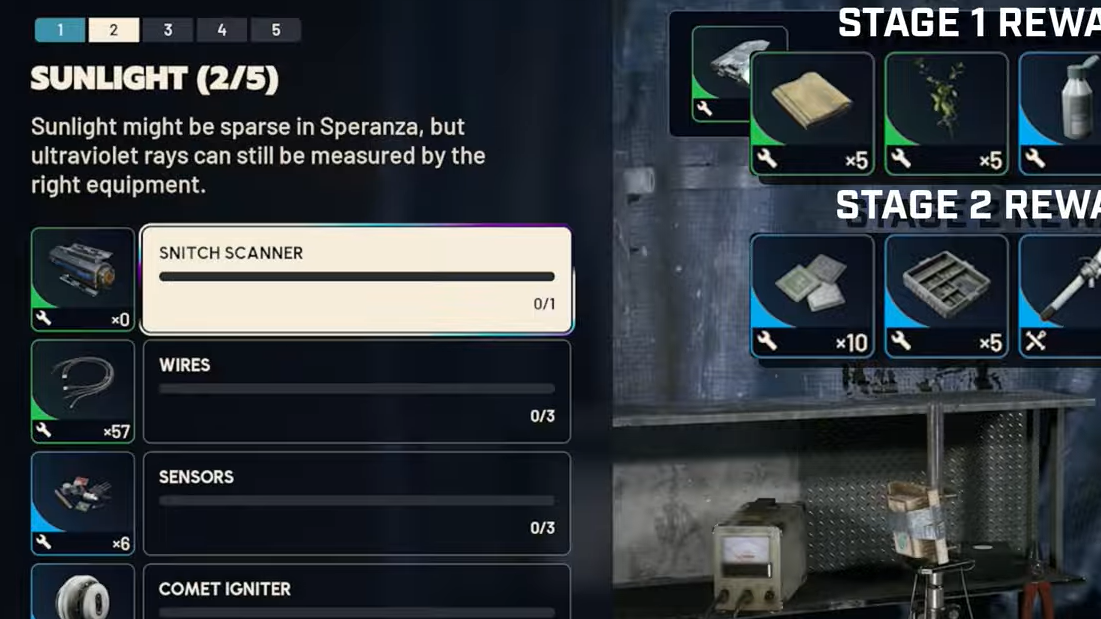
Stage 2: Sunlight
This stage introduces your first encounter with Shrouded Sky's new Arc enemies. You'll need a Comet Igniter, which drops from the Comet — the explosive ball-shaped bot added in this update. Be aware that a known bug can prevent looting if the Comet self-destructs before you kill it. To reliably get the drop, destroy the Comet with your own damage before it detonates on its own.
| Required Material | Qty | Where to Find |
|---|---|---|
| Snitch Scanner | 1 | Kill and loot a Snitch drone (found on all outdoor maps except Stella Montis) |
| Wires | 3 | Electrical and Technological areas, or recycle Portable TVs, Power Cables, Humidifiers |
| Sensors | 3 | Security and Technological areas, or recycle Radios, Tagging Grenades, Explosive Mines |
| Comet Igniter | 1 | Kill and loot a Comet before it self-destructs |
Rewards: 10 Processors, 5 Advanced Electrical Components, 3 Ziplines, 1 Raider Hatch Key
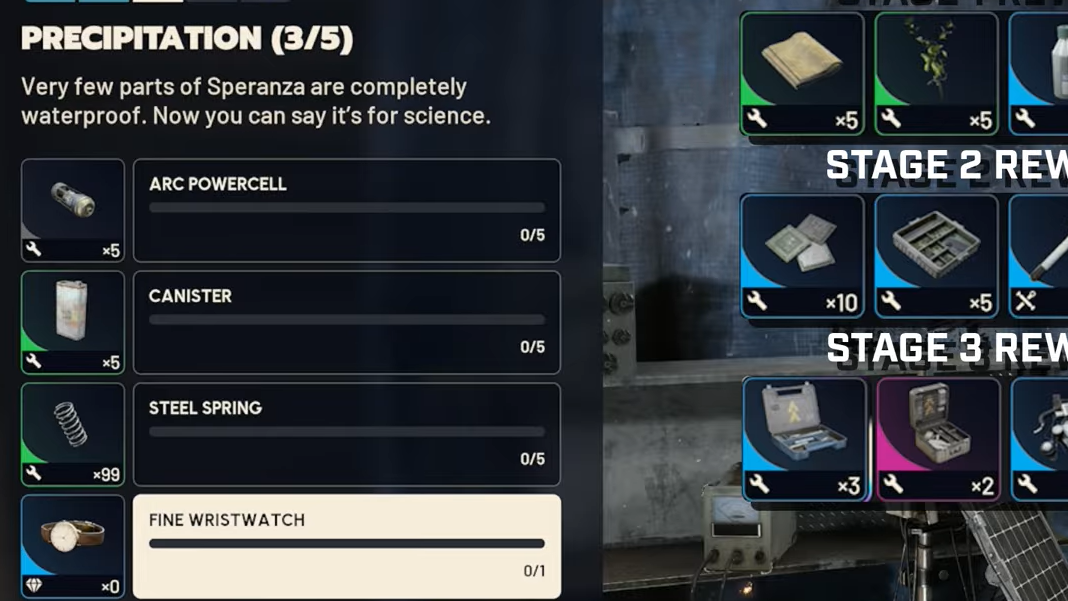
Stage 3: Precipitation
The Fine Wristwatch is the trickiest item here. It's a rare trinket that spawns in Commercial and Residential loot zones. Buried City is a particularly reliable hunting ground — check the Apartments, Library, Galleria, and houses in the center of the map. The Bird City map condition also places Fine Wristwatches in bird nests. Canisters and Steel Springs can both be purchased from Celeste if you'd rather spend Seeds than scavenge.
| Required Material | Qty | Where to Find |
|---|---|---|
| Arc Powercell | 5 | Kill and loot any Arc machine |
| Canister | 12 | Commercial areas, recycle Bicycle Pumps / Humidifiers / Smoke Grenades, or buy from Celeste |
| Steel Spring | 3 | Industrial areas, cars, recycle weapon mods, or buy from Celeste |
| Fine Wristwatch | 1 | Rare trinket in Commercial / Residential areas, or bird nests during Bird City |
Rewards: 3 Medium Gun Parts, 2 Complex Gun Parts, 3 Advanced Mechanical Components, 1 Renegade III
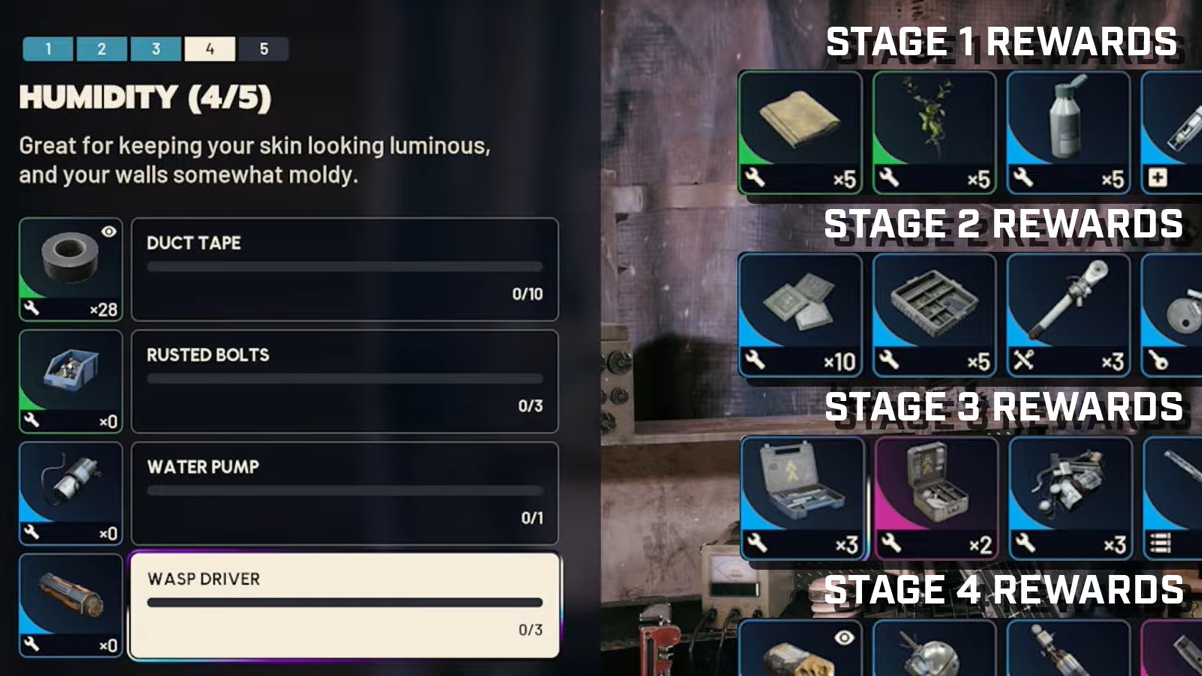
Stage 4: Humidity
Rusted Bolts tend to trip people up, but they're common in Industrial and Mechanical loot zones. Stella Montis is a reliable spot — specifically the breachable locker room on the top floor of the Bastion area. The Blue Gate underground and the buses near the Power Generation Complex extract on Dam Battlegrounds are also solid options. The Water Pump is rarer and spawns in the same Industrial and Mechanical zones, often inside metal crates or on shelves at Dam Battlegrounds' Research and Administration or Power Generation Complex areas.
| Required Material | Qty | Where to Find |
|---|---|---|
| Duct Tape | 10 | Residential and Commercial areas, recycle weapon mods, or buy from Celeste |
| Rusted Bolts | 3 | Mechanical and Industrial areas (Spaceport Container Storage, Stella Montis, Blue Gate) |
| Water Pump | 1 | Mechanical and Industrial areas, often in metal crates at Dam Battlegrounds |
| Wasp Driver | 3 | Kill and loot Wasp drones (found on all maps) |
Rewards: 10 Explosive Compounds, 3 Showstoppers, 3 Trailblazers, 1 Extended Barrel attachment
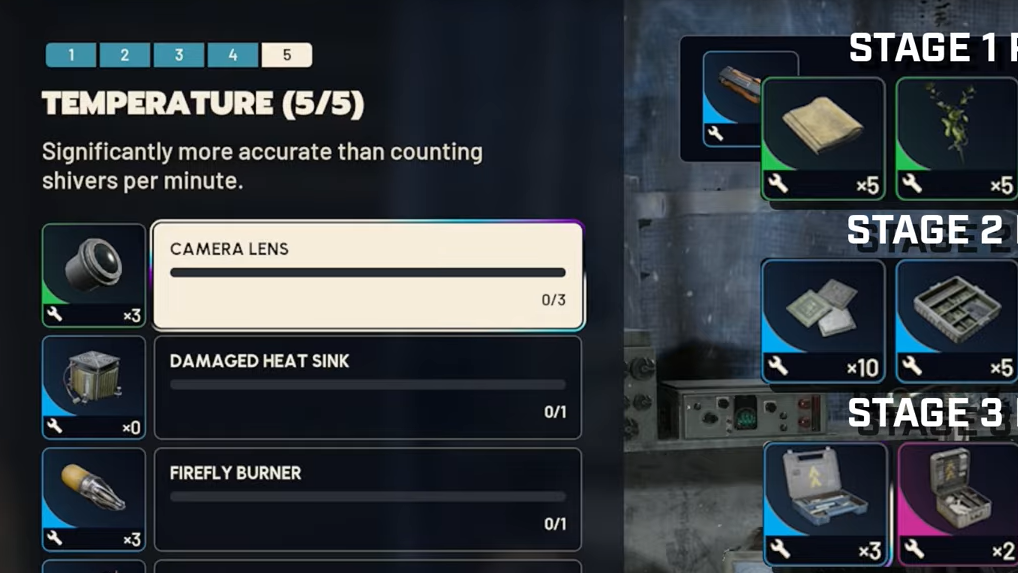
Stage 5: Temperature
The final stage requires a Firefly Burner, which drops from the Firefly — the other new Arc enemy introduced in Shrouded Sky. This flamethrower drone works similarly to the Comet in that you need to defeat it and loot the remains. Voltage Converters appear in Electrical loot zones and can also be obtained by recycling Heavy Shields, Industrial Chargers, Ion Sputters, or Signal Amplifiers. Celeste sells them as well.
| Required Material | Qty | Where to Find |
|---|---|---|
| Camera Lens | 3 | Found widely, especially in Security areas |
| Damaged Heatsink | 1 | Technological areas, in server cabinets or on desks |
| Firefly Burner | 1 | Kill and loot a Firefly drone |
| Voltage Converter | 3 | Electrical areas, recycle Heavy Shields / Industrial Chargers / Ion Sputters / Signal Amplifiers, or buy from Celeste |
Rewards: 1 Medium Shield, 5 Surge Shield Rechargers, 3 Sterilized Bandages, 1 Tactical Mk.3 Revival
Full project completion bonus
After finishing all five stages, you receive 250 Raider Tokens and the Anemometer backpack charm, which is purely cosmetic. The project does not award any blueprints, which is a notable difference from the Trophy Display project — and a point of contention among players who found that earlier project more rewarding overall.
Timing around Expeditions
Because the Weather Monitor System is permanent and progress persists through Expedition resets, you have flexibility in when you tackle it. If you're planning an Expedition soon, consider holding off on the later stages. The rewards from stages 2 through 5 — gun parts, a Renegade III, explosive compounds, shields — are significantly more impactful on a freshly wiped character than on one with a full stash. On the other hand, if you just want the Raider Tokens and the charm, there's no penalty for finishing it immediately.
The material requirements across all five stages are relatively light compared to the Trophy Display project. Most experienced raiders can complete the entire Weather Monitor System in one to two focused play sessions, with the main bottlenecks being the rare trinket drops (Fine Wristwatch) and the new Arc enemy loot (Comet Igniter and Firefly Burner). Plan your raids around maps with the right loot zone icons, and stash materials for later stages if you have the bank space.