
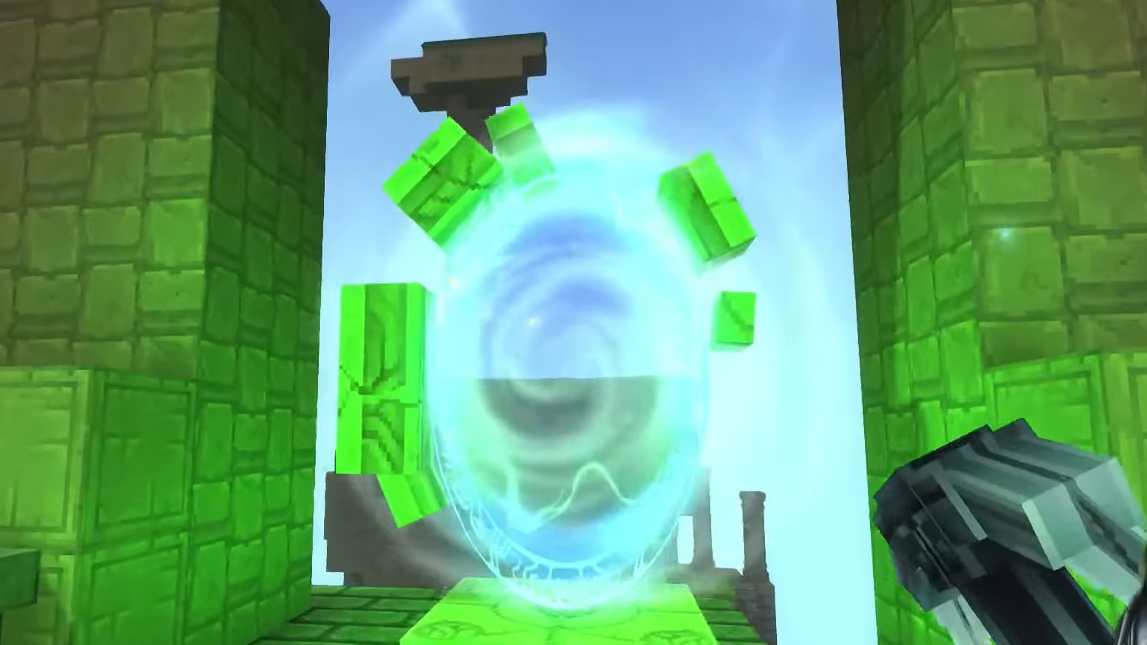
Teleporters turn Hytale’s long treks across Orbis into a few steps through a glowing portal. They are midgame structures that demand rare materials and a specific crafting path, but once set up they let you hop between bases, biomes, and points of interest almost instantly.
Teleportation limits and progression
Teleporters are capped per character. At the start, you can place up to six. As you encounter new lifeforms and recount those Memories at the Forgotten Temple, your maximum Teleporter count increases, up to a total of twelve by the endgame.
These limits apply to Teleporters you place in the world. You can keep extra crafted Teleporters in your inventory and decide later where to deploy them. Treat them as a finite, reusable network rather than disposable items.

Unlocking Teleporters and the Arcanist's Workbench
Teleporters are not available from the basic crafting interface. The recipe appears on the Arcanist's Workbench, which itself sits behind a small progression chain.
Step 1: Craft a standard Workbench using Pocket Crafting near your first base. This is the foundation for later upgrades and is available very early.
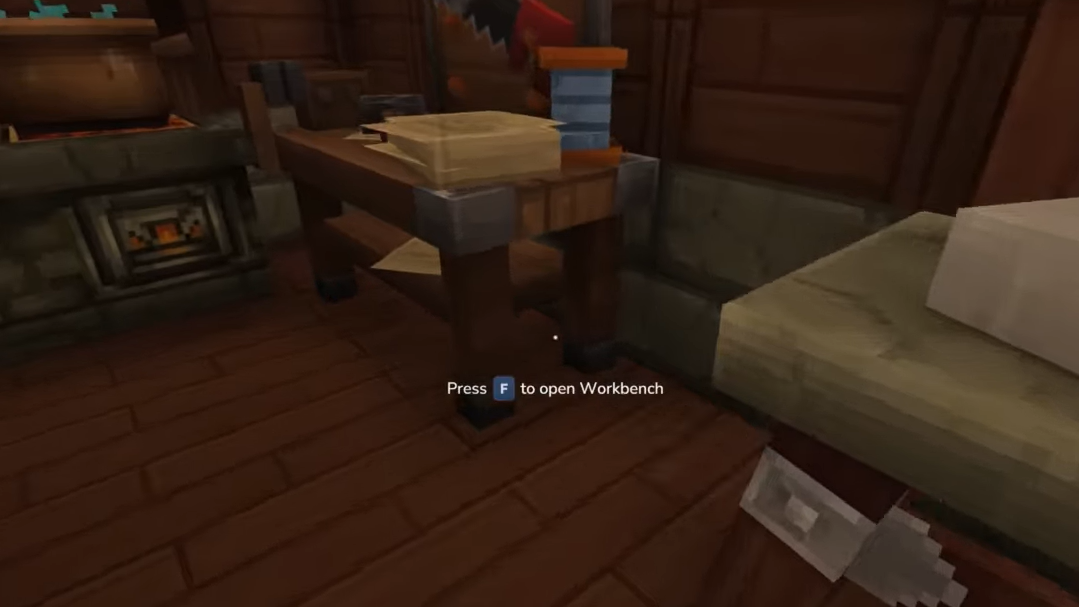
Step 2: Upgrade the Workbench to Tier 2. The upgrade costs 30 Copper Ingots, 20 Iron Ingots, and 20 Linen Scraps. Copper and Iron Ores are found underground in your starting biome, with denser veins as you mine deeper. Linen Scraps drop from humanoid enemies scattered around the world.
Step 3: Gather materials for the Arcanist's Workbench. You need 10 Thorium Ingot, 30 additional Linen Scraps, and 20 Essence of the Void. Thorium appears in small pockets on mountainsides and in shallow caves in the Howling Sands biome. Essence of the Void is obtained from green, glowing creatures that spawn only at night.
Step 4: Craft and place the Arcanist's Workbench using your Tier 2 Workbench. Once placed, interact with it to access midgame magical and technological recipes, including Teleporters, once the recipe is unlocked.
If the Teleporter recipe is missing even after you have the Arcanist's Workbench, recording more Memories at the Forgotten Temple can unlock additional recipes. As your Memory progress increases, the recipe list on the Arcanist's Workbench expands.
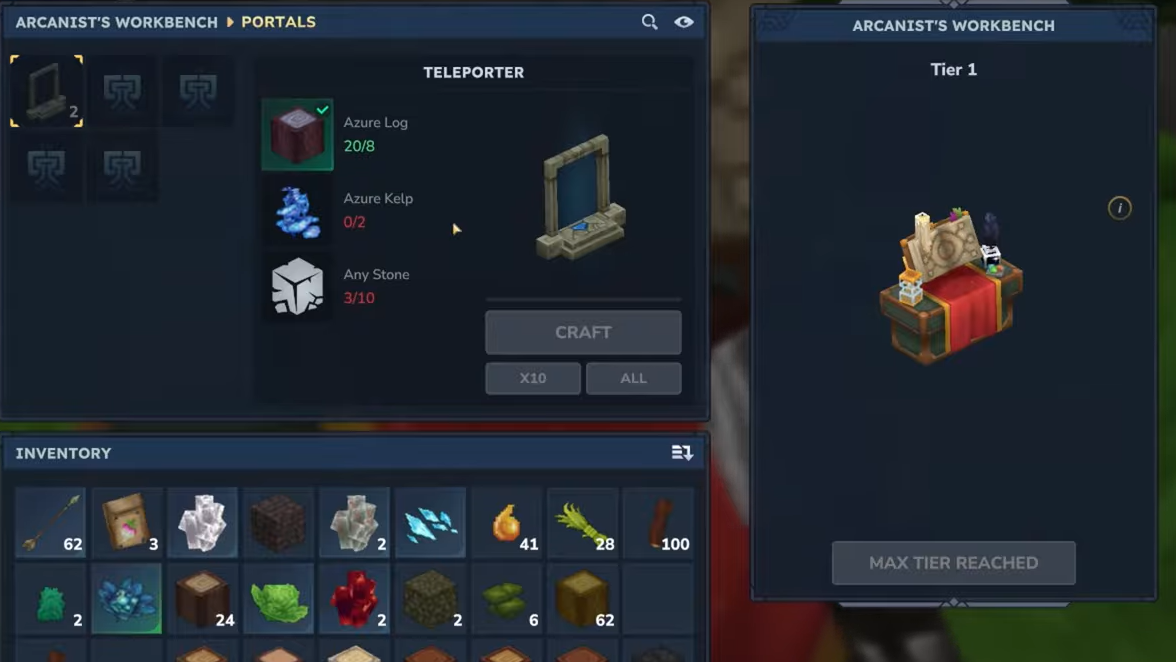
Teleporter crafting recipe and required biomes
Teleporter construction revolves around Azure Forest resources with a small stone requirement. Each craft yields two Teleporters, which is enough to create a single working connection.
| Item | Amount | Where to get it |
|---|---|---|
| Azure Logs | 8 | Chop Azure trees in Azure Forest biomes (blue-tinted regions on the world map). |
| Azure Kelp | 2 | Harvest from ponds, rivers, and shallow water in Azure Forest or Desert Oasis areas. |
| Stone (any type) | 10 | Mine with a pickaxe in most rocky terrain. |
Step 1: Travel to the nearest Azure Forest biome, which appears predominantly blue on the world map. The foliage, trees, and even the ground often have a distinct azure tint.
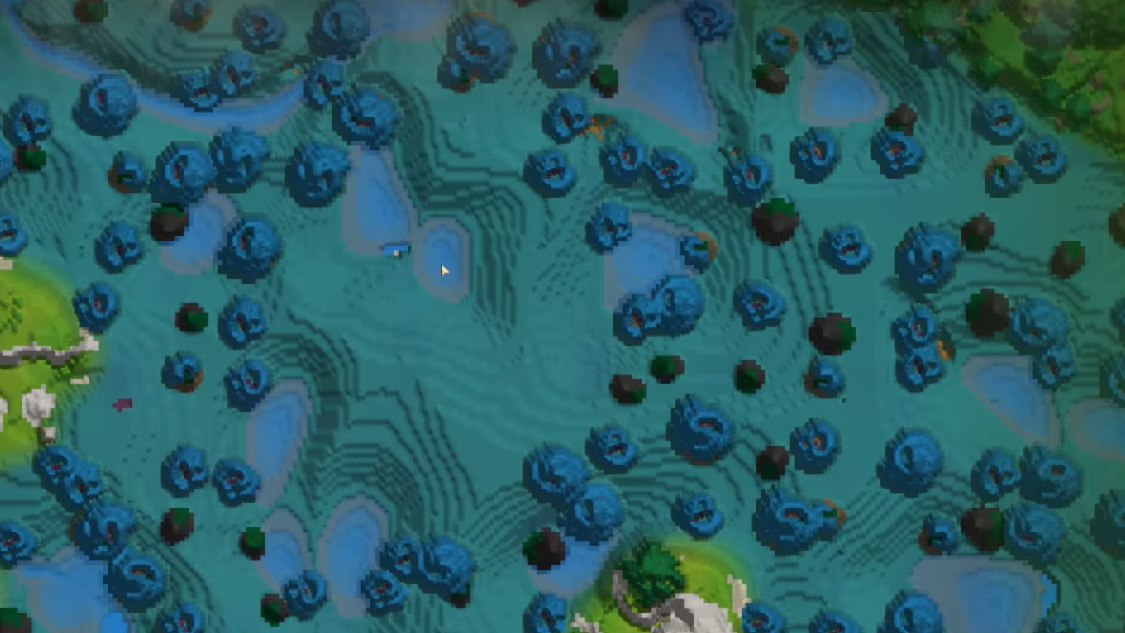
Step 2: Chop down Azure trees from the base. Each tree drops Azure Logs in quantity, so a small grove is usually enough to meet the requirement for several Teleporters.
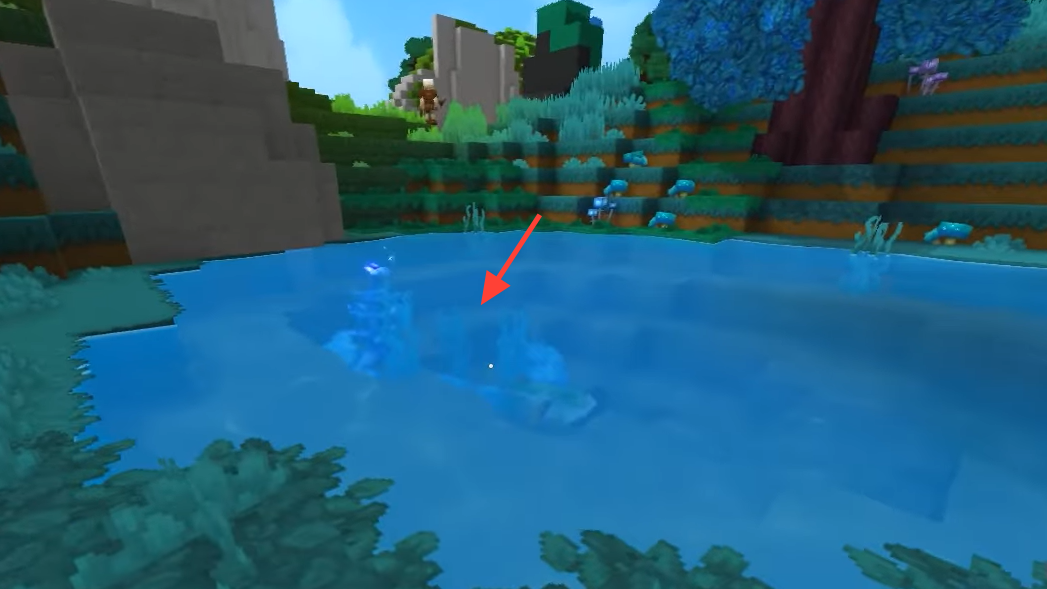
Step 3: Search shallow ponds, rivers, and small pools throughout the Azure Forest. Azure Kelp grows at the bottom and is relatively sparse, sometimes only one or two plants per pool. Interact to harvest it.
Step 4: Mine stone blocks in any rocky area. The recipe accepts any stone variant, so use whatever you have easiest access to near your base.
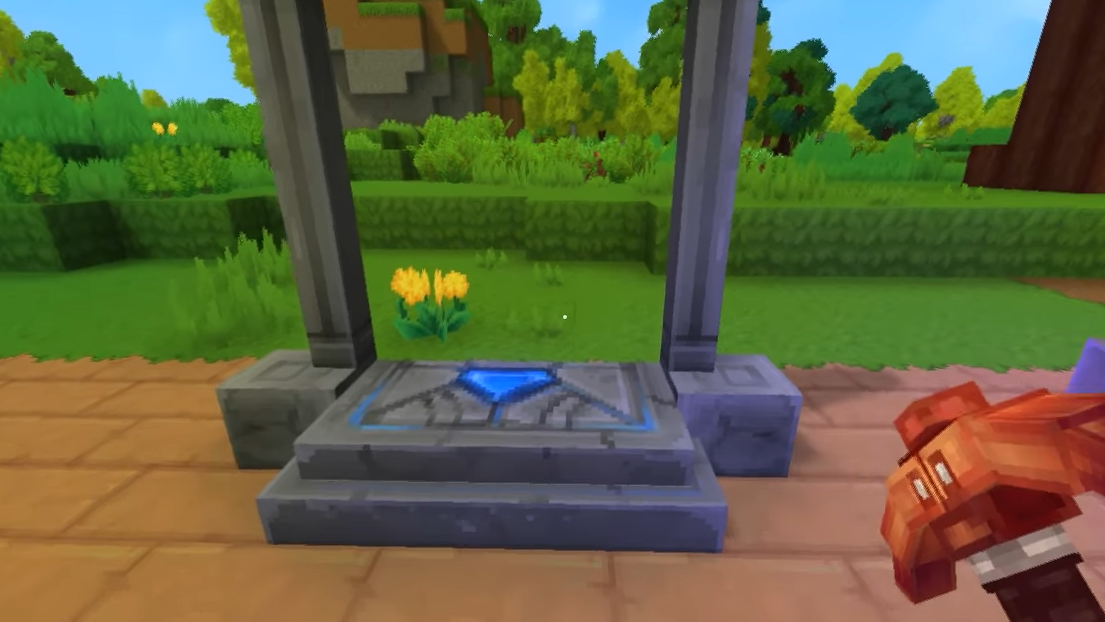
Step 5: Return to the Arcanist's Workbench and craft Teleporters using 8 Azure Logs, 2 Azure Kelp, and 10 Stone. The output is a pair of Teleporters, ready to be placed.
Placing Teleporters for fast travel
Teleporters behave like anchors in a network. Any Teleporter can be linked to any other, and you control both names and destinations.
Step 1: Decide on your endpoints. A common pattern is one Teleporter at your main base and another at a remote resource hub, dungeon entrance, or biome border.
Step 2: Place the first Teleporter at your base. Choose a location that is easy to see and reach when you respawn or return home, but that does not block doors or narrow corridors.
Step 3: Travel to your remote destination and place the second Teleporter. Position it somewhere safe from immediate enemy line-of-sight so you are not attacked the moment you arrive.
Naming and linking Teleporters
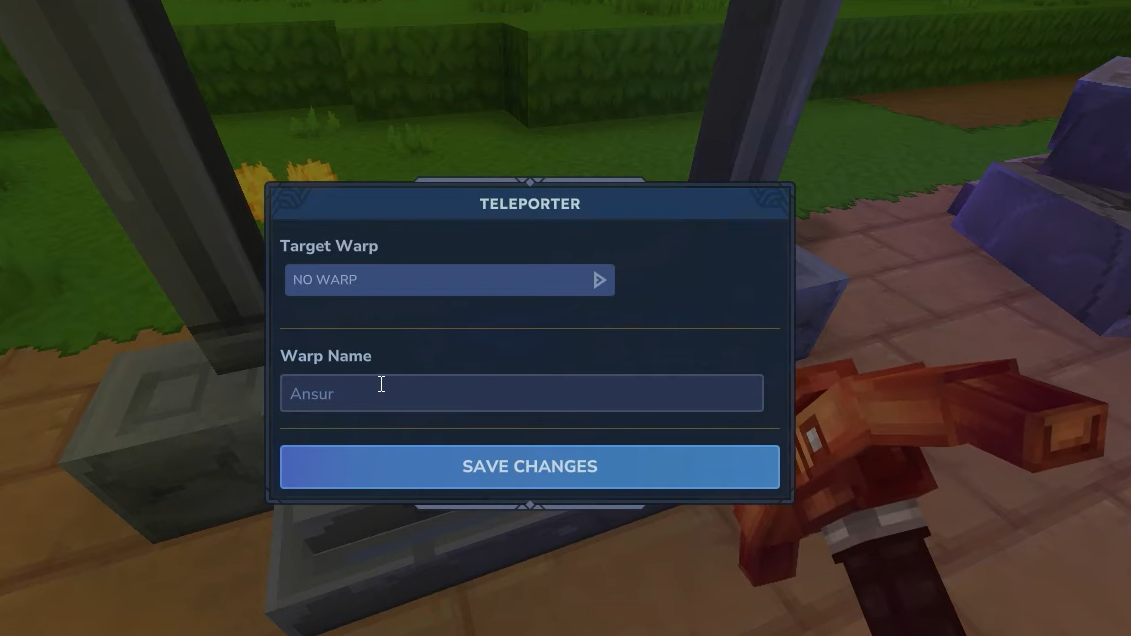
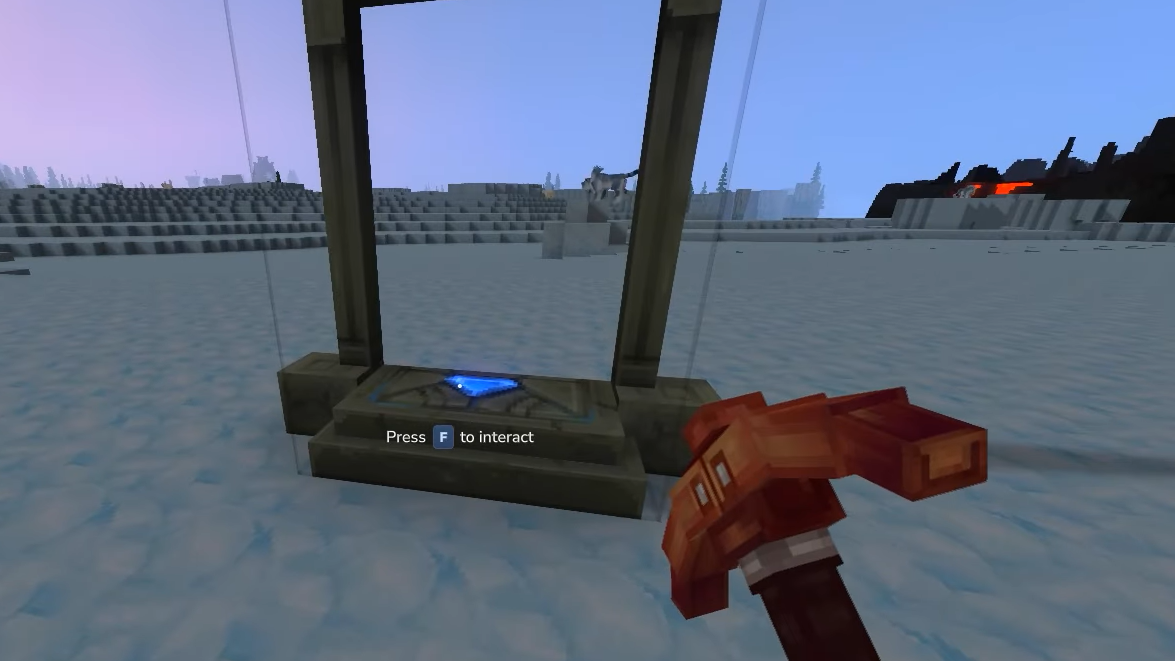
Once both structures are placed, they need configuration. A Teleporter that has not been linked will not transport you anywhere.
Step 1: Interact with the first Teleporter to open its configuration menu. You will see a field for its name and a target selector.
Step 2: Give the Teleporter a clear, memorable name, such as “Home”, “Azure Forest Camp”, or “Deep Mine”. Names matter once you have several Teleporters in play and must pick destinations from a list.
Step 3: Repeat the interaction with the second Teleporter and assign it a different descriptive name, for example, “Home 2” or “North Desert Outpost”.
Step 4: On one of the Teleporters, set the target Teleporter from the dropdown list. All placed Teleporters appear here by the names you assigned. Select the Teleporter you want to arrive at and confirm your changes.
Step 5: Step into the Teleporter field. If the link is valid, your character is instantly transported to the target Teleporter’s location.
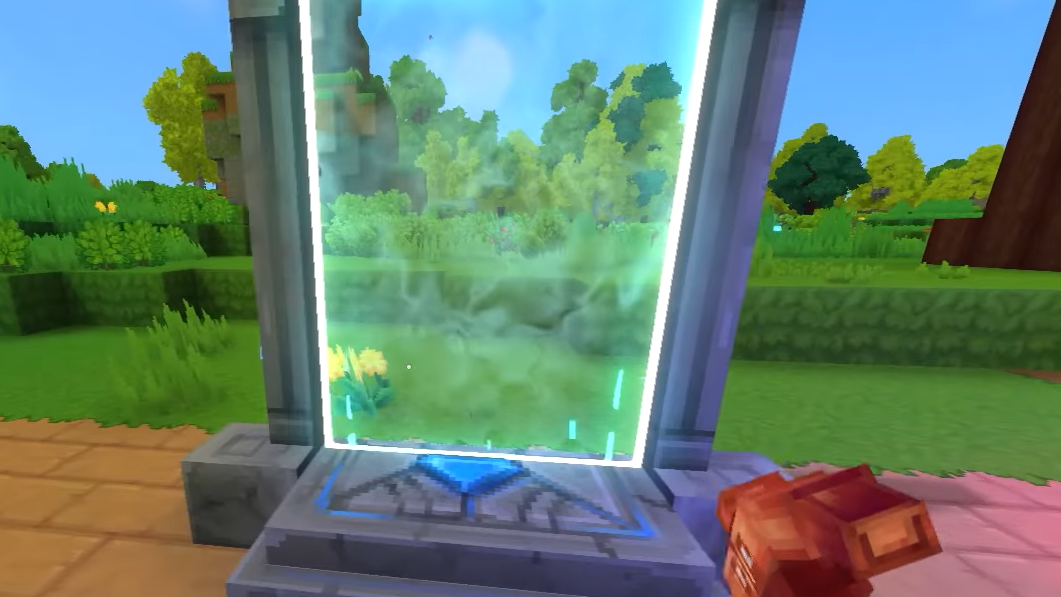
Teleporters support many-to-many configurations. Any Teleporter can target any other, and several can point to the same hub. You can route everything back to your main base, create regional chains, or build more complex loops. There is no requirement for links to be symmetrical; returning may require changing the active target or using a different Teleporter.
Reading Teleporter icons on the map
Once you start placing Teleporters around Orbis, your world map becomes the overview of your fast travel network.
Every placed Teleporter appears as its own icon, visually similar to key structures such as the Forgotten Temple. Hovering over a Teleporter icon on the map shows its name, helping you distinguish hubs, resource spots, and biome gateways at a glance.
As you expand your network toward the maximum of twelve placements, naming discipline and map awareness become important. Clear labels like “West Ocean Dock” or “Tier 3 Mine” make it easier to choose the right destination from each Teleporter’s dropdown menu.
Creative mode and direct map teleport
In creative mode, there is an additional way to move instantly that does not rely on crafted Teleporters.
Step 1: Open the world map while in creative mode.
Step 2: Right-click any point on the map. A small teleport button appears at the clicked location.
Step 3: Use that button to teleport your character directly to the selected map position without building or configuring a Teleporter.
This mechanic is separate from the crafted Teleporter system and is intended for experimentation, building, or rapid testing rather than normal progression. It does not consume resources and ignores the usual placement limits.
Strategies for building an effective Teleporter network
Teleporters are expensive enough that each placement should solve a specific problem.
One common approach is a hub-and-spoke layout with a primary “Home” Teleporter at your main base and multiple remote Teleporters all targeting it. This setup lets you return home quickly from almost anywhere while still requiring some walking or riding to head back out.
Another pattern chains Teleporters through dangerous zones. For example, one Teleporter at the edge of a hostile biome, another near a central objective, and a third near a safe exit. Adjust the targets so you can move stepwise deeper into or out of risk without crossing the entire region every time.
Because you can expand from six to twelve placements through Memories, it is often worth holding a few Teleporters in reserve for late-game dungeons, rare biomes, or multiplayer bases. Once the network is mature, the cost of Azure materials and Void essences is repaid by hours of saved travel time and safer exploration.
With a fully built network and a clear naming scheme, Teleporters become the backbone of mid and late-game movement in Hytale, turning Orbis from a daunting sprawl into a connected set of reachable destinations.