Most of us, more than once in our life have received a document over the mail which they have to sign and send back to somebody. Though technology has come a long way in these last years, we still have to rely on the cumbersome process of printing and then scanning the aforementioned document to send it back digitally if you still haven’t created your digital signature.
Now, this is where your Mac comes in to make your life easier, by simply letting you add the digitized version signature to any document or picture. You can completely eliminate the step of printing and scanning the document, which is almost always the culprit behind these types of tasks getting delayed.
Launch the Signature Tool on your Mac
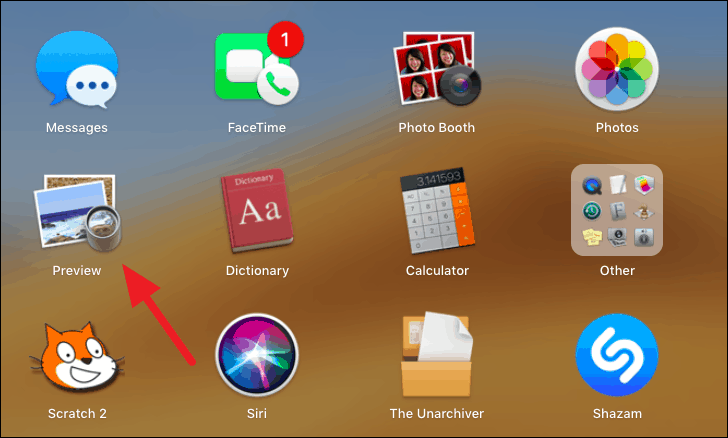
From the Launchpad, launch the ‘Preview’ app.
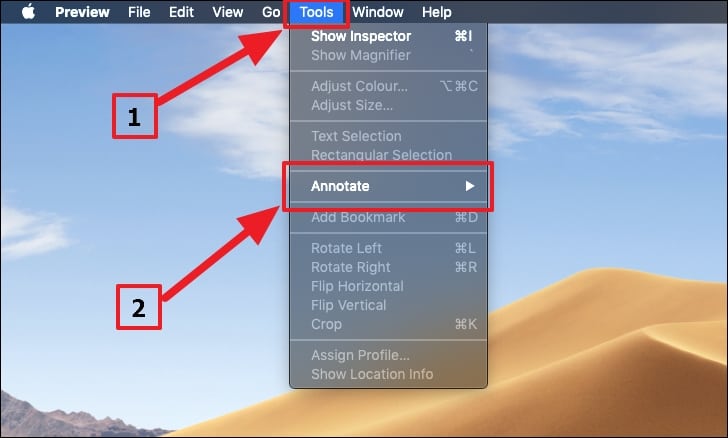
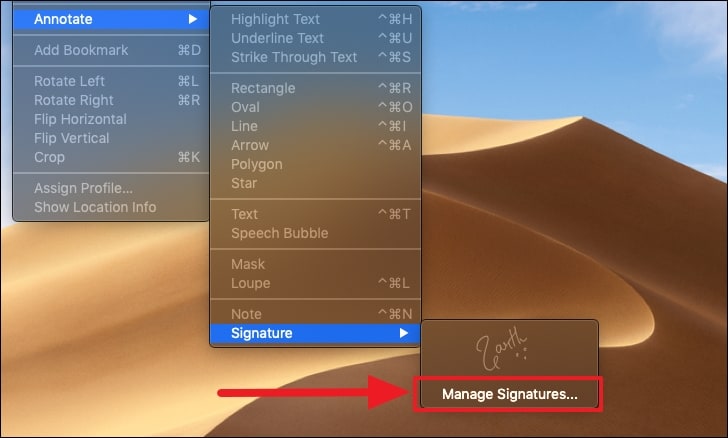
Now, select the ‘Tools’ option from the menu bar on the top right section of the screen and navigate to the ‘Annotate’ option.
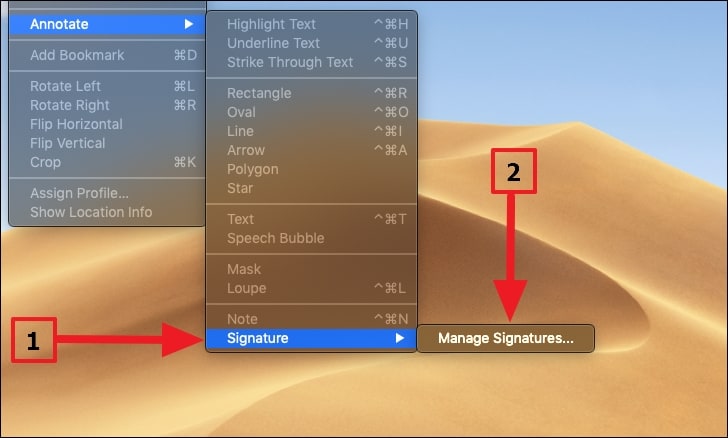
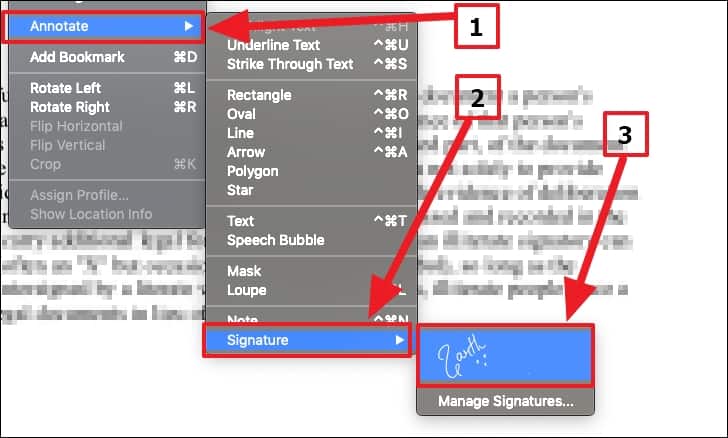
Under the ‘Annotate’ option you can locate the ‘Signature’ option. ‘Signature’ would be the last option on the list. As you hover on the ‘Signature’ option you can see the list of available signatures. If not, you can click on ‘Manage Signatures’ to create a new one.
Note: You can either use the in-built trackpad to create a signature or use the in-built webcam to scan your signature. I am going to use the ‘Camera’ to digitize the signature in this guide.
Digitizing the Signature using Trackpad
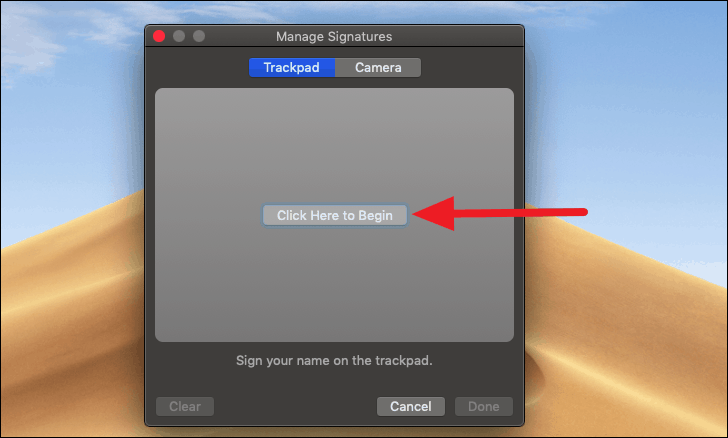
Clicking on the ‘Manage Signatures’ option would open a window for creating a new signature would open and ‘trackpad’ would be selected by default. Click on the ‘Click here to begin’ button and you can start signing the trackpad right away with a stylus or your finger.
Once you are done, you can press escape to exit the editing mode. It might take multiple tries to perfect the signature. You can use the ‘Clear’ option in the bottom left corner to start again.
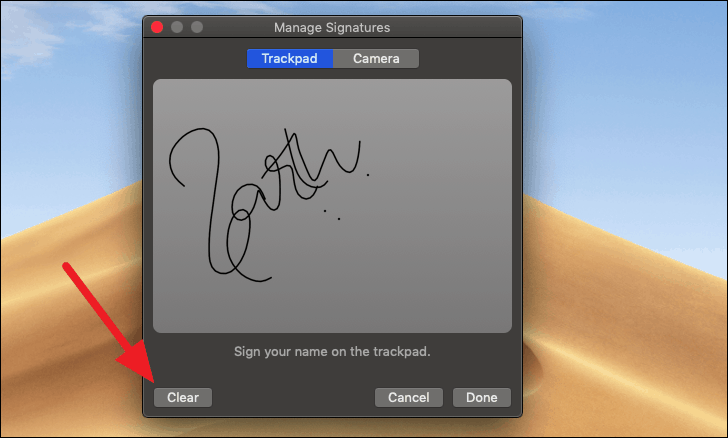
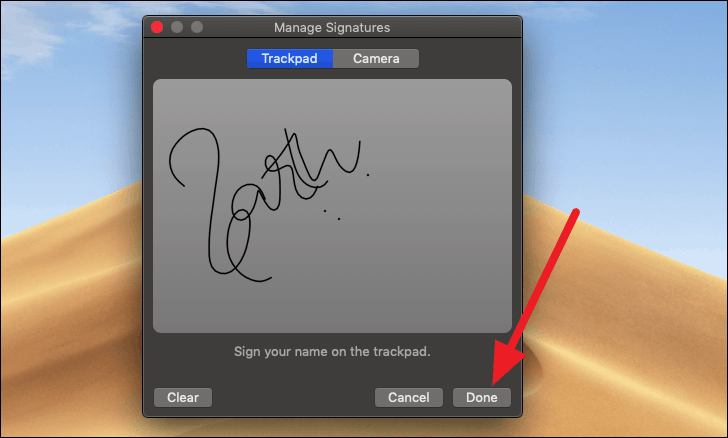
Once you’re satisfied with the result you can click on done and your signature is ready to be used. You can now jump to the last step to know how to access your signature.
Digitizing Signature Using the Camera
Creating a signature using the camera is pretty straightforward, and would only take a few minutes.
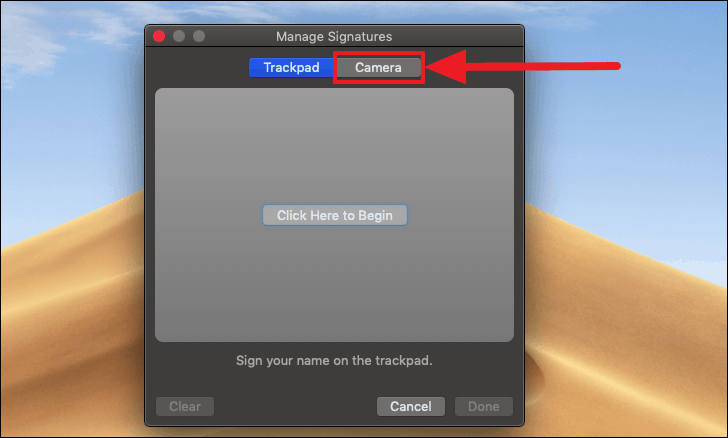
First of all, select the ‘Camera’ option from ‘Manage Signatures’ window.
Now, sign on a blank sheet of white paper and hold it near the camera. You need to place the sheet of paper so that the blue line is running across from the center of your signature. This will let you have the best possible result.
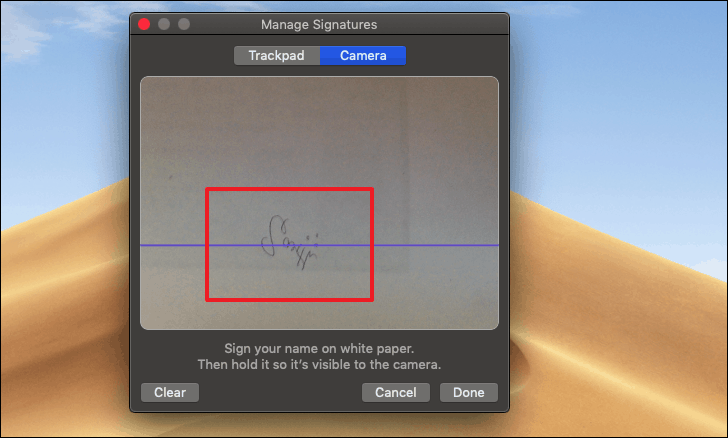
You might need to hold the paper for a bit in the same position to let the camera scan it. You can always try more than once by using the ‘Clear’ option in the bottom left corner of the window.
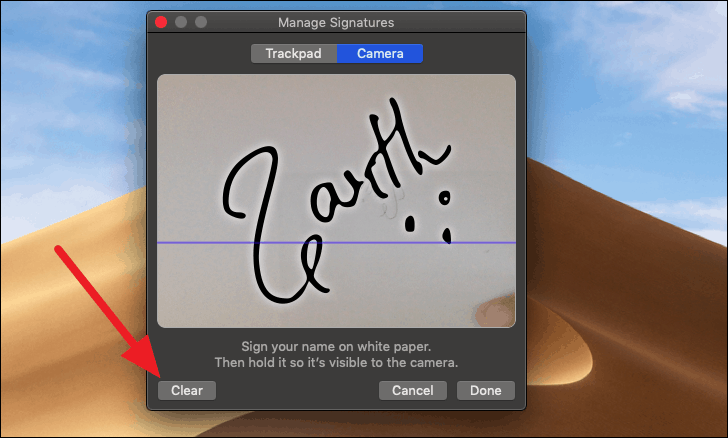
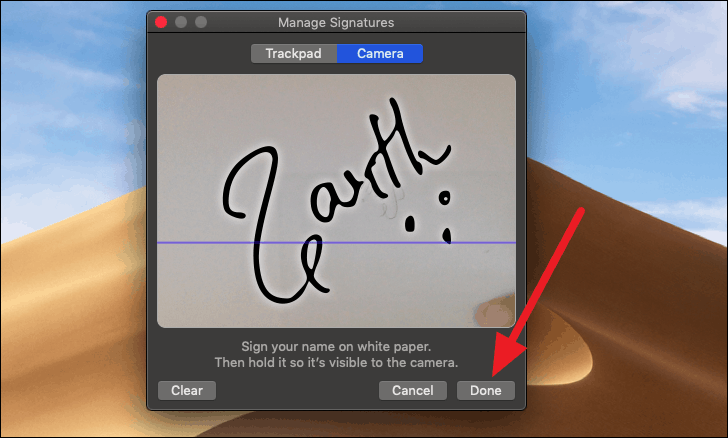
After attaining a satisfactory result, you can click on done and your signature would be ready to use.
Using the Digital Signature
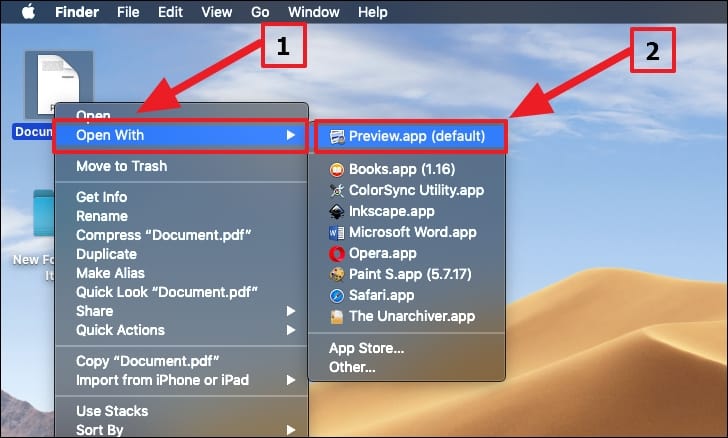
Open any PDF document or picture using the ‘Preview’ app. If ‘Preview’ is not your default viewer, you can secondary click on the document and locate ‘Preview.app’. Which would be located under the ‘Open With’ option.
After opening the file, locate the ‘Signature’ option under ‘Annotate’ from the ‘Tools’ tab of the menu bar. As we did earlier in this guide.
You can also resize the signature by dragging from it’s vertex according to the space available in the document.
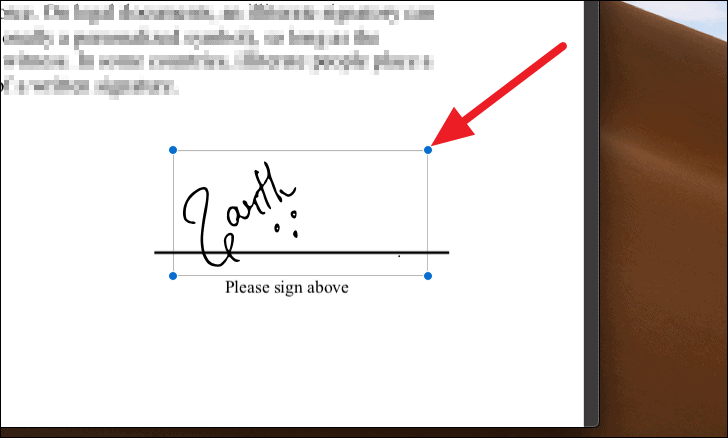
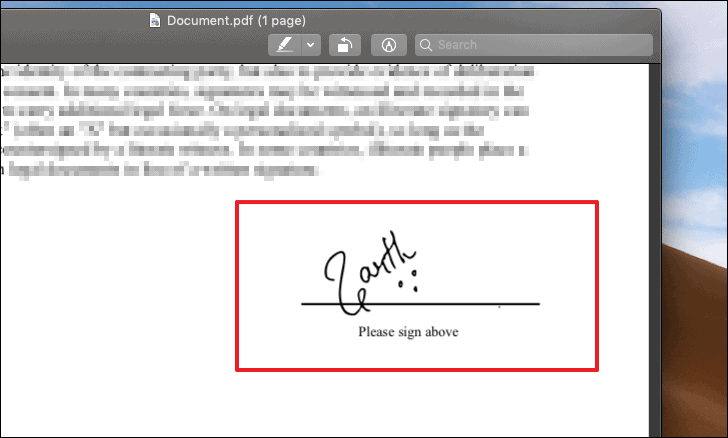
You can click anywhere on the screen to confirm the size as well as the place of the signature. Now save the document to make the changes permanent.
To add more signatures, you can always go to the ‘Manage Signatures’ option. Which would be under the ‘Tools’ tab of the menu bar.
It goes without saying that if you digitize your signature. You would save yourself from a lot of unnecessary hassle as well as provide you a quick solution to a cumbersome problem.


