
LibreOffice is the FOSS world’s answer to the mainstream and proprietary Microsoft Office Suite. Developed by leading Office Productivity software developers and contributors, it offers a complete replacement for Microsoft Office on multiple Operating Systems.
The LibreOffice app equivalent of Microsoft Excel is called LibreOffice Calc. It comes with a number of features and an interface similar to Excel. It has a built-in Macro engine to develop and run Macros for automation. However, it does not support Visual Basic, but supports its own language; LibreOffice Basic, for programming macros.
The LibreOffice suite comes pre-installed in most Linux distributions, including Ubuntu, Debian, Fedora, and CentOS.
Creating And Running a Macro in LibreOffice Calc
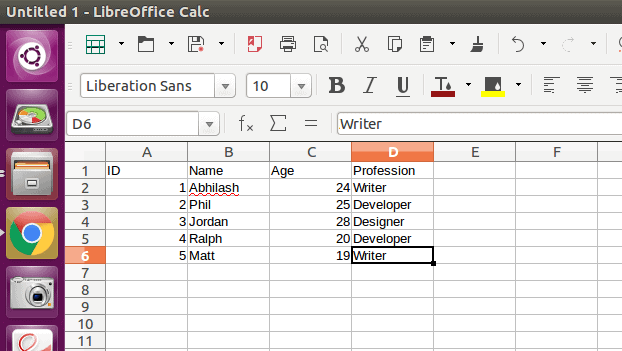
First, let’s create a worksheet with some sample data.
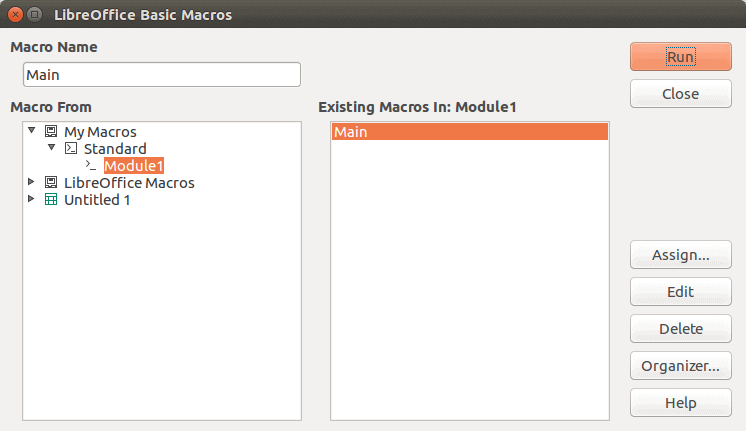
To open the Macros organiser, go to Tools » Macros » Organize Macros » LibreOffice Basics. It will open the LibreOffice Basic Macros window as shown in the screenshot below.
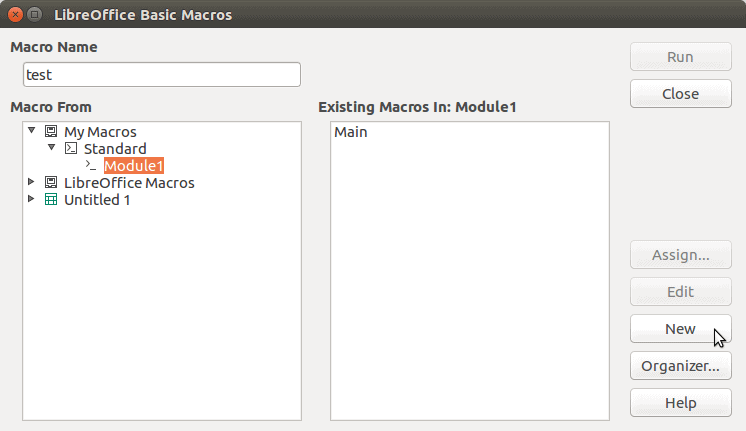
Enter a new name for the Macro, then click the New button on the lower right side of the window.
You should now see the Macro editor screen in LibreOffice Basic.
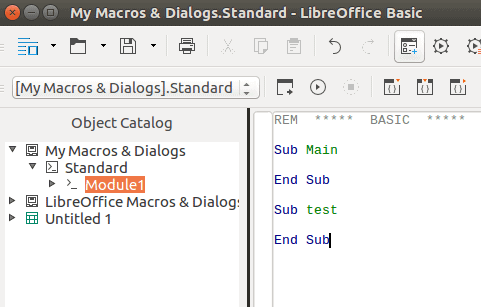
As we can see, manually created Macros are by default created under “My Macros & Dialogs -> Standard -> Module1”.
Currently there are two macros present: One is Main, which is a default empty macro, and other is test, the macro we created above. We will now enhance the test macro.
Our macro will do the following tasks:
- Check which all people have profession writer
- Create a new sheet
- Move all entries for writers in new sheet
Following is our Macro:
Sub test
rem Move entries with profession Writer to new sheet
dim crs(8) as object
dim j as Integer
dim prof as object
dim i as Integer
dim sh as object
dim sh2 as object

sh = ThisComponent.Sheets(0)
crs(0) = sh.getCellRangeByPosition(0, 0, 3, 0)
j = 1

for i = 1 to 5
	x = 1
	prof = sh.GetCellByPosition(3, i)
	rem Store complete row in variable
	If prof.string = "Writer" Then
		crs(j) = sh.getCellRangeByPosition(0, i, 3, i)
		j = j + 1
	End If
next i
rem Now create a new sheet and write this data there
ThisComponent.Sheets.insertNewByName("Writers", 1)
sh2 = ThisComponent.Sheets(1)

i = 0
Do While not IsNull(crs(i))
	sh2range = sh2.getCellRangeByPosition(0, i, 3, i)
	sh2range.setDataArray(crs(i).getDataArray)
	i = i + 1
Loop

End Sub
Let me explain the above macro to you section by section.
Sub test
.
.
.
End Sub
test is the name of our macro, hence in the code, it is denoted as Sub test (sub = subroutine). Similarly we end this macro code with statement End Sub. Note that these statements are automatically added when we create a macro from the menu, though user can directly write the macro code here and the Subroutine name will be considered as macro name.
rem <string>All comments in LibreOffice Basic start with the keyword rem. A complete line beginning with rem is considered comment. Another way is to use ' (single inverted comma) at the start of line.
dim crs(8) as object
dim j as Integer
dim prof as object
dim i as Integer
dim sh as object
dim sh2 as object
This is variable declaration in LibreOffice Basic. The general syntax is dim <var_name> as <var_data_type>. To declare an array, use syntax similar to the variable crs, where 8 is the length of the array.
sh = ThisComponent.Sheets(0)
crs(0) = sh.getCellRangeByPosition(0, 0, 3, 0)
j = 1
ThisComponent refers to the current document. In this case it is a Calc Worksheet. We load Sheet with index 0, i.e., the first sheet, in variable sh. There are also functions to load a Sheet using name.
Next we call function getCellRangeByPosition of object sh and load it into array crs. Cell Range refers to a group of cells in the sheet based on position.
Note that the arguments, 0, 0 (column 0, row 0) are denoting the starting cell of the range, and 3, 0 (column 3, row 0) are denoting the ending cell of the range. Thus 0, 0, 3, 0 refers to first (heading) row of our sample sheet.
for i = 1 to 5
	x = 1
	prof = sh.GetCellByPosition(3, i)
	rem Store complete row in variable
	If prof.string = "Writer" Then
		crs(j) = sh.getCellRangeByPosition(0, i, 3, i)
		j = j + 1
	End If
next i
We use a for statement to loop through the rows. The for block ends with a next statement, which increments the variable i at end of each iteration.
Next we call a function GetCellByPosition of object sh. We pass parameters (3, i), i.e., with each iteration, the object of cell on column 3 and row i is retrieved in variable prof.
Then we use an If statement to check if value in cell prof is “Writer”. If it is, we again call the function getCellRangeByPosition, this time, with i in place of start and end row number. Again we store it in the array crs.
ThisComponent.Sheets.insertNewByName("Writers", 1)
sh2 = ThisComponent.Sheets(1)
First we create a new sheet with name Writers, at position 1, which is the 2nd position, as index starts at 0. Then we get an object of this newly created sheet, so that we can enter the data of writers in this sheet.
i = 0
Do While not IsNull(crs(i))
	sh2range = sh2.getCellRangeByPosition(0, i, 3, i)
	sh2range.setDataArray(crs(i).getDataArray)
	i = i + 1
Loop
The Do While loop statement is used when we want to loop based on conditions, as opposed to looping in a range of integer values, for which use use for as shown earlier. Here, we loop till crs(i) is not null.
Next, we again call getCellRangeByPosition in a similar way as before to get a range object in the new sheet.
Finally, we call two functions: getDataArray which returns the data from crs(i), i.e., one row of data (about a writer) from the first sheet; and we write this data to the cell range in new sheet using setDataArray.
Finally, save the macro from File » Save all option.
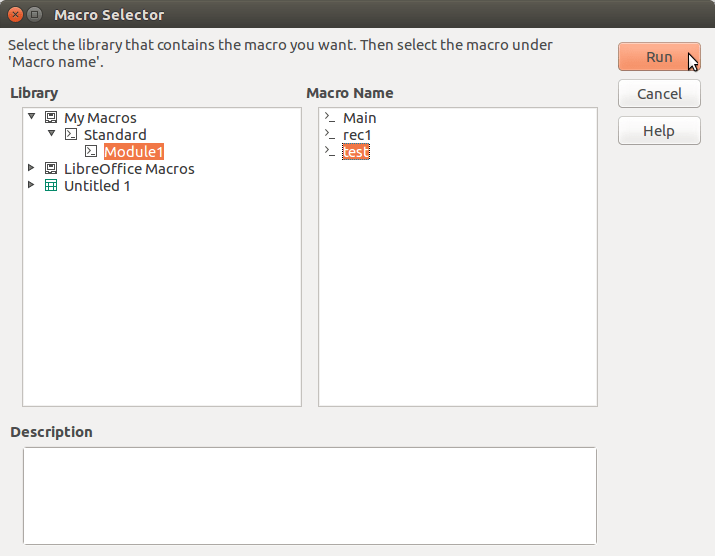
To run the macro, go to Tools » Macros » Run Macro and select your Macro from the “My Macros” directory in Macro Selector Library. Click the Run button after selecting a Macro Name.
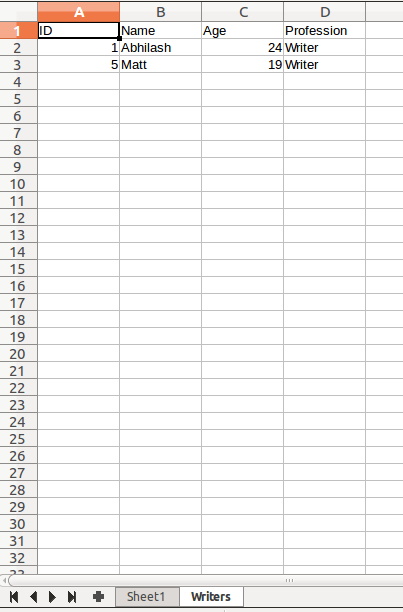
Running the above macro on our sample spreadsheet, produces the following result.
This is the way to create macros in LibreOffice. For more information and options, refer to the official documentation.
🍻 Cheers!


