Windows 11 encourages users to set up a PIN as part of its Windows Hello security features. While a PIN can provide quick and secure access to your device, you might prefer to use a traditional password or another sign-in method. If you're looking to disable the PIN on your Windows 11 computer, here are some effective methods to help you accomplish that.
Method 1: Disable the Windows Hello Sign-in Requirement
By default, Windows 11 may require you to use Windows Hello sign-in options, such as a PIN, for Microsoft accounts. Disabling this requirement allows you to remove your PIN and use other sign-in methods.
Step 1: Press Win + I to open the Settings app.
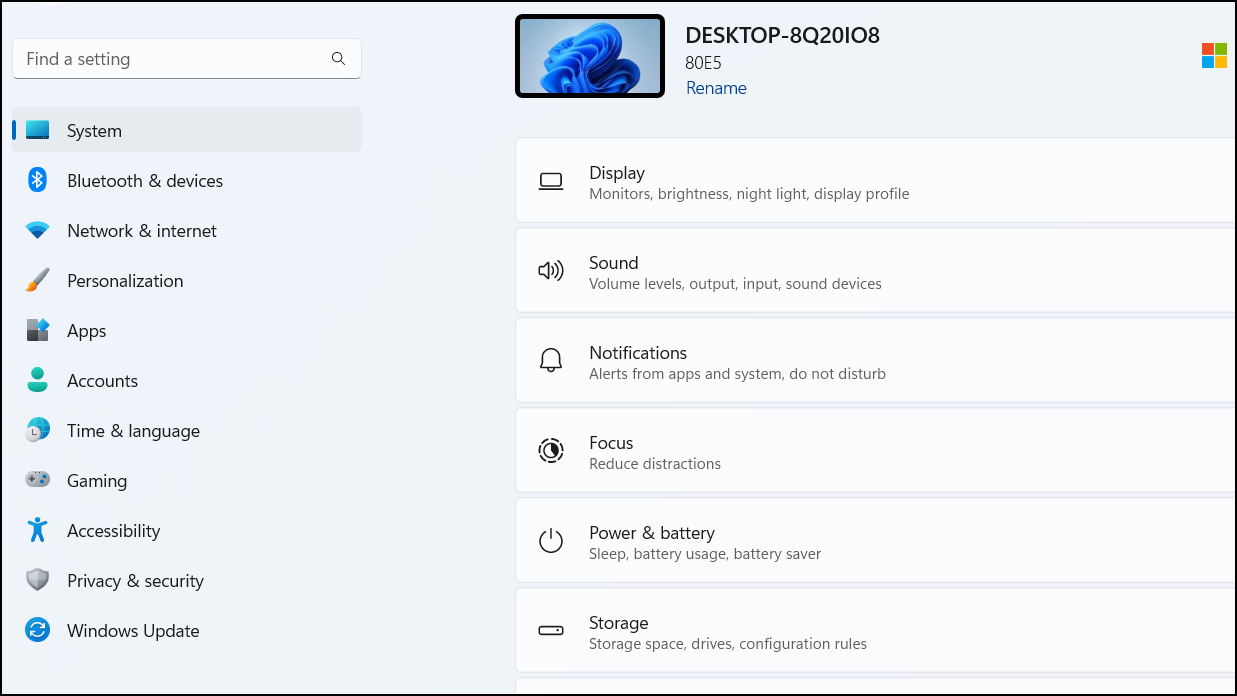
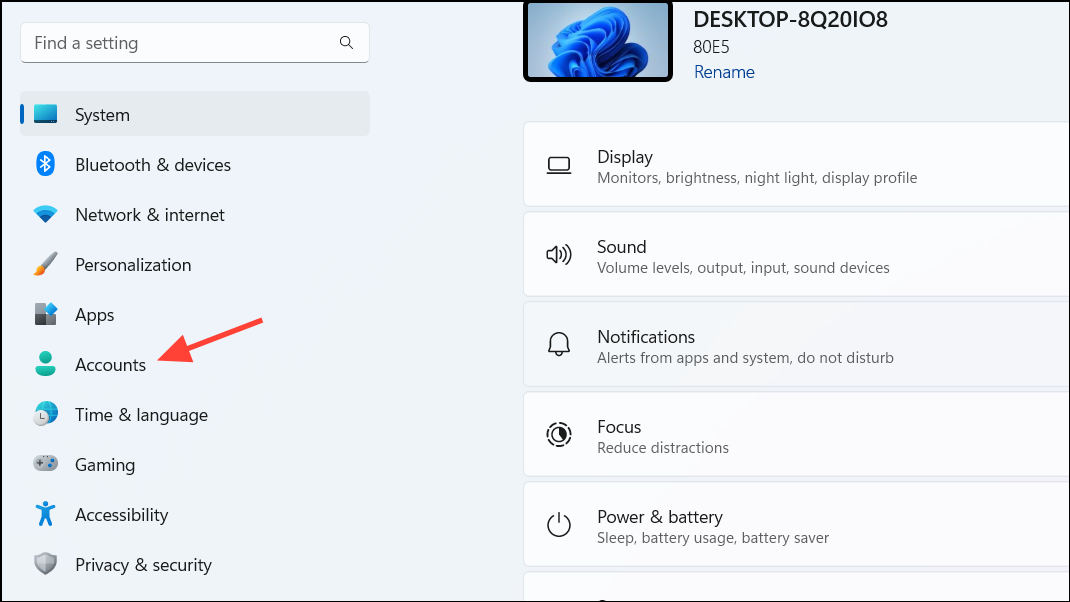
Step 2: In the left pane, select the Accounts tab.
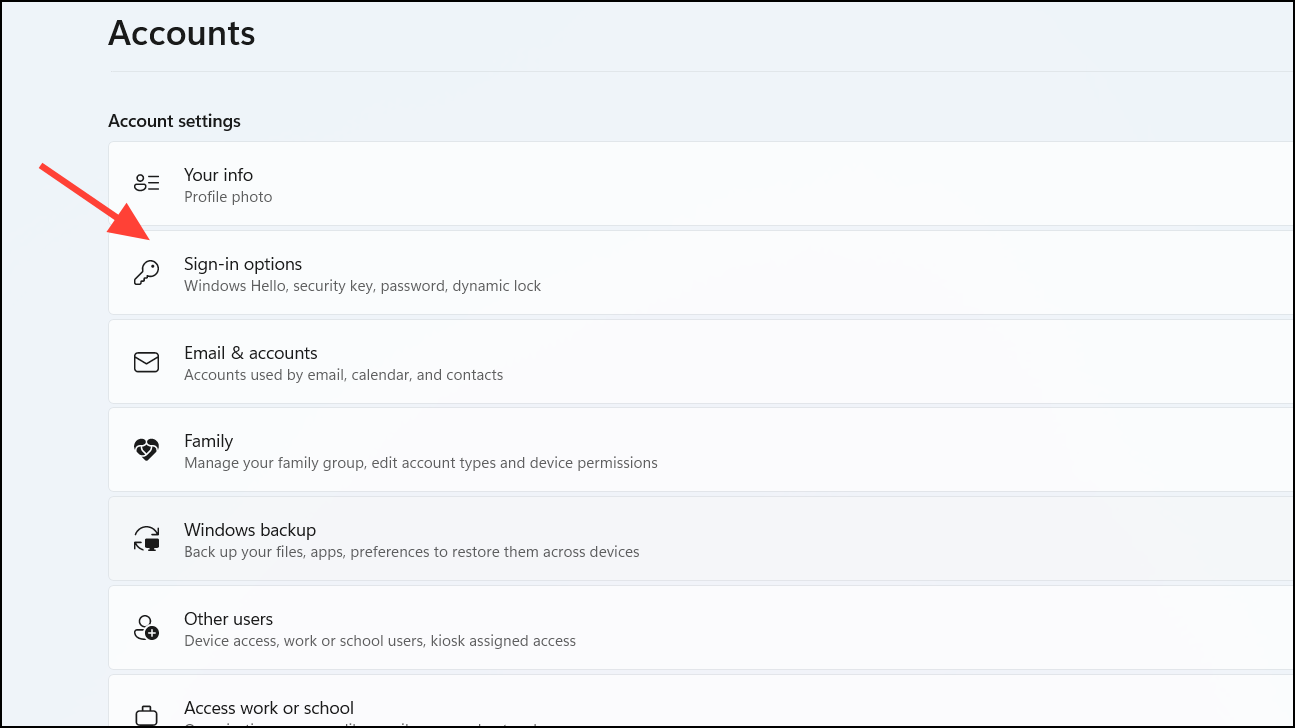
Step 3: Click on Sign-in options in the right pane.
Step 4: Scroll down to the Additional settings section.
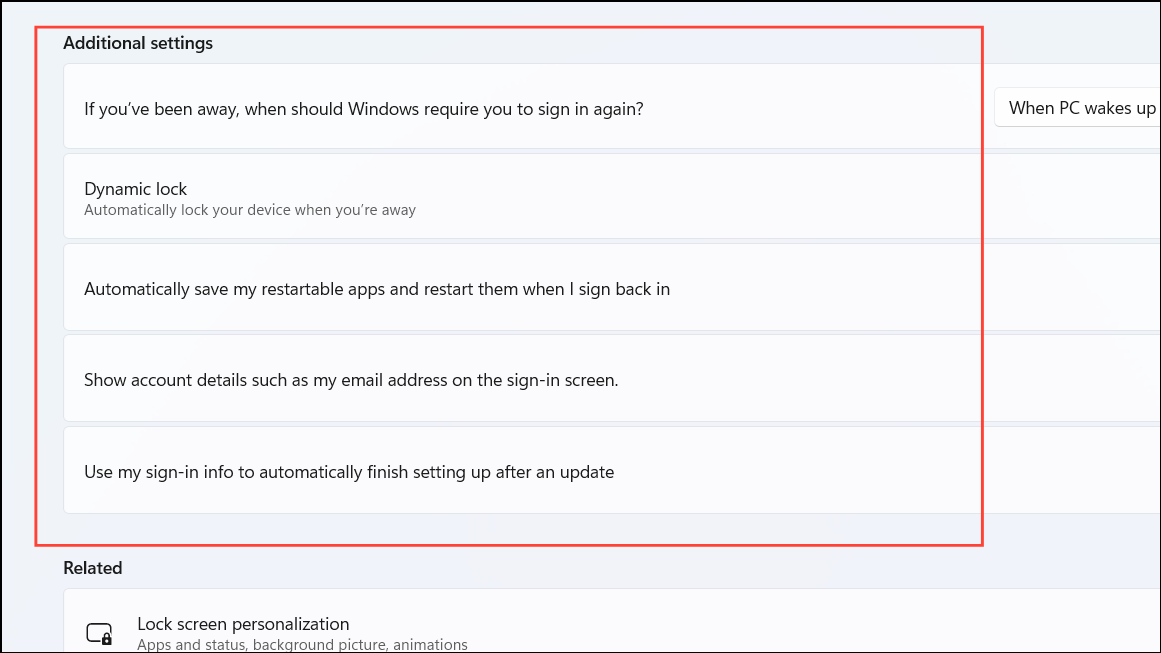
Step 5: Toggle off the option labeled For improved security, only allow Windows Hello sign-in for Microsoft accounts on this device (Recommended).
By turning off this setting, you can now choose to remove your PIN and use a password or another sign-in option.
Method 2: Remove the PIN Using the "I Forgot My PIN" Option
If the Remove PIN option is greyed out, you can use the "I forgot my PIN" feature to remove your PIN without setting up a new one.
Step 1: Open the Settings app by pressing Win + I.

Step 2: Navigate to the Accounts tab and select Sign-in options.

Step 3: Expand the PIN (Windows Hello) section.
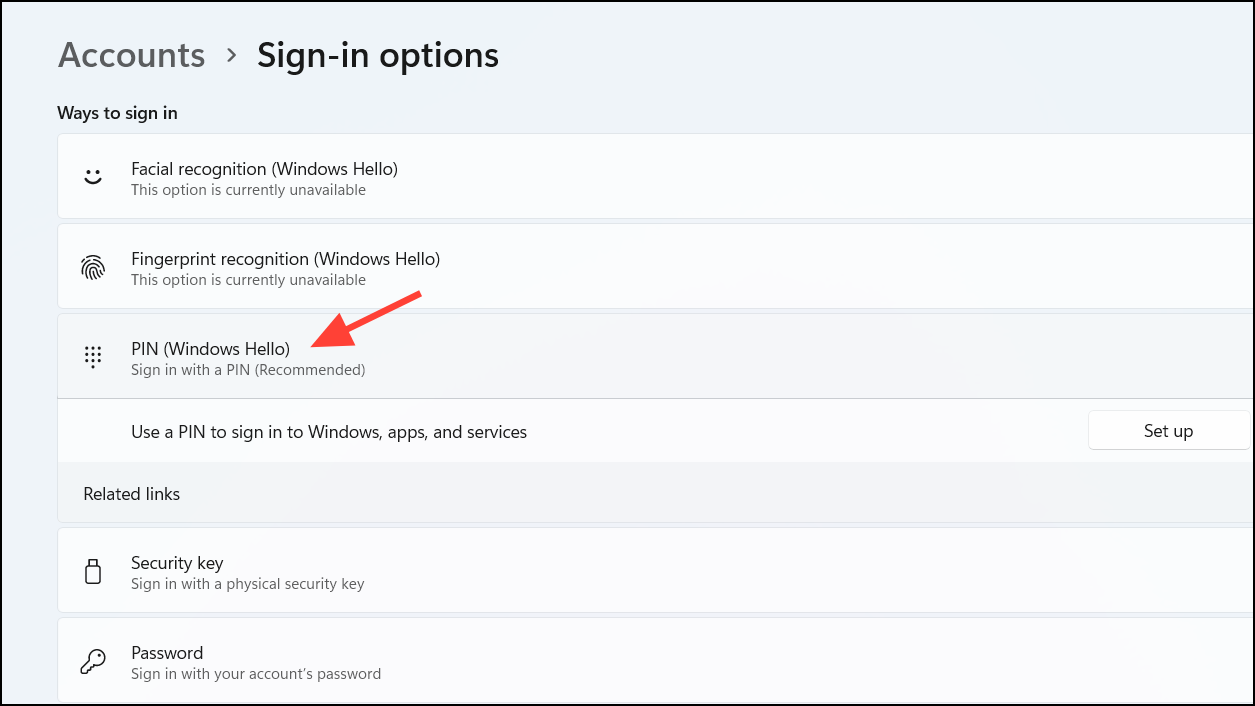
Step 4: Click on the I forgot my PIN link.
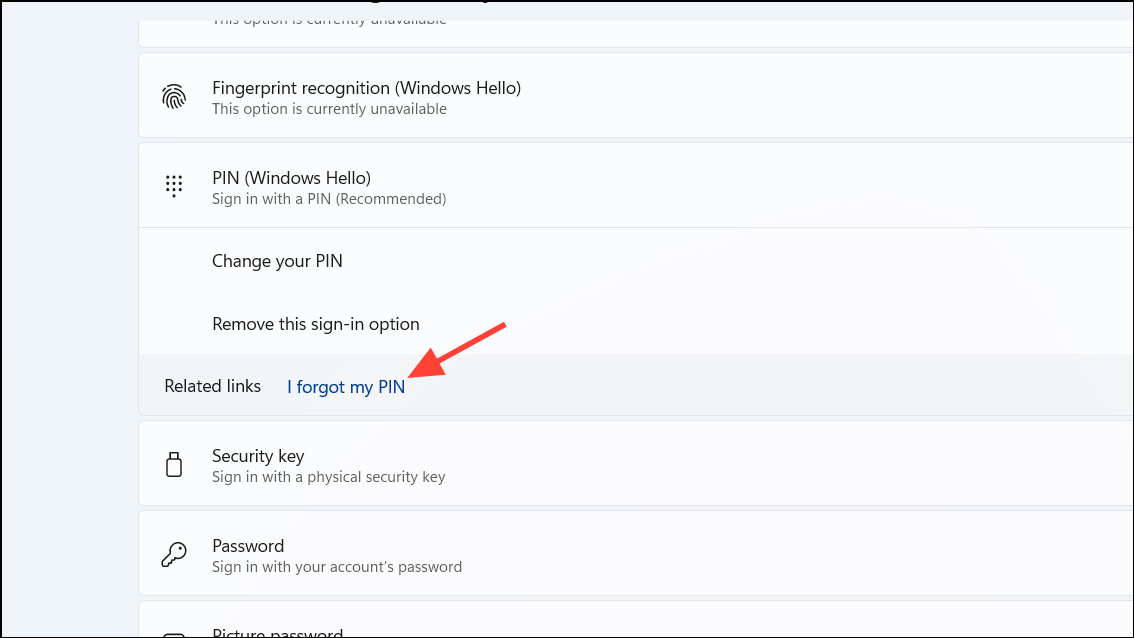
Step 5: In the confirmation dialog, click Continue.
Step 6: Verify your identity by entering your Microsoft account password.
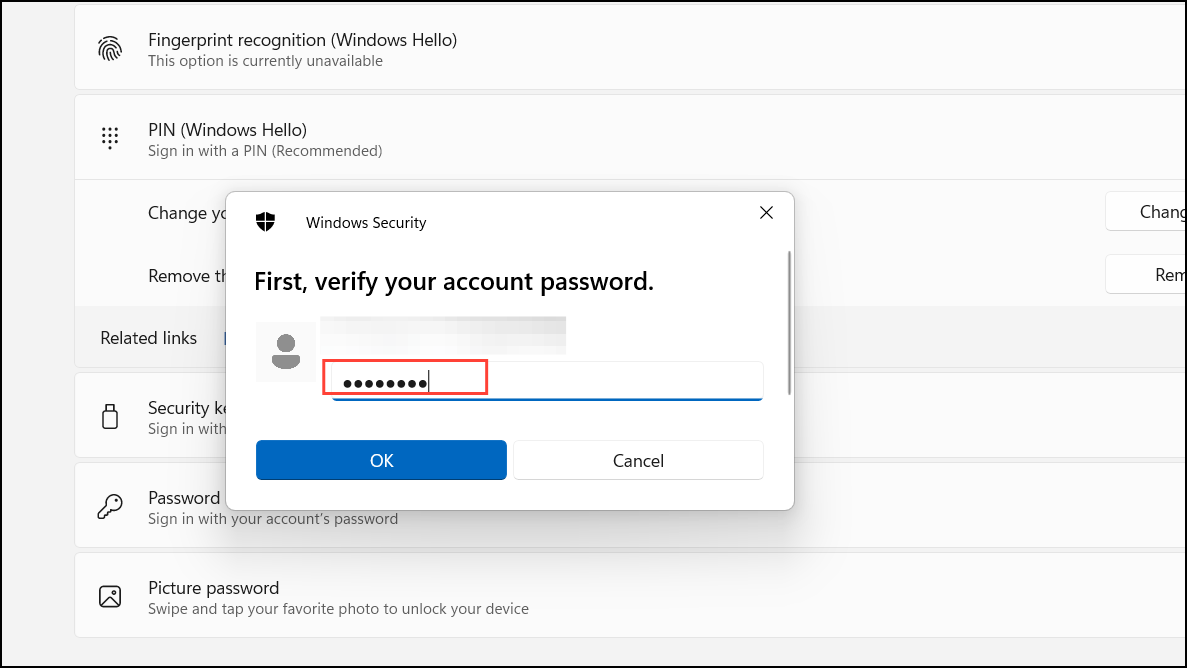
Step 7: When prompted to set up a new PIN, click on Cancel.
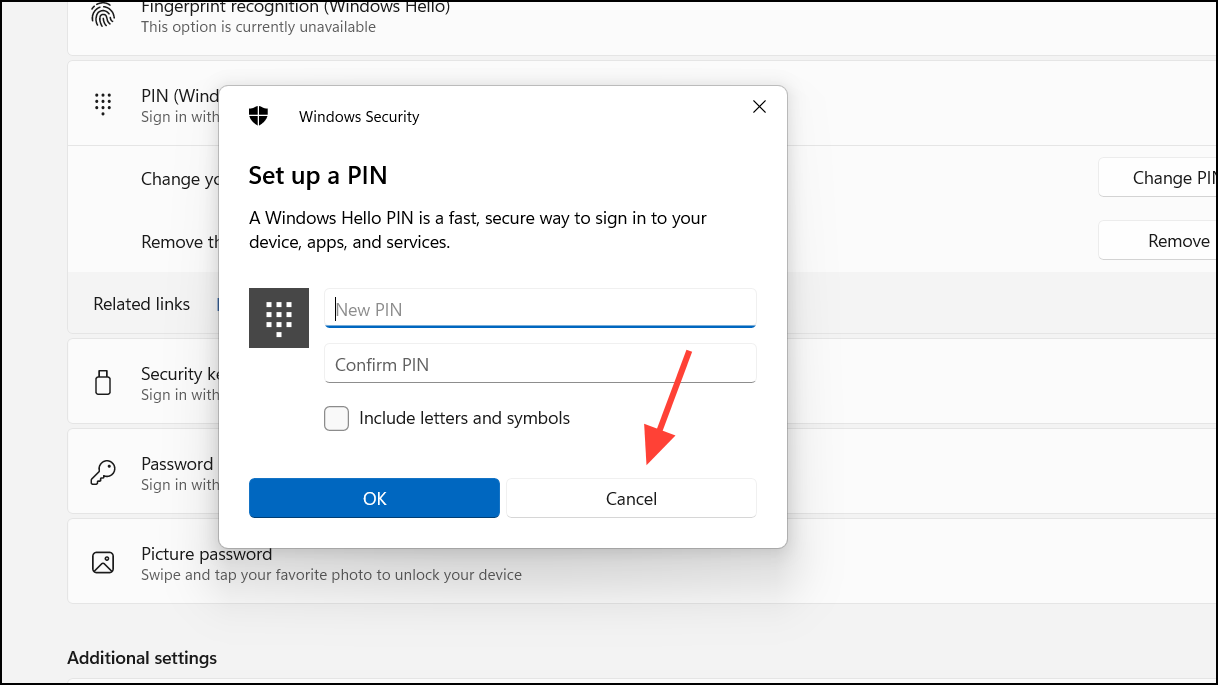
Step 8: Close any remaining dialogs to complete the process.
Your PIN has now been removed, and you can sign in using your password or another method.
Method 3: Turn Off the Passwordless Login Feature for Your Microsoft Account
Disabling the passwordless login feature in your Microsoft account settings can help remove the PIN requirement from your device.
Step 1: Open the Settings app by pressing Win + I and click on the Accounts tab.

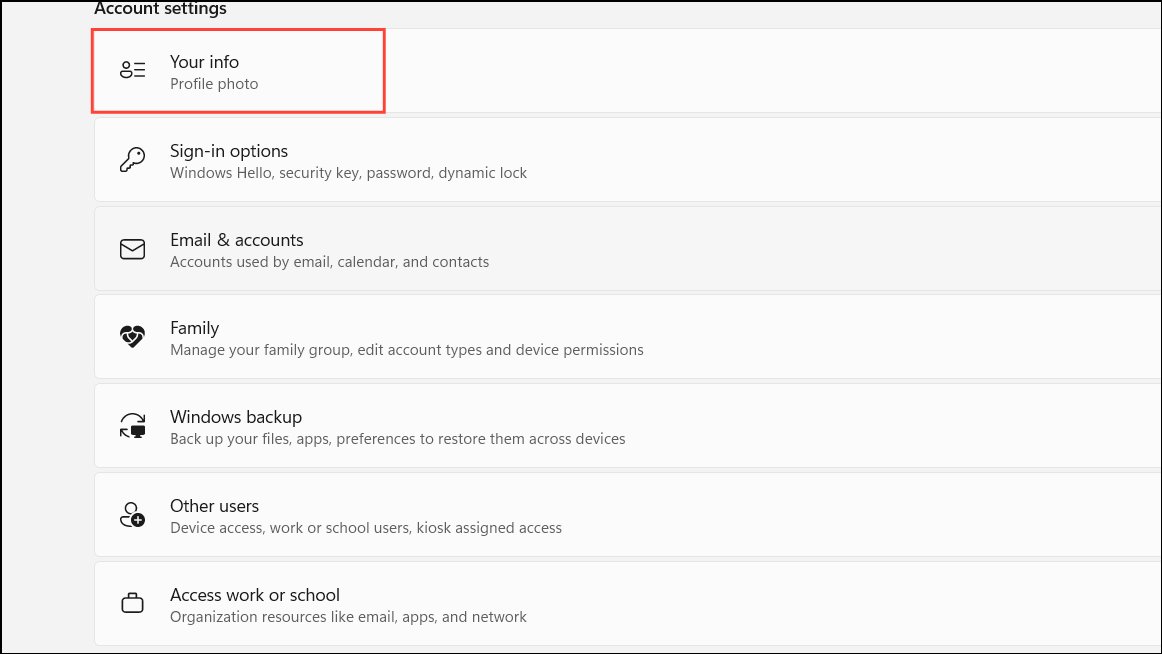
Step 2: Select Your info from the right pane.
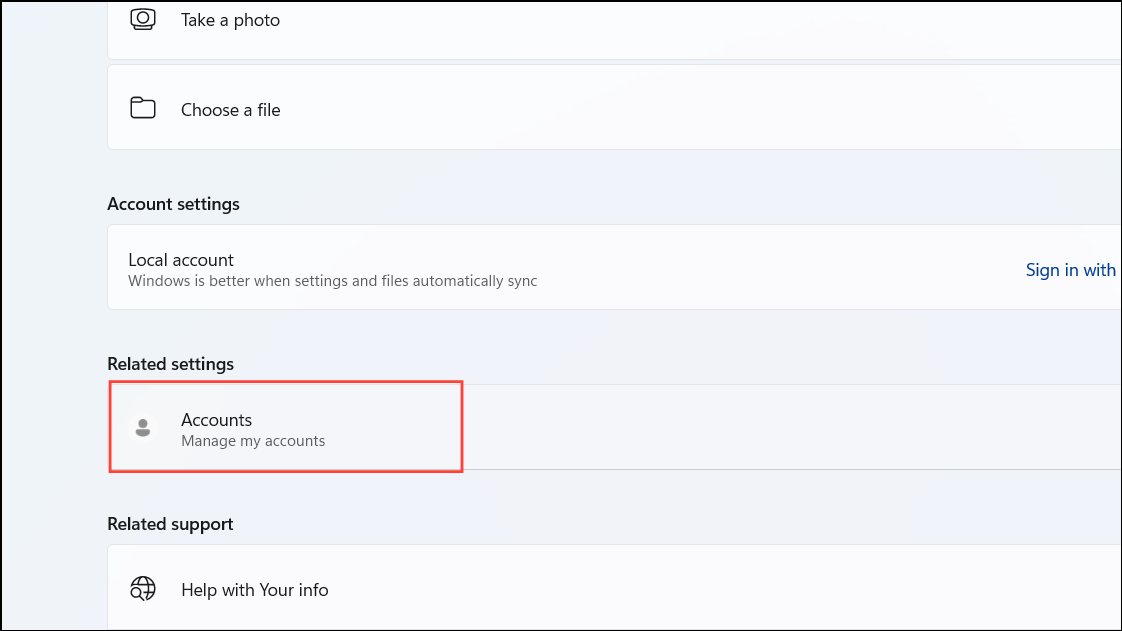
Step 3: Under Related settings, click on Accounts (Manage my Microsoft account). This will open your Microsoft account page in a web browser.
Step 4: Sign in to your Microsoft account if prompted.
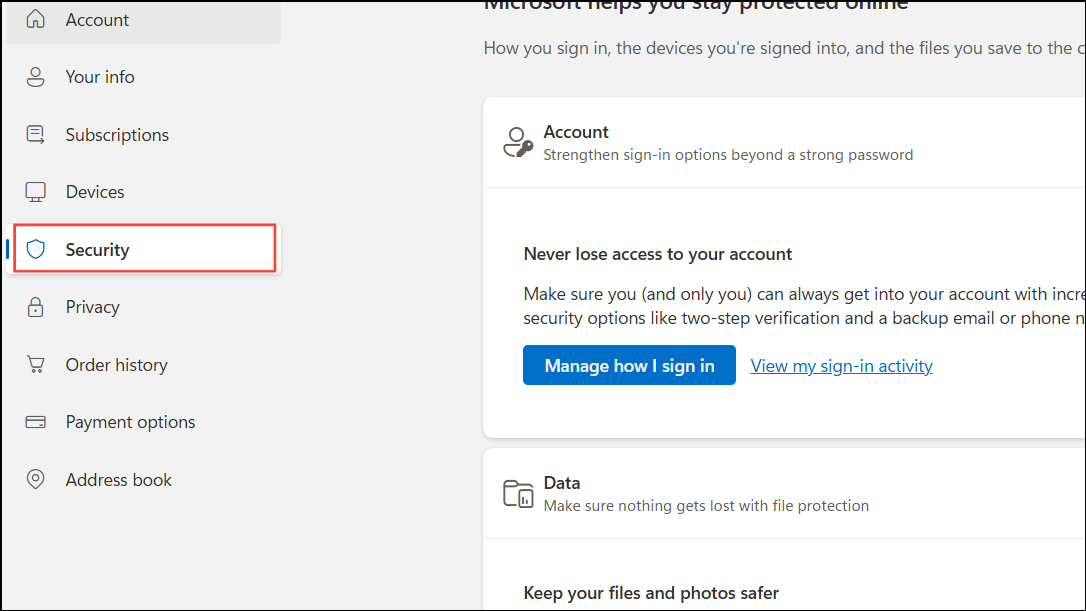
Step 5: Navigate to the Security tab and click on Advanced security options.
Step 6: Scroll down to the Additional security section.
Step 7: Find the Passwordless account option and click on Turn off.
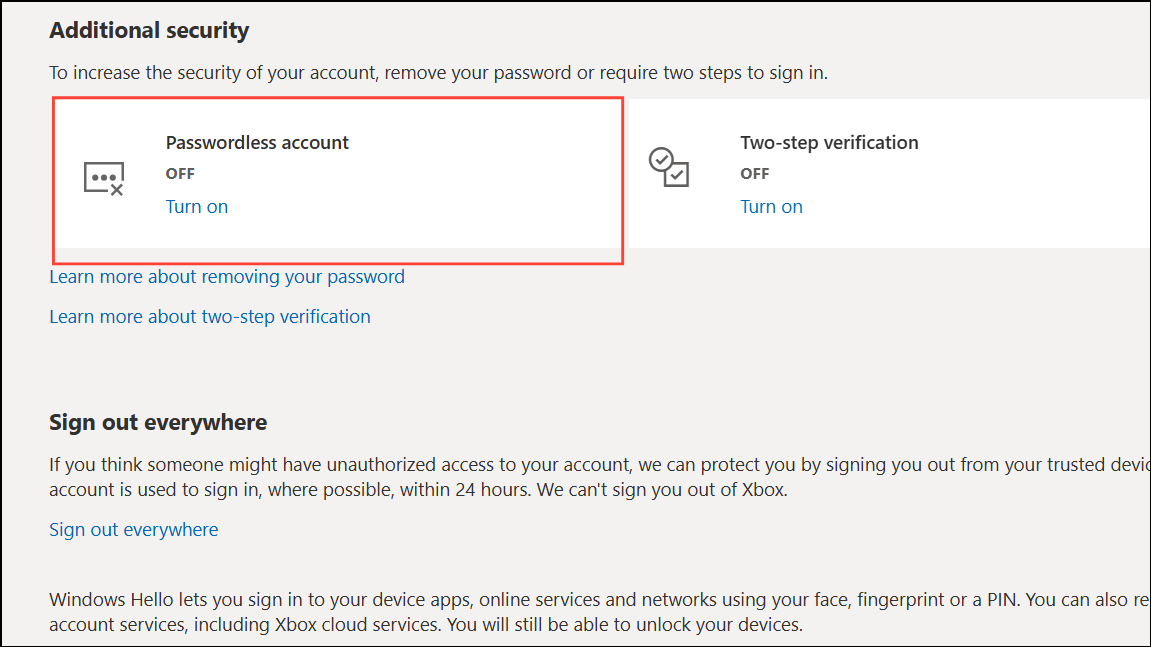
Step 8: Follow the on-screen instructions to confirm and disable the passwordless feature.
With passwordless login turned off, you can now remove your PIN from Windows 11.
Method 4: Remove the PIN from Your Account
After performing the steps in Method 1 or Method 3, you should now have the option to remove your PIN directly from the Settings app.
Step 1: Press Win + I to open Settings and go to the Accounts tab.

Step 2: Click on Sign-in options.

Step 3: Expand the PIN (Windows Hello) section.

Step 4: Click on the Remove button.
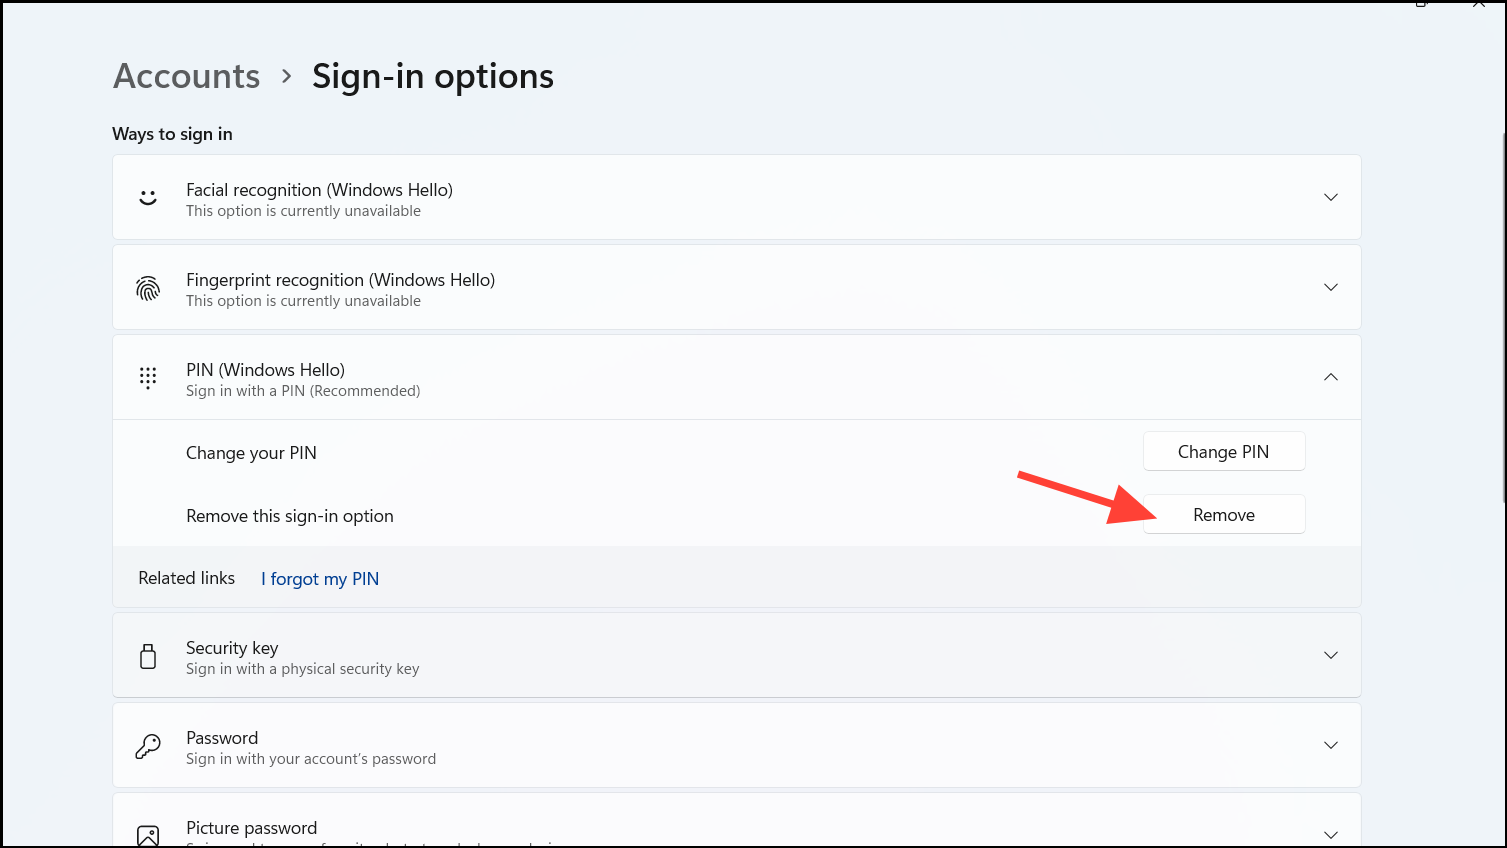
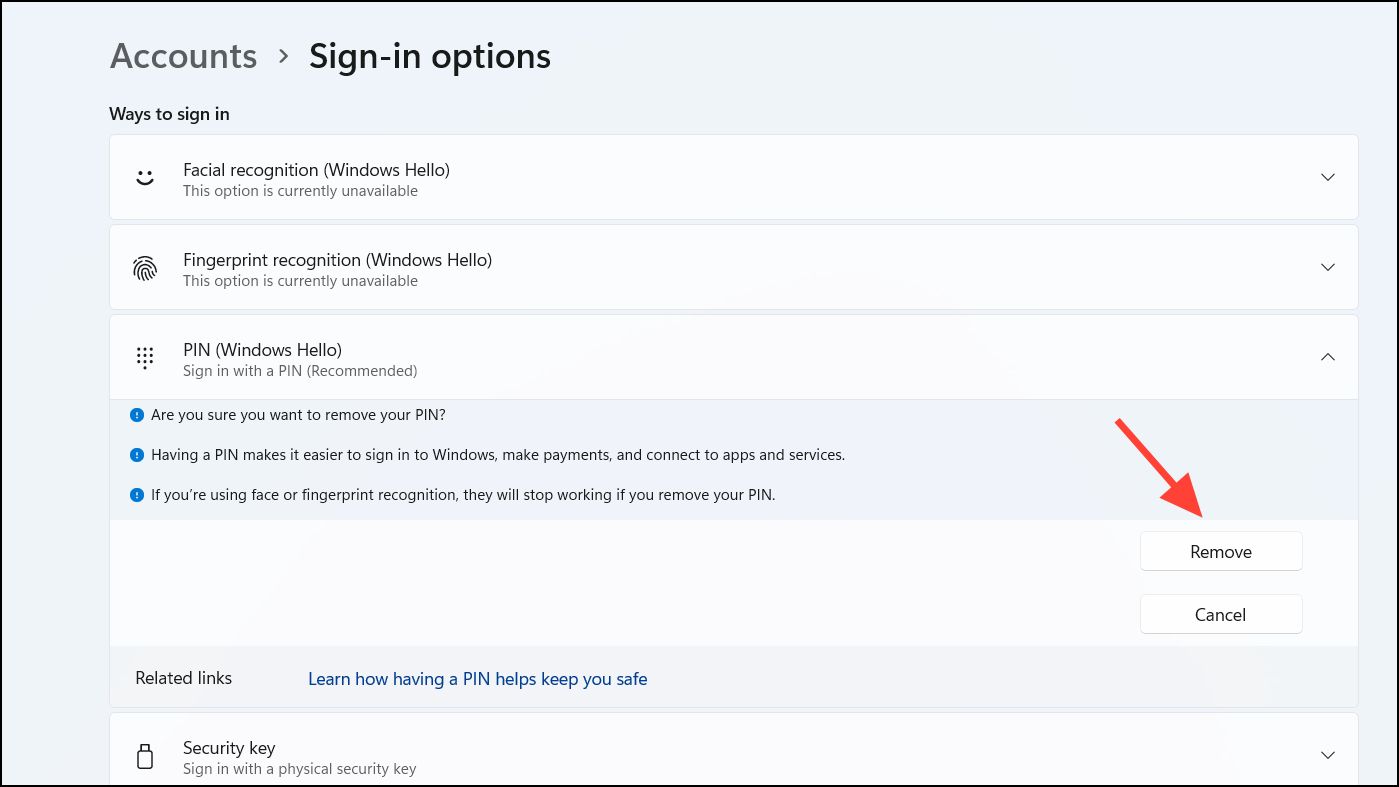
Step 5: In the confirmation dialog, click Remove again.
Step 6: Enter your account password when prompted and click OK to finalize the removal.
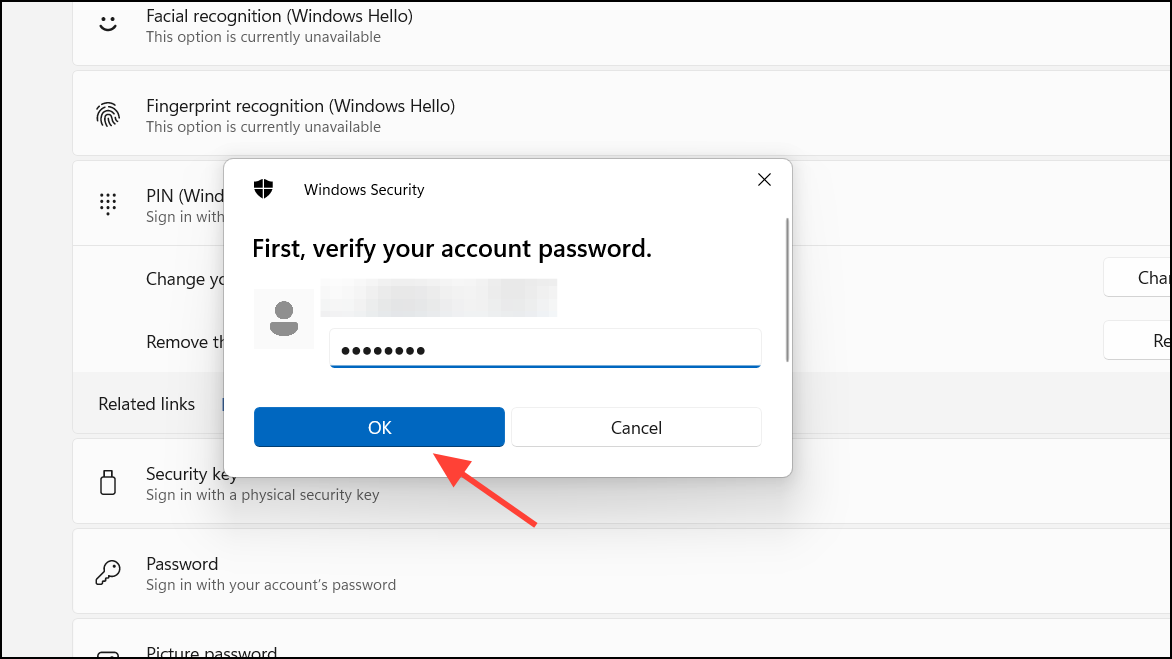
Your PIN has been successfully removed, and you can now use your password or another sign-in method to access your device.
By following these methods, you can disable the PIN feature on your Windows 11 device and choose the sign-in option that best suits your preferences.

