If you've encountered the error code 0xA00F42A0 <SceneSwitchFailed> while using your camera on Windows 10 or Windows 11, you're not alone. This error can prevent your camera from functioning properly in applications like the Camera app or video conferencing tools. Fortunately, there are several solutions you can try to resolve this issue.
Understanding the 0xA00F42A0 Scene Switch Failed Error
The 0xA00F42A0 <SceneSwitchFailed> error typically indicates a problem with switching the camera scene or mode. This can be caused by outdated or corrupted camera drivers, incorrect privacy settings, conflicts with antivirus software, or recent Windows updates that affect camera functionality.
Methods to Fix the Camera Error
Below are several methods you can use to troubleshoot and fix this camera error. Try these solutions in the order presented for the best results.
Method 1: Update Your Camera Driver
An outdated or corrupted camera driver can prevent your camera from communicating effectively with your system. Updating the driver can resolve this issue.
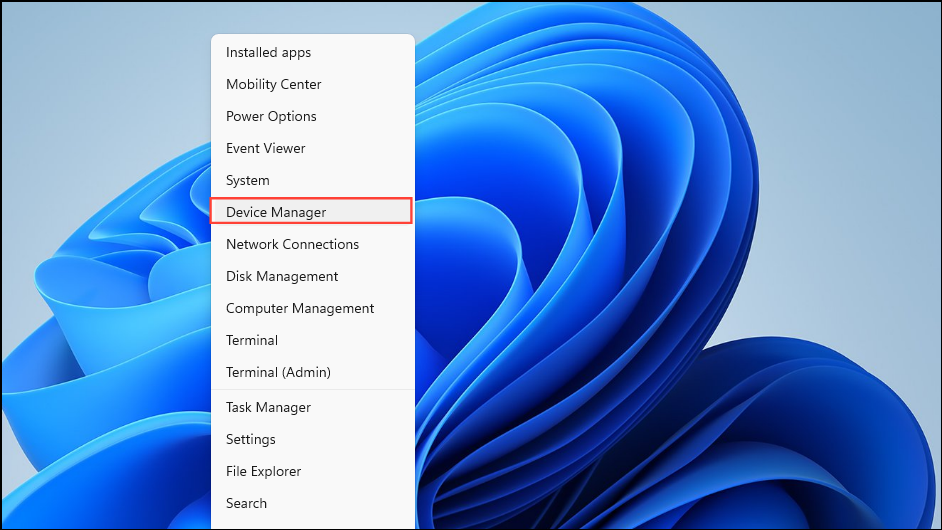
Step 1: Right-click on the Start button and select Device Manager.
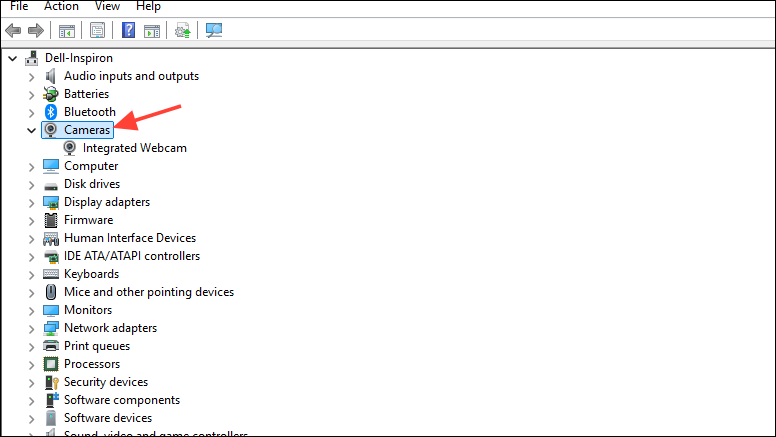
Step 2: Expand the Cameras section to view your camera device.
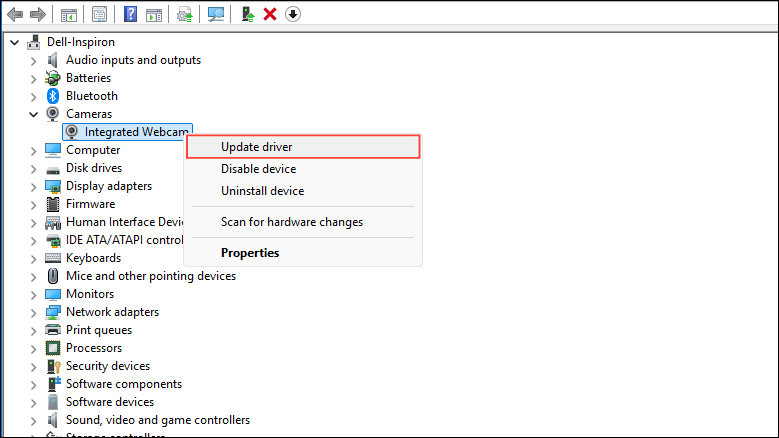
Step 3: Right-click on your camera and select Update driver from the context menu.
Step 4: Choose Search automatically for drivers. Windows will search for and install the latest driver available.
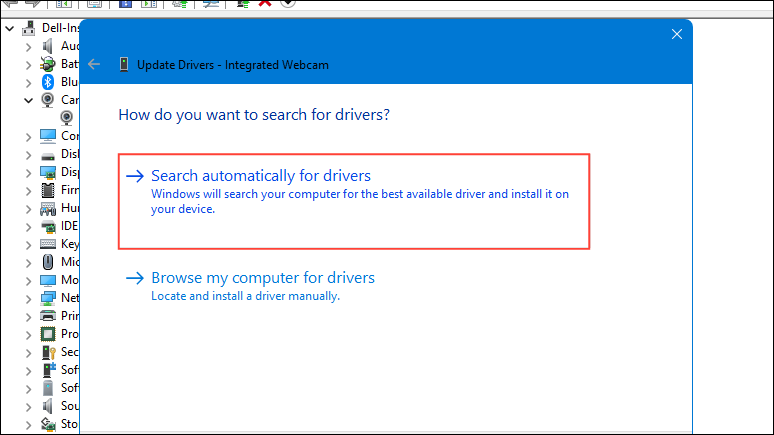
Step 5: If no updates are found, select Browse my computer for drivers.
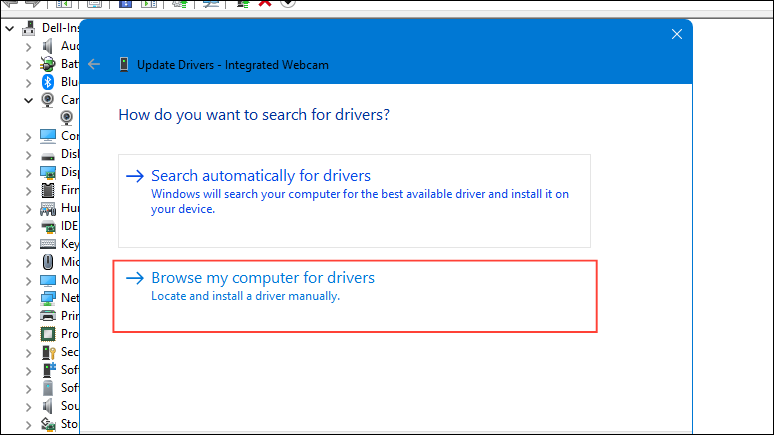
Step 6: Click on Let me pick from a list of available drivers on my computer.
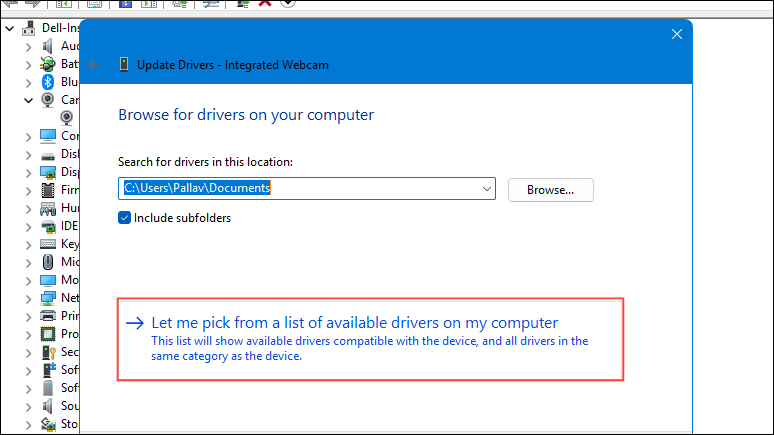
Step 7: Select USB Video Device from the list and click Next to install the generic driver.
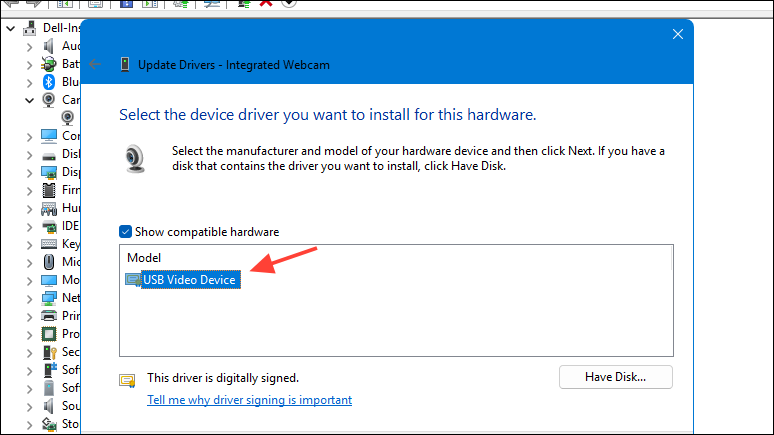
Step 8: Restart your computer and check if the camera error is resolved.
Method 2: Run the Camera Troubleshooter
Windows includes a built-in troubleshooter that can automatically detect and fix common camera problems.
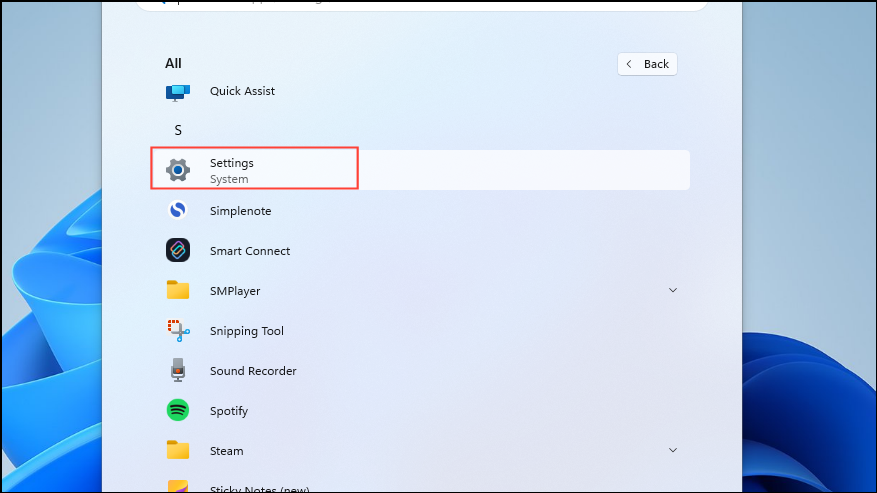
Step 1: Click on the Start button and select Settings.
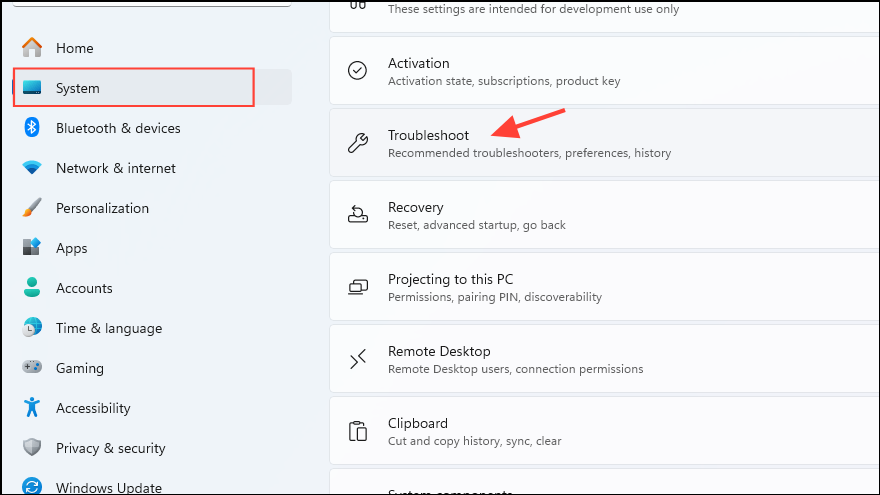
Step 2: Navigate to System, then click on Troubleshoot.
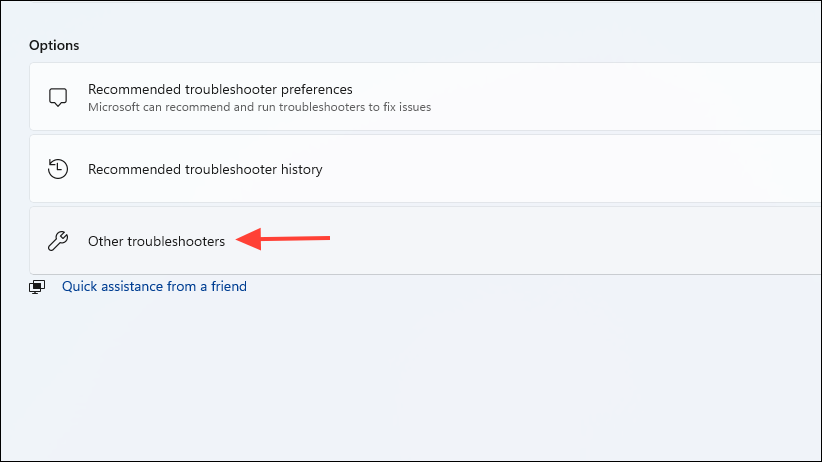
Step 3: Select Other troubleshooters.
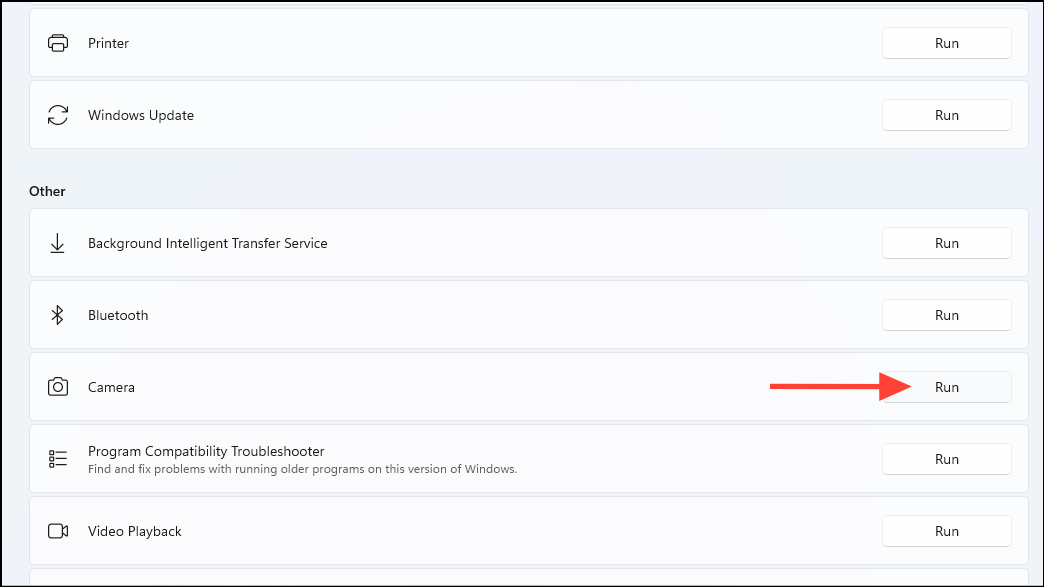
Step 4: Find the Camera troubleshooter and click Run.
Step 5: Follow the on-screen instructions to complete the troubleshooting process.
Method 3: Check Camera Privacy Settings
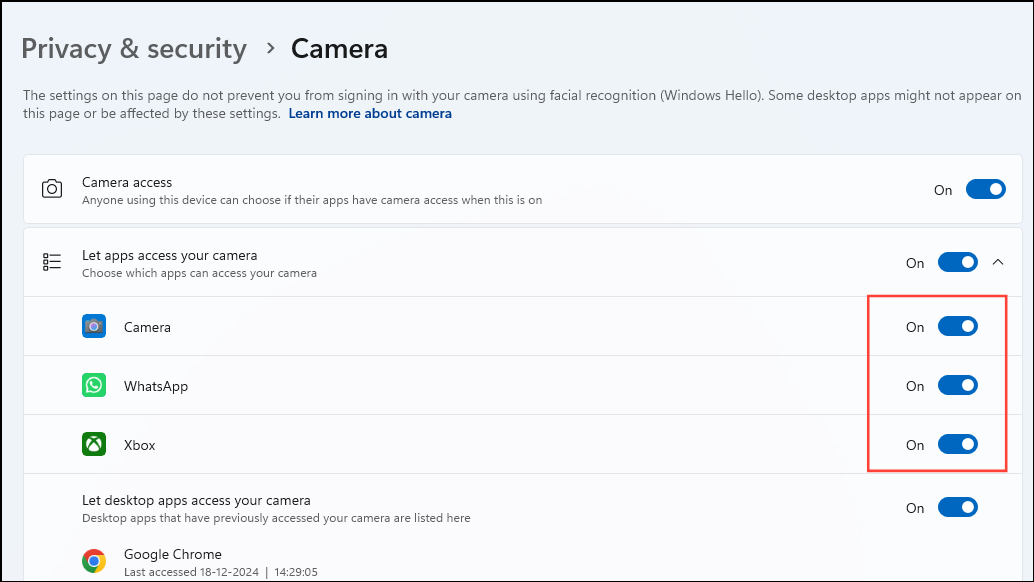
Incorrect privacy settings can block access to your camera, leading to errors. Ensure that apps have permission to use the camera.
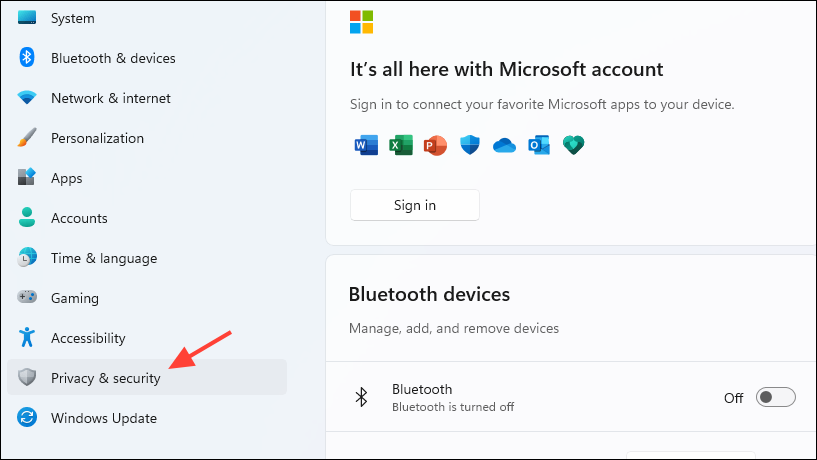
Step 1: Open Settings and go to Privacy & Security.
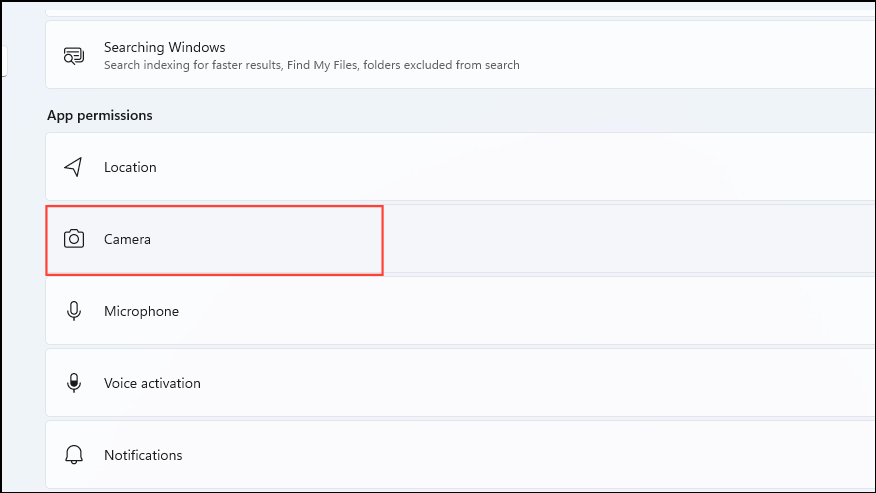
Step 2: Click on Camera under the App Permissions section.
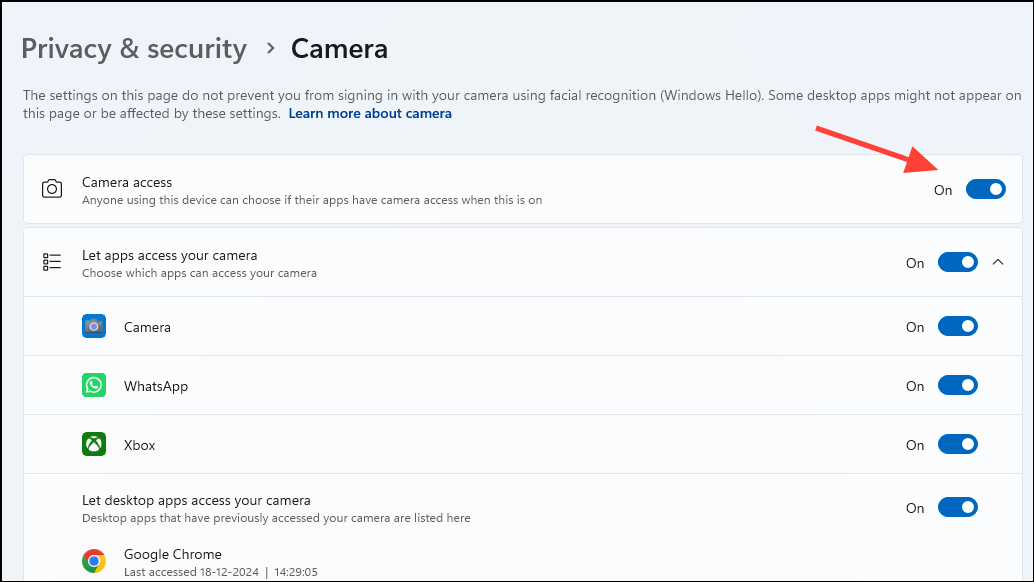
Step 3: Ensure the Camera access toggle is switched On.
Step 4: Scroll down to Let apps access your camera and make sure this toggle is also On.
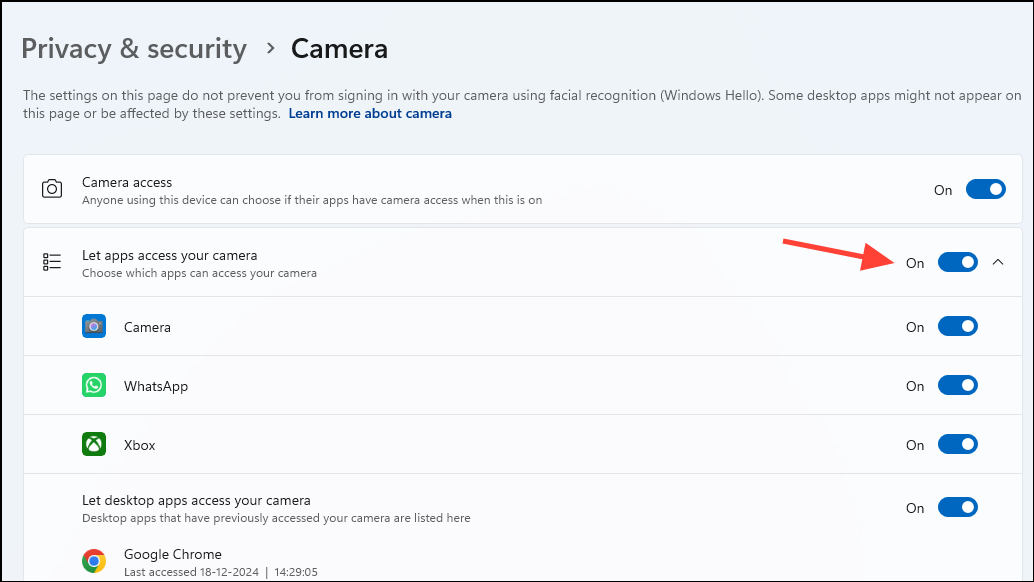
Step 5: Verify that the individual apps you want to use with the camera have permission enabled.
Method 4: Reinstall the Camera Driver
If updating the driver doesn't work, reinstalling it can fix corruption issues.
Step 1: Open Device Manager and expand the Cameras section.

Step 2: Right-click on your camera and select Uninstall device.
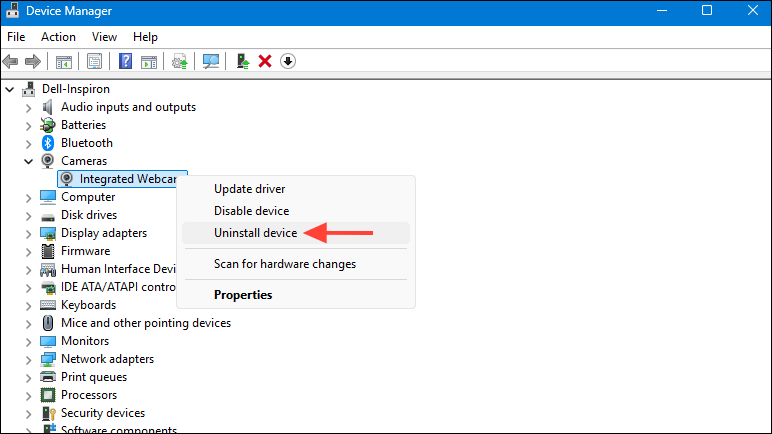
Step 3: Check the box that says Attempt to remove the driver for this device and click Uninstall.
Step 4: Restart your computer. Windows will automatically reinstall the camera driver.
Step 5: Test your camera to see if the issue is resolved.
Method 5: Reinstall the Camera App
Sometimes, the Camera app itself may become corrupt. Reinstalling it can restore its functionality.
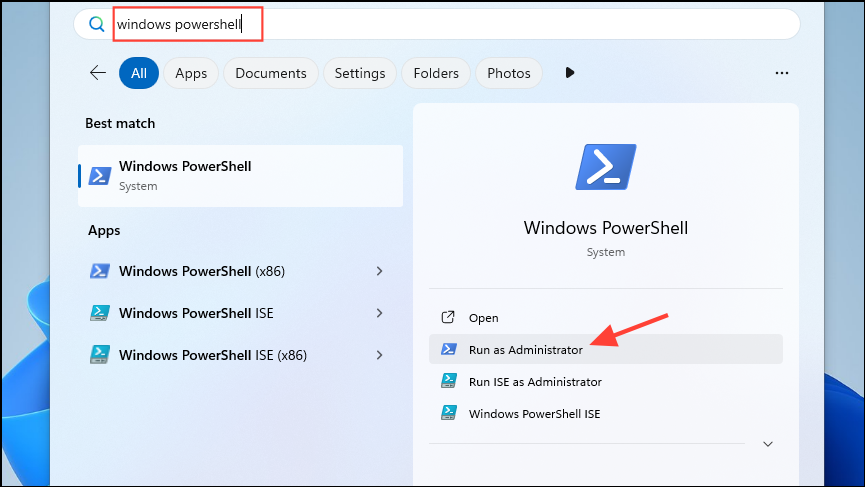
Step 1: Click on the Start button, type Windows PowerShell, right-click on it, and select Run as administrator.
Step 2: In the PowerShell window, type the following command and press Enter to uninstall the Camera app:
Get-AppxPackage Microsoft.WindowsCamera | Remove-AppxPackage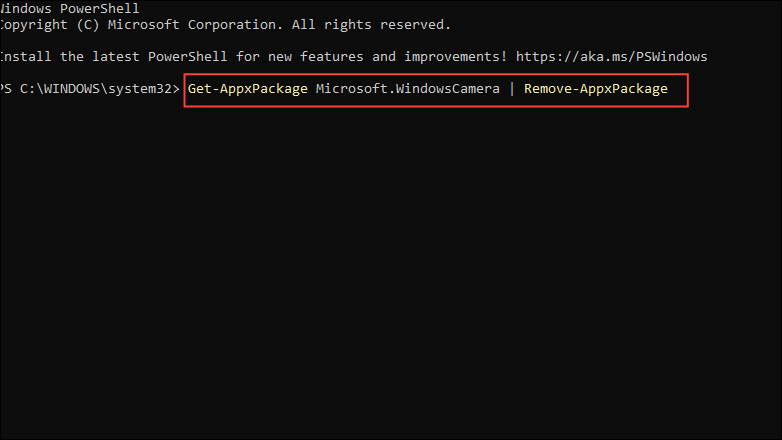
Step 3: To reinstall the Camera app, execute this command:
Get-AppxPackage -allusers Microsoft.WindowsCamera | Foreach {Add-AppxPackage -DisableDevelopmentMode -Register "$($_.InstallLocation)\AppXManifest.xml"}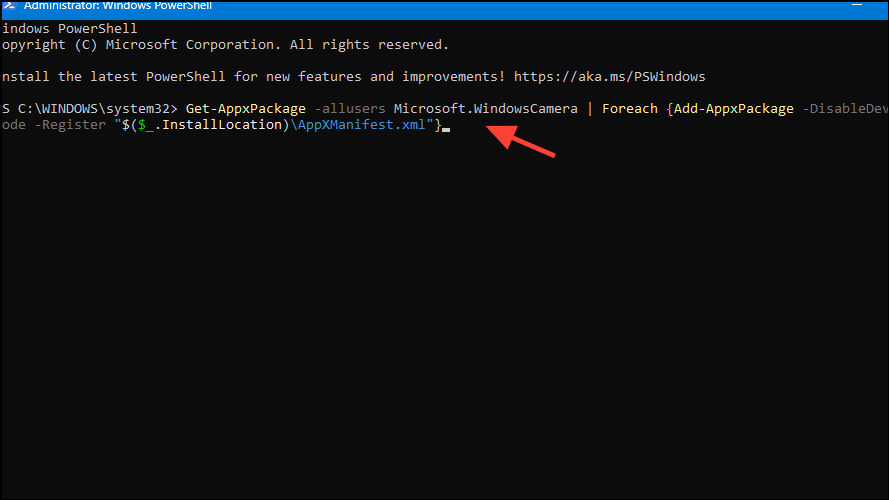
Step 4: Restart your computer and check if the Camera app works properly.
Method 6: Disable Antivirus Temporarily
Your antivirus software might be blocking the camera for security reasons. Disabling it temporarily can help identify if it's causing the issue.
Step 1: Locate the antivirus icon in the system tray at the bottom-right corner of your screen.
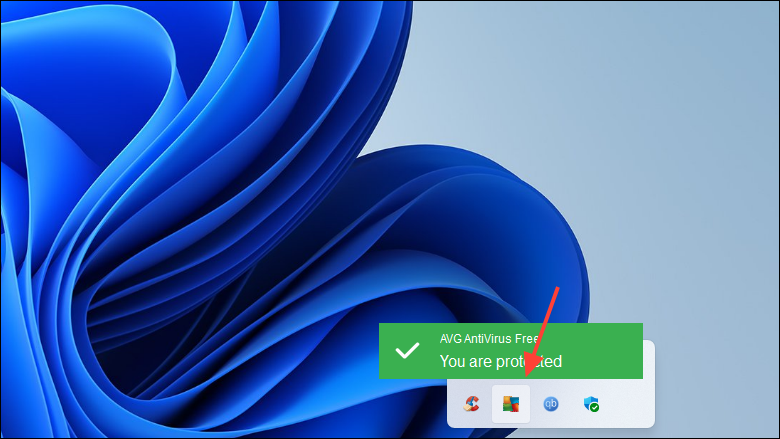
Step 2: Right-click on the antivirus icon and select Disable or Pause protection.
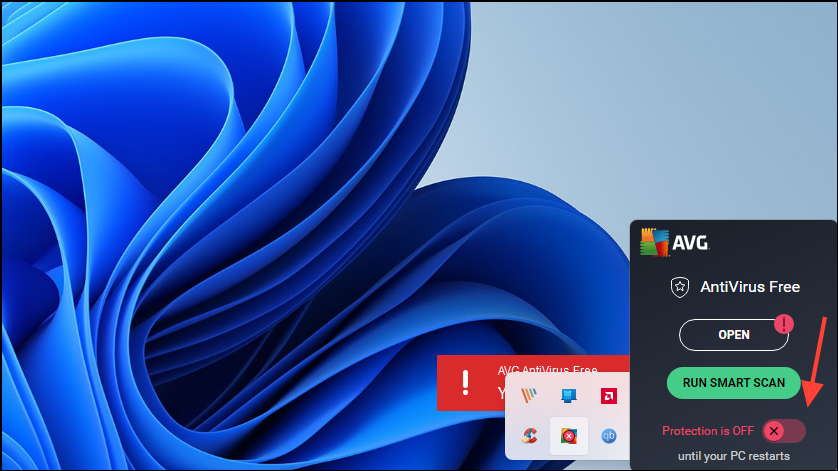
Step 3: Choose a short duration, such as 15 minutes.
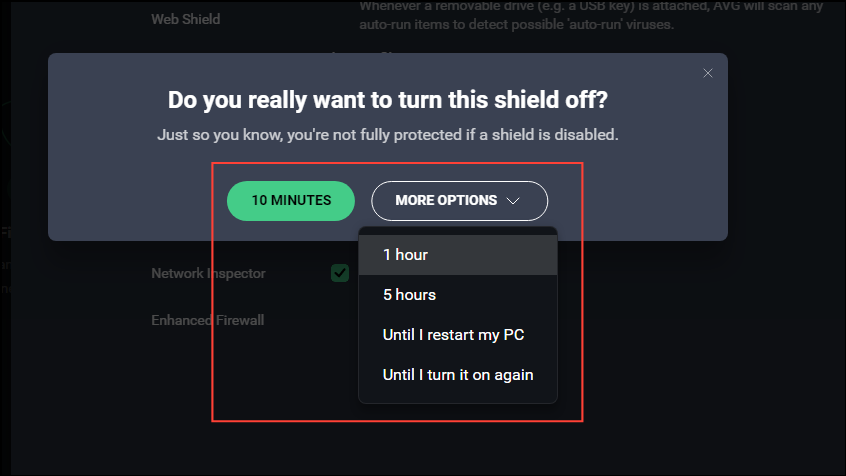
Step 4: Try using your camera to see if the error persists.
Step 5: After testing, ensure you re-enable your antivirus software to keep your system protected.
By following these methods, you should be able to resolve the 0xA00F42A0 <SceneSwitchFailed> camera error on your Windows PC. If the problem continues, consider reaching out to your device manufacturer or Microsoft Support for further assistance.

