
Application errors linked to nvoglv32.dll frequently disrupt programs that rely on NVIDIA graphics and OpenGL on Windows 11. These crashes can present as access violations, startup failures, or freezes, impacting both games and productivity software. The root causes typically include driver incompatibility, DLL file corruption, antivirus interference, or incomplete application installations. Addressing these issues promptly restores system stability and allows affected programs to launch and function correctly.
Update NVIDIA Graphics Drivers
Driver updates from NVIDIA often resolve known bugs and compatibility issues, including those causing nvoglv32.dll crashes. Installing the latest Game Ready Driver can restore normal operation for most users.
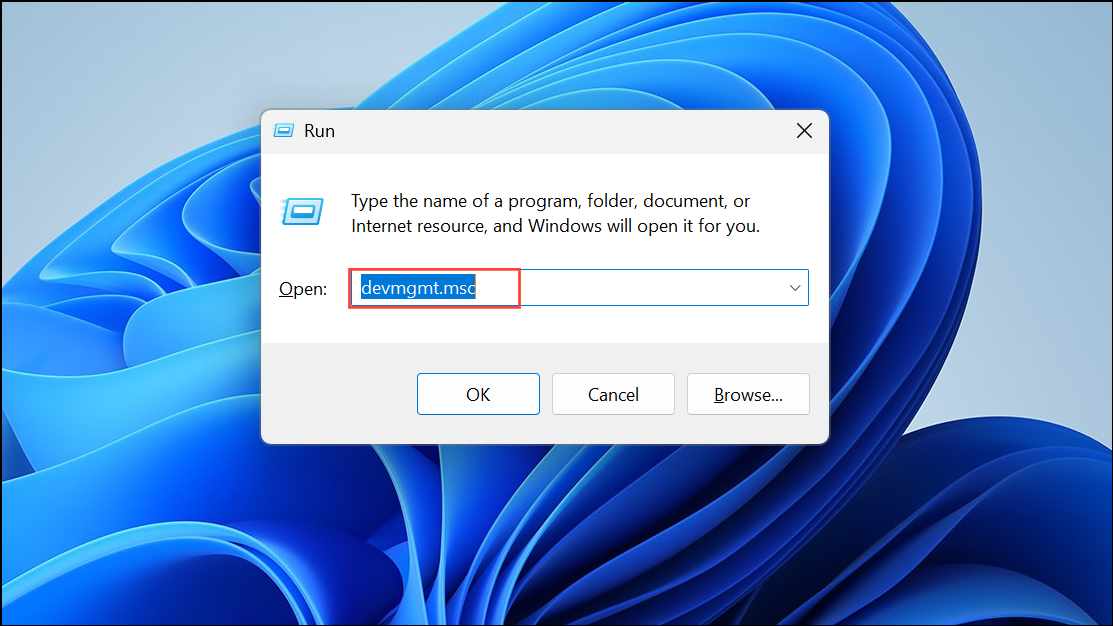
Step 1: Open the Run dialog by pressing Windows + R. Type devmgmt.msc and press Enter to launch Device Manager.
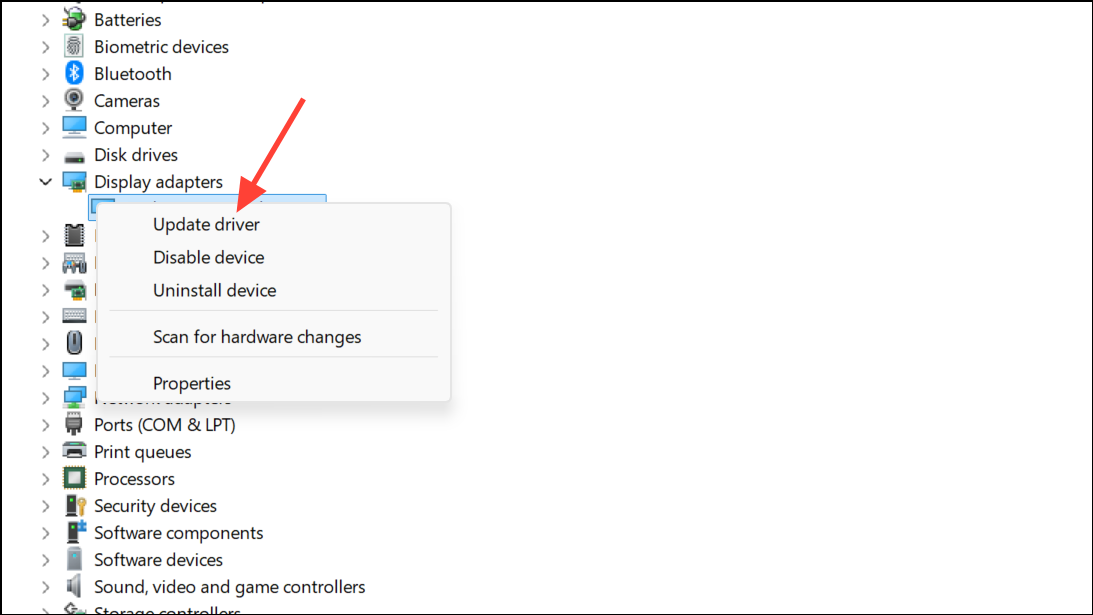
Step 2: Expand the Display adapters section, right-click your NVIDIA graphics device, and select Update driver.
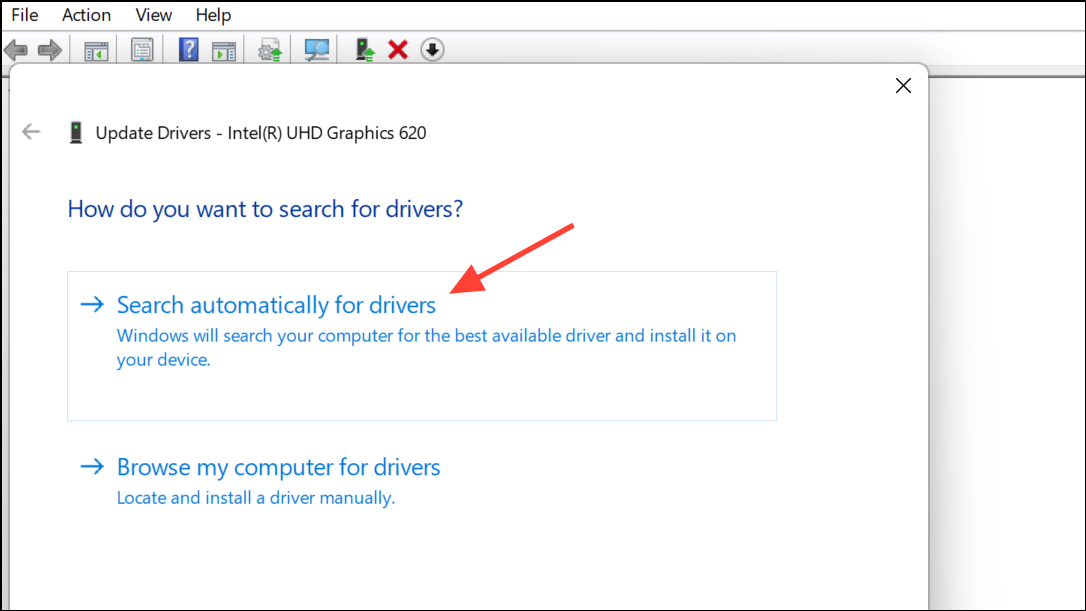
Step 3: Choose Search automatically for drivers. Windows will look for the latest compatible driver and install it if available.
Step 4: After installation, restart your computer to apply changes.
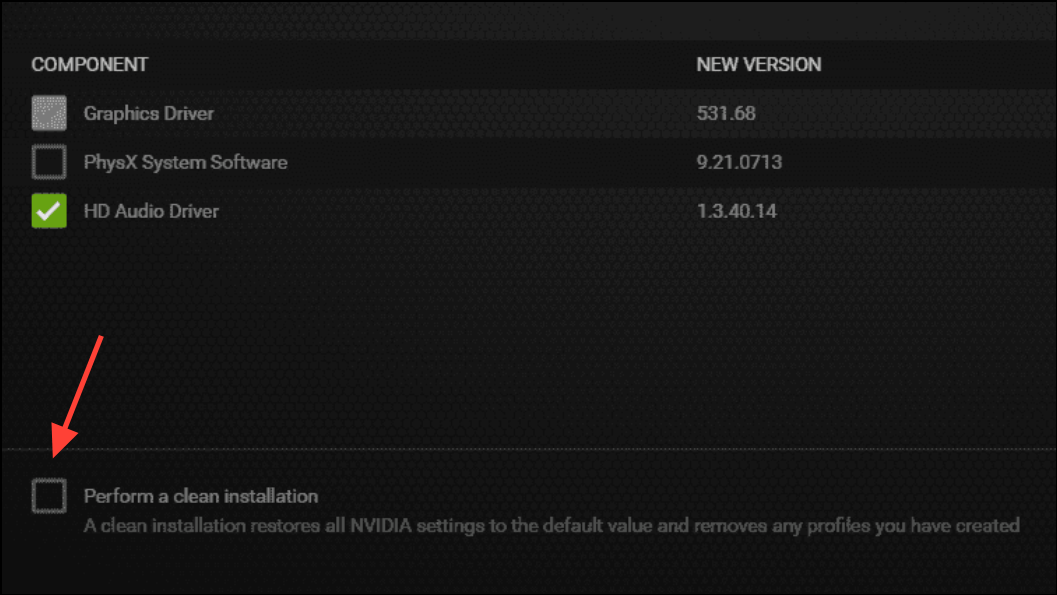
If Windows cannot find a newer driver, visit the NVIDIA Driver Download page, select your GPU model, and download the latest Game Ready Driver for Windows 11. Run the installer, choose Custom (Advanced), and check Perform a clean installation to overwrite previous driver files.
Reinstall NVIDIA Graphics Drivers
Corrupted or incomplete driver installations can persist even after updates. Performing a full uninstall followed by a clean reinstallation can resolve persistent nvoglv32.dll errors.
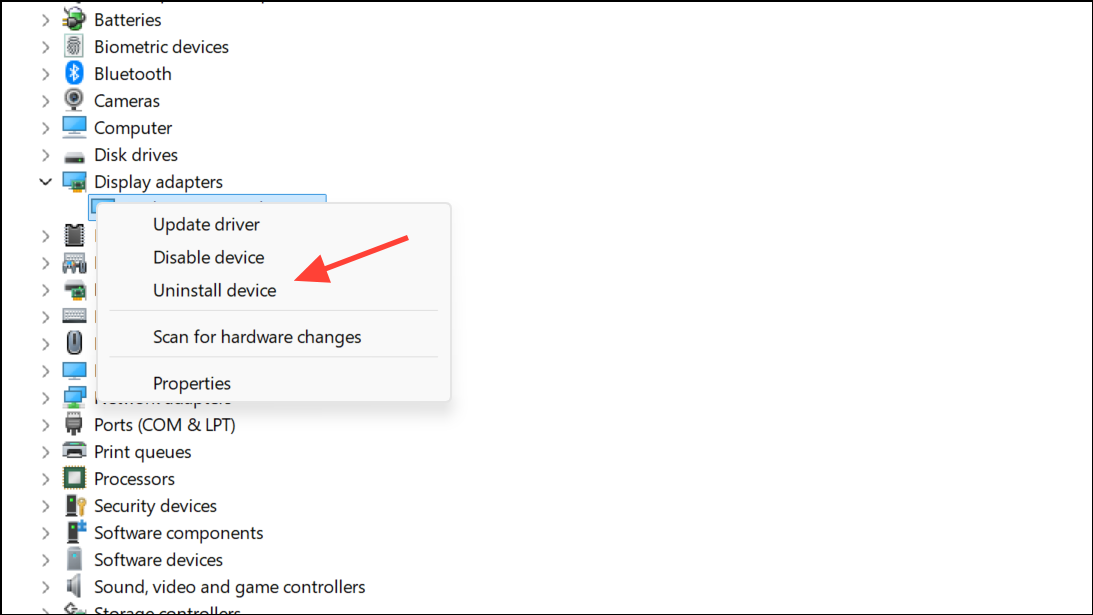
Step 1: In Device Manager, right-click your NVIDIA graphics adapter and select Uninstall device. Check the box for Delete the driver software for this device if available, then confirm the uninstallation.
Step 2: Do not restart yet. Download the latest NVIDIA driver from the official website.
Step 3: Run the downloaded installer. Select Custom (Advanced) and enable Perform a clean installation during setup. This process removes old files and registry entries that could cause conflicts.
Step 4: Restart your system when prompted. This ensures the new driver is fully loaded and active.
For especially stubborn cases, use the Display Driver Uninstaller (DDU) tool in Safe Mode to remove all traces of previous NVIDIA drivers before reinstalling.
Add or Replace the Nvoglv32.dll File
Missing or corrupted nvoglv32.dll files can prevent applications from starting or cause repeated crashes. Replacing the DLL with a known good copy can restore functionality.
Step 1: On a working Windows 11 PC with the same system architecture (32-bit or 64-bit), navigate to:
C:\WINDOWS\System32\DriverStore\FileRepository\(look for a folder starting withnv_dispi.inf_amd64_or similar)C:\WINDOWS\SysWow64(for 32-bit applications on 64-bit systems)
Step 2: Copy the nvoglv32.dll file from these locations to a USB drive.
Step 3: On the affected PC, paste the DLL file into the same folder(s), replacing the existing file if prompted. Always back up the original DLL before overwriting it.
Step 4: Restart your computer to ensure the new DLL is loaded by Windows and applications.
Whitelist Nvoglv32.dll in Windows Security or Antivirus
Security software may mistakenly quarantine or block nvoglv32.dll, causing repeated crashes or preventing applications from accessing GPU features. Whitelisting the DLL restores proper access.
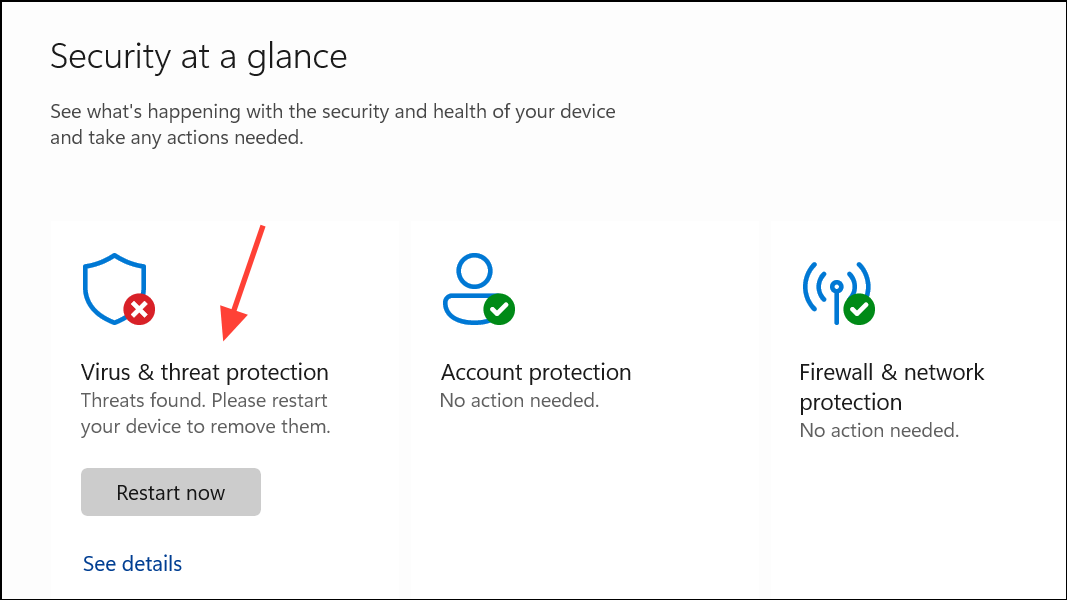
Step 1: Open Settings from the Start menu, then select Update & Security > Windows Security > Virus & threat protection.
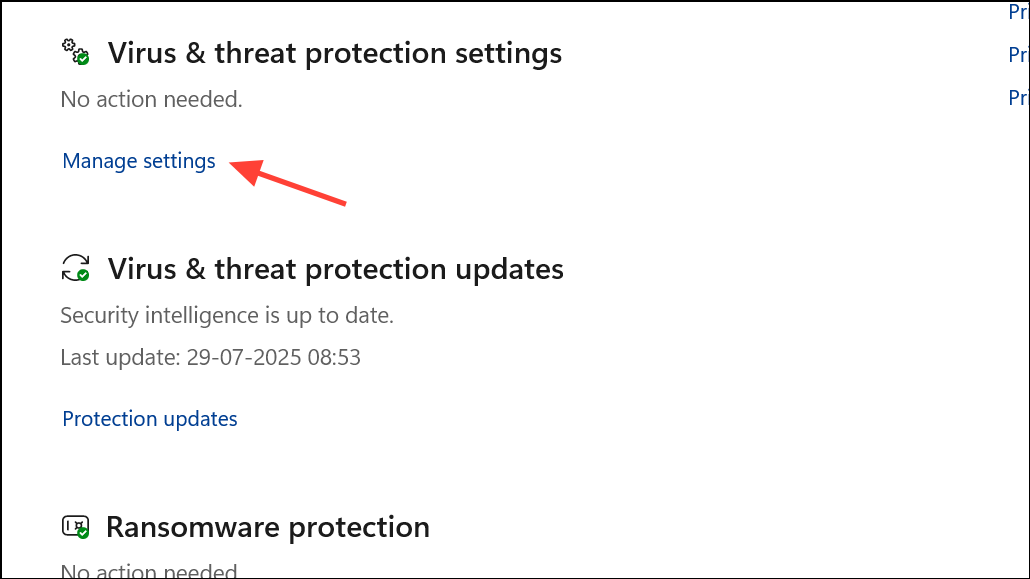
Step 2: Click Manage settings under Virus & threat protection settings.
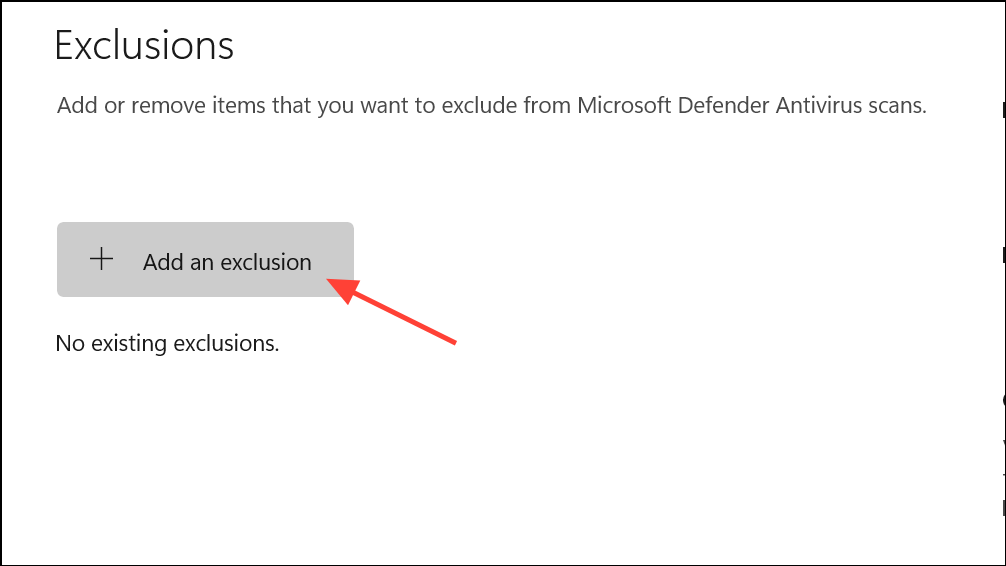
Step 3: Scroll to Exclusions and click Add or remove exclusions.

Step 4: Select Add an exclusion > File, then browse to the location of nvoglv32.dll and add it.
Step 5: Restart your system. This ensures security software does not interfere with NVIDIA driver files.
If you use third-party antivirus software, follow its documentation to add an exclusion for nvoglv32.dll as well.
Reinstall the Affected Application or Game
Improper or incomplete installations can prevent programs from accessing required DLLs, resulting in crashes. Reinstalling the affected app or game can resolve these issues.
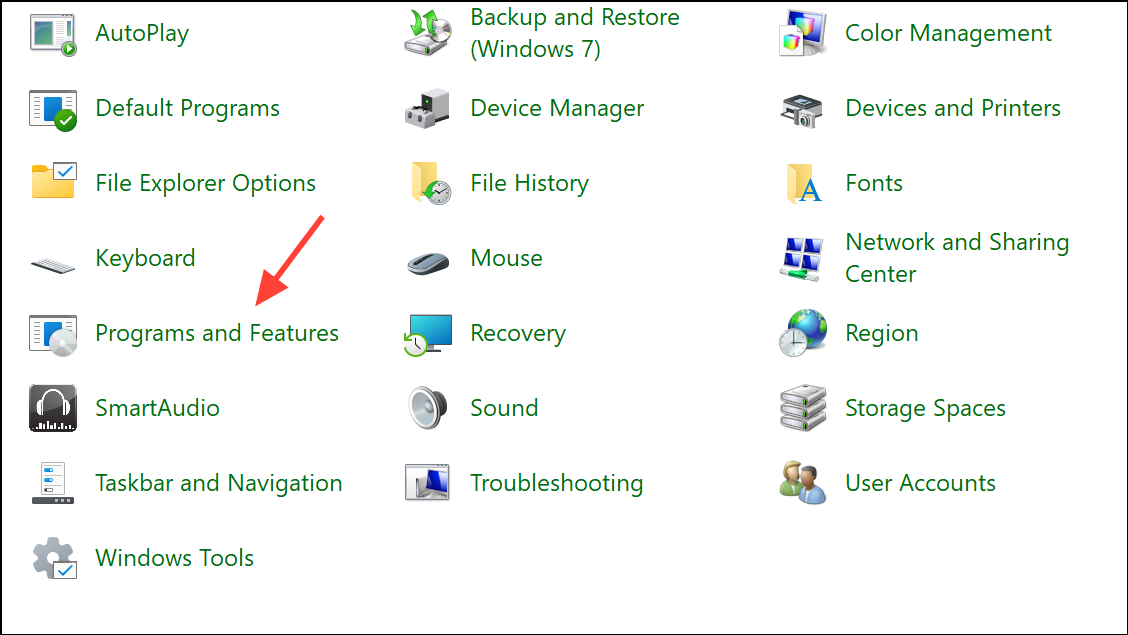
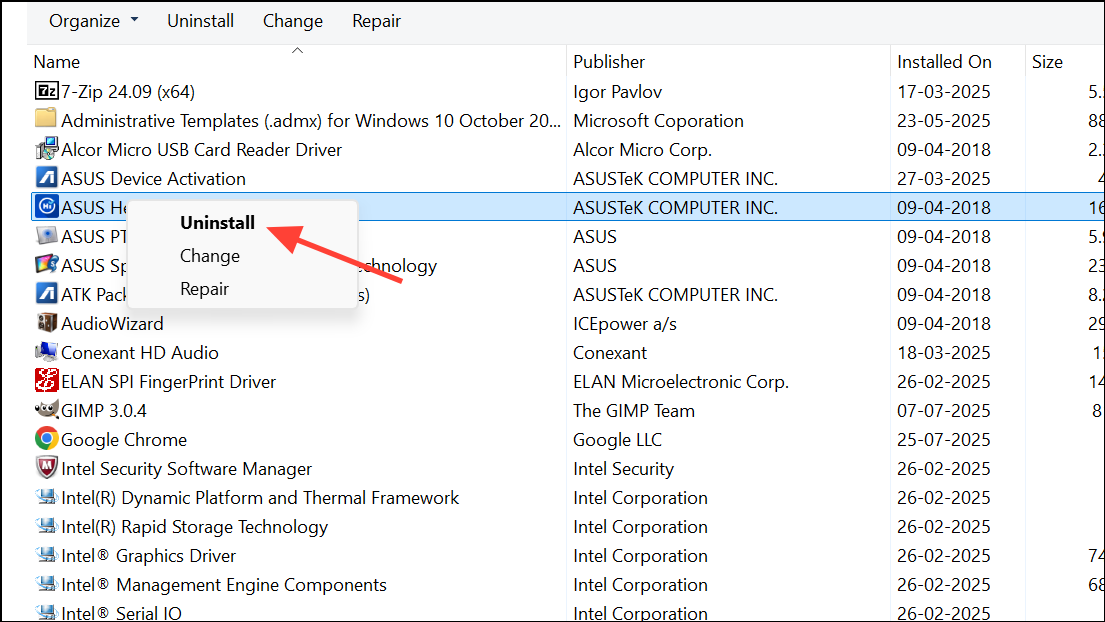
Step 1: Open Control Panel and navigate to Programs and Features.
Step 2: Locate the problematic application, right-click it, and select Uninstall. Follow the prompts to remove the program completely.
Step 3: Download the latest version of the application or game from its official website or trusted source.
Step 4: Install the program, following all on-screen instructions. After installation, restart your computer before launching the app.
If problems persist, consider using a reputable software uninstaller to remove leftover files and registry entries before reinstalling.
Additional Troubleshooting Steps
In some cases, hardware issues or system file corruption may contribute to persistent nvoglv32.dll errors. Running Windows Memory Diagnostic (MdSched), checking for Windows updates, and scanning for system file corruption using sfc /scannow and DISM /Online /Cleanup-Image /RestoreHealth can help identify and resolve deeper system-level problems. If you use enterprise security tools (such as CrowdStrike Falcon), coordinate with your IT department to ensure they are not interfering with NVIDIA drivers.
Applying these targeted fixes restores reliable access to NVIDIA graphics features and resolves application crashes linked to nvoglv32.dll on Windows 11. Keeping drivers up to date and monitoring antivirus actions will help maintain system stability moving forward.