
After updating your Windows 11 system to version 24H2, you might see a frustrating message stating "no audio device installed," despite your audio hardware being physically connected and previously working fine. This issue typically arises due to driver conflicts, incorrect audio settings, or system file corruption triggered by the update. Follow these practical methods to quickly restore audio functionality and get your sound back on track.
Method 1: Set the Correct Audio Output Device
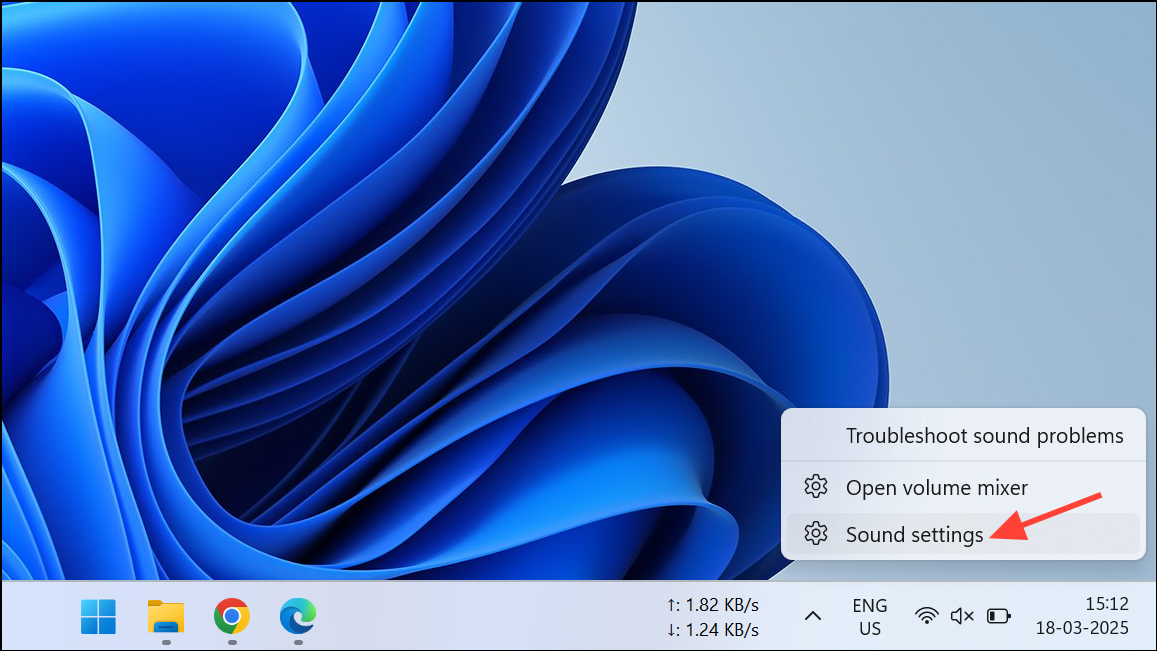
Step 1: Right-click on the speaker icon located on the taskbar and select "Sound settings".
Step 2: In the Sound settings window, navigate to the "Output" section. Verify that your audio device (for example, Realtek Audio) is selected as the default output. If it isn't, click on the correct device to select it.
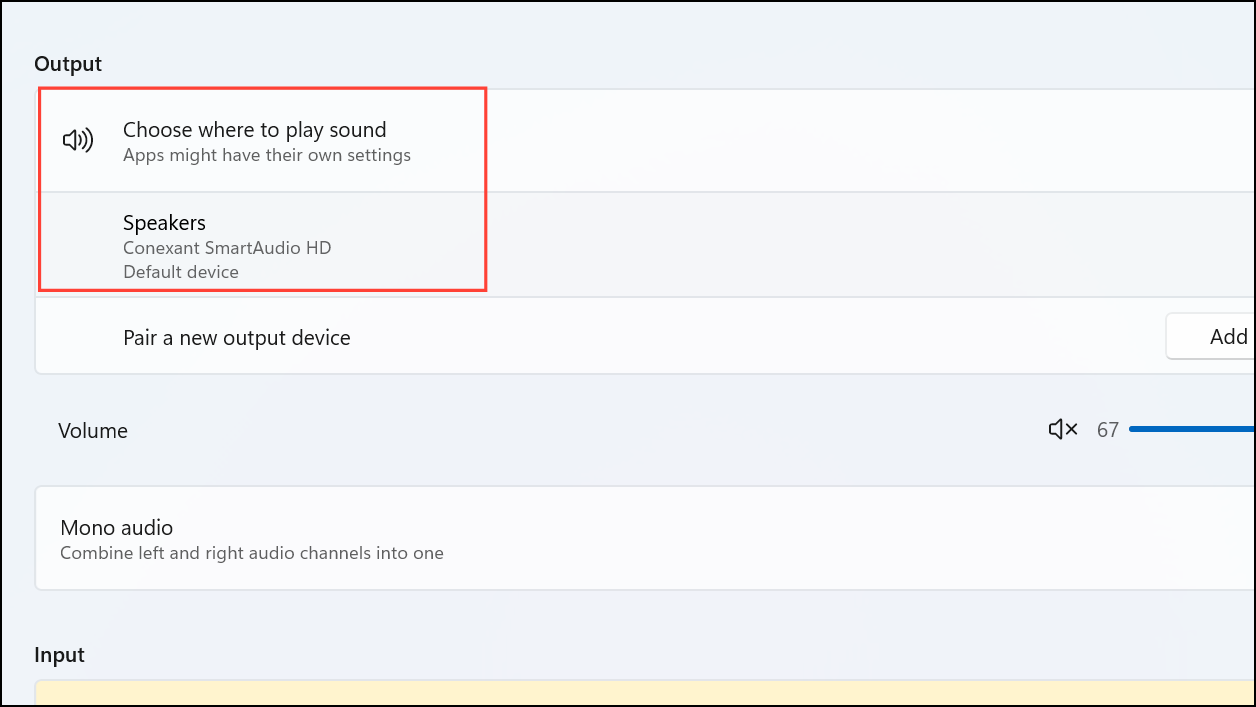
Step 3: Adjust the volume slider to ensure the device isn't muted. You can also test the audio by clicking the "Test" button next to your selected output device.
This quick check ensures Windows is directing audio signals to the correct hardware.
Method 2: Run the Windows Audio Troubleshooter
Step 1: Press the Windows + I keys to open Settings. Navigate to "System" > "Troubleshoot" > "Other troubleshooters".

Step 2: Locate "Playing Audio" and click "Run". Follow the on-screen instructions to complete the troubleshooting process. Windows will automatically detect and attempt to fix common audio issues.
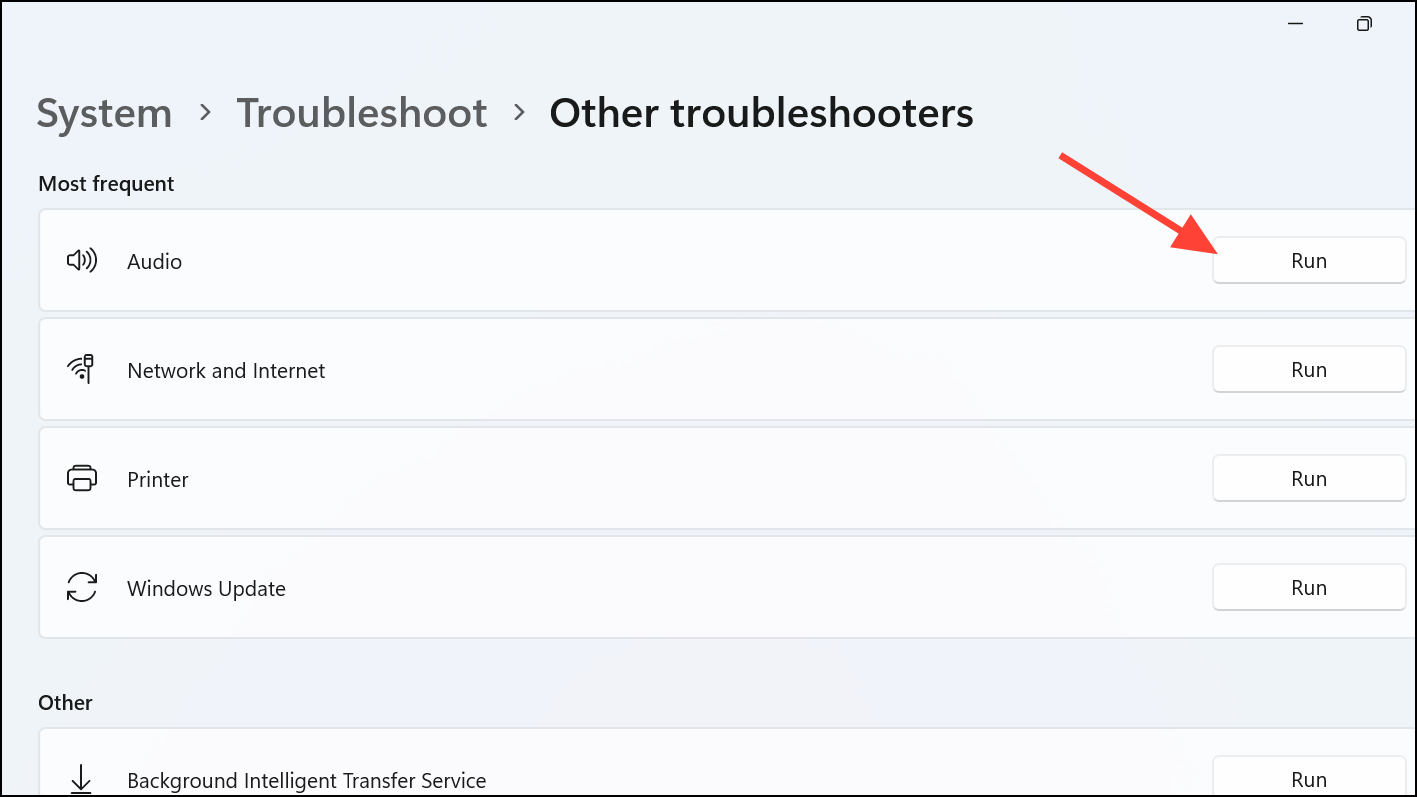
Running the troubleshooter often resolves basic audio device recognition errors without extensive manual intervention.
Method 3: Update or Reinstall Your Audio Drivers
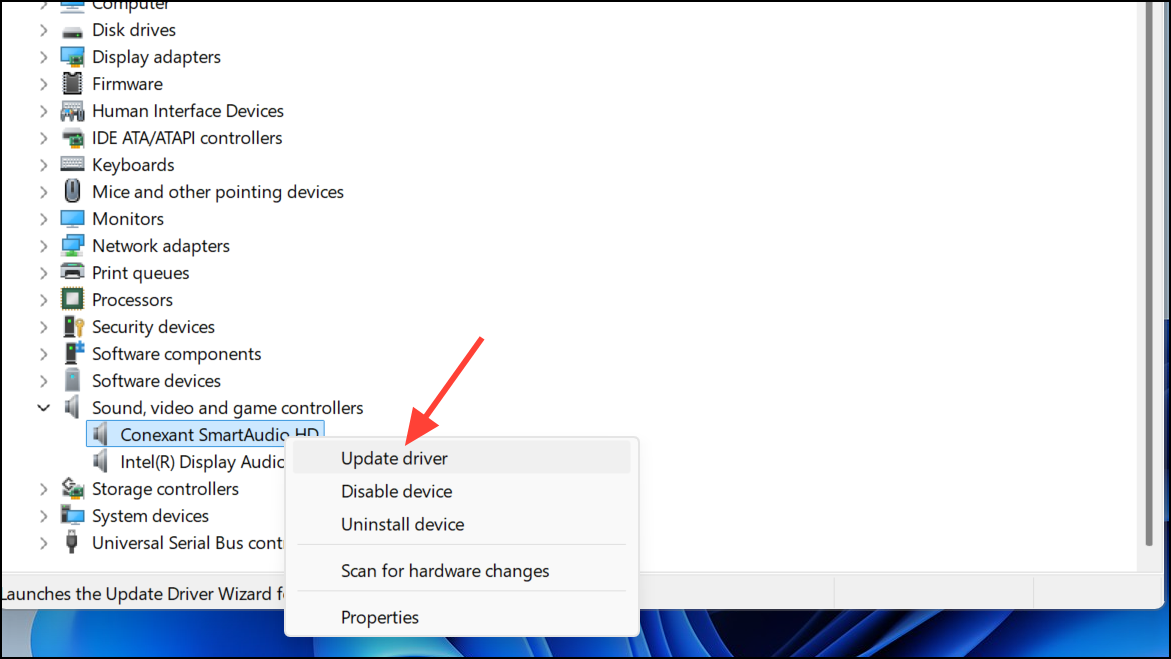
Step 1: Right-click the Start menu and select "Device Manager".
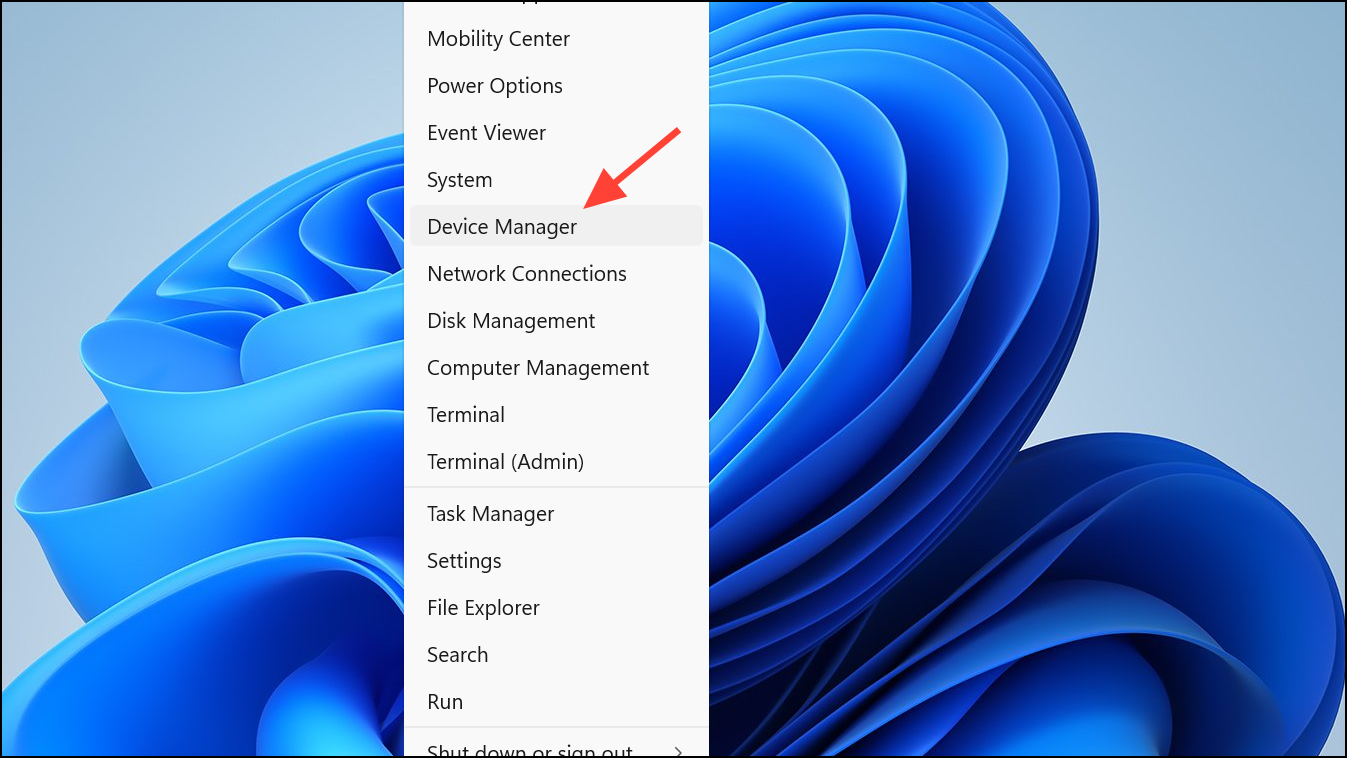
Step 2: Expand the "Sound, video and game controllers" category. Right-click your audio device (such as Realtek High Definition Audio) and select "Update driver".
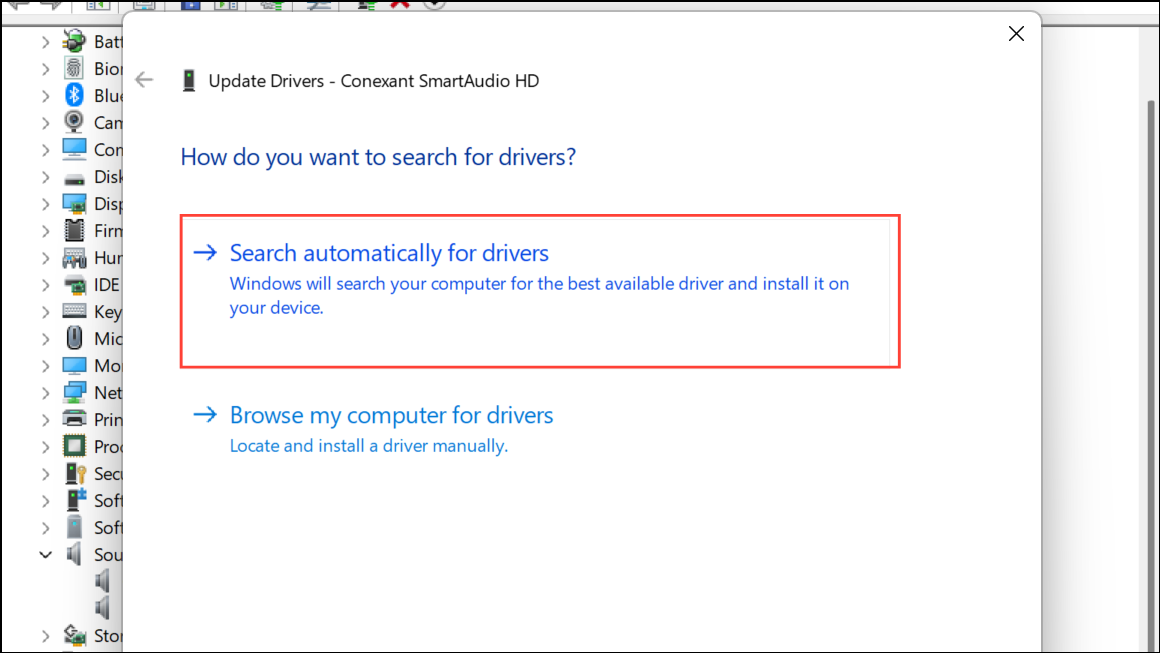
Step 3: Choose "Search automatically for drivers" and let Windows find and install any available updates.
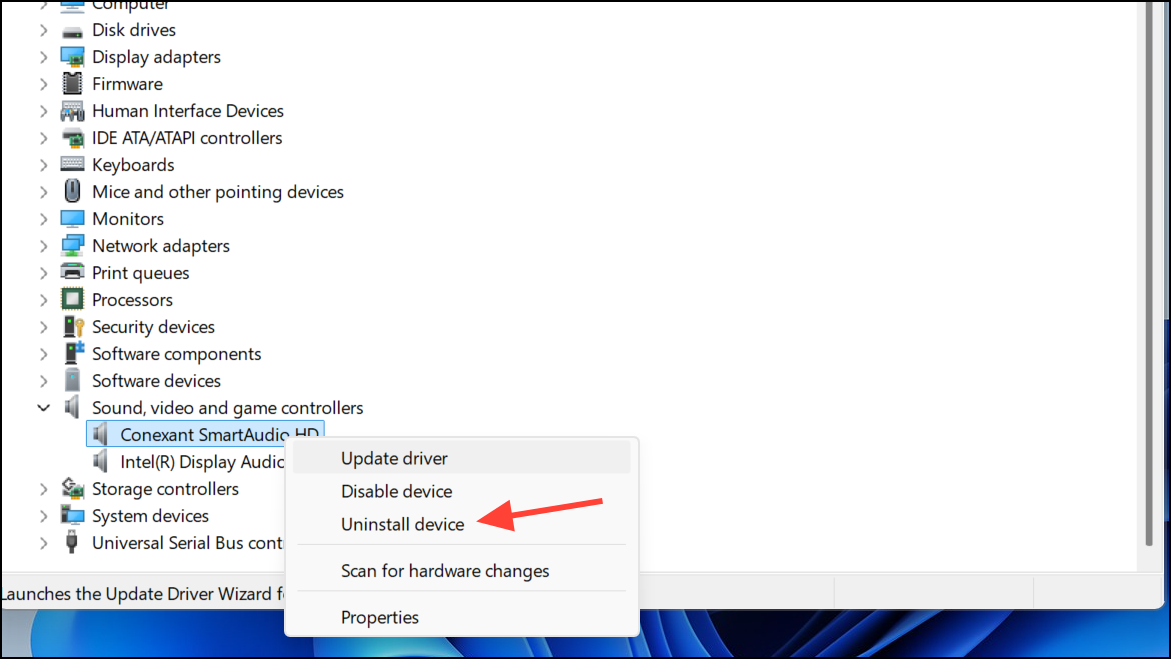
Step 4: If no updates are found, right-click the audio device again and select "Uninstall device". After uninstalling, restart your computer. Windows will automatically reinstall the default audio driver upon reboot.
For persistent issues, visit your device manufacturer's website (Dell, Lenovo, HP, etc.) to manually download and install the latest audio drivers specifically designed for your hardware.
Method 4: Roll Back the Audio Driver
Step 1: In Device Manager, right-click the audio device and choose "Properties".
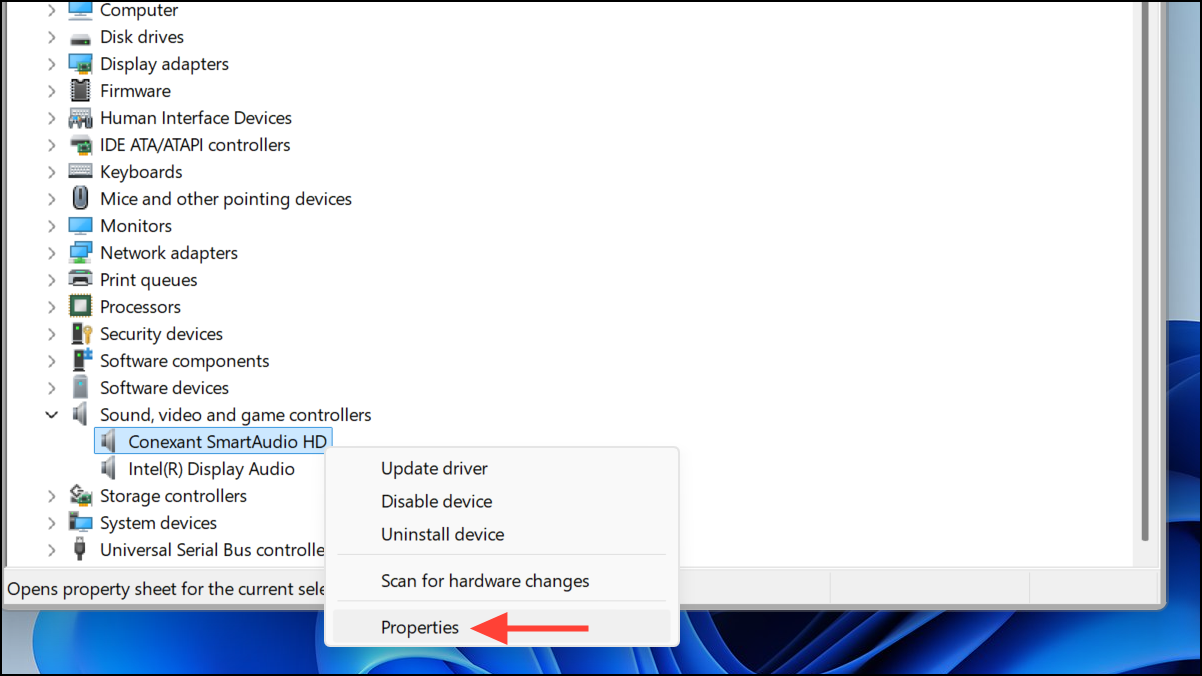
Step 2: Go to the "Driver" tab and click "Roll back driver", if the option is available.
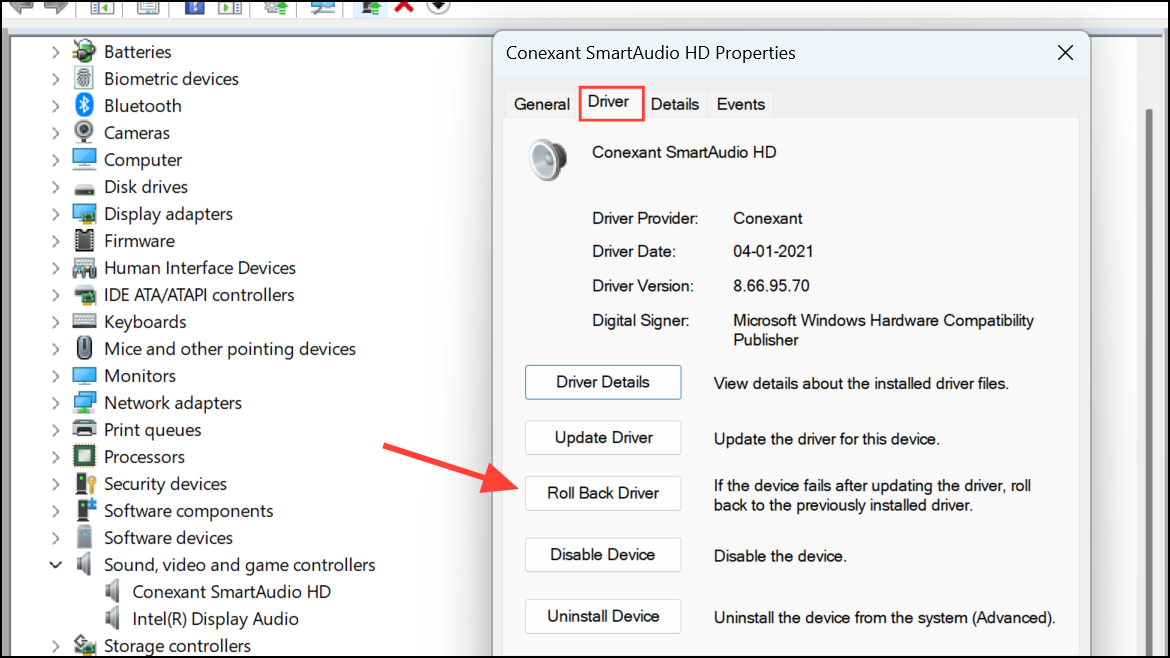
Step 3: Select an applicable reason for rolling back and confirm the action. Restart your computer after the rollback completes.
This method is particularly effective if the 24H2 update installed an incompatible driver version, causing device recognition issues.
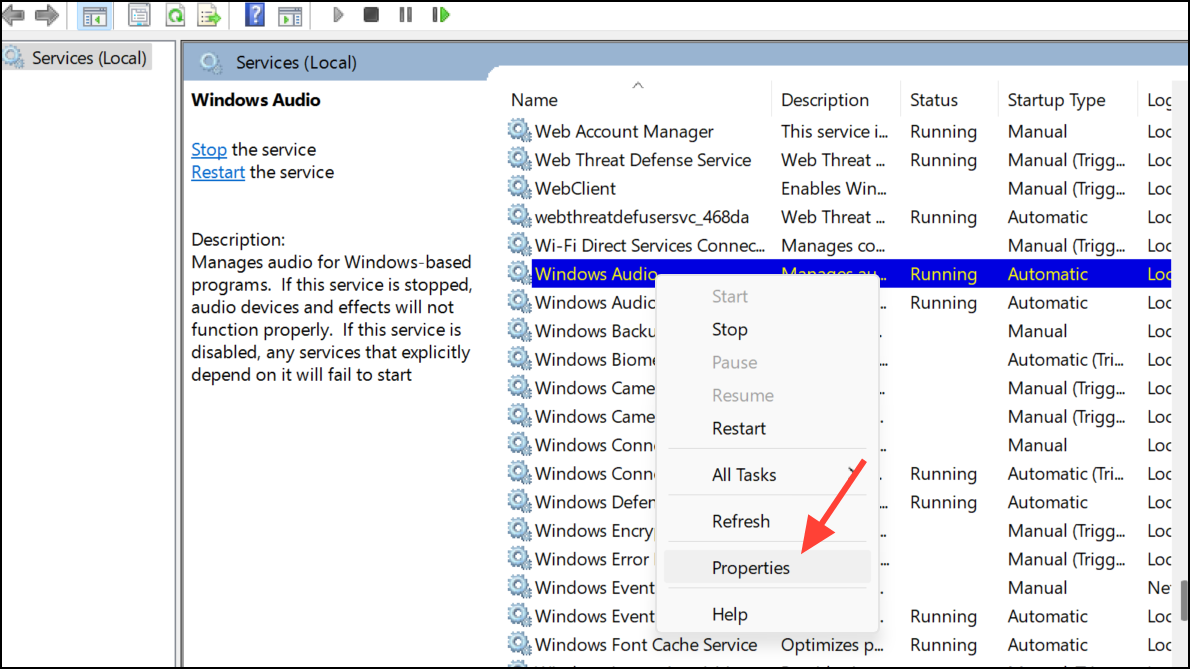
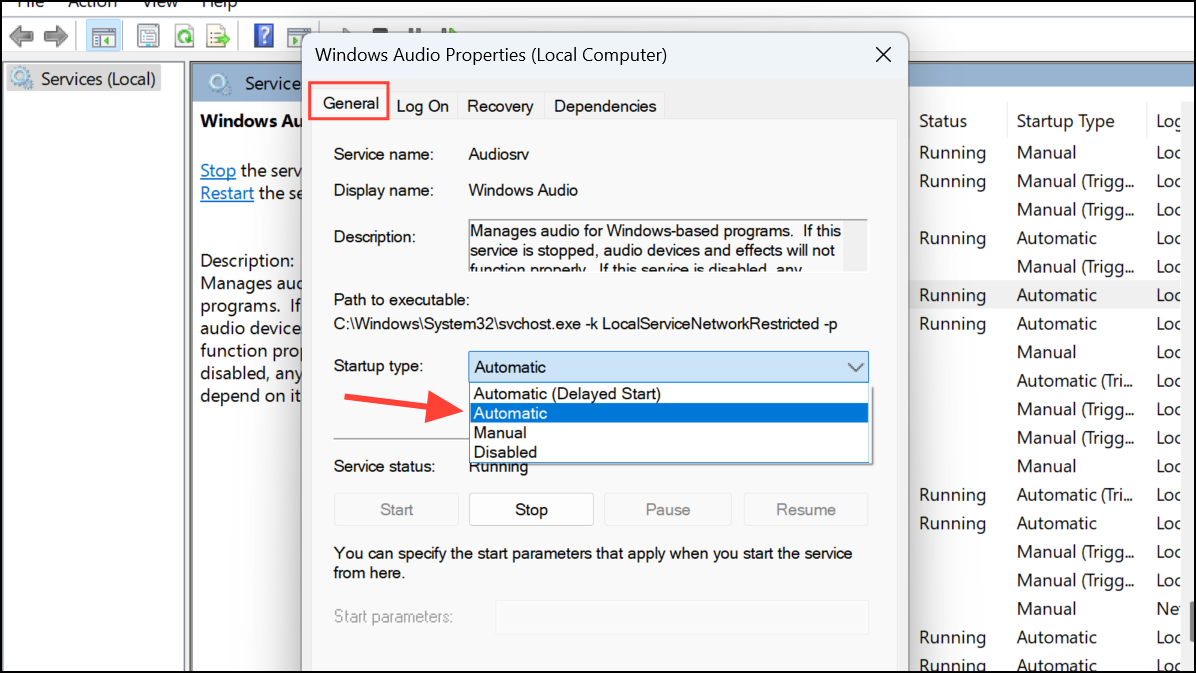
Method 5: Restart Windows Audio Services
Step 1: Press Windows + R, type services.msc, and press Enter to open the Services panel.

Step 2: Locate the following services:
- Windows Audio
- Windows Audio Endpoint Builder
- Remote Procedure Call (RPC)
Right-click and select "Properties".
Step 3: Then select "Automatic" from the Startup type dropdown on the "General" tab. Repeat these steps for all three services.
Step 4: Next, right-click each service and select "Restart".
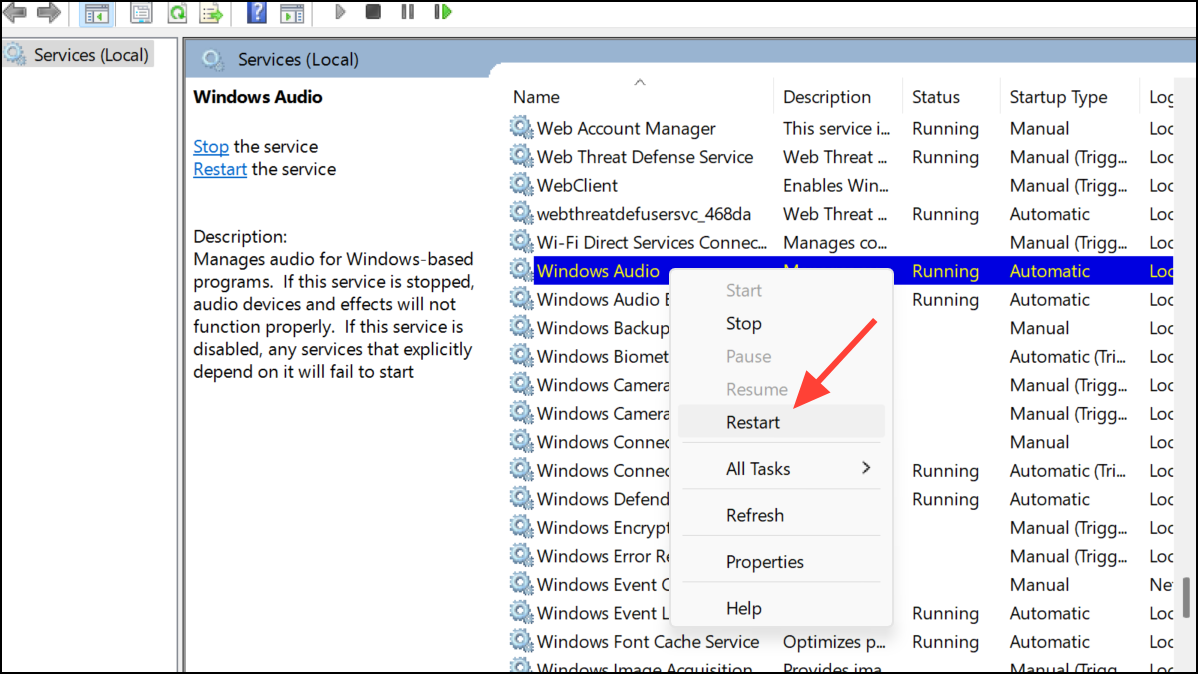
Restarting these services can resolve communication issues between Windows and your audio hardware.
Method 6: Disable Audio Enhancements
Step 1: Right-click the speaker icon on the taskbar and select "Sounds". Under the "Playback" tab, right-click your default audio device and choose "Properties".
Step 2: Navigate to the "Enhancements" or "Advanced" tab (depending on your driver version) and check "Disable all enhancements". Click "Apply", then "OK".
Disabling these features removes potential conflicts caused by additional audio processing features.
Method 7: Perform a System Restore
If you have set up a restore point earlier, you can use it to revert your system to an older state when it did not experience any audio issues.
Step 1: Type "Create a restore point" in the Windows search bar and open the System Properties window.
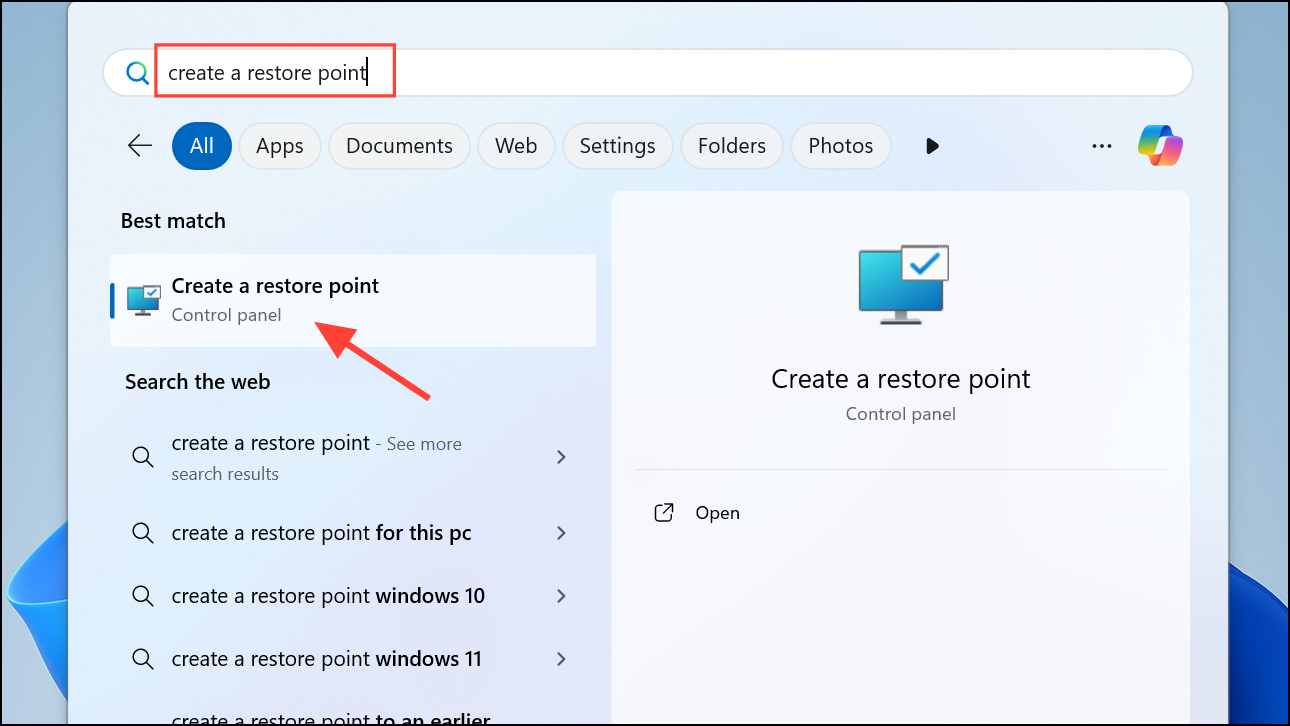
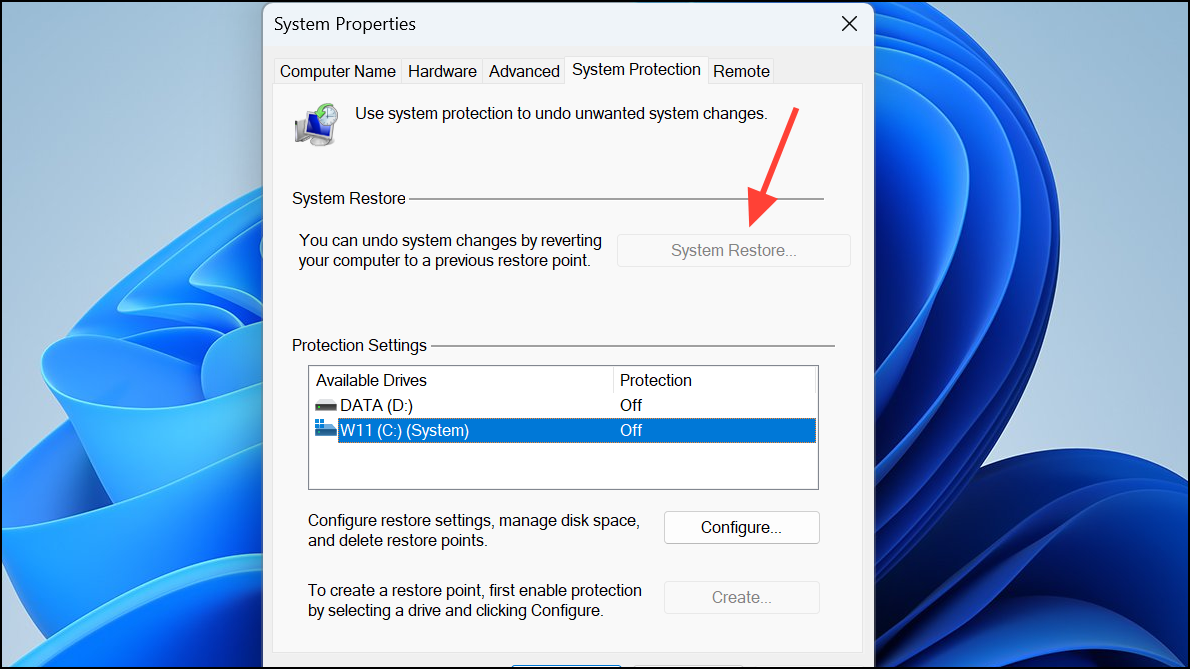
Step 2: Select "System Restore" and click "Next". Choose a restore point created before installing the 24H2 update. Follow the prompts to complete the restoration process.
System restore reverts your system to a previous stable state, undoing changes introduced by the problematic update.
Method 8: Uninstall the Windows 11 24H2 Update (Last Resort)
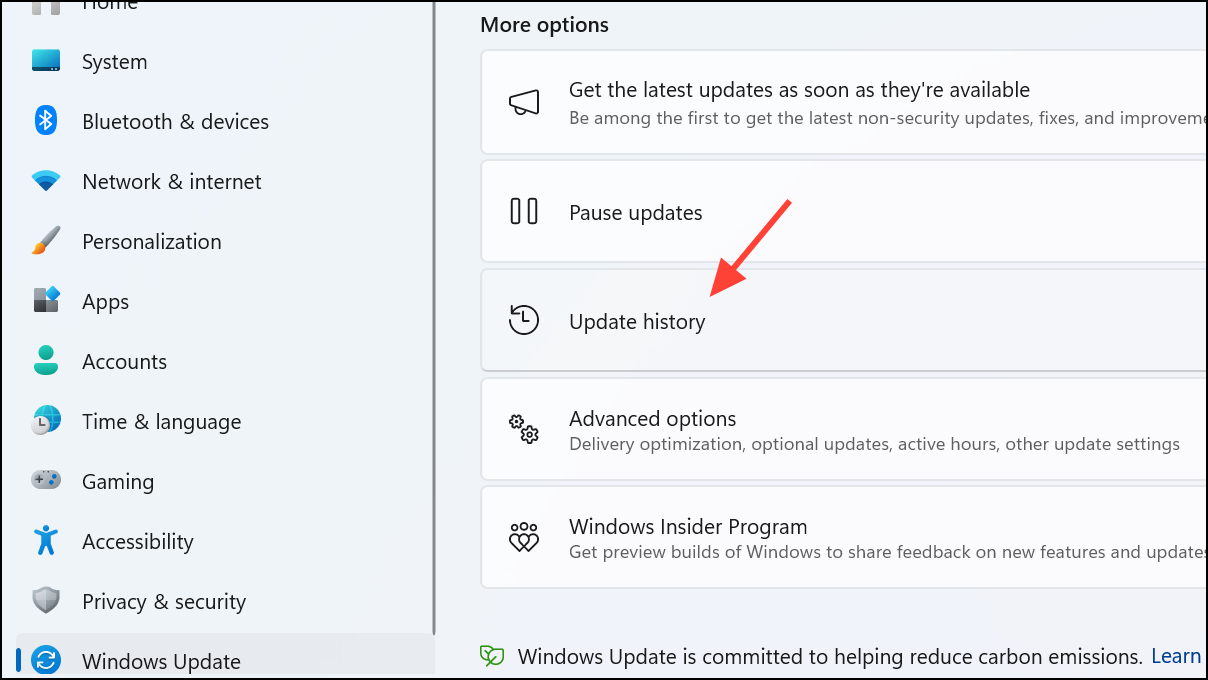
Step 1: Navigate to "Settings" > "Windows Update" > "Update history".
Step 2: Click "Uninstall updates" on the next page.
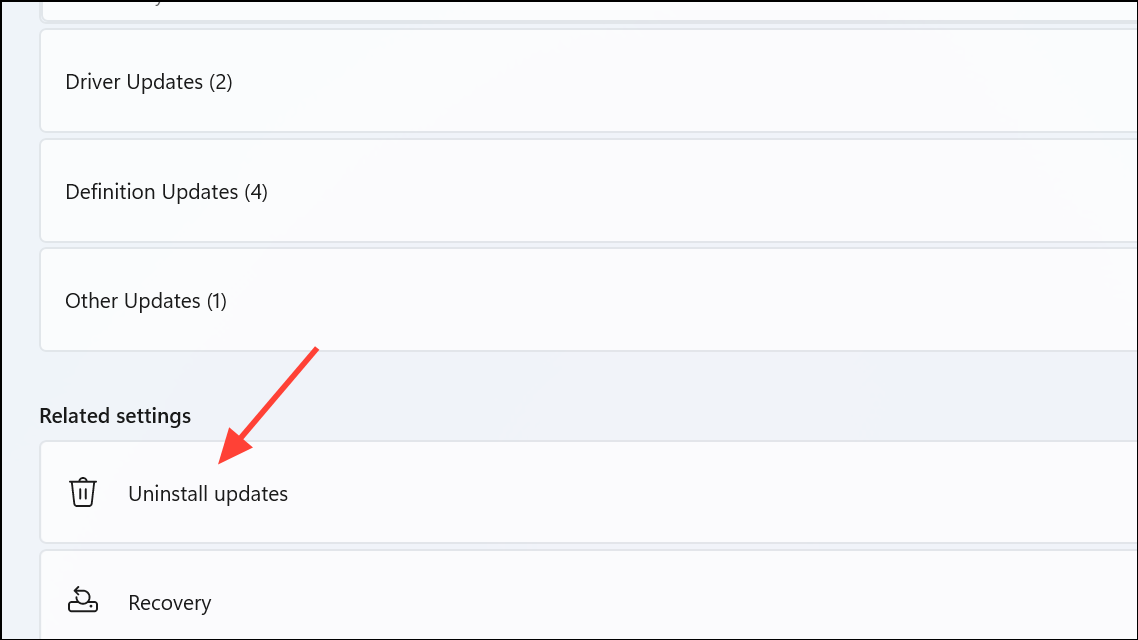
Step 3: Find the 24H2 update (such as KB5044284), select it, and click "Uninstall". Restart your computer after the uninstallation completes.
Removing the update is a final measure if other methods fail, restoring your system to its previous working state.
With these practical solutions, you should successfully resolve audio device recognition issues caused by the Windows 11 24H2 update. Remember to regularly check for driver updates from your device manufacturer to prevent similar issues in future updates.