
DirectDraw initialization failures block older games and legacy applications from launching on Windows 11, often displaying messages like “DirectDraw initialization failed” or “DirectDraw error (variable error code) DDERR_UNSUPPORTED.” These issues stem from outdated graphics APIs, missing DirectX components, or incompatible display settings that modern Windows versions no longer support by default. Addressing this error requires specific adjustments to compatibility settings, graphics drivers, and system features to bridge the gap between legacy software and current hardware.
Use a DirectDraw Wrapper (dgVoodoo)
Modern Windows systems sometimes lack the necessary support for legacy DirectDraw calls used by older games. A DirectDraw wrapper such as dgVoodoo translates these calls into modern DirectX instructions, allowing games to run smoothly on Windows 11.
Step 1: Download the latest version of dgVoodoo from the official website. This tool is free and widely recommended for running older DirectX and DirectDraw games.
Step 2: Extract the downloaded archive to a folder on your computer. You will find MS/x86 and MS/x64 folders, each containing .dll files.
Step 3: Copy the required DDRAW.dll, D3DImm.dll, and D3D8.dll files from the MS/x86 folder (for 32-bit games) or MS/x64 folder (for 64-bit games) into the installation directory of the affected game—where the game’s executable file is located.
Step 4: Run dgVoodooCpl.exe (the configuration utility) from the main dgVoodoo folder. Use this tool to fine-tune graphics settings, such as resolution, scaling, and output API, to match your system and game requirements.
Step 5: Launch the game. The wrapper intercepts DirectDraw calls, allowing the game to run on modern hardware without triggering initialization errors.
Using dgVoodoo or a similar wrapper is often the most reliable solution for persistent DirectDraw errors, especially when other compatibility tweaks fail.
Configure Compatibility Mode for the Application
Older games and applications are typically designed for Windows XP, Windows 98, or even earlier. Compatibility mode in Windows 11 simulates an older Windows environment for a specific program, allowing legacy software to function correctly.
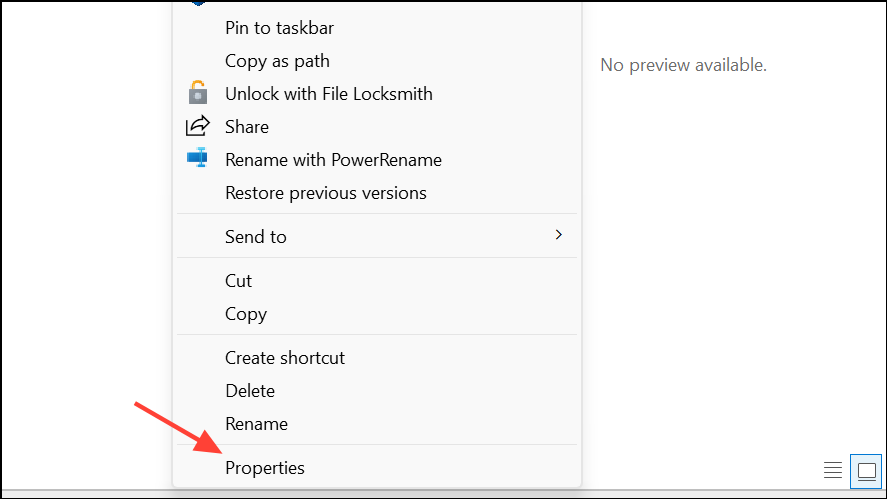
Step 1: Open File Explorer with Win + E and navigate to the folder where the game or application is installed.
Step 2: Right-click the program’s executable file (.exe), then select Properties.
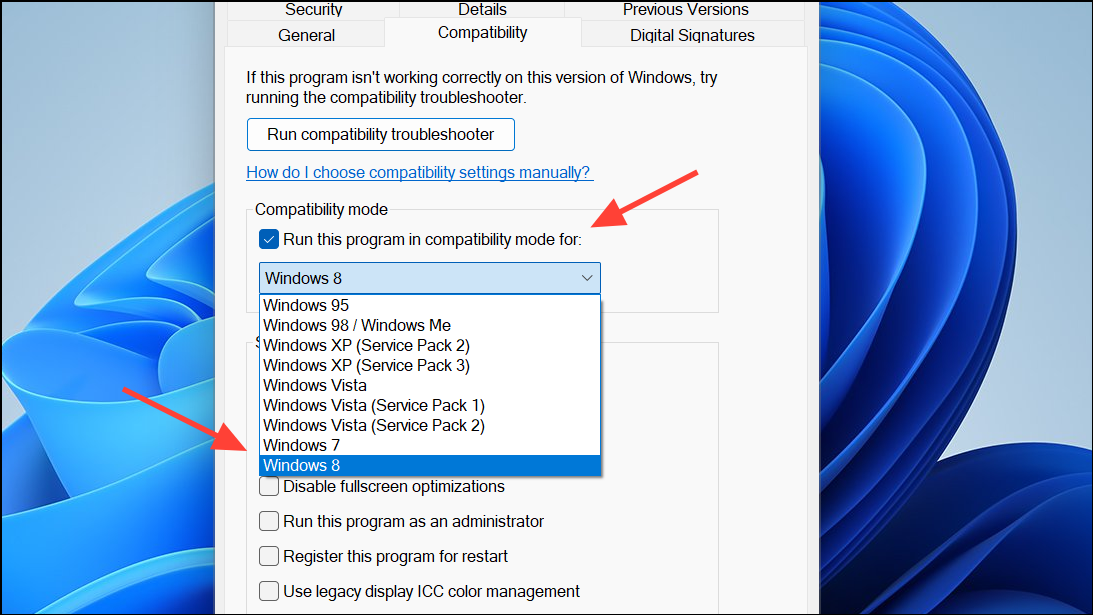
Step 3: Go to the Compatibility tab. Check Run this program in compatibility mode for: and choose an older version of Windows, such as Windows 8, Windows 7, or the version closest to the original release date of the program.
Step 4: For some games, also check Run in 640 x 480 screen resolution if you suspect resolution mismatch issues. This forces the game to use a display mode it expects, which can resolve DirectDraw errors.
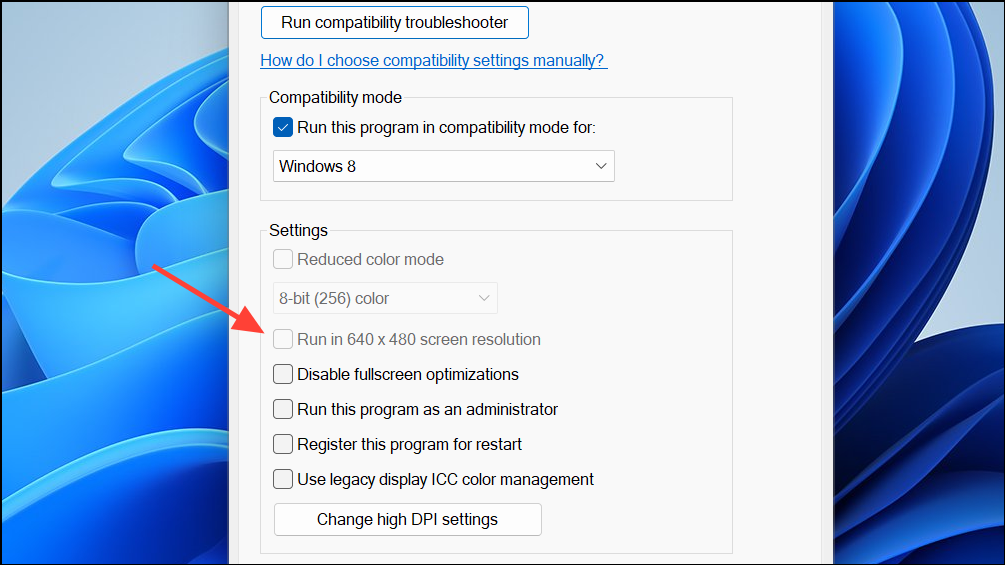
Step 5: Click Apply and then OK to save your changes. Attempt to launch the game or application again.
If issues remain, try using the Program Compatibility Troubleshooter, which can automatically apply recommended compatibility settings for problematic apps.
Enable Legacy DirectPlay Component
Some older games require DirectPlay, a deprecated networking component of DirectX, to function. By default, DirectPlay is disabled on Windows 11, which can trigger DirectDraw initialization errors.
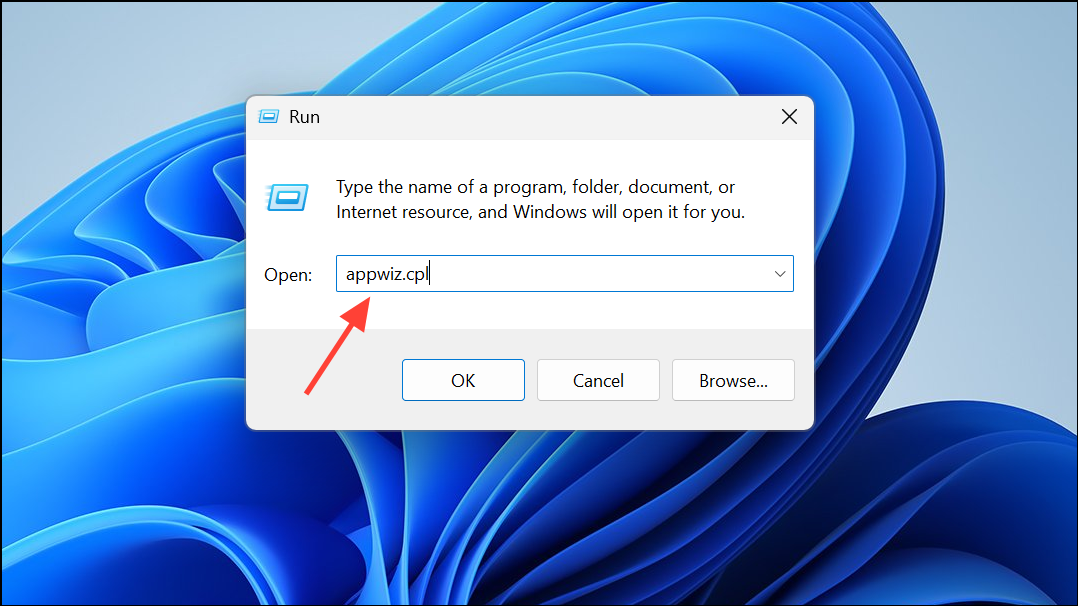
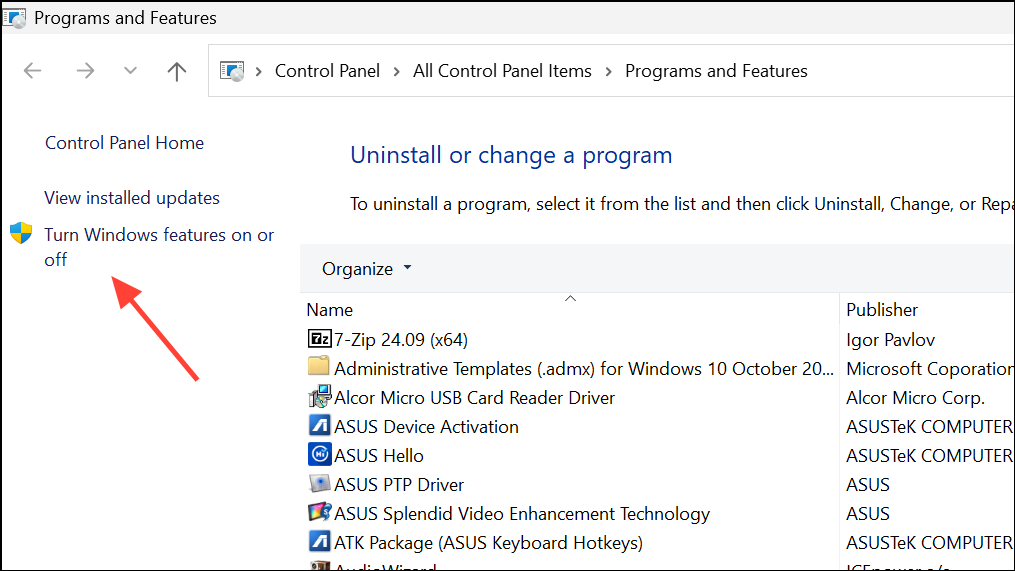
Step 1: Press Win + R, type appwiz.cpl, and press Enter to open Programs and Features.
Step 2: Click Turn Windows features on or off in the left sidebar.
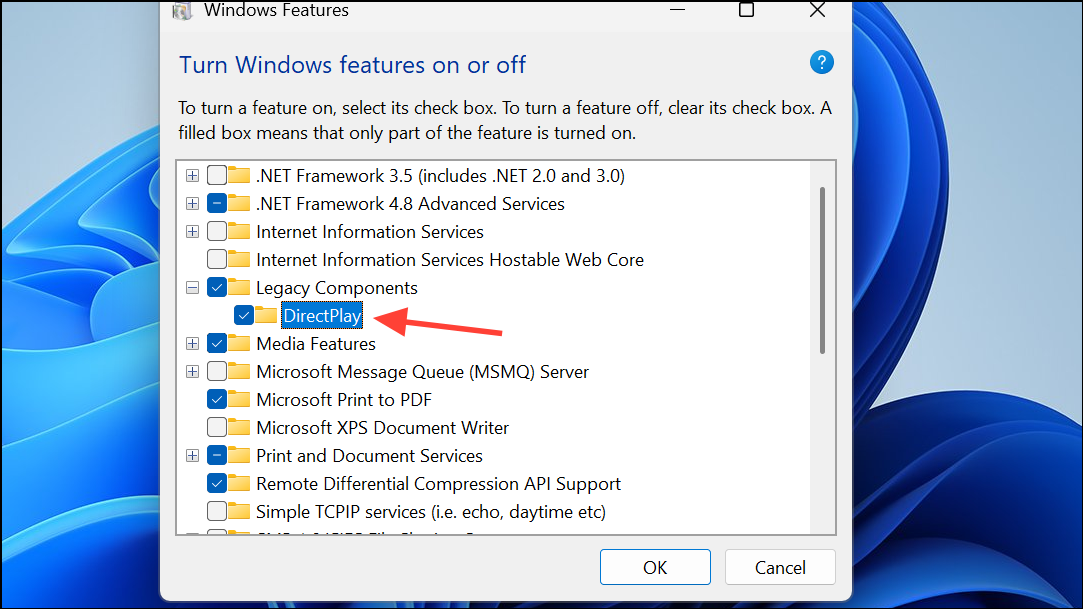
Step 3: In the Windows Features dialog, scroll down and expand Legacy Components. Check the box for DirectPlay.
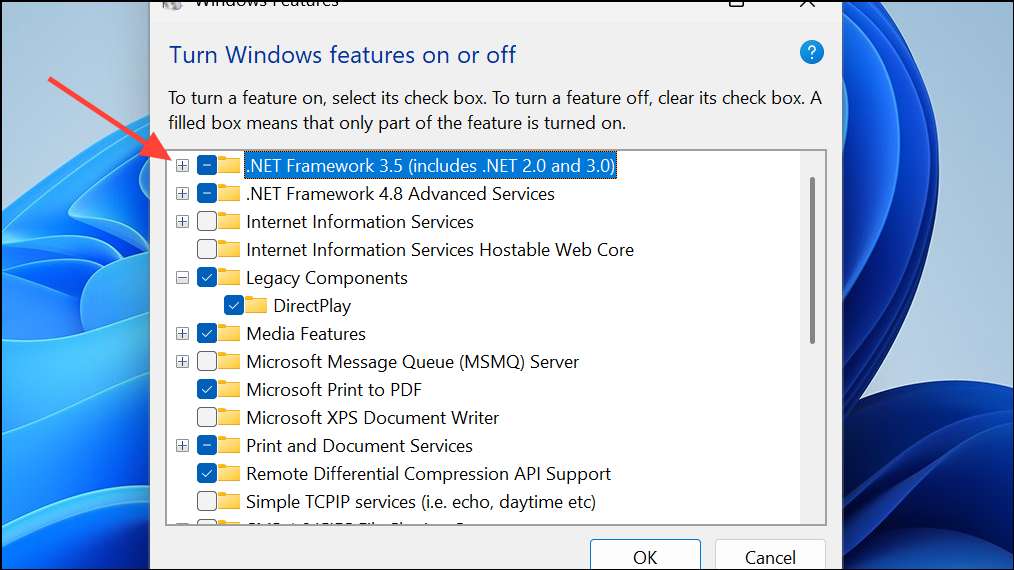
Step 4: Optionally, check .NET Framework 3.5 (includes .NET 2.0 and 3.0) if your legacy software requires it.
Step 5: Click OK and allow Windows to install the selected features. Restart your computer when prompted.
Activating DirectPlay restores support for certain DirectDraw-dependent games and applications, especially those released in the late 1990s and early 2000s.
Install Missing DirectX Runtime Components
DirectDraw is part of the DirectX suite, but Windows 11 may not include all legacy DirectX runtime files required by older software. Installing the DirectX End-User Runtime redistributes missing libraries and resolves initialization errors.
Step 1: Visit the official Microsoft DirectX End-User Runtime Web Installer page.
Step 2: Click Download and save the installer to your computer.
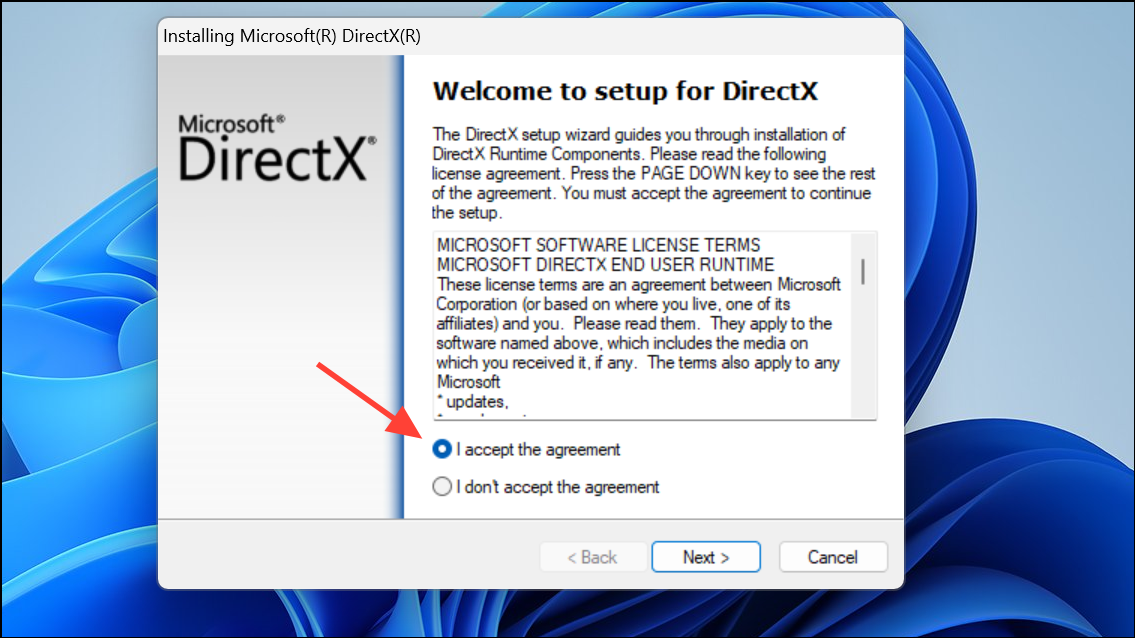
Step 3: Run the dxwebsetup.exe file and follow the on-screen prompts. Accept the license agreement and proceed with the installation.
Step 4: Once installation completes, restart your system to ensure all DirectX components are loaded.
Installing these older runtime files often resolves compatibility issues for games and applications that rely on deprecated DirectX APIs.
Update Graphics Drivers and Windows
Outdated or generic display drivers can cause DirectDraw to malfunction. Updating your graphics drivers and ensuring Windows is fully updated improves compatibility and performance for legacy software.
Step 1: Identify your graphics card manufacturer (NVIDIA, AMD, Intel) and download the latest driver from their official website. For laptops, check the manufacturer’s support page first, as they may offer customized drivers.
Step 2: Install the updated driver and restart your computer.
Step 3: Open Windows Update from Settings and check for any pending system updates. Download and install all available updates, then restart your PC.
Proper driver support ensures DirectDraw and DirectX features are fully functional, reducing the chance of initialization errors.
Run the Game in Windowed Mode
Some legacy games fail to initialize DirectDraw correctly when forced into full-screen mode on modern systems. Running the game in windowed mode can sidestep display mode conflicts.
Step 1: Right-click the game’s shortcut, select Properties, and locate the Target field.
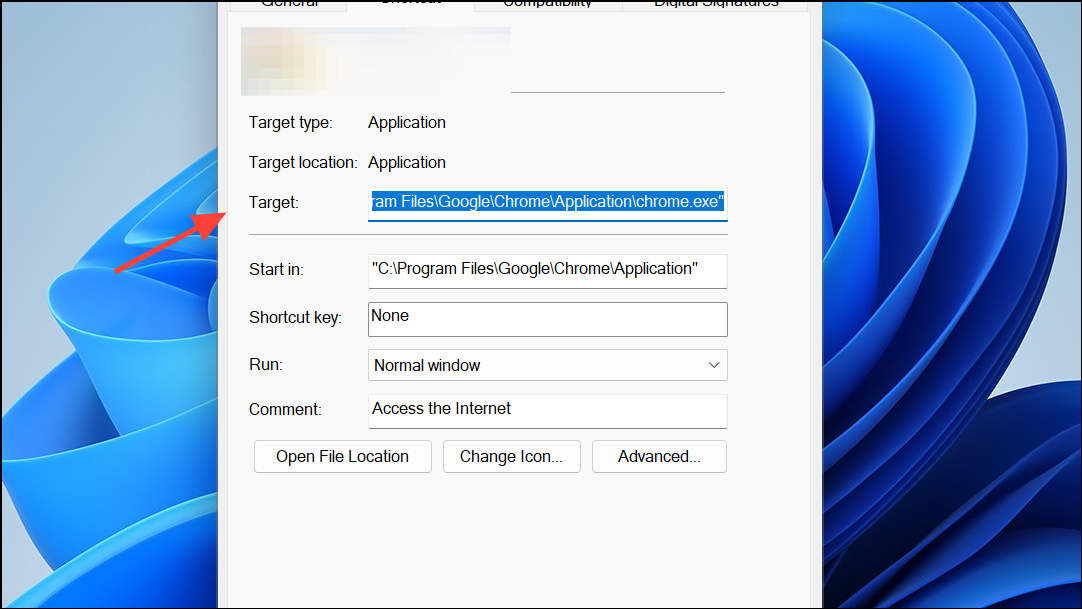
Step 2: Add a windowed mode parameter such as -windowed or -w to the end of the target path, if supported by the game.
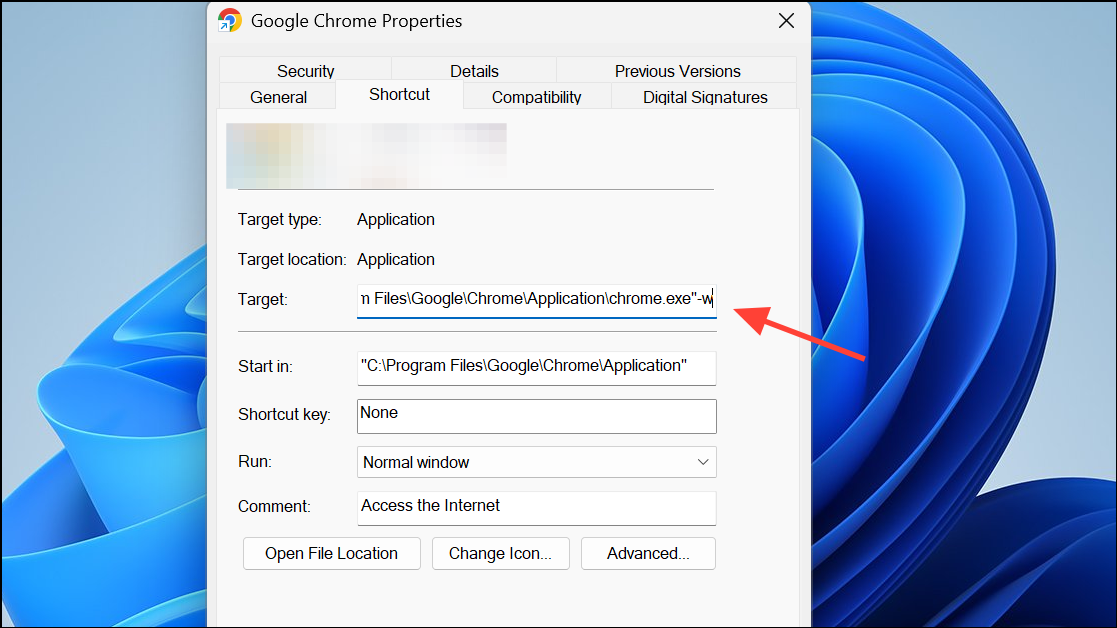
Step 3: Click Apply and OK, then launch the game. If the game does not support command-line windowed mode, check its settings or configuration files for a windowed option.
This approach is especially useful for games that crash or display a black screen when attempting to switch to full-screen mode.
Reinstall the Affected Game or Application
Corrupted files or incomplete installations can also trigger DirectDraw errors. A clean reinstall ensures all necessary components are present.
Step 1: Uninstall the problematic game or application using its uninstaller, your game client (such as Steam or GOG Galaxy), or the Windows Settings app.
Step 2: Restart your computer to clear any lingering processes or locked files.
Step 3: Reinstall the game or application from a trusted source. If the software came on a CD or DVD, use the original media for installation.
Step 4: Apply any relevant compatibility, resolution, or DirectPlay settings before launching the program again.
Reinstallation addresses missing or damaged files that can interfere with DirectDraw initialization.
Resolving DirectDraw initialization errors on Windows 11 restores access to classic games and legacy applications, letting you enjoy retro software without major roadblocks. If a particular fix doesn’t work, combining several methods above often yields the best results.