
Web applications, video streaming, and daily productivity tasks can grind to a halt when Google Chrome starts running slowly. Users report issues like tabs taking minutes to load, unresponsive interfaces, and video playback delays—even on high-end hardware. These slowdowns often occur after recent updates or when specific extensions are active, affecting both Windows and macOS users. Addressing Chrome’s sluggishness requires a focused approach, starting with the most effective methods and working through additional troubleshooting steps as needed.
Disable Problematic Extensions and Ad Blockers
Resource-heavy or incompatible browser extensions are a leading cause of Chrome slowdowns. Recent user feedback highlights that certain ad blockers, especially AdBlock and AdBlock Plus, can significantly degrade Chrome’s performance—particularly on YouTube and other media-rich sites. Malwarebytes Browser Guard and the Adobe Acrobat extension have also been identified as culprits. Even if you have previously disabled or hidden extensions, ensure they are fully turned off or removed, as simply unpinning them does not stop them from running.
Step 1: Click the ⋮ (three-dot menu) in the top-right corner of Chrome, then select Extensions > Manage Extensions.
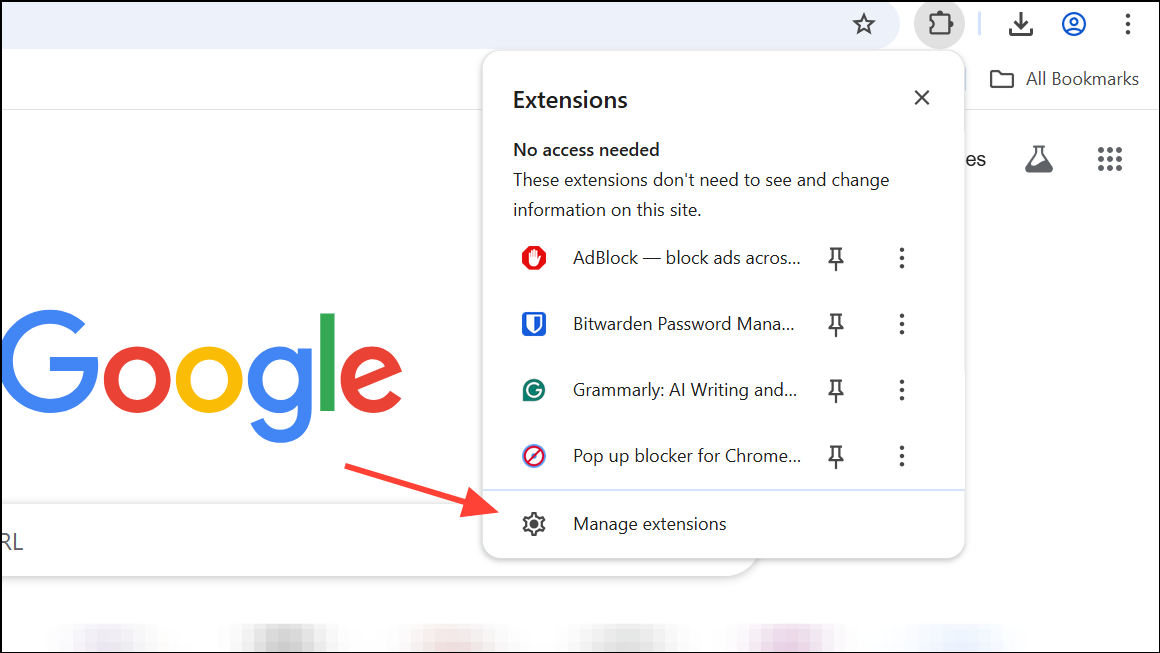
Step 2: Review your installed extensions. Toggle off or click Remove next to any extension you suspect is causing issues, starting with ad blockers and security-related add-ons.

Step 3: After disabling or removing extensions, close and relaunch Chrome. Test performance by opening new tabs or loading sites like YouTube to check for improvement.
For users who rely on ad blocking, switching from AdBlock or AdBlock Plus to uBlock Origin (especially the Lite version) has been reported to maintain ad blocking functionality without causing slowdowns.
Update Google Chrome to the Latest Version
Outdated versions of Chrome can contain bugs or compatibility issues that slow down browsing. Google regularly releases updates that address performance and security problems.
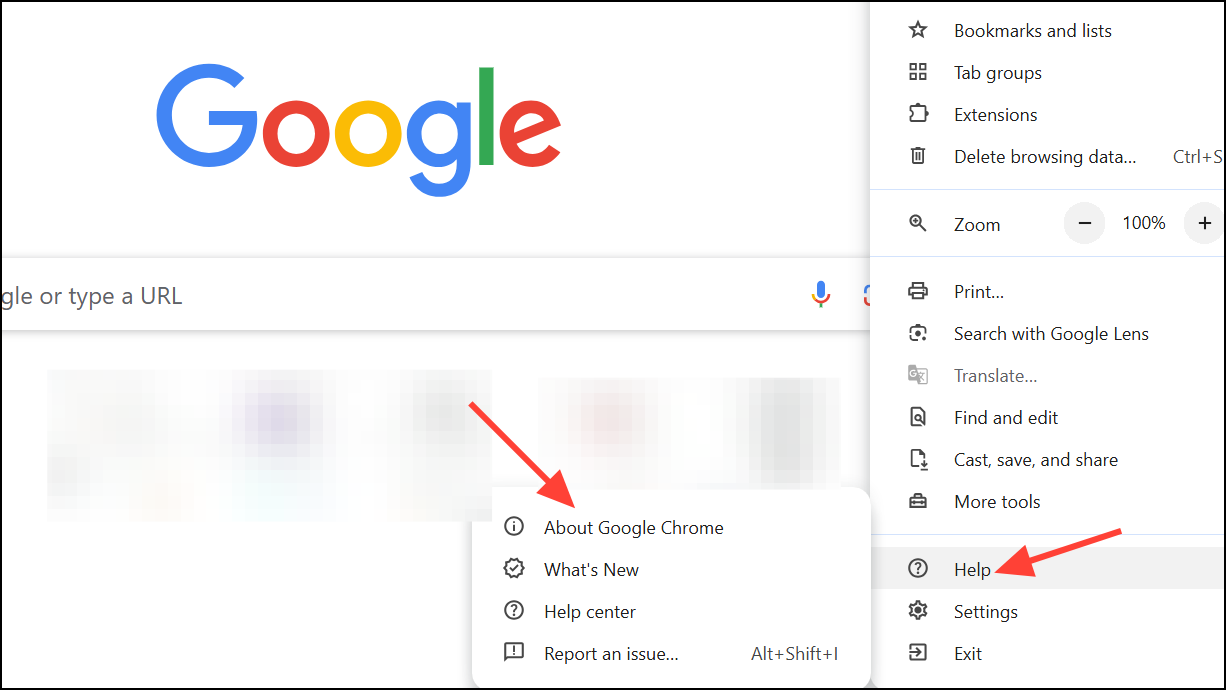
Step 1: Open the ⋮ menu, select Help, then click About Google Chrome.
Step 2: Chrome will automatically check for updates and install any available. Click Relaunch to apply the update.
Keeping Chrome up to date ensures you benefit from recent fixes and optimizations that can resolve slow performance.
Clear Cache, Cookies, and Browsing Data
Accumulated cache files, cookies, and browsing history can slow down Chrome by overloading its storage and processing resources. Clearing this data can restore browser speed, especially if you notice delays when loading websites or switching tabs.
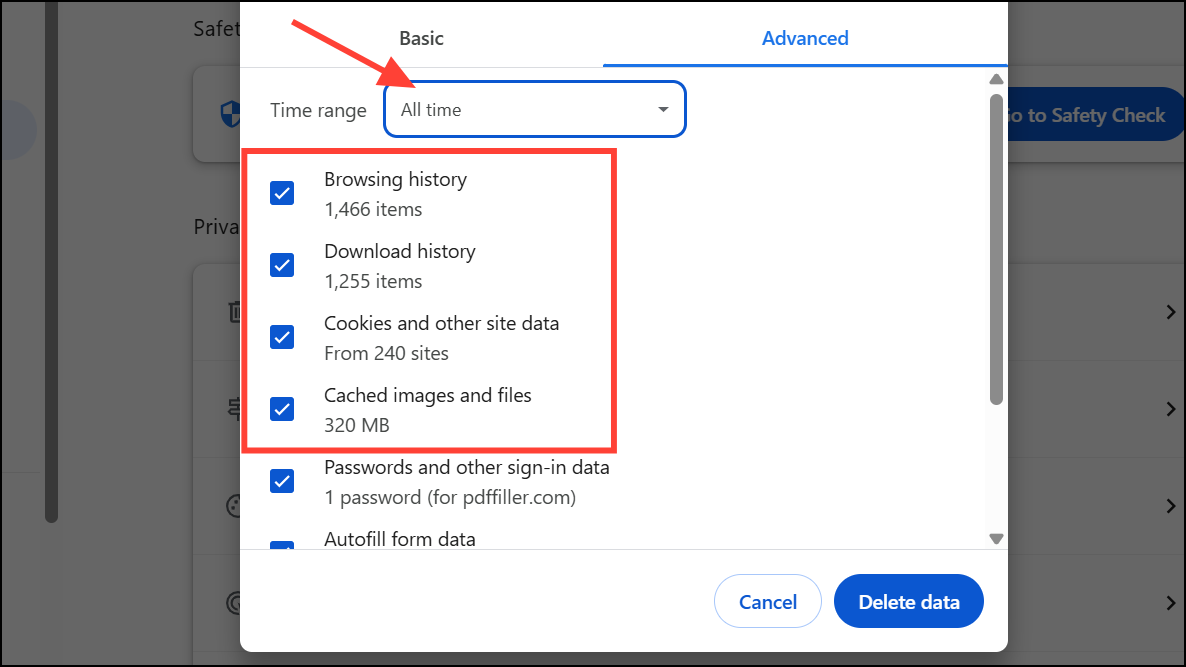
Step 1: Click the ⋮ menu, go to More Tools, then select Clear browsing data.

Step 2: In the dialog, choose All time for the time range. Check Cookies and other site data, Cached images and files, and Browsing history if you want a thorough cleanup.
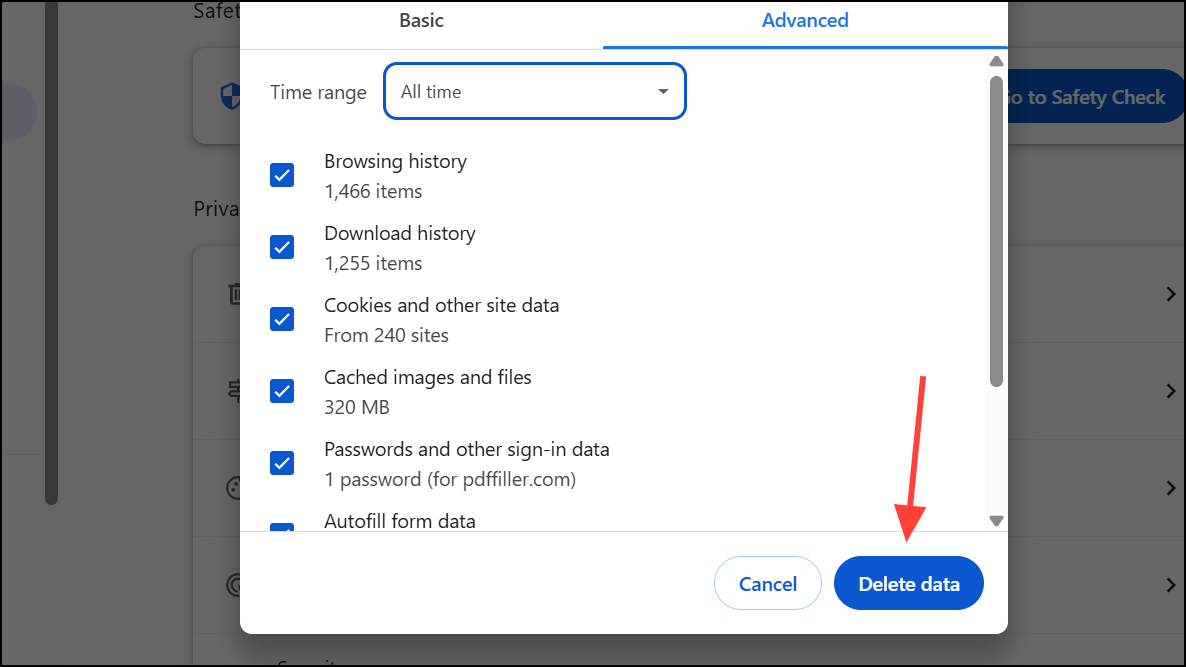
Step 3: Click Delete data, then restart Chrome.
This process can resolve issues caused by corrupted or excessive stored data.
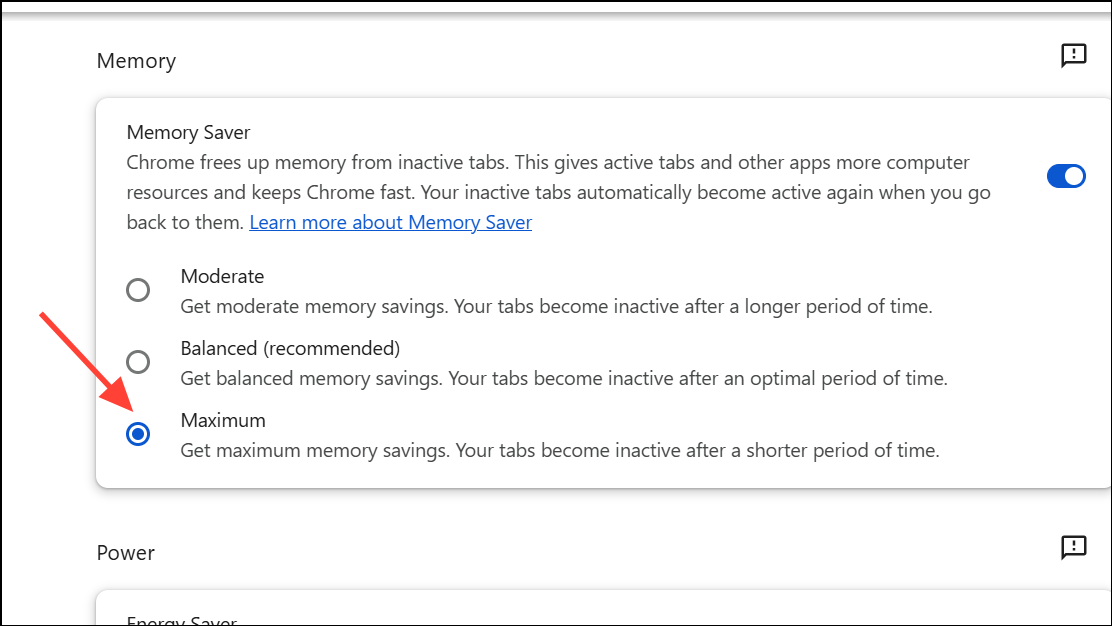
Adjust Chrome’s Performance and Preloading Settings
Chrome includes built-in performance controls that manage how it handles memory, tab activity, and page preloading. Adjusting these settings often results in immediate speed improvements, especially after recent browser updates that introduced new features like Memory Saver and tab efficiency modes.
Step 1: Open Chrome’s Settings, then select Performance from the sidebar.

Step 2: Set Memory Saver to Maximum to automatically free up resources from inactive tabs.
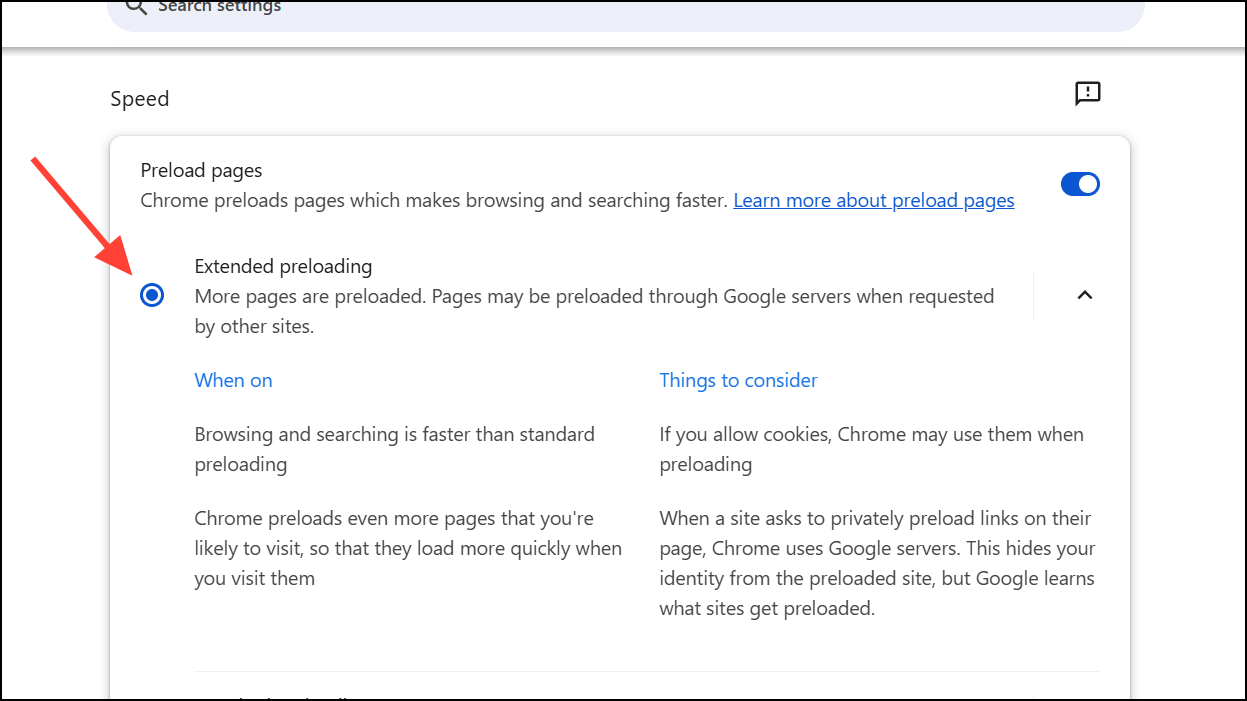
Step 3: In the Speed section, enable Preload pages and, if available, choose Extended preloading for faster page loading. Users have reported that switching from Standard to Extended preloading can reduce tab load times from minutes to seconds.
Some users have also experienced issues with Chrome’s efficiency mode being enforced by Windows. To check and adjust this, open Task Manager, right-click on Chrome processes, and disable efficiency mode if it is enabled.
Close Unused Tabs and Limit Active Sessions
Running dozens of open tabs or multiple browser sessions can overwhelm even high-spec computers, as each tab consumes memory and processing power. Chrome’s Task Manager (Shift + Esc) allows you to see which tabs and extensions use the most resources.
Step 1: Review your open tabs and close those you no longer need by clicking the X on each tab or using Ctrl + W (⌘ + W on Mac).
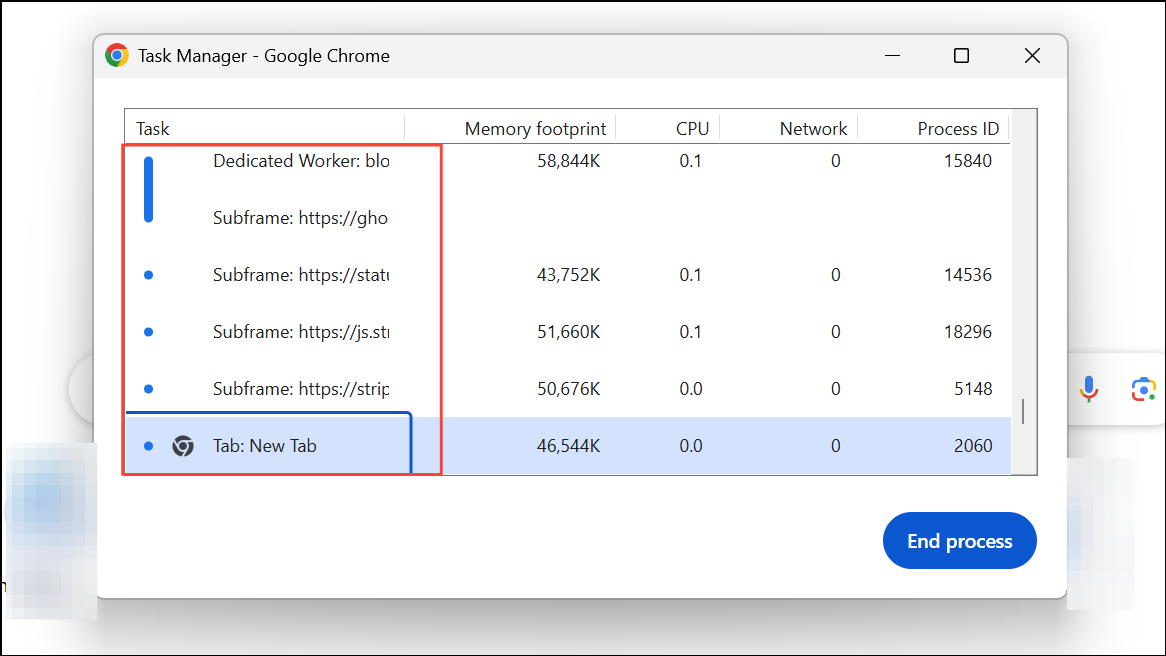
Step 2: In Task Manager, sort by memory or CPU usage and close the highest-consuming tabs or extensions.
Reducing tab clutter directly improves Chrome’s responsiveness and speeds up loading times.
Reset Chrome to Default Settings
Persistent slowdowns after trying the above methods may indicate corrupted settings or profiles. Resetting Chrome restores it to its original state, removing all extensions, custom settings, and temporary data, but retaining bookmarks and saved passwords.
Step 1: In Chrome’s address bar, type chrome://settings/reset and press Enter.
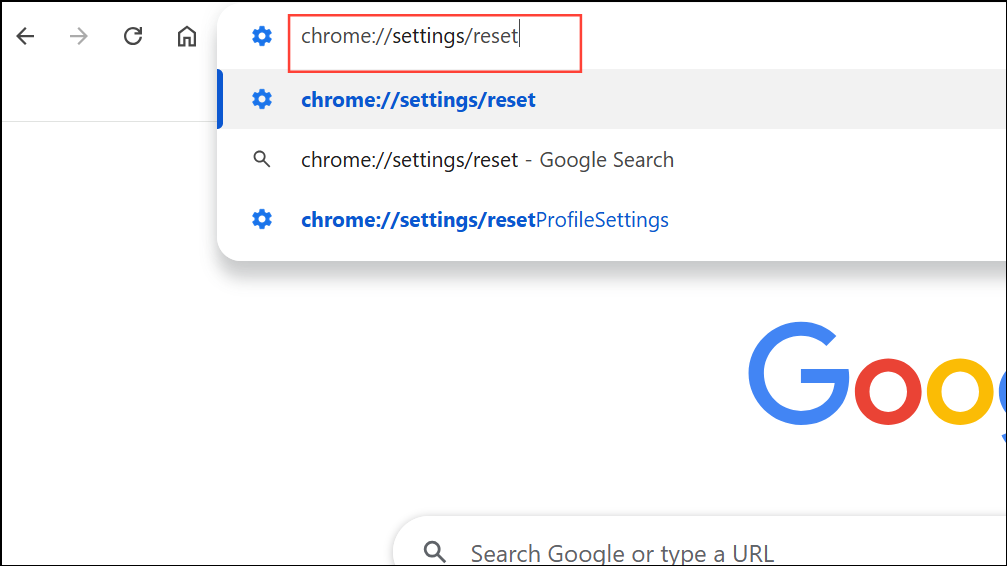
Step 2: Click Restore settings to their original defaults and then Reset settings in the confirmation dialog.
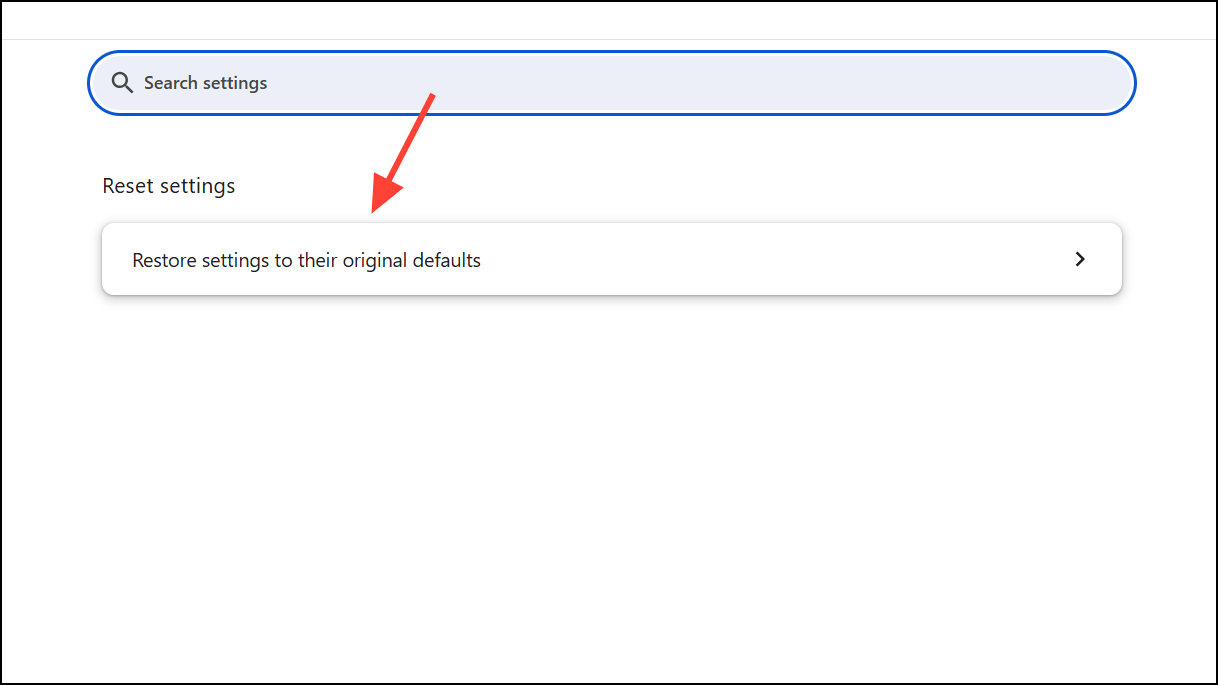
After the reset, sign in to your Google account if desired and reinstall only essential extensions, testing performance before adding more.
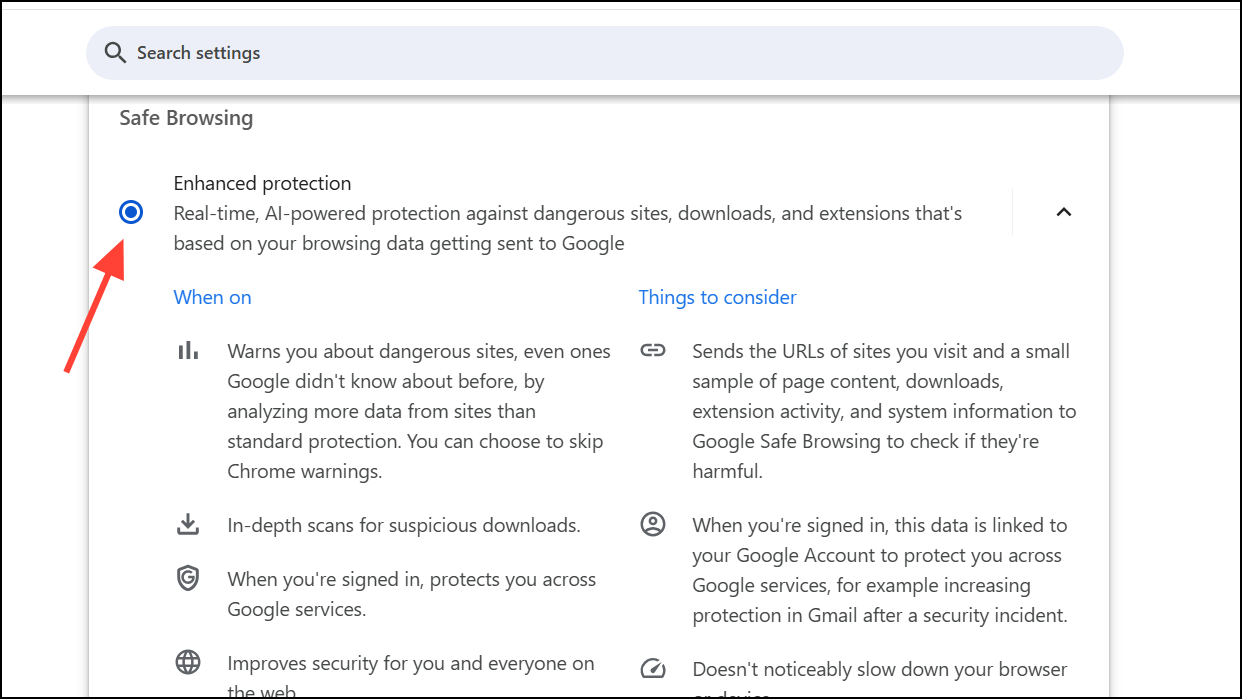
Check for Malware and System Issues
Malicious software or unwanted programs can hijack browser resources, causing Chrome to lag or freeze. While Chrome’s built-in Cleanup Tool is no longer available, running a reputable anti-malware scan remains an effective way to detect and remove threats.
Step 1: Use a trusted anti-malware application to scan your system for viruses, adware, or suspicious programs.
Step 2: Remove any threats found, then restart your computer and check Chrome’s performance.
For ongoing protection, enable Enhanced Protection in Chrome’s Privacy and Security settings to increase real-time threat detection.
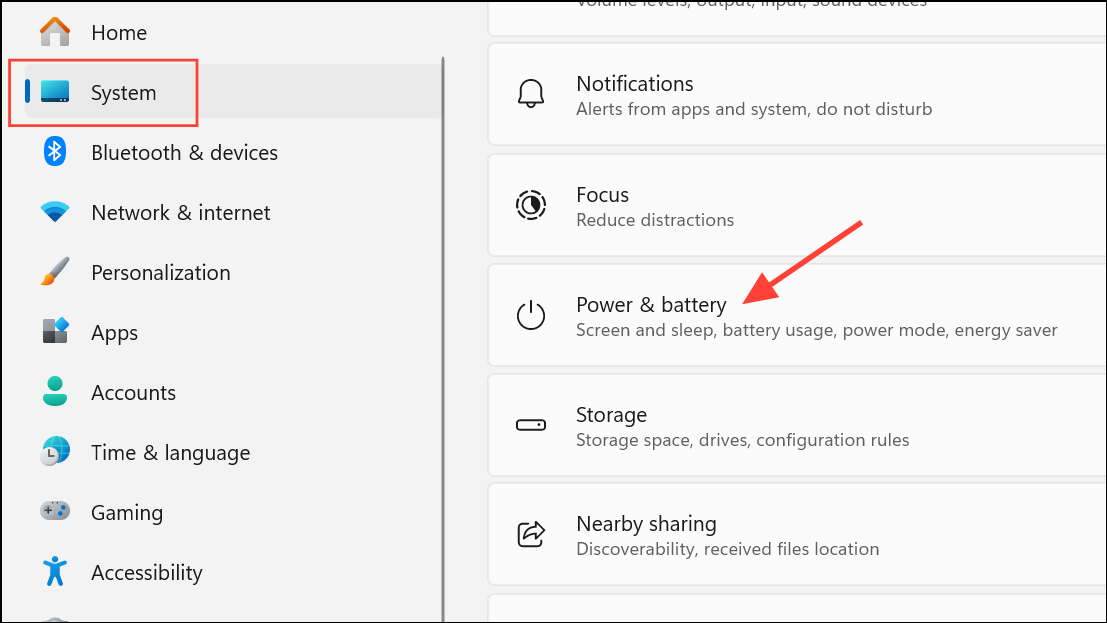
Optimize System Power and Network Settings
Energy-saving modes on laptops can throttle system performance, slowing down Chrome and other applications. Switching to a high-performance power plan can resolve these issues.
Step 1: On Windows, open Settings, go to System > Power & Battery, and set Power Mode to Best Performance.
Step 2: If Chrome remains slow, check your network connection using an online speed test. Low internet speeds or poor DNS routing can also affect browser responsiveness.
Consider switching to a public DNS provider (such as Google DNS or Cloudflare) if you suspect DNS issues, or connect through a VPN with optimized routing for further troubleshooting.
Following these targeted solutions addresses the most common and impactful causes of slow performance in Google Chrome. Regularly reviewing extensions, keeping Chrome updated, and managing settings can keep your browser running quickly and reliably.