
"Waiting for cache" messages in Google Chrome often signal that the browser is struggling to retrieve or write cached data, resulting in slow-loading pages, frequent freezes, or even complete browser lockups. This issue is particularly common on Windows systems with SSD storage, but it can also be triggered by corrupted browser data, problematic extensions, or hardware conflicts. Addressing the underlying causes not only restores Chrome’s performance but also prevents broader system slowdowns.
Clear Chrome Cache and Browsing Data
Step 1: Open Google Chrome and press Ctrl + Shift + Delete to bring up the Clear Browsing Data dialog. This shortcut works on any Chrome tab and immediately takes you to the relevant settings.
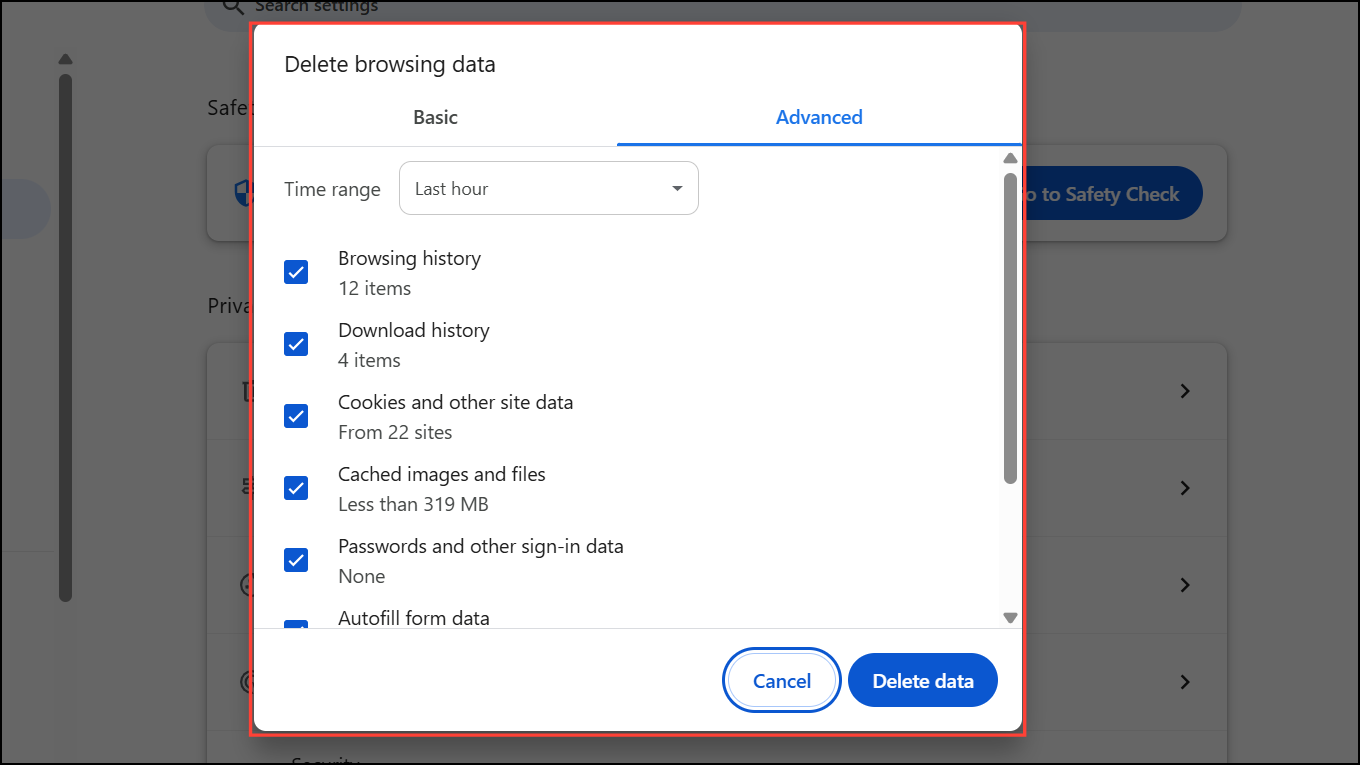
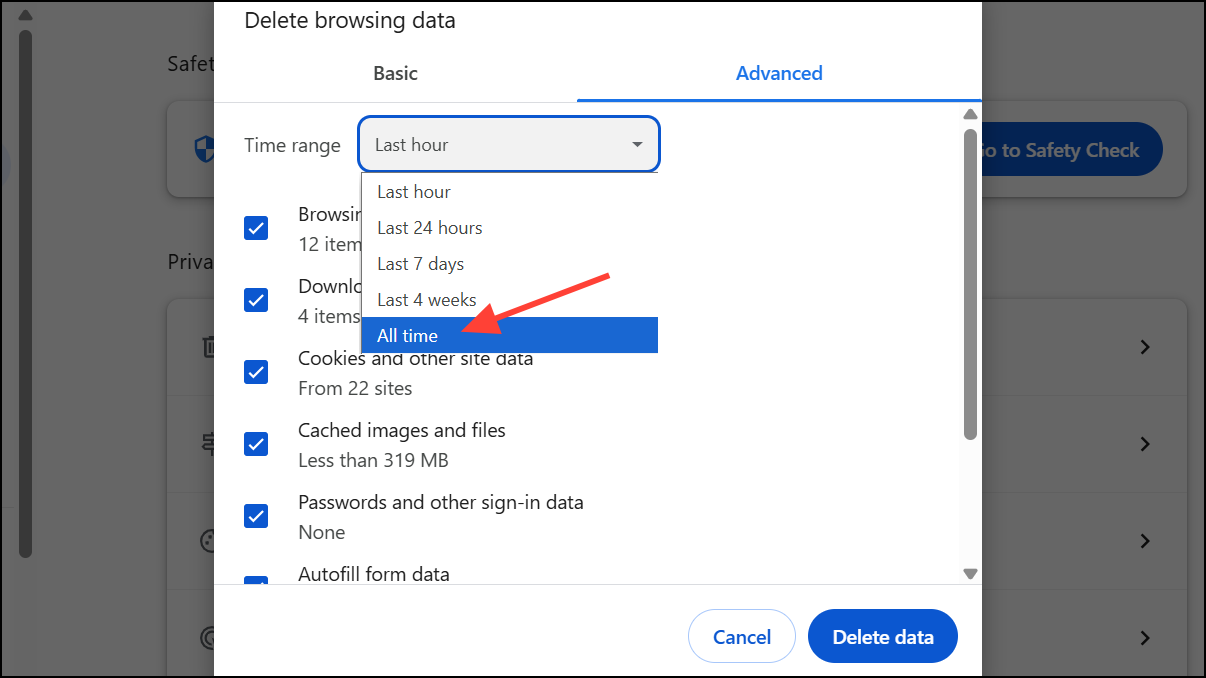
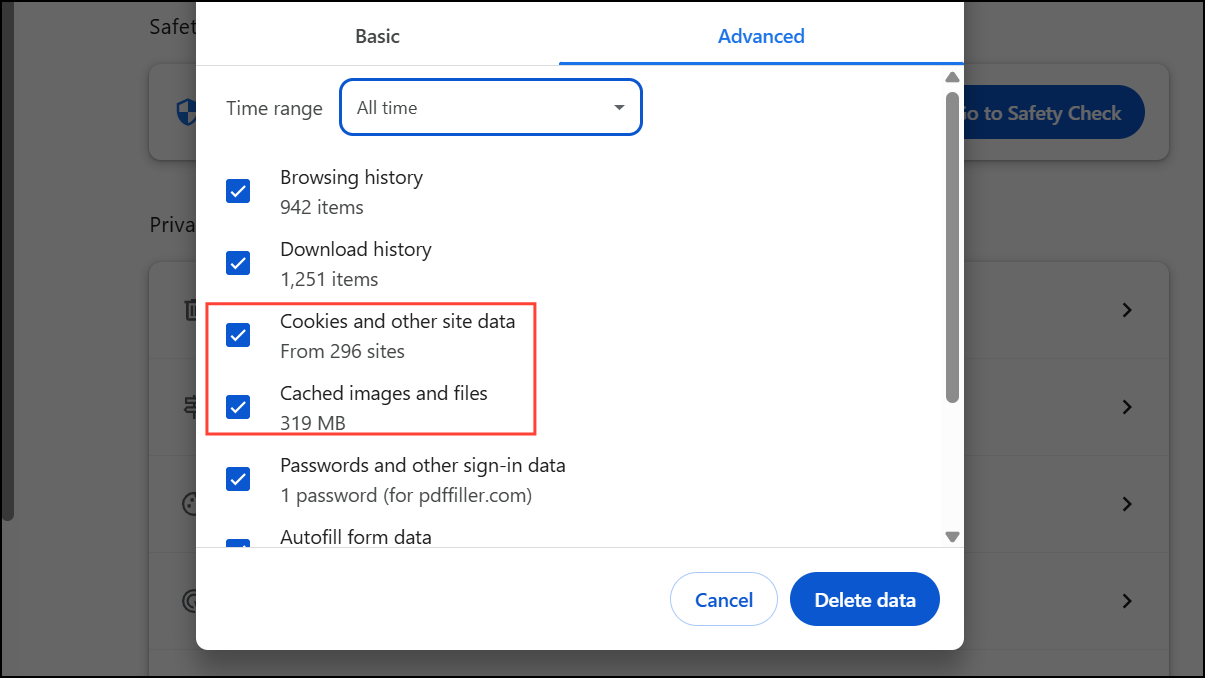
Step 2: In the dialog, select All time from the Time range dropdown. This ensures that all cached files and cookies, regardless of age, are removed.
Step 3: Check the boxes for Cached images and files and Cookies and other site data. These are the most likely culprits for cache-related delays.
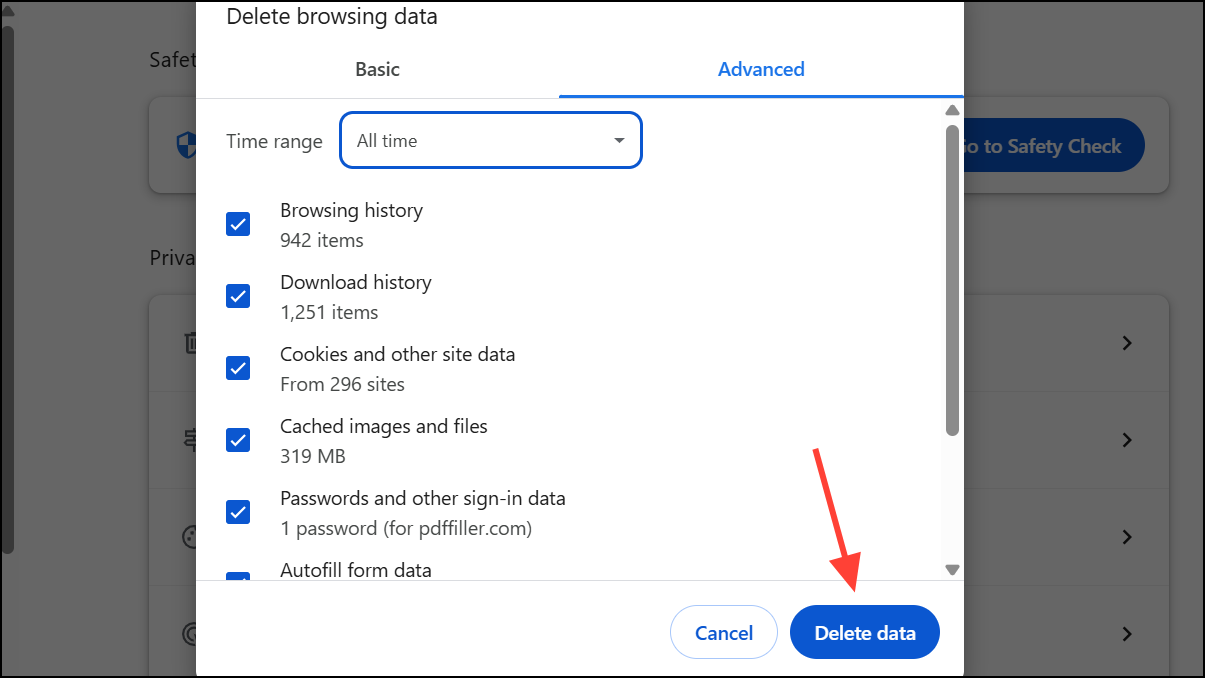
Step 4: Click Delete data. Wait for Chrome to finish deleting the files, then restart the browser. Removing outdated or corrupted cache files forces Chrome to rebuild its cache, often eliminating the waiting error and restoring normal page load speeds.
Disable Hardware Acceleration
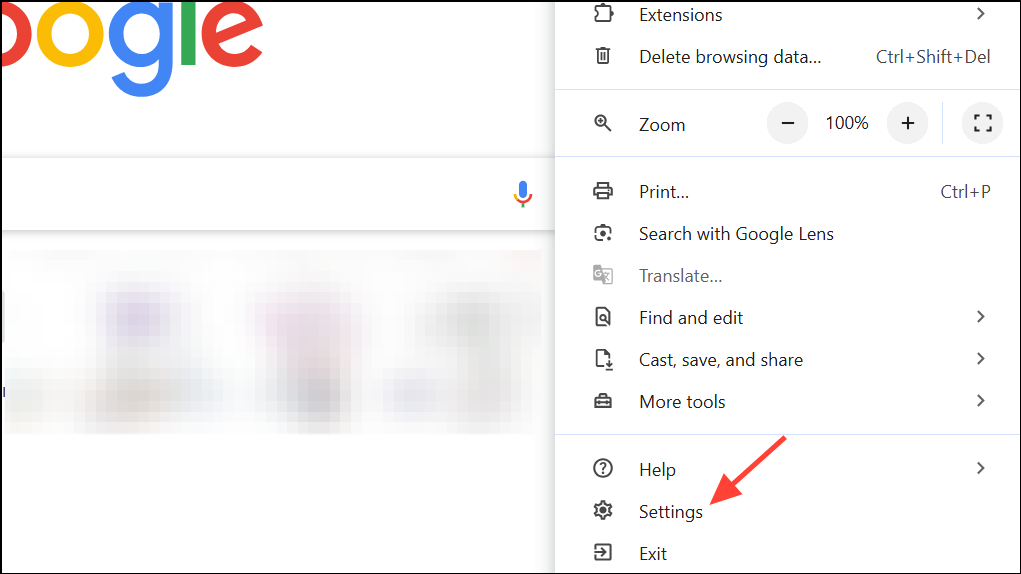
Step 1: Click the three dots in the top-right corner of Chrome, then go to Settings.
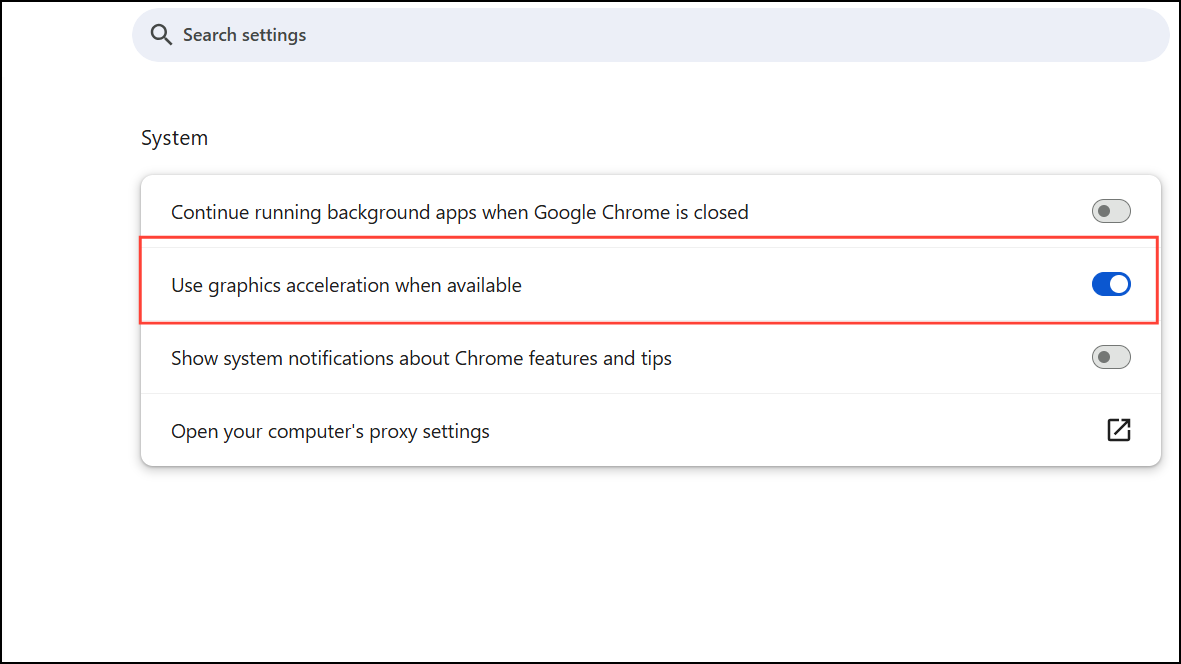
Step 2: Scroll to the System section. Locate the option labeled Use graphics acceleration when available.
Step 3: Toggle this setting off. Hardware acceleration can sometimes conflict with graphics drivers or system resources, especially on certain hardware configurations, causing Chrome to stall while accessing cache data.
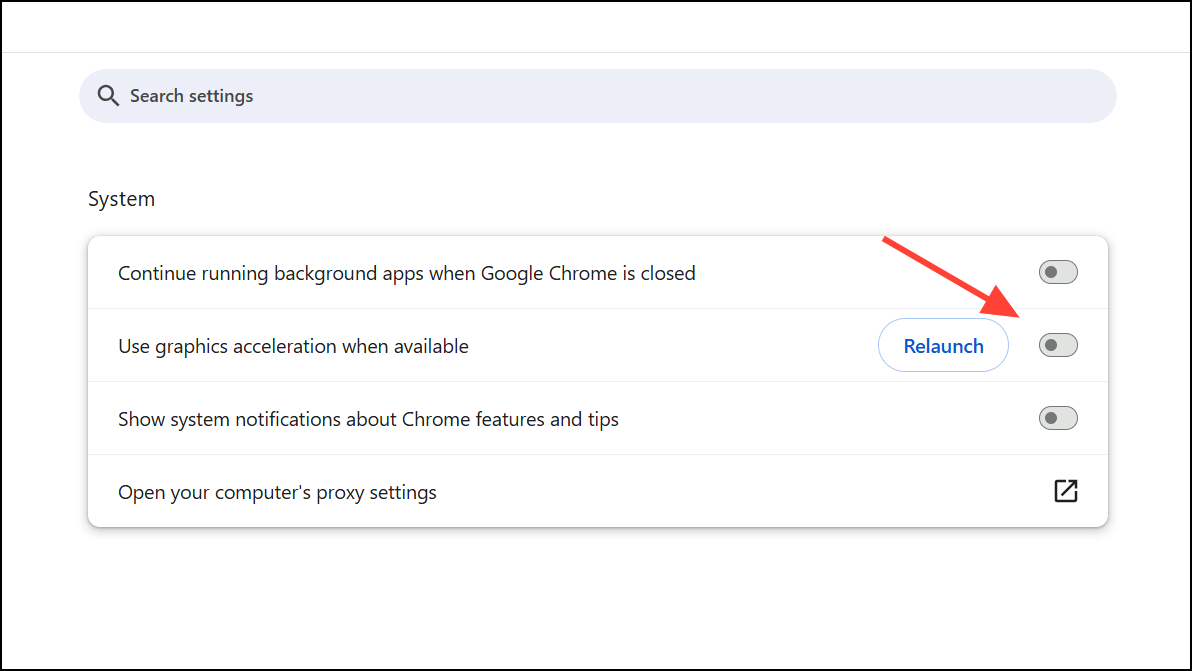
Step 4: Restart Chrome to apply the change. Disabling hardware acceleration can resolve freezes or delays related to cache access.
Create a New Chrome User Profile
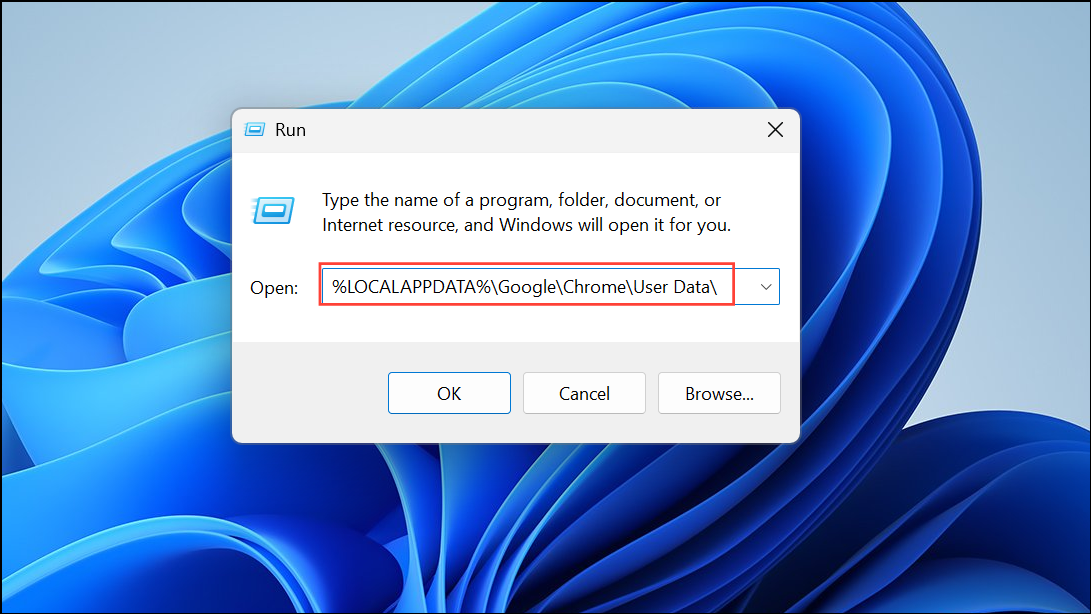
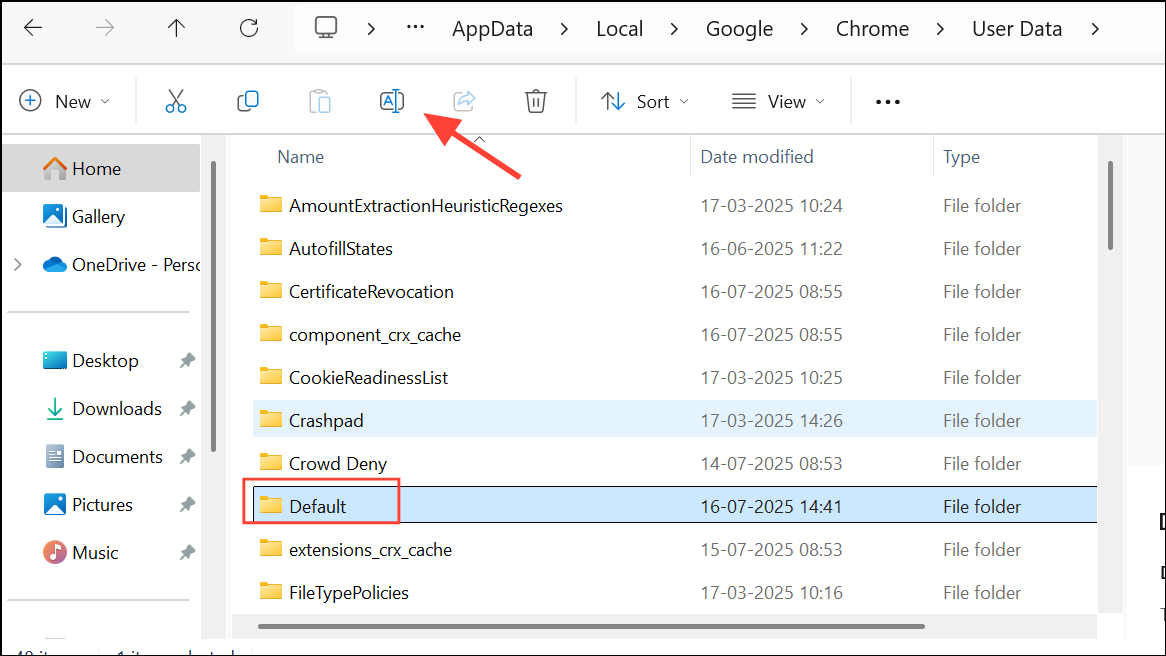
Step 1: Fully close Chrome. Press Windows + R, type %LOCALAPPDATA%\Google\Chrome\User Data\, and press Enter to open the Chrome user data folder.
Step 2: Locate the folder named Default and rename it to Default_backup. This preserves your original data while allowing Chrome to generate a fresh user profile.
Step 3: Reopen Chrome. The browser will automatically create a new default profile. Sign in with your Google account to resync bookmarks and settings as needed. A new profile eliminates issues stemming from corrupt user data that can interfere with cache operations.
Disable Write Caching on SSDs (Advanced)
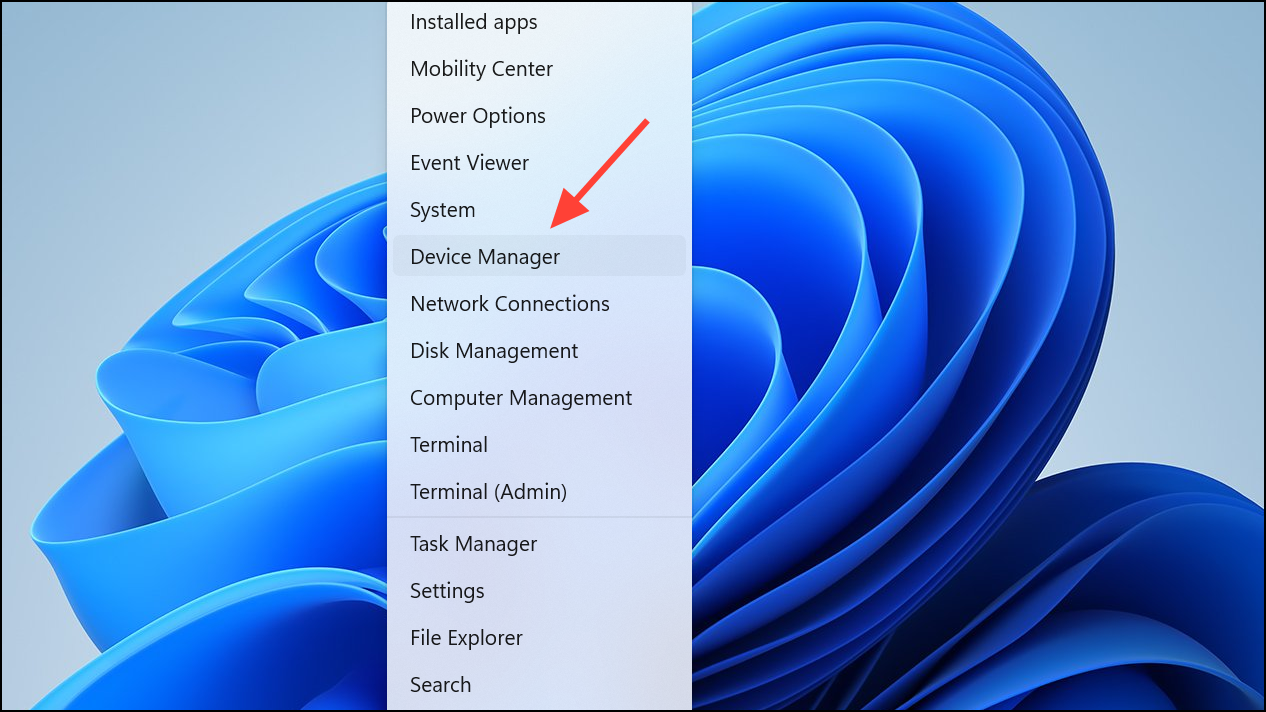
Step 1: Press Windows + X and select Device Manager.
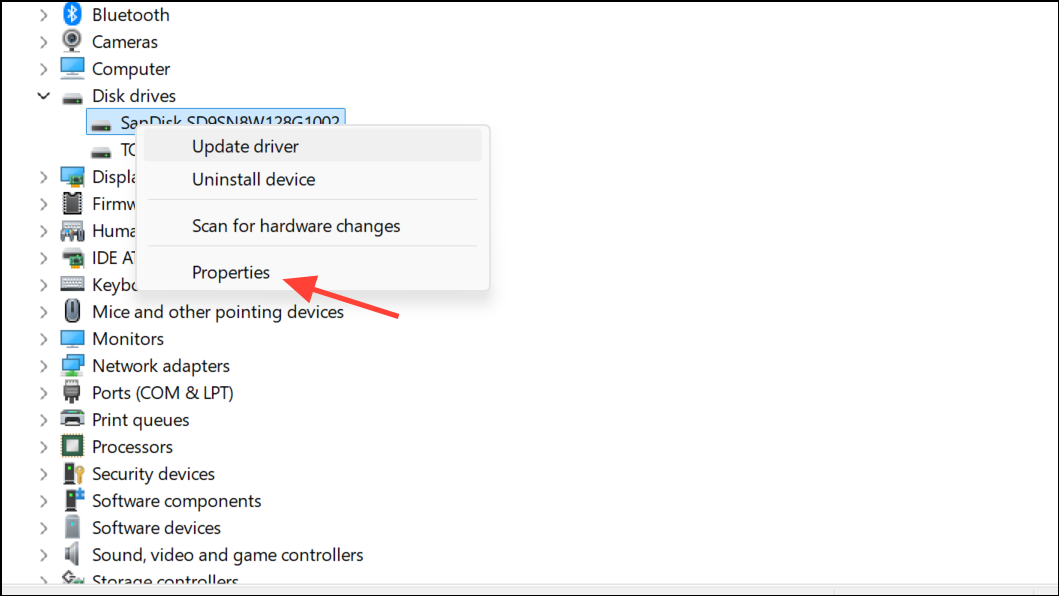
Step 2: Expand the Disk drives section. Right-click your SSD and choose Properties.
Step 3: Go to the Policies tab. Uncheck Enable write caching on the device and click OK.
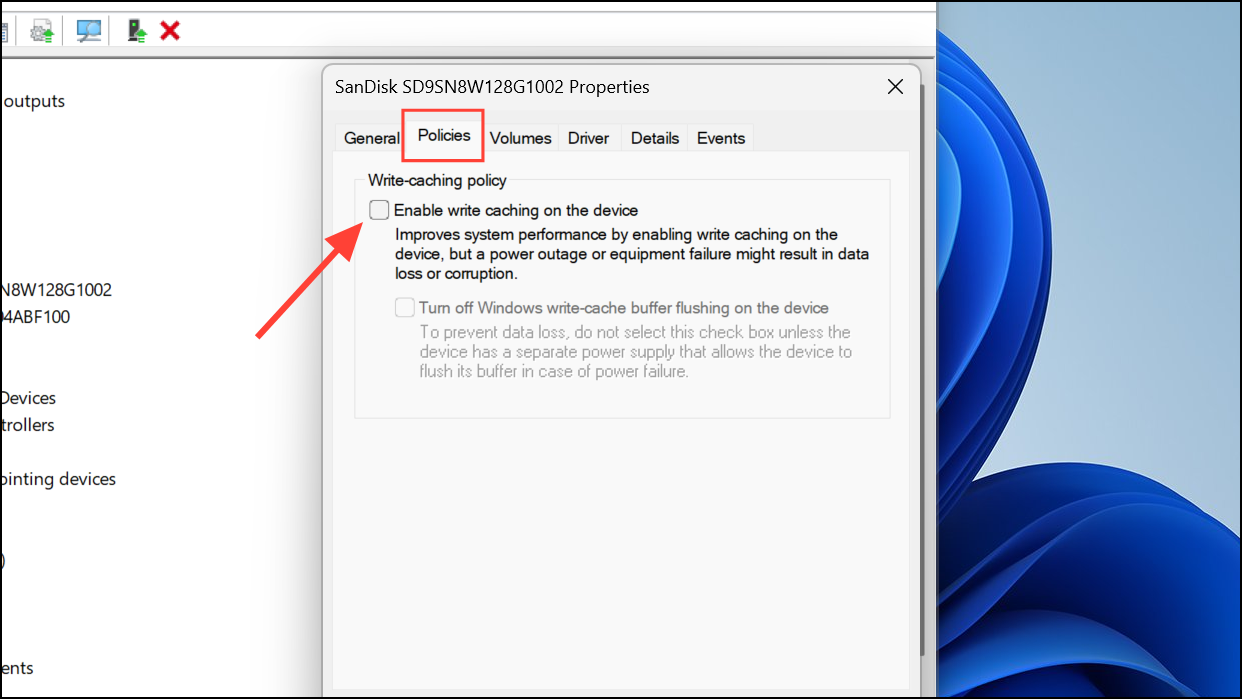
Step 4: Restart your computer. Disabling write caching can sometimes resolve cache-related Chrome errors, especially on systems where SSD write operations cause intermittent access issues. Note that this may slightly reduce disk performance; only use this step if other solutions fail or if you suspect storage-related problems.
Turn Off Chrome Extensions
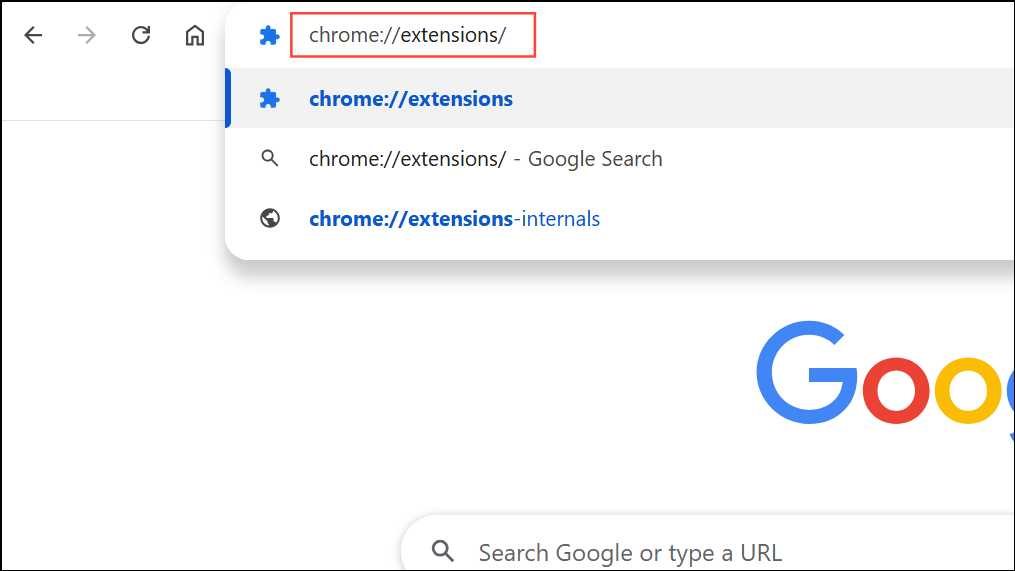
Step 1: In Chrome, type chrome://extensions/ into the address bar and press Enter.
Step 2: Toggle off all extensions by clicking the switch next to each one. Extensions that manage content, block ads, or interact with cache can disrupt normal browser operations.
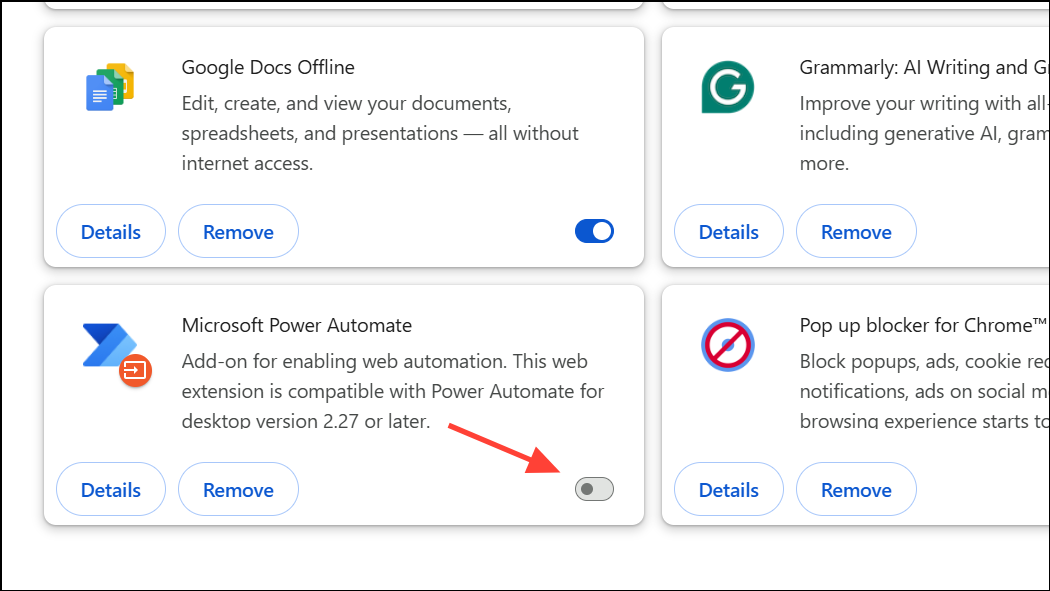
Step 3: Restart Chrome and observe if the waiting for cache issue persists. If the problem is resolved, re-enable extensions one at a time to identify the problematic add-on.
Update Google Chrome
Step 1: Click the three dots menu, go to Help, and select About Google Chrome.
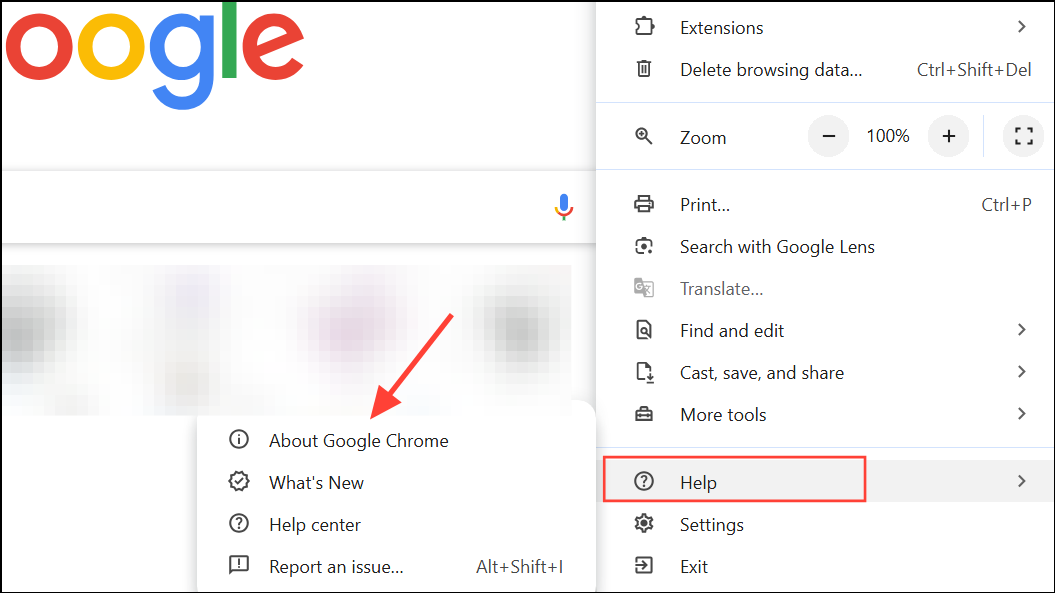
Step 2: Chrome will automatically check for and install updates. If an update is available, allow it to finish and then click Relaunch.

Running the latest Chrome version ensures that you benefit from recent bug fixes and performance improvements, some of which specifically address cache handling and browser stability.
Reset Chrome Settings to Default
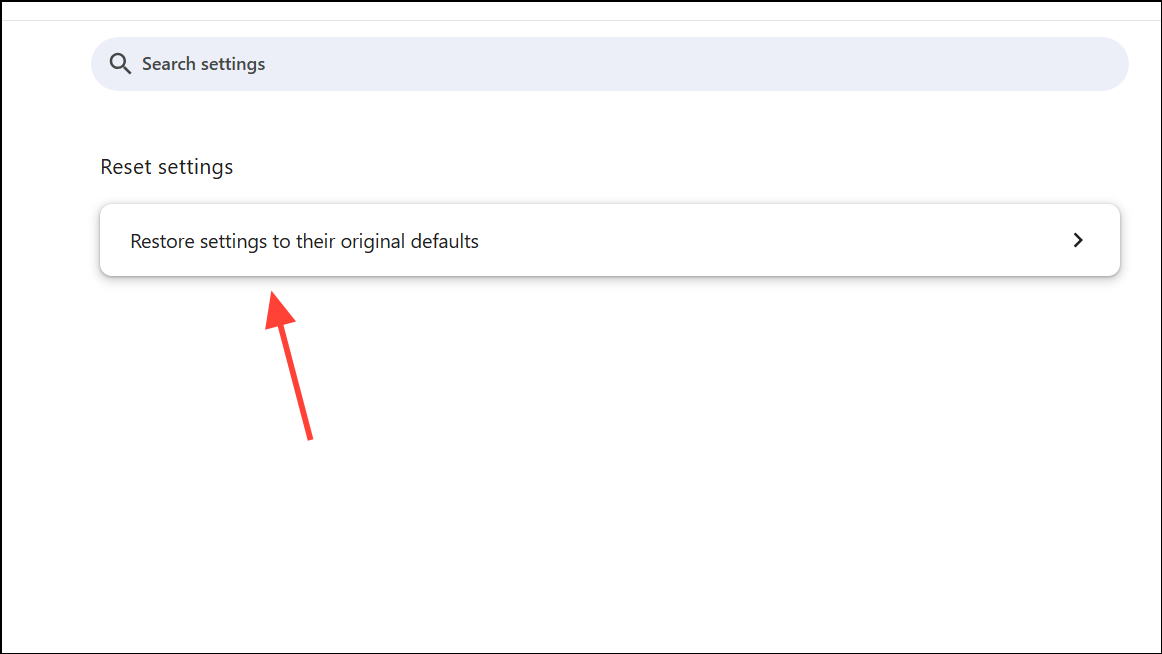
Step 1: Open Settings in Chrome, then scroll to Reset settings.
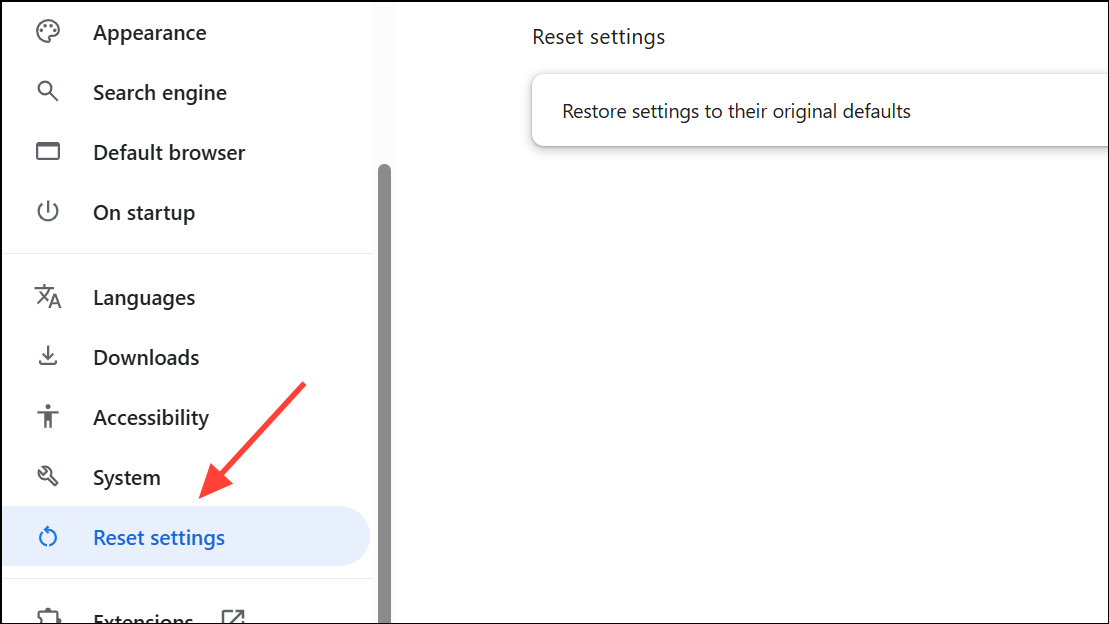
Step 2: Click Restore settings to their original defaults and confirm by clicking Reset settings. This will revert Chrome to its original configuration, disabling extensions and undoing customizations, but your bookmarks and saved passwords will remain intact.
Resetting can resolve persistent misconfigurations that interfere with cache access or browser performance.
Run Windows Disk Cleanup
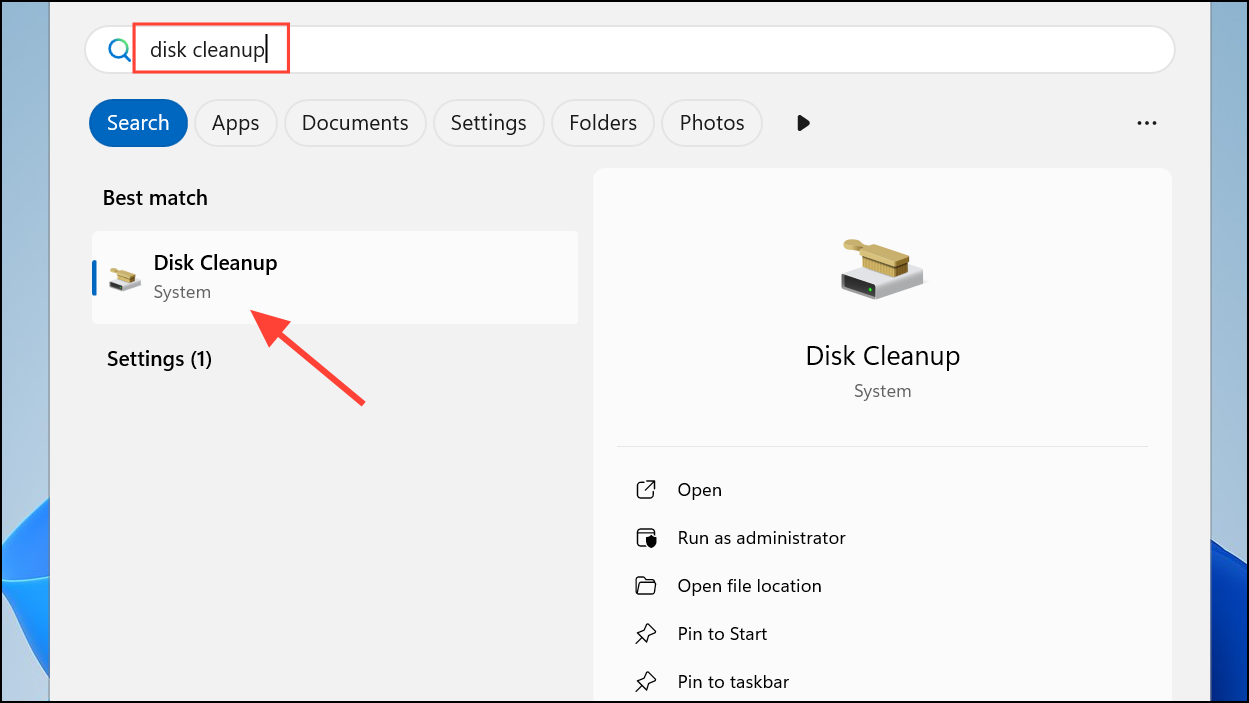
Step 1: Press Windows + S and type Disk Cleanup. Select the app from the search results.
Step 2: Choose your system drive (typically C:), then check Temporary files, Thumbnails, and System created Windows Error Reporting.

Step 3: Click OK, then Delete Files. Cleaning up disk space removes system-level temporary files that could interfere with Chrome’s ability to read or write cache data.
Reinstall Google Chrome
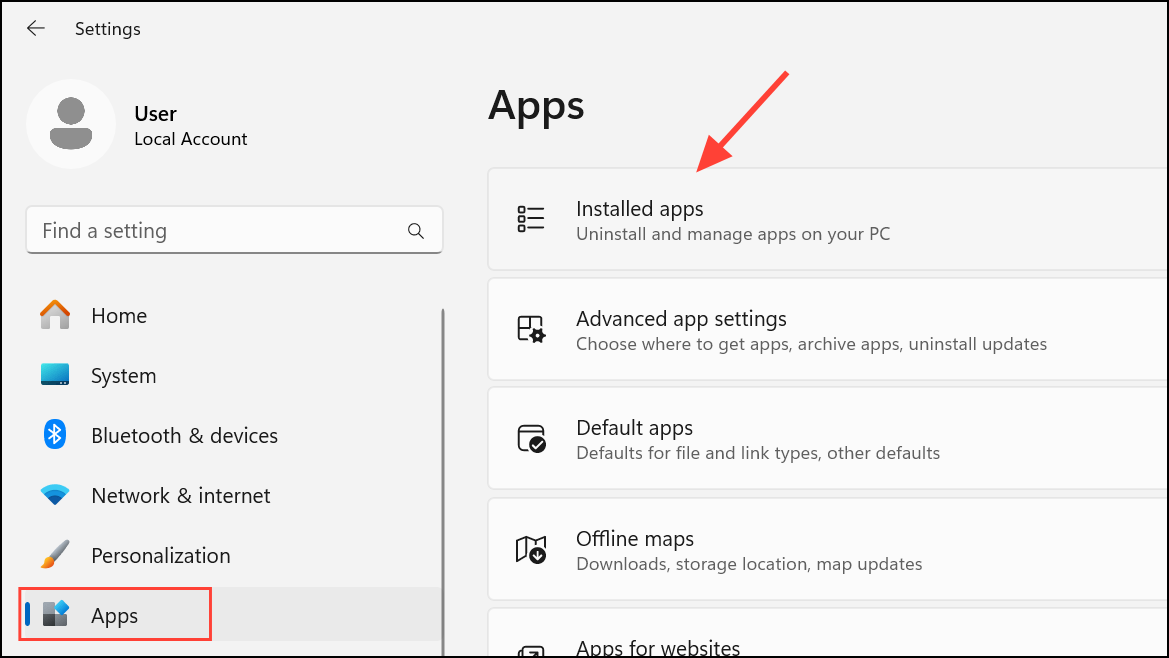
Step 1: Open Settings via Windows + I, go to Installed apps.
Step 2: Find Google Chrome, and click Uninstall.

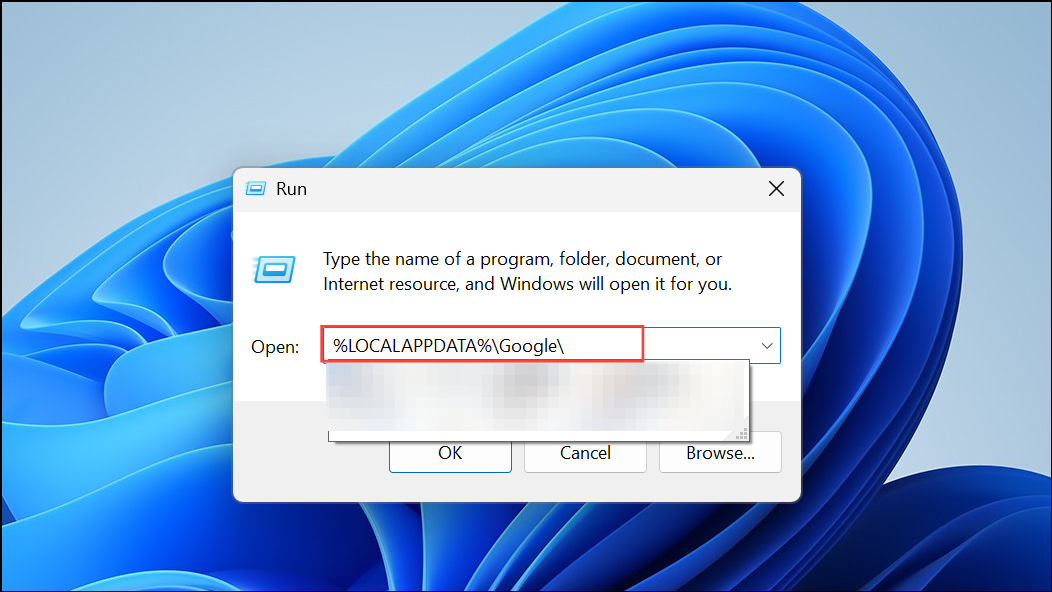
Step 3: After uninstalling, press Windows + R, type %LOCALAPPDATA%\Google\, and delete the Chrome folder to remove all leftover data.
Step 4: Download the latest Chrome installer from the official website and reinstall the browser. Sign in with your Google account to restore your bookmarks and settings.
Reinstalling Chrome ensures you have a clean, up-to-date installation free from corrupted files or conflicting settings.
Addressing Chrome’s "waiting for cache" problem with these targeted steps restores fast, reliable browsing and prevents disruptive freezes or crashes on Windows systems.