
If your Windows 11 PC keeps dropping its Wi-Fi connection, it could be due to system glitches, outdated network drivers, or incorrect power settings. Fortunately, you can try several methods to resolve this issue and get your internet connection stable again. Let's explore some effective solutions.
Update your network adapter drivers
Outdated or faulty network adapter drivers can cause connectivity problems. Updating them might fix the issue.
- Right-click the Start button and select Device Manager.

- In Device Manager, expand the Network adapters section.
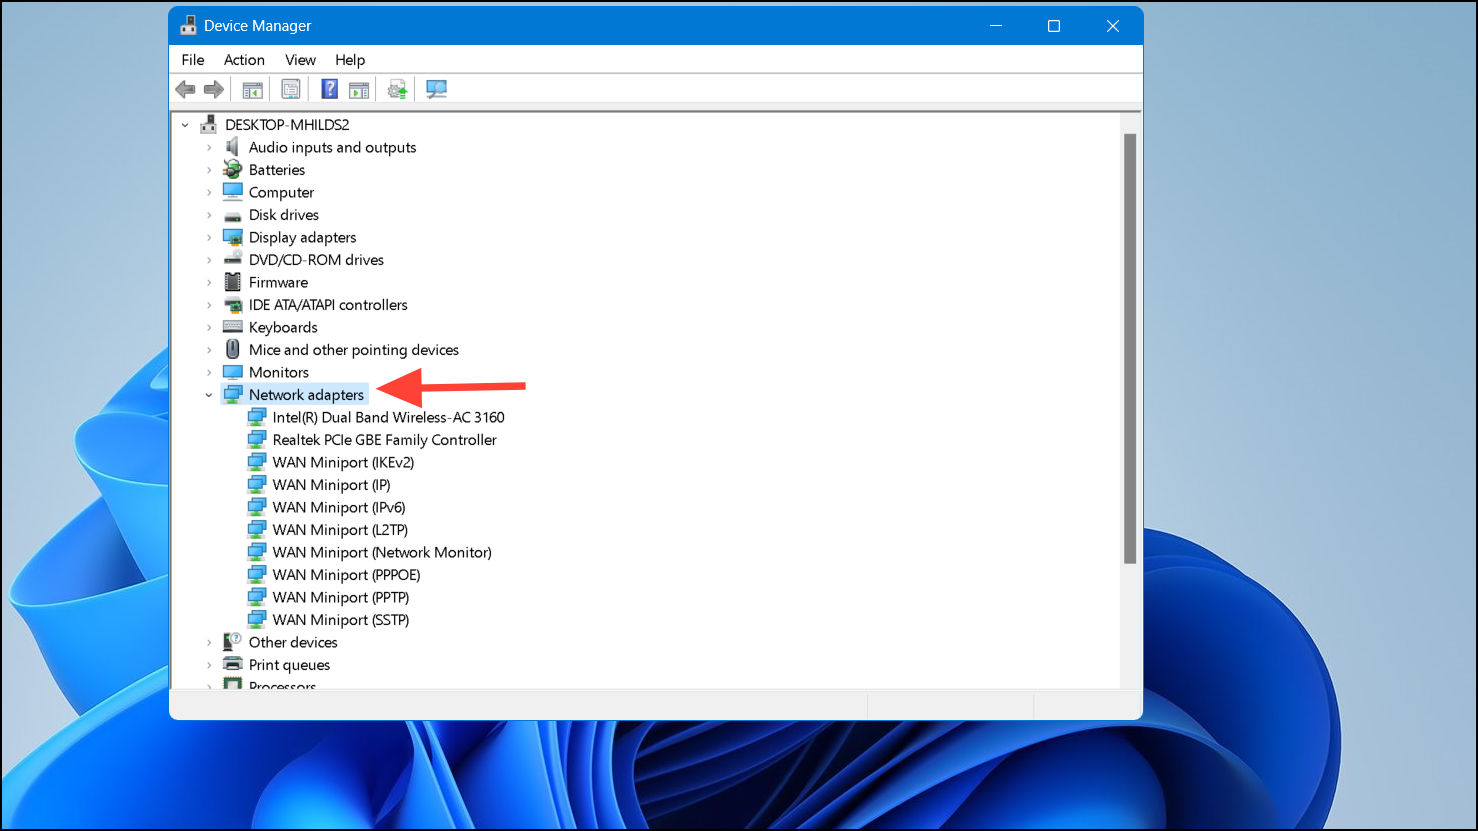
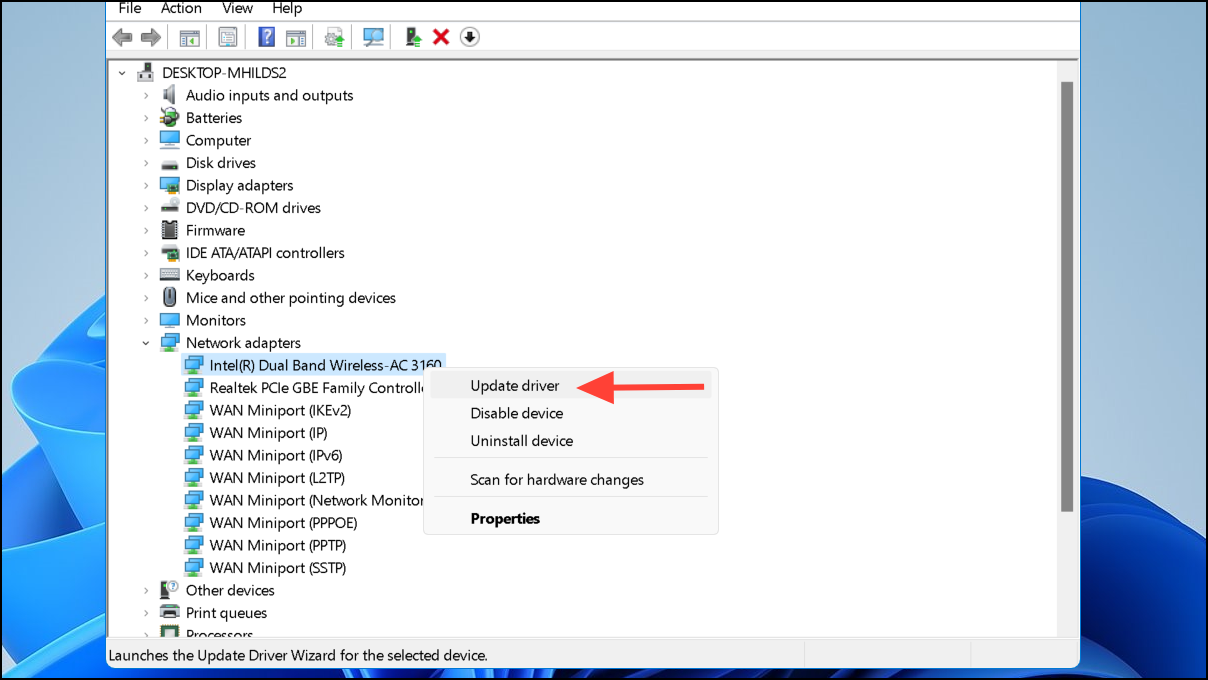
- Right-click your wireless adapter and choose Update driver.
- Select Search automatically for drivers.
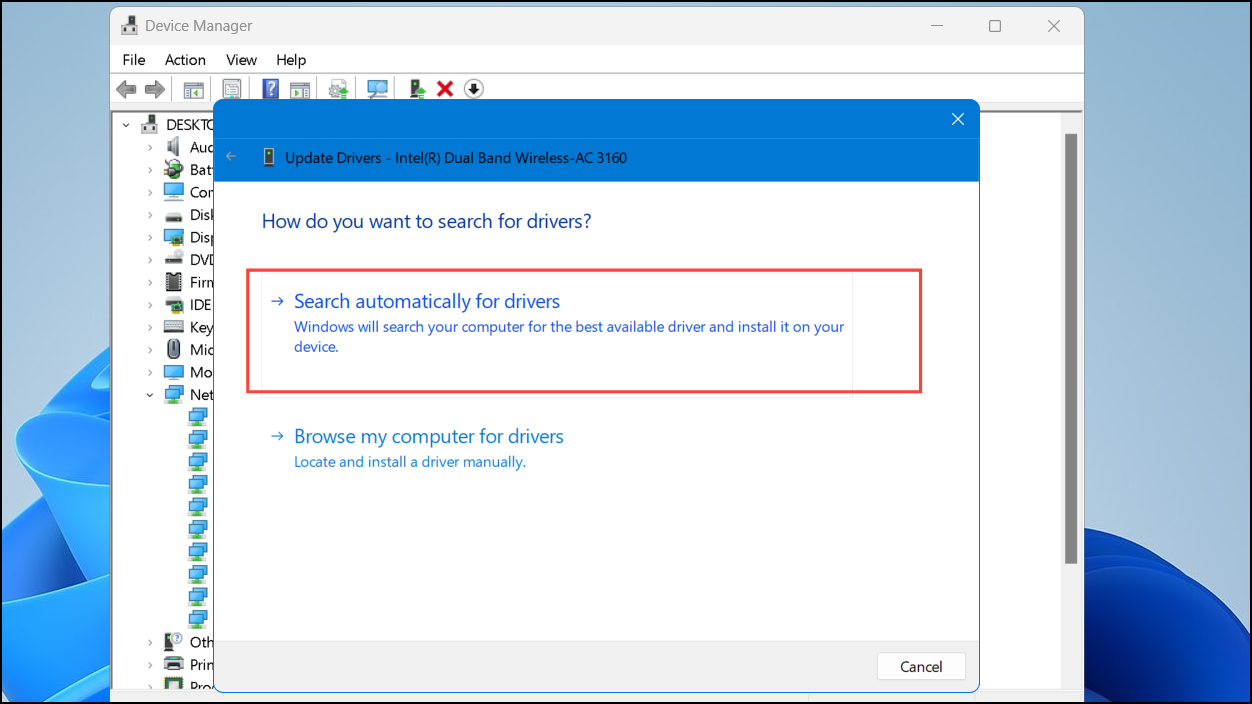
- Windows will look for available driver updates and install them. You may need to restart your computer once the process is complete.
Reinstall network adapter drivers
If updating the drivers doesn't help, reinstalling them might resolve any underlying issues.
- Open Device Manager and expand Network adapters as before.
- Right-click your wireless adapter and select Uninstall device.
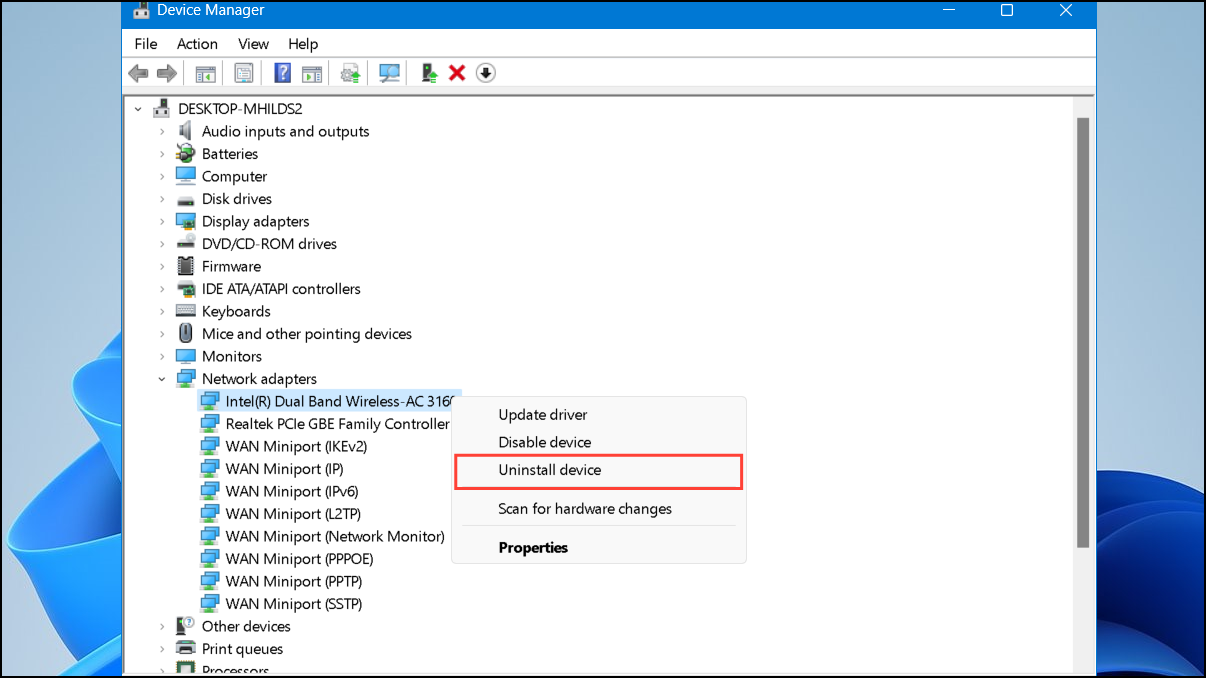
- Check the box for Attempt to remove the driver for this device and click Uninstall.
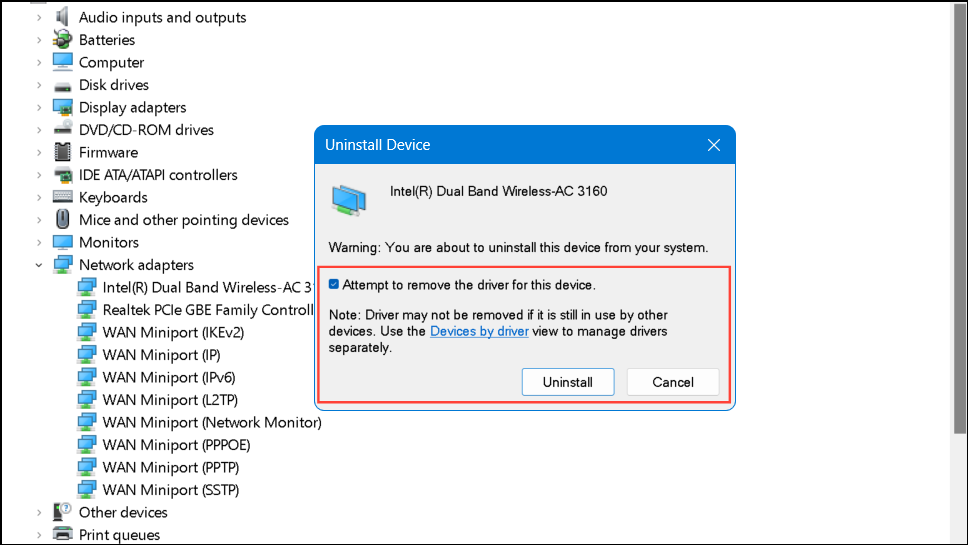
- Restart your PC. Windows will automatically reinstall the correct drivers during the reboot.
Reset network settings
Resetting your network settings can clear underlying issues that might be causing disconnections.
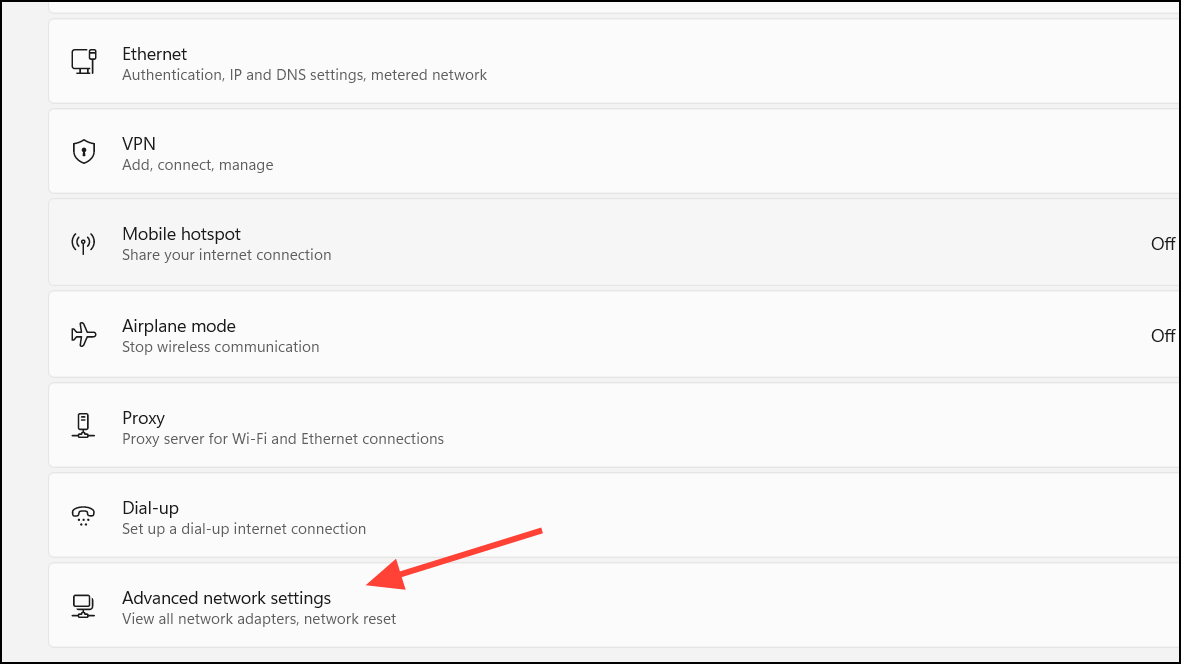
- Press
Win + Ito open Settings and navigate to Network & Internet. - Scroll down and click on Advanced network settings.
- Click Network reset at the bottom.
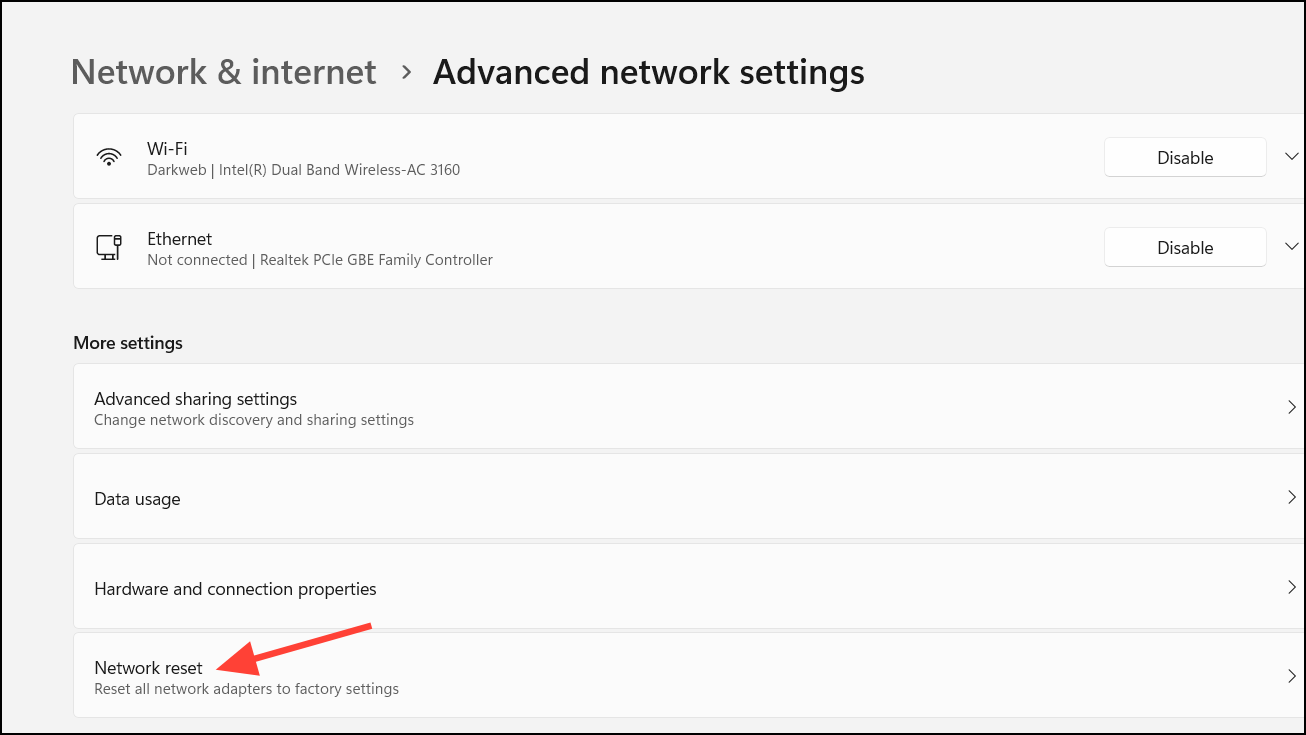
- Click Reset now and confirm. Your PC will restart, and you'll need to reconnect to your Wi-Fi network afterward.
Reset the TCP/IP stack
Resetting the TCP/IP stack can help fix network configuration issues.
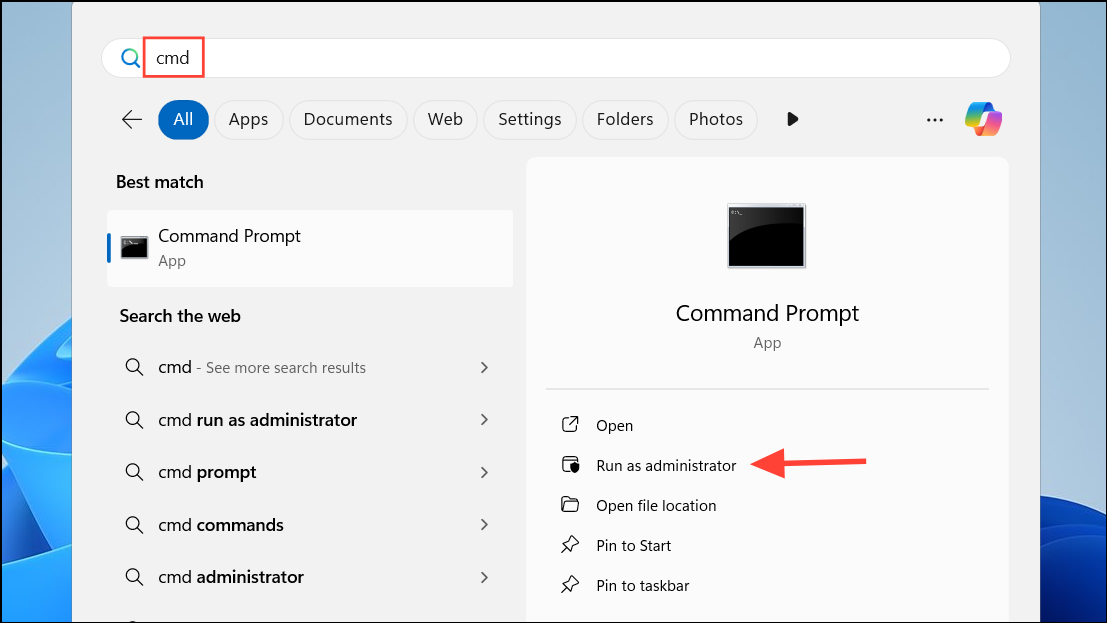
- Press
Win + Xand select Windows Terminal (Admin) or Command Prompt (Admin).
- Type
ipconfig /flushdnsand press Enter.
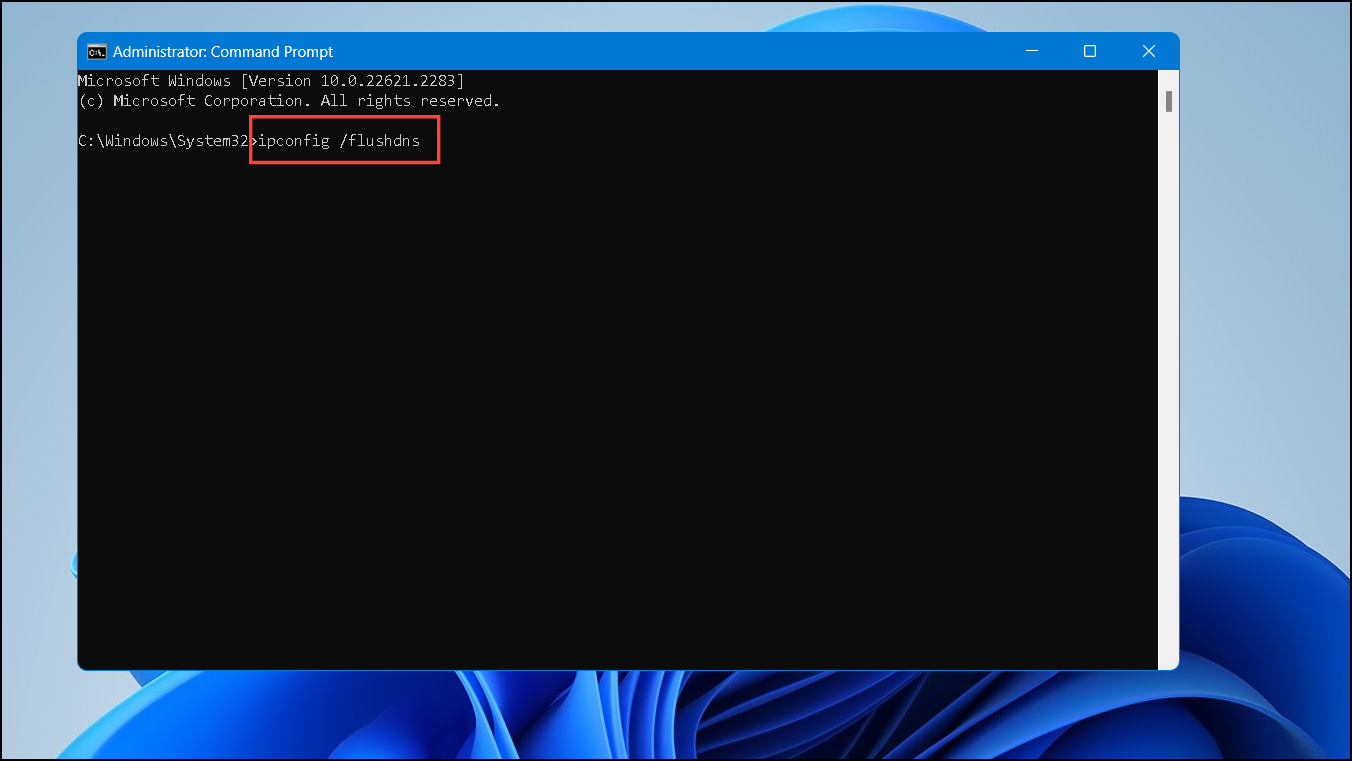
- Execute the following commands one by one, pressing Enter after each:
netsh winsock reset catalog
netsh int ip reset- Close the terminal and restart your computer.
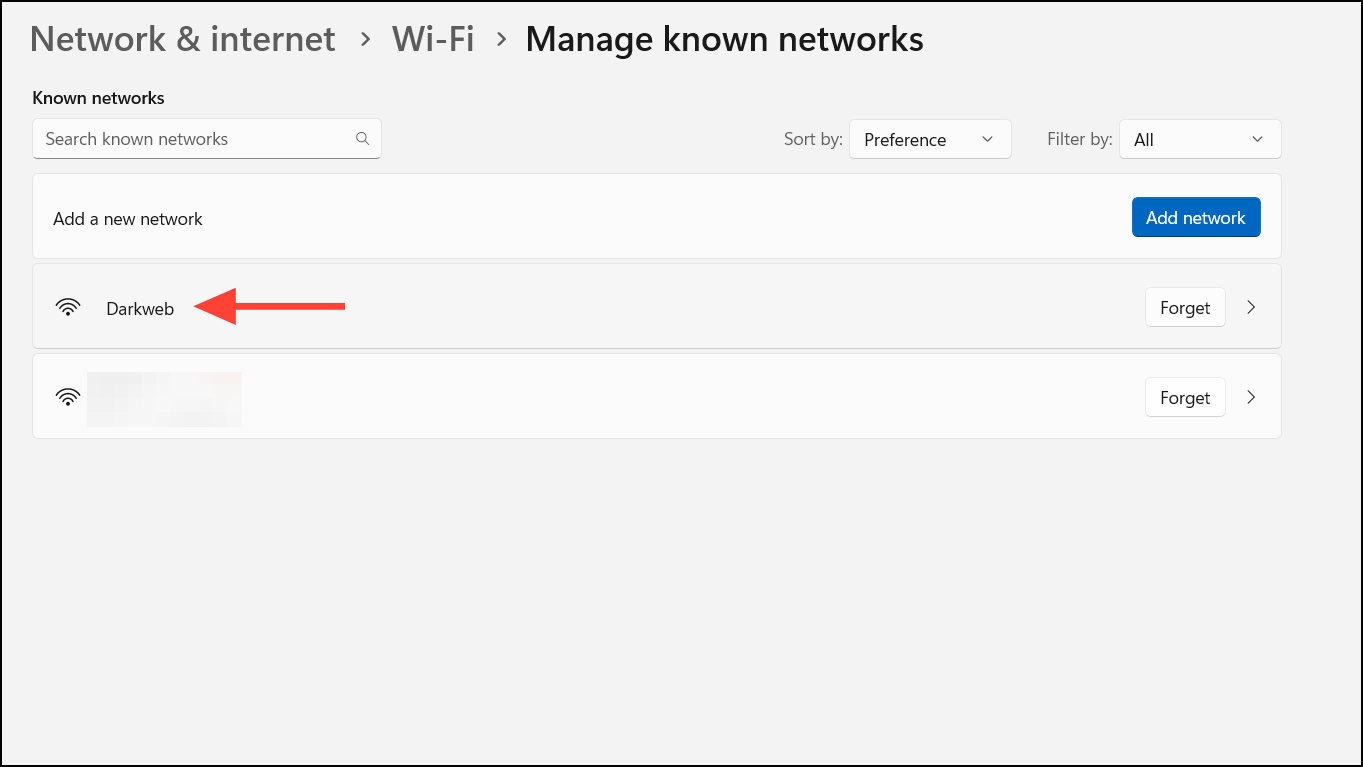
Forget and reconnect to your network
Reconnecting to your Wi-Fi network can resolve issues caused by corrupted network profiles.
- Open Settings with
Win + Iand select Network & Internet from the left pane.
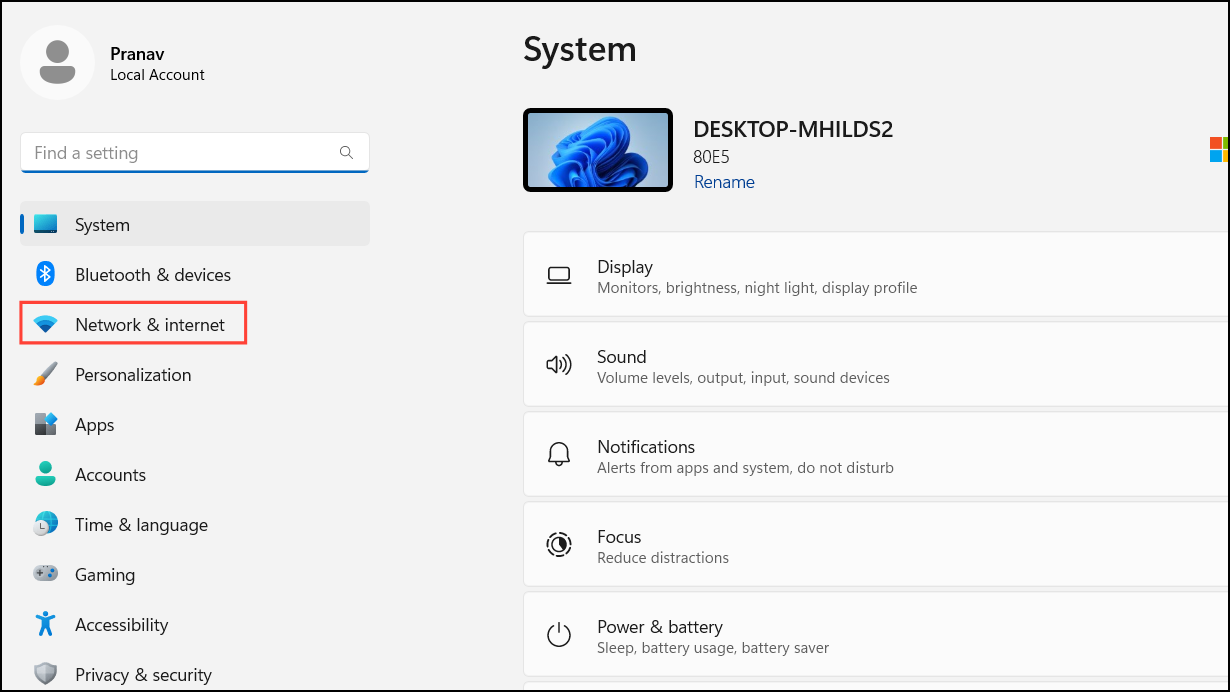
- Click on Wi-Fi.
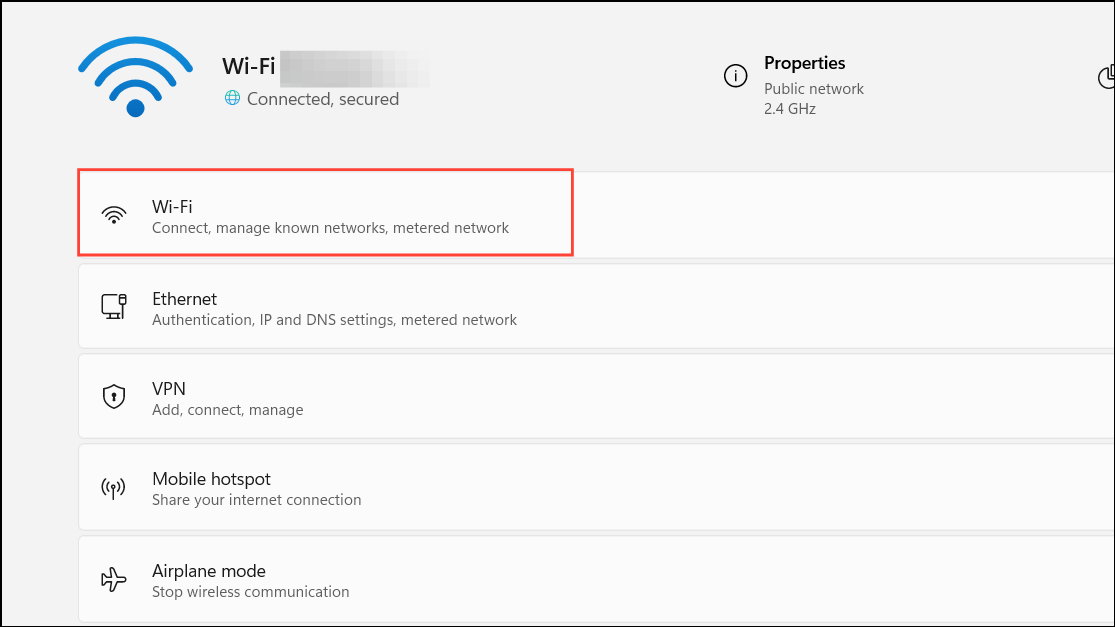
- Select Manage known networks.
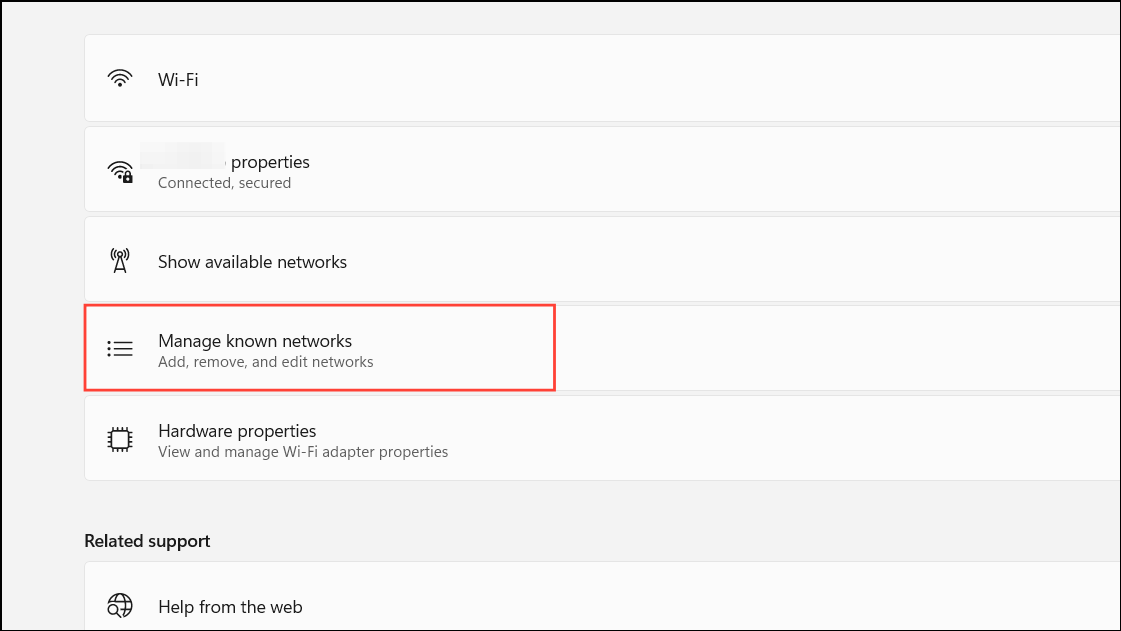
- Find your network and click Forget.

- Reconnect to your Wi-Fi network by selecting it from the available networks and entering your password.
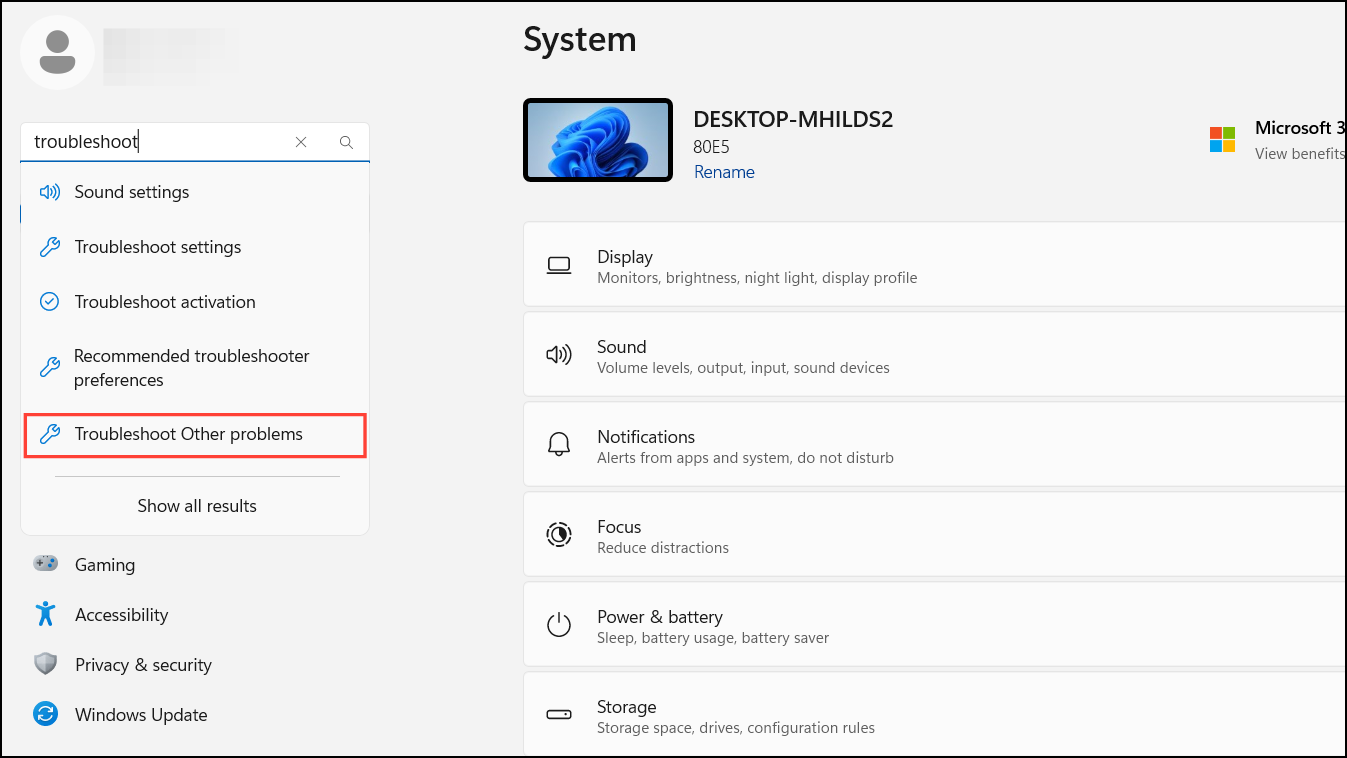
Run the Network Adapter Troubleshooter
Windows has a built-in troubleshooter that can detect and fix network issues.
- Open Settings and search for Troubleshoot.
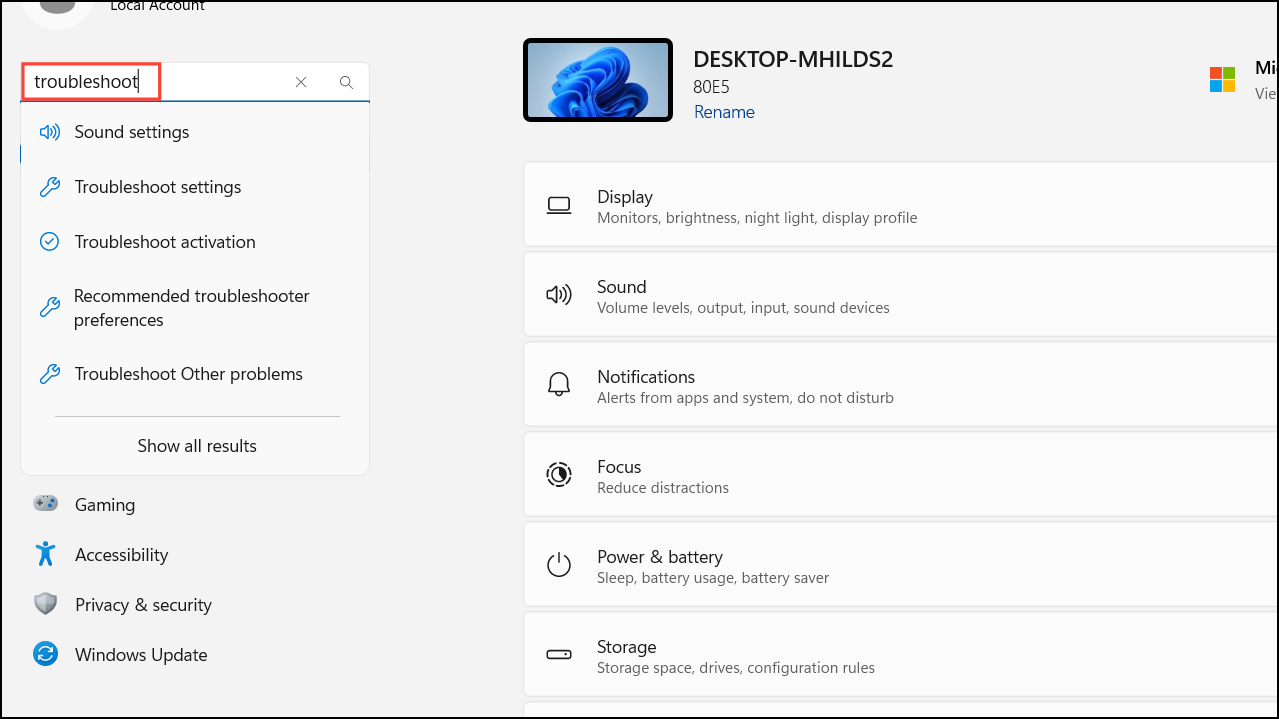
- Select Other troubleshooters.
- Click Run next to Network Adapter.
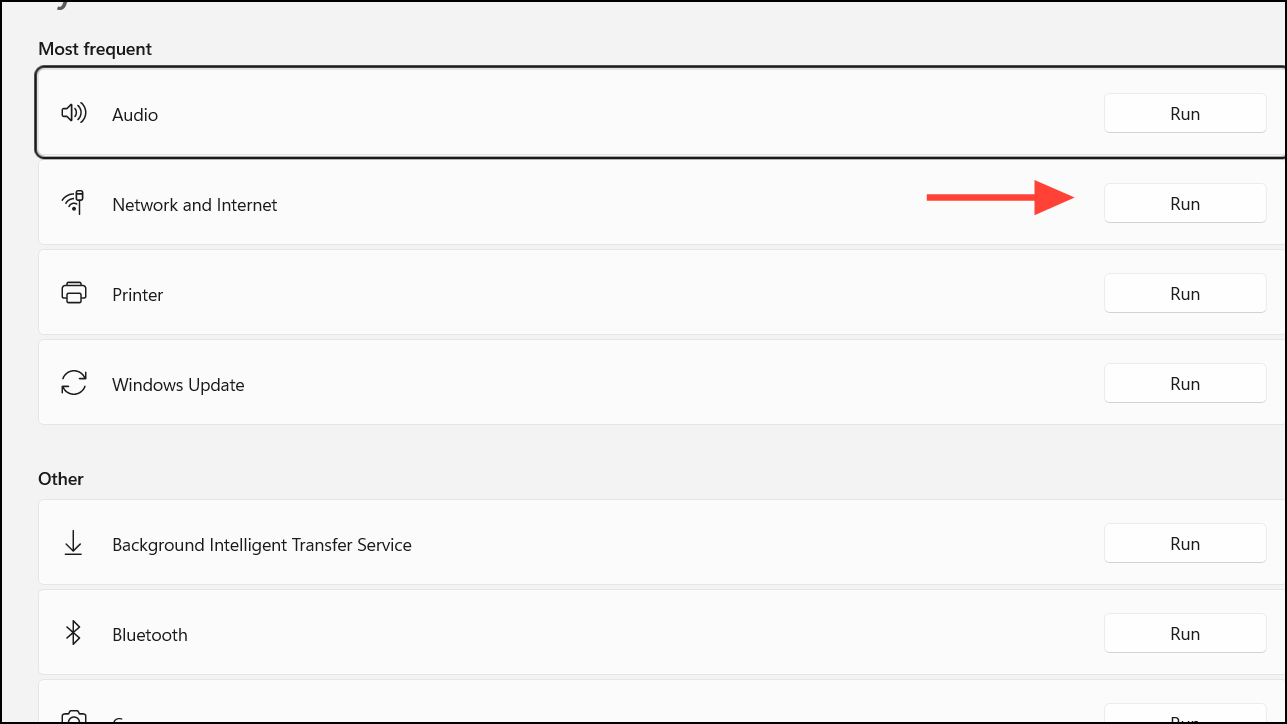
- Follow the on-screen instructions to complete the troubleshooting process.
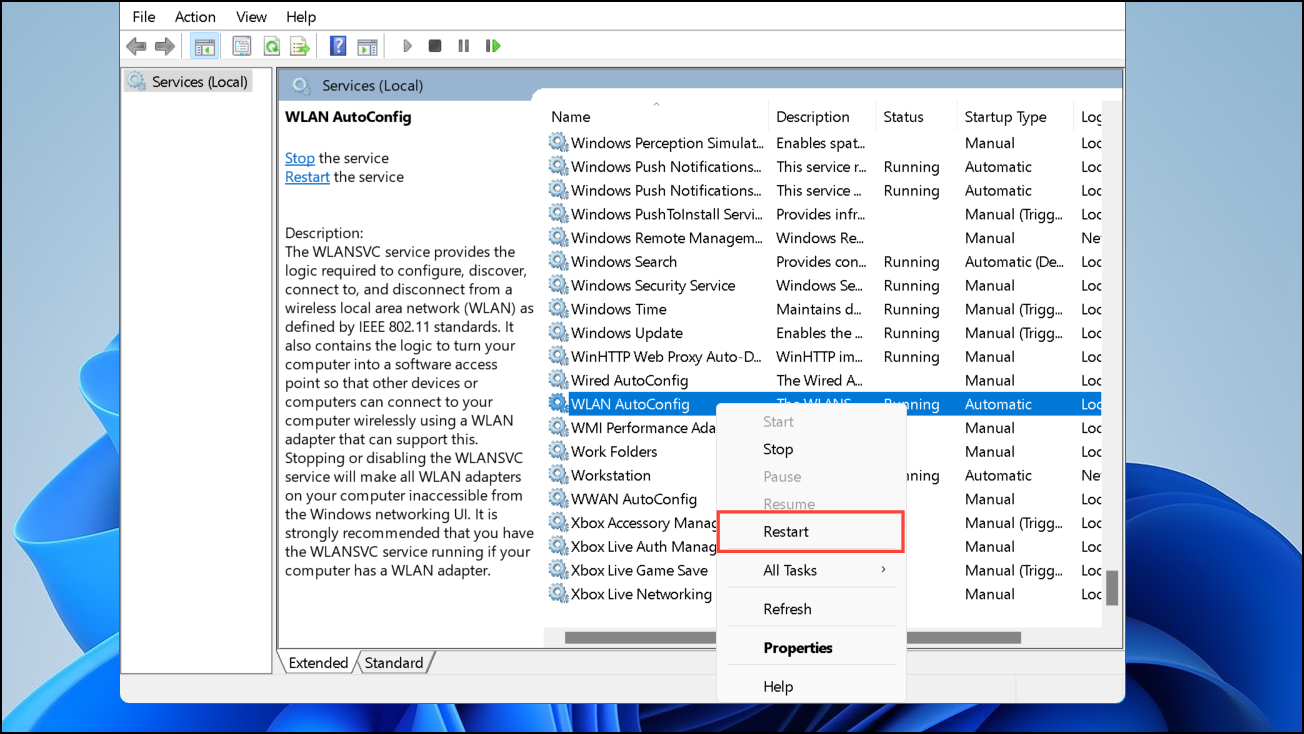
Restart the WLAN AutoConfig service
Restarting the WLAN AutoConfig service can resolve issues related to wireless connectivity.
- Press
Win + R, typeservices.msc, and press Enter.
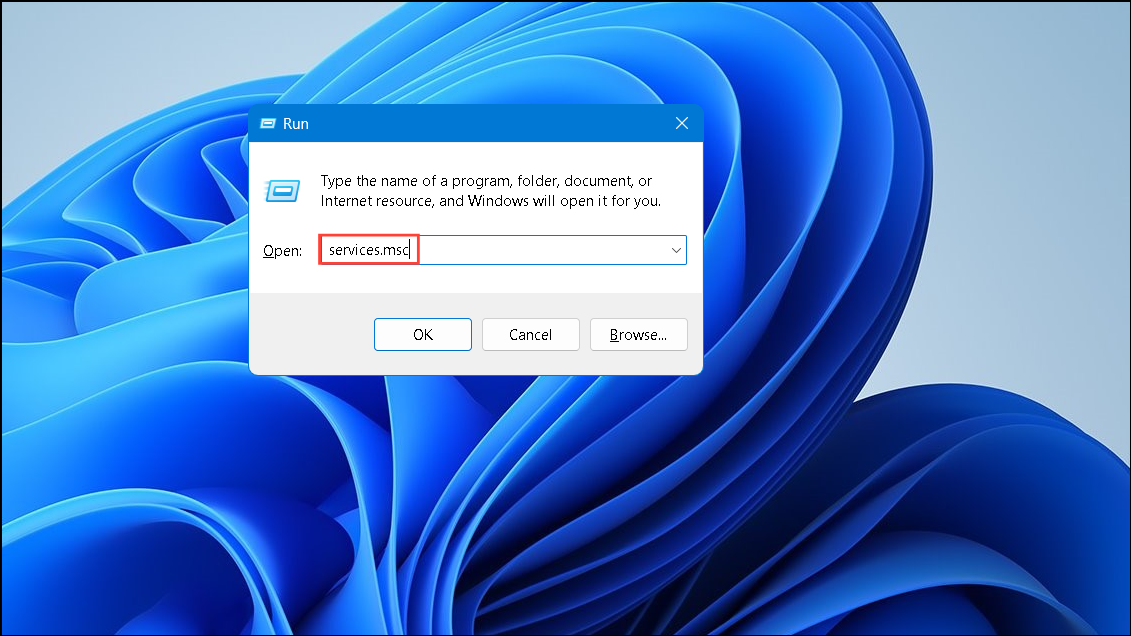
- Scroll down and find WLAN AutoConfig. Right-click it and select Restart.
Change power management settings
Your network adapter might be set to turn off to save power, which can cause disconnections.
- Open Device Manager and expand Network adapters.
- Right-click your wireless adapter and select Properties.
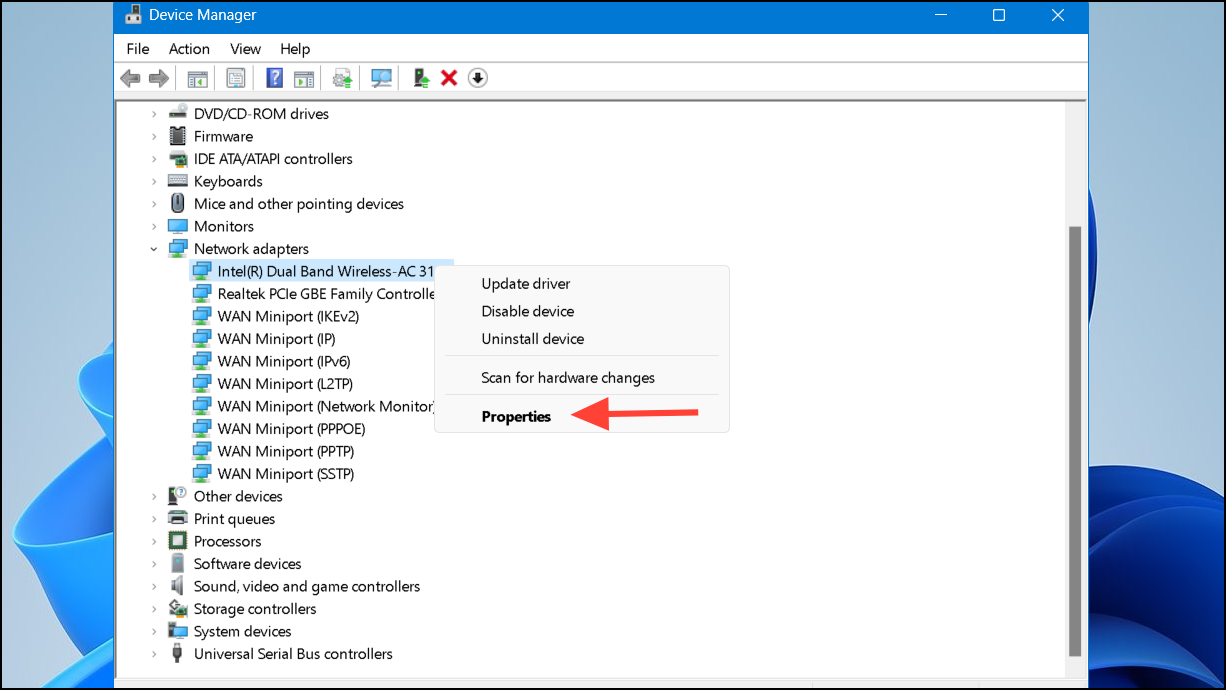
- Go to the Power Management tab.
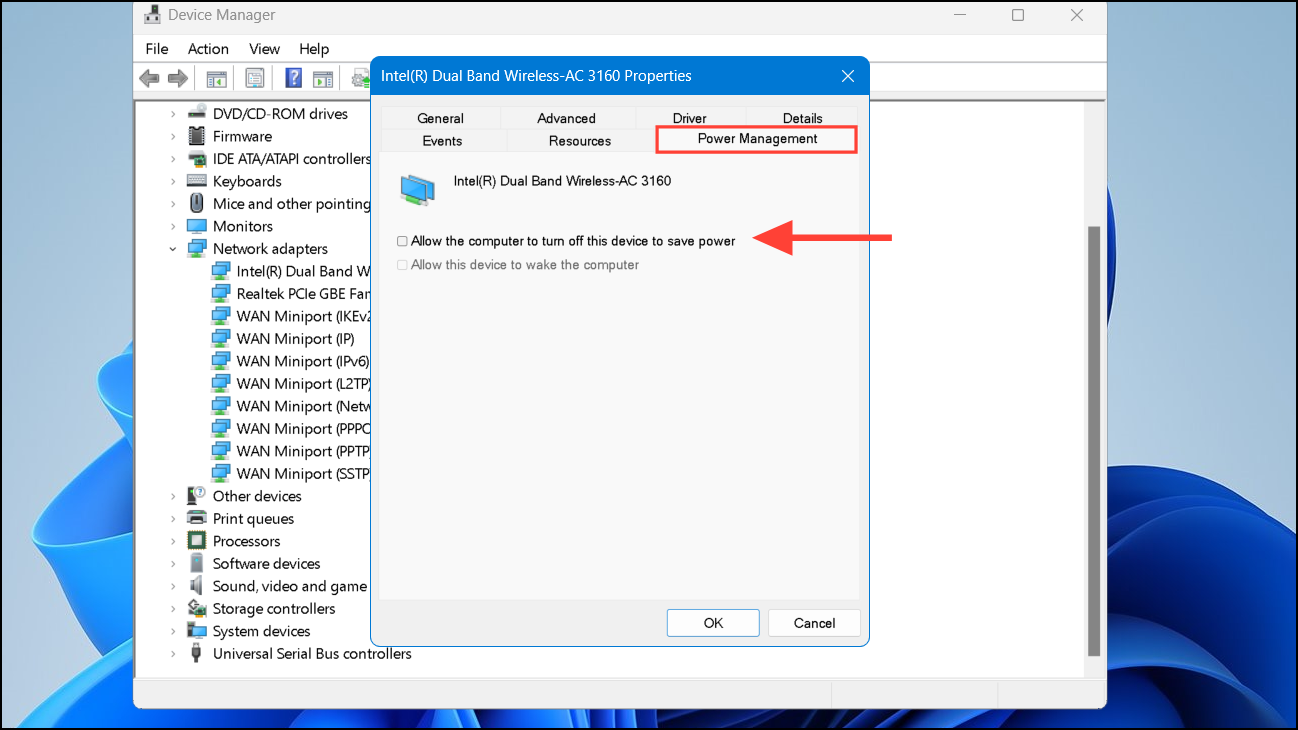
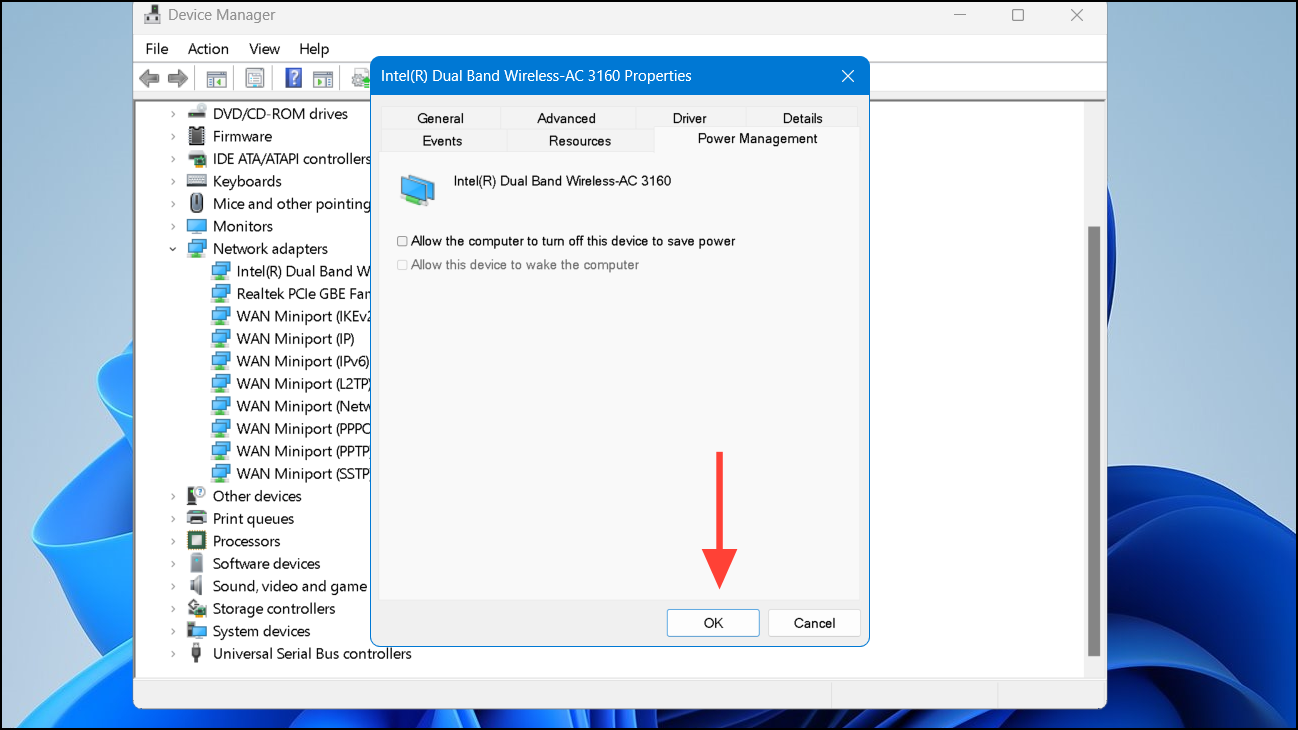
- Uncheck Allow the computer to turn off this device to save power and click OK.
Adjust network adapter power settings
Modifying your power plan settings can prevent the network adapter from reducing performance.
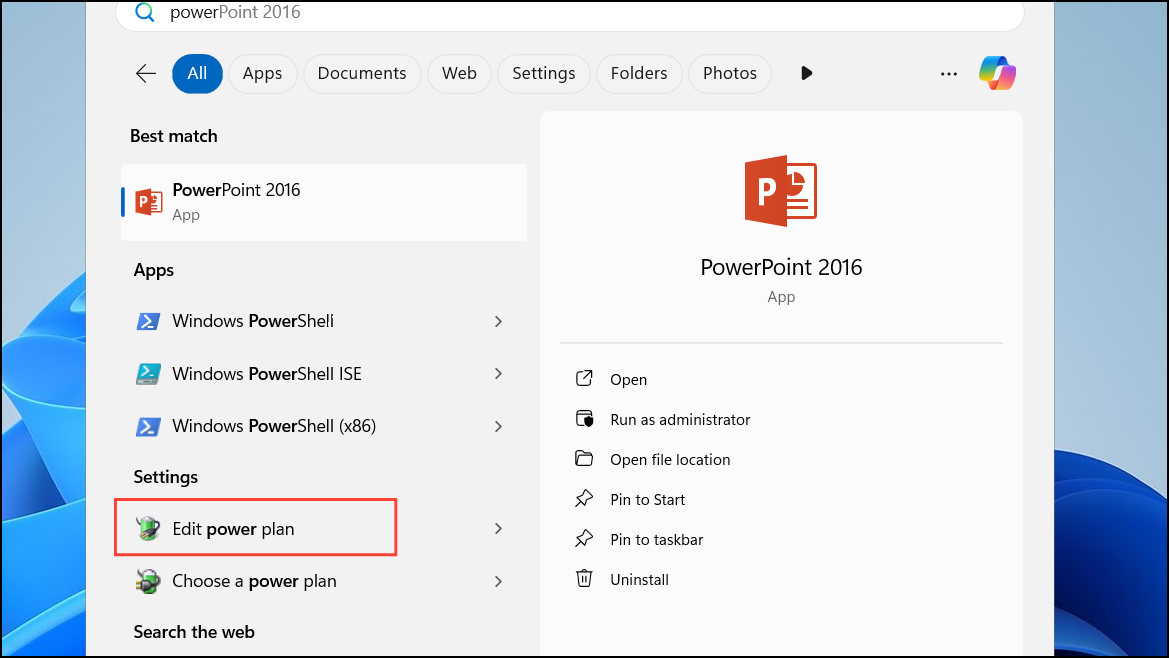
- Press
Win + S, type Edit power plan, and open it.
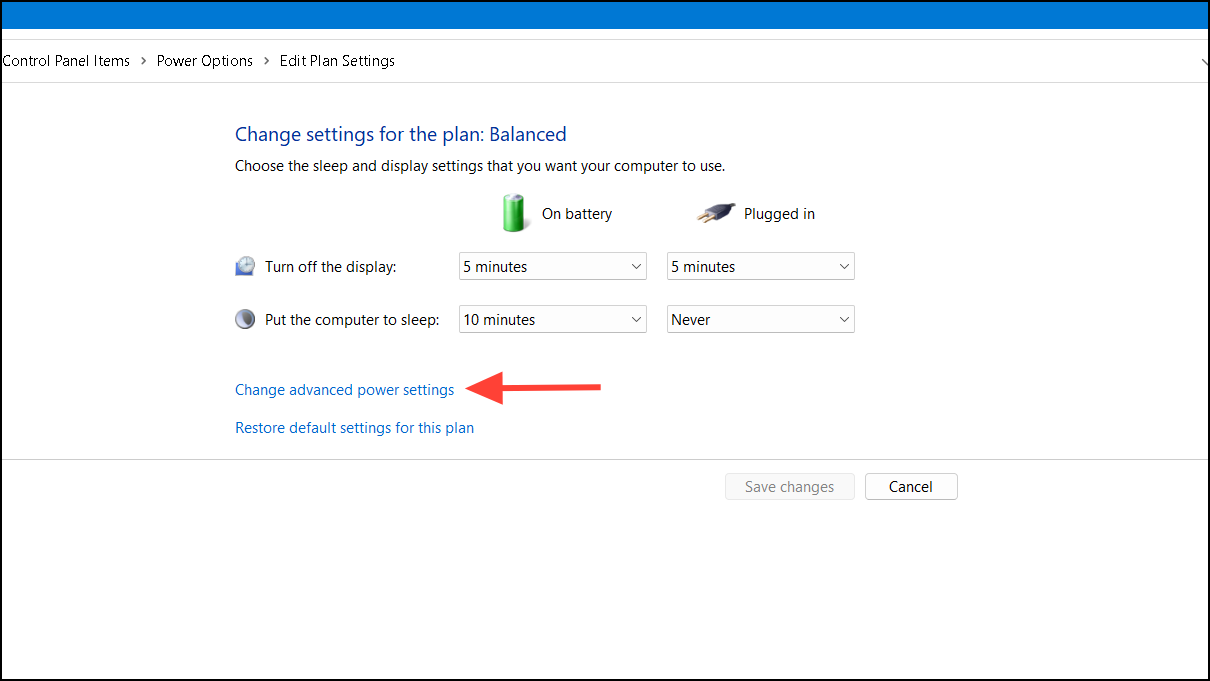
- Click on Change advanced power settings.
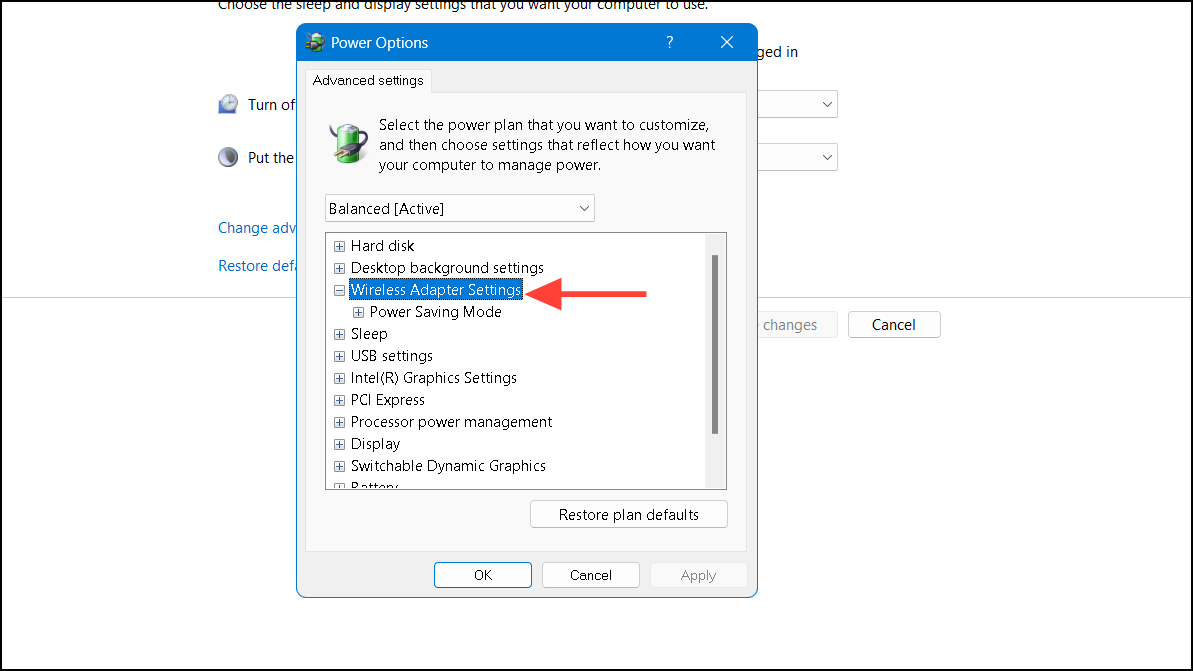
- In the Power Options window, expand Wireless Adapter Settings.
- Expand Power Saving Mode and set both On battery and Plugged in to Maximum Performance.
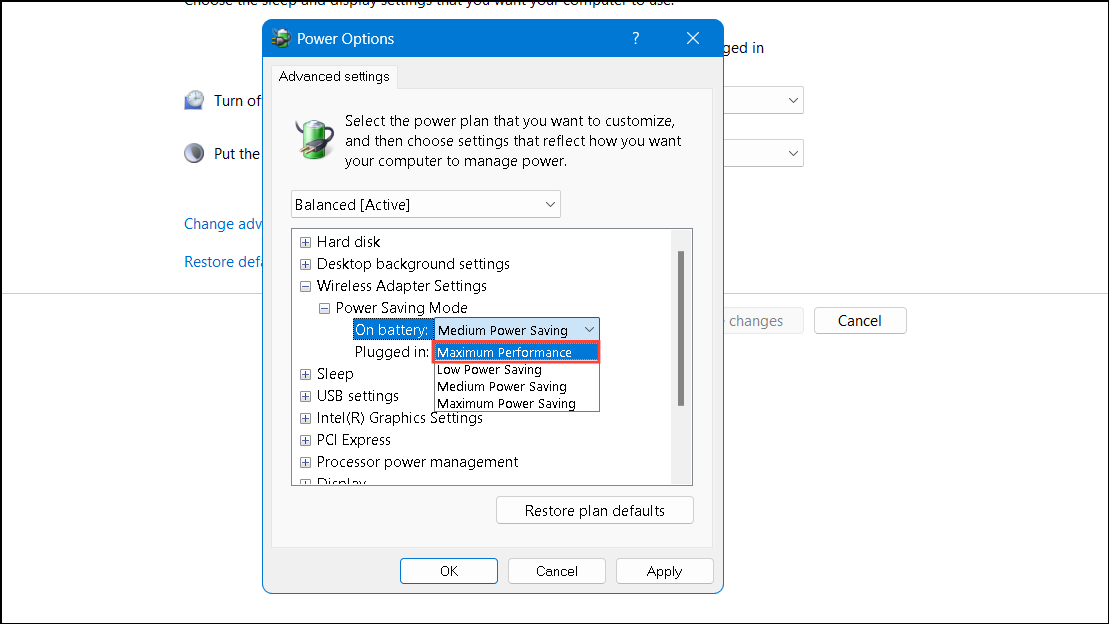
- Click Apply and then OK to save the changes.
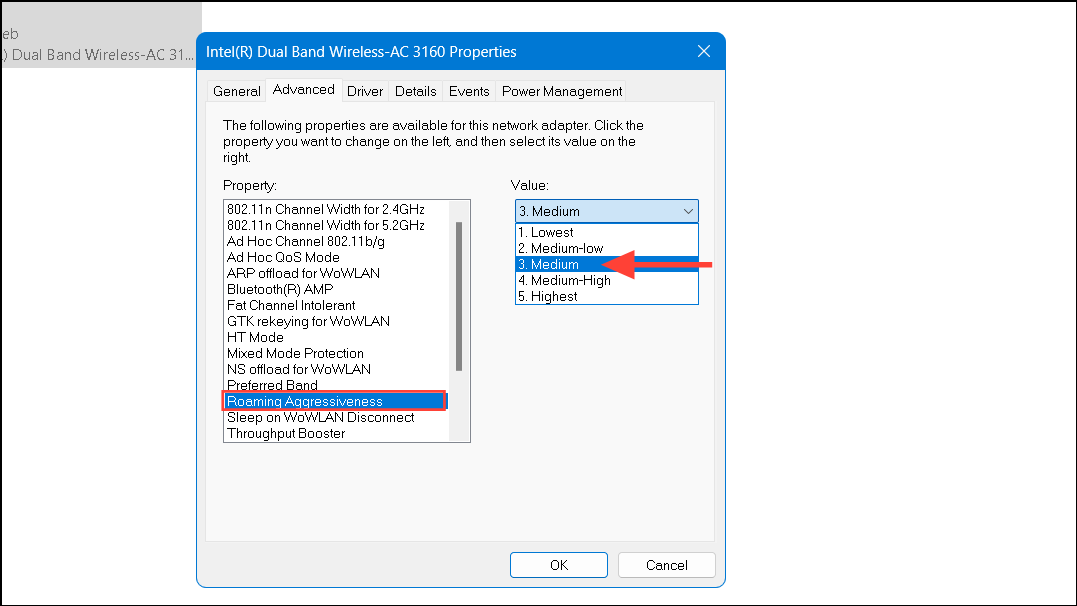
Check the roaming aggressiveness level
Setting the roaming aggressiveness too high can cause your adapter to switch networks frequently.
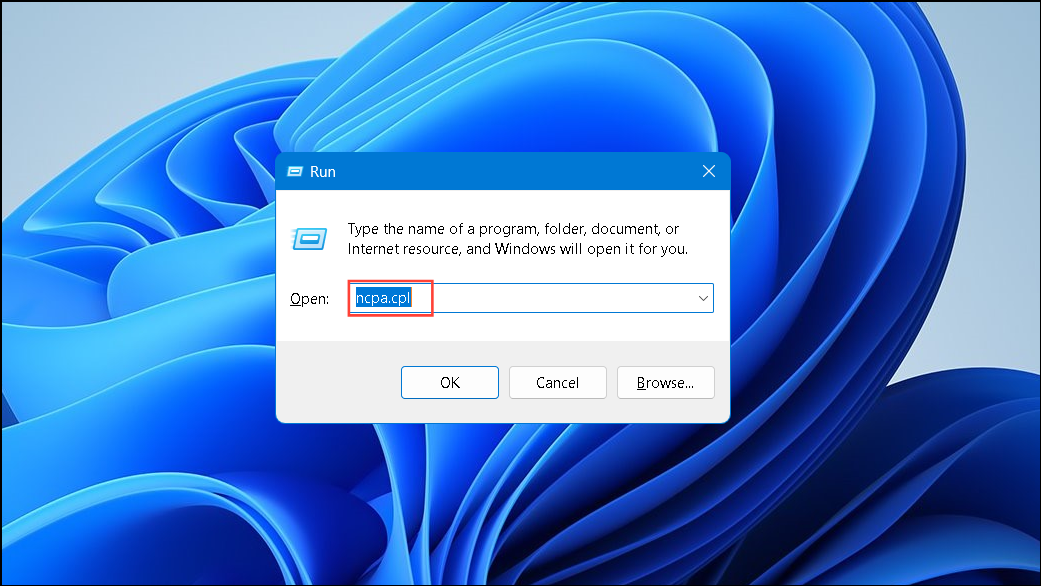
- Press
Win + R, typencpa.cpl, and press Enter.
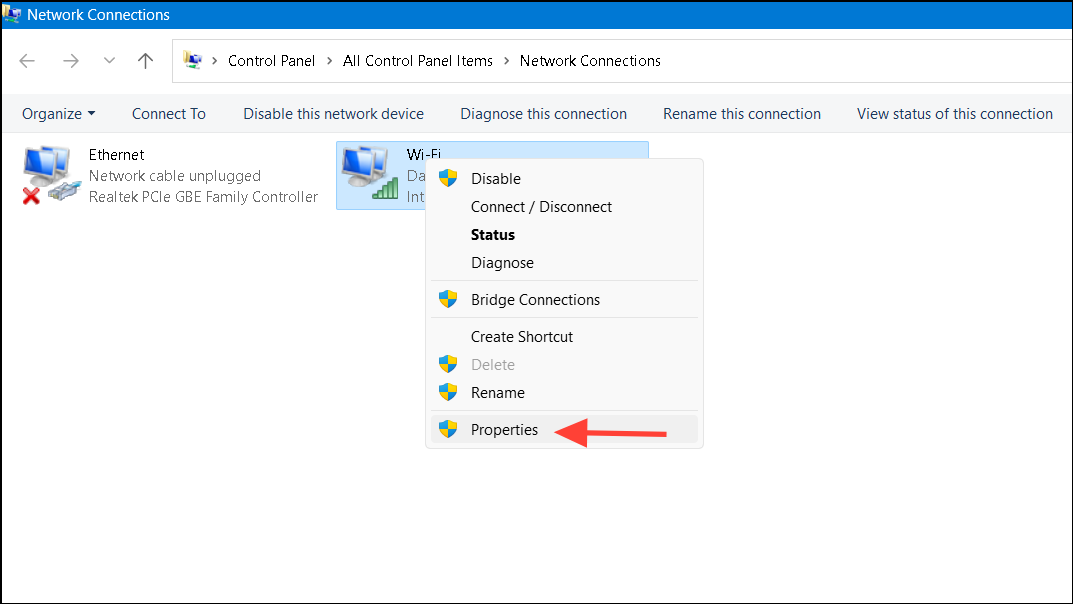
- Right-click your Wi-Fi connection and select Properties.
- Click on Configure.
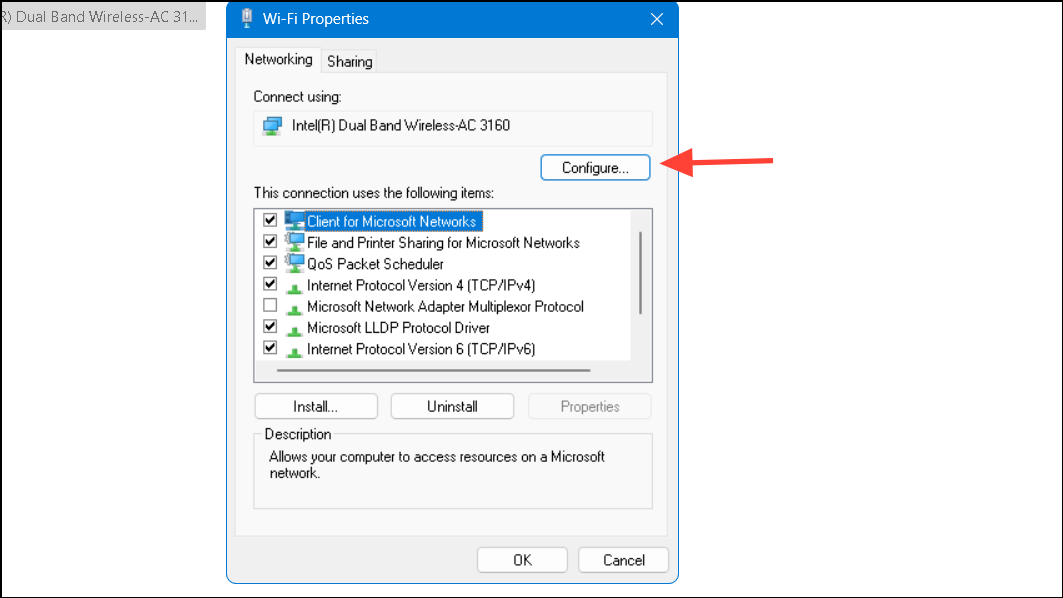
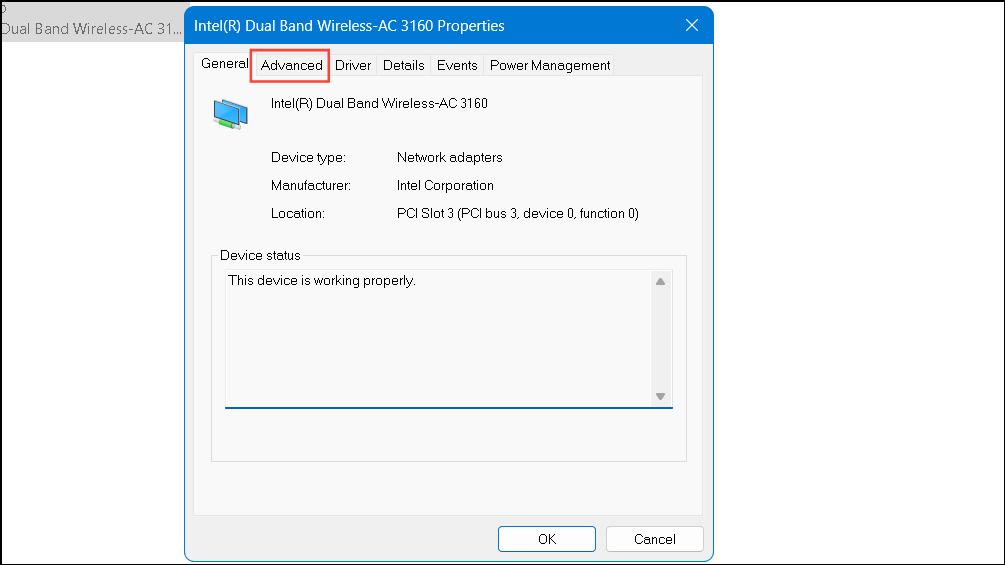
- In the Advanced tab, select Roaming Aggressiveness under Property.
- Set the Value to Medium and click OK.
Keep your network connection in private mode
Switching your network profile to private can sometimes improve connectivity.
- Open Settings and go to Network & Internet, then click on your connected Wi-Fi network.
- Under Network profile type, select Private network.

By following these steps, you should be able to resolve the Wi-Fi disconnection issues on your Windows 11 PC. If the problem persists, consider checking your router settings or contacting your internet service provider for further assistance.