
Seeing no Wi-Fi or Ethernet options in Windows 11, or finding that your network adapter is missing from Device Manager, immediately blocks internet access and can disrupt daily work or studies. This problem often appears after a fresh Windows installation, a major update, or unexpected driver conflicts. Addressing it requires a systematic approach—beginning with quick checks and moving through targeted fixes that address both software and hardware causes.
Restart and Basic Checks
Step 1: Perform a full system restart. Although simple, a complete reboot (not just a restart) sometimes restores missing hardware entries by forcing Windows to reload device drivers and hardware tables.
Step 2: Check for any physical Wi-Fi or network toggle switches on your laptop. Certain models include dedicated switches or key combinations (such as Fn + F2 or a small slider on the laptop edge) that can disable the adapter at the hardware level. Make sure these are set to enable network connectivity.
Device Manager Investigation
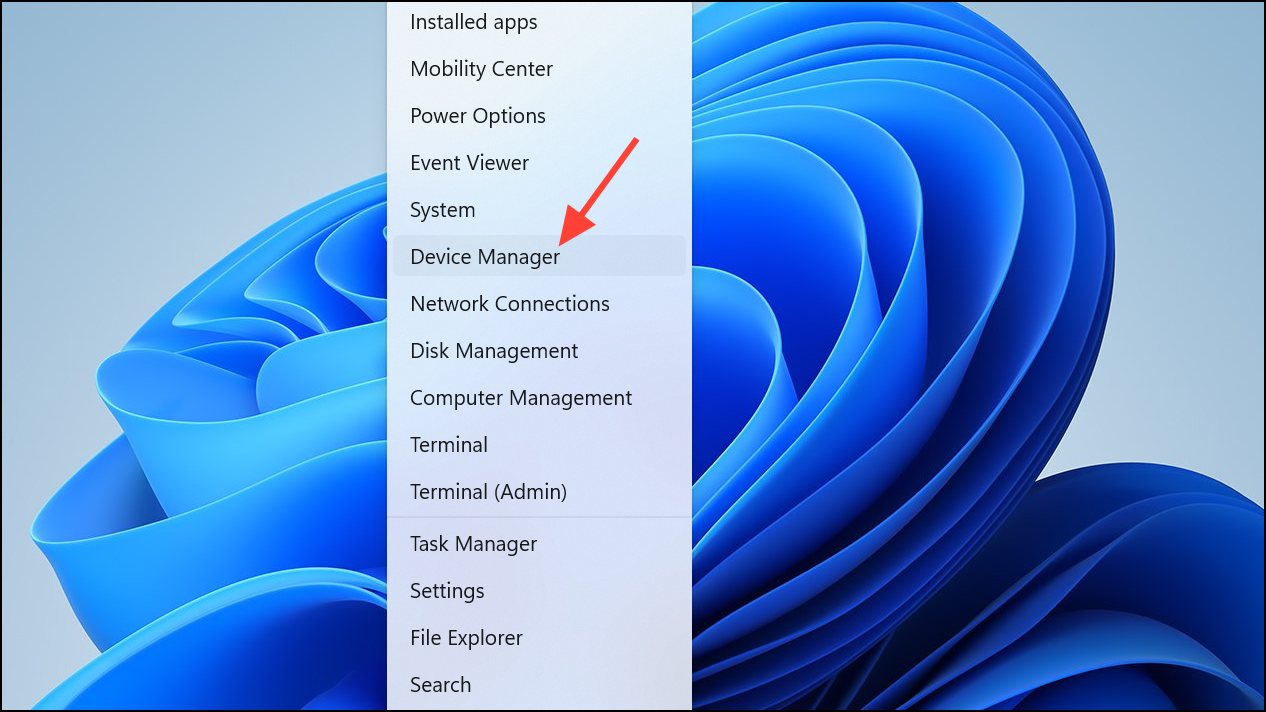
Step 1: Open Device Manager by pressing Windows + X and selecting Device Manager.
Step 2: Expand the Network adapters section.
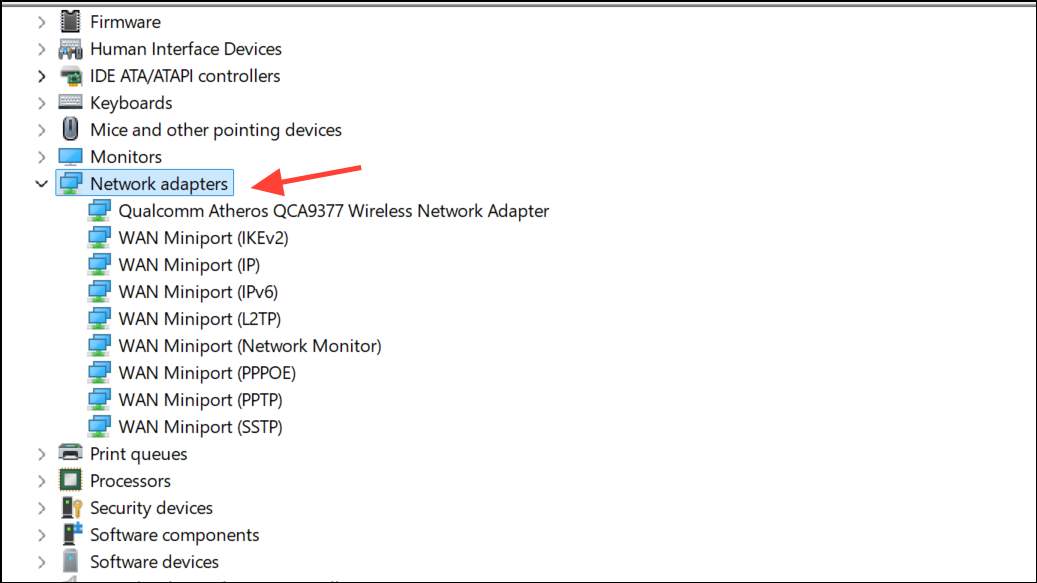
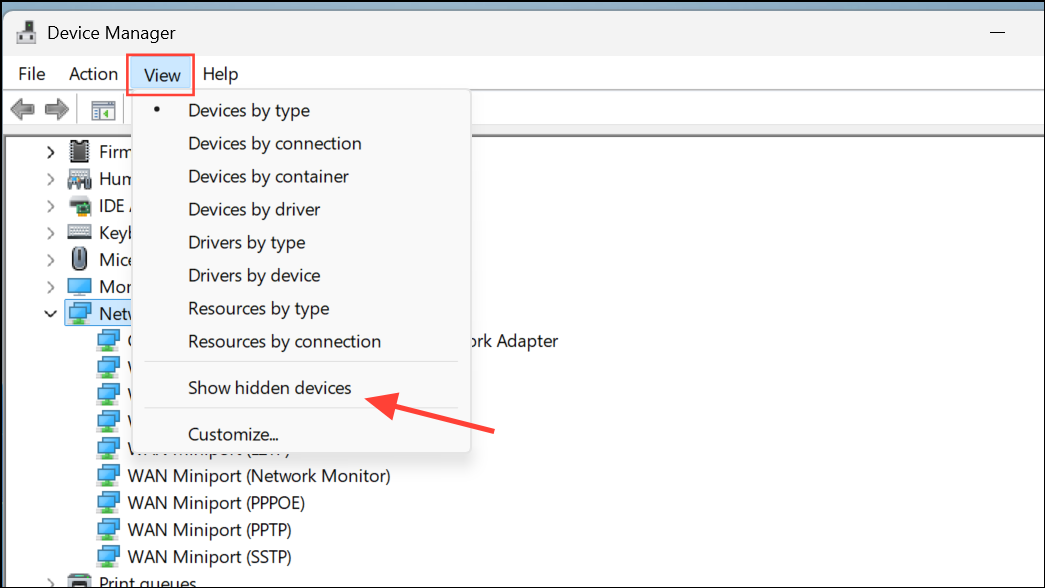
Step 3: If your adapter is missing, click View → Show hidden devices. Sometimes Windows hides disconnected or disabled hardware. Grayed-out devices can be right-clicked and re-enabled if possible.
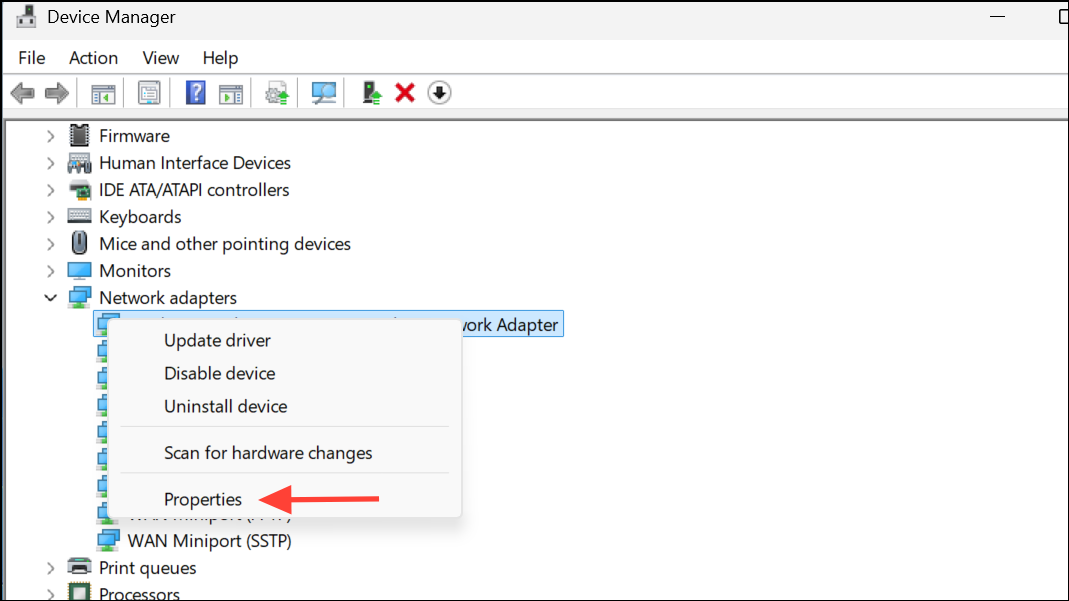
Step 4: If you see entries marked with a yellow warning icon, right-click the device, choose Properties, and review the device status. This can provide error codes or messages that hint at missing or corrupted drivers.
Run the Network Troubleshooter
Step 1: Use Windows 11’s built-in troubleshooting tools. Navigate to Settings → System → Troubleshoot.
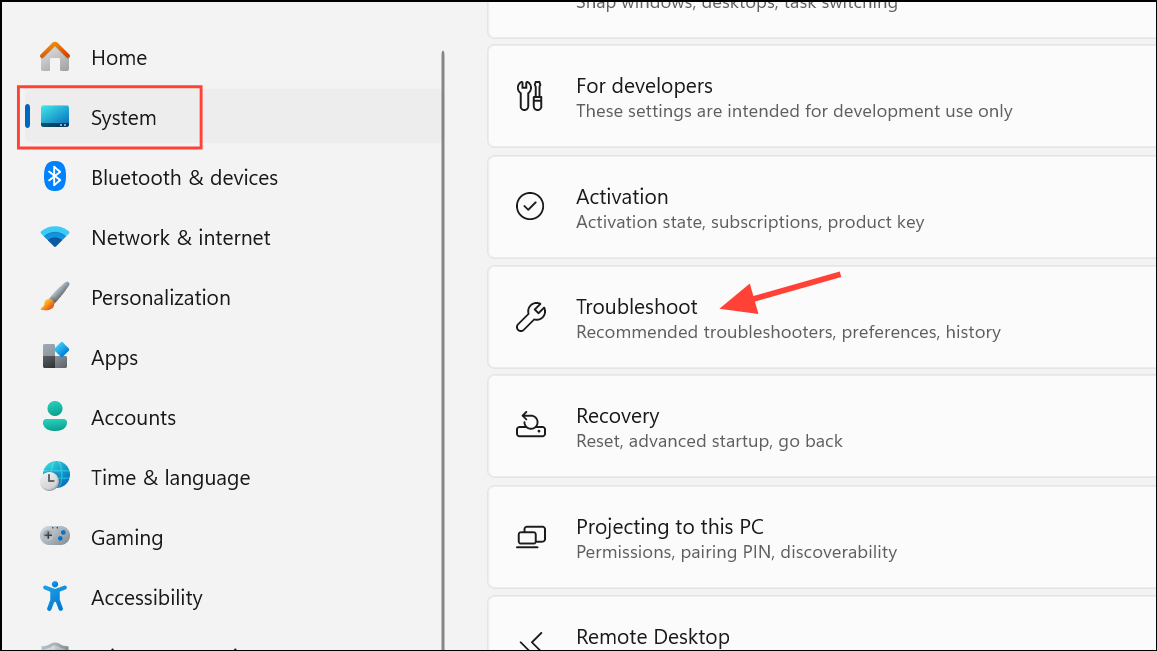
Step 2: Go to Other troubleshooters, then locate Network and Internet and click Run. This tool automatically scans for configuration issues and attempts to repair common network adapter problems, such as service failures or registry errors.

Driver Installation and Updates
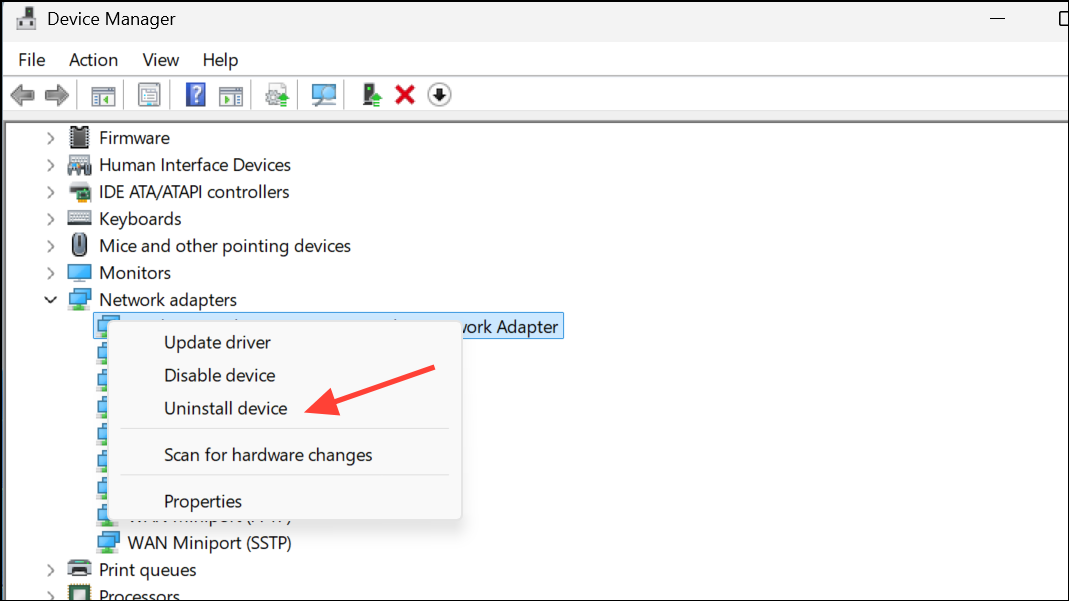
Step 1: If your adapter appears in Device Manager, right-click it and select Uninstall device. After uninstalling, reboot your computer. Windows will attempt to reinstall the driver automatically, which often resolves driver corruption issues.
Step 2: If the adapter does not reappear or Windows cannot find a suitable driver, you’ll need to manually install the correct network driver. On another device with internet access, visit your PC or motherboard manufacturer’s support page (such as Dell, HP, ASUS, MSI, or Intel) and download the latest network drivers for your specific model and Windows 11 version.
Step 3: Transfer the driver files to your affected PC using a USB drive and run the installer. After installation, restart your system and check Device Manager again.
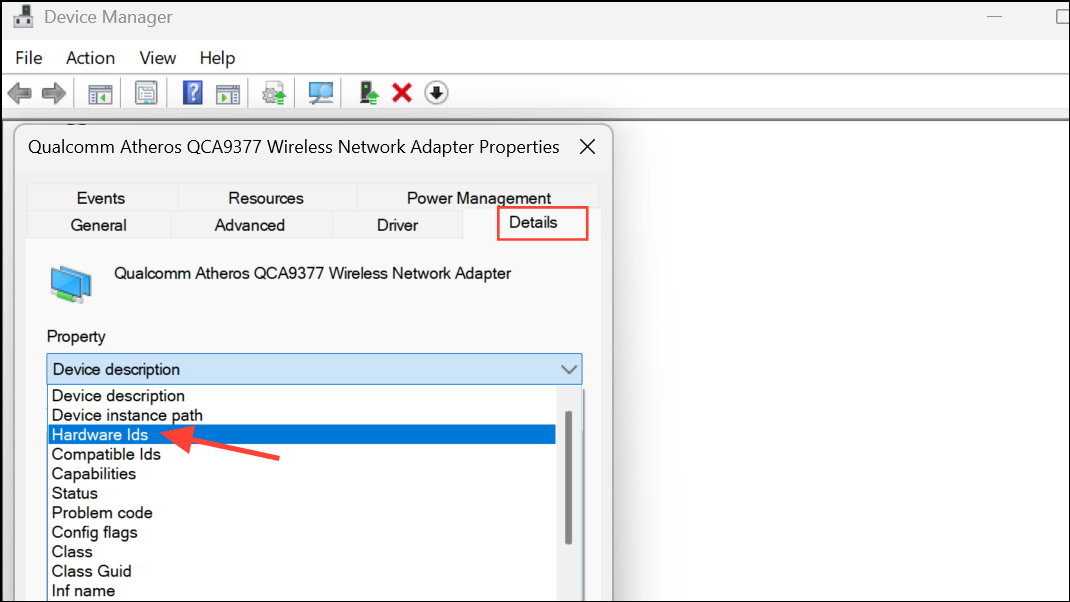
Step 4: For advanced troubleshooting, if you see an Unknown device or a device with a warning icon, right-click, select Properties, go to the Details tab, and choose Hardware Ids from the dropdown. Copy the displayed IDs and search them online to identify the correct driver.
BIOS/UEFI Settings
Step 1: In some cases, the network adapter is disabled in BIOS or UEFI firmware. To check this, reboot your PC and repeatedly press the appropriate key (often Del, F2, or Esc) to enter BIOS/UEFI.
Step 2: Look for settings related to Integrated Peripherals or Onboard Devices, and ensure that Onboard LAN or Network Controller is enabled. Save changes and exit. This step is essential if the adapter remains missing after all software-based fixes.
Network Settings and Power Management
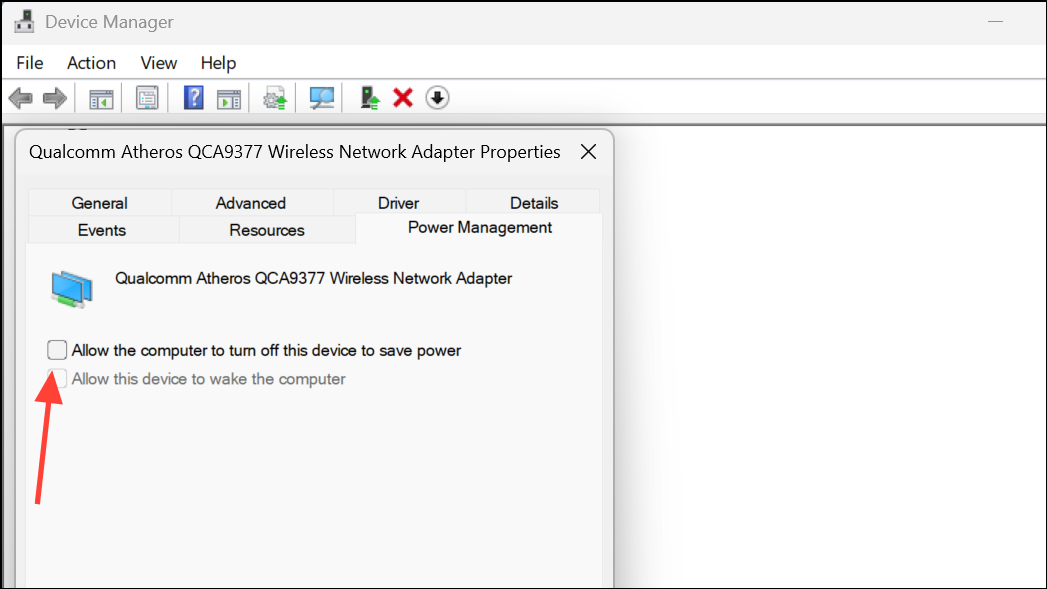
Step 1: Disable power management features that might cause the adapter to disappear. In Device Manager, right-click your network adapter, choose Properties, and open the Power Management tab.
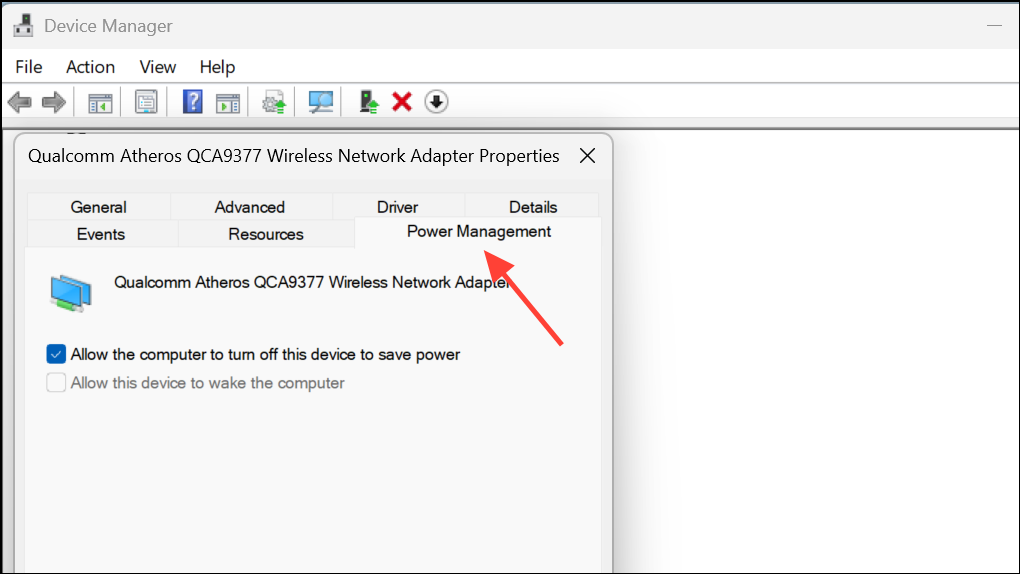
Step 2: Uncheck Allow the computer to turn off this device to save power. This prevents Windows from disabling the adapter to conserve energy, which can sometimes make it vanish from the system.
Network Reset and Command Line Repairs
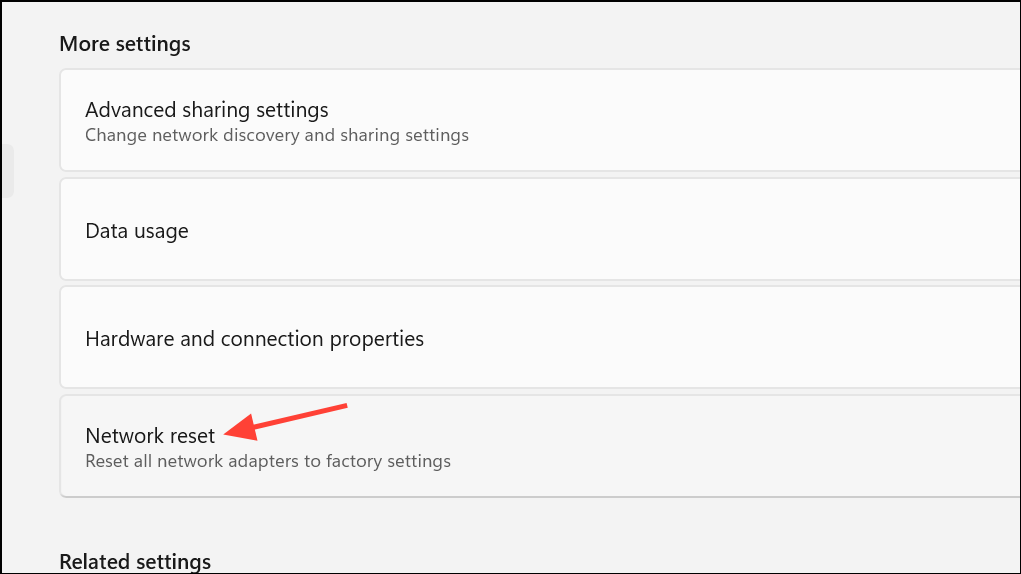
Step 1: As a last resort, reset all network settings. Go to Settings → Network & Internet → Advanced network settings and click Network reset. Confirm and reboot. This process removes and reinstalls all network adapters, resets TCP/IP stack, and clears custom network settings. Note that you’ll need to re-enter Wi-Fi passwords and reconfigure VPNs or static IPs afterward.
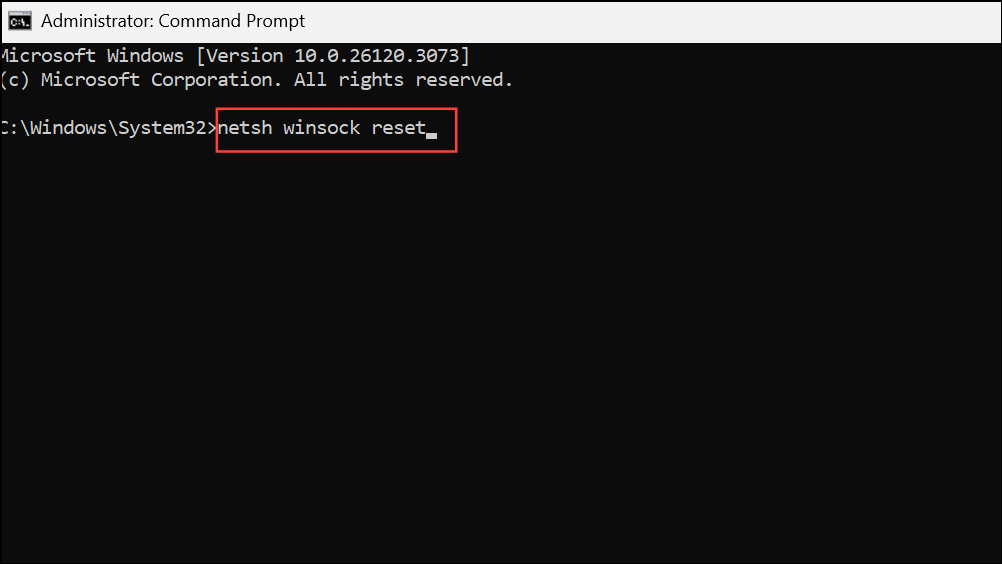
Step 2: For deeper repair, open Command Prompt as Administrator and run the following commands one at a time to reset network components:
netsh winsock reset
netsh int ip reset
ipconfig /release
ipconfig /renew
ipconfig /flushdns
Reboot your PC after running these commands to apply changes.
Physical Hardware Checks
Step 1: If your network adapter still does not appear, consider possible hardware failure. For desktops, power off the machine, unplug it, and open the case. Reseat any removable network cards, or inspect the Ethernet port for damage.
Step 2: For laptops, check for loose Wi-Fi modules or antennas if you’re comfortable opening the device. If the adapter is integrated and none of the above steps work, professional repair or warranty service may be required.
Resolving a missing network adapter in Windows 11 usually involves a combination of driver installation, hardware checks, and system settings adjustments. Following these steps restores reliable network connectivity and helps prevent similar issues after future updates or installations.