- If you are getting the 'Location is not available' error, look for the folder in a different place and ensure your connection to the network and external drives is stable.
- In case that does not work, restart Windows Explorer, check and change the drive letter, perform a virus scan, and grant full control permission to your user account.
- A system restore can help you revert your PC to an earlier time, in case no other solution works.
- Alternatively, you can try recovering your data from the inaccessible drive using data recovery tools.
Fix 1: Search for the folder in a different location
The folder you are looking for may have been moved to a different location or may have been deleted. You can search for it in a different drive or directory. In case you're trying to access a folder through its shortcut, go to the actual path and check whether the folder exists. If it is not present there, search for it and see if you can find it in a different location, such as the Recycle Bin. You can use Windows Search to look for the folder.
Fix 2: Check whether your external drive is properly connected
If the folder you are looking for is on an external drive, check that the drive is properly connected to your computer. Your PC will not be able to read data from a drive that is not connected properly, and it may not even detect that drive. Try connecting the drive using other ports, such as those at the back of your computer. Disconnect and reconnect the drive and check whether the missing folder is visible.
Fix 3: Ensure you are connected to the network
In case the folder you are looking for is on a network, check your connection to the network and ensure that the connection is stable. If it is located on the internet, you can open a website using a web browser to check whether your internet is working properly. In case the website fails to load, try resolving issues with your internet connection first.
Check your ethernet cable if you have a wired connection, restart your router, and contact your ISP if the problem is not resolved. If the folder is located on a Network-Attached Storage (NAS) drive, you should try disconnecting and reconnecting the device. In case it does not work, try accessing that device from a different computer. Depending on the storage device, you may have to check its manual to find out how to resolve connectivity problems with it.
Fix 4: Restart the Windows Explorer process
Sometimes, issues with Windows Explorer can prevent you from accessing and managing your files. The best thing to do in such a situation is to restart the Windows Explorer process.
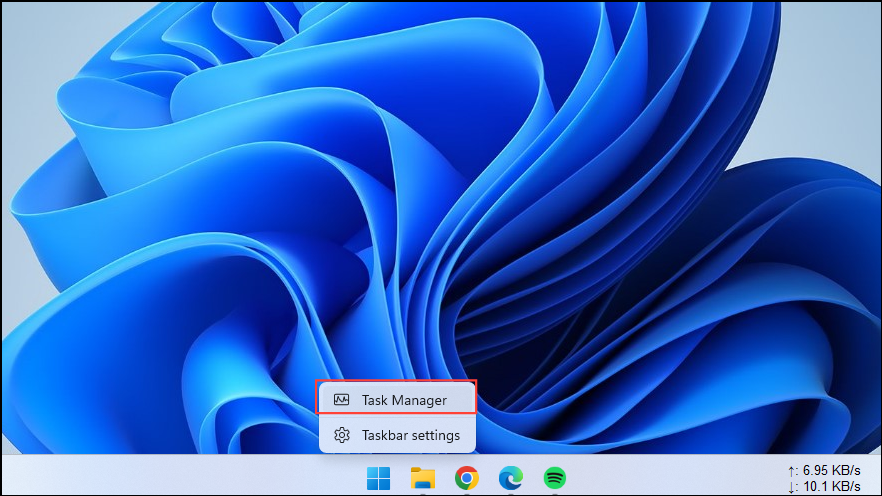
- Right-click on the taskbar and click on 'Task Manager'.
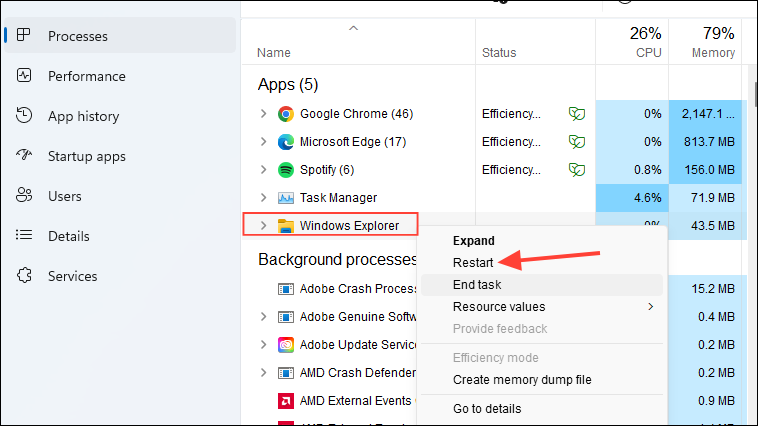
- When the Task Manager opens up, look for 'Windows Explorer' in the list of processes on the right. Right-click on it and click on 'Restart'.
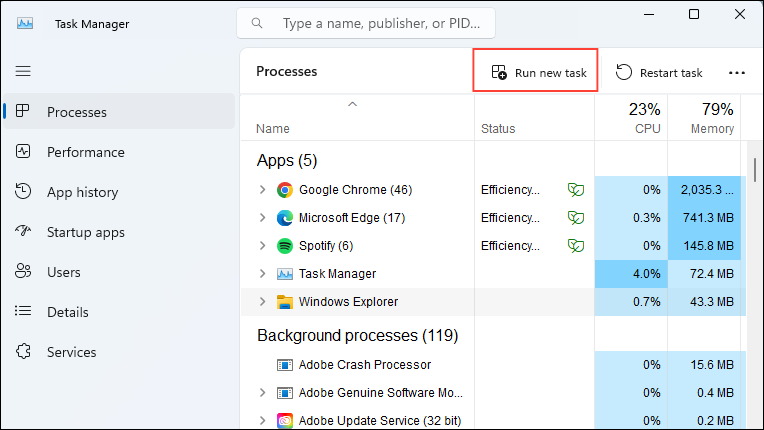
- Windows Explorer will relaunch. In case there are problems relaunching, you will need to force launch it. To do that, click on 'Run new task' in the Task Manager.
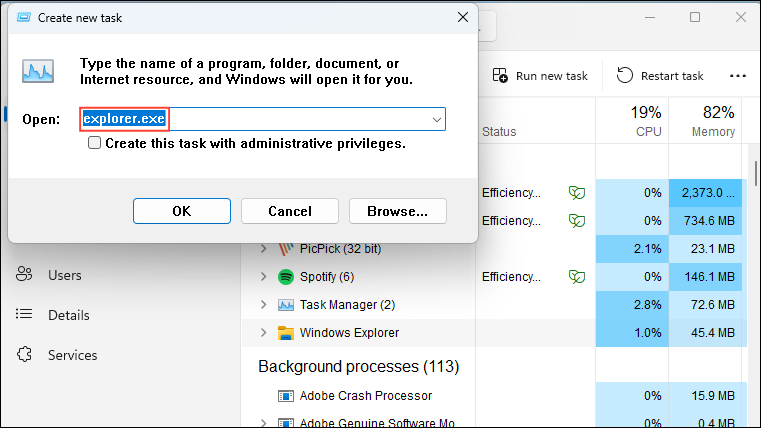
- Type
explorer.exein the box that appears and press the 'Enter' key.
Fix 5: Check and change the drive letter
Windows assigns letters to different drives for easy access, but if the drive letter for a particular drive gets changed, you may have trouble locating your files and folders. If the drive letter is changed, first, check the original path of the folder you are looking for and verify it is located there. If you use multiple external drives, Windows can assign the same drive letter to different drives if they are connected at different times.
In such cases, you may not be able to locate the folder you are searching for. While you can check the actual folder path and verify whether the folder is located there, you can also change the drive letter and see if that helps.
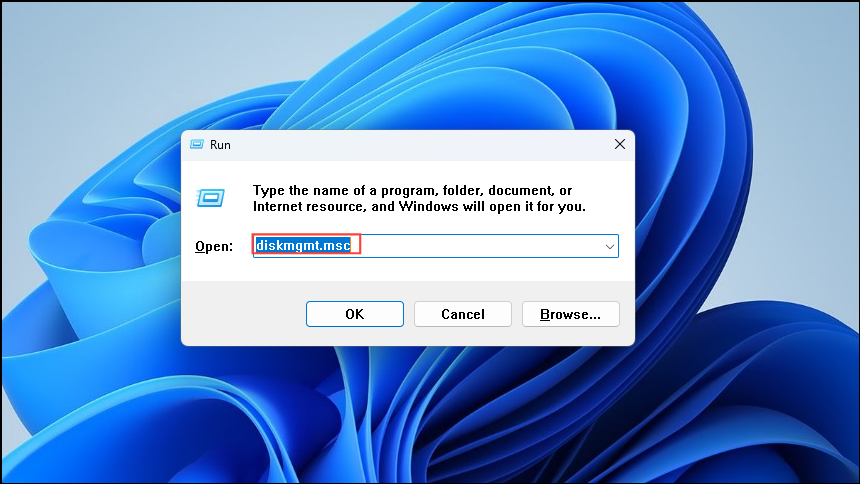
- Use the
Windows + Rshortcut to open the 'Run' dialog box and then typediskmgmt.mscbefore pressing the 'Enter' key.
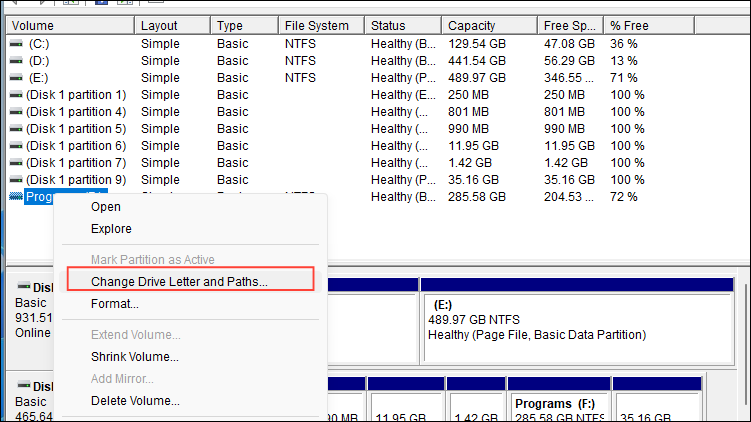
- The Disk Management utility will list all your drives. Right-click on the drive whose letter you want to change and then click on 'Change Drive Letter and Paths'.
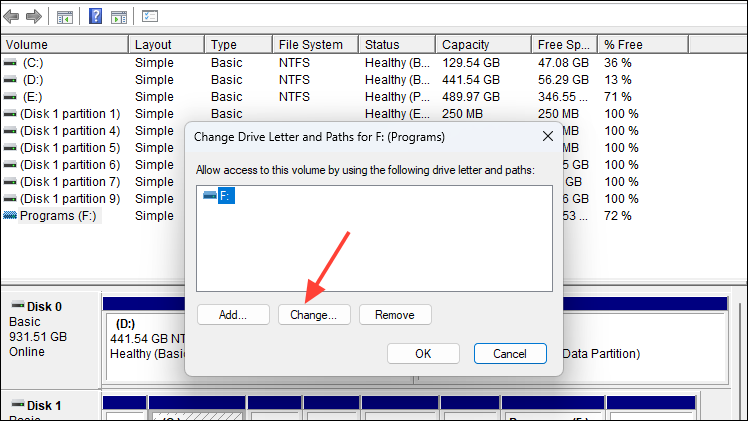
- To change the drive letter, click on the 'Change' button and select a different letter from the list. Then click on the 'OK' button.
Fix 6: Perform a virus scan
If your system is infected with a virus or malware, you may not be able to access your folders and files. You can perform a virus scan to check whether this is the case and then take the necessary action, like deleting infected files.
- Click on the Taskbar Overflow button that appears like an arrow on the right side of the taskbar to view hidden icons.
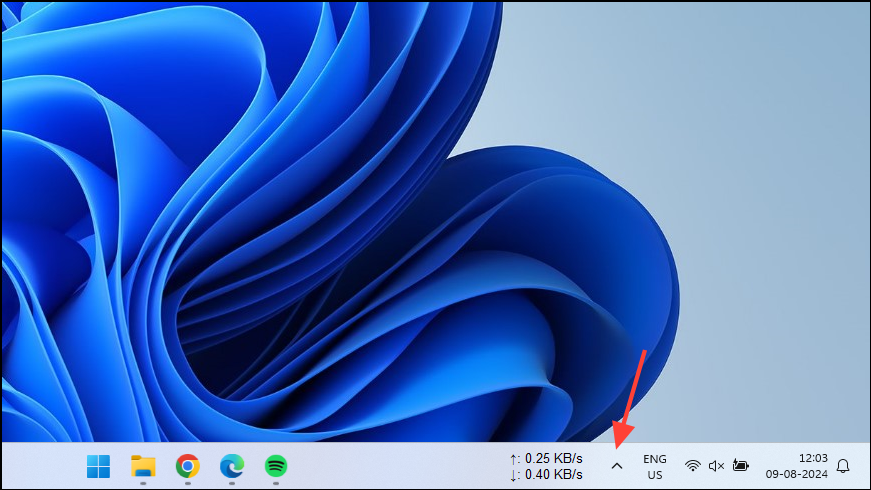
- Next, click on your antivirus to launch it.

- Once your antivirus program opens, click on the option that says 'Deep scan' or 'Complete scan' to scan your PC.
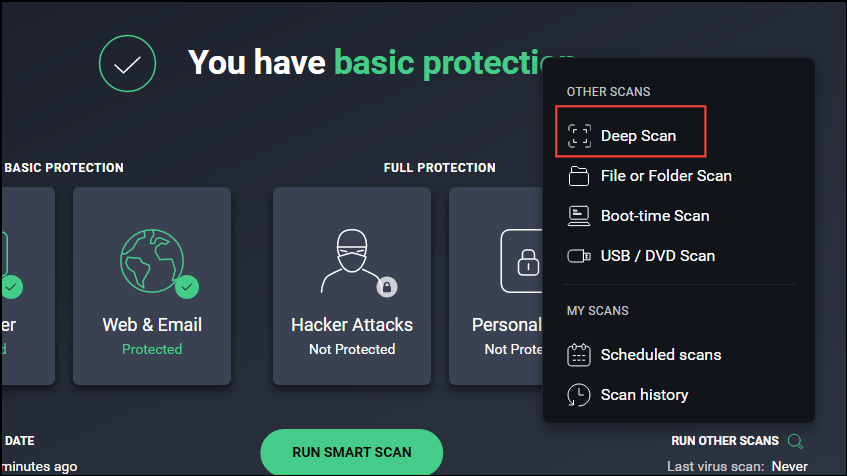
- Wait until the scan is complete, which can take some time. If any folders or files are infected, your antivirus will let you know. You can then quarantine or delete them from your PC.
Fix 7: Grant full control permission
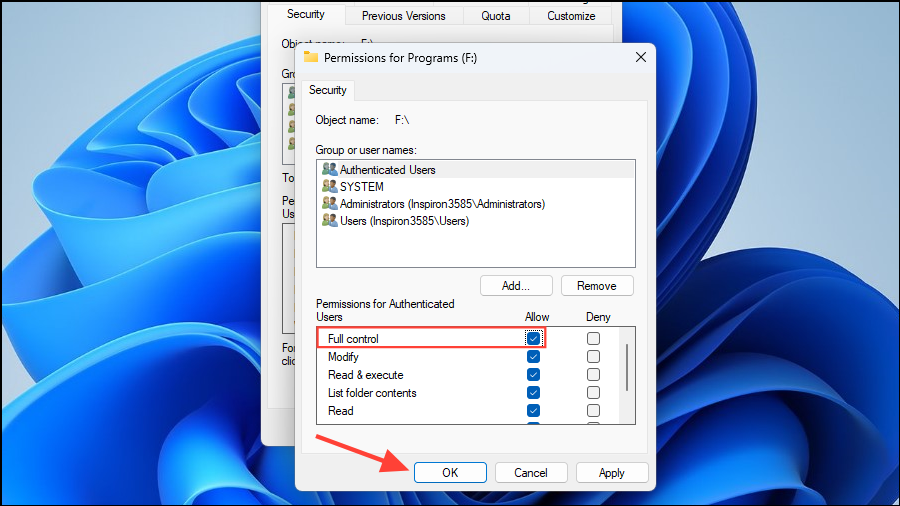
You may get the 'Location is not available' error if you do not have sufficient permission to access the drive. To fix this, you need to grant full control permission for your user account.
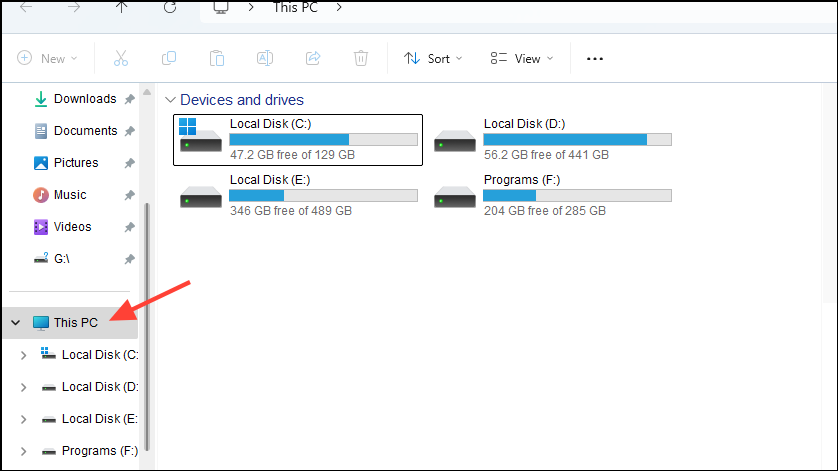
- Open Windows Explorer and then go to 'This PC'.
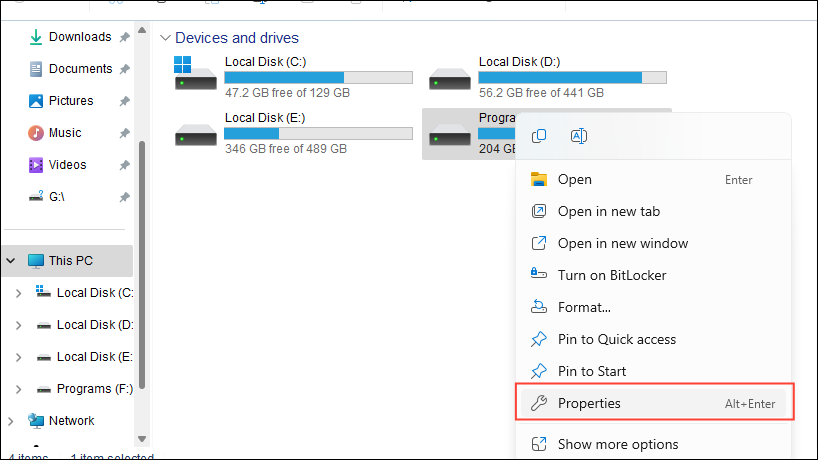
- Right-click on the drive that is giving you the error and then click on 'Properties'.
- In the dialog box that appears, click on the 'Security' tab at the top and then on the 'Edit' button.
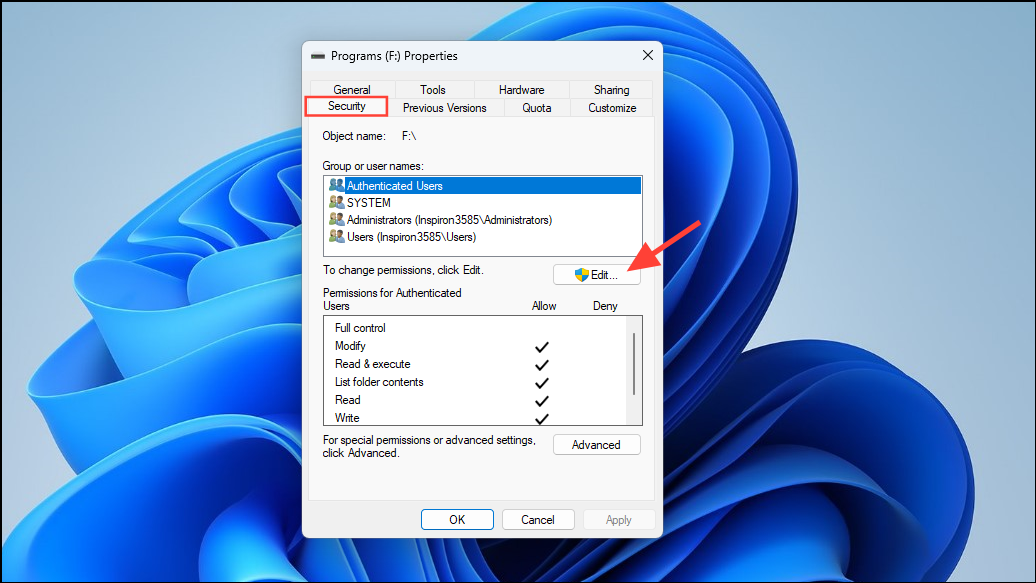
- Click on the checkbox next to the 'Full Control' option to enable it. Then click on 'Apply' and 'OK'. Now try accessing the folder again.
Fix 8: Check for bad sectors
You can use the Windows Check Disk utility to check whether your drive has any bad sectors that are responsible for the error.
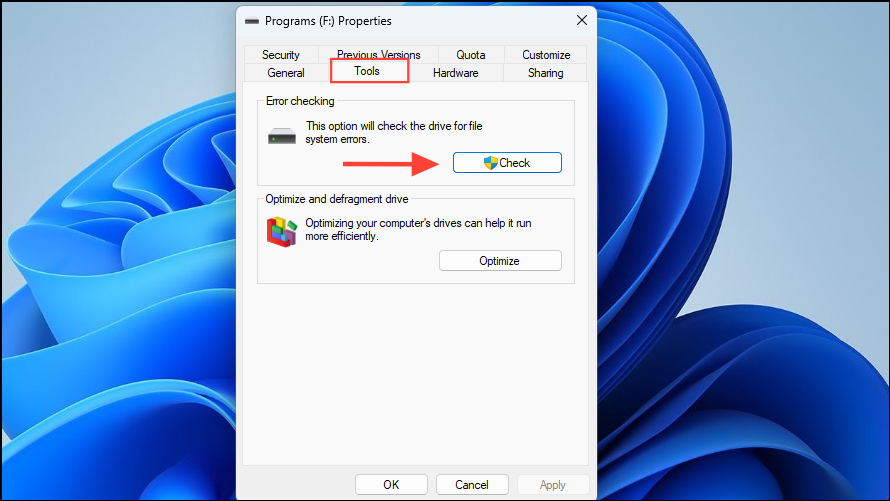
- Open the Properties window for the drive by right-clicking on it in Windows Explorer as explained above.
- However, instead of the Security tab, click on the 'Tools' tab and then on the 'Check' button.
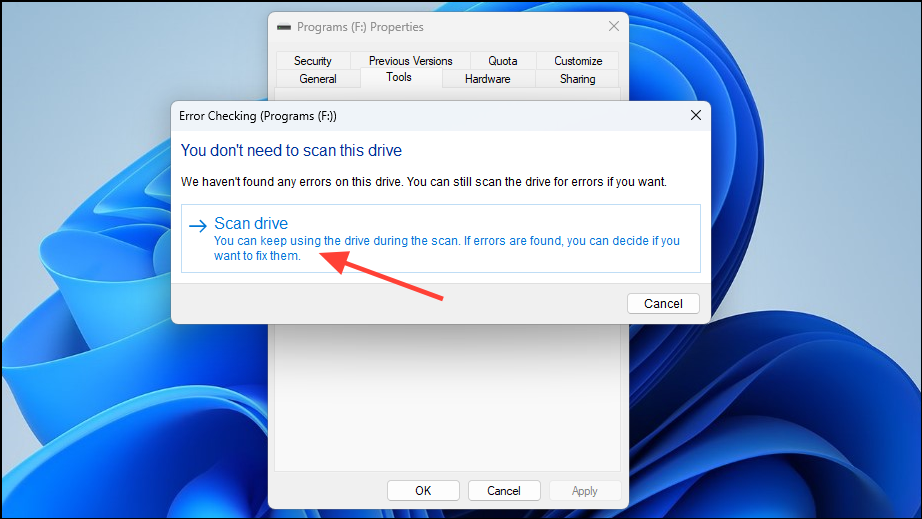
- Now, click on 'Scan Drive' and let the scan commence. Depending on the size of your drive, the scan can take time to complete. If any errors are present, the utility will show you a few options you can use to resolve them.
Fix 9: Perform SFC, DISM, and CHKDSK scans
The Windows System File Check (SFC) utility can scan your PC for errors and try to fix them.
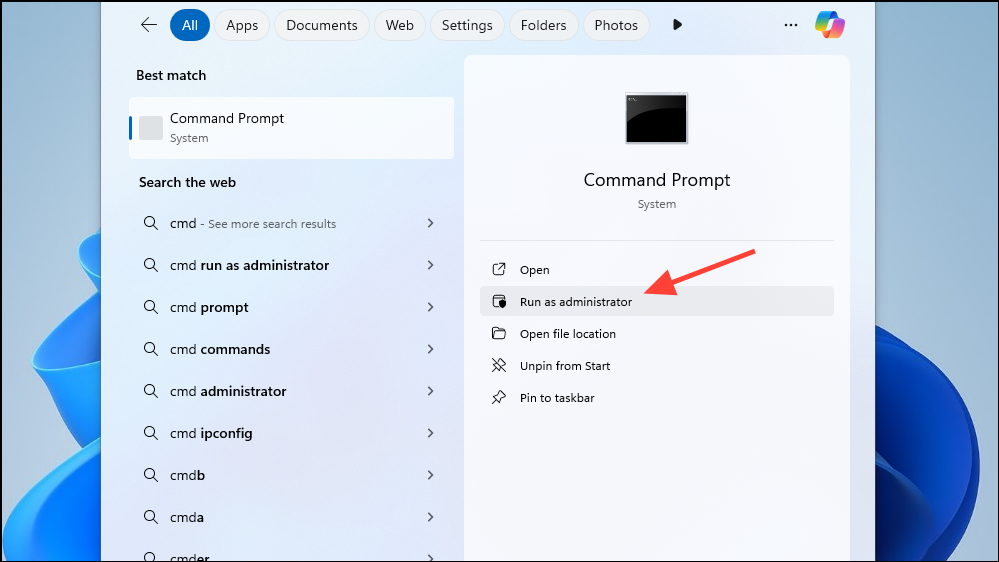
- Open the Start menu, type
cmd, and click on 'Run as administrator'.
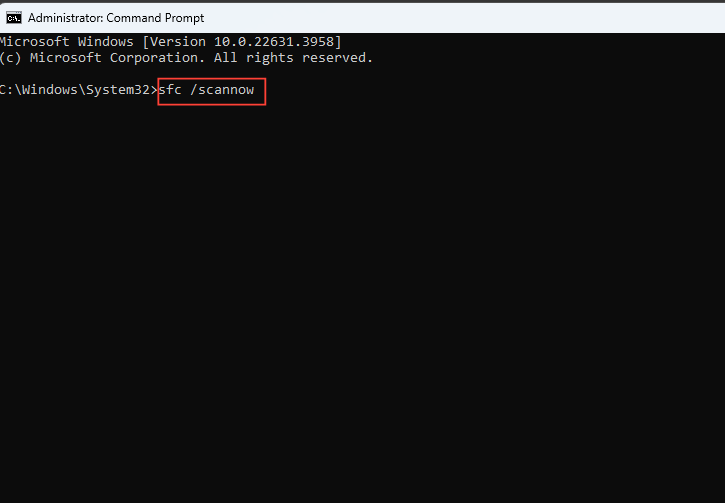
- When the command prompt window appears, type
sfc /scannowand press Enter.
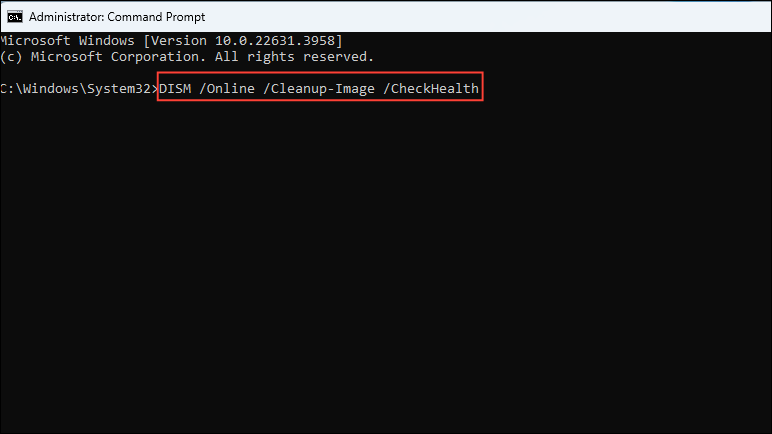
- Wait for the scan to complete and then type
DISM /Online /Cleanup-Image /CheckHealthbefore pressing the 'Enter' key again.
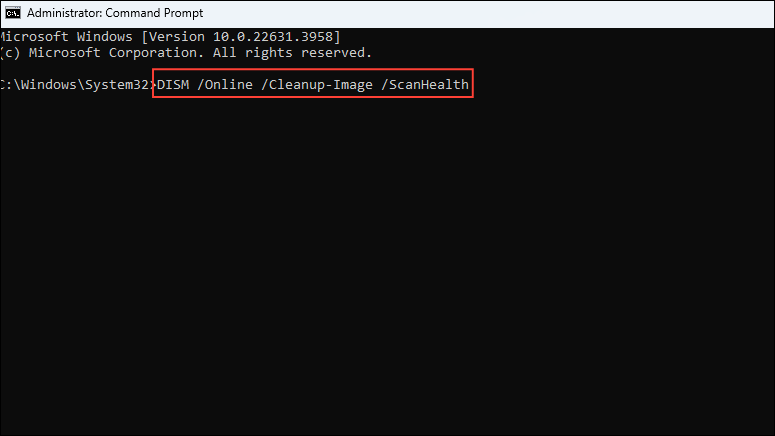
- Next, type
DISM /Online /Cleanup-Image /ScanHealthand press Enter again.
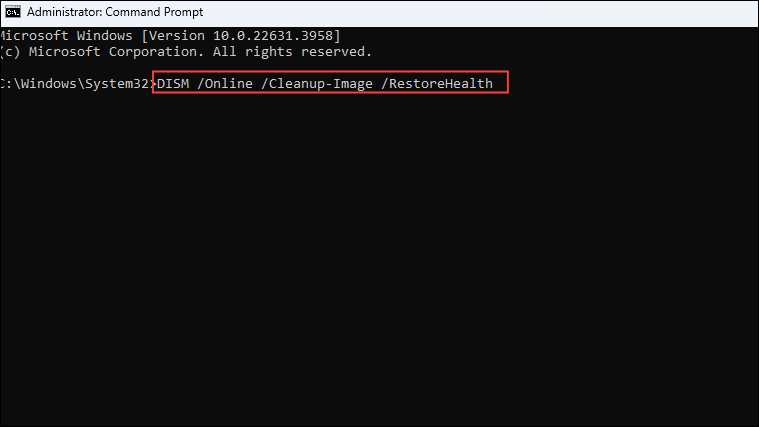
- Finally, type
DISM /Online /Cleanup-Image /RestoreHealthand press the 'Enter' key.
- Once the DISM scans are complete, you can perform the CHKDSK scan. Type
chkdsk g: /f /r /xin the command prompt window and press Enter. Make sure to replace 'g' with the drive letter to the disk you cannot access.
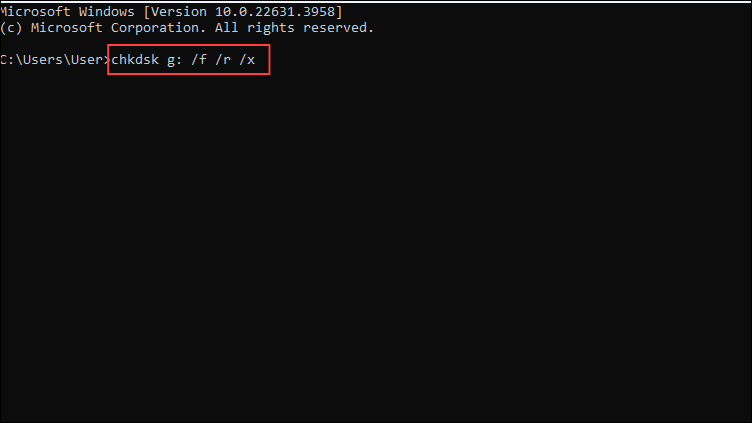
- Wait until the scan is complete and then restart your computer.
Fix 10: Copy the desktop folder to System Profile
- Open Windows Explorer, go to 'This PC', and then open the 'C' drive.
- Double-click on the 'Users' folder to open it.
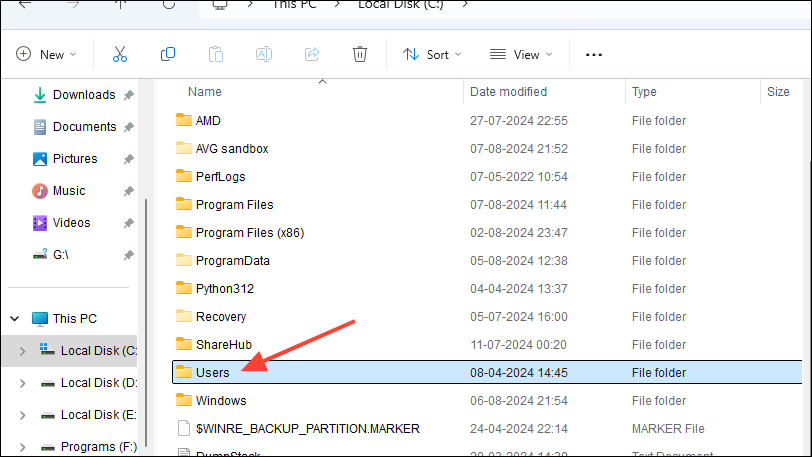
- In the 'Users' folder, look for the 'Default' folder. If it is not visible, click on the 'View' menu at the top, then go to the 'Show' option and then click on 'Hidden items.
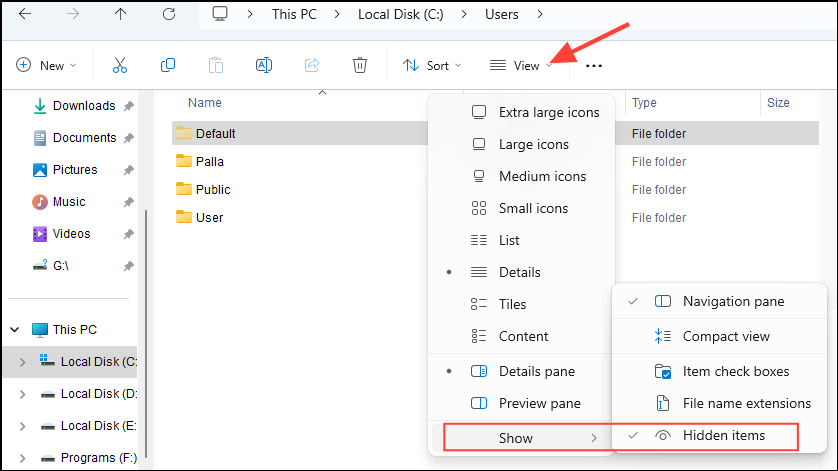
- Once you can see the Default folder, right-click and copy it, and then move it to the following location:
C drive -> windows -> system 32 -> config and then systemprofile. Once you've copied the folder, restart your PC.
Fix 11: Add desktop location to the registry
- Open the Start menu, type
regeditand click on 'Run as administrator'.
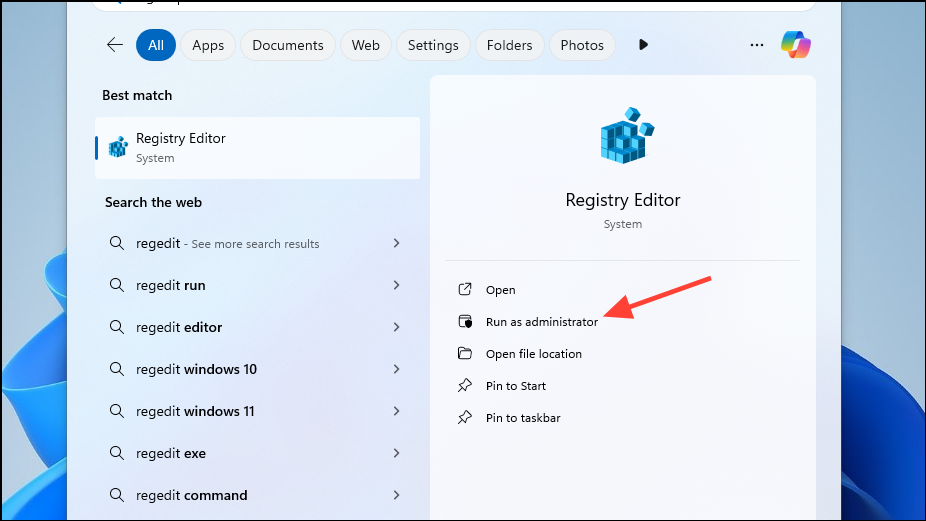
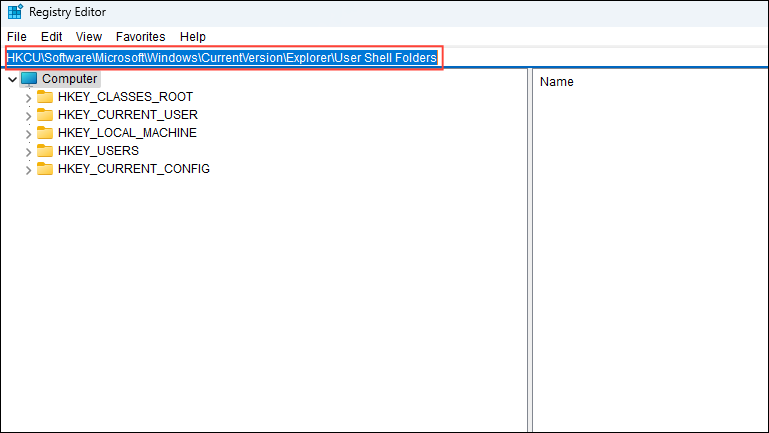
- Paste the following address in the address bar of the Registry Editor:
HKCU\Software\Microsoft\Windows\CurrentVersion\Explorer\User Shell Foldersand press Enter.
- Right-click on the ' User Shell Folders' folder on the left, and click on 'New' and then on 'String Value'.
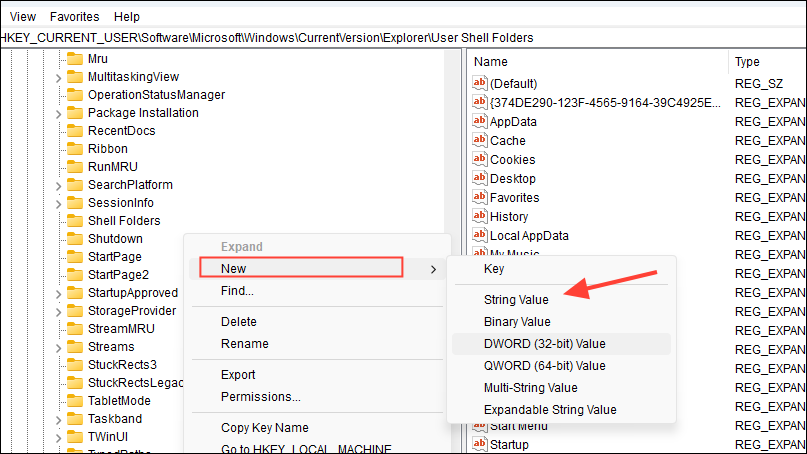
- Type the name of the new DWORD value as
%USERPROFILE% \Desktop C:\Users\%USERNAME%\Desktopand press Enter before restarting your PC.
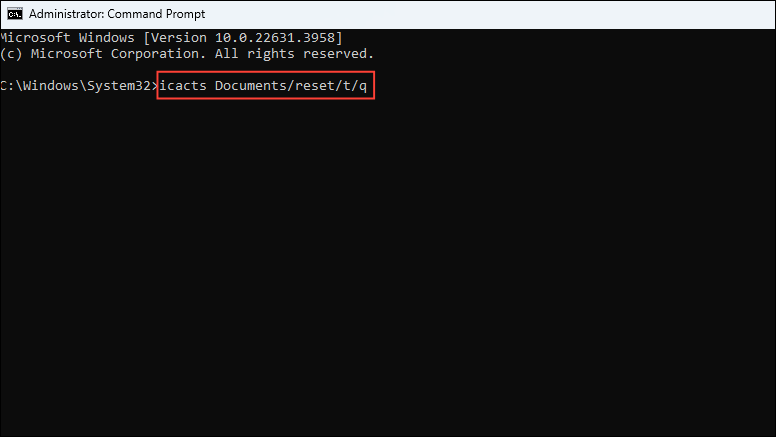
Fix 12: Reset user permissions
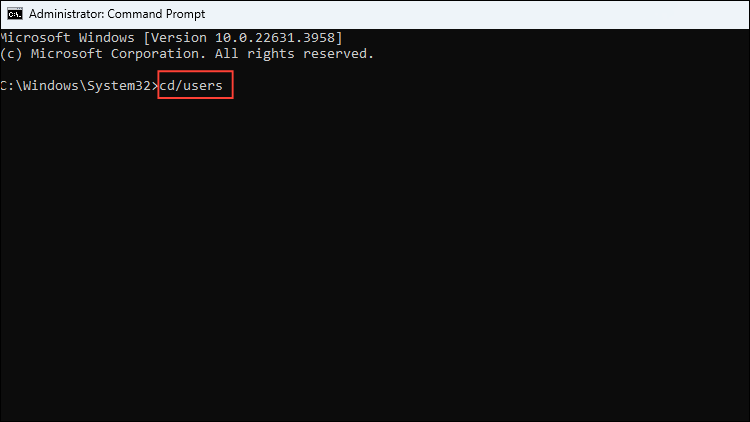
- Open the command prompt as administrator and type
cd/usersand press Enter.
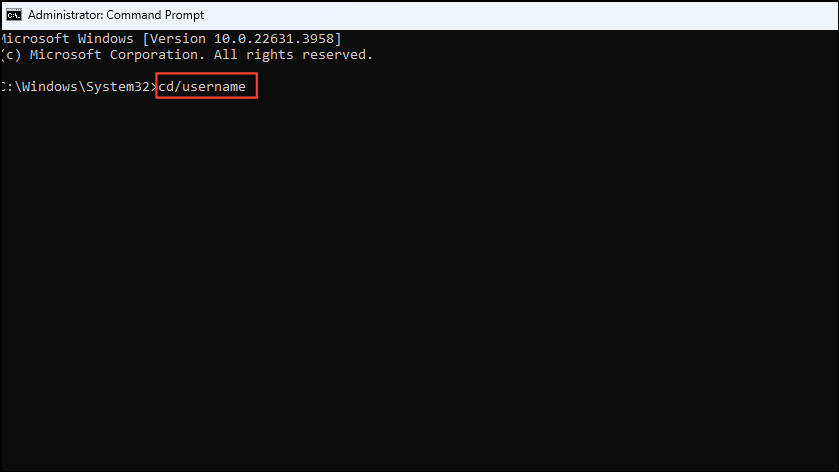
- Follow this with
cd/usernameand again press Enter. Replace 'username' with your Windows account name.
- Then, type
icacts Documents/reset/t/qand press the 'Enter' key.
Fix 13: Restart the RPC service
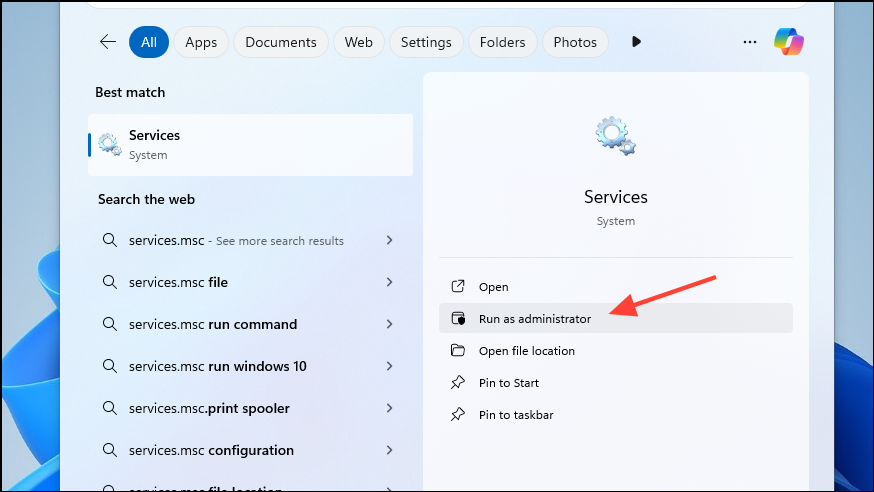
- Open the Start menu, type
services.msc, and click on 'Run as administrator'.
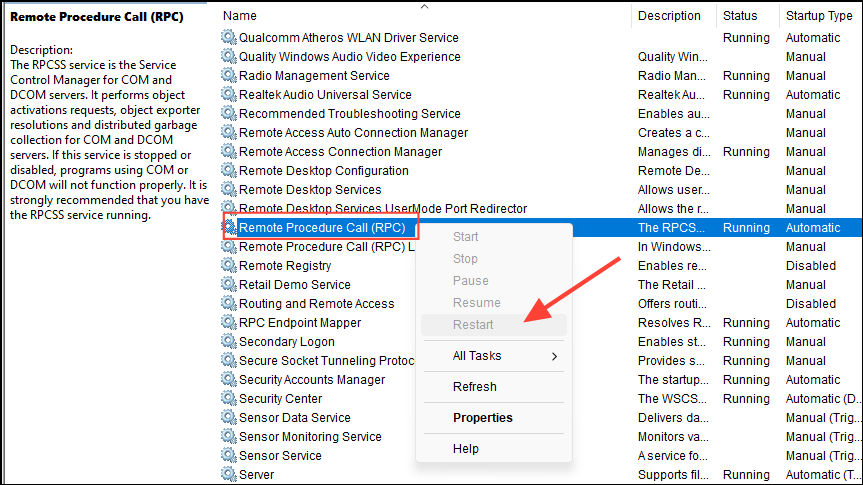
- Look for the 'Remote Procedure Call' (RPC) service, right-click on it, and check whether the 'Restart' option is available. If it is, click on it. If it is grayed out, that means the service is running properly.
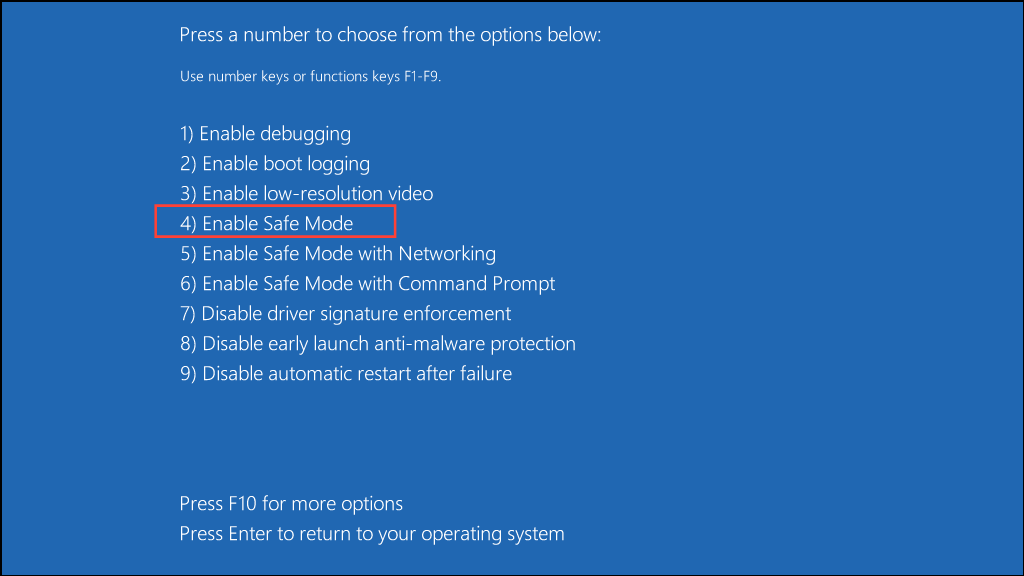
Fix 14: Enable Safe Mode
- Press and hold the
Shiftkey and restart your PC to boot into the Advanced Options. Alternatively, restart your computer and press theF8key repeatedly. - On the Advanced Options screen, click on the 'Startup Settings' option.
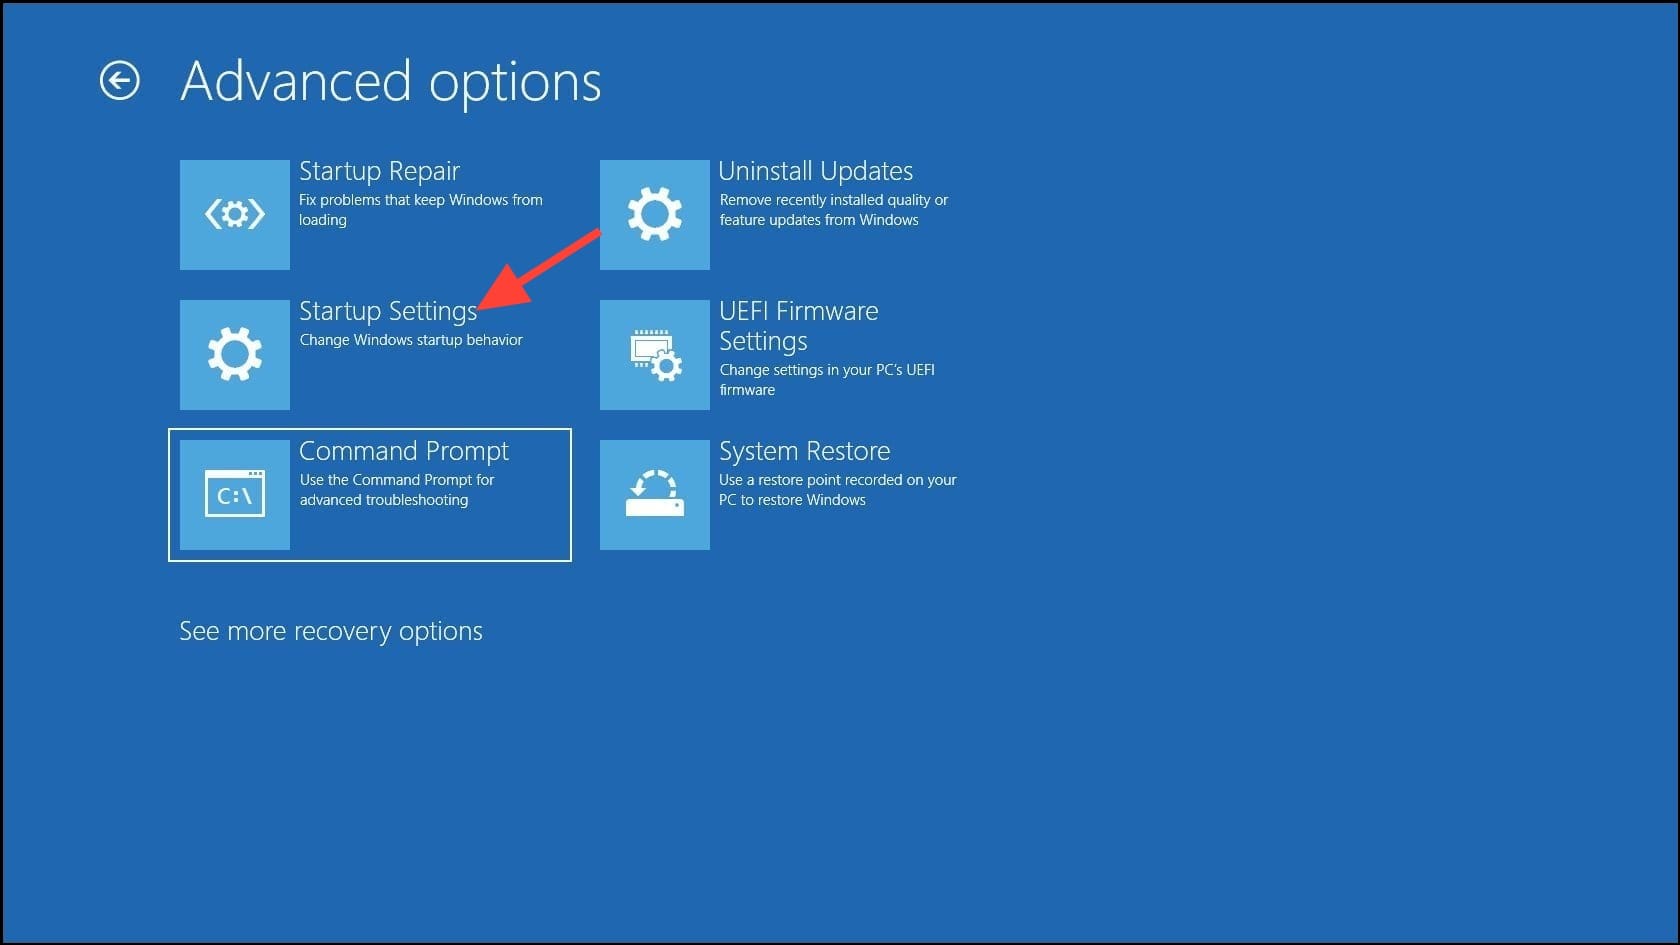
- On the Startup Settings page, click on the 'Restart' button. When your PC reboots, press the
F4key to boot into Safe Mode. Try accessing the folder in Safe Mode.
Fix 15: Perform a system restore
If you are unable to solve the issue, consider using system restore to revert your PC to the time when the folder was accessible.
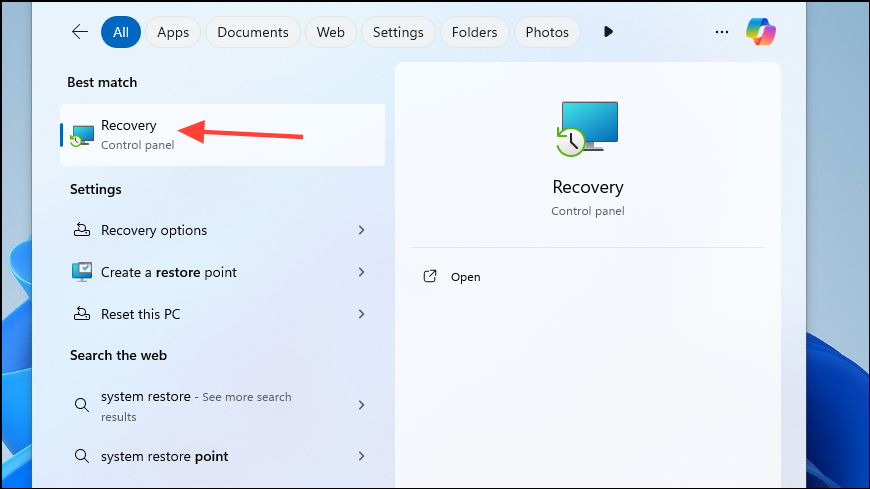
- Open the Start menu, type
system restore, and click on 'Recovery'.
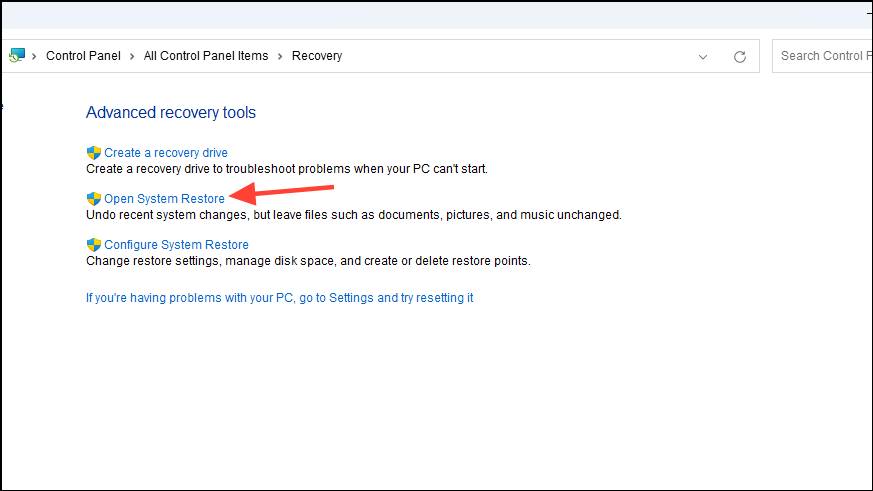
- Click on 'Open System Restore' on the Control Panel page that appears.
- When the System Restore utility opens up, you can select the restore point you wish to use by clicking on it. Then click on the 'Next' button.
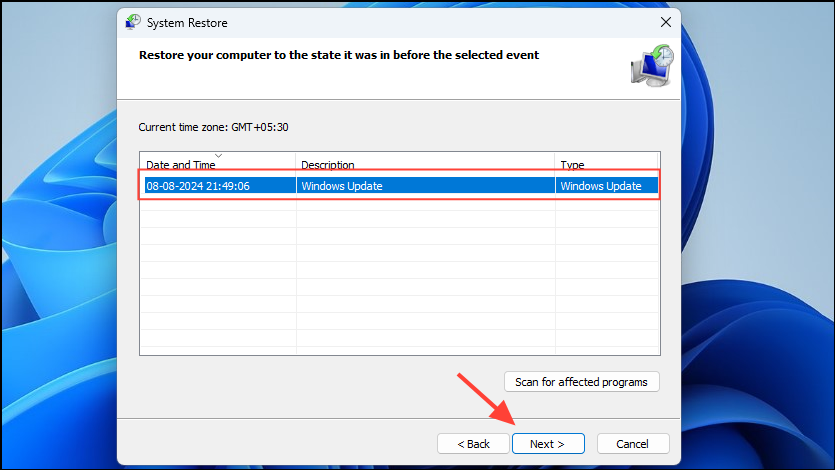
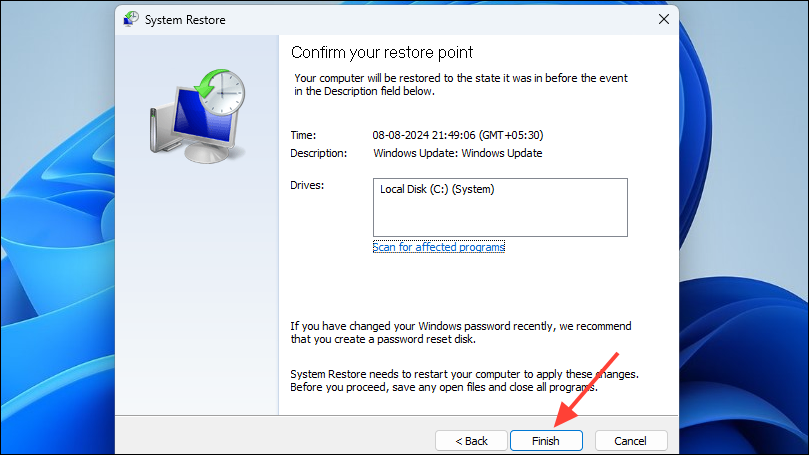
- Finally, click on the 'Finish' button and let your computer reboot. Wait for it to revert itself to when the 'Location not available' error was not present.
Things to know
- If the data contained in the folder that you are unable to access is not important, you can try formatting the drive and see if that helps.
- When using the Safe Mode to access the folder, you may have to opt for the 'Safe Mode with Networking' option if the folder is on a network.
- In case you are unable to access the folder even after trying the above methods, you can try recovering the data in that location using data recovery tools.

