
Quick Info
- If you're using Windows Home edition, you will be limited to a single display language on your machine.
- To change that, you can install a language pack and make adjustments in the Registry Editor.
- A better solution would be to get a Windows Pro license and upgrade your PC, which will allow you to set different languages as the display language easily.
Solution 1: Install a language pack and tweak the registry
- Use the
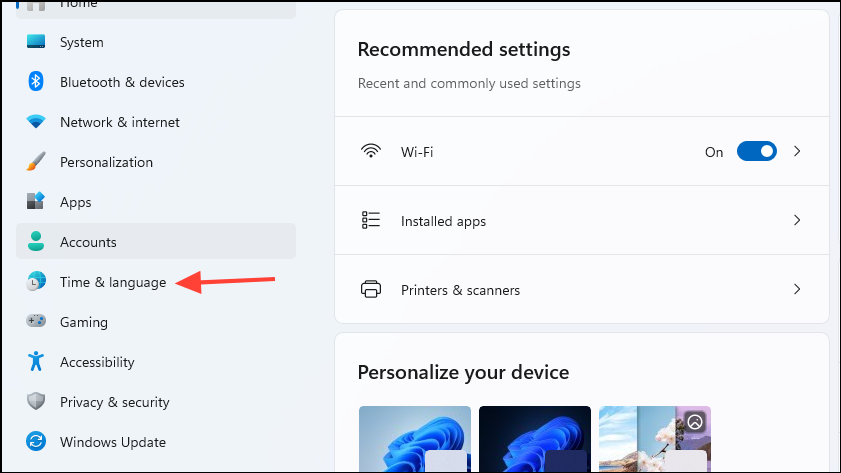
Win + Ishortcut to open the Settings page. - Click on the 'Time and Language' option on the left.
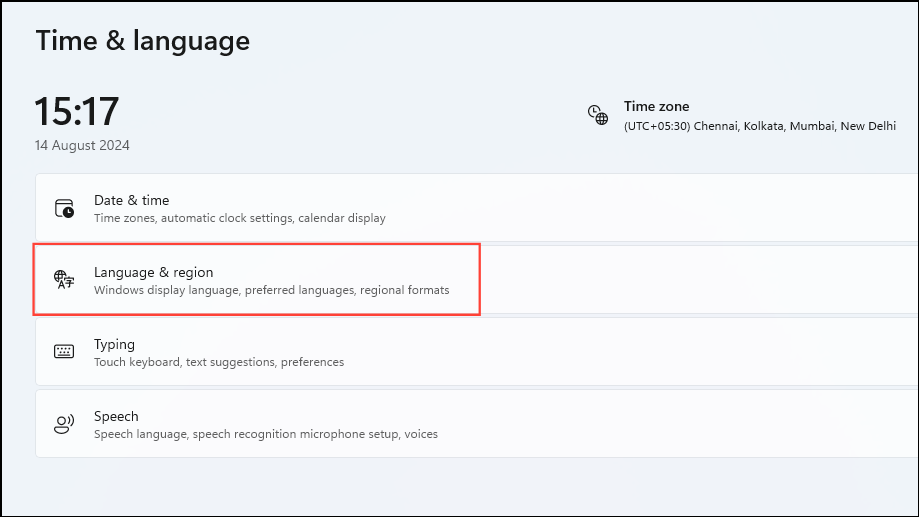
- Next, click on 'Language and Region'.
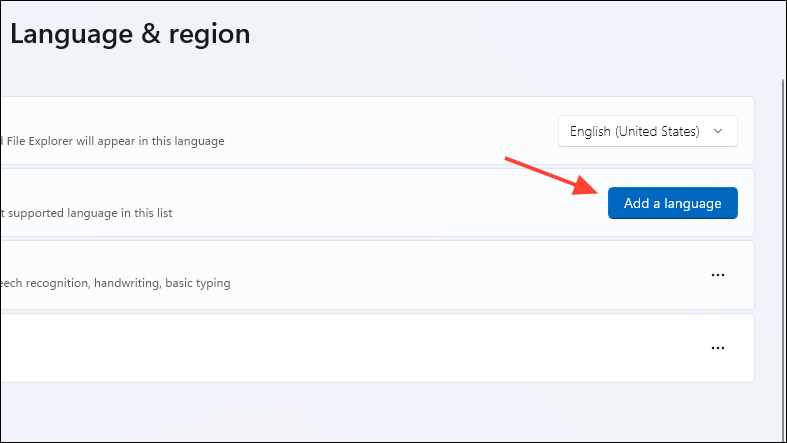
- Then click on the 'Add a language' button.
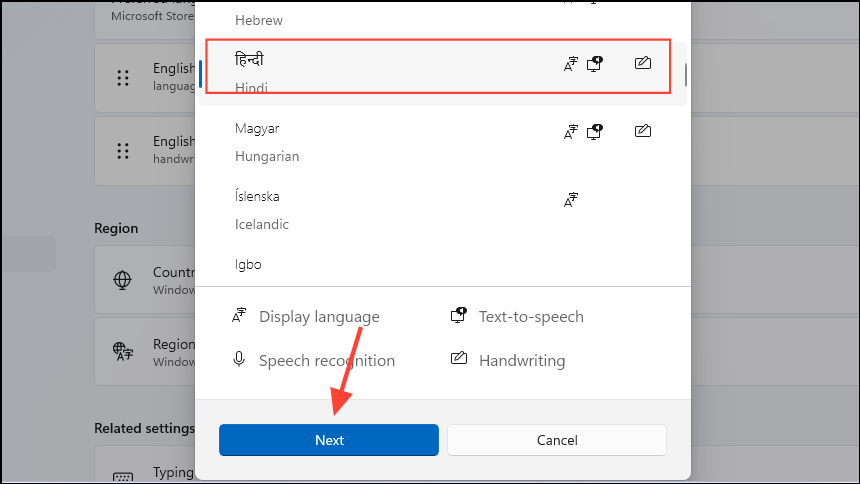
- You will see a list of the available languages. Click on the one you want to install and then click on the 'Next' button.
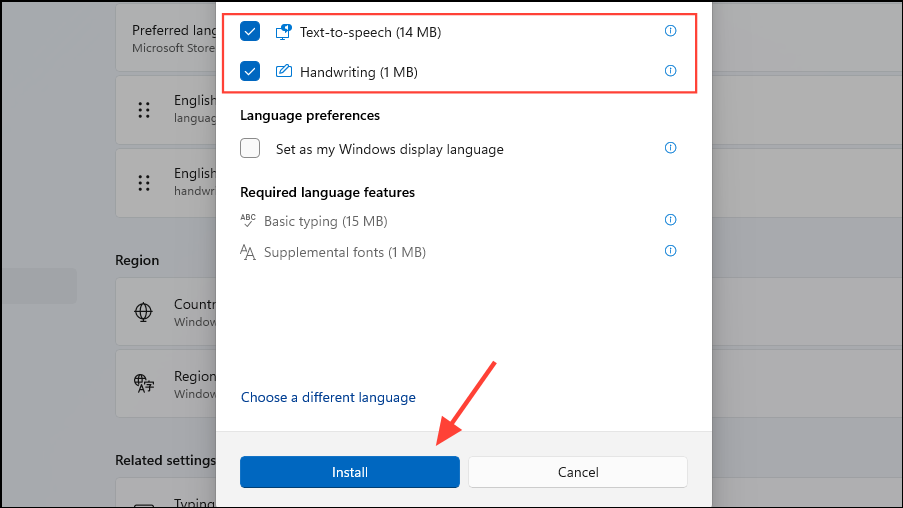
- Click on the checkboxes for the language features before clicking on the 'Install' button. Wait until the language is installed.
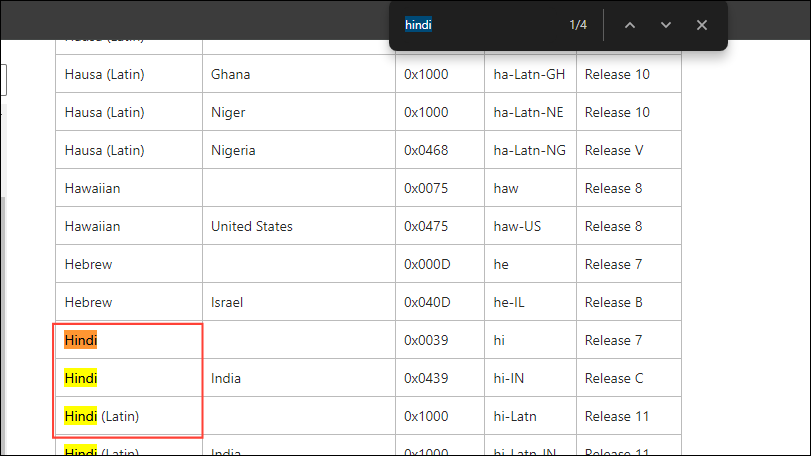
- Once you've installed a language, you can switch to it with the Registry Editor. To do that, first, go to Microsoft's Windows Protocols website.
- On the website, use the
Ctrl + Fshortcut and type the name of the language you installed to search for it. This will show you its Language ID.
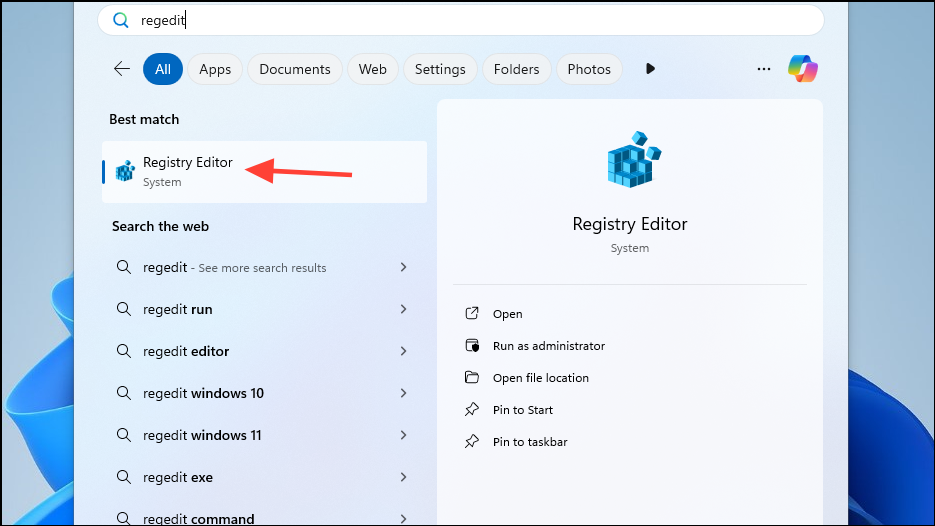
- Now open the Start menu, type
regedit, and click on 'Run as administrator' to open the Registry Editor.
- Copy the last four digits of the Language ID from the website and navigate to the following location in the Registry Editor:
HKEY_LOCAL_MACHINE > SYSTEM > CurrentControlSet > Control > Nls > Language
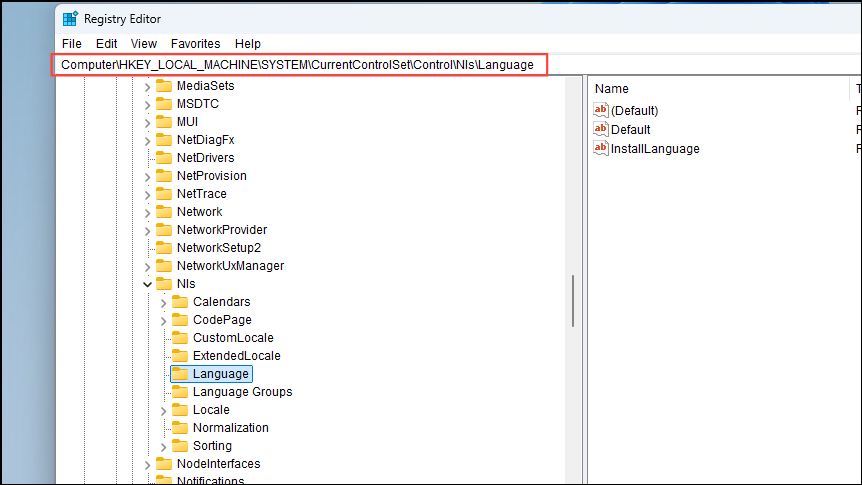
- Double-click on the 'Default' string on the right and paste the digits you copied from the website in the 'Value Data' section before clicking on OK.
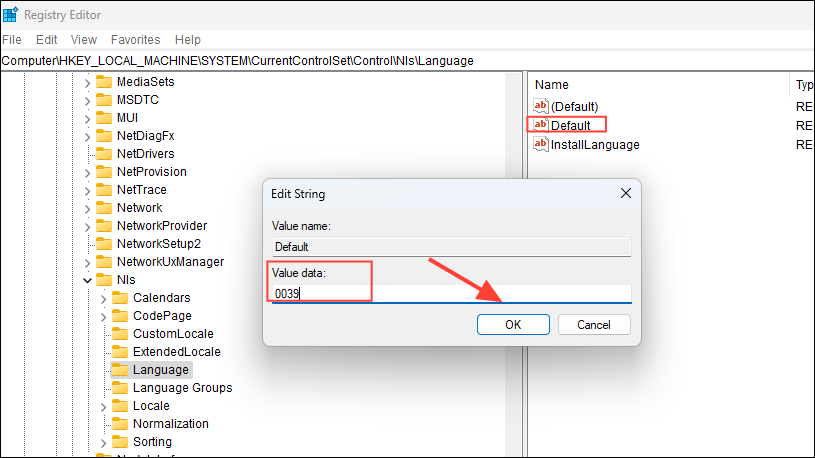
- Now double-click on the 'InstallLanguage' string and paste the digits there too. Click on OK and close the Registry Editor before restarting your computer.
Solution 2: Upgrade to Windows Pro
The method explained above involves bypassing the limitations of a single-language Windows install. This means that Microsoft can block it with future updates to the OS. So, a better solution is to upgrade your installation to Windows Pro or Windows Multilanguage. You need a Windows Pro key for upgrading.
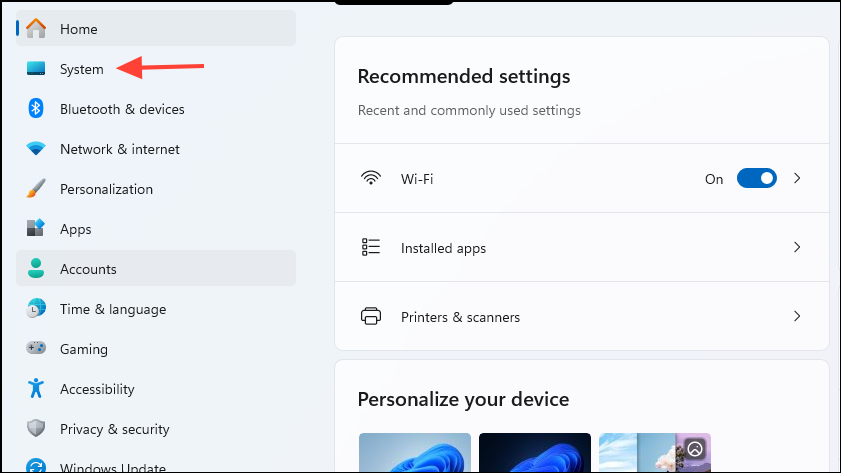
- Open the Settings page and click on 'System'.
- Scroll down to the bottom of the page and click on 'About'.
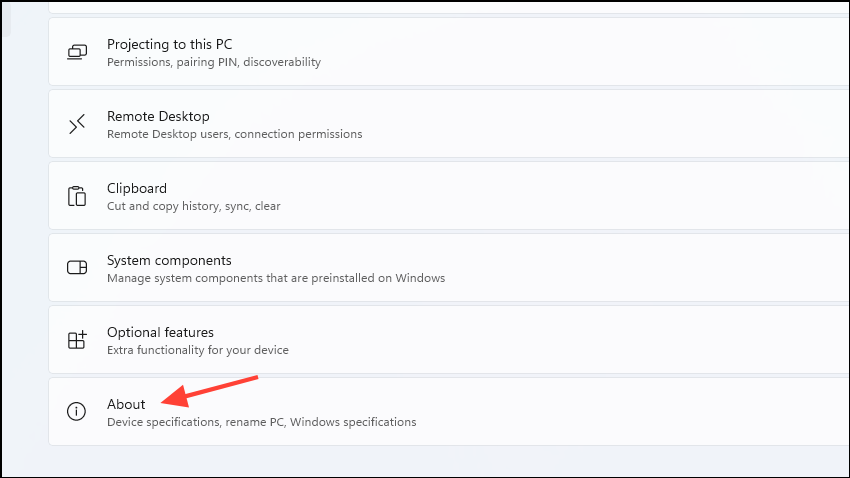
- On the next page, click on 'Product key and activation'.
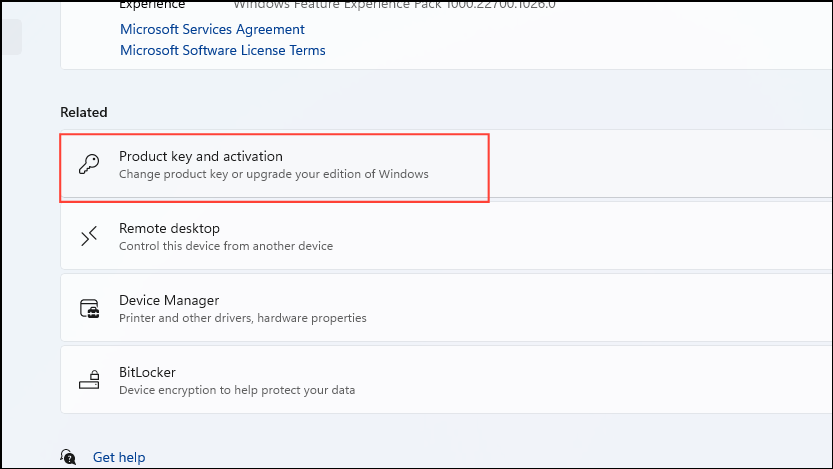
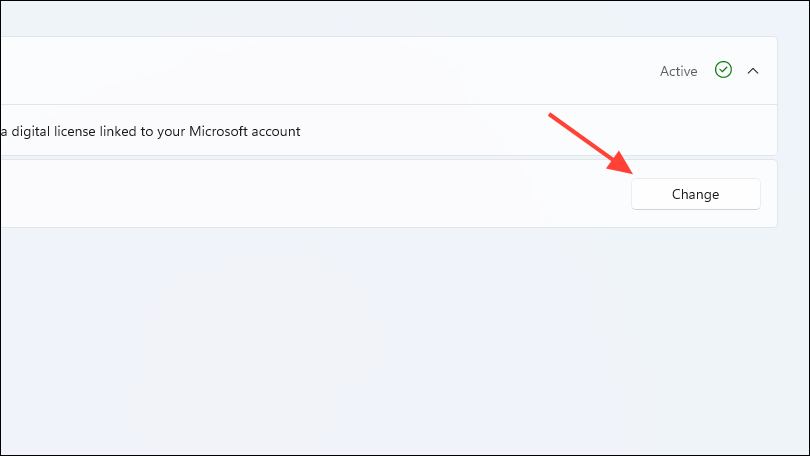
- On the Activation page, click on the 'Change' button on the right of the 'Change product key' option.
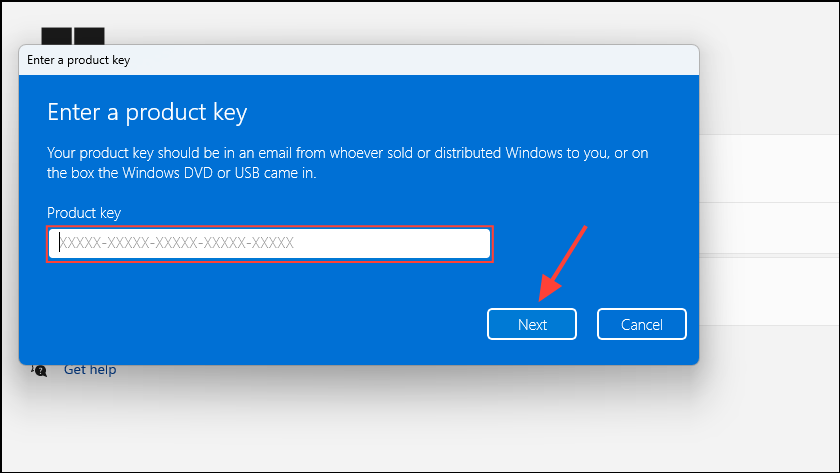
- Type in the product key for Windows 11 Pro or Windows 11 Multilanguage and click on the 'Next' button. Then follow the prompts to upgrade your copy of Windows.
Note: You can also purchase Windows 11 Pro from the Microsoft Store if you do not have a product key. Alternatively, you can undertake a fresh install of Windows and go with the Pro version when activating it.
Things to know
- Create a backup of the registry before making any changes in the Registry Editor just in case something goes wrong.
- If you reset your PC or use system restore after changing the display language, your display language will be reset to the default one.
- Once you upgrade to Windows Pro, you can switch between different languages at any time without needing to tweak the Windows registry.