
Tiny11, a streamlined version of Windows 11, often blocks progress during installation by requiring a Microsoft account at the "Let's add your Microsoft account" screen. This requirement can prevent users from completing setup, especially when a local account is preferred. Several practical solutions exist to bypass this obstacle, each with its own advantages depending on your setup environment and Windows 11 build version.
Bypassing the Microsoft Account Requirement by Disconnecting from the Internet
Step 1: Proceed with the Tiny11 installation until you reach the Microsoft account sign-in prompt. At this stage, do not enter any credentials.
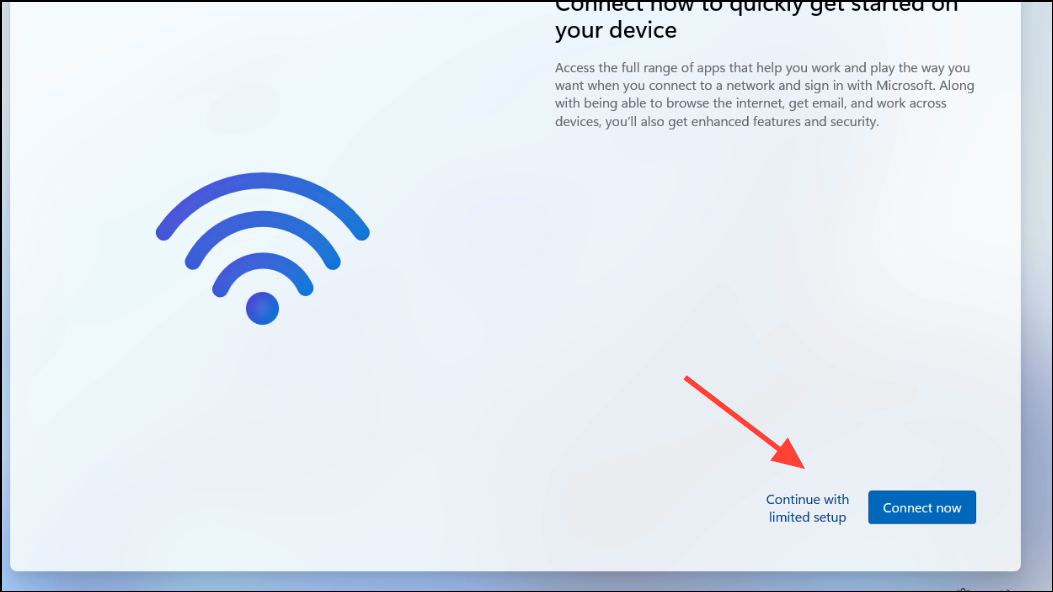
Step 2: Disconnect your device from all internet sources. If using Wi-Fi, either disable it using a physical switch, toggle, or by turning off your router temporarily. For wired connections, unplug the Ethernet cable. This step is crucial because Windows setup checks for an internet connection to enforce the Microsoft account requirement.
Step 3: Wait a few moments for the setup to recognize the loss of connectivity. The screen may refresh or display new options such as Offline account, Limited experience, or Skip for now. Select the available option to continue without a Microsoft account.
Step 4: Follow the prompts to create a local user account. Once setup is complete and you reach the desktop, reconnect your device to the internet as needed.
Bypassing Using Command Prompt During Setup
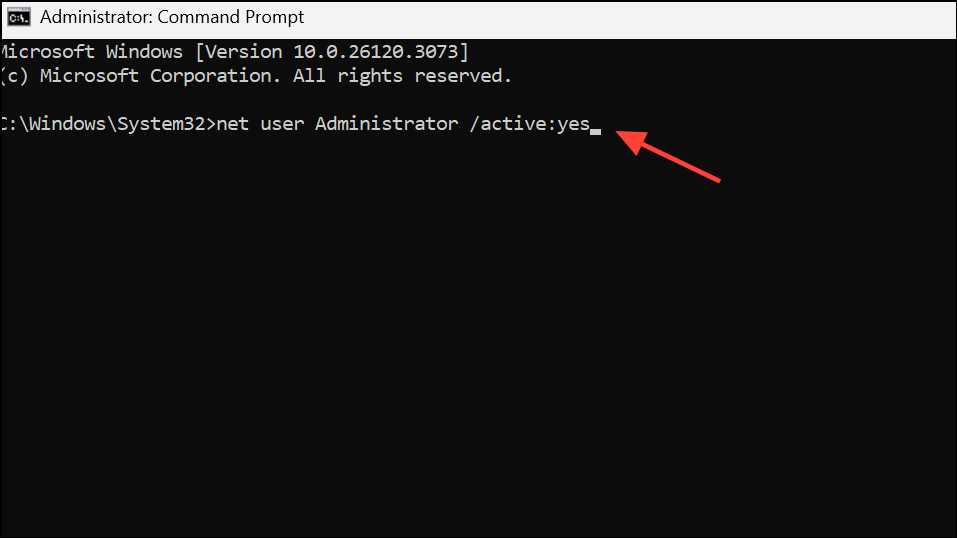
Step 1: When you are blocked at the "Let's add your Microsoft account" screen, press Shift + F10 to open the Command Prompt window. This shortcut works during the Windows setup process and gives you access to system commands.
Step 2: In the Command Prompt, activate the built-in Administrator account by entering the following command:
net user Administrator /active:yesThis command enables the Administrator account, which can allow you to continue setup without a Microsoft account.
Step 3: Close the Command Prompt. Restart your computer by clicking the power icon in the lower right corner and choosing Restart.
Step 4: After the restart, the setup may prompt you to log in as Administrator or allow you to create a local account. Complete the remaining setup steps as prompted.
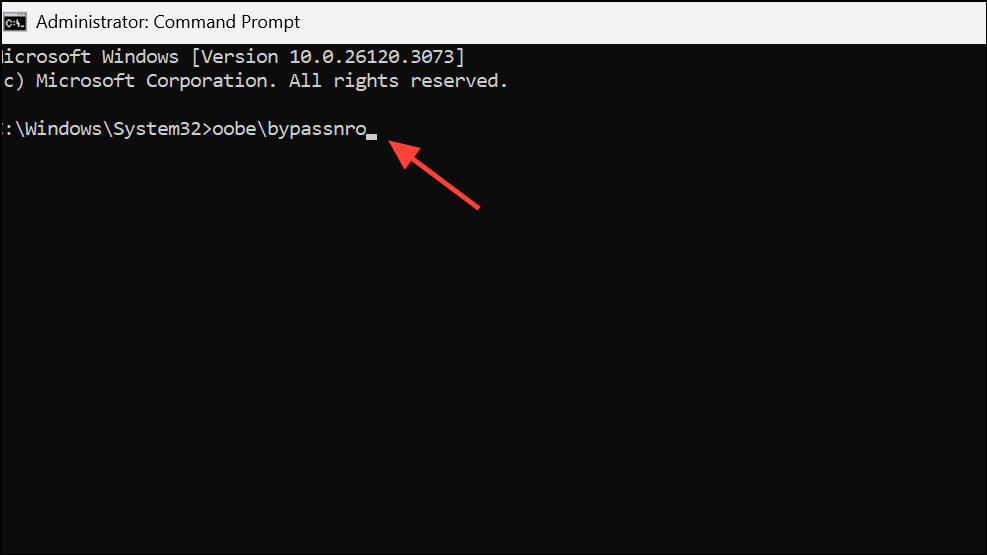
Alternatively, you can use the following command in Command Prompt to directly trigger the bypass for the network requirement:
oobe\bypassnroThis command restarts the system and, on reboot, typically allows you to select "I don't have internet" or "Limited setup," leading to local account creation. Ensure you use the correct backslash (\) in the command, as a forward slash will not work.
Bypassing by Entering Invalid Account Information
Step 1: At the Microsoft account prompt, enter a deliberately incorrect email address (such as no@thankyou.com or user@user.com) and any password.
Step 2: Attempt to proceed. The setup will try to verify the information, fail, and occasionally offer an option to create a local or offline account. If not, repeat the process or use the back arrow to retry entering invalid credentials. Some users report that after several failed attempts, the local account option appears.
Step 3: Once the offline or local account option is available, select it and continue with the setup, creating your desired username and password.
Disabling Network Adapters via Command Prompt
Step 1: At the Microsoft account screen, press Shift + F10 to open Command Prompt.
Step 2: To disable Wi-Fi, type the following command and press Enter:
netsh interface set interface "Wi-Fi" disable
For Ethernet, replace "Wi-Fi" with "Ethernet". This command disconnects the device from the network without needing to physically unplug cables or turn off routers.
Step 3: Switch back to the setup window (using Alt + Tab) and look for an option like "Other sign-in options" or "I don't have internet." This should now be available, allowing you to proceed with local account setup.
Step 4: Before completing the setup, re-enable your network adapter if you want internet access immediately upon finishing installation. Use the following command:
netsh interface set interface "Wi-Fi" enable
Continue with the rest of the setup as prompted.
Editing the Windows Registry to Force Local Account Option
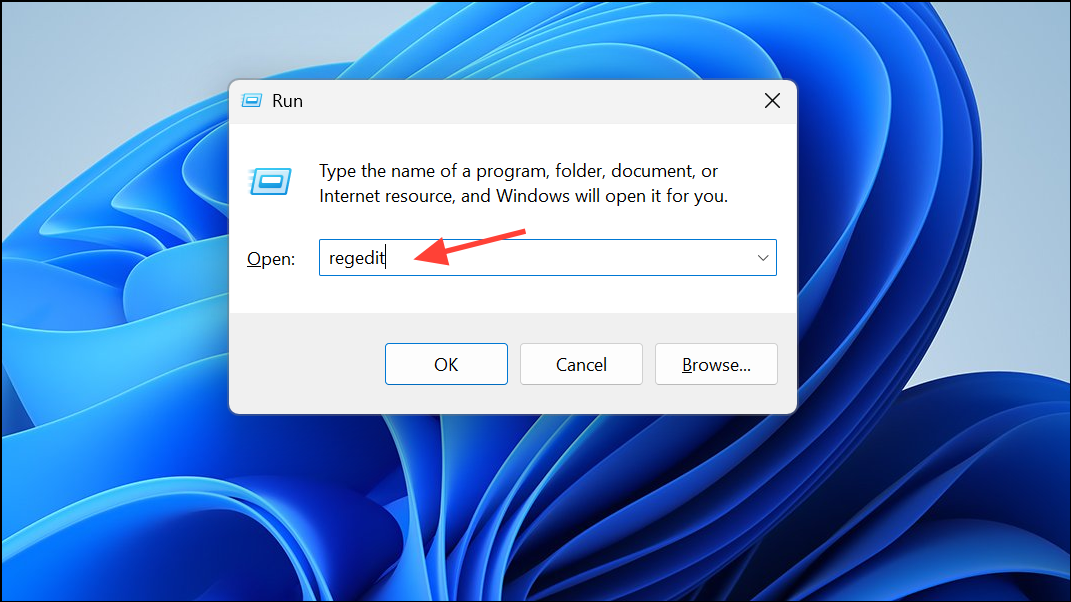
Step 1: At the Microsoft account screen, press Shift + F10 to open Command Prompt, then type regedit and press Enter to launch the Registry Editor.
Step 2: In Registry Editor, navigate to the following key:
HKEY_LOCAL_MACHINE\SYSTEM\Setup\OOBEIf the OOBE key does not exist, right-click on the Setup folder, select New > Key, and name it OOBE.
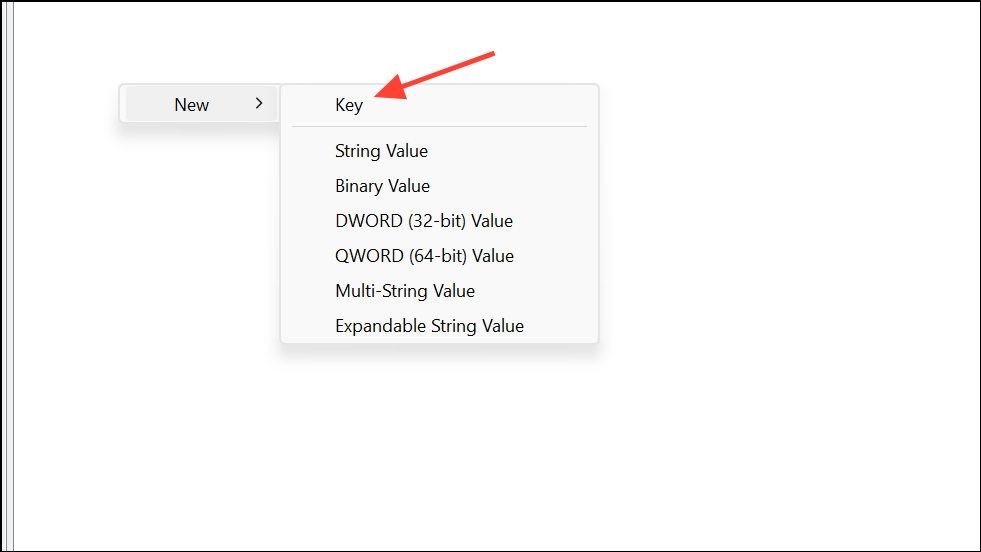
Step 3: Right-click the right pane in the OOBE key, select New > DWORD (32-bit) Value, and name it ByPassNRO.
Step 4: Double-click ByPassNRO and set its value to 1. Close Registry Editor and Command Prompt, and restart your device. After rebooting, the setup should offer the option to create a local account.
These methods allow you to move past the Microsoft account requirement in Tiny11 setup, giving you the flexibility to use a local account and complete installation efficiently. If one method does not work due to a specific Windows build, try another approach from the list above.