Experiencing WiFi issues after installing Windows 10 November 2019 update? Fret not! It’s a common issue with Windows updates and fixing it is fairly simple.
The issue you’re facing with wireless connectivity on your PC is most likely due to driver compatibility, or system changes introduced with the update. A quick Network reset on your PC, or updating the driver should resolve the problem.
Below are some of the fixes that works 99% of the time when it comes to WiFi problems on Windows 10 PCs. Whether it be slow WiFi speed, random connection drops, or WiFi not connecting at all. The tips mentioned below should fix the problem for you.
Troubleshoot the Network Adapter
Windows’ built-in troubleshooter is pretty helpful in automatically working out WiFi issues. To run “Network Adapter” troubleshooter, open the Windows 10 Start menu and click the “Settings” icon.

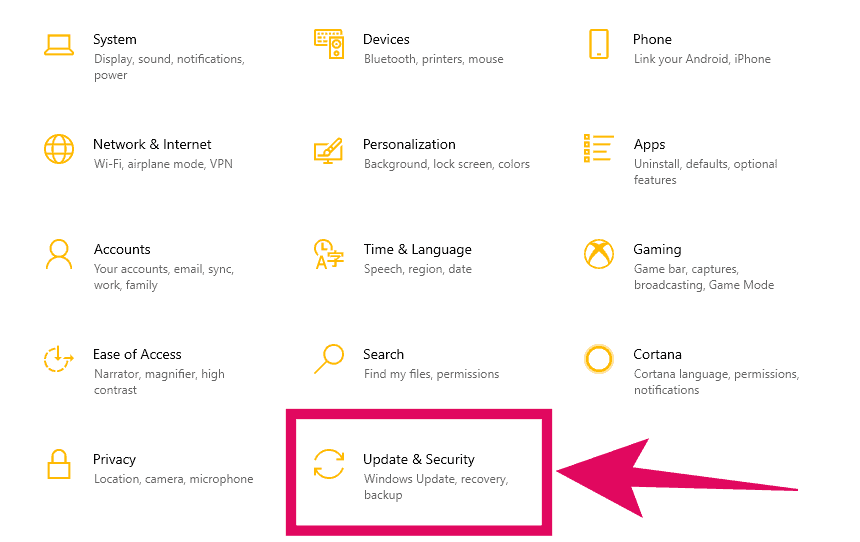
From the Windows 10 Settings screen, click “Update & Security” at the bottom of the list of options.
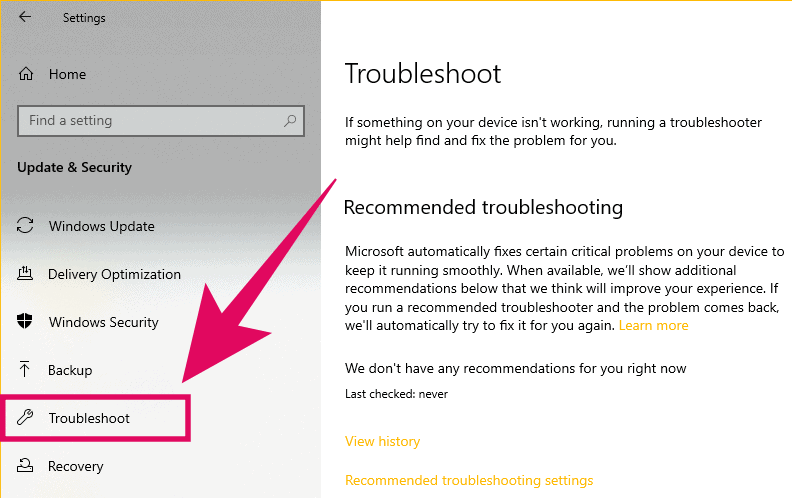
On the next screen, click “Troubleshoot” on the left panel of the Updates & Security settings page.
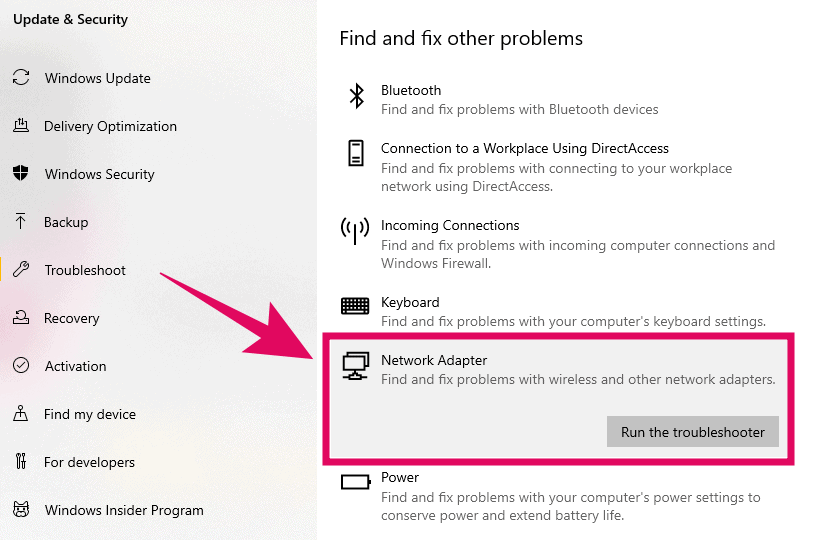
Under the “Find and fix other problems” section on the Troubleshoot screen, click “Network Adapter” and then click “Run the troubleshooter” from expanded options.
The troubleshooter will ask you to select a network adapter. Make sure you select “Wi-Fi” from the list network adapters available on your PC.
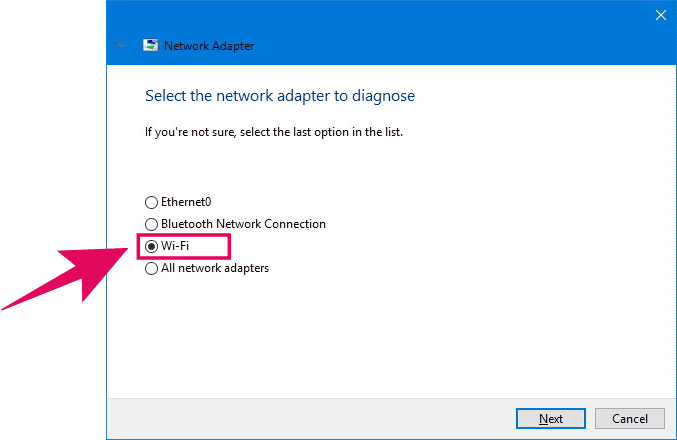
Click the “Next” button and let the Troubleshooter fix any issues it detects with the WiFi adapter on your PC.
To verify if the troubleshooter was able to fix the WiFi problem, launch a web browser on your PC and try opening a web page.
Update Wi-Fi Adapter Driver
The network adapter troubleshooter isn’t able to find and fix WiFi issue on your PC, try updating the WiFi adapter driver from Windows Device Manager.
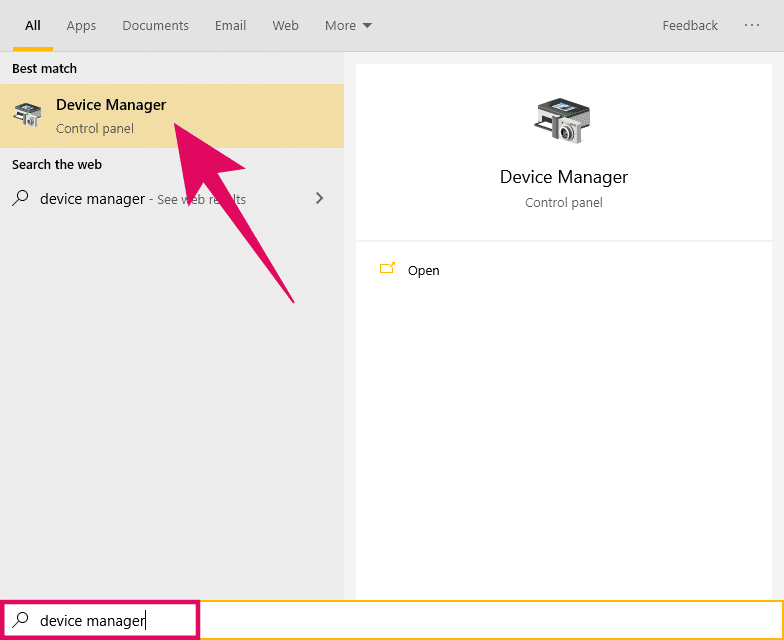
Open Start menu and type Device Manager, then click “Device Manager” from the search results in Start menu.
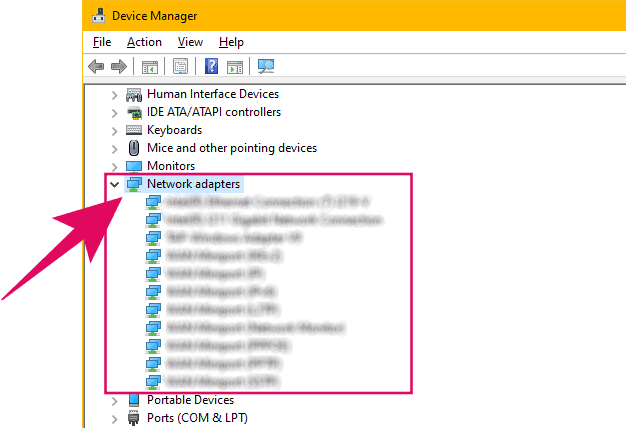
On the Device Manager screen, double-click on “Network Adapters” to view all adapters available on your PC.
Right-click on the Wi-Fi adapter (look for wireless in name) and select “Update Driver” from the context menu.
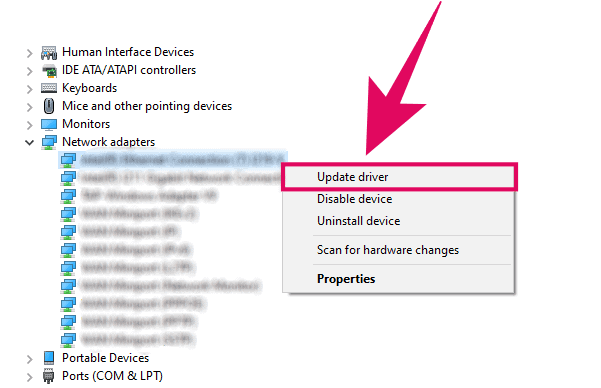
Windows will prompt you to either automatically search for driver or manually load the driver file. Click on “Search automatically for updated driver software”.
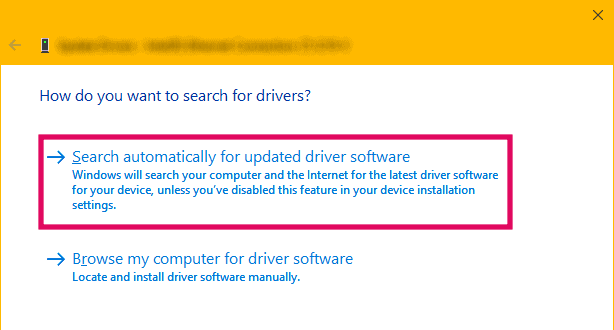
Let Windows search locally and online for updated driver. If it finds any, the updated driver will automatically download and install on your system.
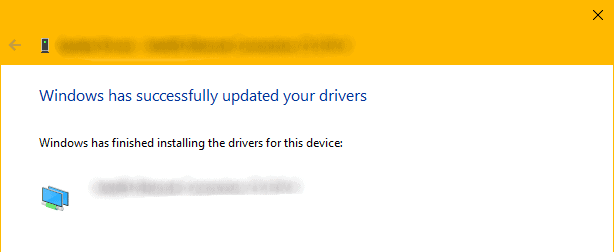
Try opening a website in a web browser on your PC now. If WiFi issue is resolved, you should be able to access the internet in your web browser.
Reset Network
Remove and then reinstall all network adapters on your PC, and set networking components to their original state by resetting the Network.
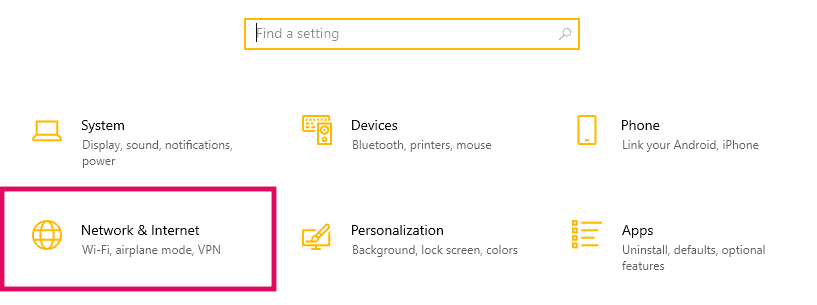
Open Windows 10 Settings menu and click “Network & Internet” from available options.
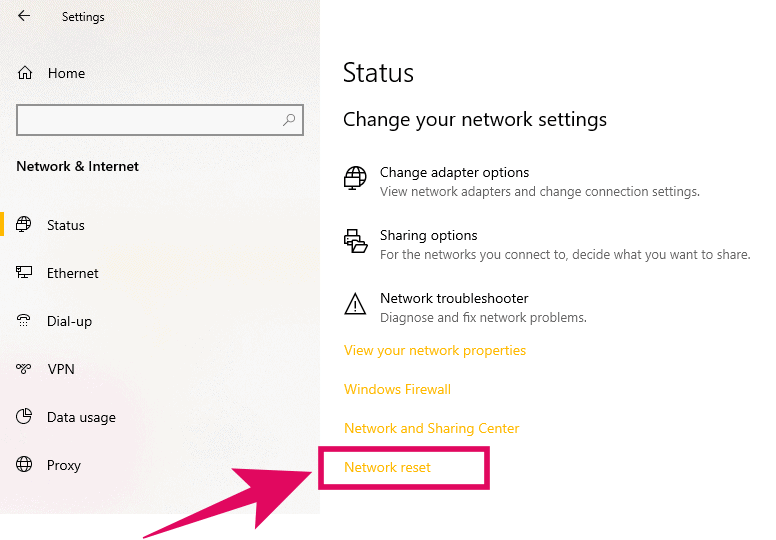
Scroll down on the Network status page, and click the “Network Reset” link under the “Change your network settings” section.
Finally, click the “Reset Now” button on the Network Reset screen. This will reset all network adapters, VPN clients, WiFi password, and other network related stuff.
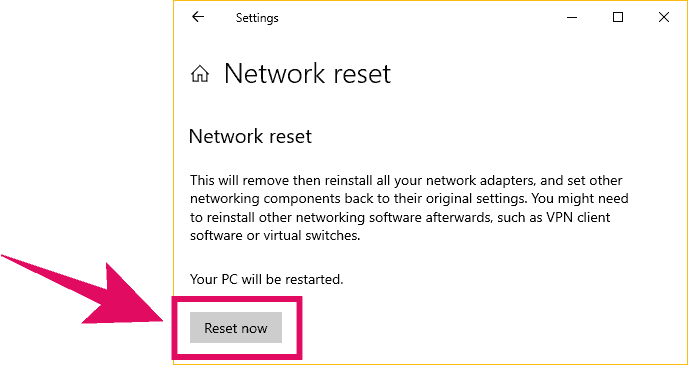
Your PC will restart in order to properly reset the network adapters. Once it is done, connect to your WiFi network and see if internet is working now on your PC by opening a website in a web browser.
In addition to the tips shared above, it’s also recommended that you also reboot your Wi-Fi router. It just might surprisingly fix the issue.

