
Black screens appearing after running the Windows Memory Diagnostic tool on Windows 11 systems often indicate underlying hardware conflicts or failed system processes. In some cases, users report the PC powers on, lights and fans operate, but no image appears—even the BIOS fails to load. This issue can prevent normal booting, cause data access problems, and leave the system unresponsive to standard keyboard shortcuts like Ctrl + Alt + Delete. Resolving this error requires a methodical approach, starting with hardware checks and moving toward Windows recovery and reinstallation options if necessary.
Method 1: Check and Reseat Hardware Components
Memory and graphics card issues are frequent causes of black screens after memory diagnostics. Improperly seated or failing RAM modules, as well as loose graphics cards, can prevent the system from initializing the display and BIOS.
Step 1: Turn off the computer and disconnect it from the power source. This prevents electrical damage and ensures safety while working inside the system.
Step 2: Open the case or access panel to reach the RAM and graphics card. Remove all memory modules from their slots. Gently clean the metal contacts on each RAM stick with a soft eraser to remove oxidation or debris, which can disrupt the connection.
Step 3: Reinsert only one memory module into the first slot. If you have multiple sticks, test each one individually in different slots to identify faulty modules or slots. This process helps isolate whether a particular stick or slot is causing the problem.
Step 4: Check that the graphics card is firmly seated in its PCIe slot and that any required power cables are securely attached. If your motherboard has integrated graphics, remove the dedicated graphics card and connect your monitor to the motherboard's video output to determine if the dedicated GPU is the issue.
Step 5: Reconnect the power cable and attempt to power on the system. Listen for beeps or look for error LEDs that might indicate hardware faults. If the screen remains black, repeat the process with different RAM sticks and slots or try a different graphics card if available.
Step 6: If you recently installed new hardware (such as a graphics card or power supply), verify all power connectors are fully inserted and that no cables are loose or disconnected.
Method 2: Perform a Hard Reset (Power Reset)
Sometimes, residual electrical charge or a system hang can cause a persistent black screen. A hard reset clears temporary system states and can restore functionality.
Step 1: Turn off the computer completely and unplug the AC adapter or power cord. Remove all external devices, such as USB drives, printers, and external hard disks.
Step 2: Press and hold the power button for at least 15 seconds. This discharges any remaining power in the system and resets internal circuits.
Step 3: Reconnect the power cable (but not the external devices yet), and power on the computer to check if the display returns.
Step 4: If the system boots, reconnect external devices one at a time and monitor for recurring issues. If the black screen persists, move to the next troubleshooting step.
Method 3: Clear CMOS to Reset BIOS Settings
Corrupted BIOS settings or failed memory diagnostics can sometimes prevent the motherboard from initializing correctly. Clearing the CMOS resets BIOS settings to defaults, which may restore system boot.
Step 1: Turn off and unplug the computer. Open the case to access the motherboard.
Step 2: Locate the CMOS battery—a small, round, silver battery on the motherboard. Remove it carefully and wait for at least 1-2 minutes.
Step 3: Reinsert the CMOS battery, ensuring proper contact. Alternatively, some motherboards have a "Clear CMOS" jumper; follow the manufacturer's instructions if available.
Step 4: Close the case, reconnect power, and turn on the computer. If the BIOS screen appears, adjust any necessary settings and attempt to boot into Windows.
Method 4: Boot with Minimal Hardware Configuration
Eliminating non-essential hardware can help identify conflicts or faults that prevent system startup.
Step 1: Disconnect all drives (hard drives, SSDs, optical drives) and peripherals, leaving only the motherboard, CPU, one stick of RAM, and graphics output.
Step 2: Attempt to power on the system. If the BIOS loads, gradually reconnect devices one at a time, rebooting after each addition to identify the problematic component.
Step 3: If the system still fails to display anything, further hardware diagnostics or professional service may be needed to check for motherboard or CPU failure.
Method 5: Access Windows Recovery Environment (WinRE) for Advanced Repair
If hardware checks do not resolve the issue and the system powers on but does not load Windows, the Windows Recovery Environment (WinRE) offers tools for repair.
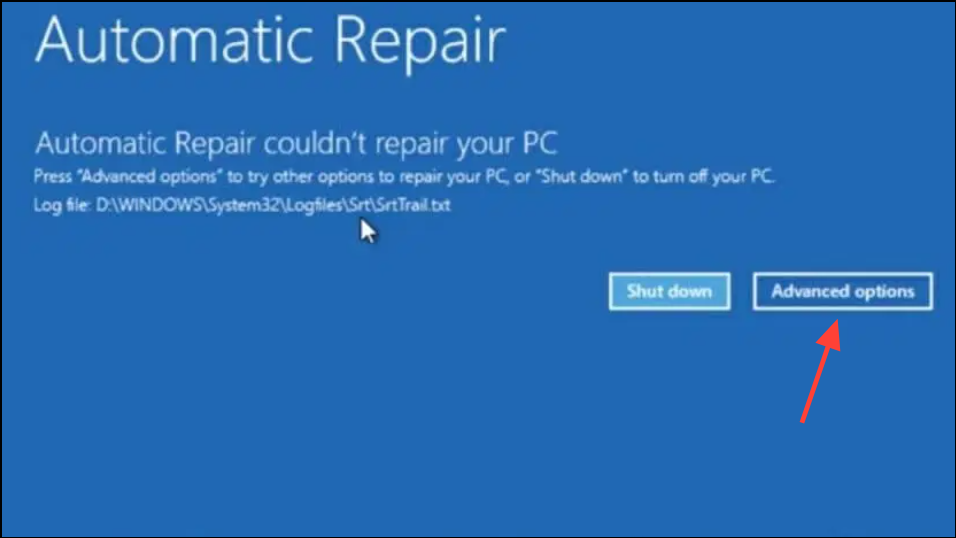
Step 1: Force the system to enter WinRE by powering it on and off three times in a row. Each time, hold the power button for 10 seconds to shut down, then power back on. After the third cycle, Windows should display the "Automatic Repair" screen.
Step 2: On the "Automatic Repair" screen, select Advanced options, then choose Troubleshoot.
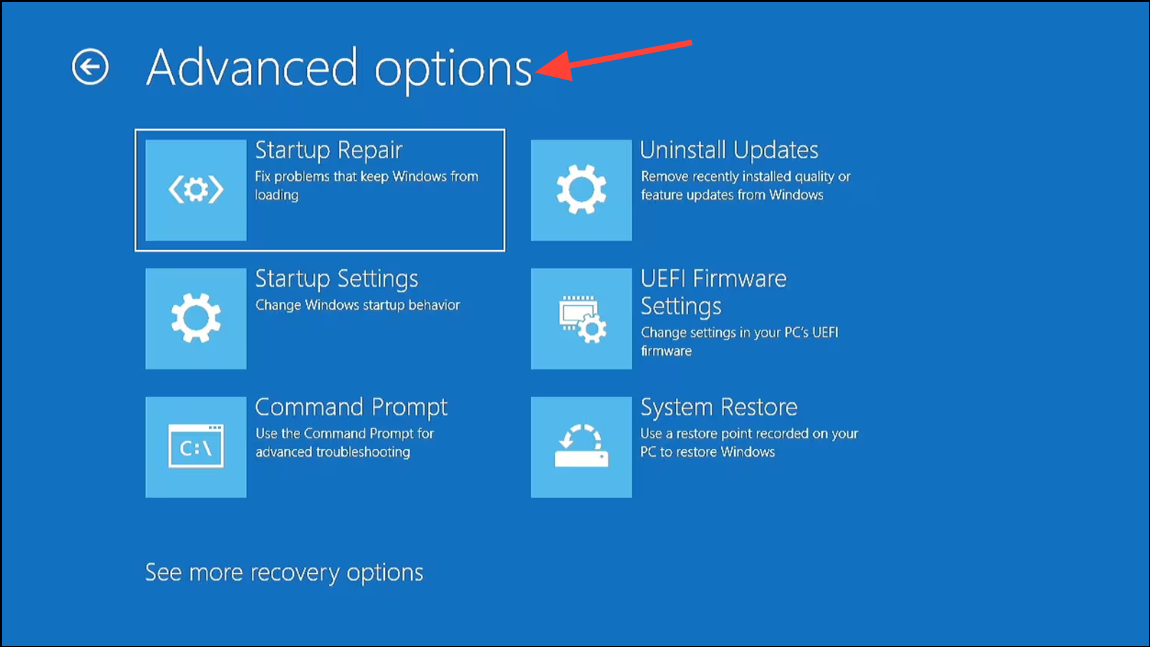
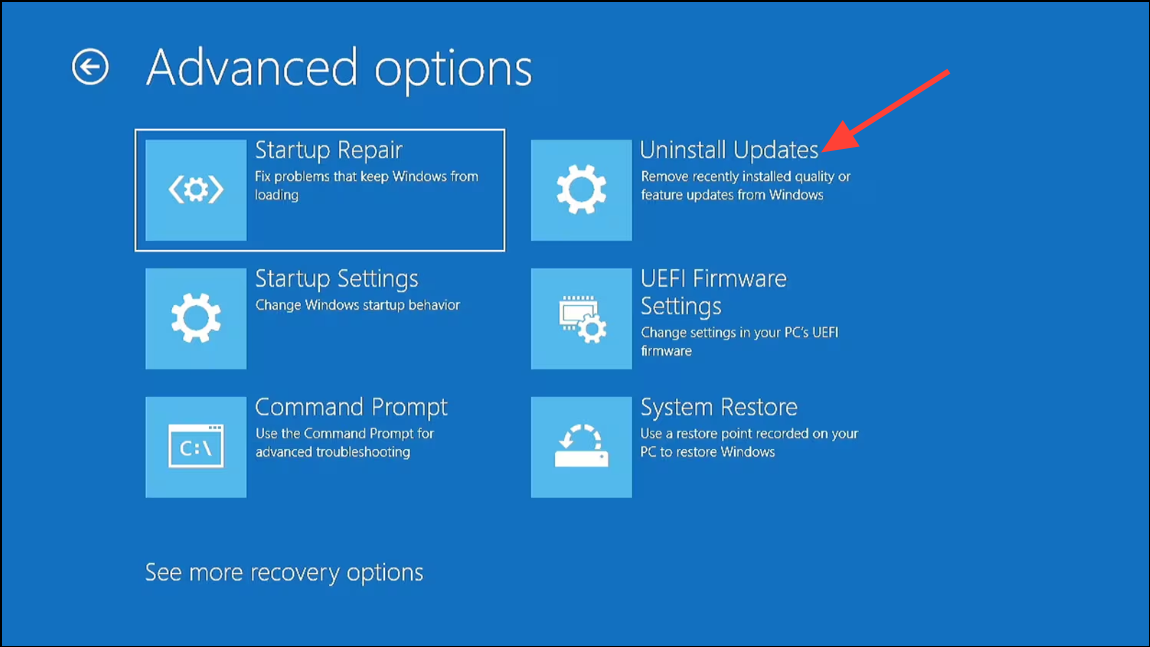
Step 3: In "Troubleshoot," access Advanced options to find tools such as Startup Repair, System Restore, Command Prompt, and Uninstall Updates.
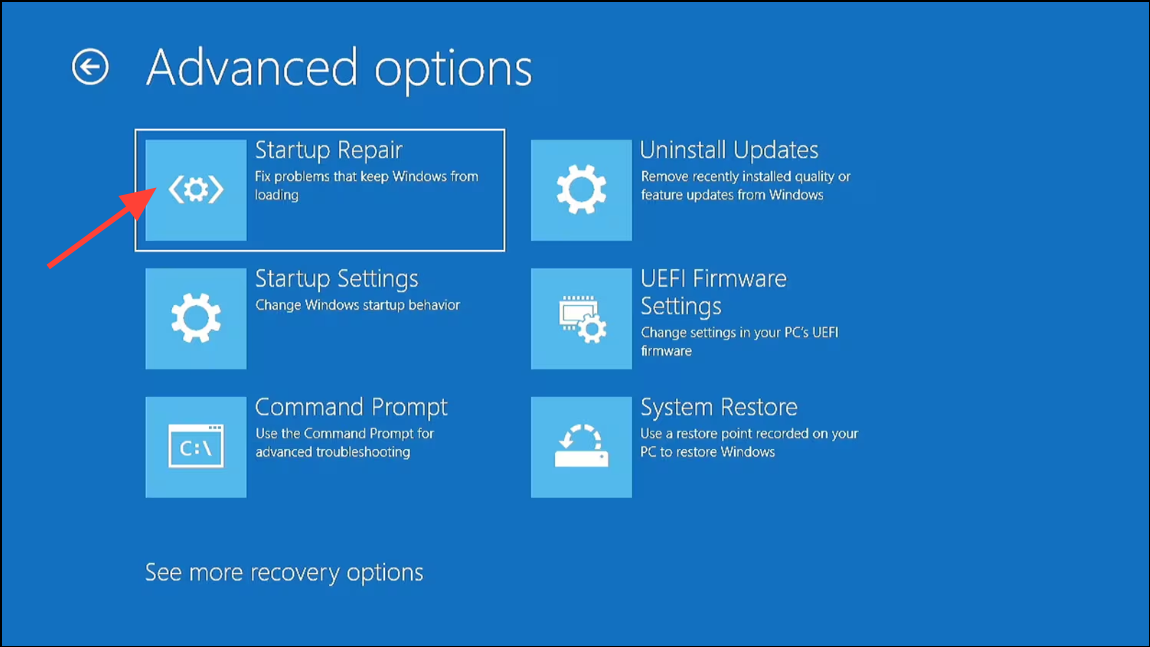
Step 4: Attempt Startup Repair to fix boot-related issues automatically. If that fails, try System Restore to revert the system to a previous working state (if restore points exist).
Step 5: Use Command Prompt to run system file repairs. Enter the following commands one by one:
    sfc /scannow
    dism /online /cleanup-image /restorehealth
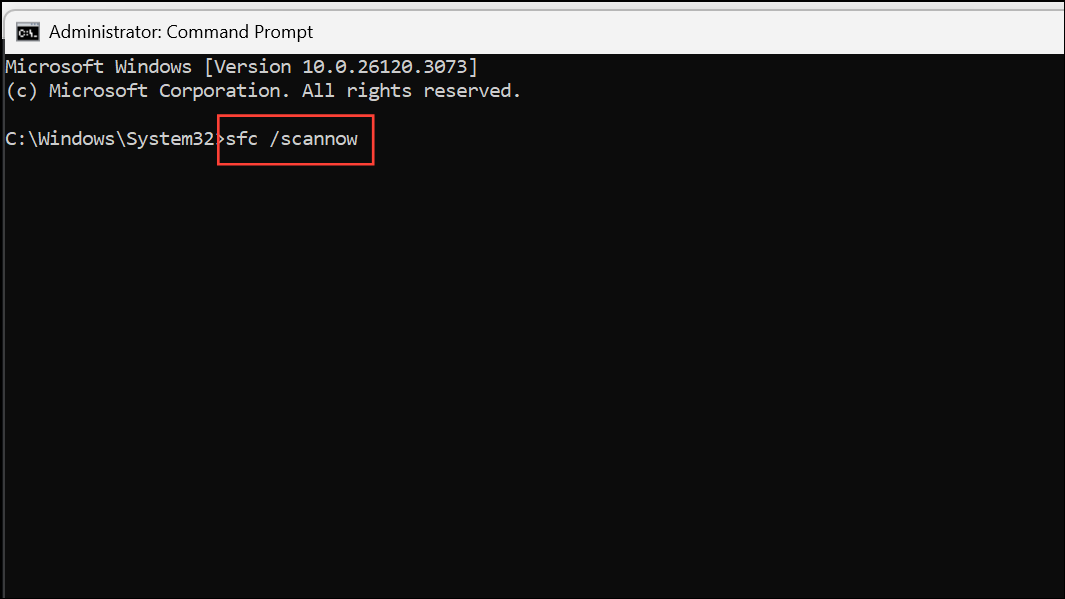
These commands scan and repair corrupted system files that may cause black screen errors.
Step 6: If the issue started after a Windows Update, use the "Uninstall Updates" option to remove recent updates that may have triggered the problem.
Method 6: Reinstall Windows 11 as a Last Resort
If none of the above steps restore system functionality, reinstalling Windows 11 may be necessary. This process requires a blank USB flash drive (at least 8 GB) and another working computer to create installation media.
Step 1: On a working PC, download the Windows 11 Media Creation Tool from the official Microsoft website.
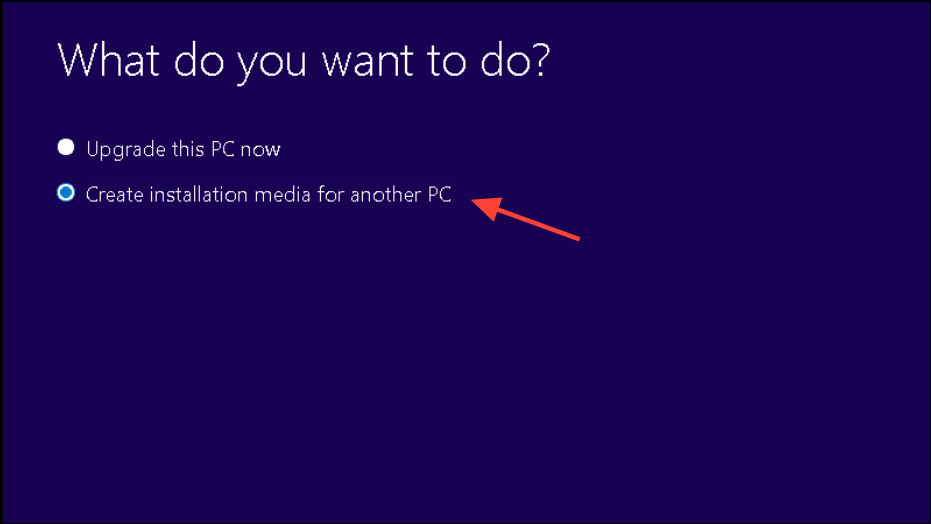
Step 2: Run the tool and select Create installation media for another PC. Follow the prompts to create a bootable USB drive.
Step 3: Insert the USB drive into the affected computer. Power it on and enter the BIOS (usually by pressing F2, Del, or Esc at startup). Set the USB drive as the primary boot device.
Step 4: Save changes and restart. The system should boot from the USB drive, allowing you to reinstall Windows 11. Choose the option to keep personal files if possible, but always back up data first if you can access the drive from another computer or via a recovery environment.
Additional Tips and Preventive Measures
- Regularly back up important files to external drives or cloud storage to prevent data loss during troubleshooting or reinstallation.
- Run third-party memory tests like MemTest86+ if Windows Memory Diagnostic does not complete or provide results. These tools can reveal RAM issues that Windows tools might miss.
- Keep drivers and BIOS updated to minimize compatibility issues that can lead to black screens.
- Document hardware changes or recent updates, as these are often linked to new system errors.
Systematically working through hardware checks, resets, and recovery options can restore Windows 11 functionality after a black screen triggered by memory diagnostics. If hardware faults persist, professional repair or replacement may be required for a reliable fix.