
Running the Windows 11 Installation Assistant and encountering error code 0x8007007f usually signals a permissions or compatibility problem that blocks the upgrade process. This error can abruptly halt the transition from Windows 10 to Windows 11, often after the installation process has already started. Addressing this issue involves ensuring the installer has the necessary administrative rights, updating your system, and confirming there’s enough free space on your primary drive.
Run the Installation Assistant as Administrator
Step 1: Locate the Windows11InstallationAssistant.exe file you downloaded for the upgrade. This is typically found in your Downloads folder unless you chose a different location.
Step 2: Right-click the installer file and select Run as administrator. This step is crucial because insufficient permissions are a leading cause of the 0x8007007f error. When prompted by User Account Control (UAC), click Yes to allow the installer to make changes to your device.
Step 3: Proceed through the on-screen prompts to restart the installation. Running as administrator grants the installer access to necessary system files and settings, directly addressing the permissions issue that triggers this error code.
Enable User Account Control (UAC)
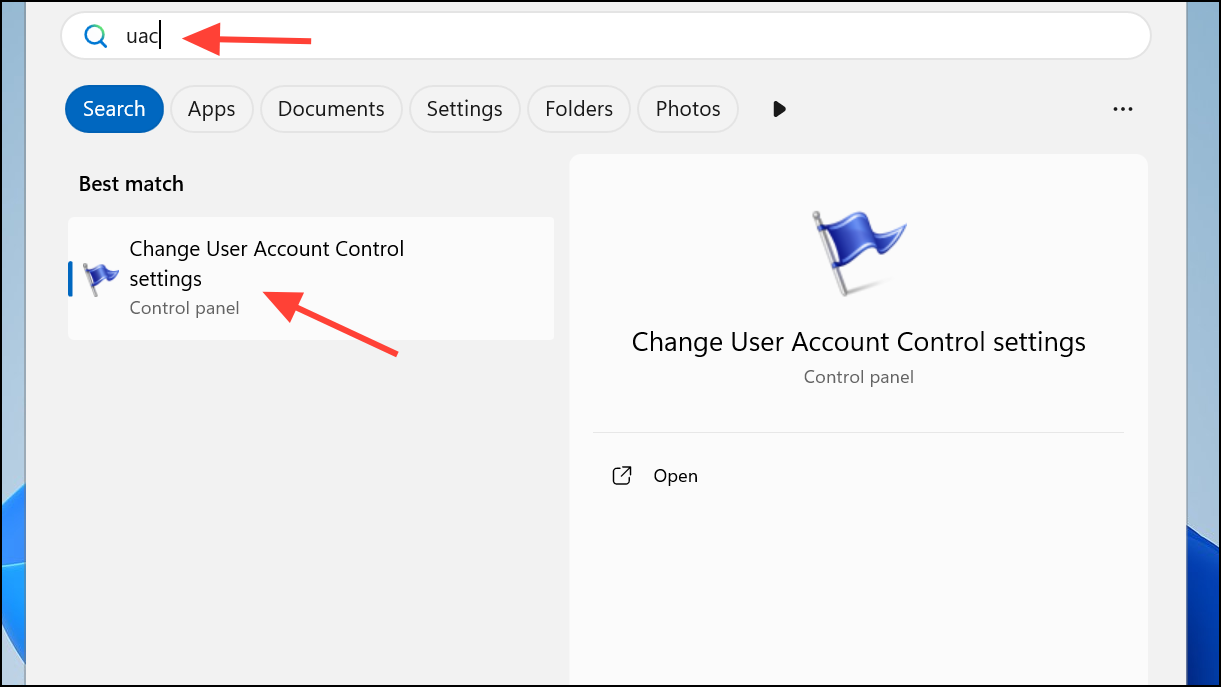
Step 1: Open the Start menu and type UAC or User Account Control. Select Change User Account Control settings from the results.
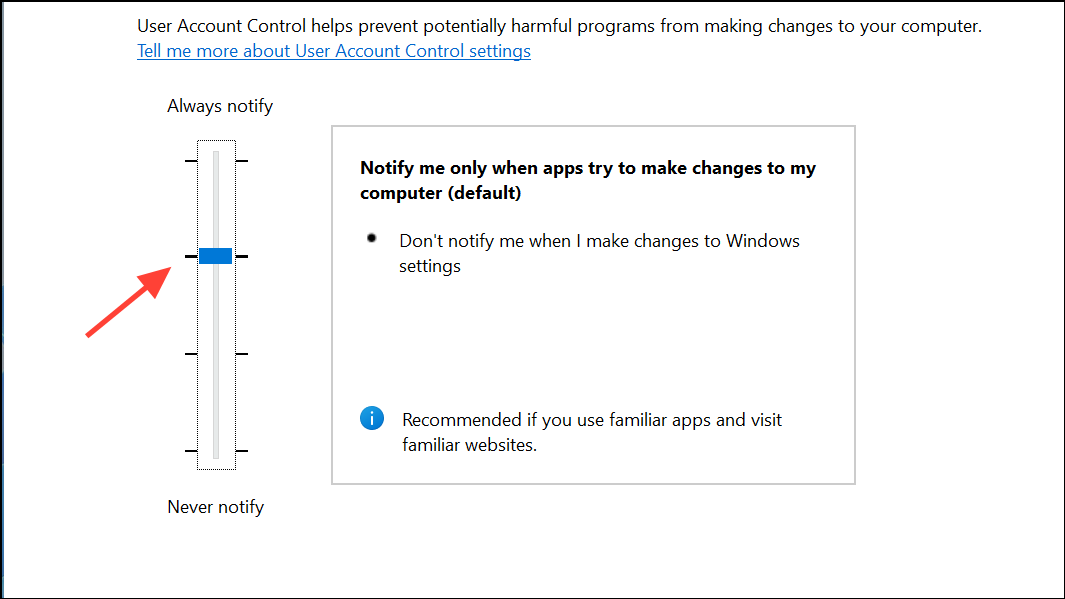
Step 2: In the window that appears, move the slider to at least the second-highest setting, which notifies you when apps try to make changes to your computer. Click OK and restart your computer if prompted.
Turning UAC back on ensures that the installer can prompt for and receive the necessary permissions. Several users report that enabling UAC and then re-running the installer as administrator allows the installation to proceed past the error.
Free Up Disk Space on the System Drive
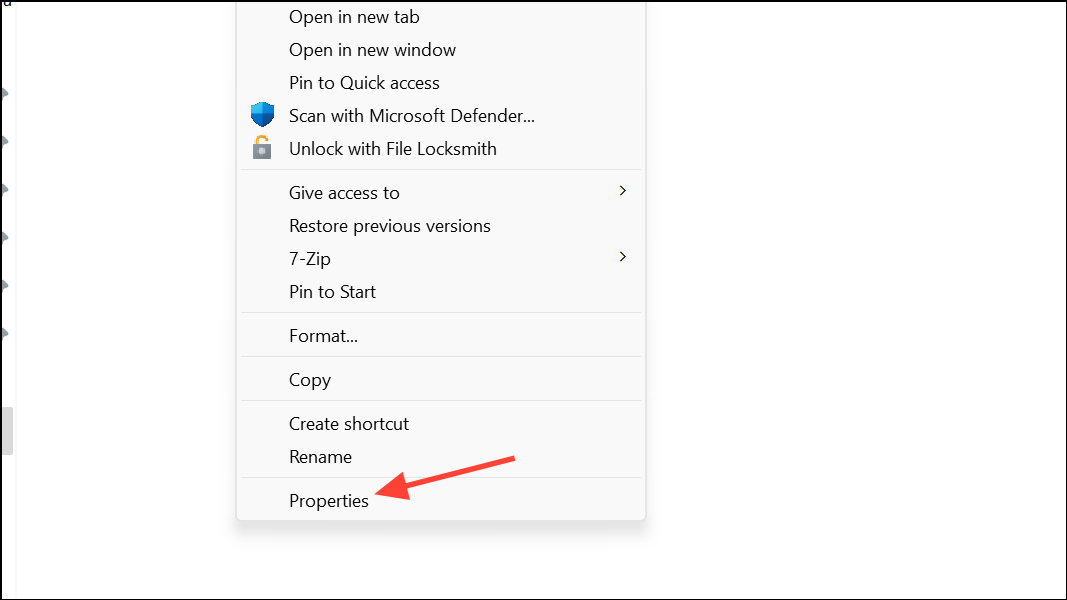
Step 1: Press Win + E to open File Explorer. Right-click your system drive (usually C:) and select Properties.
Step 2: Under the General tab, click Disk Cleanup. Choose files you no longer need, such as temporary files and previous Windows installations, then click OK to delete them.
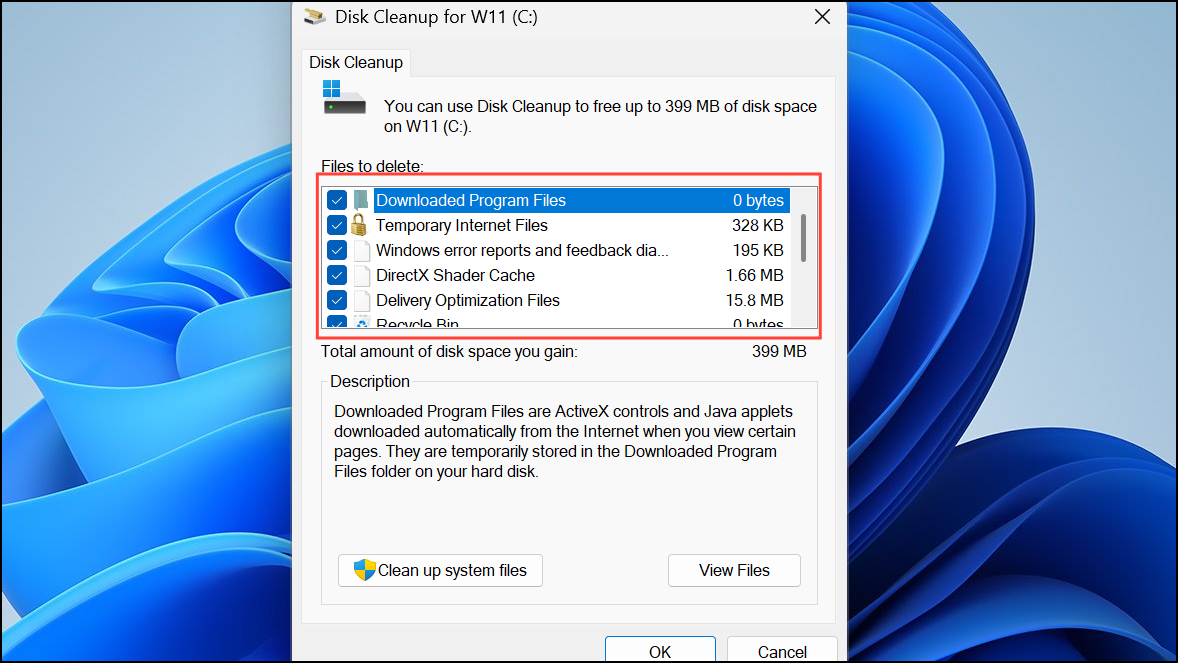
Step 3: For a deeper clean, click Clean up system files within the Disk Cleanup window. Select additional categories, including Windows Update Cleanup, and confirm deletion.
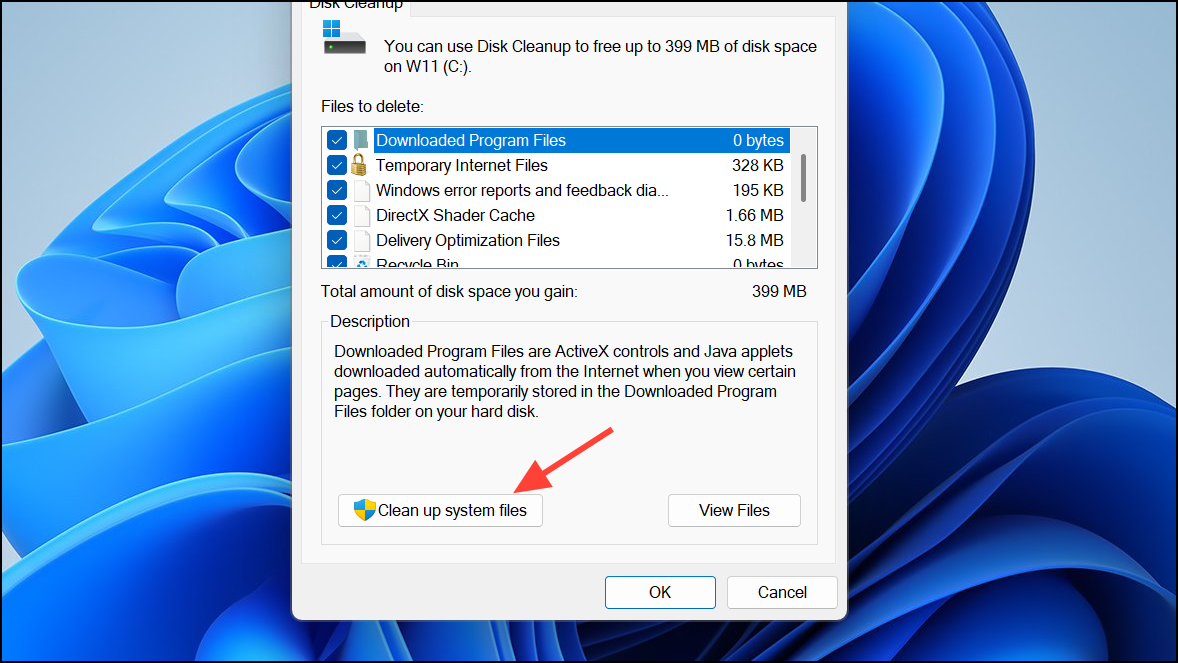
While the official minimum is about 9 GB, reports indicate that having at least 20-60 GB free is more reliable, since the installer creates backup files and needs working space for extraction and rollback.
Update Windows 10 to the Latest Version
Step 1: Click the Start menu and open Settings, then go to Update & Security.
Step 2: On the Windows Update page, click Check for updates and install any available updates. The Windows 11 installer requires Windows 10 version 2004 or newer.
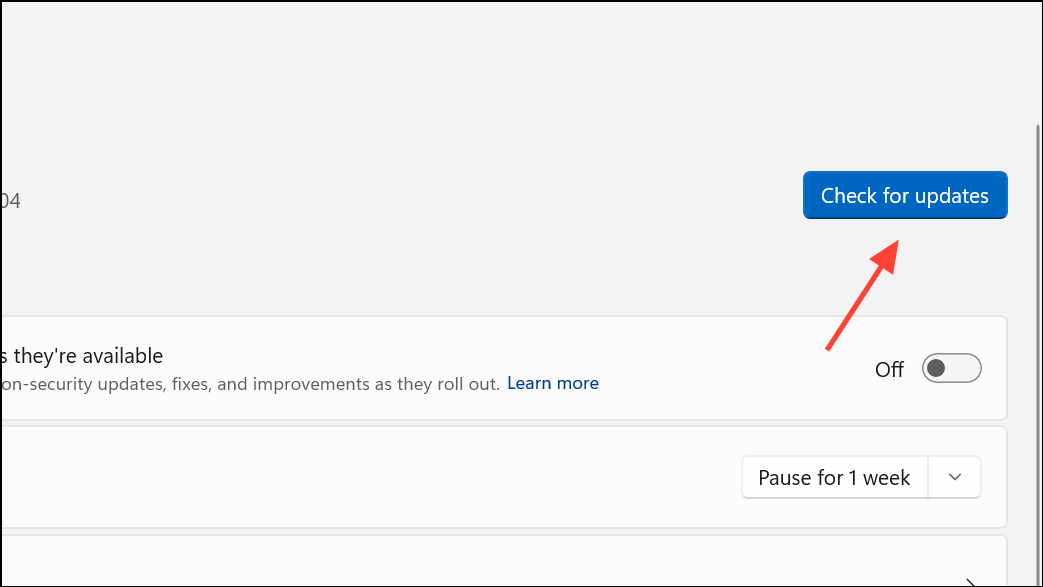
Step 3: Once updates are installed, restart your computer and reattempt the upgrade.
Running an outdated version of Windows 10 can cause compatibility problems that result in the 0x8007007f error, so keeping your system updated is essential.
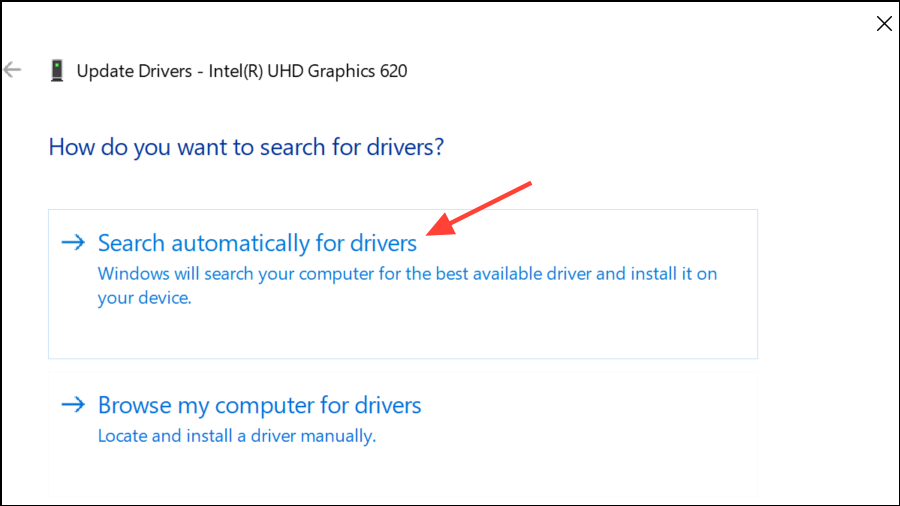
Update Graphics Drivers
Step 1: Right-click the Start button and choose Device Manager.
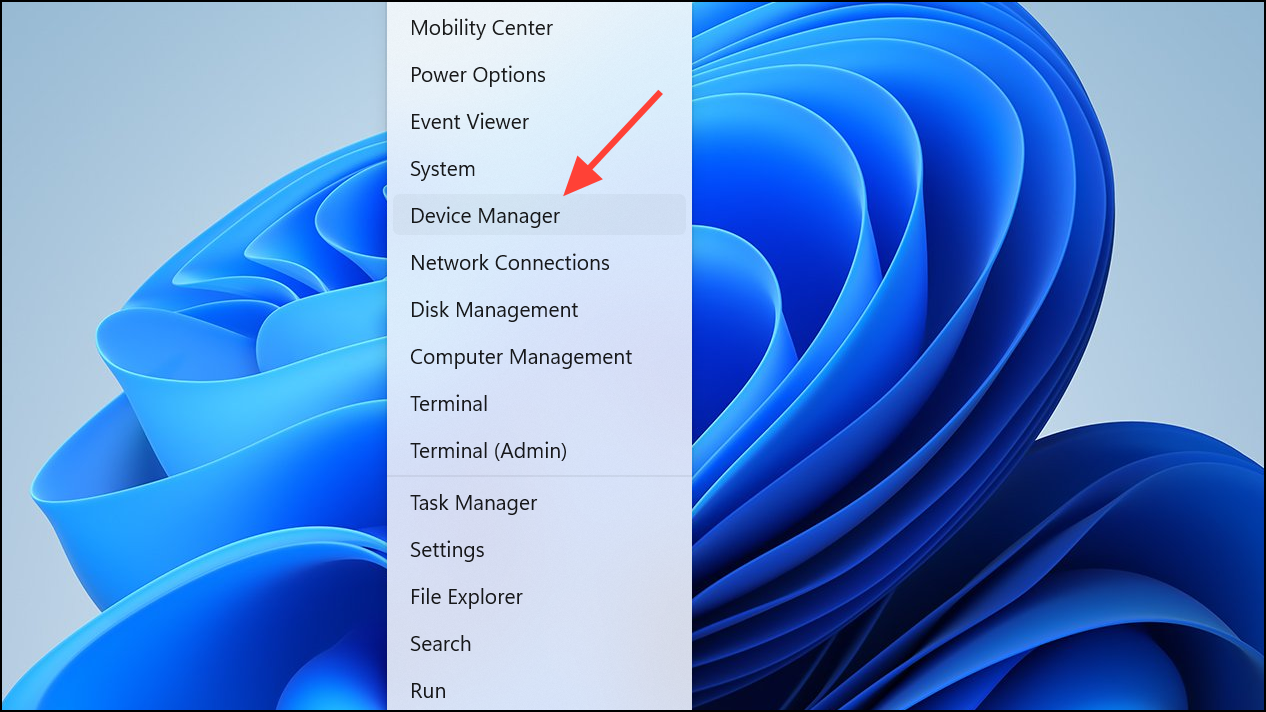
Step 2: Expand the Display adapters section. Right-click your graphics card and select Update driver.
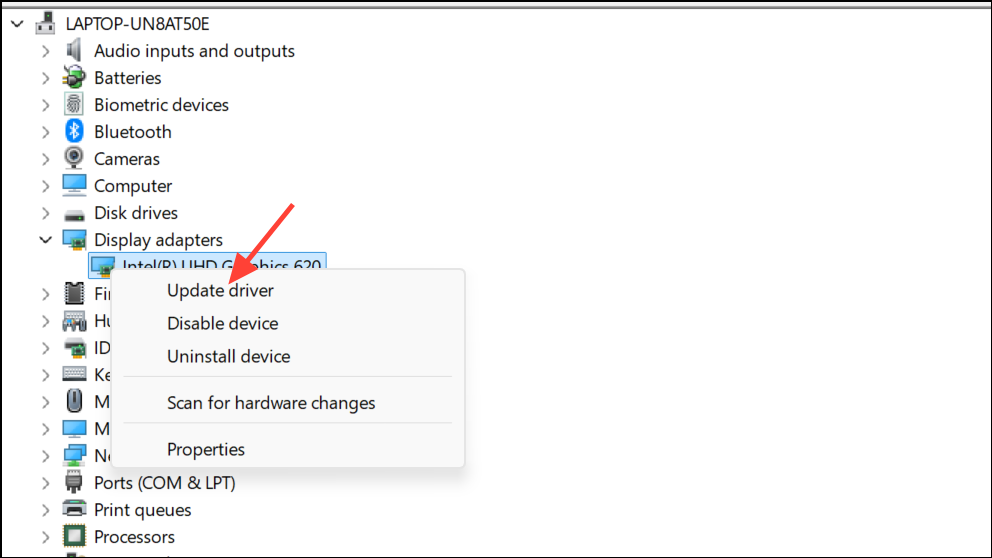
Step 3: Choose Search automatically for drivers and let Windows search for and install any updates. Outdated or incompatible graphics drivers have been linked to installation failures with error code 0x8007007f.
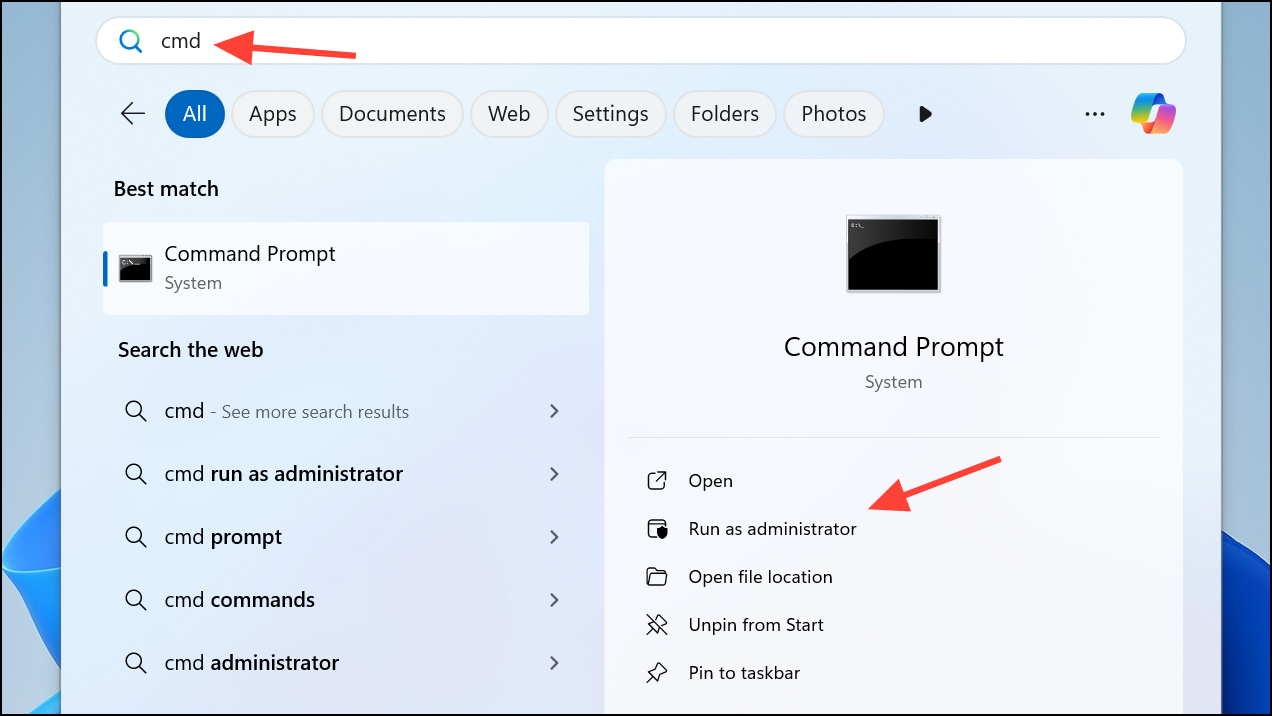
Scan and Repair System Files
Step 1: Type cmd in the Start menu, then right-click Command Prompt and choose Run as administrator.
Step 2: In the Command Prompt window, enter the following command and press Enter:
sfc /scannow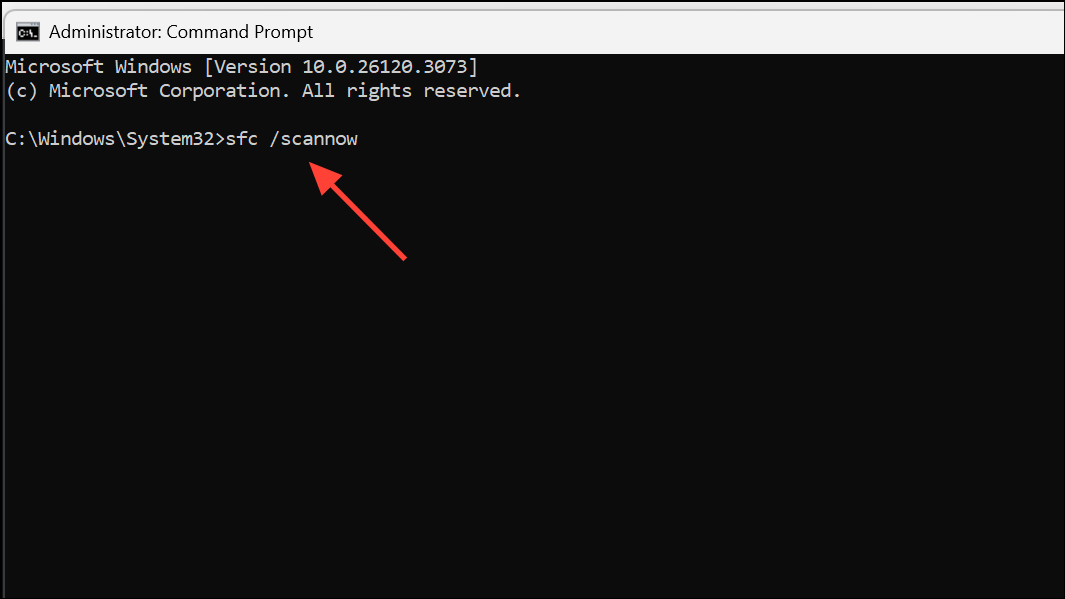
This command checks for and repairs corrupted system files that could interfere with the installation process. Wait for the scan to complete, then try the upgrade again.
Alternative Methods and Additional Checks
- If the Installation Assistant continues to fail, download the official Windows 11 ISO from Microsoft’s website, mount it, and run
setup.exeas administrator. - Confirm that your PC meets all Windows 11 requirements, including TPM 2.0 and Secure Boot. Use
tpm.mscto check TPM status. - Disable or temporarily uninstall third-party antivirus software, as it may block installer actions.
- Turn off Developer Mode under
Settings > Update & Security > For Developersbefore running the installer. - If you have used privacy or system tweaking utilities (like O&O Shutup10++), restore default settings before attempting the upgrade.
Addressing Windows 11 error code 0x8007007f usually comes down to running the installer with elevated permissions, confirming system requirements, and ensuring your PC is updated. Tackle these steps methodically, and you’ll typically resolve the installation roadblock without a full reinstall.