
Windows 11 systems sometimes skip the BIOS or UEFI firmware screen entirely during startup, leaving users unable to adjust critical hardware settings or troubleshoot boot issues. This behavior often appears after upgrading from Windows 10, changing display connections, or modifying system startup configurations. Addressing this problem restores access to essential firmware controls and system recovery options.
Method 1: Restore BIOS Access by Resetting Startup Configuration
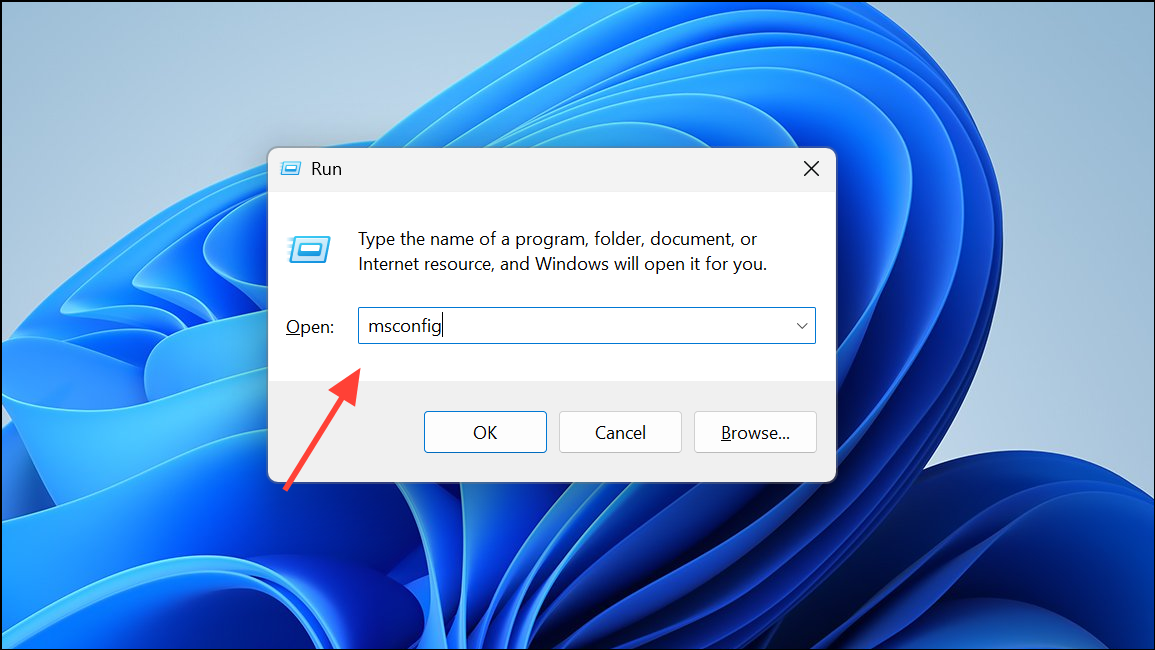
Step 1: Open the Run dialog by pressing Windows + R on your keyboard. This shortcut launches the small window for executing commands directly.
Step 2: Type msconfig and press Enter. This opens the System Configuration utility, which manages how Windows starts up.
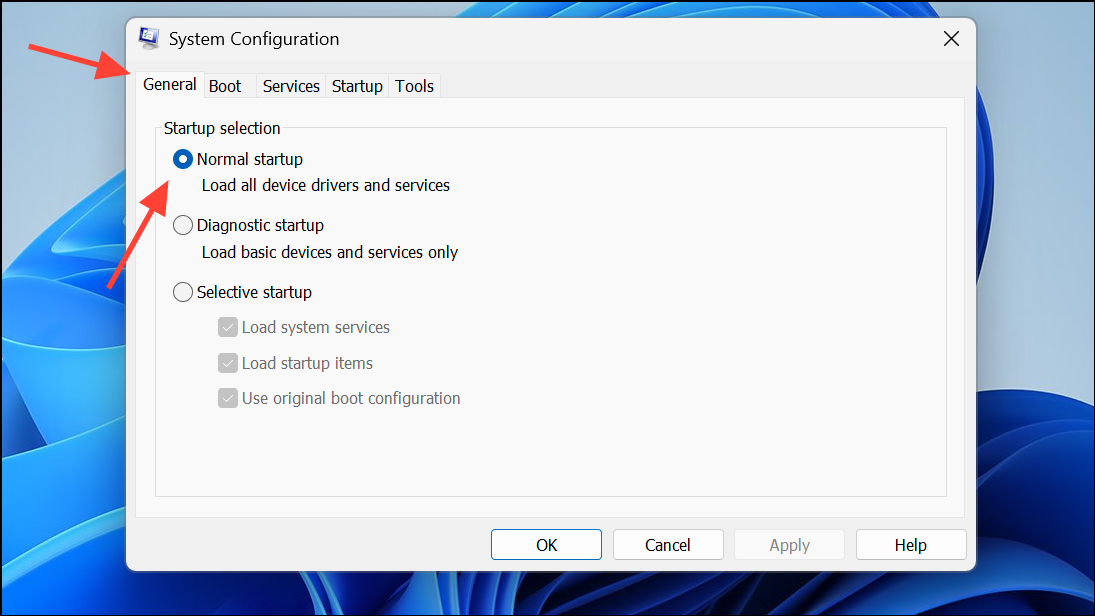
Step 3: In the System Configuration window, select the General tab. Choose the Normal startup option. This setting ensures all essential startup services and drivers load correctly, which can restore the BIOS splash screen and pre-boot options.
Step 4: Click OK and restart your computer. After rebooting, watch for the motherboard logo or splash screen. Press the correct BIOS key for your system (such as Delete, F2, or another key—refer to your motherboard’s manual or manufacturer’s website for details) as soon as the splash screen appears. This should allow access to BIOS or UEFI settings as normal.
Method 2: Enter BIOS via Windows 11 Recovery Options
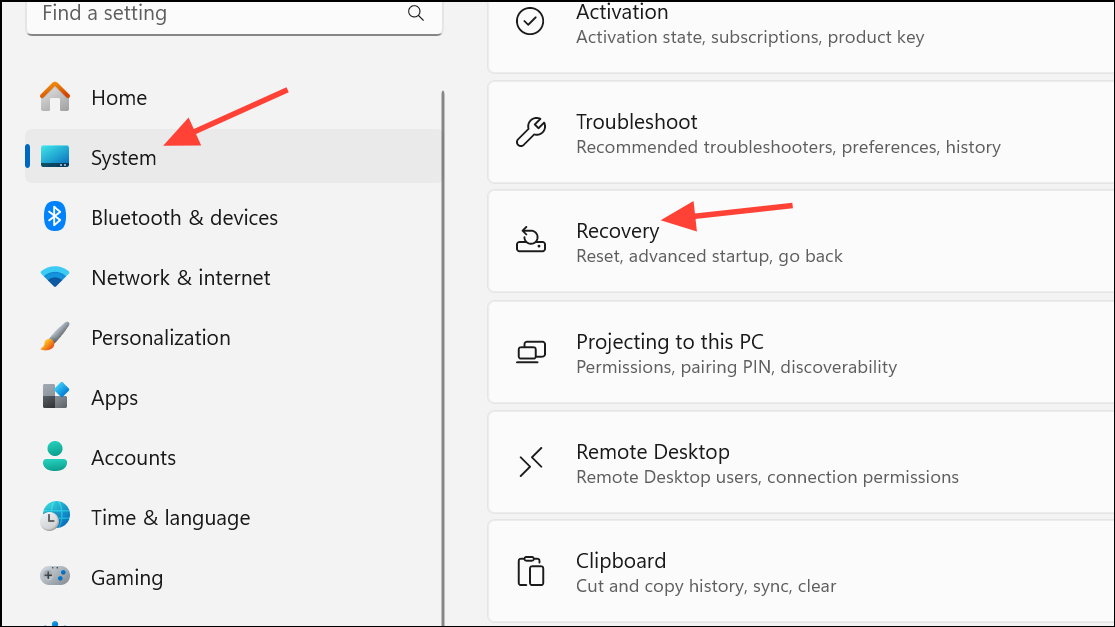
Step 1: Open the Windows Settings app by pressing Windows + I. Navigate to System and select Recovery from the sidebar.
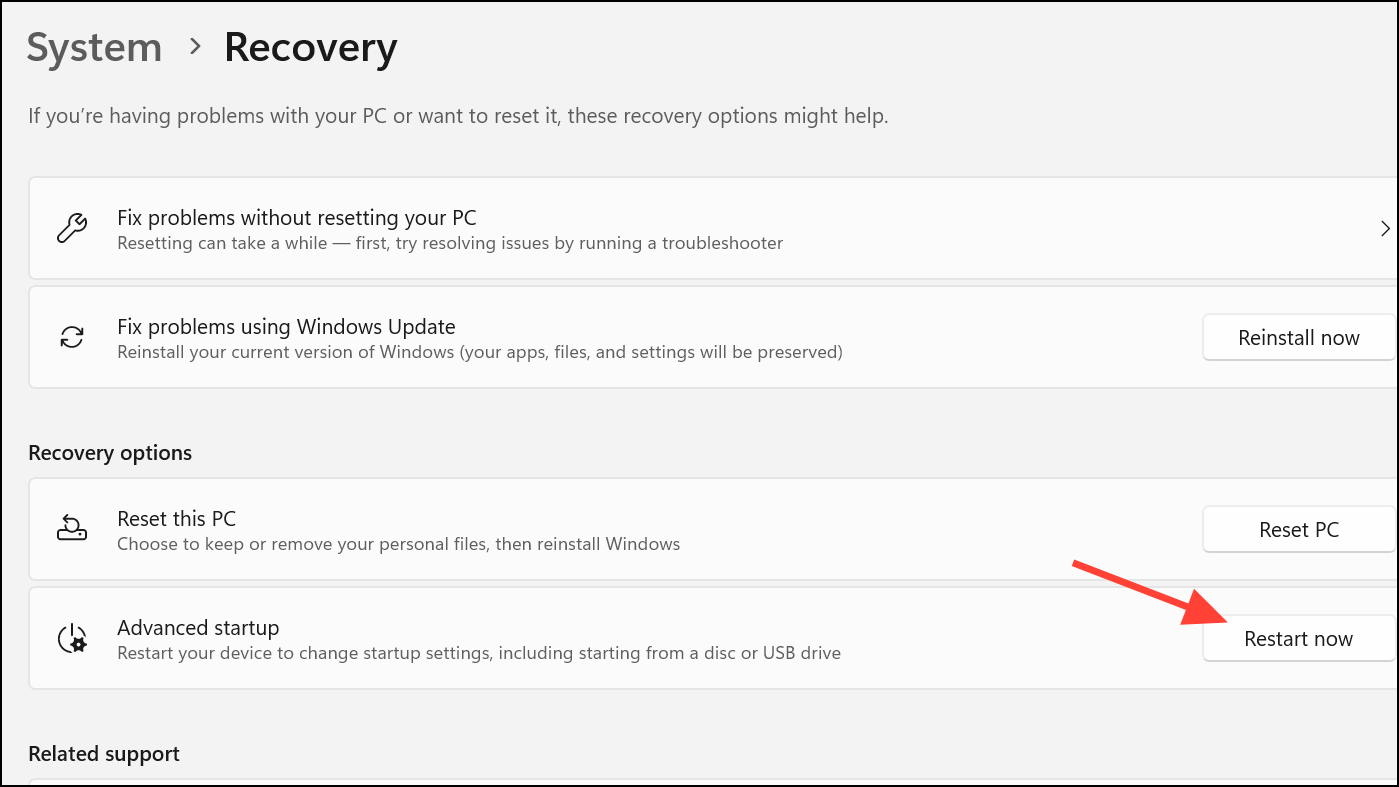
Step 2: In the Recovery section, locate Advanced startup and click Restart now. Your PC will prepare to reboot into a special troubleshooting environment.
Step 3: After restarting, a blue screen with several options will appear. Choose Troubleshoot, then Advanced options, and finally UEFI Firmware Settings. Click Restart to reboot directly into your BIOS or UEFI firmware interface.
This approach works even if the BIOS key is not responsive during startup, as long as Windows Recovery Environment (WinRE) is functioning. If the system skips the recovery environment or displays only a black screen, continue to the next method.
Method 3: Use Command Prompt or PowerShell to Trigger BIOS Access
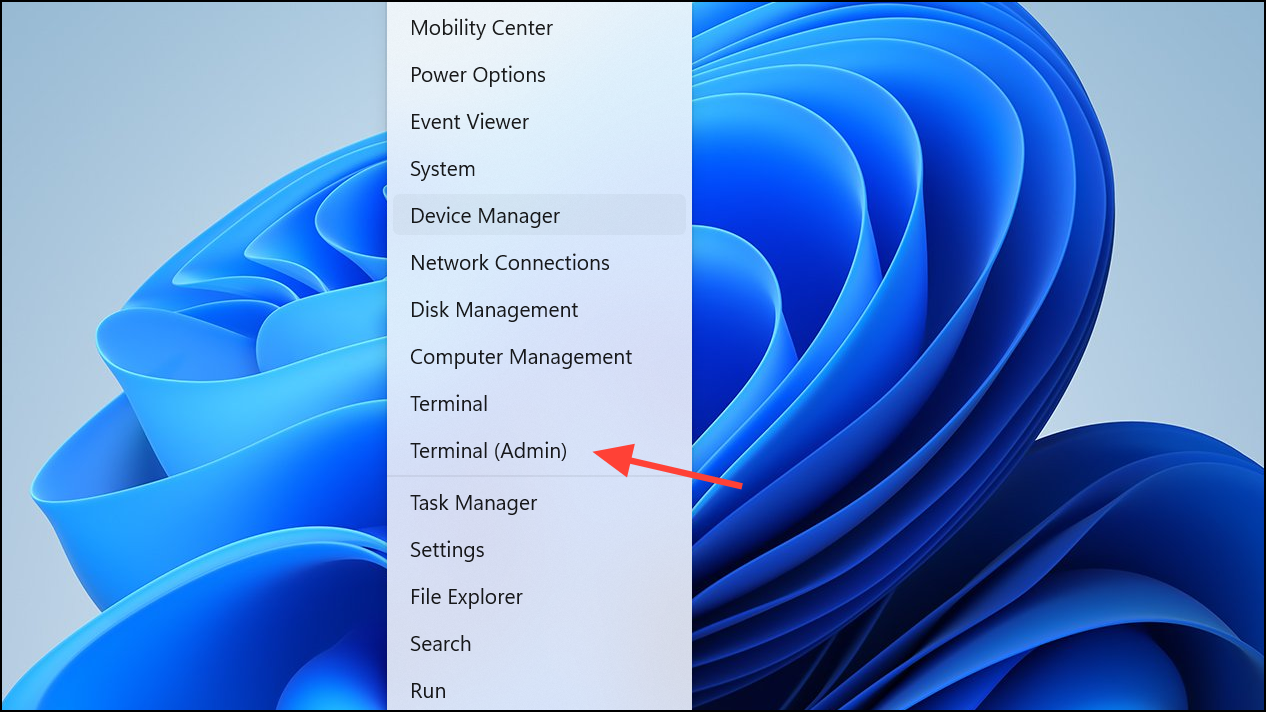
Step 1: Open an elevated Command Prompt or PowerShell window. Right-click the Start button and select Windows Terminal (Admin) or Command Prompt (Admin).
Step 2: Enter the following command to instruct Windows to reboot into firmware settings:
shutdown /r /fw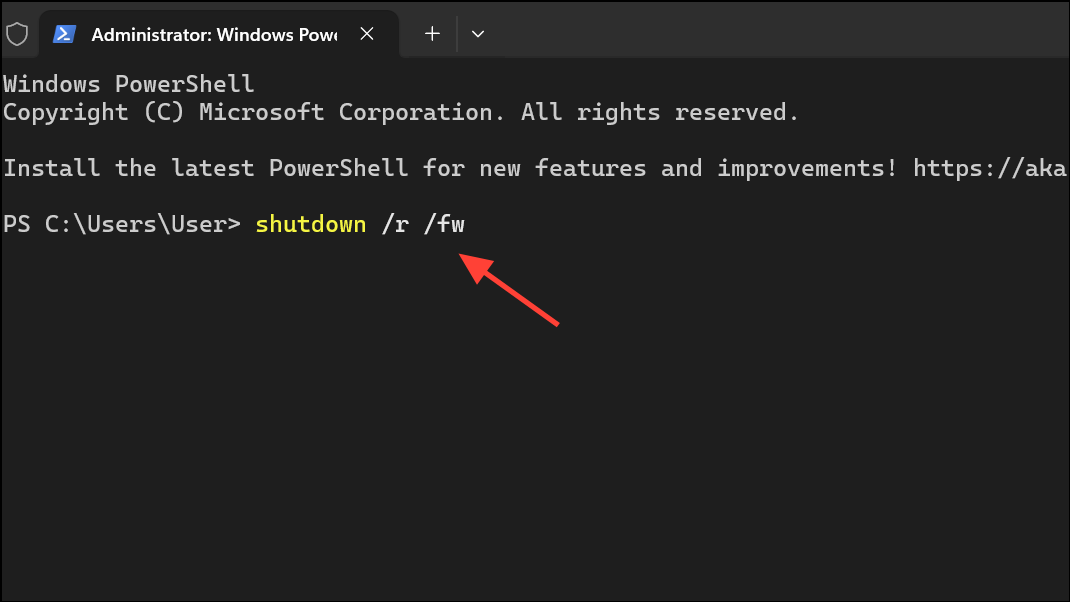
Alternatively, you can use:
shutdown /r /o /f /t 00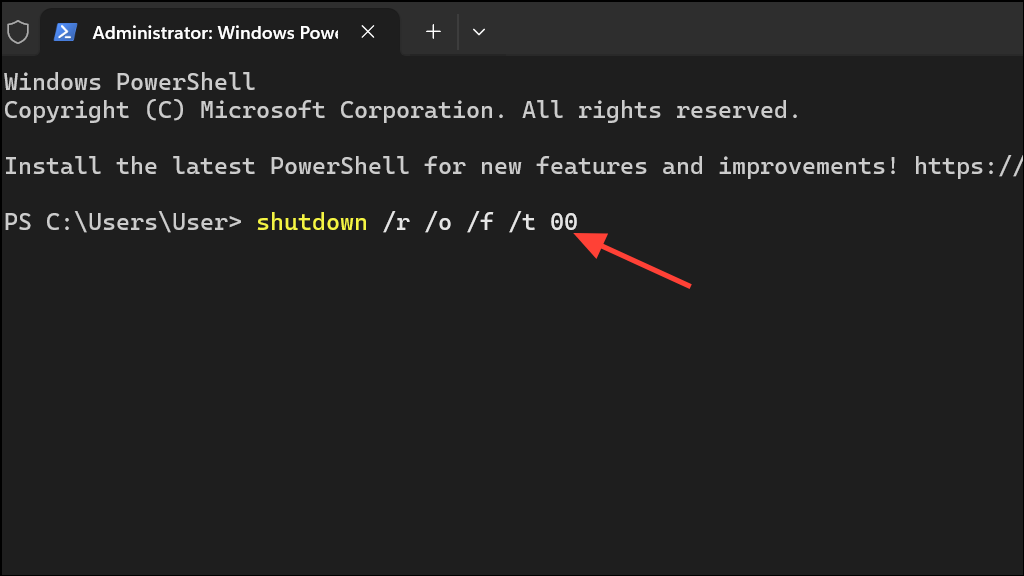
These commands schedule a restart that bypasses the normal boot sequence and loads the firmware interface. If successful, the system will restart and present the BIOS or UEFI screen.
Method 4: Adjust Monitor and Display Settings for BIOS Visibility
Some systems fail to display the BIOS or UEFI screen due to monitor compatibility issues or graphics card output settings. If you see a black screen instead of the BIOS, try these adjustments:
- Switch the monitor’s input from DisplayPort to HDMI, or vice versa.
- Connect the display cable directly to the motherboard’s video output if your CPU includes integrated graphics. Note that some processors (such as Intel “KF” or AMD “F” series) lack integrated graphics, so this method will not work in those cases.
- Try all available video outputs on your graphics card (DisplayPort, HDMI, DVI). Some graphics cards only output BIOS screens on specific ports.
- Access your monitor’s settings menu and lower the DisplayPort version (for example, from 1.4 to 1.2 or 1.1). Certain monitors only show the BIOS interface on specific versions.
- Temporarily disable features like Adaptive Sync or monitor overclocking, as these can interfere with BIOS display output.
After making these changes, restart your computer and attempt to access the BIOS again using the usual key.
Method 5: Reset CMOS to Restore Default Firmware Settings
If previous steps do not resolve the issue, resetting the CMOS (Complementary Metal-Oxide-Semiconductor) can clear custom firmware settings that may block BIOS access. This process returns the motherboard firmware to its default configuration.
Step 1: Power off your computer and unplug it from the electrical outlet.
Step 2: For desktop PCs, open the case and locate the round CMOS battery on the motherboard. Carefully remove the battery, wait 1–2 minutes, then reinsert it. Some motherboards include a dedicated CMOS reset button or jumper—refer to your motherboard’s manual for exact instructions.
Step 3: Plug the computer back in and power it on. Attempt to enter the BIOS using the appropriate key during startup.
Resetting the CMOS can resolve firmware-level issues that prevent the BIOS screen from appearing. Be aware this will also reset any custom BIOS settings, so you may need to reconfigure them after restoring access.
Method 6: Isolate Hardware Issues by Disconnecting Drives
Rarely, a malfunctioning or misconfigured drive can interfere with the boot process and block BIOS access. Disconnect all non-essential drives, including hard drives, SSDs, and external storage devices.
With only the system drive (or no drives at all) connected, power on the system and try to enter the BIOS. If successful, reconnect drives one at a time to identify if a specific device causes the issue. If a drive is at fault, connect it to another computer to back up data and use diskpart clean or Disk Management to reformat as needed.
Regaining access to BIOS on Windows 11 requires a combination of software and hardware troubleshooting. These methods restore critical pre-boot settings and recovery options, letting you regain control over your system configuration.