
Windows 11 displays error code 0x800f0805 when system updates fail to install or when an activation attempt using a product key is unsuccessful. This error can disrupt security updates, feature installations, or edition upgrades, often preventing you from keeping your system current or fully licensed. The underlying causes range from corrupted system files and insufficient disk space to background services or network problems. Addressing these issues promptly restores system reliability and access to the latest features.
Method 1: Run the Windows Update Troubleshooter
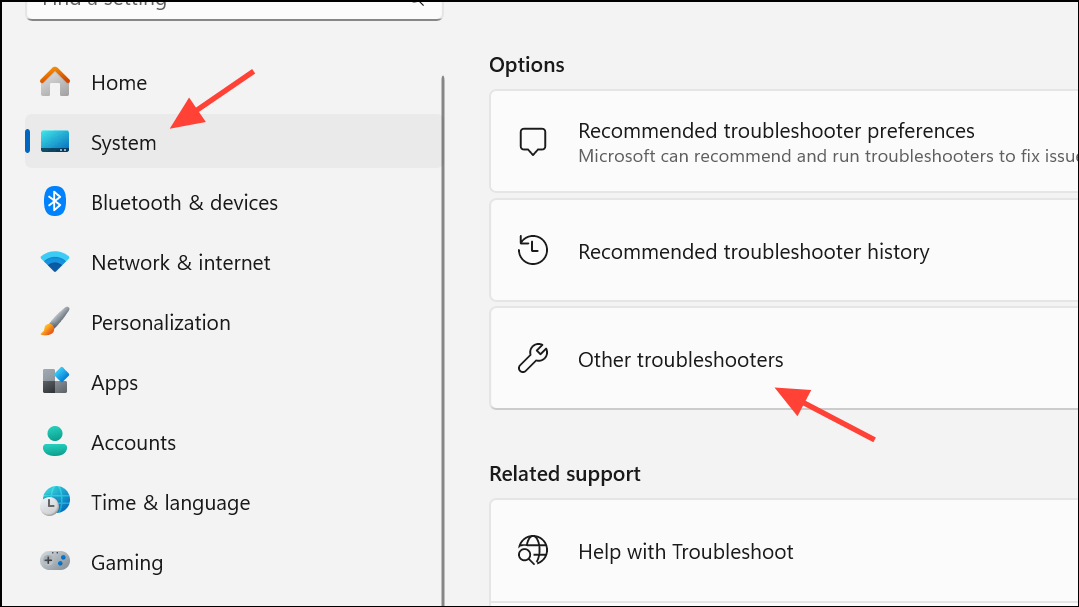
Step 1: Open the Windows Settings by pressing Windows + I. Navigate to System, then select Troubleshoot and click on Other troubleshooters.
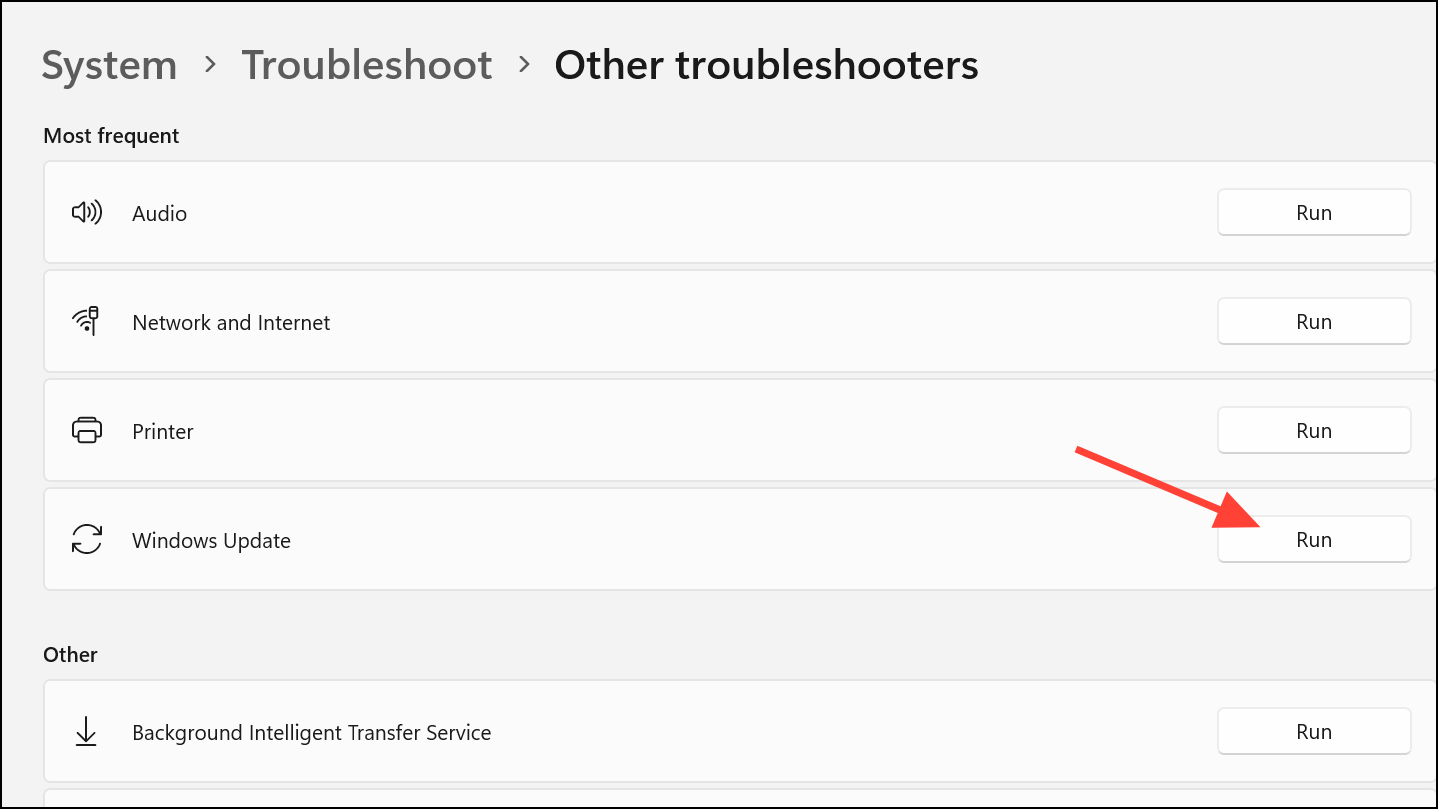
Step 2: Find Windows Update in the list and click Run. The troubleshooter scans for issues with update components and attempts automatic repairs. Apply any fixes it suggests and restart your computer.
This method often resolves temporary glitches or misconfigurations in the Windows Update process by resetting its internal components.
Method 2: Reset Windows Update Components
Corrupted update cache or services can block updates and trigger error 0x800f0805. Resetting these components clears the old cache and restarts essential services.
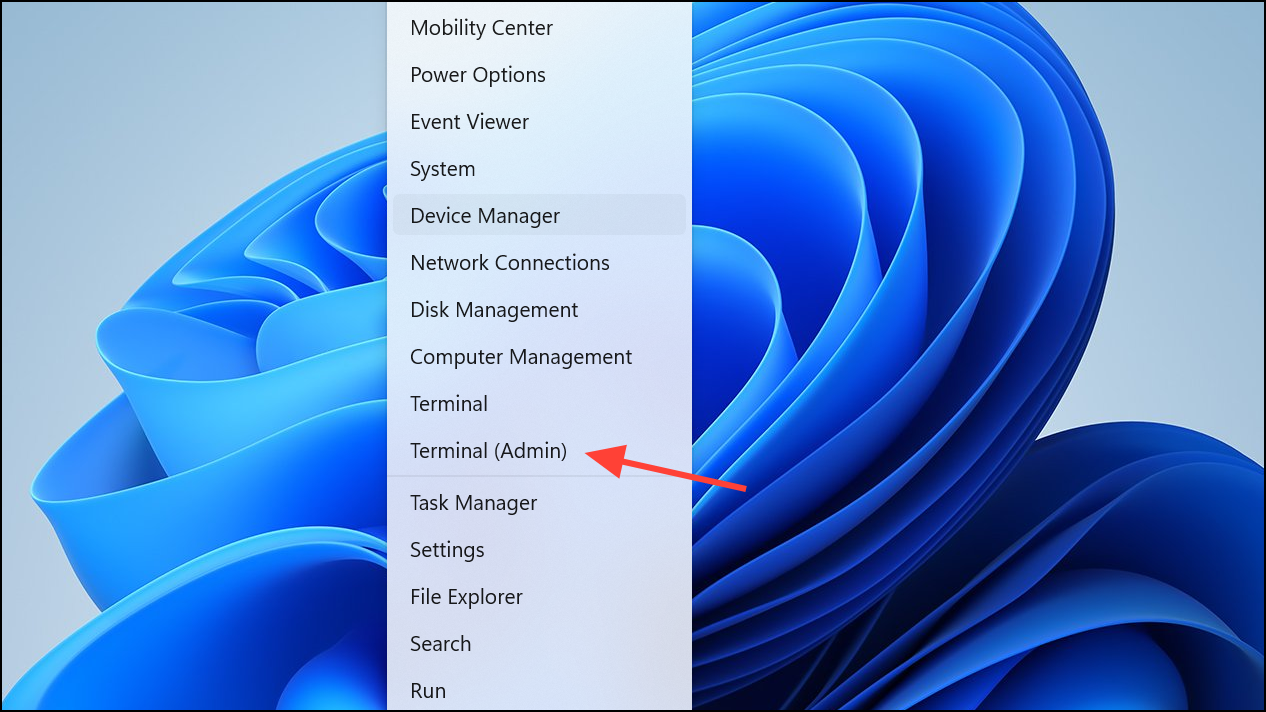
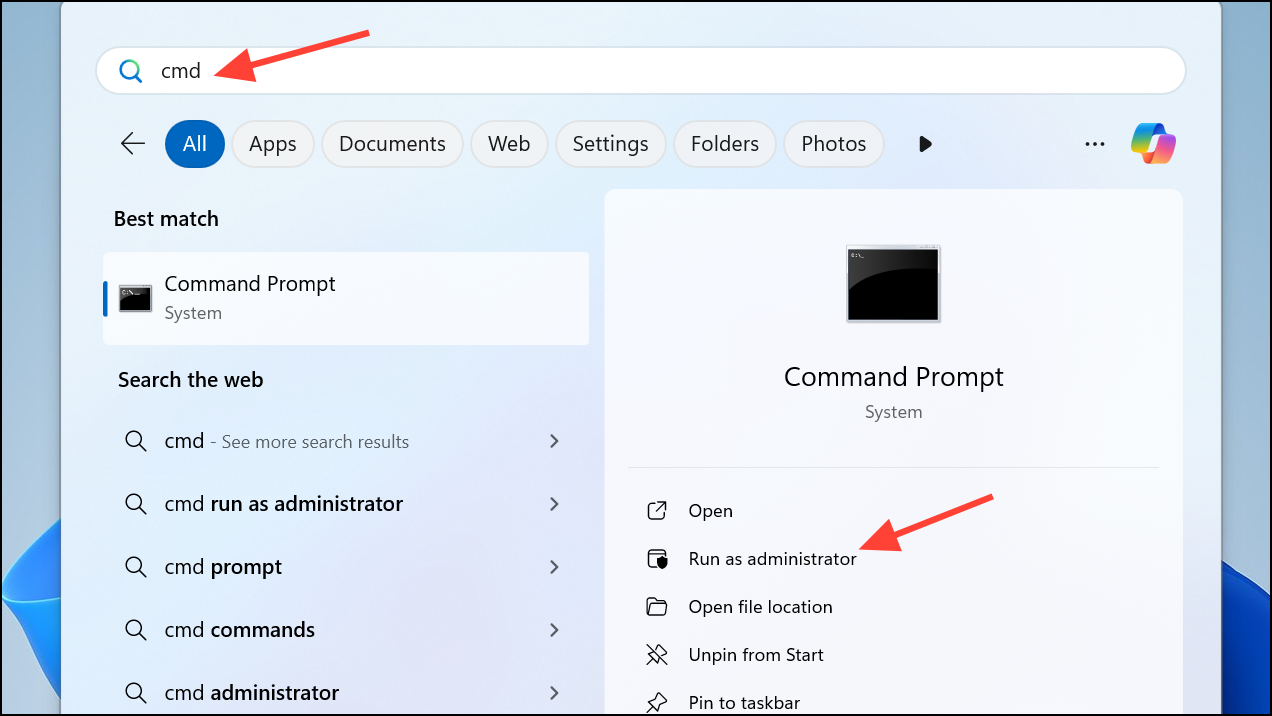
Step 1: Launch Command Prompt as an administrator. Press Windows + X and choose Windows Terminal (Admin) or Command Prompt (Admin).
Step 2: Stop update-related services by entering each of these commands one at a time, pressing Enter after each:
net stop wuauserv
net stop cryptSvc
net stop bits
net stop msiserver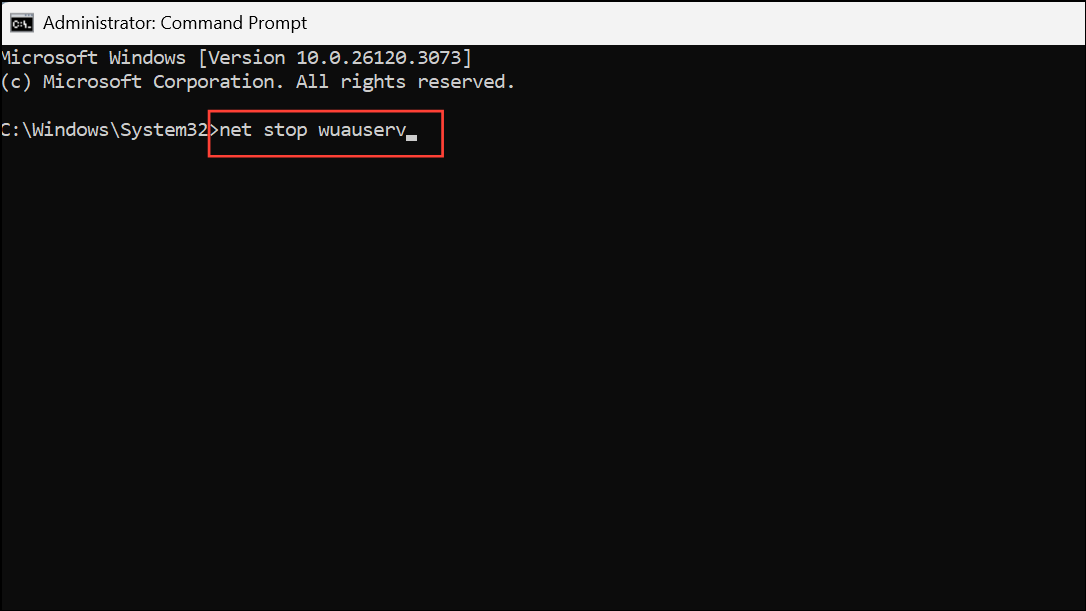
Step 3: Rename the update cache folders to force Windows to create new ones:
ren C:\Windows\SoftwareDistribution SoftwareDistribution.old
ren C:\Windows\System32\catroot2 Catroot2.old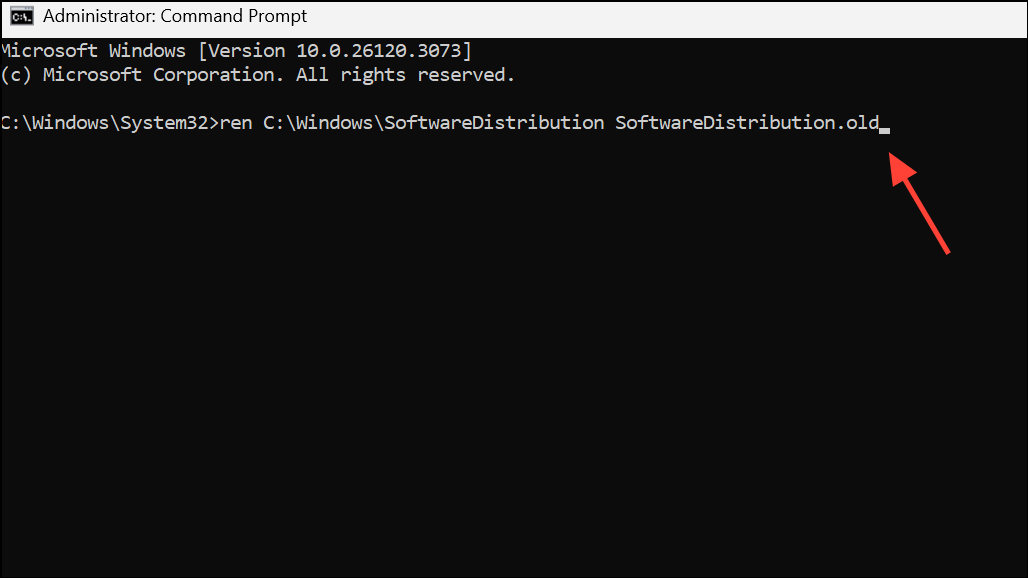
Step 4: Restart the services you stopped earlier:
net start wuauserv
net start cryptSvc
net start bits
net start msiserver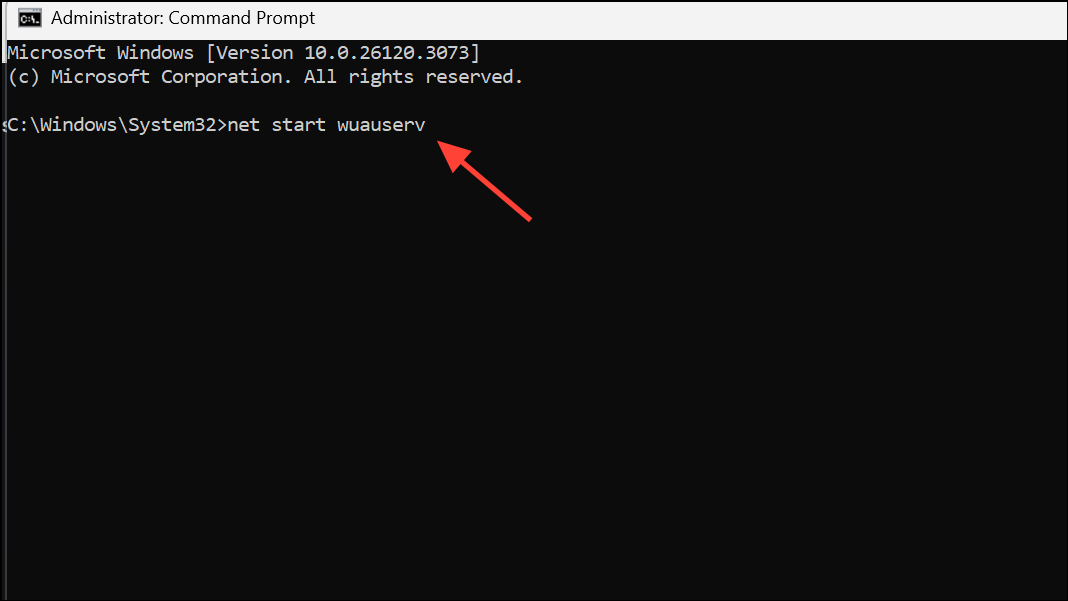
Step 5: Restart your computer. After rebooting, try checking for updates again. This process clears out potentially corrupted update files and resets update-related processes.
Method 3: Repair System Files Using SFC and DISM
Corrupted or missing system files often block updates and activations. Windows provides built-in tools for repairing these files.
Step 1: Open Command Prompt as administrator.
Step 2: Run the System File Checker to scan and repair missing or damaged files:
sfc /scannow
This scan may take several minutes. Wait for it to reach 100% and follow any prompts.
Step 3: If the issue persists, use the Deployment Imaging Service and Management Tool (DISM) to repair the system image:
DISM /Online /Cleanup-Image /RestoreHealth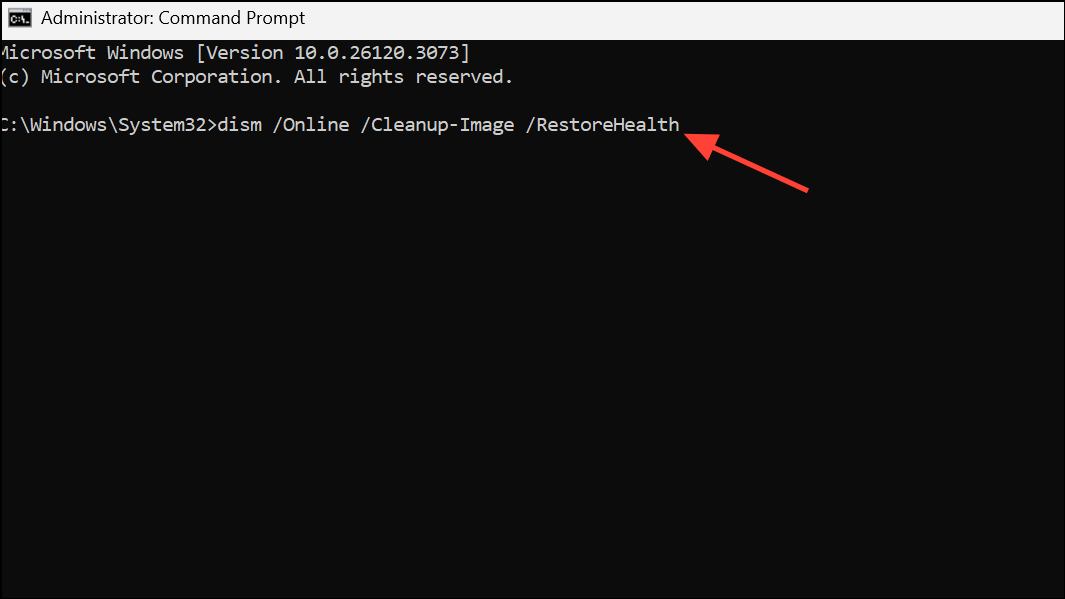
Allow the process to finish, then restart your computer. These tools address deep-seated file corruption that can interfere with updates and activation.
Method 4: Free Up Disk Space
Insufficient space on the system drive can prevent updates and upgrades. Removing unnecessary files ensures Windows has enough room for new downloads and installations.
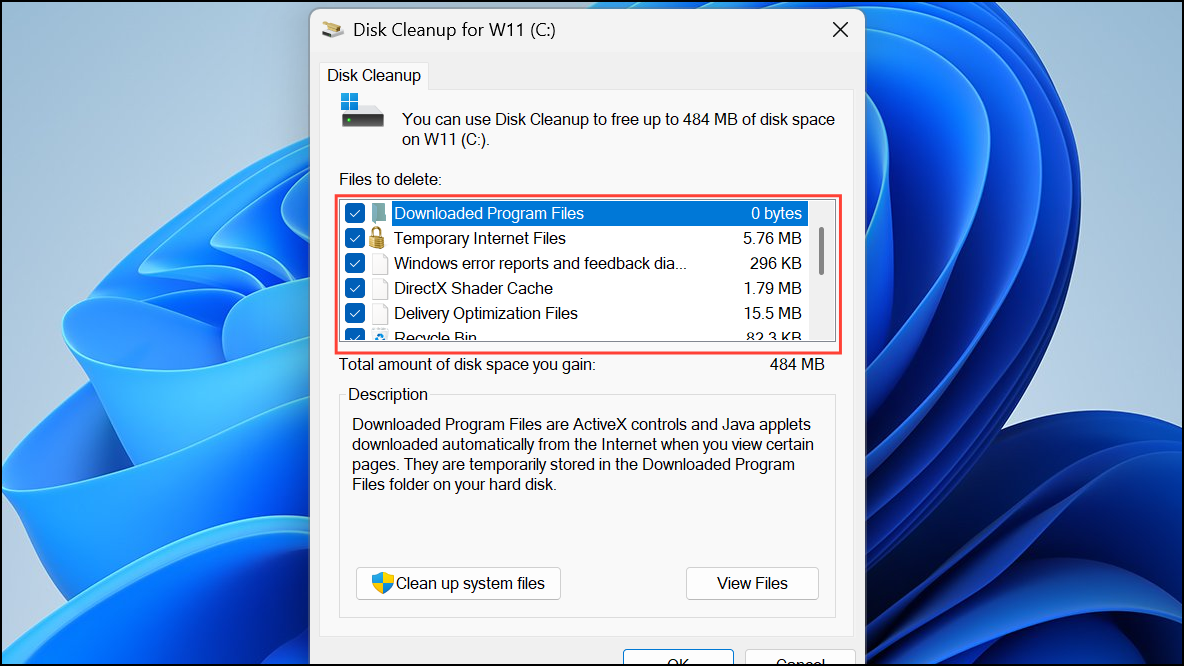
Step 1: Open File Explorer with Win + E, right-click your system drive (usually C:), and select Properties.
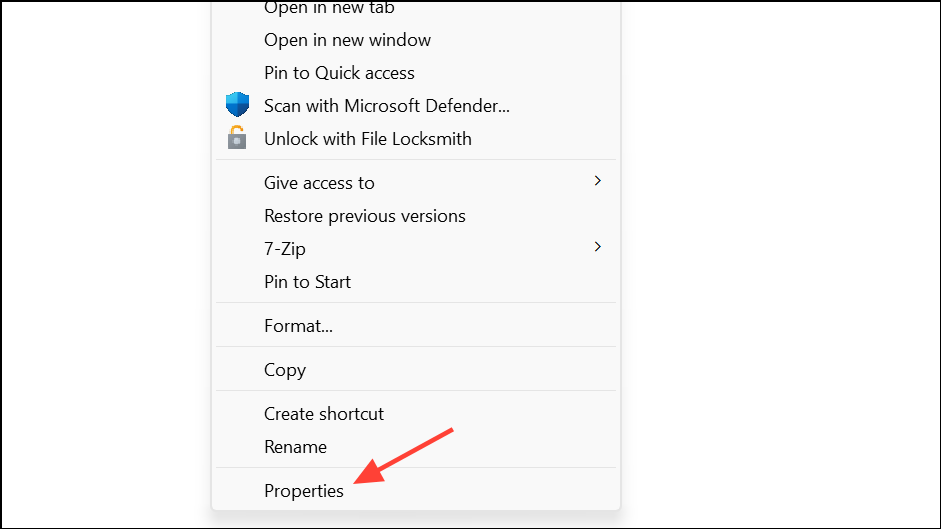
Step 2: Go to the Tools tab and click Disk Cleanup. Alternatively, launch the tool from the Start menu. Select files to delete, such as temporary files and previous update files, then click OK to remove them.
Step 3: If more space is needed, consider moving personal files to another drive or using a partition manager to extend the system partition.
Method 5: Manually Download and Install Updates
When automatic updates repeatedly fail, downloading the update package directly from the Microsoft Update Catalog can bypass update service errors.
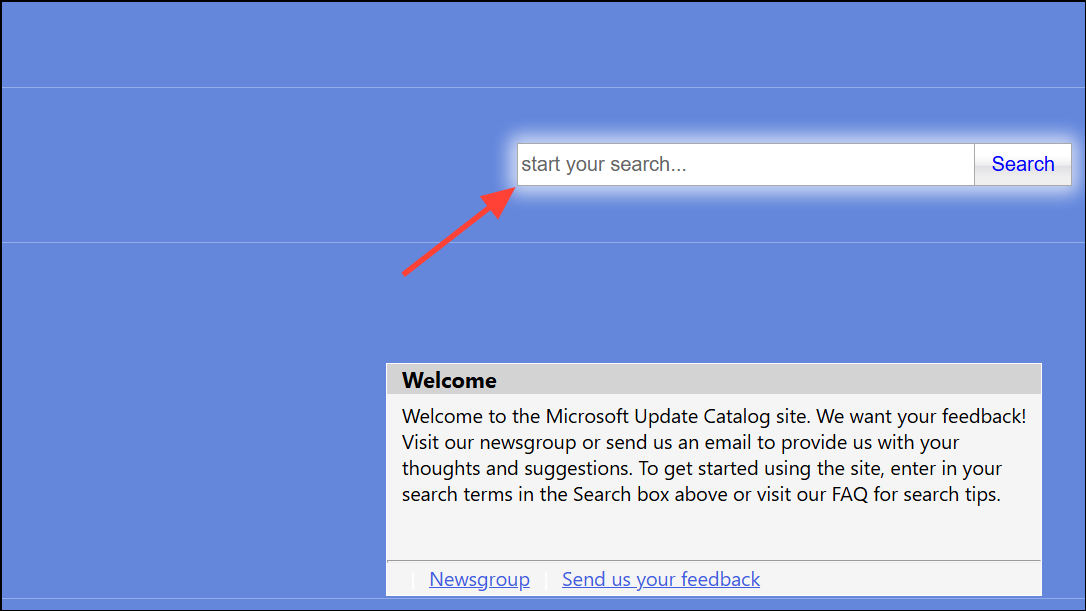
Step 1: Visit the Microsoft Update Catalog.
Step 2: Enter the KB number of the failed update in the search box (e.g., KB4023057 or KB5031358).
Step 3: Download the appropriate file for your Windows version (such as x64-based systems) and run the installer. Follow on-screen instructions to complete installation.
This method is effective when update services are interrupted or Windows Update cannot connect to Microsoft servers.
Method 6: Fix Activation Issues with Product Key Error 0x800f0805
Windows activation errors with code 0x800f0805 can occur when upgrading editions (such as Home to Pro) or entering a new product key. This is often due to background processes, wrong key entry, or system file issues.
Step 1: Make sure you are connected to a stable internet connection and unplug any non-essential external devices.
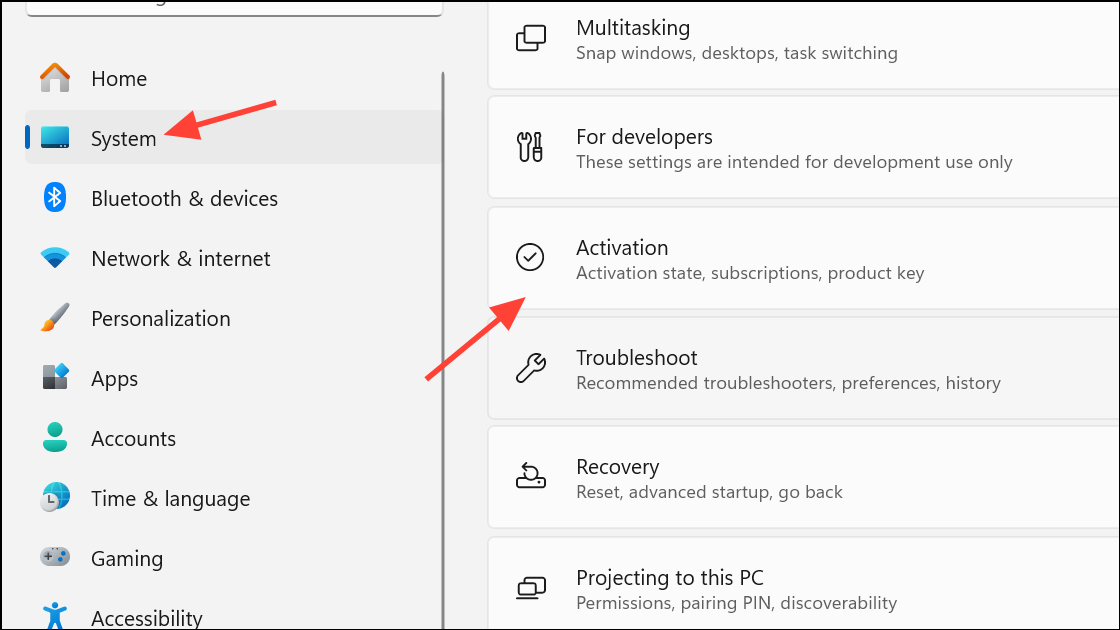
Step 2: Restart your PC and attempt activation again through System> Activation.
Step 3: If activation still fails, use Command Prompt as administrator to enter your product key:
slmgr.vbs /ipk 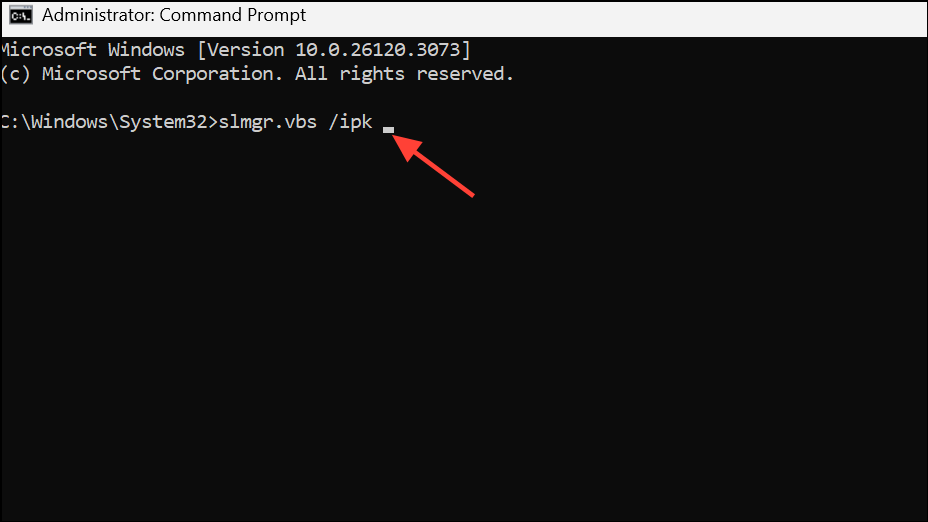
Replace <your 25-digit product key> with your actual key. This approach bypasses GUI glitches and directly registers the key with Windows licensing services.
Step 4: After successful input, restart your computer and return to the Activation settings to check the status.
Method 7: Perform an In-Place Upgrade
If previous methods do not resolve the issue, an in-place upgrade reinstalls Windows system files while keeping your apps and data intact. This process repairs deeper system corruption and often resolves persistent update or activation errors.
Step 1: Download the latest Windows 11 installation media from the official Microsoft website.
Step 2: Run the installer and choose the option to keep personal files and apps. Follow the prompts until the upgrade is complete.
Step 3: After the process, check for updates or activation again.
Before starting, back up your important data as a precaution, even though the process is designed to preserve your files.
Addressing error 0x800f0805 restores Windows 11's update and activation functions, ensuring your device stays secure and up to date. Regular system maintenance, such as freeing up disk space and scanning for file corruption, helps prevent future occurrences.