- There are several possible reasons why your Windows 11 PC is restarting randomly. These include hardware issues, overheating, malware, memory problems, etc.
- You can try to resolve the issue by turning off the automatic restart feature, disabling fast startup, checking for memory problems, and disabling overclocking.
- Additional solutions include running DISM and SFC scans, updating or reinstalling the graphics driver, changing Windows Update settings, and uninstalling the latest update.
- If these solutions do not work, you may have to reinstall Windows or perform a reset.
Solution 1: Disable automatic reboots
Windows 11 has a built-in feature that allows it to restart automatically in case there is a system failure. You can try turning it off to solve your random reboot problem.
- Use the
Win + Ishortcut to open Windows Settings and then click on the 'System' option on the left.
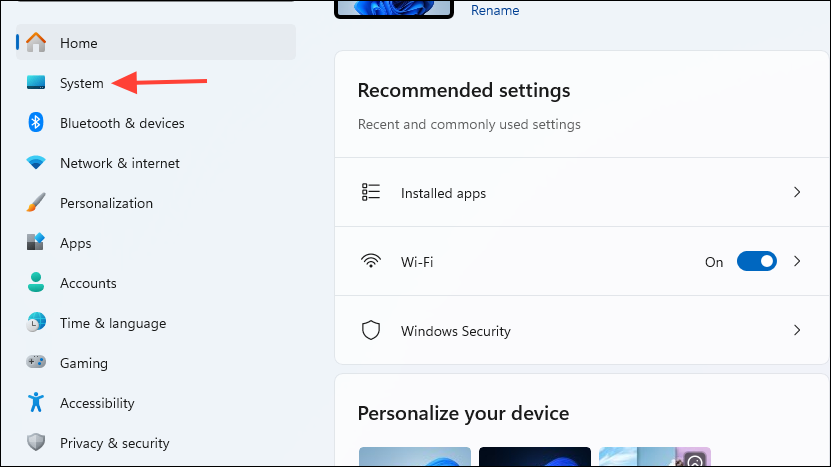
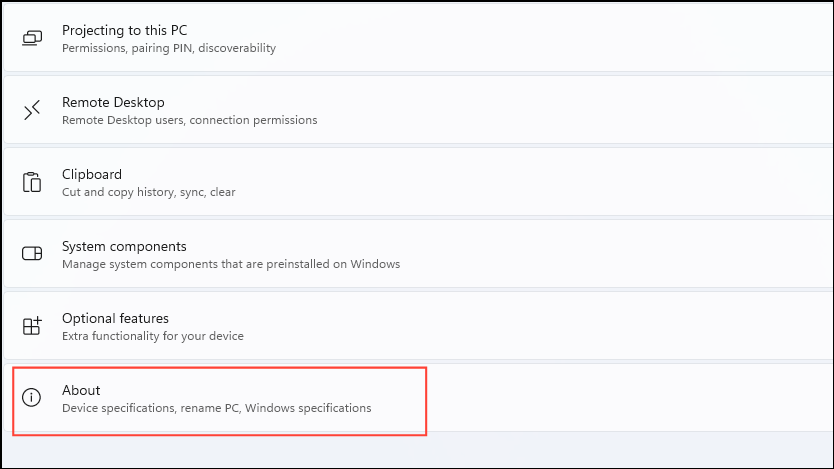
- On the System page, scroll to the bottom and click on 'About'.
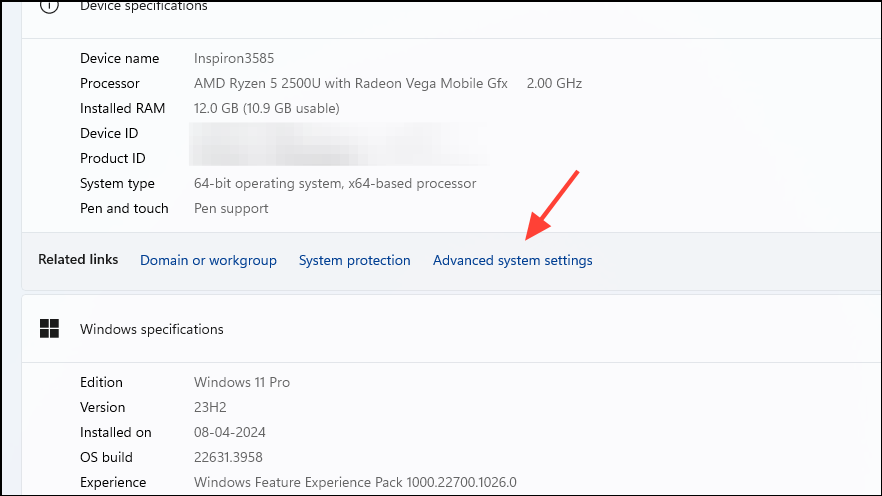
- Then click on 'Advanced System Settings'.
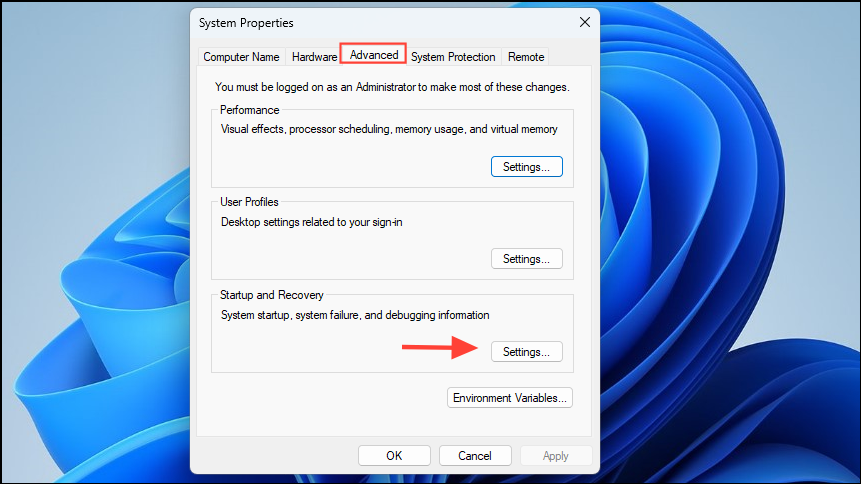
- When the System Properties dialog box appears, click on the 'Settings' button in the 'Startup and Recovery' section.
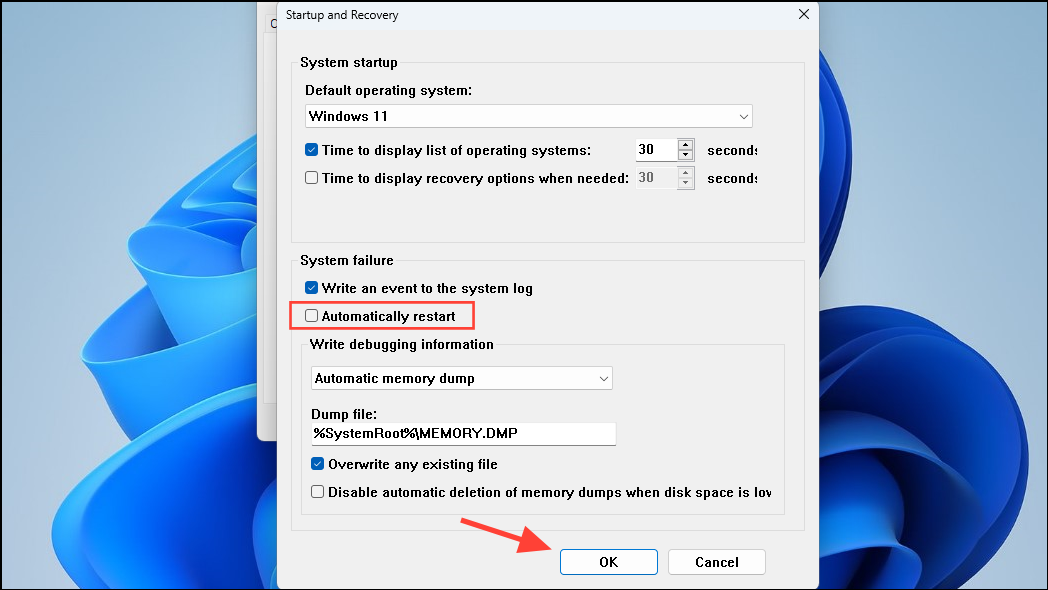
- On the page that opens, click on the checkbox next to the 'Automatically restart' option to disable it. Then click on the OK button.
Solution 2: Check that your computer isn't overheating
If your Windows 11 PC restarts when you use a graphical design software or play a graphics-intensive videogame, your hardware is heating up causing the reboot. If the GPU or CPU temperature becomes very high it can damage your PC. To prevent that, Windows will shut down your PC and then start it again.
The temperature of your PC can also go up when you are running numerous apps simultaneously, which requires a lot of system resources. Check the CPU and CPU temperatures, and if the temperatures are too high, you should take a look at your hardware and get it repaired or replaced.
Solution 3: Turn off Fast Startup
Fast Startup allows your PC to start quickly but can cause problems like random reboots. You can turn it off from the Control Panel.
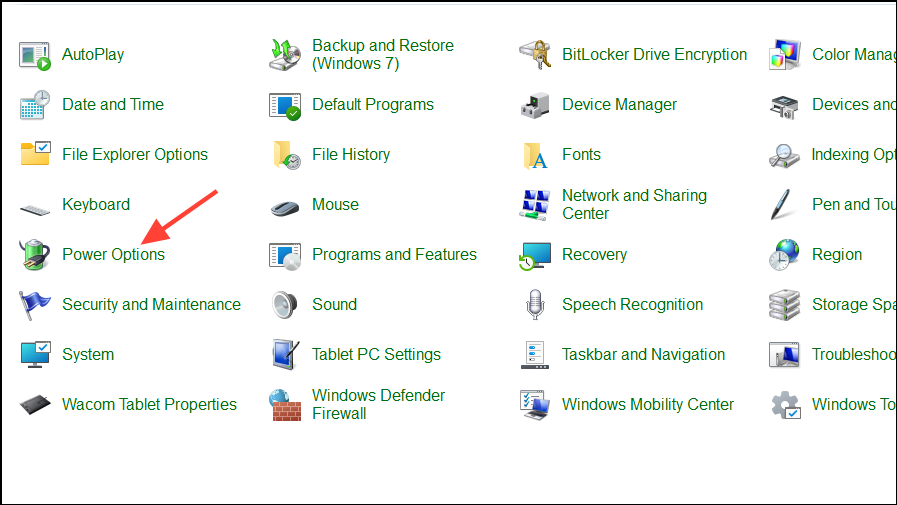
- Open the Control Panel and click on 'Power Options'.
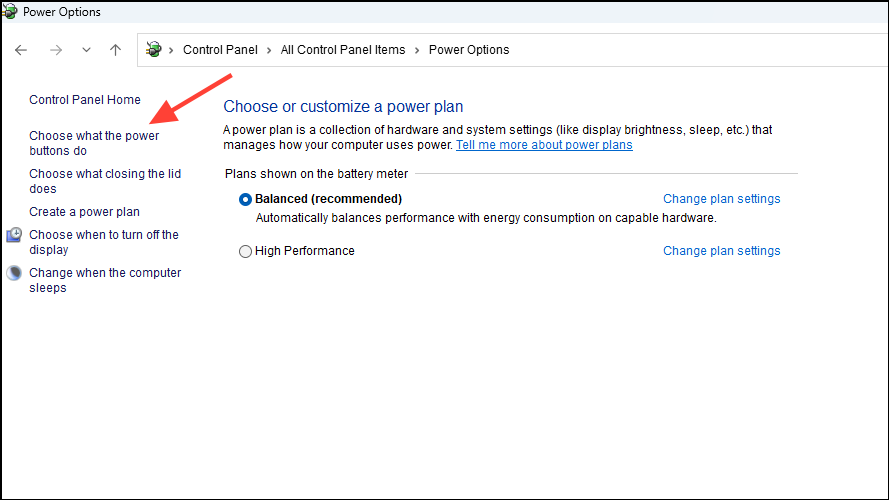
- Next, click on 'Choose what the power buttons do' on the left.
- On the next page, click on 'Change settings that are currently unavailable'.
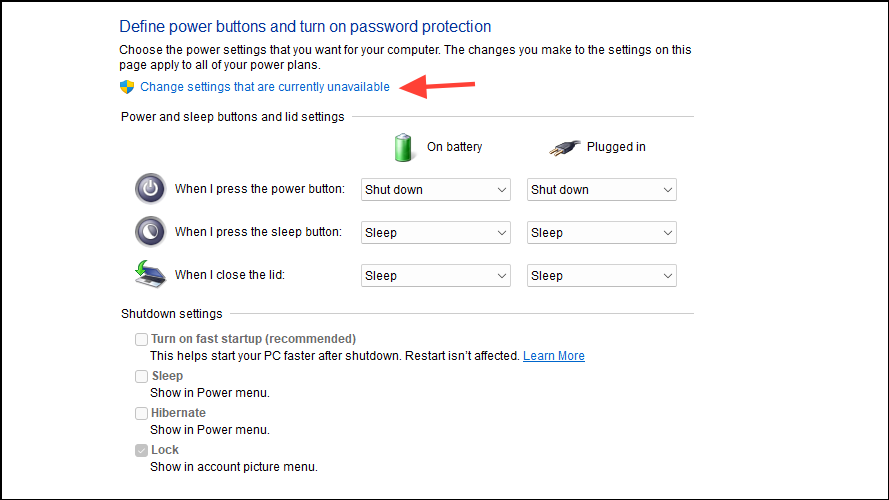
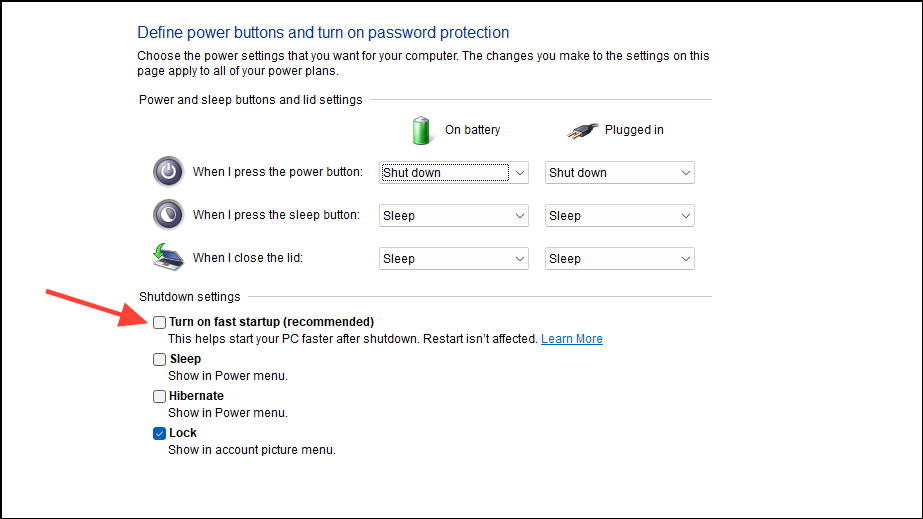
- Finally, click on the checkbox next to 'Turn on fast startup' in the 'Shutdow settings' section to disable it. Then click on the 'Save Changes' at the bottom.
Solution 4: Run SFC, DISM, and CHKDSK scans
Windows comes with certain tools that let you scan your PC for problems and fix them. These include the SFC, DISM, and CHKDSK scans.
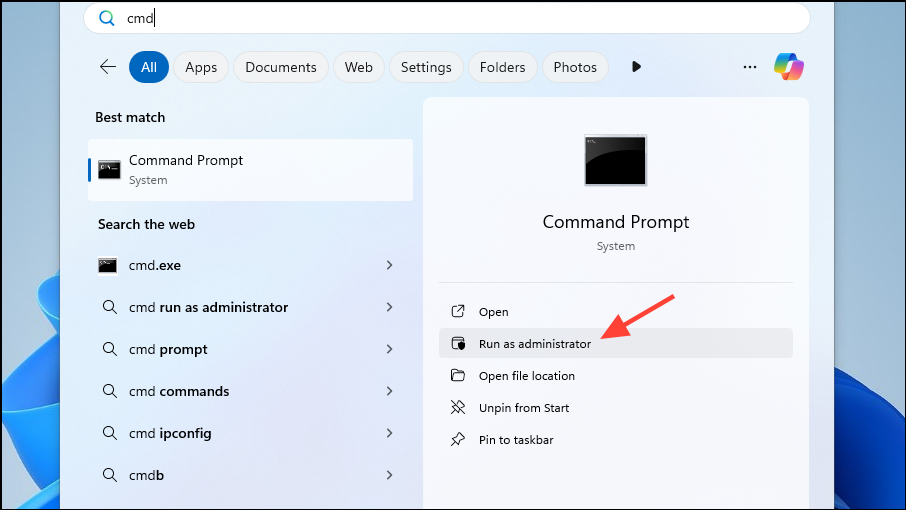
- Open the Start menu, type
cmd, and click on 'Run as administrator'.
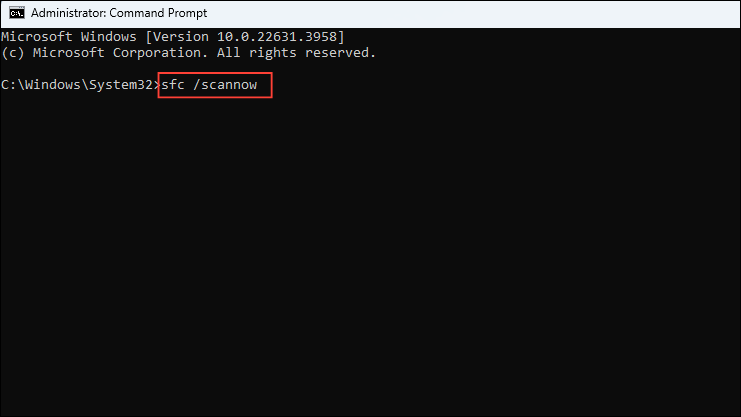
- In the command prompt window that appears, type
sfc /scannowand press Enter.
- Wait for the scan to finish and then type
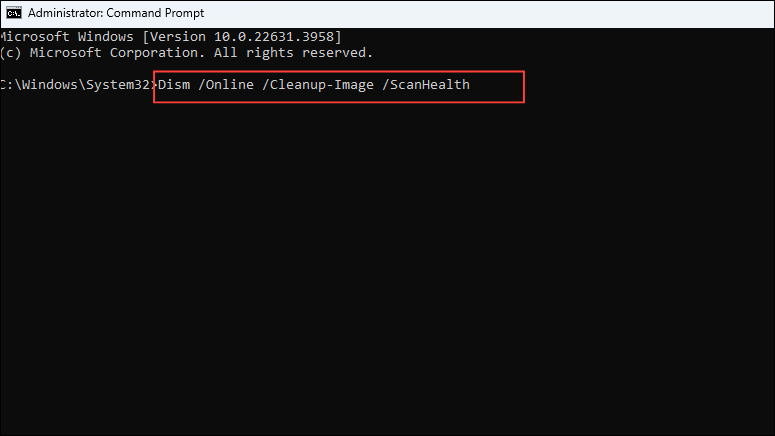
Dism /Online /Cleanup-Image /ScanHealthbefore pressing the Enter key.
- Then type
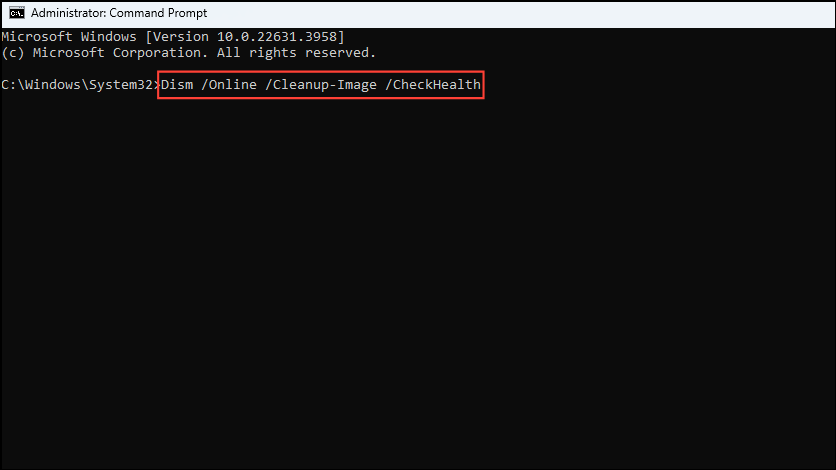
Dism /Online /Cleanup-Image /CheckHealthand press the Enter key again.
- To complete the DISM scan, type
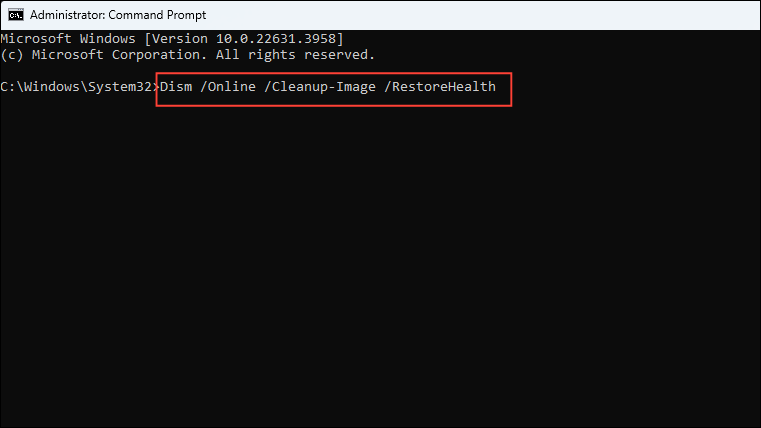
Dism /Online /Cleanup-Image /RestoreHealthbefore pressing Enter.
- Lastly, type
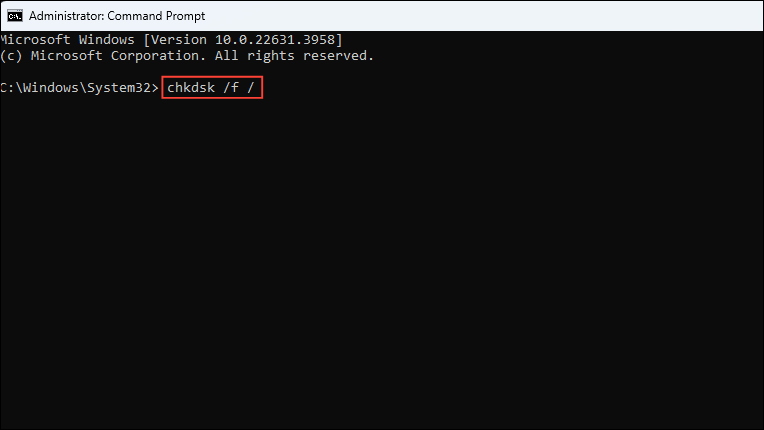
chkdsk /f /rand press Enter. When your computer restarts next time, you will have the option to start the disk check.
Solution 5: Check for memory problems
Memory problems can occur because of a faulty RAM module, and you can verify this using the Windows Memory Diagnostic tool.
- Open the Run dialog using the
Win + Rshortcut, typeMdSchedin it, and press Enter.
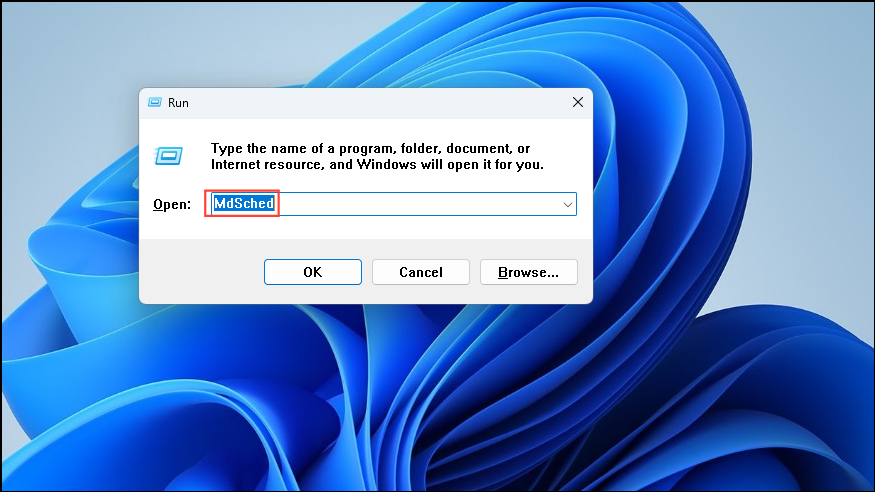
- Click on 'Restart now and check for problems (Recommended)' and your PC will reboot and start checking for memory problems.
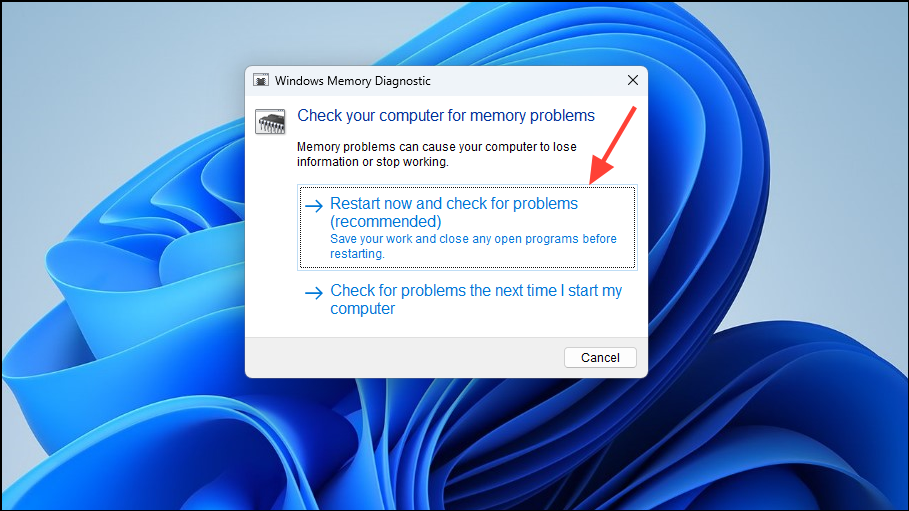
- If Windows detects memory problems, you may have to perform some troubleshooting actions to resolve them.
Solution 6: Disable overclocking
If you play video games on your PC, you may have overclocked it to get the best possible performance from your hardware. Unfortunately, it can also increase the temperature significantly and damage your computer. As explained above, extremely high temperatures will cause Windows to reboot. In case you're running into that problem, you should disable overclocking and revert your PC to its normal state.
Solution 7: Perform a malware scan
Virus and malware can cause problems with your Windows 11 PC and cause it to restart. You can perform a virus scan using Windows Defender or a third-party antivirus program and take the necessary steps to get rid of them.
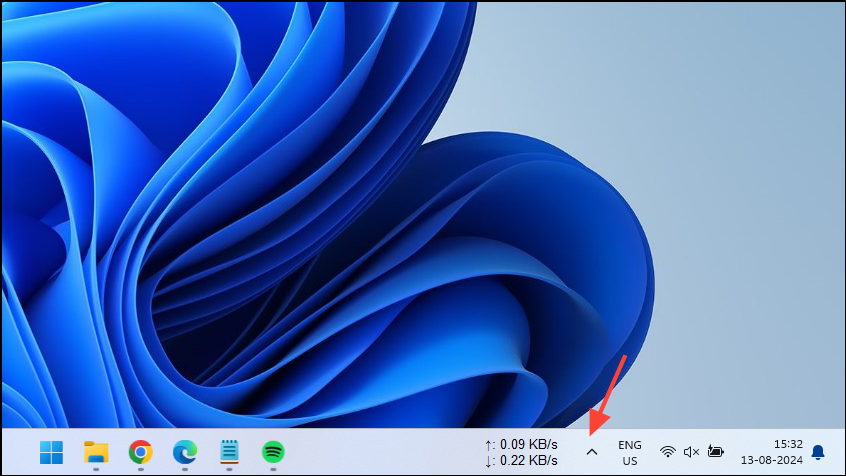
- Click on the Taskbar Overflow icon on the taskbar to view hidden icons.
- Click on your antivirus when it appears to open it.
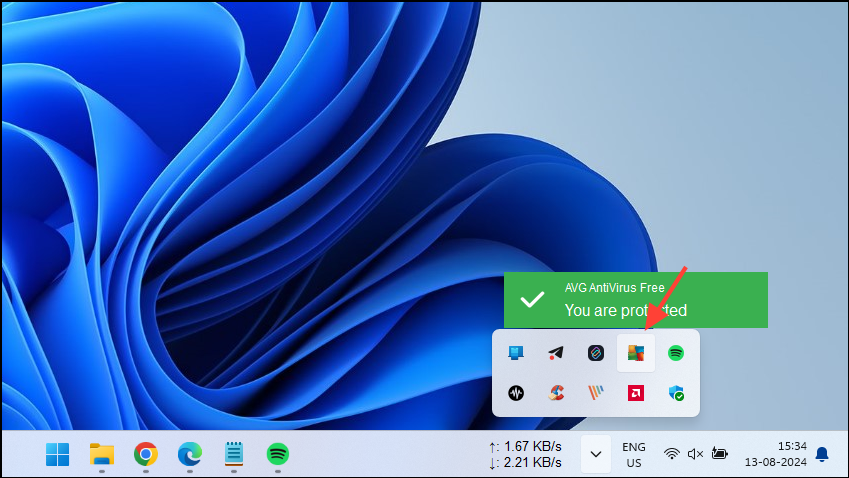
- When the antivirus program opens, look for an option like 'Complete scan' or 'Deep scan'. Click on it to start scanning your PC. Wait until the scan is complete and then perform the actions that your antivirus recommends.

Solution 8: Update your graphics drivers
Outdated graphics drivers are another cause of random reboots in Windows 11. Check whether an update for your graphics driver is available and install it if it is.
- Click on the taskbar overflow icon to access hidden icons and then click on your graphics card software to launch it. You can also search for it and open it from the Start menu.
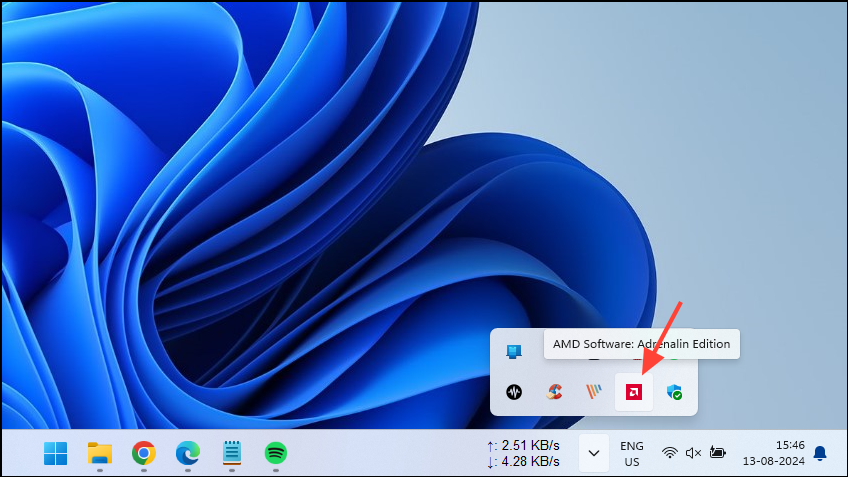
- Once the graphics driver software launches, look for an option like 'check for updates' or something similar. Click on it to check for the latest driver and software updates.
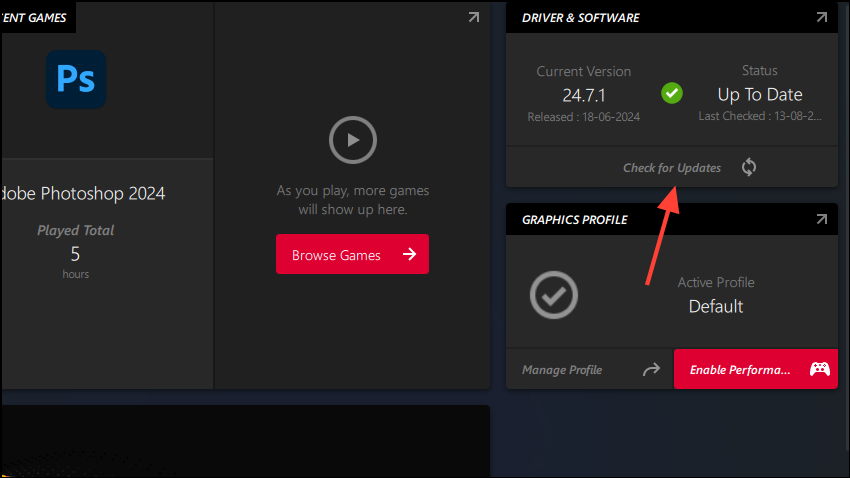
- If updates are available, you can download and install them directly from the software. Once your graphics driver is updated, restart your computer.
Solution 9: Reinstall graphics drivers
If updating your graphics drivers does not solve your problem, you can try removing and reinstalling them.
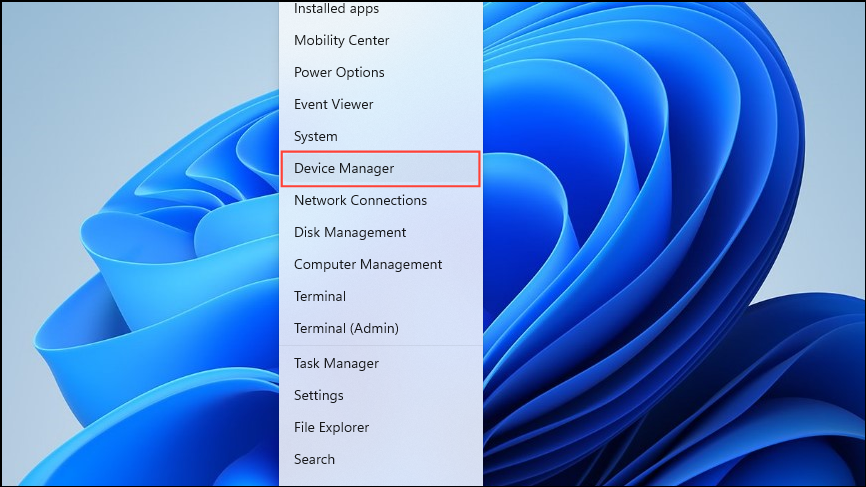
- Right-click on the Start button and click on 'Device Manager' to open it.
- Click on 'Display drivers' to expand the category.
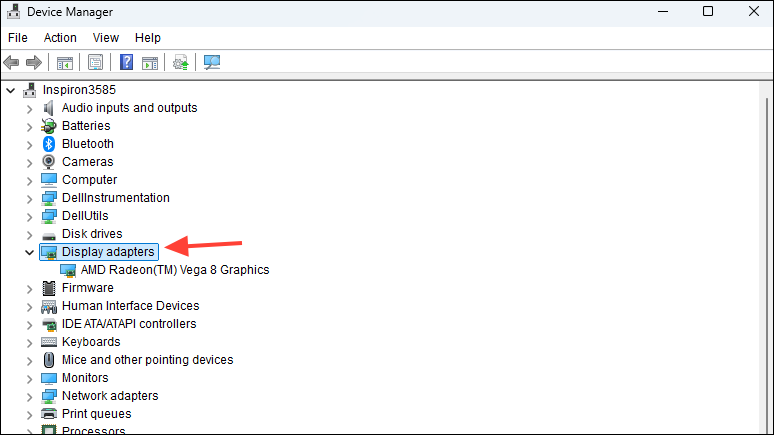
- Right-click on your graphics driver and click on 'Uninstall device'.
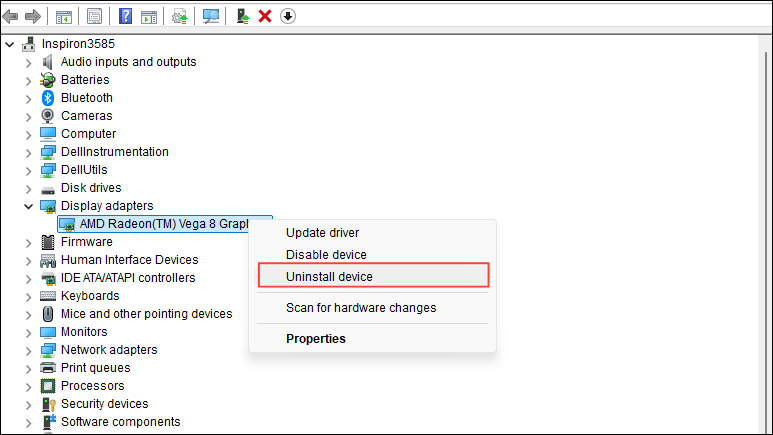
- Wait until the graphics driver is removed from your system. Then reboot and reinstall the latest drivers.
Solution 10: Uninstall the latest Windows Update
Sometimes Windows Updates can cause problems like random reboots, and you may have to uninstall them.
- Open the Settings page and click on 'Windows Update' on the left.
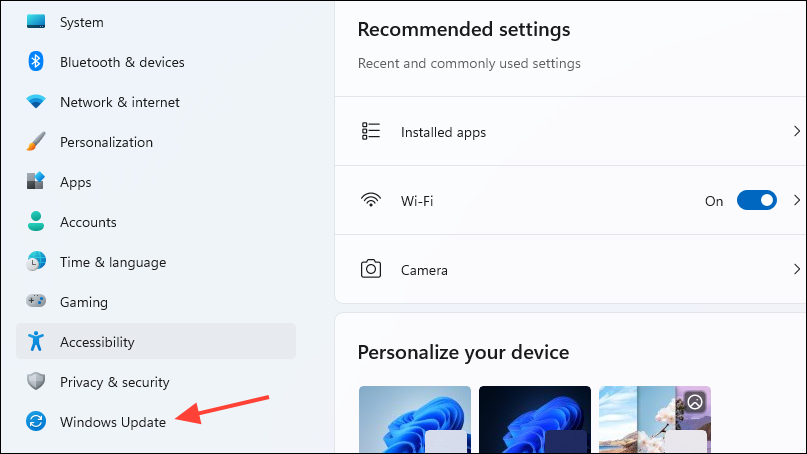
- On the Windows Update page, click on 'Update History'.
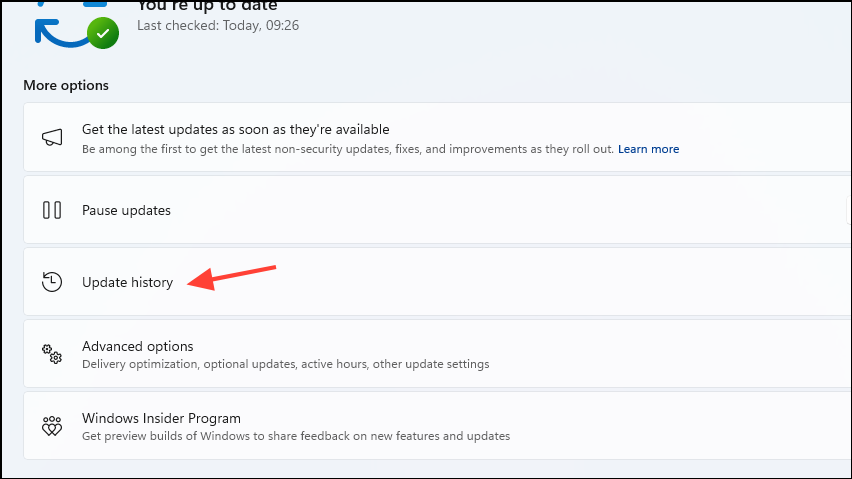
- Next, click on 'Uninstall updates'.
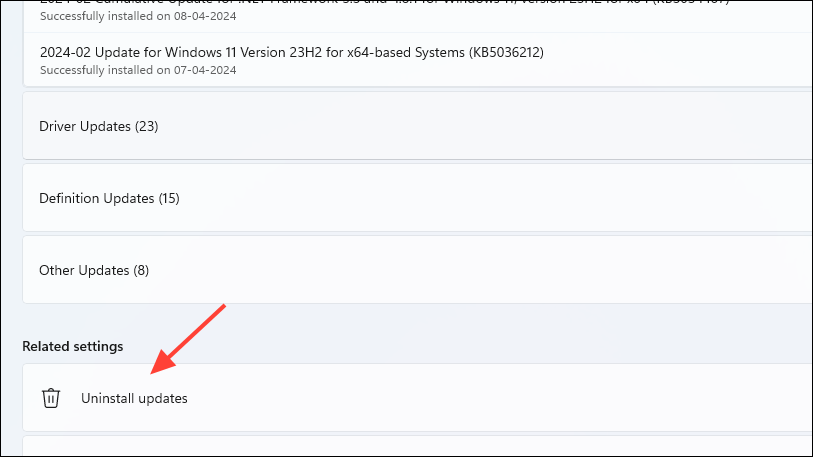
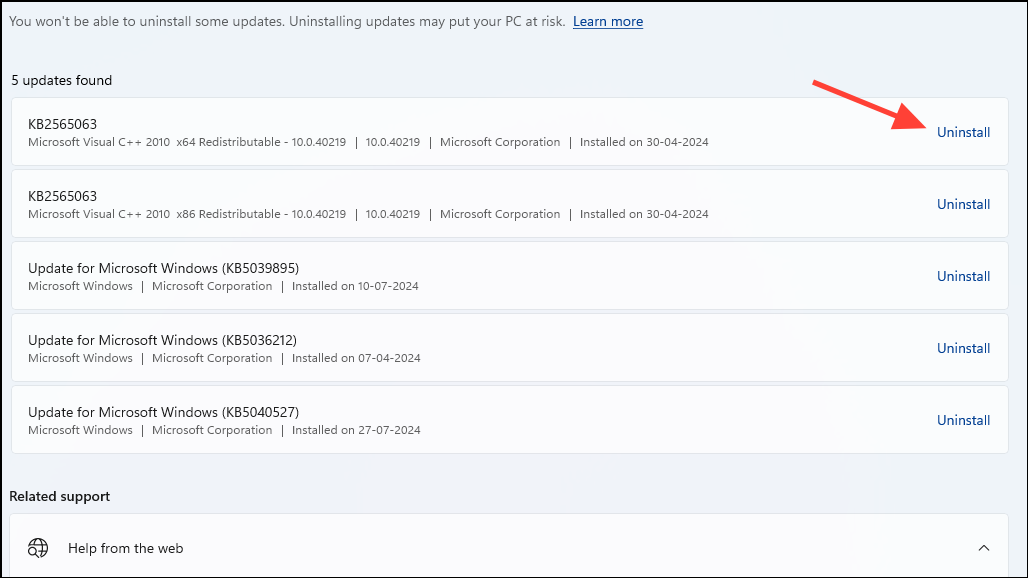
- You will see a list of the updates that you can uninstall. Click on 'Uninstall' on the right for the updates you want to remove. Restart your PC after that.
Solution 11: Change Windows Update settings
Besides uninstalling Windows Updates, you can change update settings and see if that stops the random reboots.
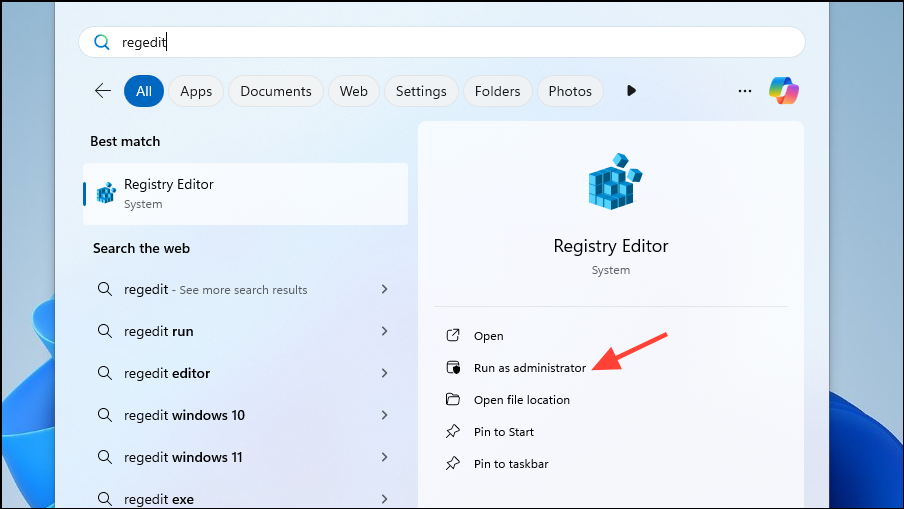
- Open the Start menu, type
regeditand click on 'Run as administrator' to launch the Registry Editor.
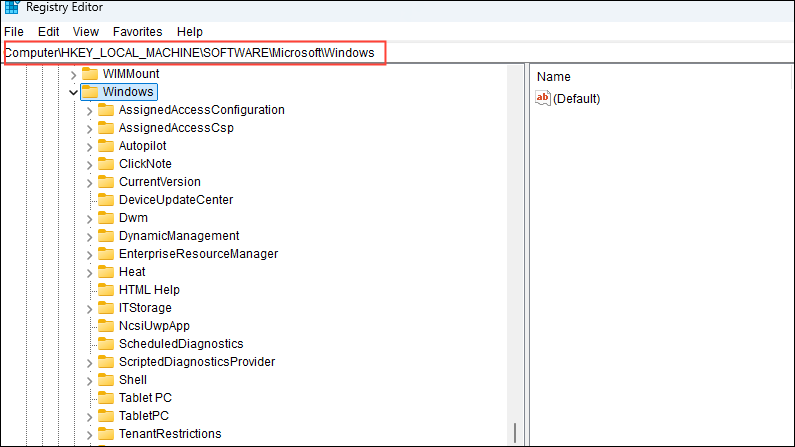
- When the Registry Editor opens, navigate to the following directory:
Computer\HKEY_LOCAL_MACHINE\SOFTWARE\Microsoft\Windows.
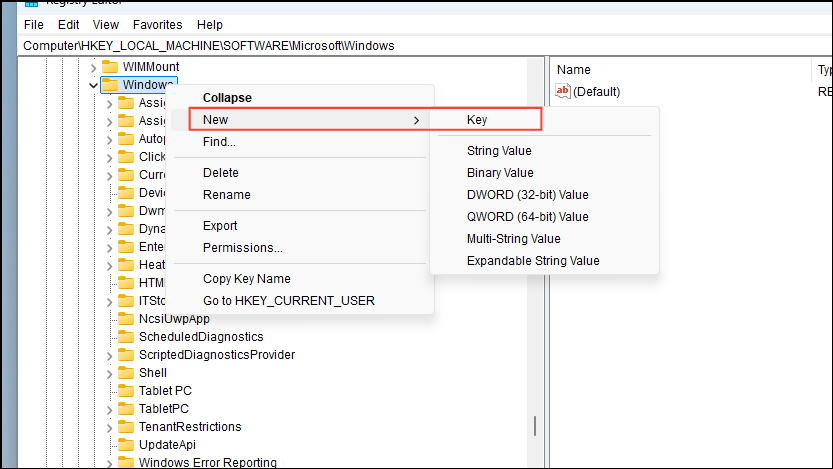
- Right-click on the 'Windows' folder and click on 'New' and then on 'Key'.
- Name the new key 'Windows Update'.
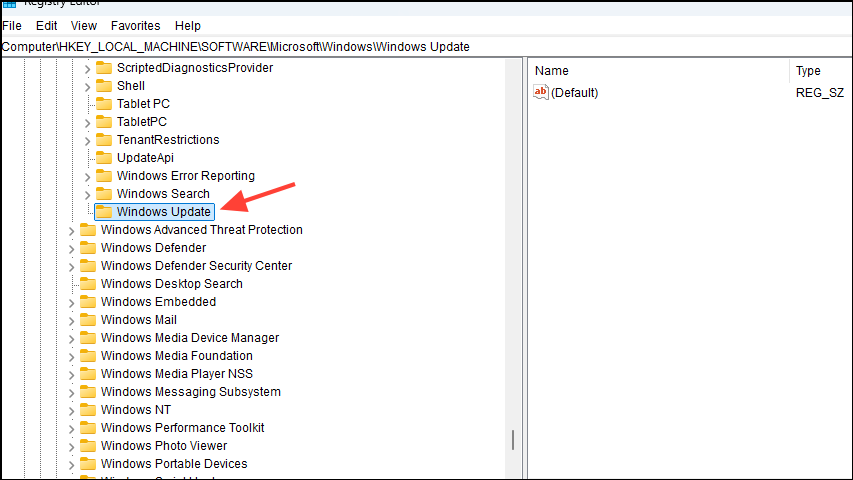
- Right-click on the new 'Windows Update' key and create another key. Name this key 'AU'.
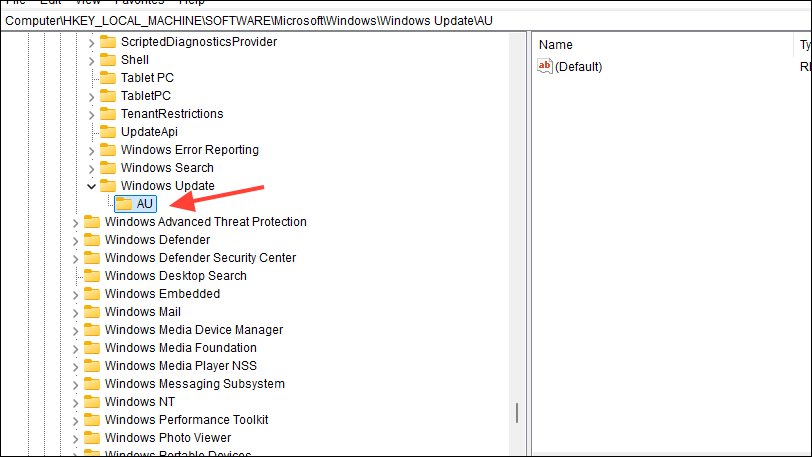
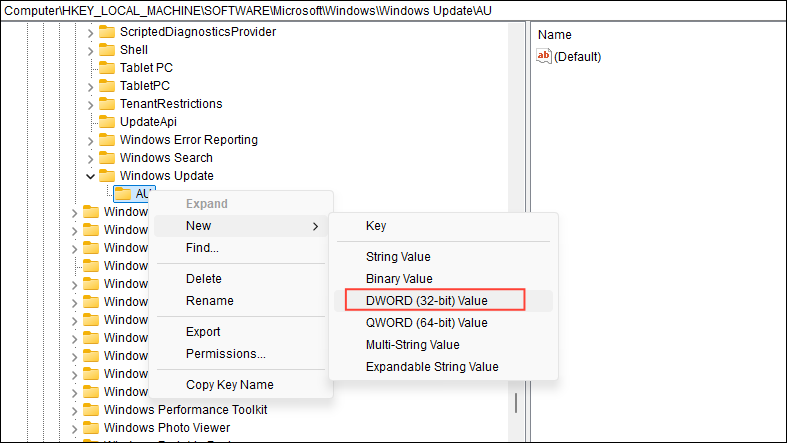
- Right-click on the 'AU' key and click on 'New' and then 'DWORD (32-bit Value)'.
- Name the DWORD
NoAutoRebootWithLoggedOnUser.
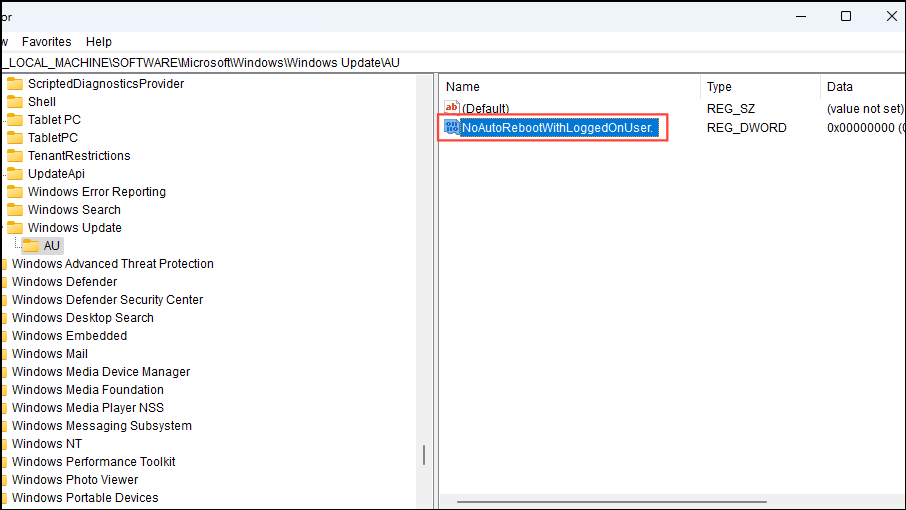
- Finally, double-click on the DWORD and change its value to '1'. Then restart your computer.
Solution 12: Perform a clean boot
A clean boot disables all non-essential services, keeping only those services enabled that are essential for your computer to operate properly. It can help you identify the cause of random reboots.
- Open the Start menu, type
msconfig, and click on 'System Configuration'.
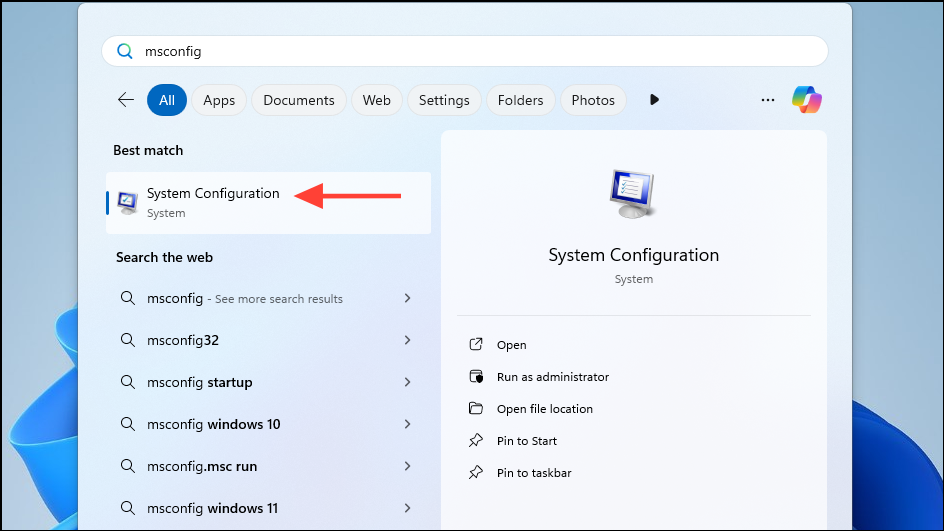
- When the System Configuration utility opens, click on the 'Services' tab at the top and then on the checkbox next to 'Hide all Microsoft services'.
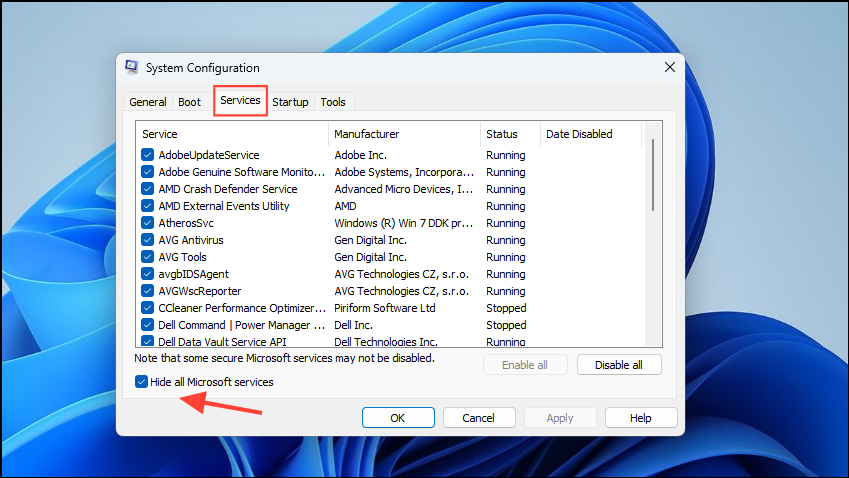
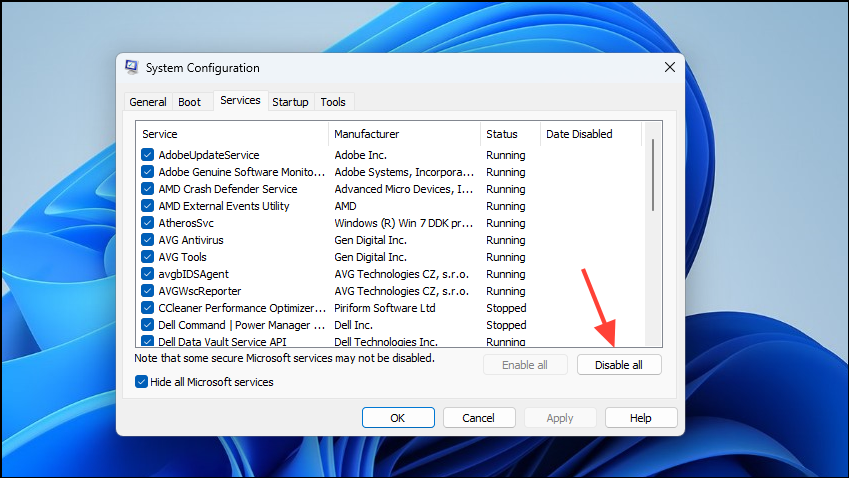
- Now, click on the 'Disable all' button to turn off all non-essential services.
- Once you've disabled the services, go to the 'Startup' tab at the top and click on 'Open Task Manager'.
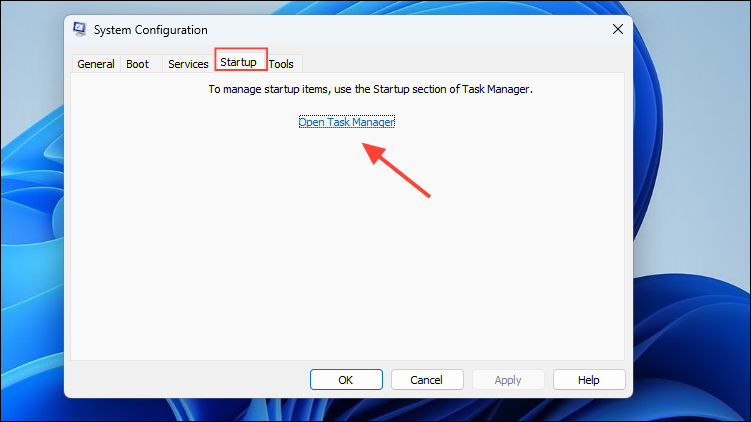
- When the Task Manager opens, click on the 'Startup apps' tab on the left.
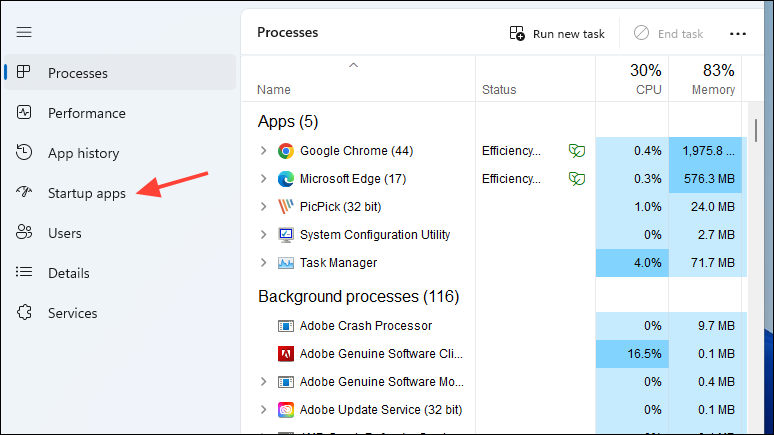
- Now, you will see all applications that start when you boot Windows. Right-click on each application and click on 'Disable'.
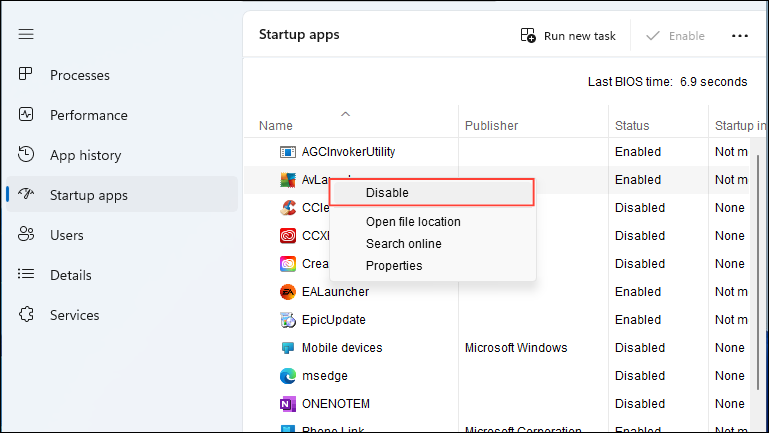
- After disabling all startup apps, close the Task Manager and click on the OK button in System Configuration. Then restart your computer. It will boot into a clean environment and you can try running different applications and programs to find out which one is causing your PC to restart.
Solution 13: Change group policies
If your PC restarts automatically after updating, check that the group policies are correctly configured.
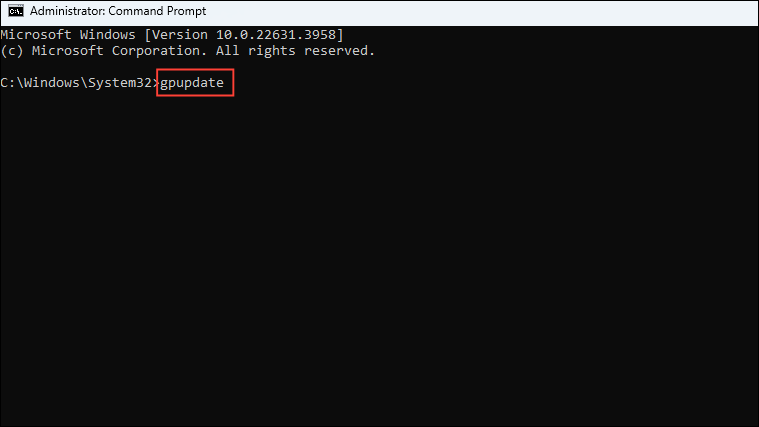
- Open command prompt as administrator.
- Type
gpupdatein the window and press Enter to update the group policies.
Things to know
- You should check your computer for any hardware issues to ensure they are not causing it to restart randomly. A component, such as the Power Supply Unit (PSU) may be faulty and cannot handle the load, which is causing the problem.
- If you've recently installed a program, it might be responsible for the random reboots. Try uninstalling it and checking whether the problem is still present.
- If you've set up a restore point, restoring your Windows 11 system to that point is another solution. This will undo all recent changes and can help sort out the issue.
- Lastly, if nothing else works and you're sure your hardware is fine, consider reinstalling or resetting Windows. While you will lose all your apps and customizations, it can help get rid of most software-related problems.

