Encountering the "Your PIN is no longer available due to a change in the security settings on this device" error in Windows 11 can be frustrating, especially when you're unable to sign in to your computer. This issue often arises after system updates, security changes, or corrupted system files. Fortunately, there are several methods to resolve this problem and regain access to your device.
In this guide, we'll walk you through effective solutions to fix this error. We'll begin with the simplest methods and progress to more advanced ones. Let's get started.
Method 1: Sign In Using Your Microsoft Account Password
If you're unable to sign in with your PIN, you can use your Microsoft account password instead. This method allows you to access your account and reset your PIN.
Step 1: On the sign-in screen, click on Sign-in options.
Step 2: Select the Password icon (it looks like a key).
Step 3: Enter your Microsoft account password and press Enter.
Step 4: Once signed in, press Windows + I to open Settings.
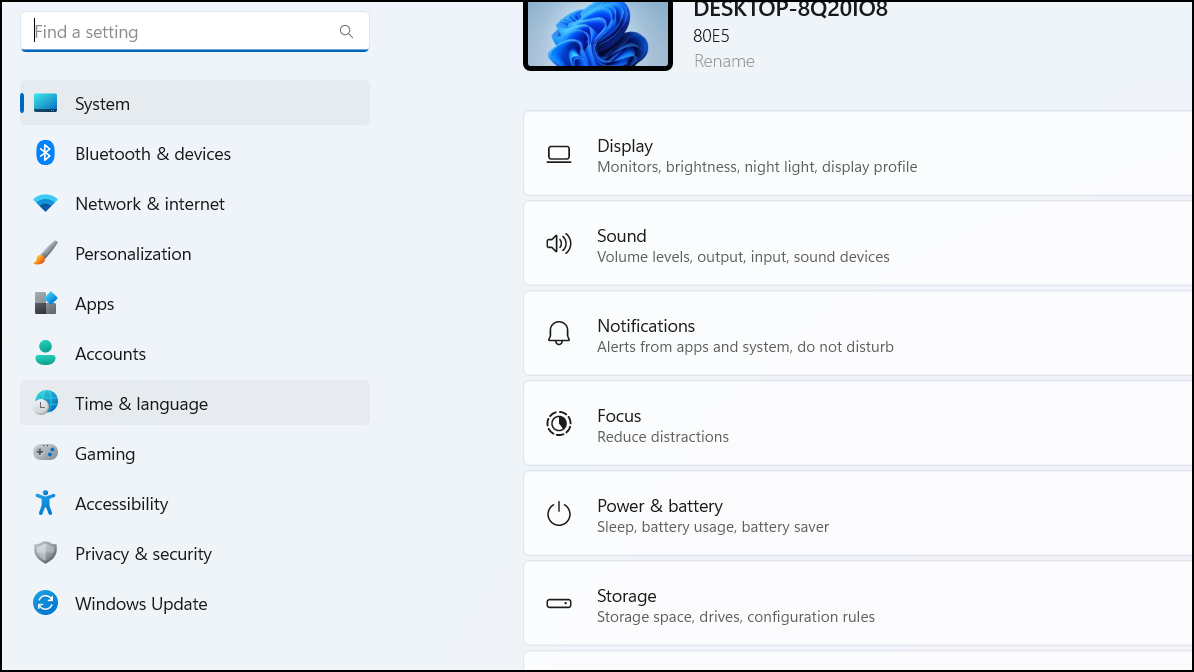
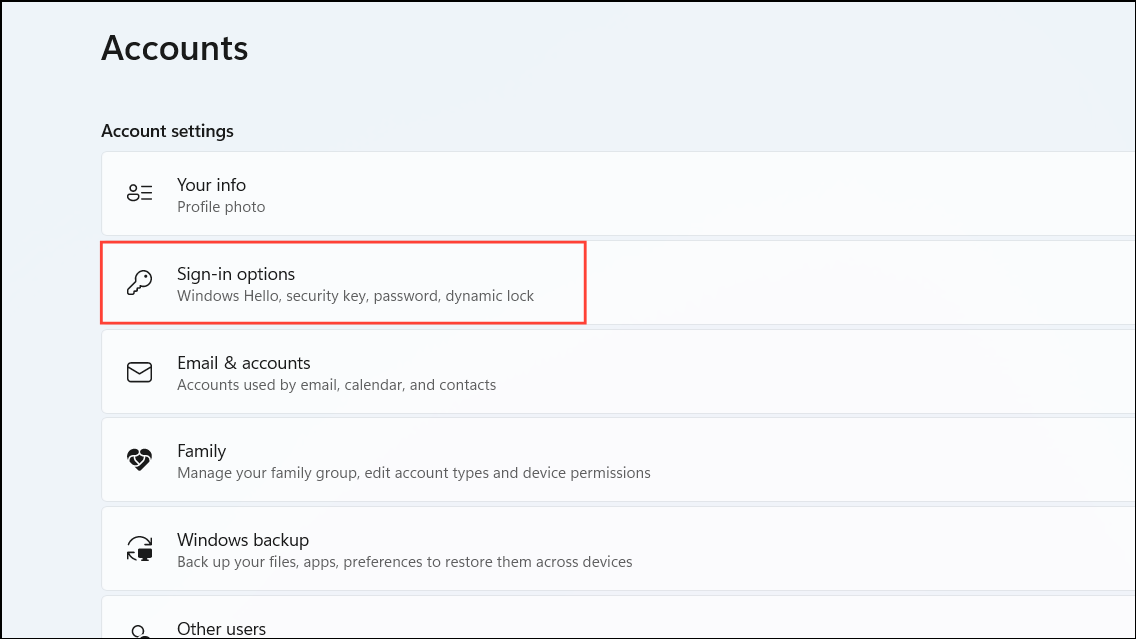
Step 5: Navigate to Accounts on the left pane, then click on Sign-in options on the right.
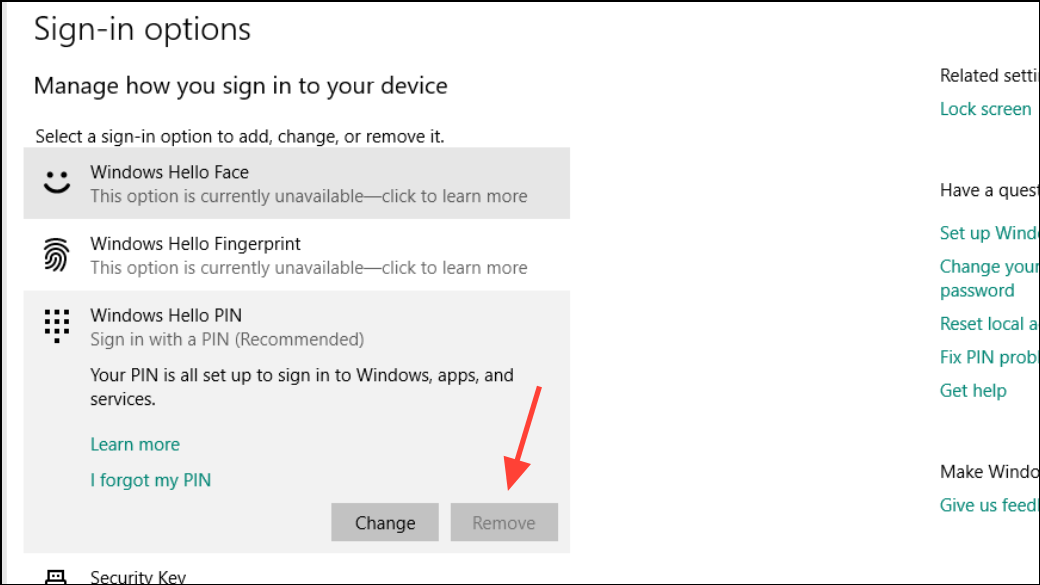
Step 6: Under PIN (Windows Hello), click on Remove to delete the existing PIN.
Step 7: Confirm the action, then click on Add to create a new PIN.
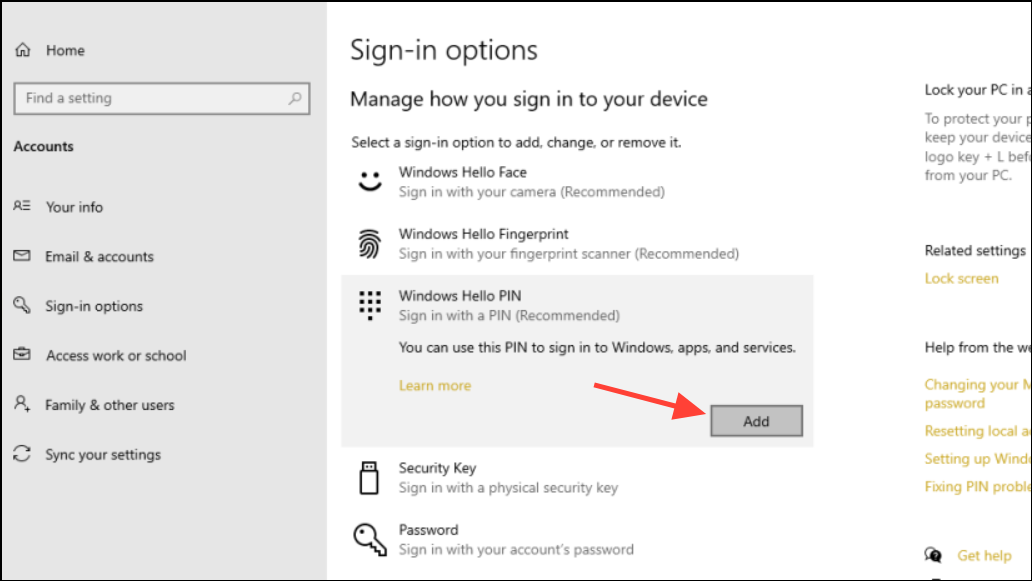
Step 8: Follow the prompts to set up a new PIN.
Method 2: Reset the PIN via "I Forgot My PIN" Option
If signing in with a password isn't possible or you prefer resetting the PIN directly, you can use the "I forgot my PIN" feature.
Step 1: On the sign-in screen, select Sign-in options, then choose the PIN icon.
Step 2: Click on the I forgot my PIN link below the PIN entry box.
Step 3: Enter your Microsoft account password when prompted, then click OK.
Step 4: Follow the on-screen instructions to set up a new PIN.
Method 3: Delete the NGC Folder in Safe Mode
The NGC folder stores your PIN configurations. If it becomes corrupted, you may encounter the PIN error. Deleting this folder forces Windows to recreate it, potentially fixing the issue.
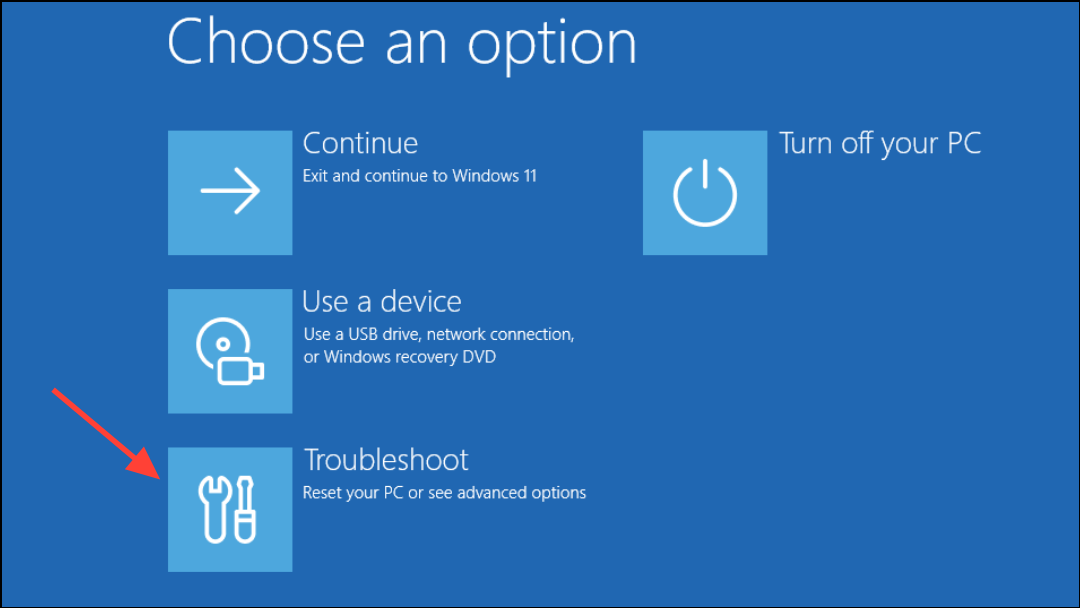
Step 1: On the sign-in screen, click the Power icon, hold down the Shift key, and select Restart. This will boot your system into the Windows Recovery Environment.
Step 2: In the Recovery Environment, select Troubleshoot, then click on Advanced options.
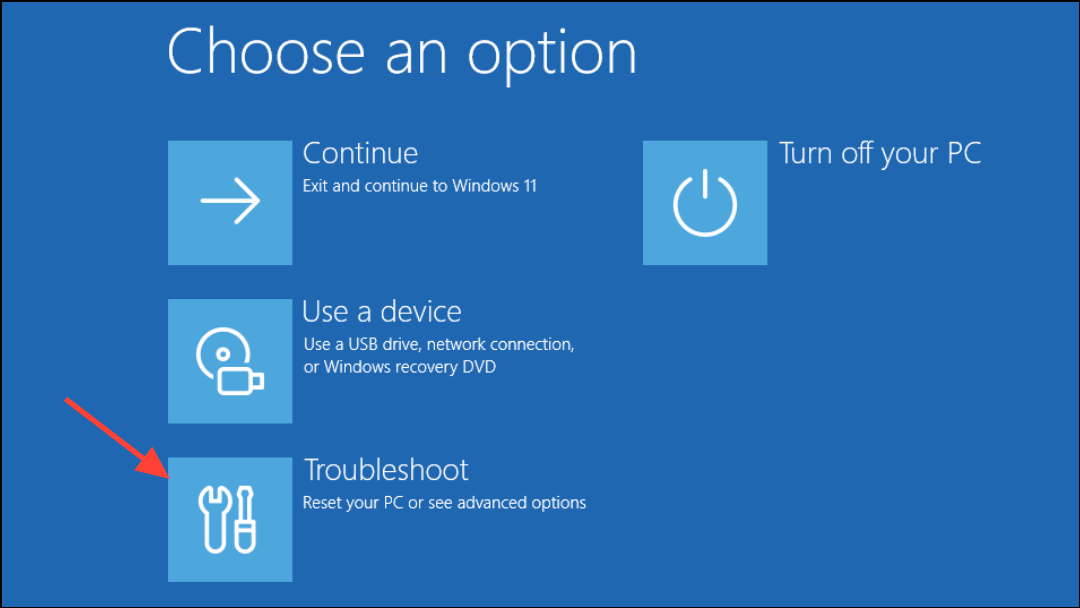
Step 3: Choose Startup Settings, then click Restart.
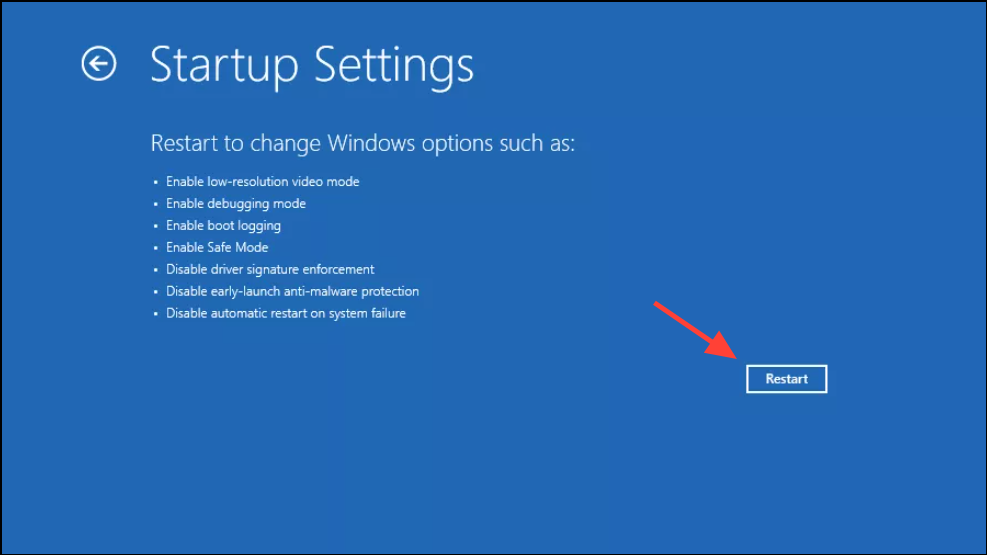
Step 4: After the restart, press F4 to boot into Safe Mode.
Step 5: Once in Safe Mode, press Windows + E to open File Explorer.
Step 6: Navigate to the following folder:
C:\Windows\ServiceProfiles\LocalService\AppData\Local\Microsoft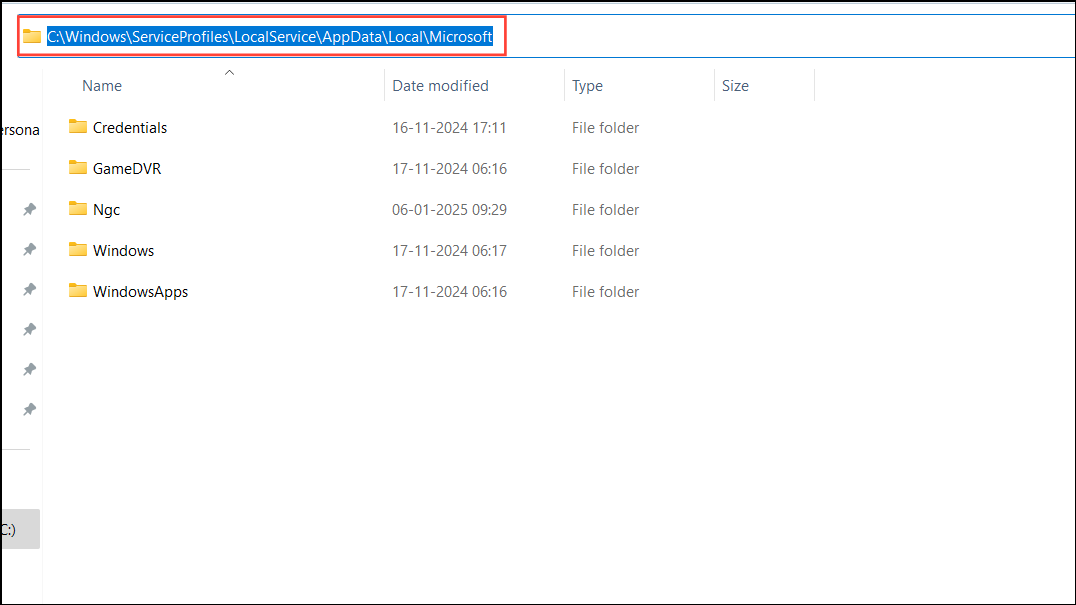
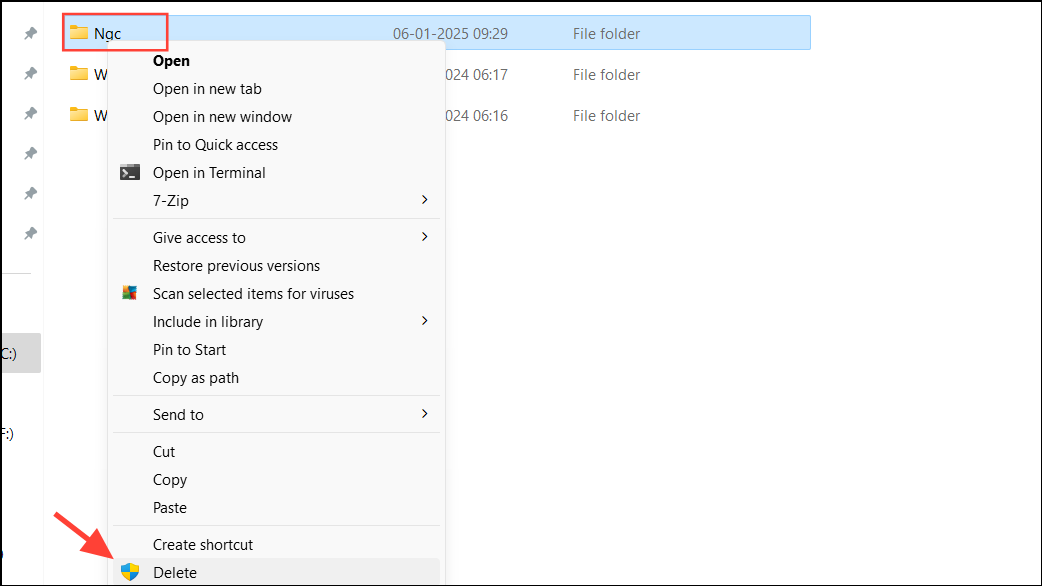
Step 7: Locate the Ngc folder, right-click on it, and select Delete.
Step 8: Restart your computer normally.
Step 9: After rebooting, set up a new PIN through Settings > Accounts > Sign-in options.
Method 4: Clear the Trusted Platform Module (TPM)
The TPM stores encryption keys and sensitive data related to security. Clearing it can resolve issues caused by corrupted TPM data.
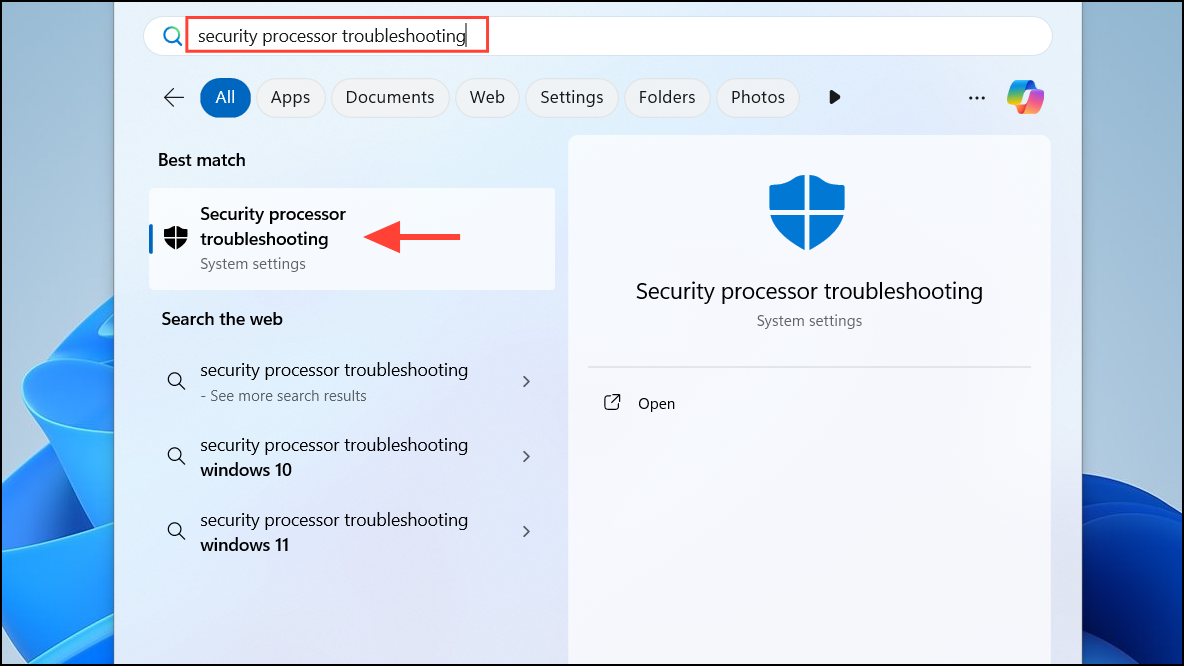
Step 1: Press Windows + S to open the search bar, type Security processor troubleshooting, and select it from the results.
Step 2: In the Security Processor window, click on Clear TPM.
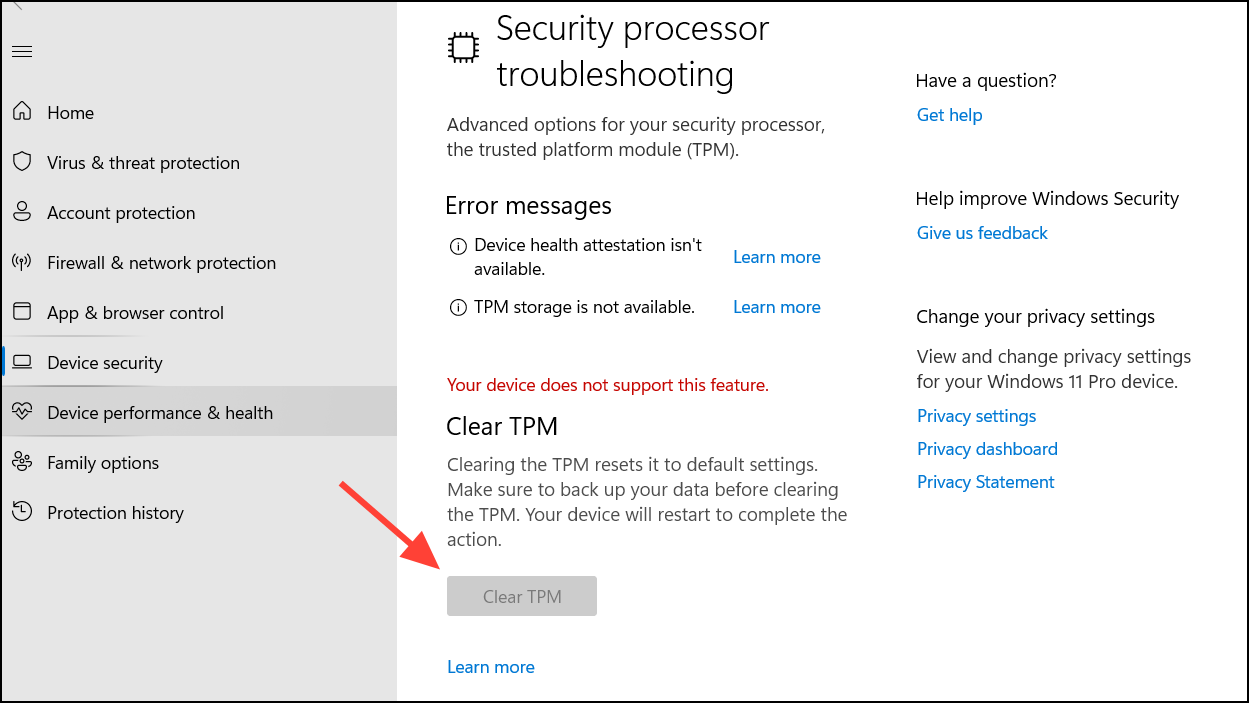
Step 3: Confirm the action when prompted, and allow your system to restart.
Step 4: After rebooting, attempt to sign in or reset your PIN as described in Method 1.
Method 5: Uninstall Recent Windows Updates
Occasionally, a recent Windows update can cause conflicts with the PIN settings. Uninstalling the latest updates may resolve the error.
Step 1: Boot into the Windows Recovery Environment as described in Method 3.
Step 2: Click on Troubleshoot, then select Advanced options.
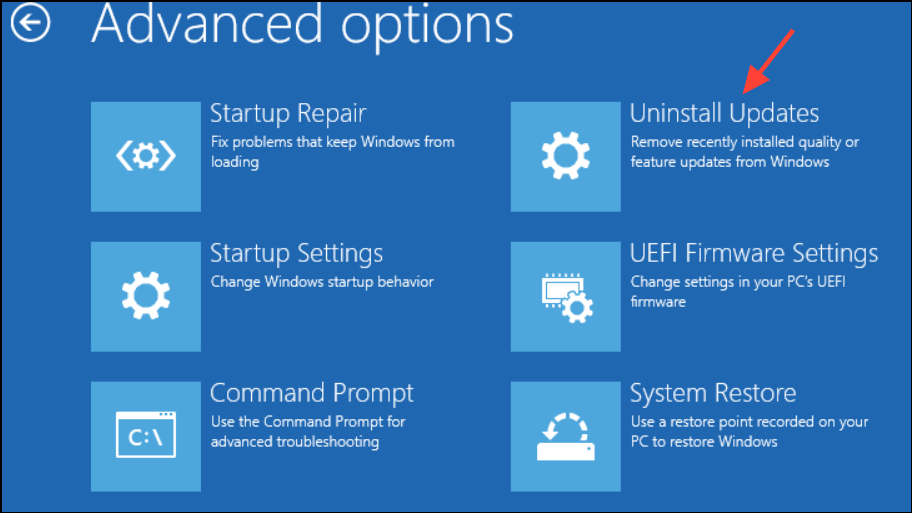
Step 3: Choose Uninstall Updates.
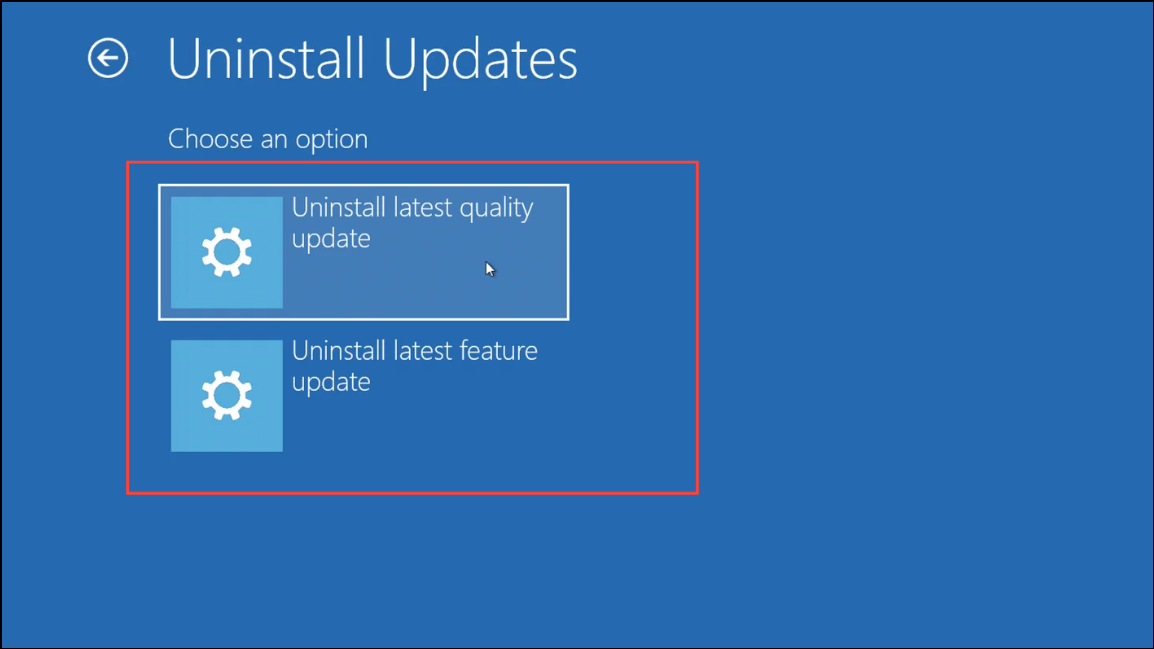
Step 4: Select Uninstall latest quality update or Uninstall latest feature update, starting with the quality update.
Step 5: Follow the on-screen instructions to complete the uninstallation.
Step 6: Restart your computer and check if the issue persists.
Method 6: Modify the Registry in Recovery Mode
Adjusting a specific registry value can resolve issues with the PIN sign-in process.
Step 1: Boot into the Windows Recovery Environment as described in Method 3.
Step 2: Select Troubleshoot, then choose Advanced options.

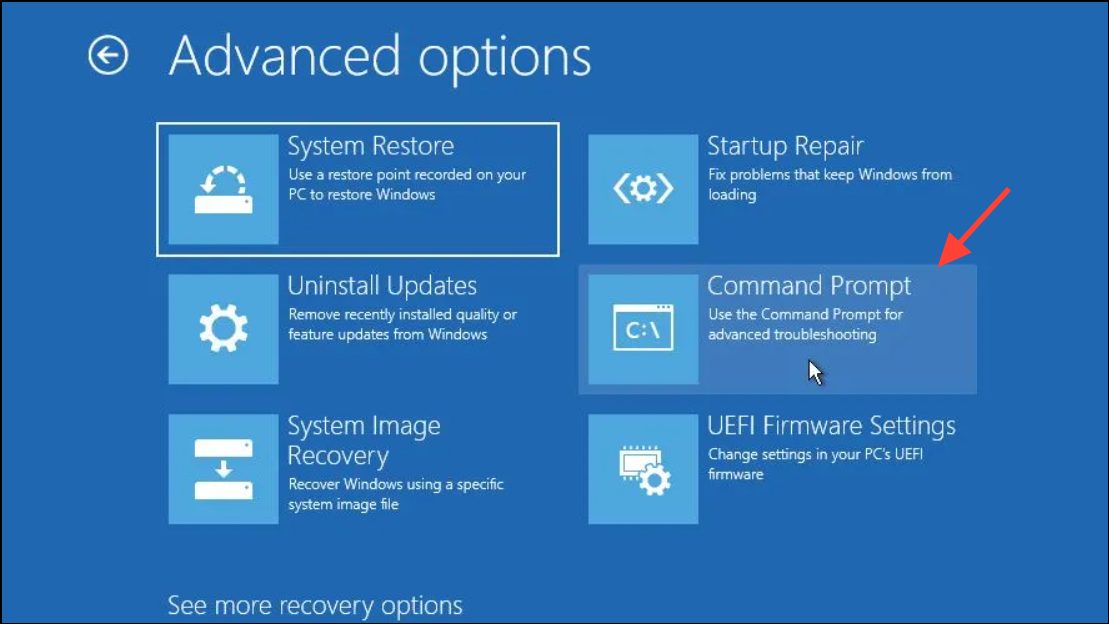
Step 3: Click on Command Prompt.
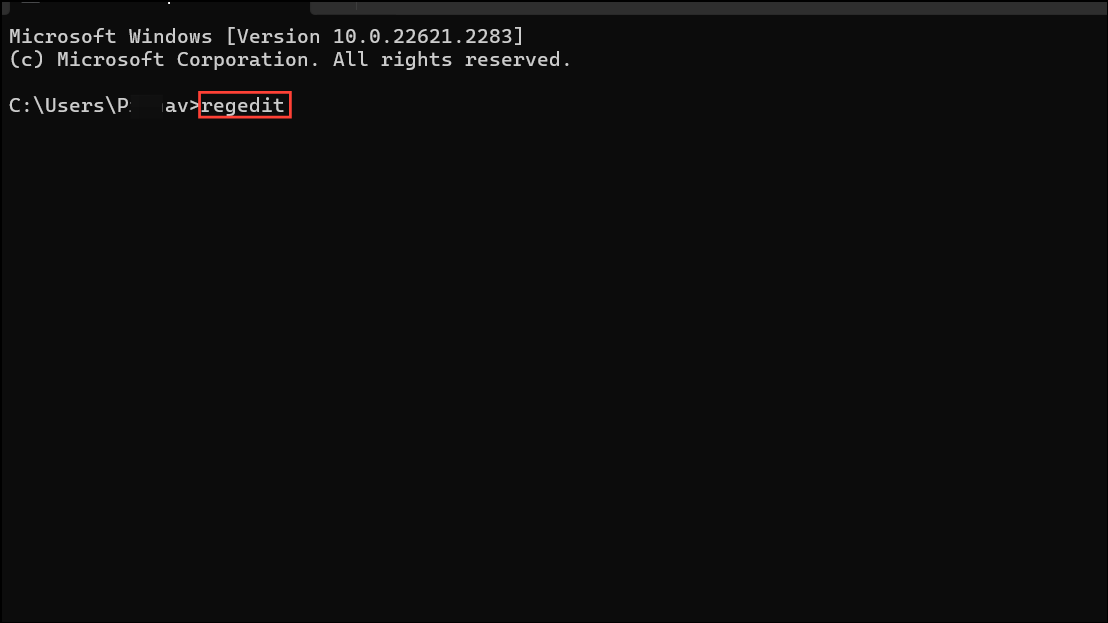
Step 4: In the Command Prompt window, type regedit and press Enter to open the Registry Editor.
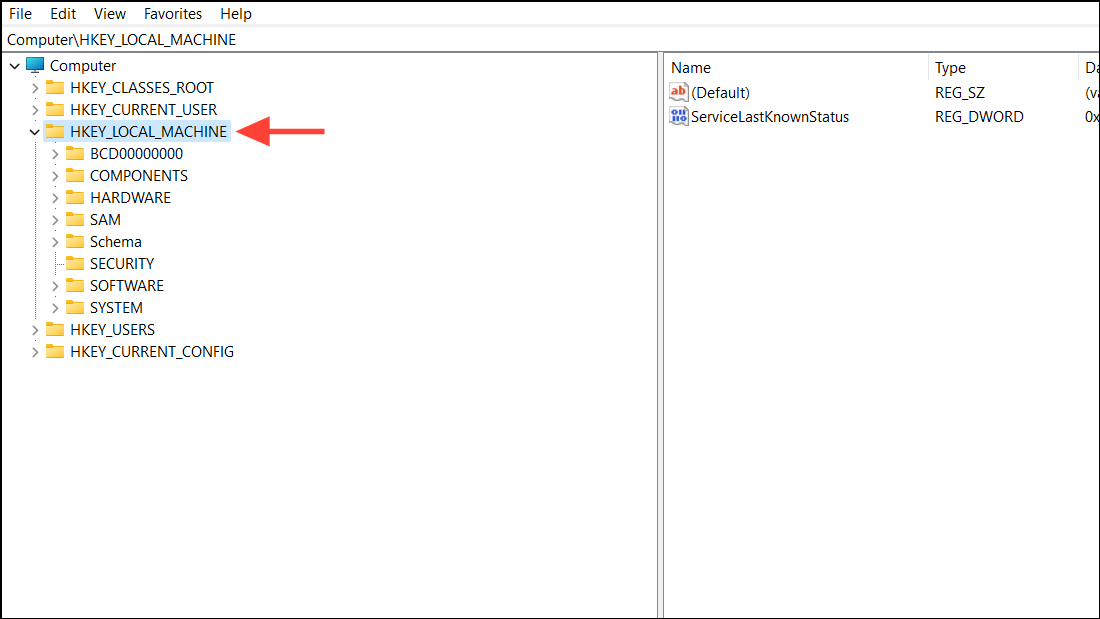
Step 5: In the Registry Editor, select HKEY_LOCAL_MACHINE.
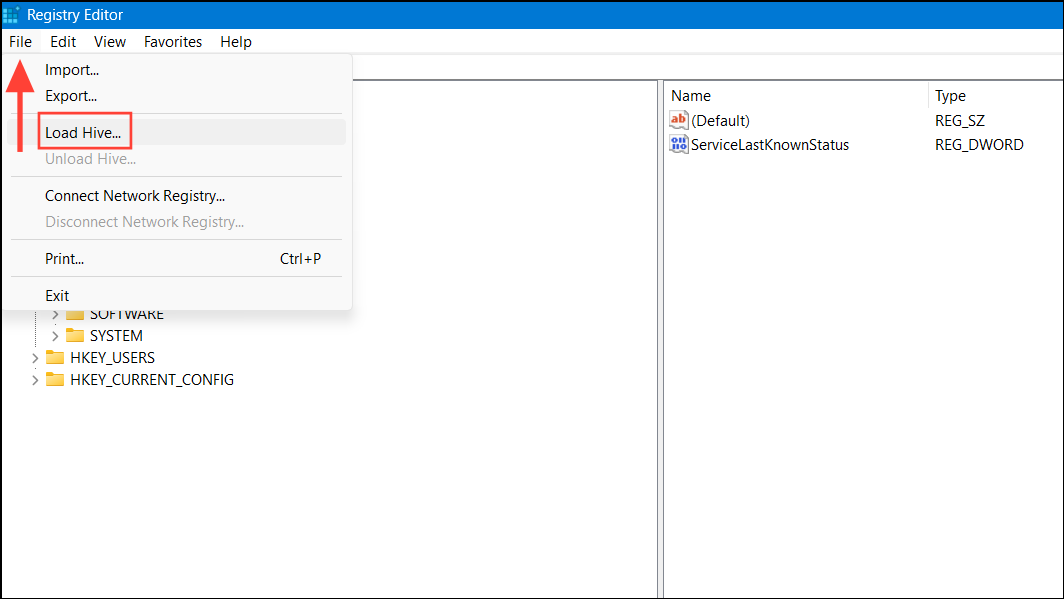
Step 6: Click on the File menu and choose Load Hive.
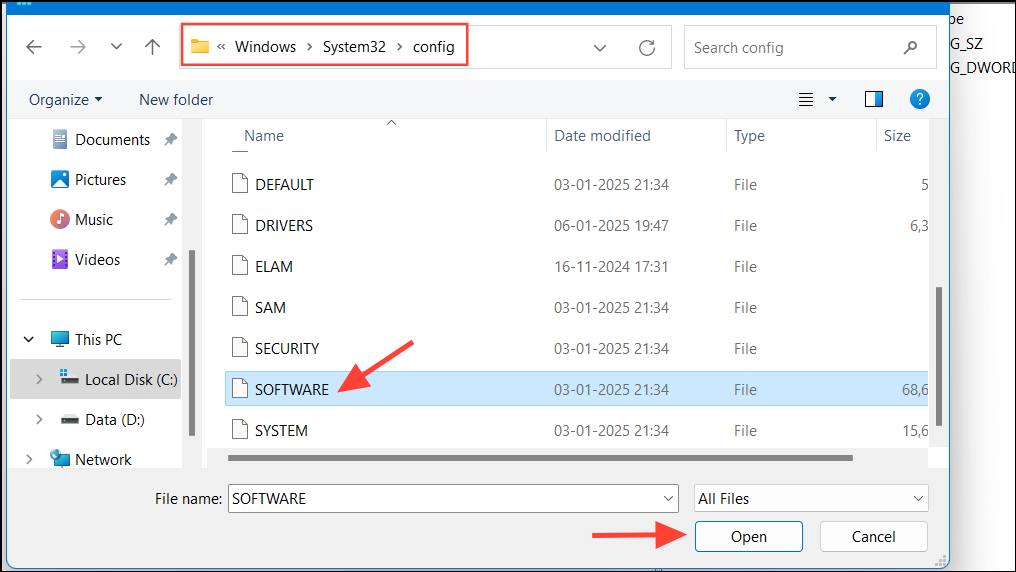
Step 7: Navigate to C:\Windows\System32\config, select the Software file, and click Open.
Step 8: When prompted for a key name, enter OfflineSoftware and click OK.
Step 9: Navigate to:
HKEY_LOCAL_MACHINE\OfflineSoftware\Microsoft\Windows NT\CurrentVersion\PasswordLess\DeviceStep 10: In the right pane, double-click on DevicePasswordLessBuildVersion.
Step 11: Change the Value data to 0 and click OK.
Step 12: Close the Registry Editor and Command Prompt.
Step 13: Click on Continue to exit the Recovery Environment and restart your computer.
Step 14: Attempt to sign in or reset your PIN as described in Method 1.
Method 7: Reset Your PC While Keeping Personal Files
If all else fails, resetting Windows can resolve deep-seated issues. This process reinstalls Windows but allows you to keep your personal files.
Step 1: On the sign-in screen, click the Power icon, hold down the Shift key, and select Restart.
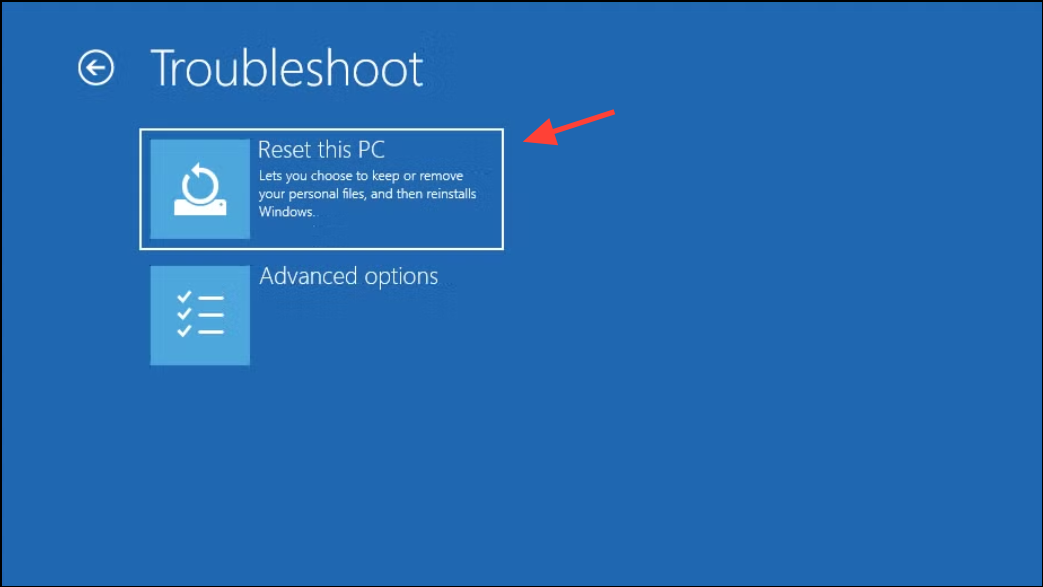
Step 2: In the Recovery Environment, select Troubleshoot, then click on Reset this PC.
Step 3: Choose Keep my files.
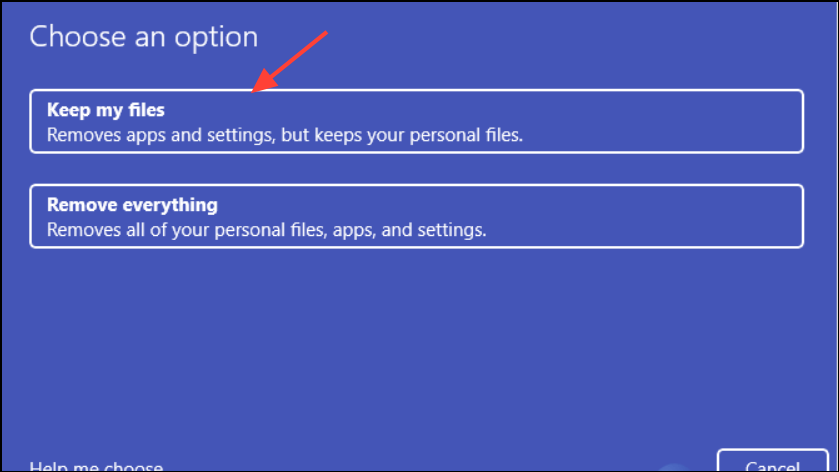
Step 4: Follow the on-screen instructions to complete the reset process.
Step 5: After the reset, set up your account and create a new PIN.
By following these methods, you should be able to resolve the PIN error and regain access to your Windows 11 device. Always ensure your system is up to date and consider backing up your data regularly to prevent future issues.

