
Sailor Piece mashes together Devil Fruits from One Piece, Sorcery from Jujutsu Kaisen, and characters from Bleach into a single Roblox experience. The sheer volume of systems — Haki types, Races, Runes, Accessories, Blessings, Skill Trees — can overwhelm anyone loading in for the first time. The core loop, though, is straightforward: travel island to island, accept quests from NPCs, kill mobs and bosses, and funnel your rewards into gear and stats that let you reach the next zone.
Quick answer: Follow the island order below (Starter → Jungle → Desert → Snow → Shibuya Station), buy the Katana at Level 100, pick up each Haki as soon as you meet its level requirement, and always have an active quest running so kills count toward bonus Money and Gem rewards.

Island-by-Island Progression Roadmap
Sailor Piece gates content behind character level. Each island has a pair of repeatable quests — one for regular mobs, one for the local boss — and you should grind both until you hit the level threshold for the next zone. The Teleport Portal on every island lets you jump ahead once you qualify.
| Island | Key Quests | Level Target | Milestone |
|---|---|---|---|
| Starter Island | Thief Hunter, Thief Boss | 250+ | Buy the Katana at Level 100 to speed up farming |
| Jungle Island | Monkey Hunter, Monkey Boss | 800+ | Set your spawn point here immediately |
| Desert Island | Desert Bandit, Desert Bandit Boss | 1,600+ | Purchase Observation Haki once you can afford it |
| Snow Island | Frost Rogue Mobs, Winter Warden Boss | ~3,000+ | Obtain Armament Haki; allocate stat points carefully |
| Shibuya Station | Sorcerer Hunter, Panda Sorcerer Boss | 5,000+ | Farm Sukuna and Yuji world bosses for Race Rerolls, Trait Rerolls, and Accessories; grab the Gryphon Sword from the Gryphon Seller NPC near the Set Spawn Crystal |
After clearing Shibuya Station and reaching Level 5,000+, add Conqueror Haki to your build and shift your focus toward mini-bosses and world bosses across later islands. The goal from this point forward is to collect Race Rerolls, Gems, Accessories, and Trait Rerolls to refine a focused build rather than simply leveling.

Haki Unlock Order and Leveling
Three Haki types exist in Sailor Piece, and each one meaningfully boosts your combat effectiveness. You should pick them up in the order the progression path naturally presents them.
| Haki | When to Get It | How It Levels | Key Benefit |
|---|---|---|---|
| Observation Haki | Desert Island (~Level 1,600) | Passive use during combat | Dodge and awareness utility |
| Armament Haki | Snow Island | Killing enemies | Permanent damage boost |
| Conqueror Haki | After Shibuya Station (~Level 5,000) | Killing enemies (same method as Armament) | +1% base damage per Mastery Level |
A common misconception is that Conqueror Haki levels differently from Armament. Both level up the same way — by killing enemies. Prioritize getting all three as early as your level allows, because the passive damage scaling compounds over time.

How Damage Scaling Works
If your damage falls behind the curve, every island transition feels punishing. Multiple systems feed into your total damage output, and stacking them is what separates a smooth grind from a painful one.
Stat points are the foundation. Invest in Melee (boosts Spec damage), Sword (boosts weapon damage), and Power (boosts Devil Fruit damage). Higher base numbers mean every percentage-based buff that comes later hits harder.
Accessories provide flat and percentage damage increases. You can equip up to five at once. Early on, strong picks include Gojo Blindfold, Yuji Hair, and Saber Armor. Once you reach Shibuya Station, visit the Enchanter NPC to further boost accessory stats through enchanting.
Blessings apply directly to your Sword and Spec, increasing Damage, Crit Chance, and Crit Damage. This system is separate from enchanting and stacks on top of it.
The Skill Tree lives on Slime Island. Talk to the Skill Tree NPC there to unlock the Damage branch, which can push your overall damage up by as much as +25%. Skill Points are earned at a rate of 1 per 250 NPC kills, so this reward accumulates passively as you grind quests.
Titles round out the picture. Blade Master, Curse King, and similar damage-oriented titles provide additional percentage buffs. Swap to farming-focused titles like Champion or Collector when you need currency instead of raw power.

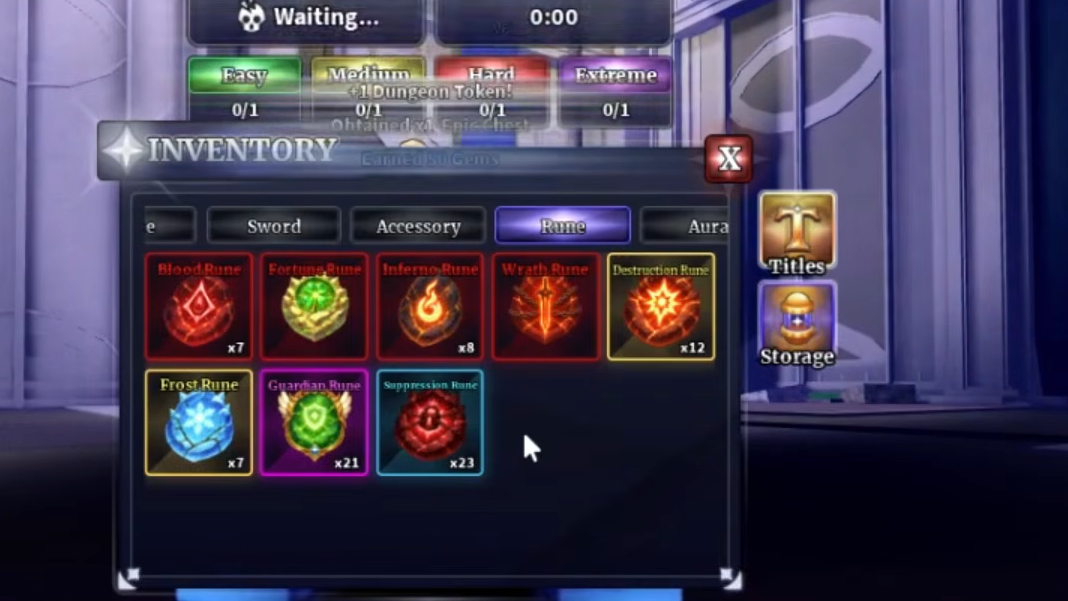
Rune System Basics
Runes drop from dungeons and other content. Every single rune you collect — regardless of type — grants 1 EXP toward your rune level. The maximum rune level is 50, and reaching it requires a total of 502 runes in your inventory. That means the fastest path to max rune level is simply accumulating any runes you can, not hunting for a specific type.
Between Havoc Runes and Wrath Runes, Havoc currently performs better in practice. If you have the choice, lean toward Havoc, but don't skip Wrath drops — they still count toward your rune EXP total.
Farming Money and Gems Early
Nearly everything in Sailor Piece costs Money, Gems, or both — Swords, Specs, Devil Fruit Gacha rolls, and crafting materials all draw from these two currencies. The economy loosens up significantly in the late game, but the early grind can feel tight. Three strategies help close the gap.
Step 1: Redeem any active Sailor Piece codes. These rotate periodically and usually hand out enough currency to buy your first Sword or Spec, or to take a spin at the Fruit Gacha.
Step 2: Keep a quest active at all times while grinding. Completed quests award Money directly, and the chests they drop guarantee Gems. Fighting mobs without an active quest wastes potential income.
Step 3: Equip farming titles as soon as you unlock them. Champion and Collector both buff Money and Gem drops from all sources during the early and mid-game. Once you reach the endgame, Golden Tyrant is the strongest farming title, offering +35% XP and +55% currency bonuses.

Race Rerolling
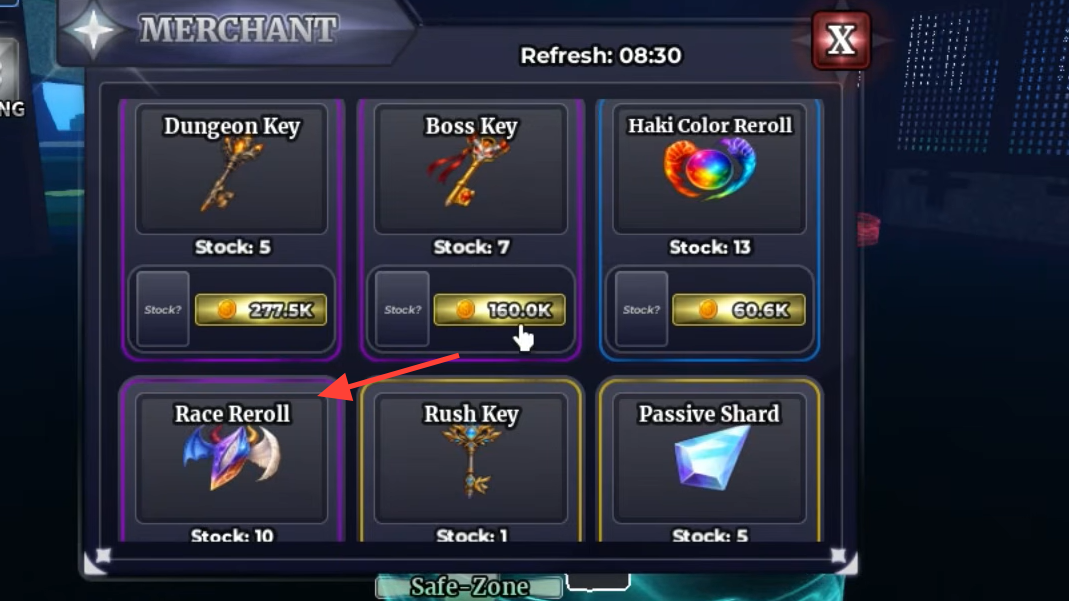
Your Race affects passive bonuses and damage output. Open the Stats menu to see your current Race displayed on the right side of the window. If it doesn't fit your build, Race Rerolls let you change it.
Race Rerolls are classified as Epic items and drop from mobs, mini-bosses, and world bosses across the game. To use one, open your inventory, click the Race Reroll item, and confirm through the dialogue box that appears. You can also batch-use multiple rerolls at once instead of clicking through one at a time.
Sailor Piece currently has 21 Races: Human, Skypea, Fishman, Mink, Orc, Vampire, Demon, Limitless, Shinigami, Vessel, Player, Shadowborn, Hollow, Oni, Sunborn, Galevorn, Sword Blessed, Servant, Slime, Kitsune, and Leviathan. Some are significantly rarer than others, so expect to burn through a stack of rerolls before landing on a top-tier option.
Useful Settings and Controls
A few quality-of-life options are easy to miss but make the grind noticeably smoother.
| Feature | How to Use It |
|---|---|
| Disable PvP | Open Settings, scroll down, and toggle Disable PvP. This prevents other players from attacking you while you farm. |
| Auto-Repeat Quests | Found in the game's settings menu. Turning this on automatically re-accepts your current quest when you complete it, saving time on repetitive grinds. |
| Camera Zoom Fix | If the camera gets stuck zoomed in (common when navigating menus), press O to zoom out. Press I to zoom back in. These are standard Roblox hotkeys. |
Devil Fruits and the Gacha
Devil Fruits are obtained through the in-game Gacha system, which costs Gems to roll. For low-level players, the Quake Fruit is widely regarded as one of the strongest early options because of its area damage and farming efficiency. If you roll one early, it can carry you through several islands before you need to invest in a replacement.
Don't pour all your Gems into the Gacha immediately. Make sure you have enough currency reserved for essential purchases like Swords and Haki before gambling on fruit rolls.

Sailor Piece doesn't have an official wiki, but the developers maintain a Trello board that stays reasonably up to date with patch changes and new content. The game also receives periodic server luck boosts on weekends and around updates, so timing your world boss farming sessions for those windows can improve your drop rates for Accessories, Rerolls, and other rare items.