
Git is an essential tool for modern software development, widely adopted for version control in projects of all sizes. From individual developers to large enterprises, Git streamlines collaboration and tracks changes efficiently.
For developers working with Ubuntu 20.04, installing Git is a straightforward process. This guide will walk you through installing Git on your Ubuntu system and verifying the installation.
Installing Git on Ubuntu 20.04
Git is included in Ubuntu’s default package repositories under the package name git. Before installing, it’s good practice to update your package list to ensure you have the latest information from all configured sources.
sudo apt updatesudo apt install gitIf you prefer a graphical user interface (GUI) over the command line, Ubuntu offers GUI tools for Git. You can install git-gui, which includes gitk, and qgit for a more visual approach to Git operations.
sudo apt install git-gui qgitBy default, the Git documentation is not installed with the main package. If you want access to the complete Git documentation locally, you can install the git-doc package.
sudo apt install git-docThis will place the documentation in the /usr/share/doc/git directory. You can refer to the README.md file in that directory for guidance on navigating the documentation.
Verifying Git Installation
After installing Git, it’s important to confirm that it’s installed correctly and to check the version.
git --version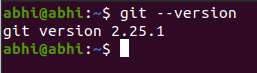
You should see an output displaying the installed Git version, confirming that Git is ready to use on your Ubuntu 20.04 system. You’re now prepared to initialize new repositories or clone existing ones to start collaborating on projects.
By following these steps, you’ve successfully installed Git on your Ubuntu 20.04 machine. If you’re interested in exploring Git’s source code, you can download the source code tarballs for various versions from here.
For more comprehensive information and resources on using Git, visit the official website at git-scm.com.