Windows 11 is designed with security features that limit the installation of apps to those verified by Microsoft, mainly those available through the Microsoft Store. While this helps protect your system from untrusted software, there are instances when you might need to install applications from other sources. This guide provides several methods to allow the installation of unverified apps on your Windows 11 PC.
Switch Out of S Mode
If your Windows 11 PC is running in S Mode, you're limited to installing only apps from the Microsoft Store. To install unverified apps, you'll need to switch out of S Mode. Keep in mind that once you switch out of S Mode, you cannot revert back.
Step 1: Click on this link to open the Microsoft Store page for switching out of S Mode.
Step 2: On the 'Switch Out of S Mode' page, click on the 'Get' button to proceed.
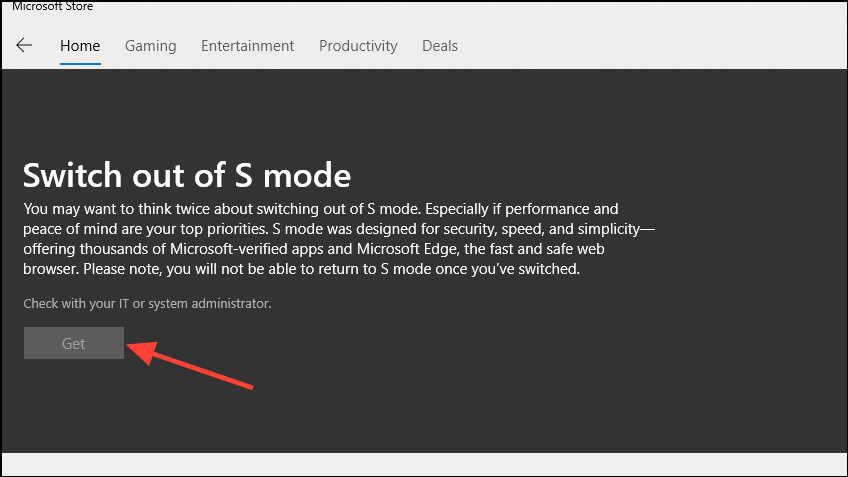
After completing these steps, your PC will be switched out of S Mode, allowing you to install apps from any source.
Change Windows 11 Settings
If you're not in S Mode, you can adjust your system settings to allow the installation of unverified apps. Here's how to do it:
Step 1: Open the Settings app by clicking on the Start menu and selecting Settings, or by pressing Win + I.
Step 2: In the Settings window, select 'Apps' from the left-hand menu.
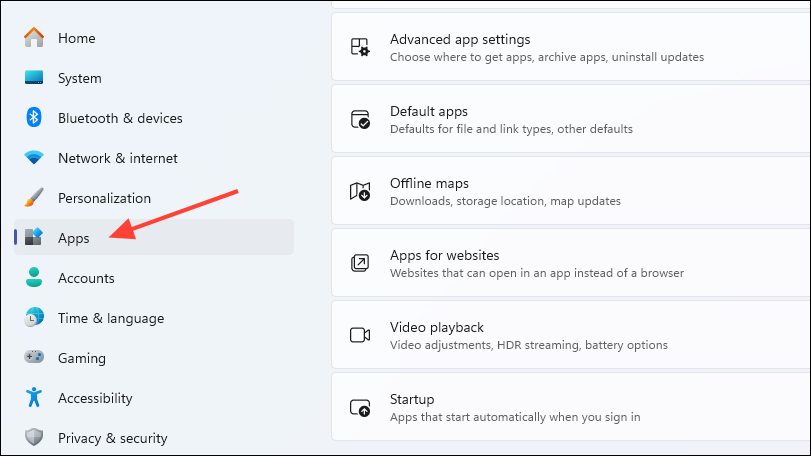
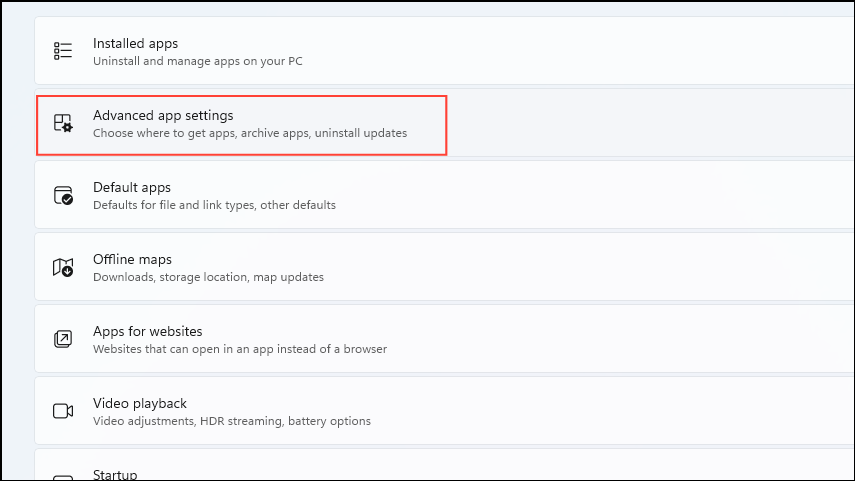
Step 3: Click on 'Advanced app settings' on the Apps page.
Step 4: Under 'Choose where to get apps', click on the dropdown menu and select 'Anywhere'.
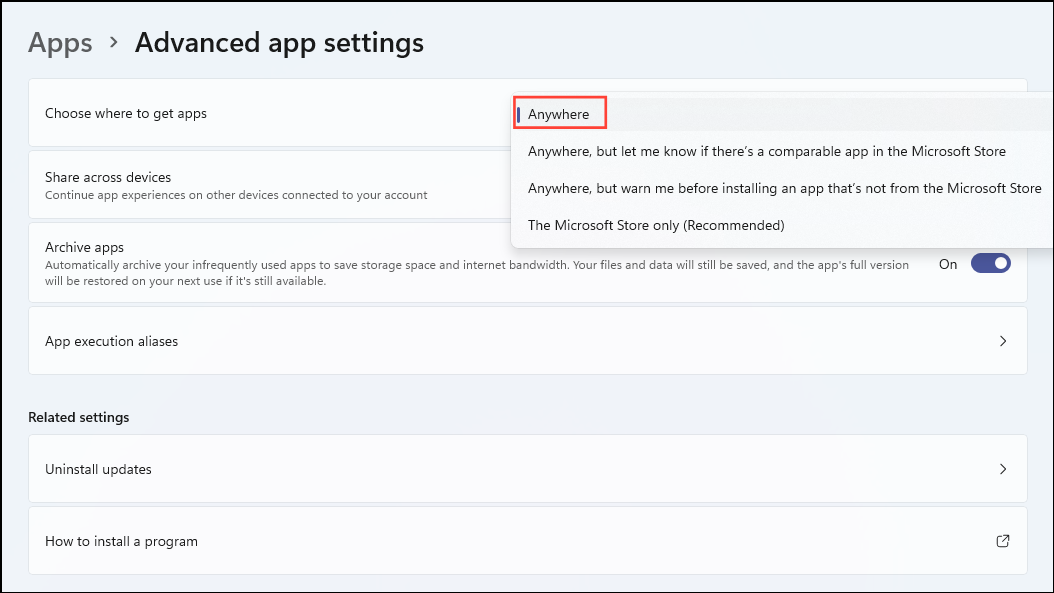
With these settings adjusted, you can now install apps from any source, not just the Microsoft Store.
Use the Group Policy Editor
If the settings to allow app installations from anywhere are unavailable or restricted, you can use the Group Policy Editor to modify your system policies. Note that the Group Policy Editor is only available on Windows 11 Pro and higher editions.
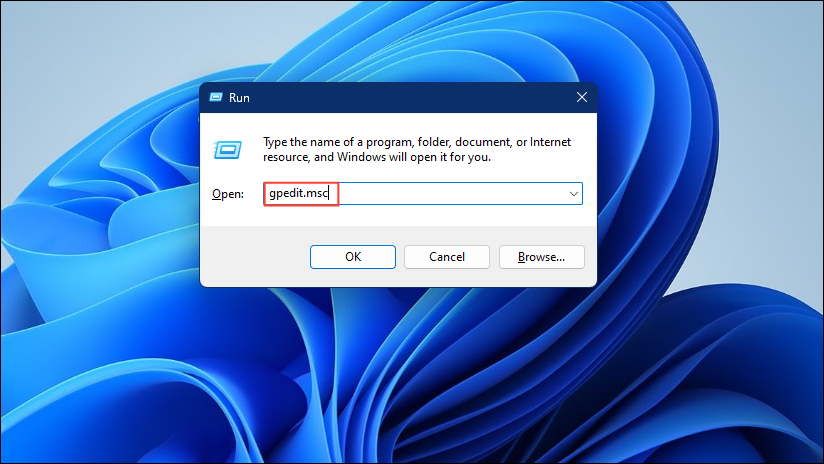
Step 1: Open the Run dialog by pressing Win + R, type gpedit.msc, and press Enter to open the Group Policy Editor.
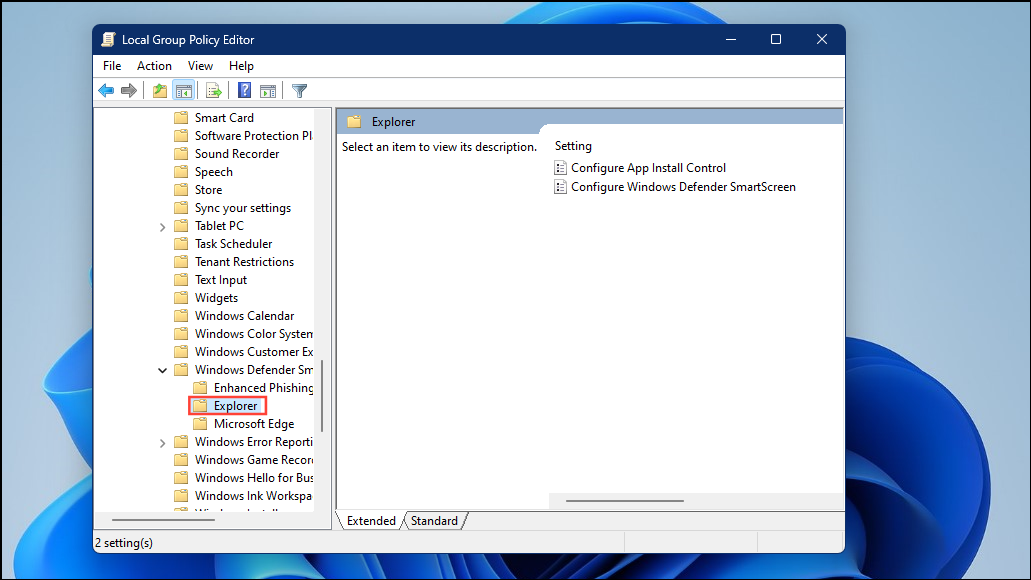
Step 2: In the Group Policy Editor, navigate to the following path:
Computer Configuration > Administrative Templates > Windows Components > Windows Defender SmartScreen > Explorer
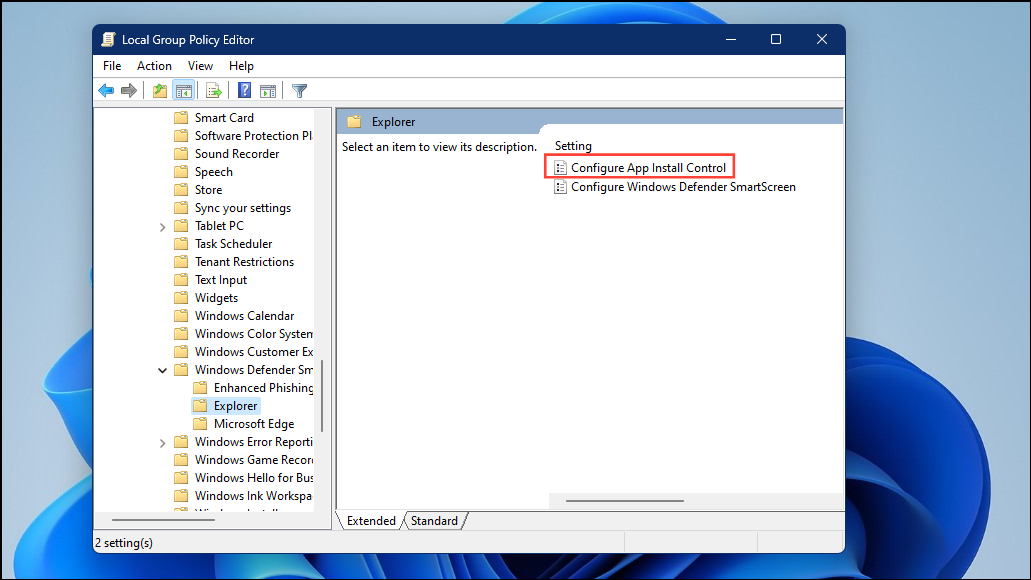
Step 3: On the right-hand side, double-click on 'Configure App Install Control' to edit this setting.
Step 4: In the configuration window, set the policy to 'Not Configured' or 'Disabled', then click 'OK' to apply the changes.
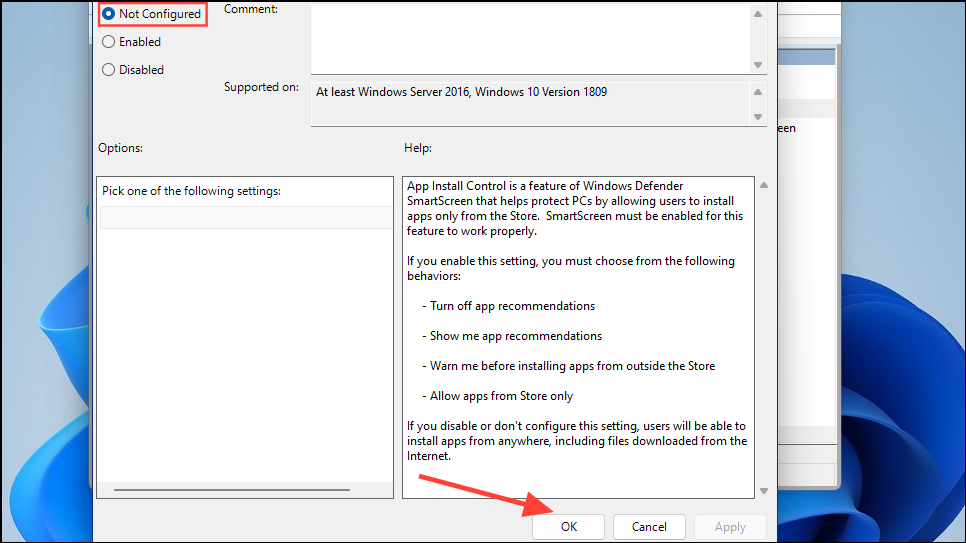
After making these changes, you should be able to install unverified apps on your system.
Edit the Registry
If you're comfortable editing the Windows Registry, you can adjust settings to allow the installation of unverified apps. Before proceeding, it's strongly recommended to back up the registry to prevent potential system issues.
Step 1: Open the Start menu, type regedit, and select 'Run as administrator' to open the Registry Editor.
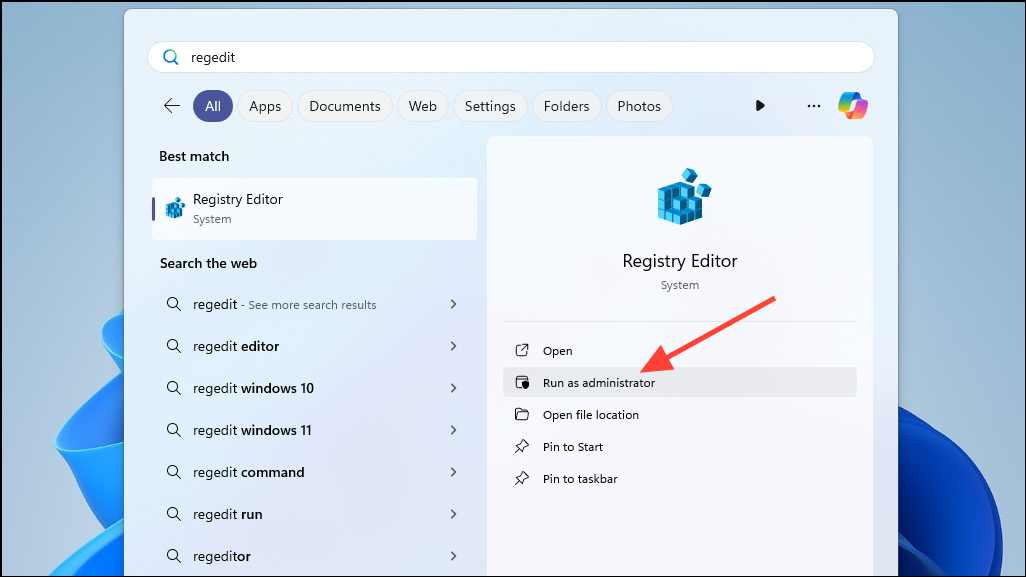
Step 2: In the Registry Editor, navigate to the following key by copying and pasting the address into the address bar:
HKEY_LOCAL_MACHINE\SOFTWARE\Microsoft\Windows\CurrentVersion\Explorer
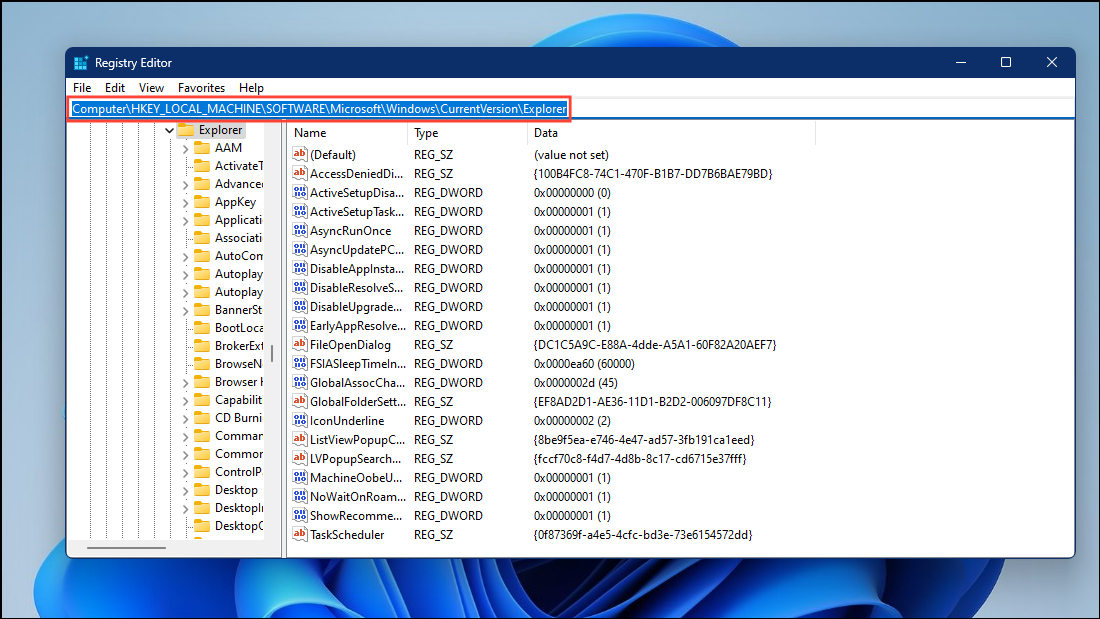
Step 3: Look for a string value named 'AicEnabled' in the right pane. If it doesn't exist, right-click on the 'Explorer' key in the left pane, select 'New', then choose 'String Value'.
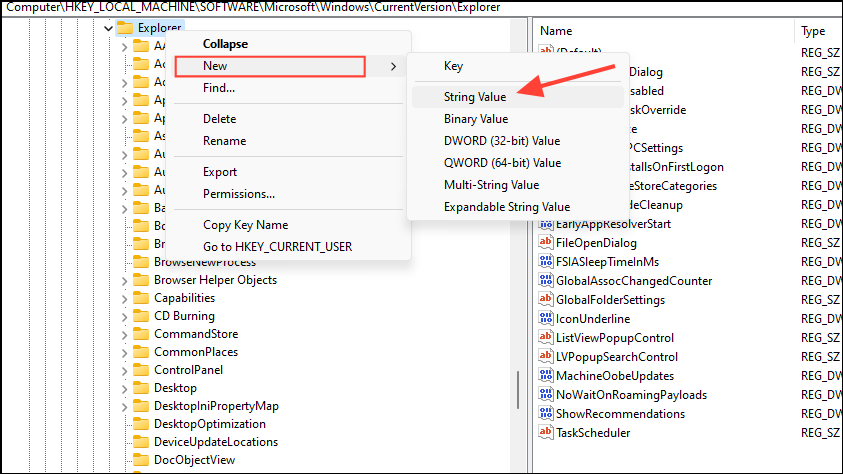
Step 4: Name the new string value 'AicEnabled'.
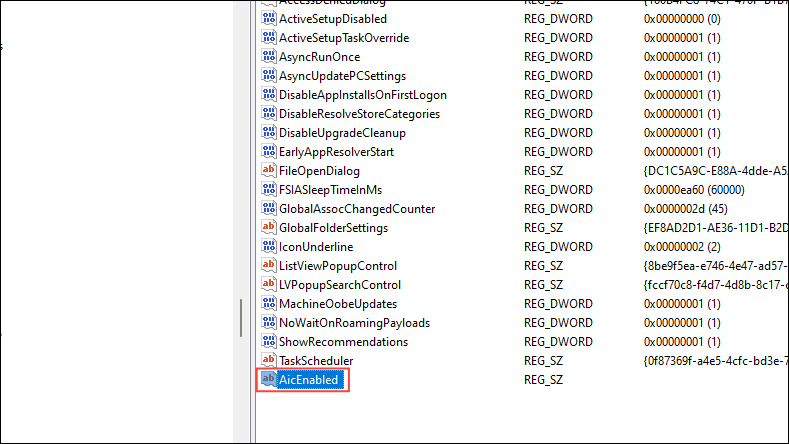
Step 5: Double-click on 'AicEnabled' and set its value data to 'Anywhere'. Click 'OK' to save the changes and close the Registry Editor.
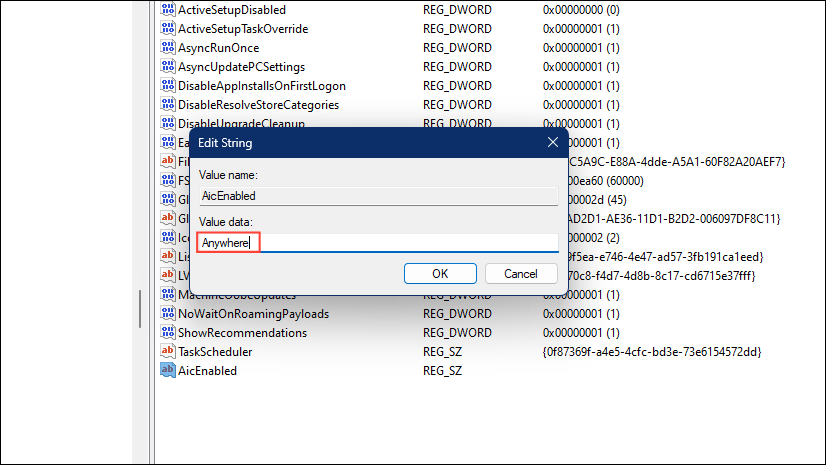
After modifying the registry, you may need to restart your computer for the changes to take effect.
Use Command Prompt
You can also use the Command Prompt to adjust your system settings to allow unverified app installations. This method effectively makes the same change as editing the registry directly.
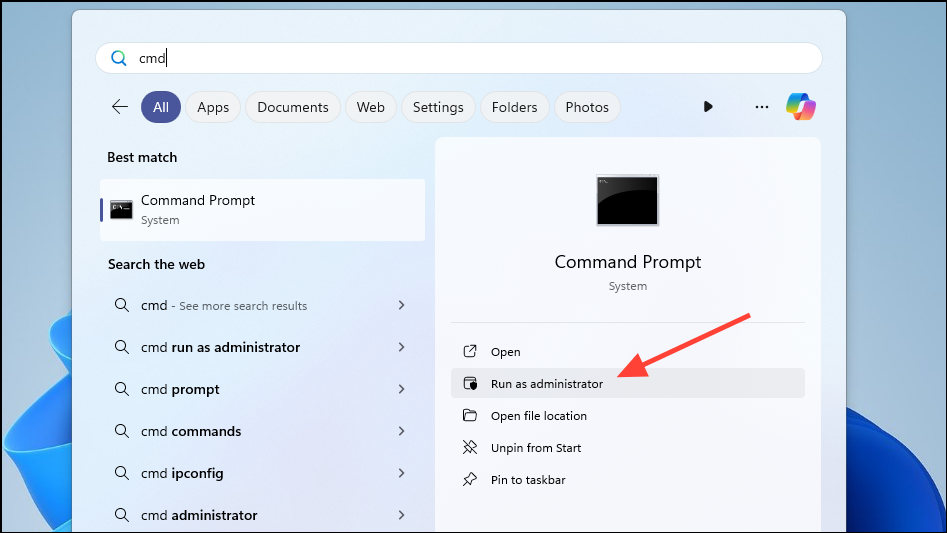
Step 1: Open the Start menu, type cmd, and select 'Run as administrator' to open an elevated Command Prompt window.
Step 2: In the Command Prompt, enter the following command and press Enter:
reg add HKEY_LOCAL_MACHINE\SOFTWARE\Microsoft\Windows\CurrentVersion\Explorer /v AicEnabled /t REG_SZ /d Anywhere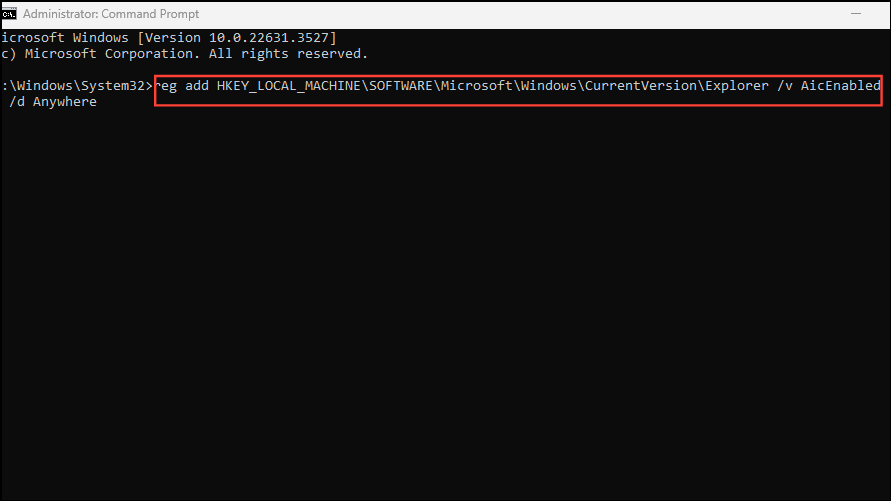
Y and press Enter to confirm.Once the command executes successfully, you should be able to install unverified apps on your system.
By following these methods, you can install unverified apps on your Windows 11 PC. Always ensure that you download software from trusted sources and keep your antivirus software updated to protect your system from potential threats.


