
Windows 11 offers various built-in features and settings you can tweak to achieve smoother, faster, and more stable gaming performance. While the operating system does a decent job out of the box, certain default settings can slow down your gaming experience. Adjusting these settings can free up resources, provide smoother frame rates, and reduce lag, giving you an optimized gaming environment. Here are several effective ways to optimize Windows 11 for gaming.
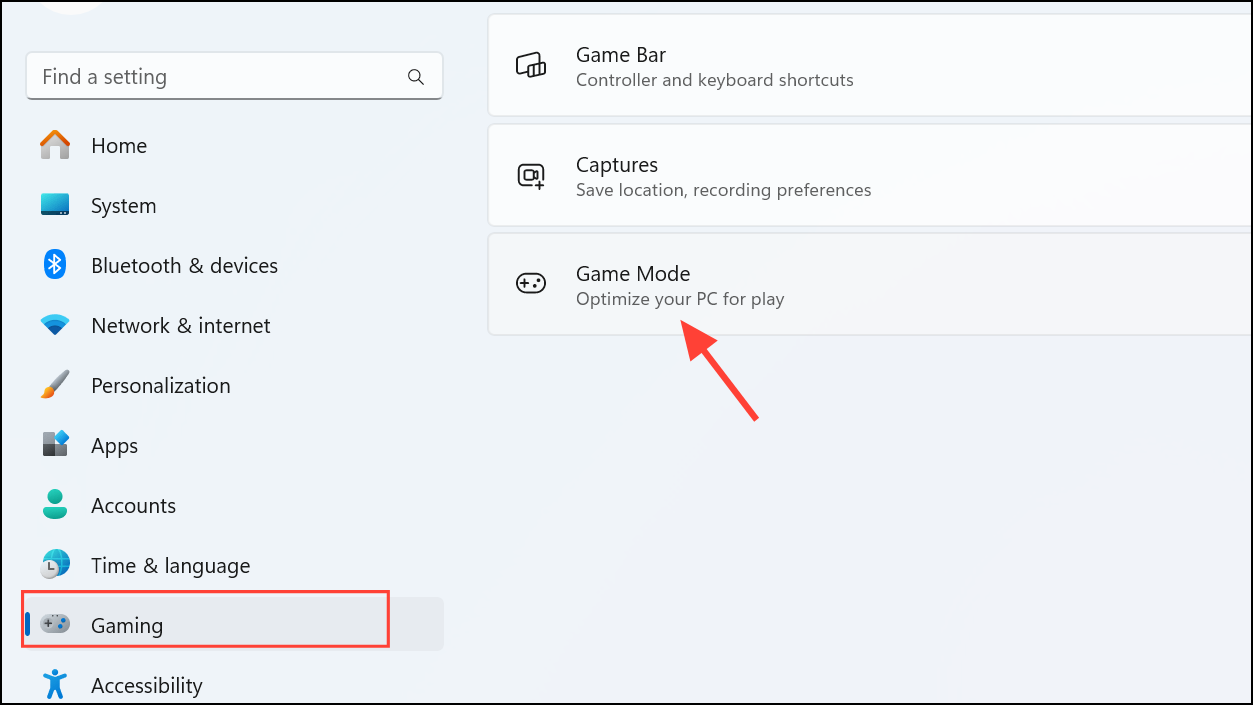
Turn On Game Mode
The Game Mode feature in Windows 11 prioritizes your system's resources for gaming tasks, reducing background processes that might interfere with your game. Game Mode is usually enabled by default, but it's worth confirming it's active.
Step 1: Open the Windows Settings app by pressing Win + I on your keyboard.
Step 2: Navigate to "Gaming" in the left-hand menu, then click "Game Mode."
Step 3: Ensure the toggle switch for Game Mode is set to "On."
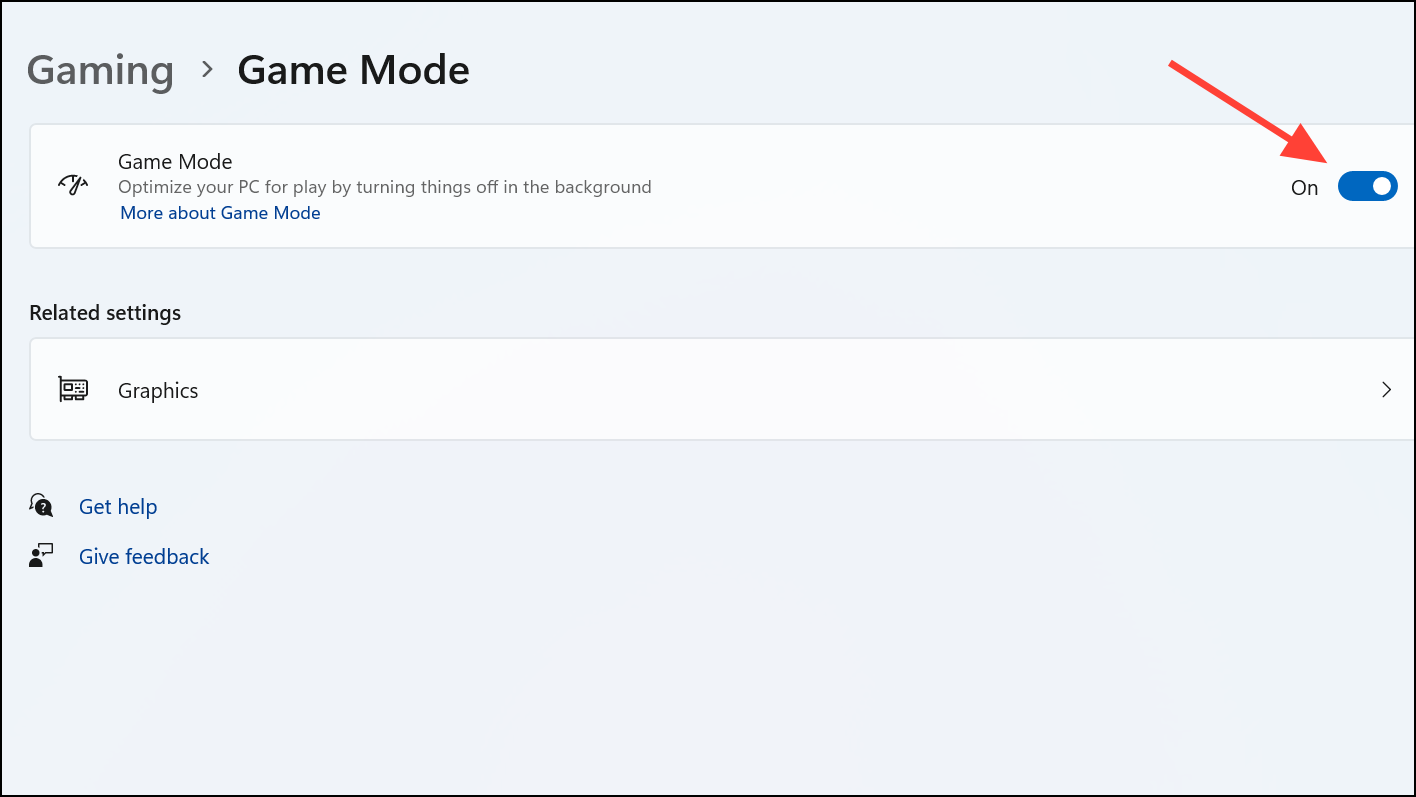
This setting reduces interruptions from background apps and system notifications, providing a more stable gaming experience.
Set Power Mode to Best Performance
Windows 11 typically uses a balanced power mode by default, which limits performance to conserve energy. Switching to the "Best Performance" mode ensures maximum CPU and GPU performance, crucial for gaming.
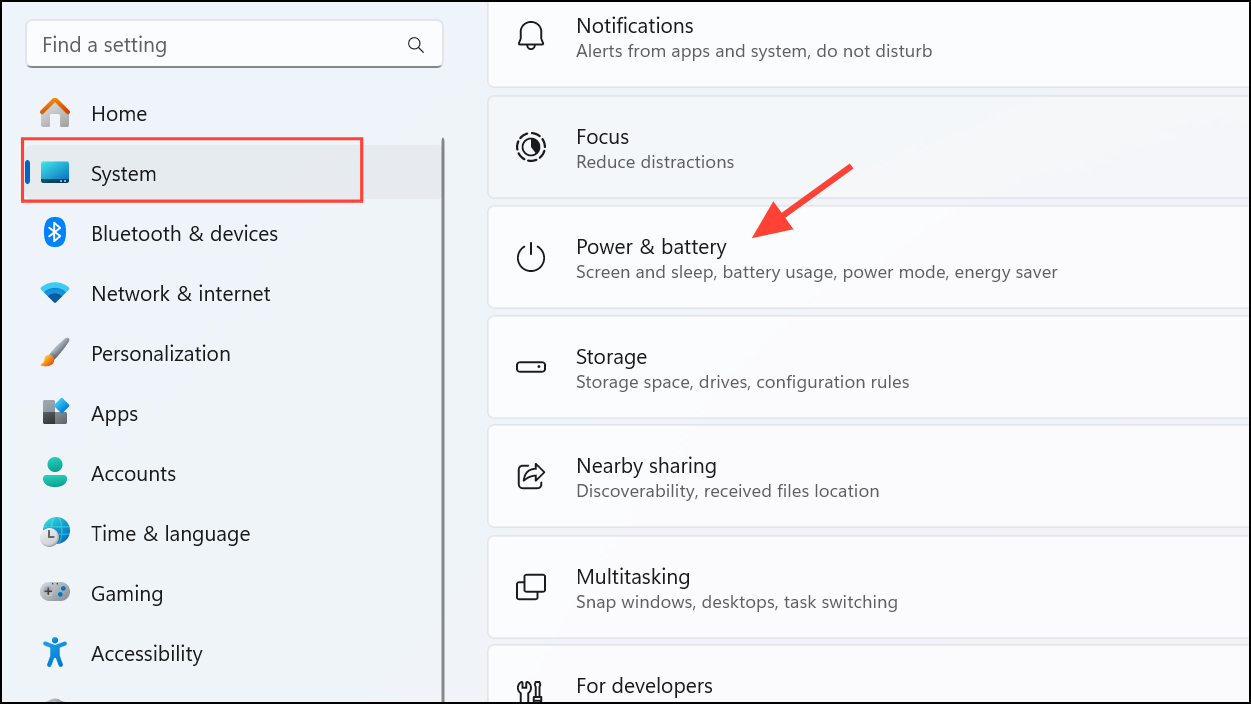
Step 1: Open the Settings app (Win + I).
Step 2: Select "System" from the sidebar, then click "Power" (on desktop PCs) or "Power & Battery" (on laptops).
Step 3: Under the "Power Mode" option, select "Best Performance" from the dropdown menu.
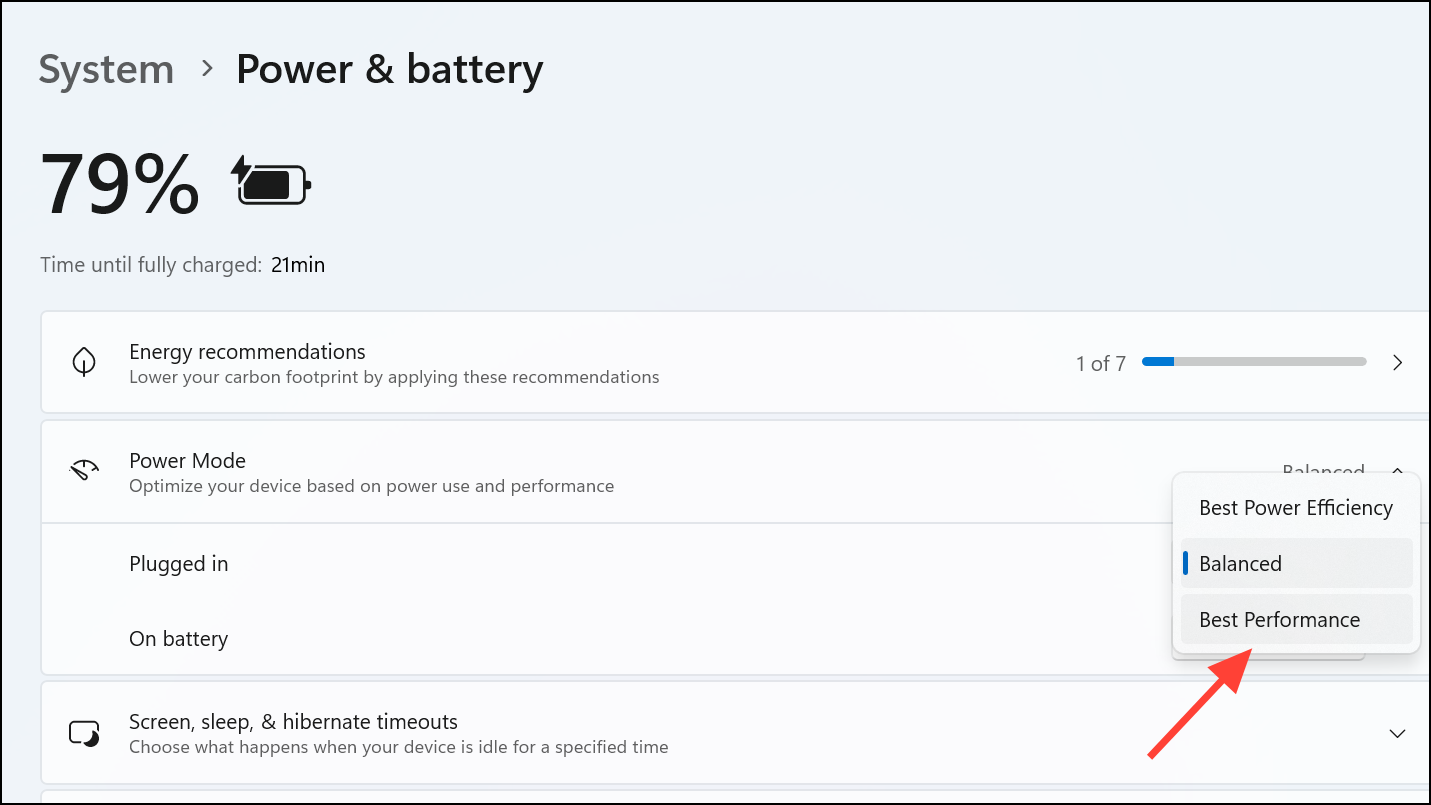
If you're gaming on a laptop, consider disabling battery saver mode to prevent performance throttling.
Update Your GPU Drivers
Outdated graphics drivers can lead to suboptimal gaming performance, including lower frame rates and graphical glitches. Regularly updating your GPU drivers ensures compatibility with the latest games and optimal performance.
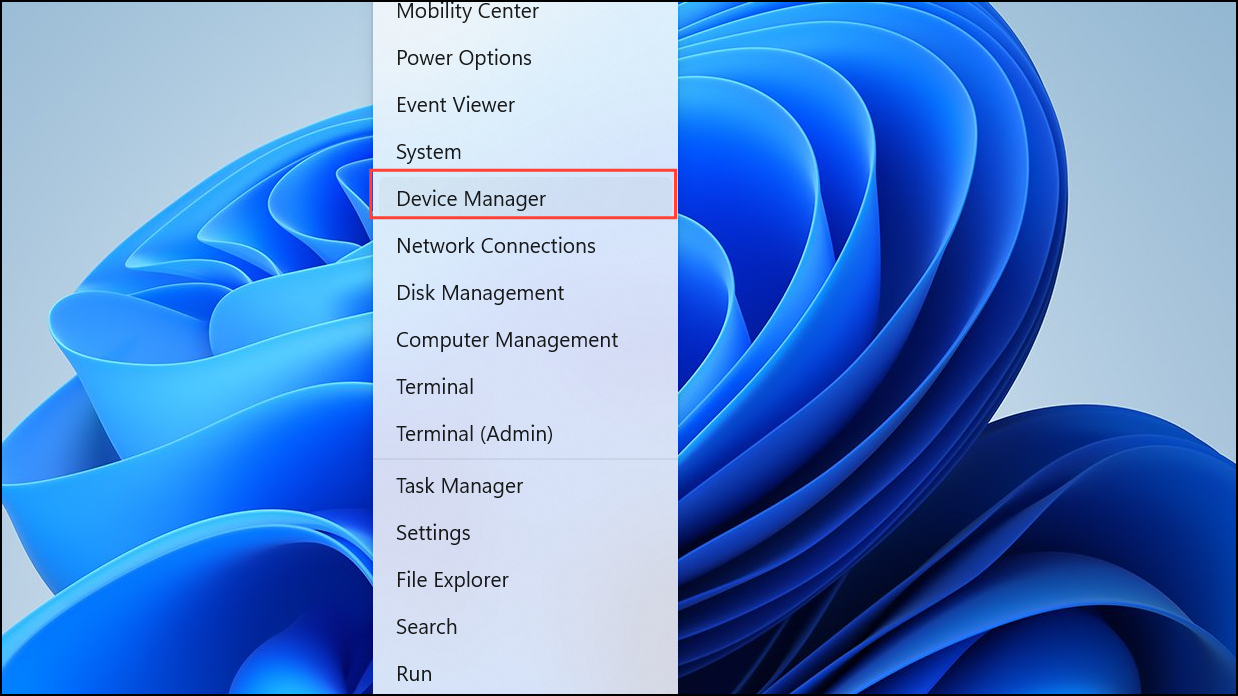
Step 1: Right-click the Start button and select "Device Manager."
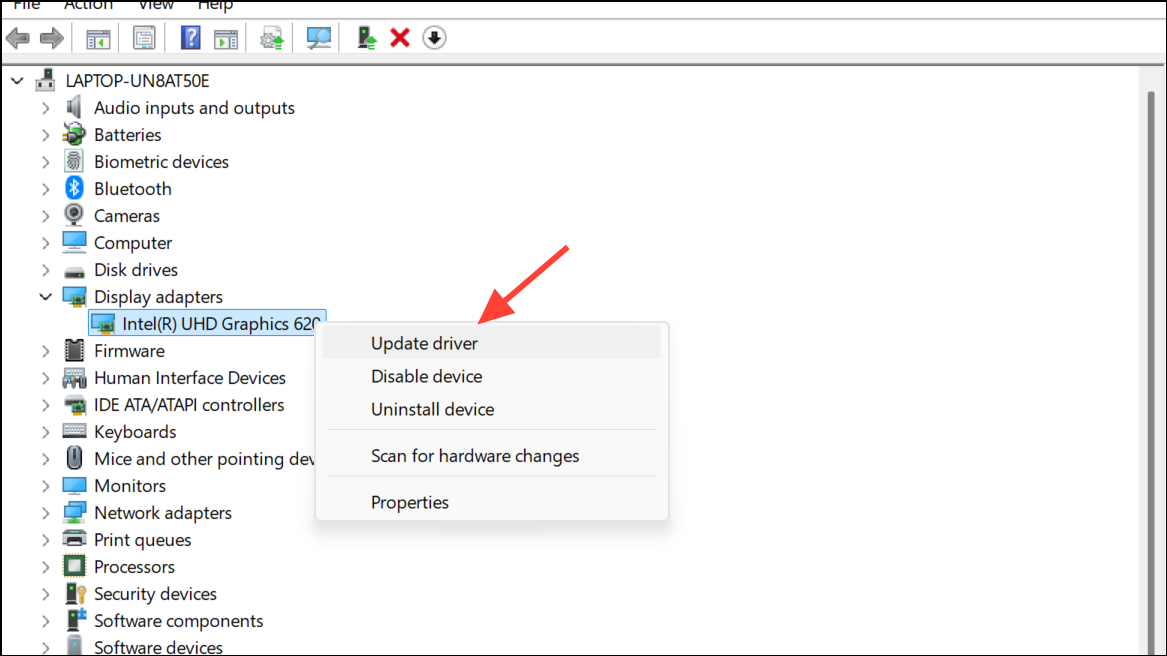
Step 2: Expand the "Display adapters" section, then right-click your GPU and select "Update driver."
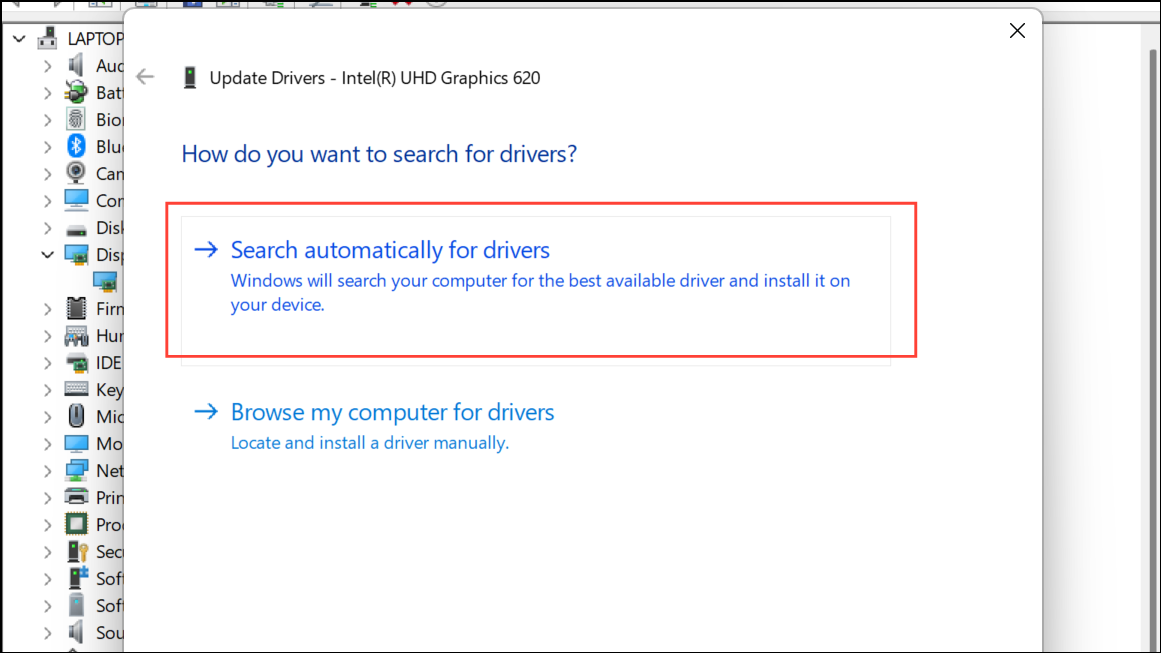
Step 3: Choose "Search automatically for updated driver software." Windows will check and install any available updates.
Alternatively, you can manually download the latest drivers directly from your GPU manufacturer's website (Nvidia, AMD, or Intel).
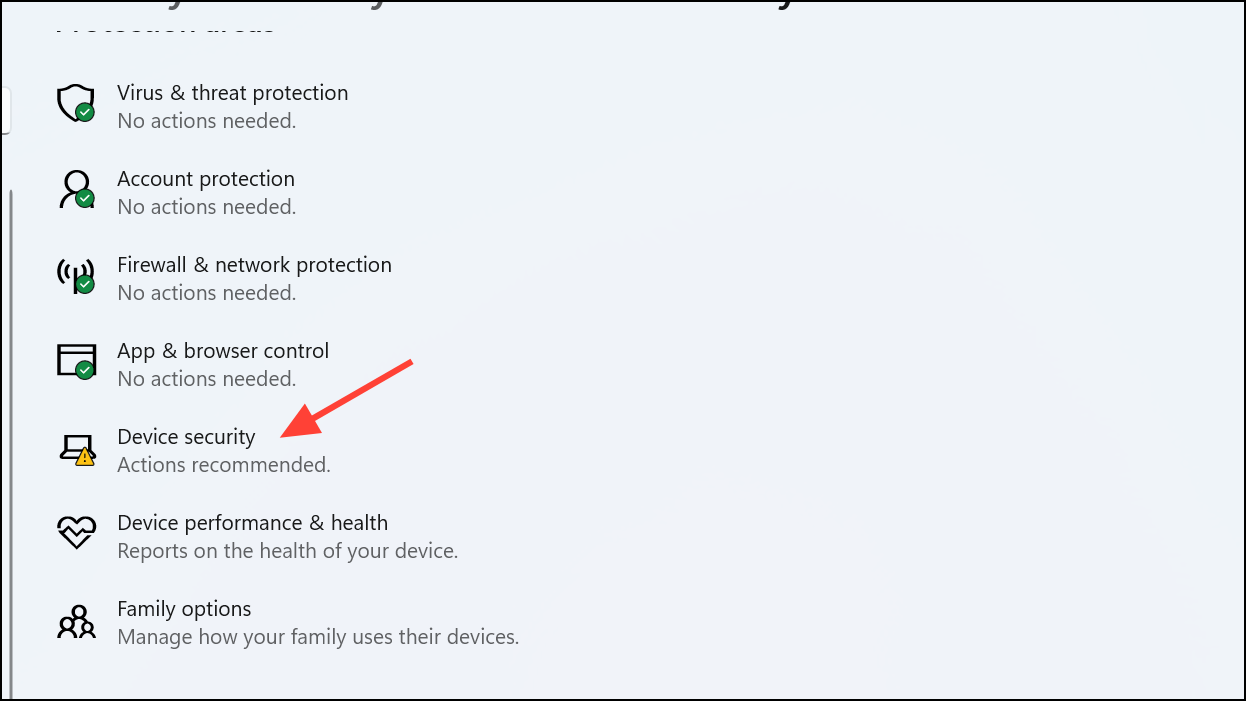
Disable Memory Integrity (Core Isolation)
Memory Integrity is a security feature in Windows 11 designed to protect the system from malware attacks. However, it can consume significant CPU resources, potentially reducing gaming performance. If you're looking to maximize gaming performance, temporarily disabling this feature can help.
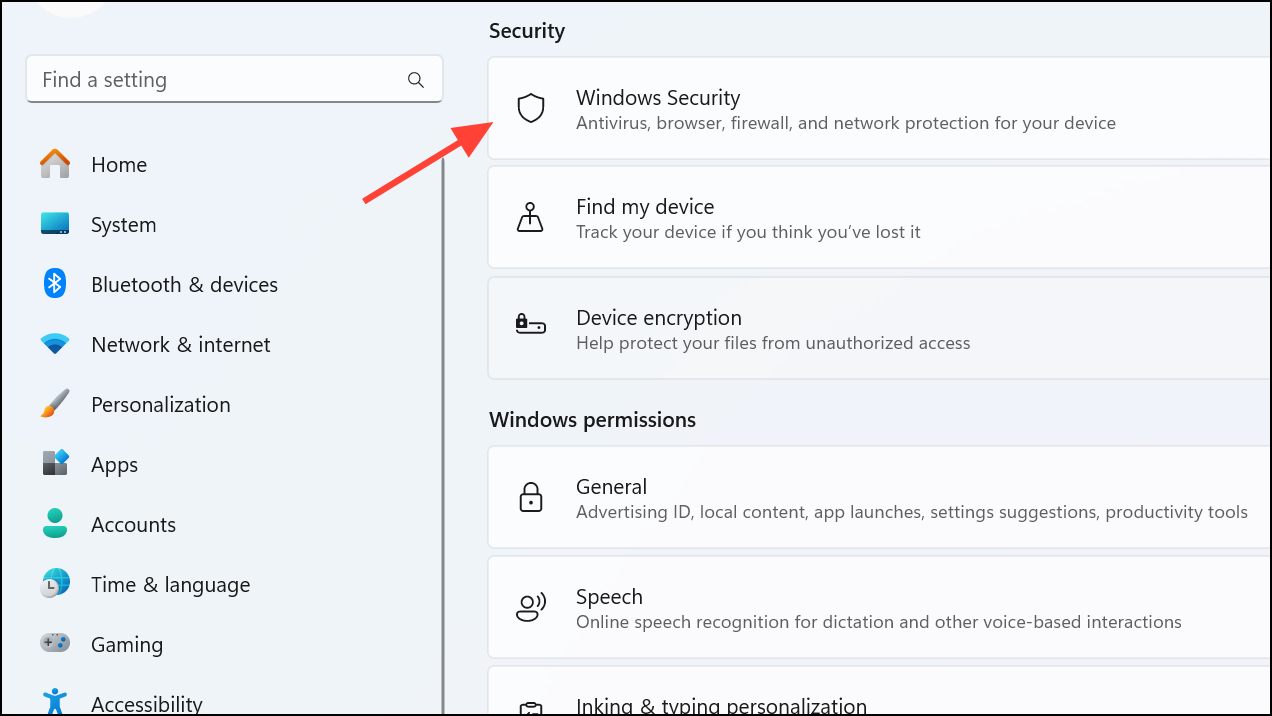
Step 1: Press the Start button and search for "Core Isolation." If you cannot locate it using the search option, go to the "Privacy and Security" page in the Settings app and click on "Windows Security".
Step 2: Then click on "Device Security" on the next page.
Step 3: Open the Core Isolation settings and toggle the "Memory Integrity" setting to "Off."
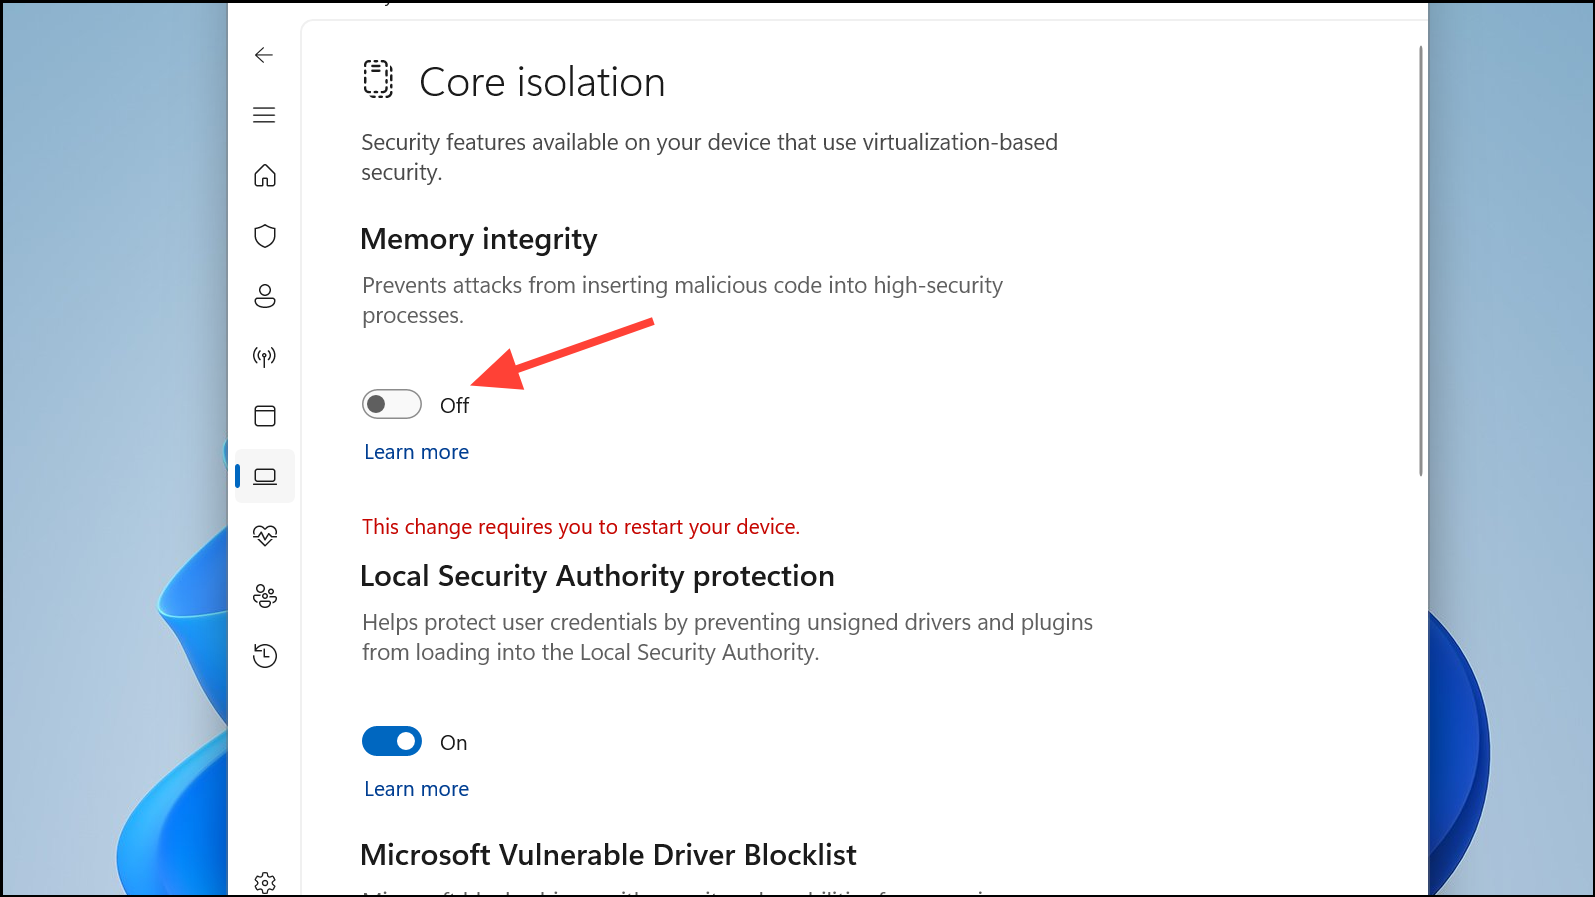
Step 4: Restart your PC to apply the changes.
Keep in mind that disabling Memory Integrity reduces your system's protection against certain types of malware. Consider re-enabling it after your gaming session.
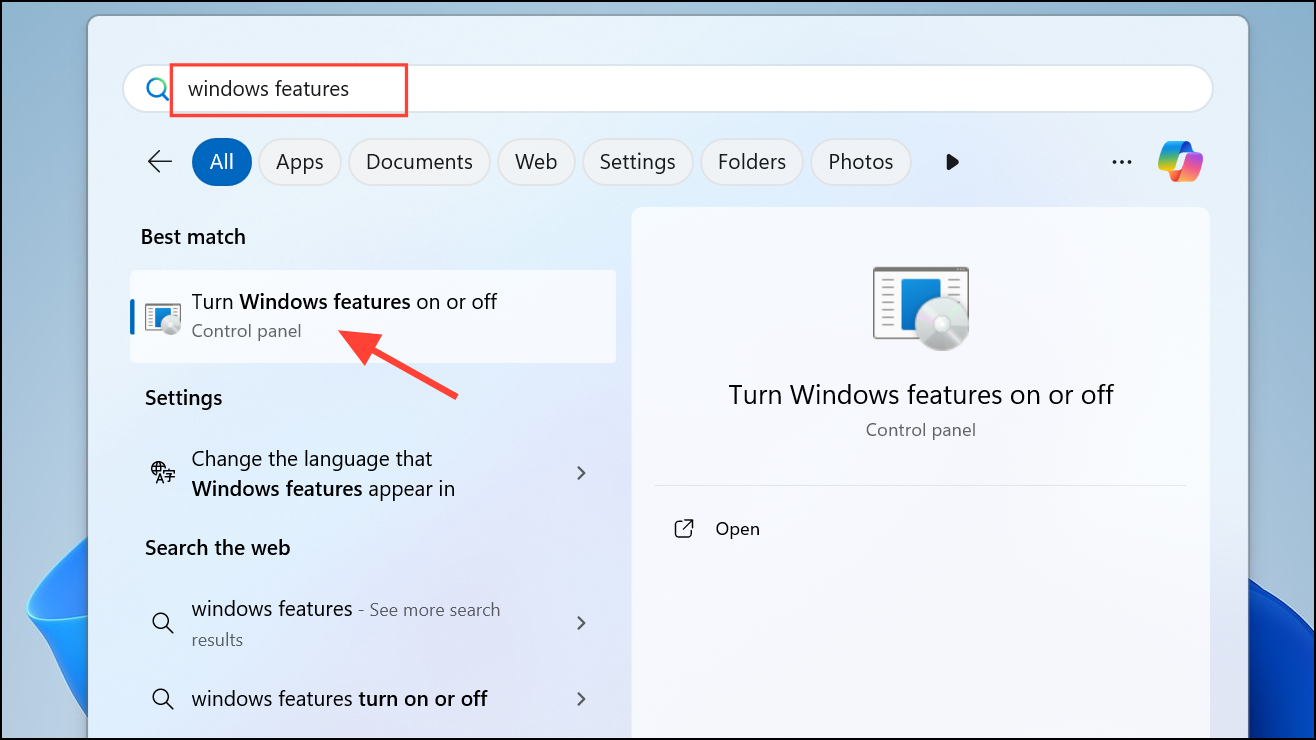
Turn Off Virtual Machine Platform (VMP)
The Virtual Machine Platform allows Windows to run virtualized environments, useful for developers but unnecessary for gamers. Disabling this feature frees up system resources that can be better utilized by games.
Step 1: Open the Start menu and search for "Windows features."
Step 2: Select "Turn Windows features on or off."
Step 3: In the list, uncheck the box next to "Virtual Machine Platform," then click "OK."
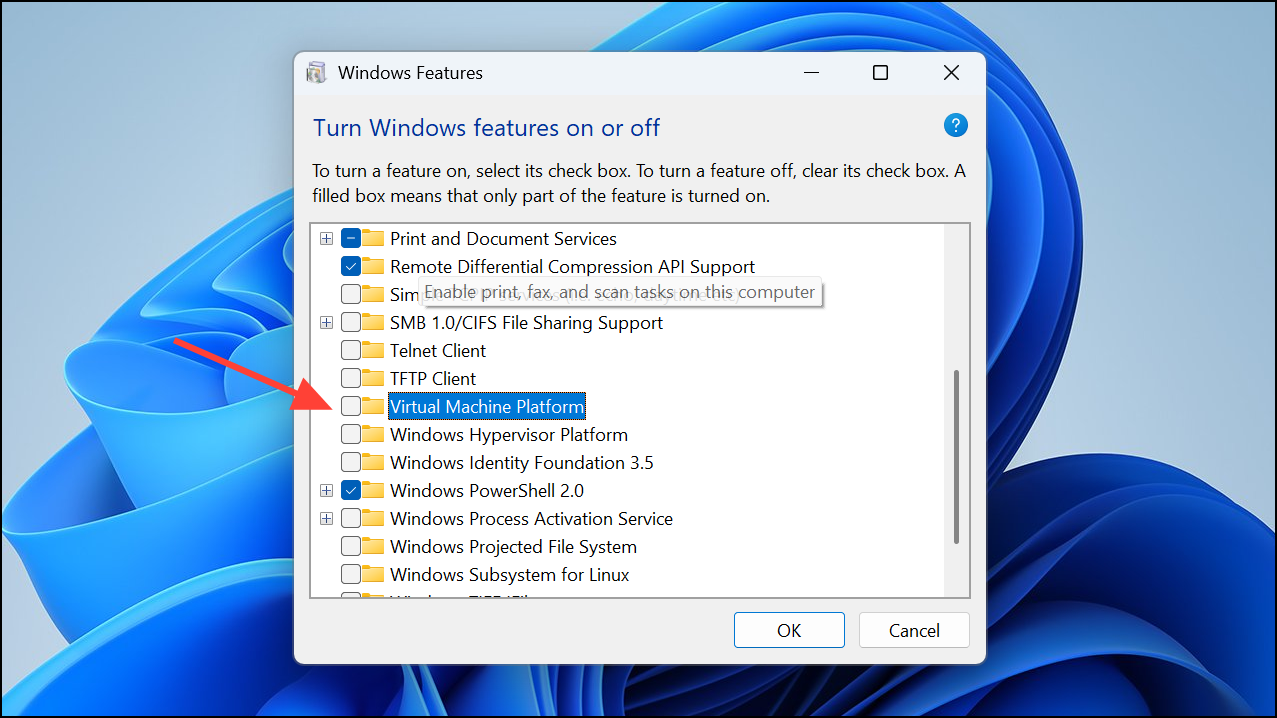
Step 4: Restart your PC to apply the changes.
Disable Startup Tasks
Unnecessary apps running in the background can consume valuable system resources. Disabling non-essential startup tasks ensures your system dedicates more resources to gaming.
Step 1: Right-click the taskbar and select "Task Manager."
Step 2: Click the "Startup" tab on the left panel.
Step 3: Identify any unnecessary apps, right-click them, and select "Disable."
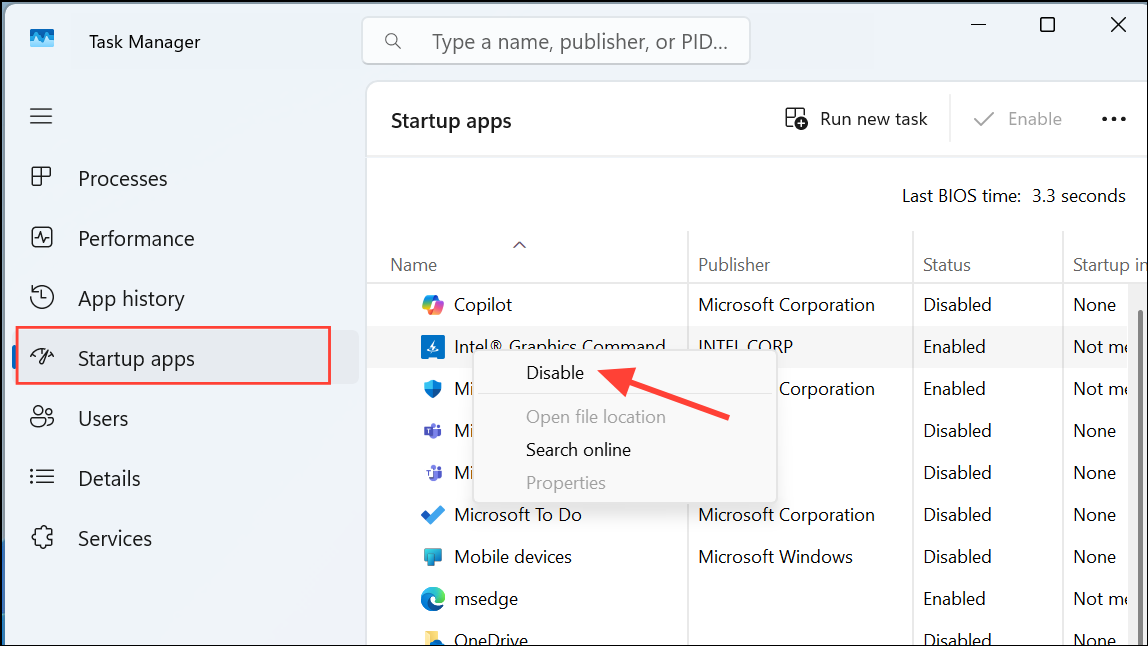
This process doesn't uninstall the apps; it simply prevents them from automatically running at startup.
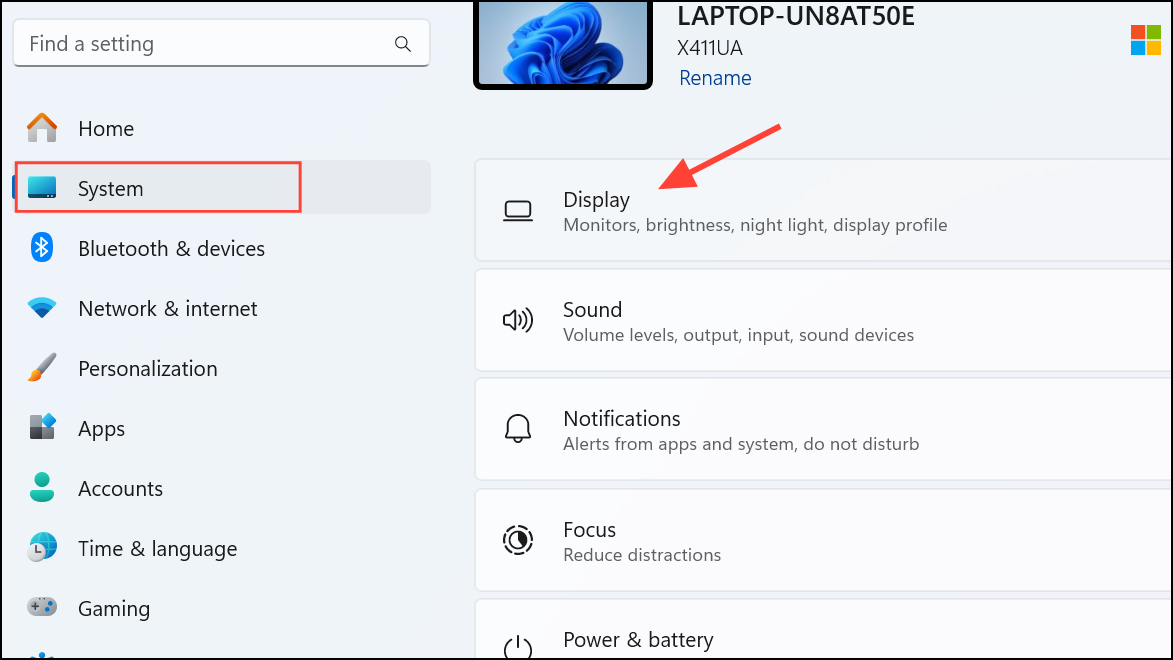
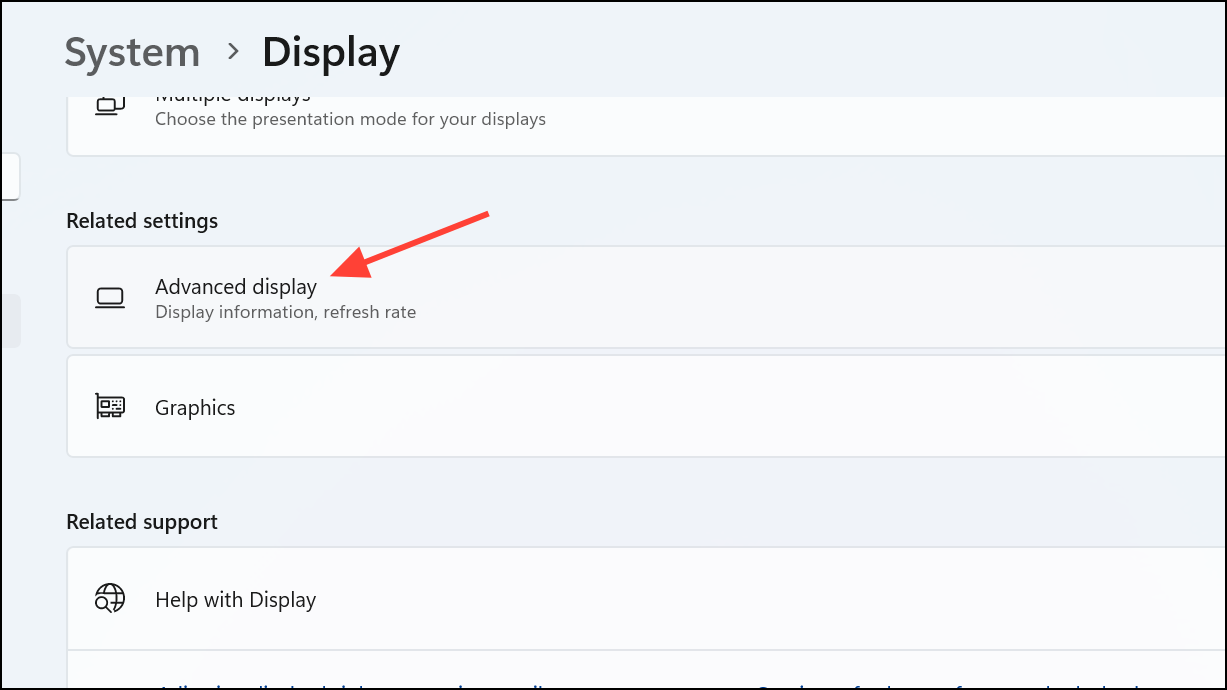
Optimize Your Display and Graphics Settings
Properly configuring your display resolution, refresh rate, and graphics settings ensures your games run smoothly and look their best.
Step 1: Open Settings (Win + I), go to "System," then click "Display."
Step 2: Select the recommended resolution and highest available refresh rate under "Advanced Display."
Step 3: Enable "Auto HDR" if your monitor supports HDR for improved color and contrast.
Step 4: From the main Display settings, select "Graphics," choose your game, click "Options," and select "High Performance."
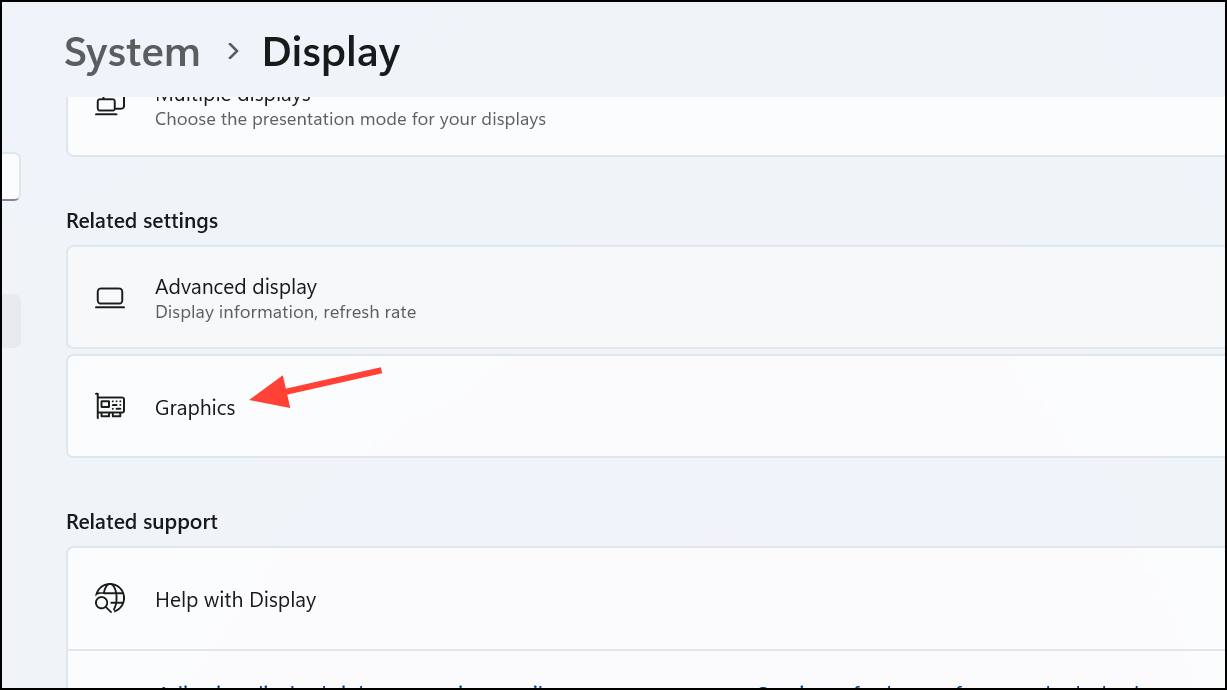
Additionally, ensure "Hardware-accelerated GPU scheduling" is enabled under "Change default graphics settings."
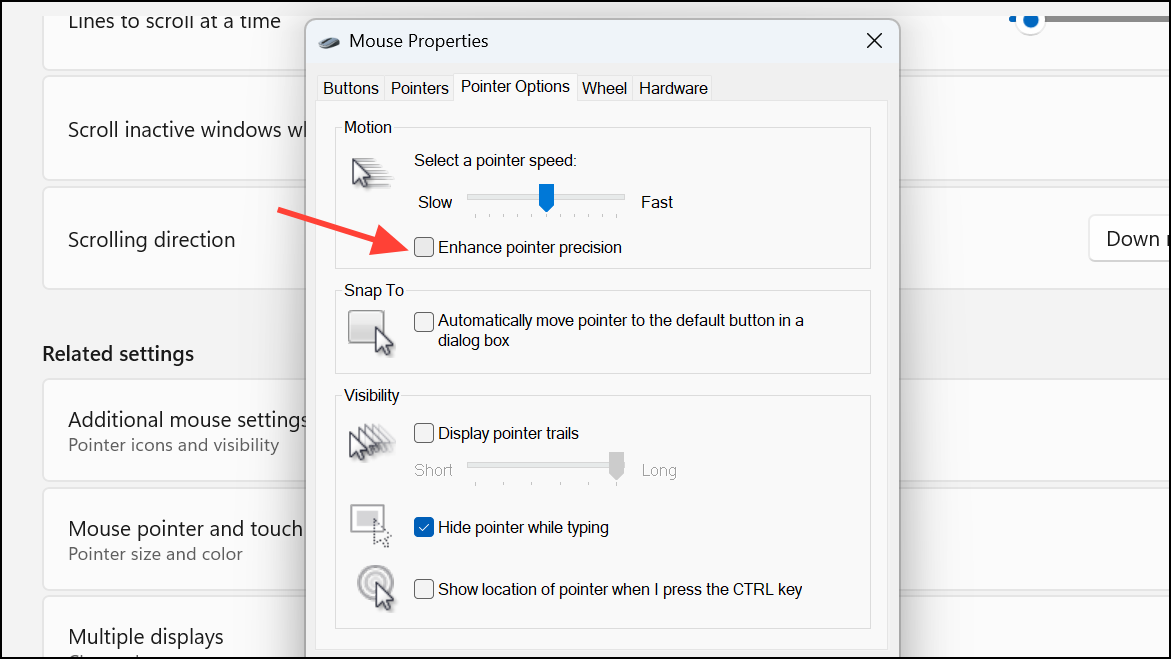
Turn Off Enhanced Pointer Precision
Windows' Enhanced Pointer Precision can interfere with precise mouse movements, negatively impacting accuracy in FPS games. Turning this off ensures consistent mouse behavior.
Step 1: Open Settings (Win + I) and click "Bluetooth & devices."
Step 2: Select "Mouse," then "Additional mouse settings."

Step 3: Under the "Pointer Options" tab, uncheck "Enhance pointer precision," then click "Apply."
Use Wired or High-Speed Wi-Fi Connections
For online gaming, network stability is critical. Wired Ethernet connections offer the best stability, but if Wi-Fi is your only option, ensure you're using a 5GHz or 6GHz network for lower latency and higher speeds.
Verify your router settings and ensure your PC connects to these faster bands to reduce lag and improve multiplayer gaming experiences.
After applying these settings, your Windows 11 PC should provide a noticeably smoother gaming experience. Remember, while these tweaks can significantly optimize your system, hardware upgrades such as adding RAM or upgrading your GPU will provide even greater performance boosts.