Encountering issues when trying to play .MOV files on Windows 11 can be frustrating, especially when you expect them to open seamlessly. Whether the built-in media player shows a black screen or fails to play the file altogether, these problems can disrupt your workflow or entertainment. Fortunately, there are effective solutions to ensure your .MOV files play smoothly on your Windows 11 computer. Here's how you can resolve this issue.
Use a third-party media player like VLC Media Player
If you're having trouble playing .MOV files with the default media player, using a versatile third-party media player like VLC Media Player can be a game-changer. VLC supports a wide range of video formats and often doesn't require additional codecs.
Step 1: If you haven't installed VLC Media Player yet, you can download it from the Microsoft Store. Use the link below to access the official VLC app.

Step 2: After installing VLC Media Player, open it by clicking on the Start Menu and searching for VLC. Click on the VLC Media Player app from the search results.

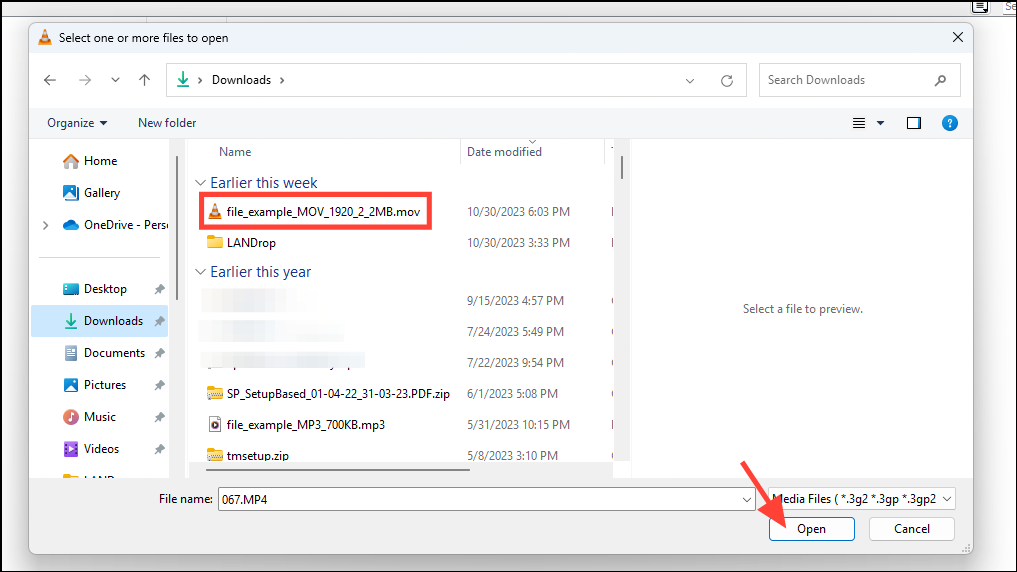
Step 3: In the VLC Media Player window, click on the Media menu at the top-left corner and select Open File from the dropdown. This action will prompt a File Explorer window to appear.

Step 4: Navigate to the location of your .MOV file in the File Explorer window. Select the file you wish to play and click on Open.

Step 5: Your .MOV file should now begin playing smoothly in VLC Media Player without any issues.
Install K-Lite Codec Packs
If you're still unable to play .MOV files, it's possible that your system lacks the necessary codecs. Installing the K-Lite Codec Pack can resolve this by adding support for various video formats to your media players.
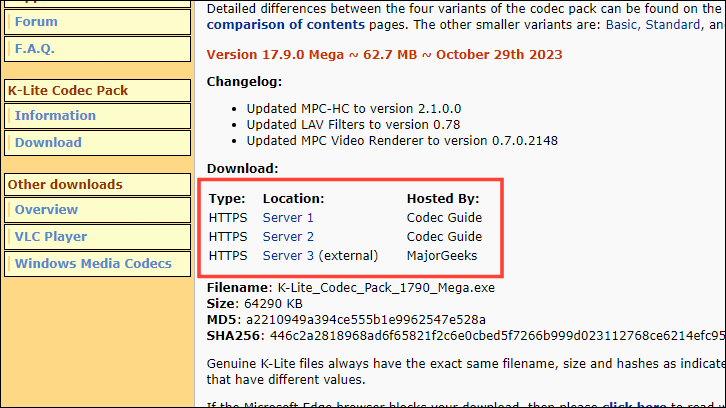
Step 1: Open your preferred web browser and navigate to the official K-Lite Codec Pack website at www.codecguide.com.
Step 2: On the download page, click on one of the available servers such as Mirror 1, Mirror 2, or Mirror 3 to begin downloading the codec pack. This will open a dialog box prompting you to save the file.

Step 3: Choose the destination folder where you want to save the downloaded file and click on Save.
Step 4: Once the download is complete, locate the installer file and double-click on it to start the installation process.

Step 5: In the installation window, select the Normal installation mode and click on Next to proceed.

Step 6: When prompted, choose the media player you use most frequently from the Preferred video player dropdown menu. Then, click on Next to continue.

Step 7: Complete the installation by following the on-screen instructions. Once finished, restart your computer to ensure the new codecs are properly integrated.
Step 8: After restarting, try playing your .MOV file using your chosen media player. The file should now play without any problems.
Use Windows Media Player Legacy
Windows 11 includes the Windows Media Player Legacy, which can play .MOV files. If you're experiencing issues with the default Media Player, you can try using this legacy version.
For a single file
Step 1: Open File Explorer and navigate to the location of your .MOV file.
Step 2: Right-click on the file, hover over the Open with option, and then select Choose another app from the submenu.

Step 3: In the window that appears, select Windows Media Player from the list of applications. If you want to use Windows Media Player for all .MOV files by default, check the box for Always use this app to open .MOV files. Then, click on OK.

Step 4: The .MOV file should now open and play in Windows Media Player Legacy.
To permanently include a directory
If you have a folder containing multiple .MOV files, you can add it to Windows Media Player's library for easy access.
Step 1: Click on the Start Menu and type Windows Media Player in the search bar. From the search results, select Windows Media Player Legacy.

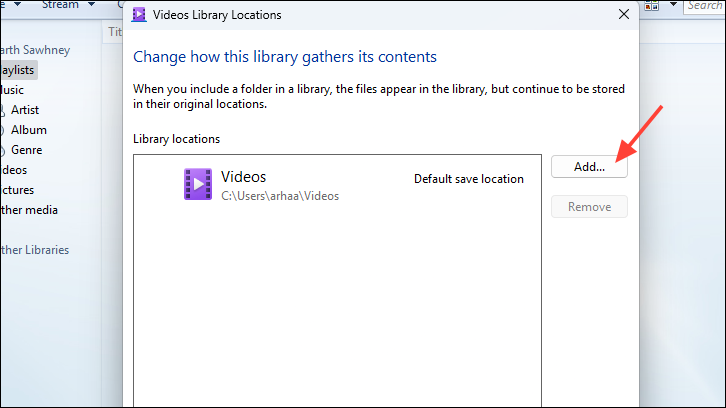
Step 2: In Windows Media Player, click on the Organize menu. Hover over Manage libraries, and then click on Videos.

Step 3: In the Videos Library Locations window, click on Add to include a new folder to the library.

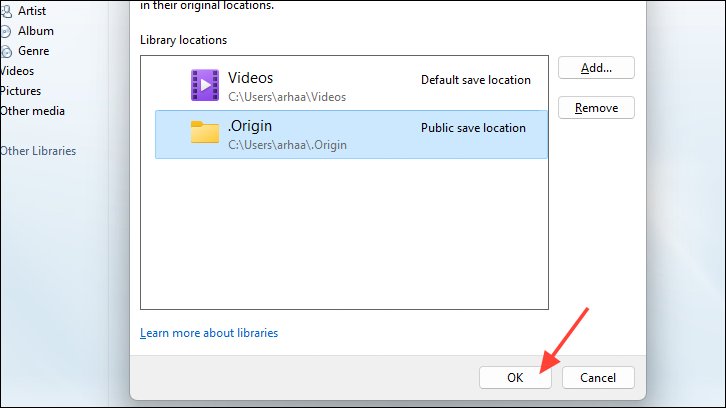
Step 4: Navigate to the folder containing your .MOV files, select it, and click on Include folder.
Step 5: Back in the Videos Library Locations window, click on OK to confirm.

Step 6: Your .MOV files will now appear in the Videos tab within Windows Media Player. Any new files added to this folder will be automatically included in the library.

By following these methods, you should be able to play .MOV files effortlessly on your Windows 11 computer.


