
The Sony PlayStation 2 (PS2) remains a timeless classic in the gaming world, boasting a vast library of memorable titles that continue to captivate players. With the help of emulators like PCSX2, you can relive these iconic games on your Ubuntu system. This guide will walk you through the steps to set up PCSX2 and enjoy PS2 games on your Ubuntu machine.
Installing PCSX2
sudo apt updatesudo add-apt-repository ppa:gregory-hainaut/pcsx2.official.ppaPress Enter when prompted to confirm the addition of the repository.
sudo apt updatesudo apt install pcsx2This command will install PCSX2 along with all necessary dependencies on your system.
Obtaining the PS2 BIOS
To emulate PS2 games, PCSX2 requires the original PlayStation 2 BIOS. The BIOS contains the essential system firmware needed for game emulation.
Important: Downloading the PS2 BIOS from the internet is illegal and violates copyright laws. You should only use a BIOS dumped from your own PS2 console.
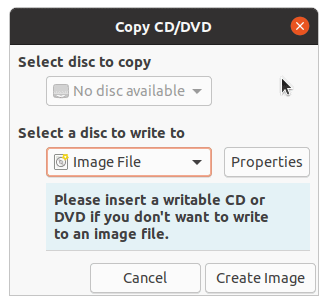
Creating a PS2 Game ISO
PCSX2 works best with ISO images of PS2 game discs. You’ll need to create an ISO from your physical game disc.
sudo apt install brasero
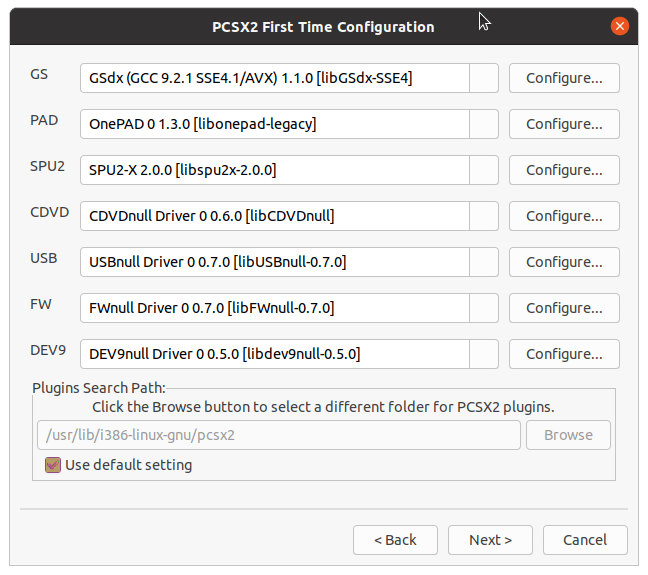
Configuring PCSX2 and Loading Your Game
With PCSX2 installed, the BIOS obtained, and your game ISO ready, you’re all set to configure the emulator.

Use default setting for the BIOS configuration. Click Browse and navigate to the folder containing your dumped BIOS files. A list of available BIOS versions will appear. Select the appropriate BIOS and click Finish.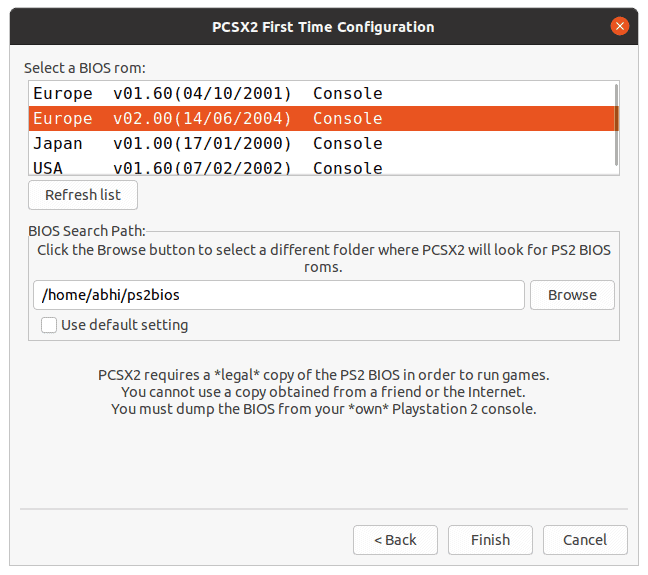
You have now configured PCSX2 with your PS2 BIOS. You can adjust settings later from the Config menu if needed.
Configuring Controls
Config > Controllers (PAD) > Plugin Settings.... This will open the controller configuration window.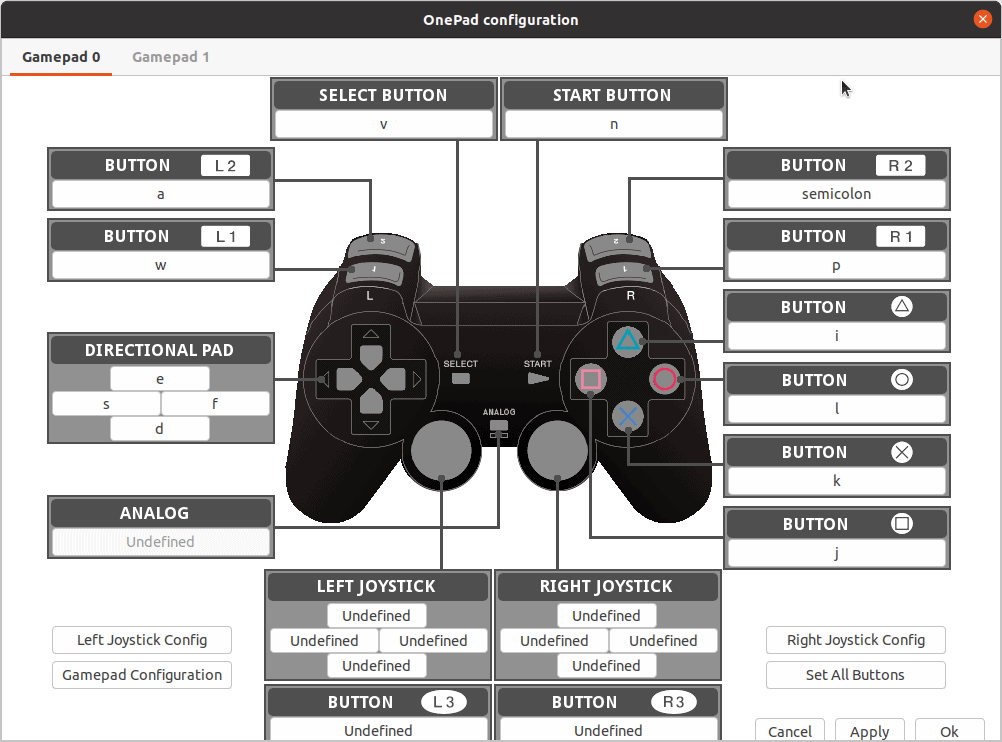
Map your keyboard keys or gamepad buttons to the PS2 controller buttons according to your preference. After configuring, click OK to save your settings.
Loading Your PS2 Game
System > Boot ISO (full). Locate and select the ISO file of your PS2 game.
You might be prompted to configure initial settings like language and time zone during the first boot.
If you experience errors or slow performance, try loading the game using System > Boot ISO (fast), which skips the PS2 startup sequence and loads the game directly.
By following these steps, you can enjoy classic PlayStation 2 games on your Ubuntu system through PCSX2. Happy gaming!