
Hytale leans on durability to keep tools and weapons from lasting forever, but it also gives you a straightforward way to fix them. Instead of feeding items into an anvil or paying experience levels, you carry disposable Repair Kits that restore durability to any eligible piece of gear.
How durability and item repair work in Hytale
Most tools, weapons, and armor in Hytale have a durability bar that depletes as you use them. When that bar runs low, damage and utility suffer, and you risk losing access to the item at a bad moment, like deep in a cave or mid-fight. You can restore that durability with a crafted Repair Kit instead of crafting an entirely new item.
Repair Kits are single-use consumables. When you apply one to an item, the kit is consumed in the process. That makes repair a meaningful choice: you are trading leather and metal for the convenience of instantly restoring a piece of gear instead of going back to gather and craft from scratch.
Death also interacts with durability. When your character dies, equipped items lose a portion of their durability, so regular repairs become part of long-term progression if you are taking risks or fighting tough enemies.

How to get leather and other materials for Repair Kits
Repair Kits sit on top of Hytale’s early resource loop, so you will start by hunting and processing animal drops. Small animals drop hides that later turn into Light Leather, which is one of the key ingredients for repairing gear.
- Hunt small animals such as rabbits or similarly sized creatures to collect Light Hide or basic Leather Hide drops.
- Build a Tanning Rack at a Workbench, place it in your base, and interact with it to process hides.
- Convert hides to leather by placing Light Hide on the Tanning Rack. The rack turns Light Hide into Light Leather over time.
Beyond leather, higher-tier Repair Kits can also use metal and cloth. Iron ingots and linen scraps are typical ingredients once you progress into better tools and armor. Iron comes from smelting ore at a Furnace, while linen scraps are produced from plant-based materials at crafting stations.
How to craft a Repair Kit at the Workbench
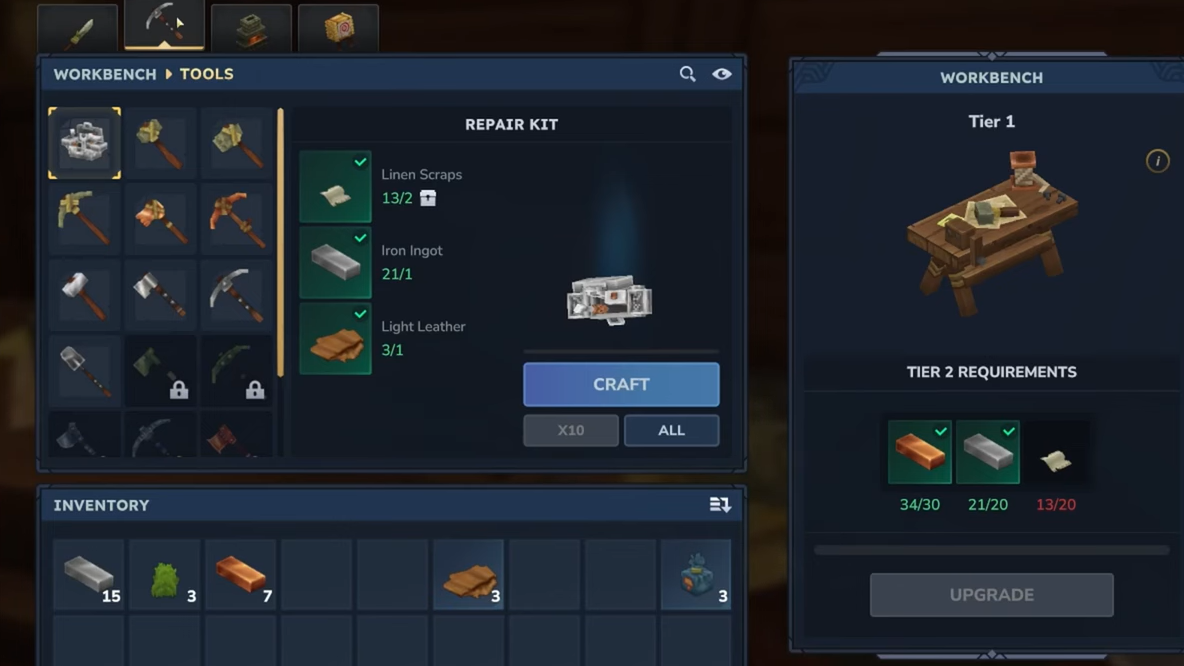
Repair Kits are crafted at the standard Workbench once you have the basic crafting setup running in your base. The game groups them together with other tool-related recipes, so you reach them from a specific tab in the Workbench UI.
Step 1: Place a Workbench in your base if you have not already, and interact with it to open the crafting interface. Make sure you are using at least a Tier 1 Workbench so the full set of basic recipes is available.

Step 2: Switch to the second tab in the Workbench menu, the one that lists tools and utility items. The Repair Kit recipe sits here with an icon that can look like a metal chunk at a glance.
Step 3: Check that you have the required components in your inventory. A typical Repair Kit recipe at this stage combines Light Leather with basic crafting resources like iron ingots and linen scraps.
Step 4: Select the Repair Kit recipe and craft it. The finished kit will appear in your inventory; drag it onto your hotbar so you can use it in the world.
How to use a Repair Kit to fix your gear
Once you have a Repair Kit in your hotbar, repairing an item is a direct interaction rather than a menu-driven process. You hold the kit in your hand and then apply it to the damaged item you want to fix.
Step 1: Move the crafted Repair Kit onto one of your hotbar slots and select that slot so your character is holding the kit.
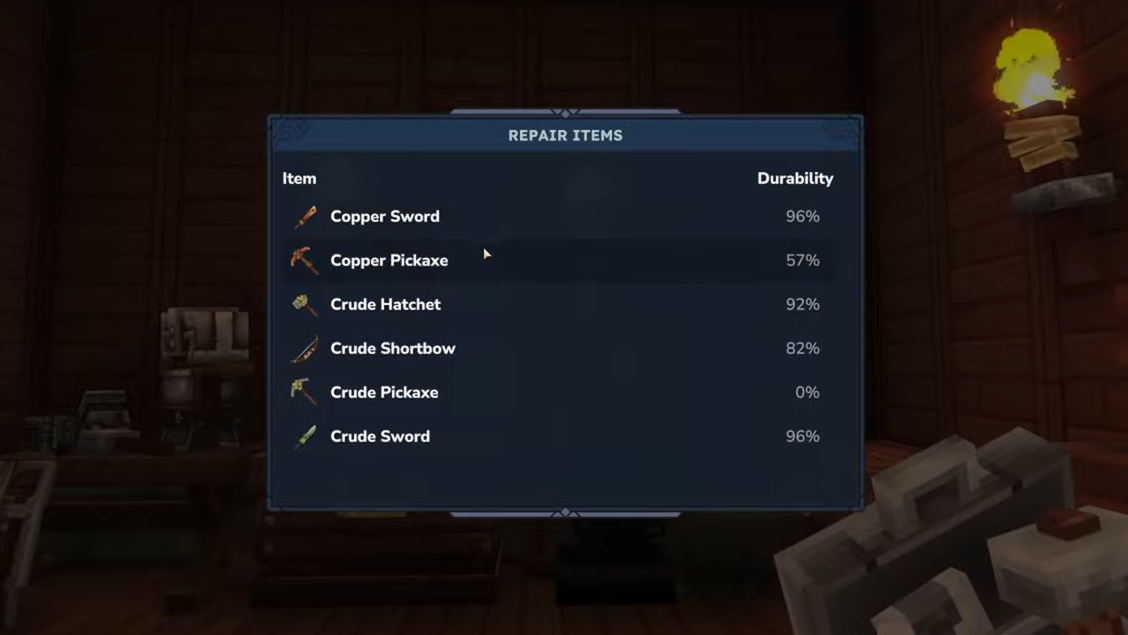
Step 2: With the kit equipped, interact to bring up the repair window or prompt that lists items with durability. This interface lets you choose which piece of gear to restore.
Step 3: Select the damaged tool, weapon, or armor you want to repair. Confirm the action when prompted. The Repair Kit is consumed immediately, and the chosen item’s durability bar is restored.
Some setups also allow you to repair by directly right-clicking on damaged gear while the kit is equipped, depending on how your controls are configured. In all cases, the Repair Kit disappears after a single successful repair.
When to repair and when to replace items
Because Repair Kits cost leather, cloth, and metal, you gain more value by reserving them for items that are time-consuming or expensive to replace. Basic stone or copper tools can often be discarded and remade from common materials gathered in minutes.
Repair becomes more attractive once you move into iron and beyond. High-tier weapons, shields, and armor pieces use rarer ores and more complex crafting chains, and you will usually want to preserve them. Using a single kit to restore a powerful weapon before a long dungeon run is often cheaper than building a whole new one from raw resources.
Durability, death, and long-term progression
Durability and Repair Kits subtly shape how progression feels in Hytale. Early on, you cycle through low-tier tools quickly, using them as a disposable stepping stone toward copper and iron. As your gear improves, leather and metals you once used only for crafting become a maintenance resource for your existing kit.
Deaths that chip away at durability reinforce this loop. Repeated failures in a difficult area translate into extra repair work and more material use, nudging you to prepare better food, shields, or armor before attempting another push. That preparation phase is where Repair Kits shine, letting you keep a favorite weapon or piece of armor in service instead of replacing it outright.
Over time, a small stockpile of Repair Kits in your base and your backpack becomes as important as spare arrows or food. They give you the freedom to commit to longer journeys, knowing you can keep tools and weapons functional without retreating all the way home to craft replacements.