
The uptime counter in Windows 11 shows how long your system has been running continuously since the last reboot. Resetting uptime can be useful when troubleshooting performance issues, accurately tracking system stability, or simply starting fresh after system updates. Here are clear, step-by-step instructions on how to reset your uptime in Windows 11.
Method 1: Restart Your Computer (Recommended)
The simplest and most effective way to reset the uptime counter in Windows 11 is by restarting your computer. This method fully resets all system counters and refreshes your system state.
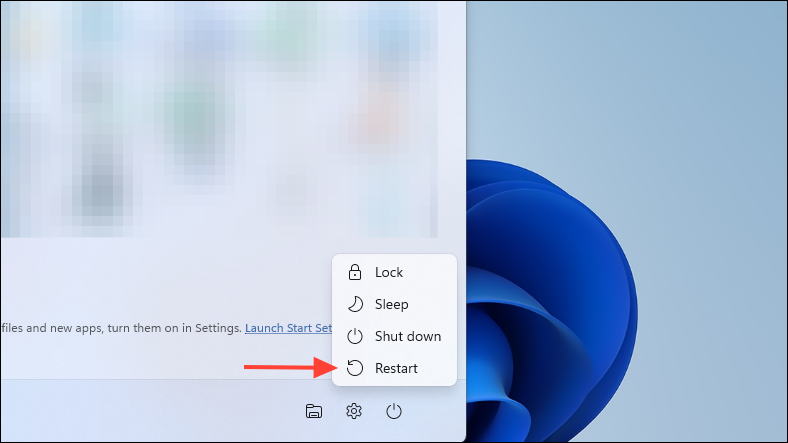
Step 1: Click the Start button on your taskbar.
Step 2: Click the Power icon located at the bottom-right corner of the Start menu.
Step 3: Select Restart from the available options. Windows will close all running applications and reboot your system. Once your computer restarts, the uptime counter will reset to zero.
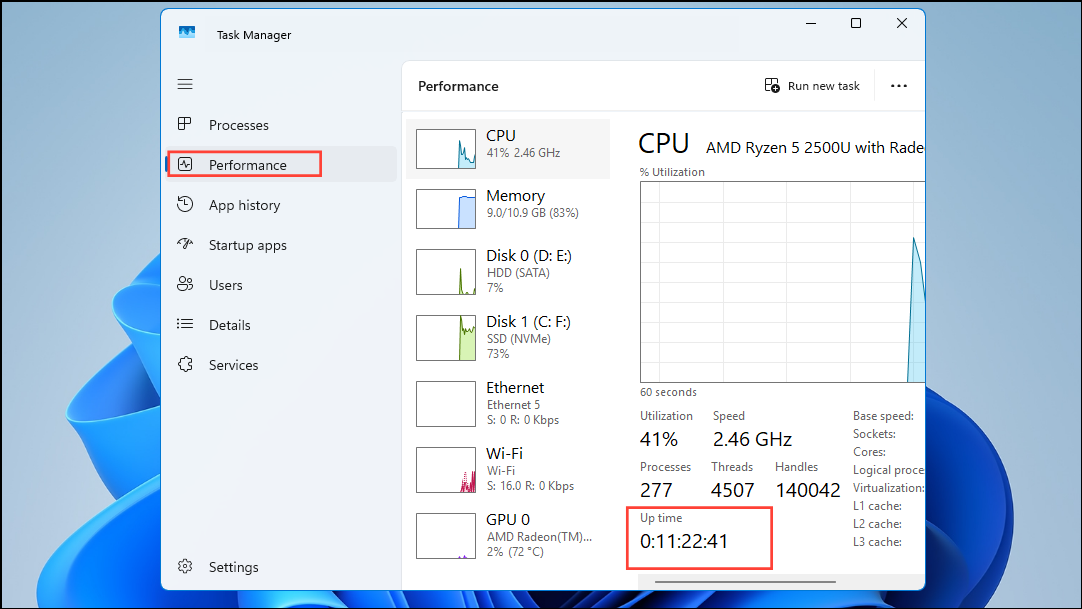
To confirm that your uptime has successfully reset, open Task Manager by pressing Ctrl + Shift + Esc, click on the Performance tab, and check the "Up time" field under CPU details.
Method 2: Full Shutdown via Command Prompt
If you prefer a manual approach or need a full shutdown to reset all uptime counters thoroughly, use the Command Prompt to perform a complete shutdown.
Step 1: Press Win + S to open the Search box, type cmd, right-click on Command Prompt, and select Run as administrator.
Step 2: In the Command Prompt window, type the following command and press Enter:
shutdown /s /f /t 0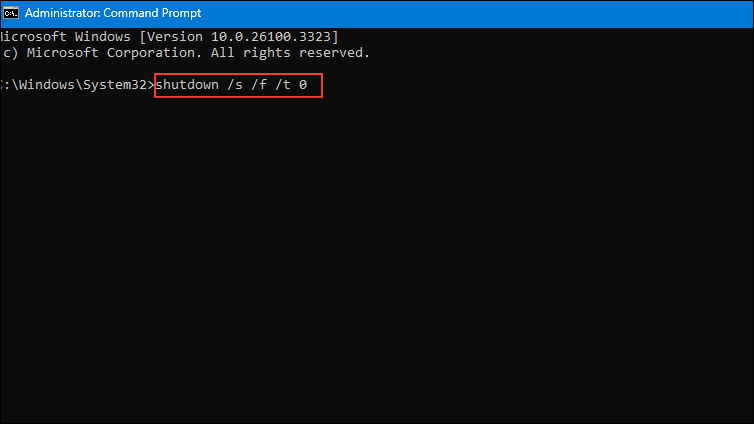
This command forces a full shutdown immediately, closing all running programs and processes. After your system shuts down completely, manually power it back on to reset the uptime counter.
Verify the uptime reset by opening Task Manager (Ctrl + Shift + Esc) and checking the "Up time" under the CPU section.
Method 3: Disable Fast Startup (Long-Term Solution)
Windows 11 has a feature called Fast Startup, which speeds up boot times by saving system state information. However, this can cause inaccurate uptime readings because the system never fully shuts down. Disabling Fast Startup ensures each shutdown fully resets uptime.
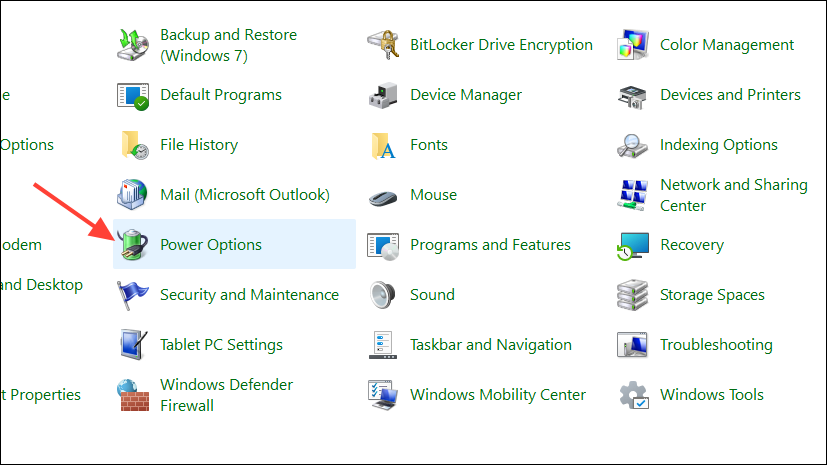
Step 1: Press Win + R to open the Run dialog box, type control, and press Enter to open Control Panel.
Step 2: In the Control Panel, select System and Security, then click on Power Options.
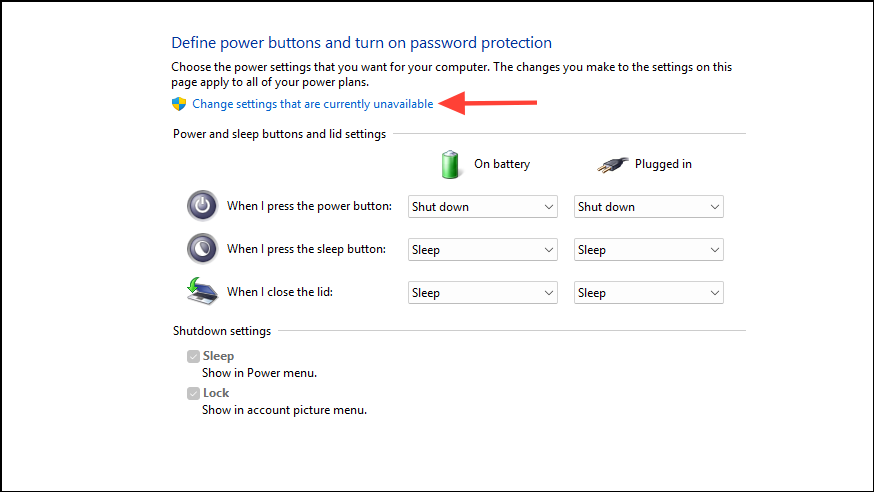
Step 3: On the left sidebar, click Choose what the power buttons do. Then, click the link at the top labeled Change settings that are currently unavailable.
Step 4: Under the "Shutdown settings" section, uncheck the option labeled Turn on fast startup (recommended). Click Save changes to apply your settings.
After disabling Fast Startup, every shutdown will perform a full system reset, effectively resetting your uptime counter each time you power off your PC.
Now your Windows 11 uptime counter should accurately reflect your system's operation time. Regularly resetting uptime can help you monitor system stability and troubleshoot potential issues more effectively.