
Windows Defender on Windows 11 moves suspicious files into quarantine, isolating them from your system to prevent potential harm. Occasionally, important files or trusted programs are mistakenly flagged and quarantined due to false positives, heuristic scanning, or signature issues. Recovering these files quickly is crucial to avoid workflow disruptions and potential data loss.
Restore Quarantined Files Using Windows Security (GUI)
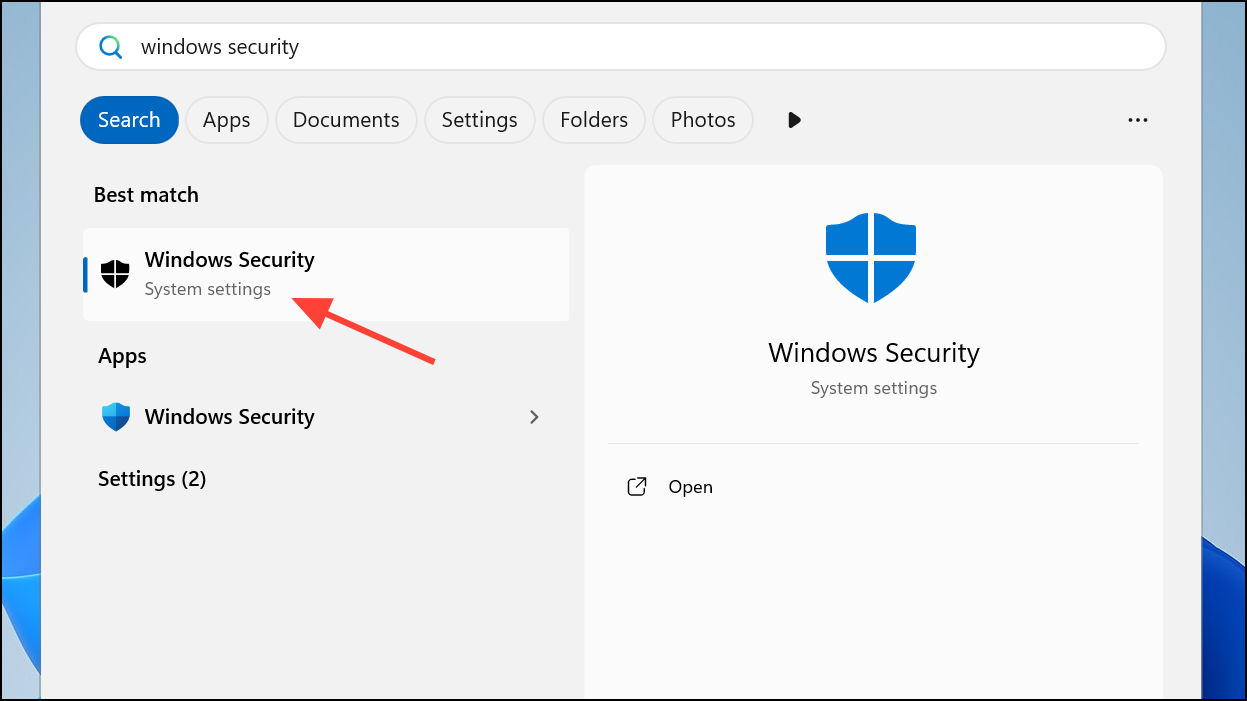
Step 1: Open the Windows Security app by typing Windows Security into the Start menu and selecting the matching result. This app manages security features including virus and threat protection.
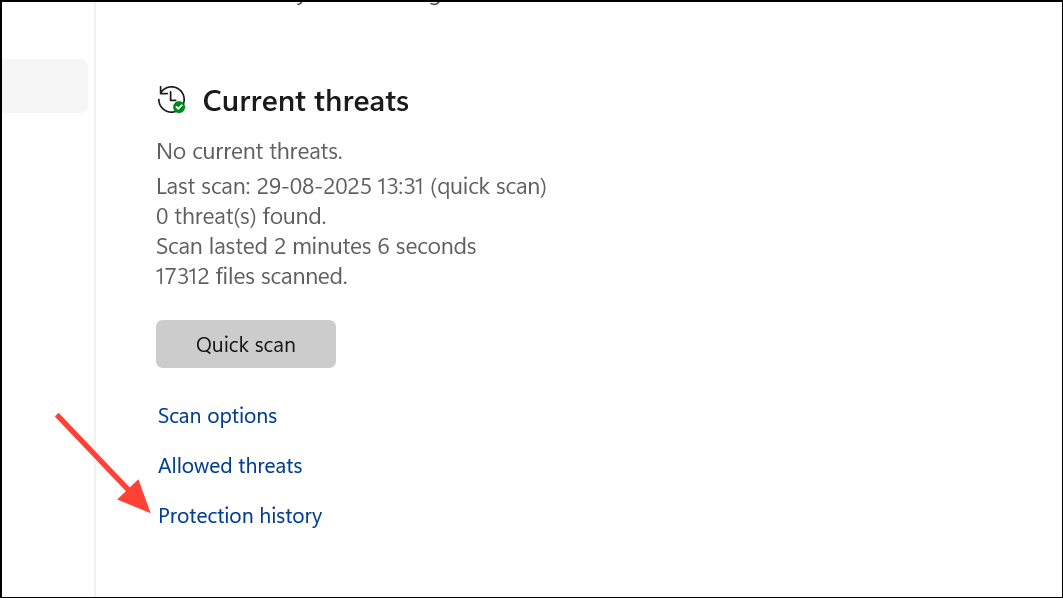
Step 2: In the Windows Security window, select Virus & threat protection. Under the Current threats section, click on Protection history to view recent actions taken by Defender.
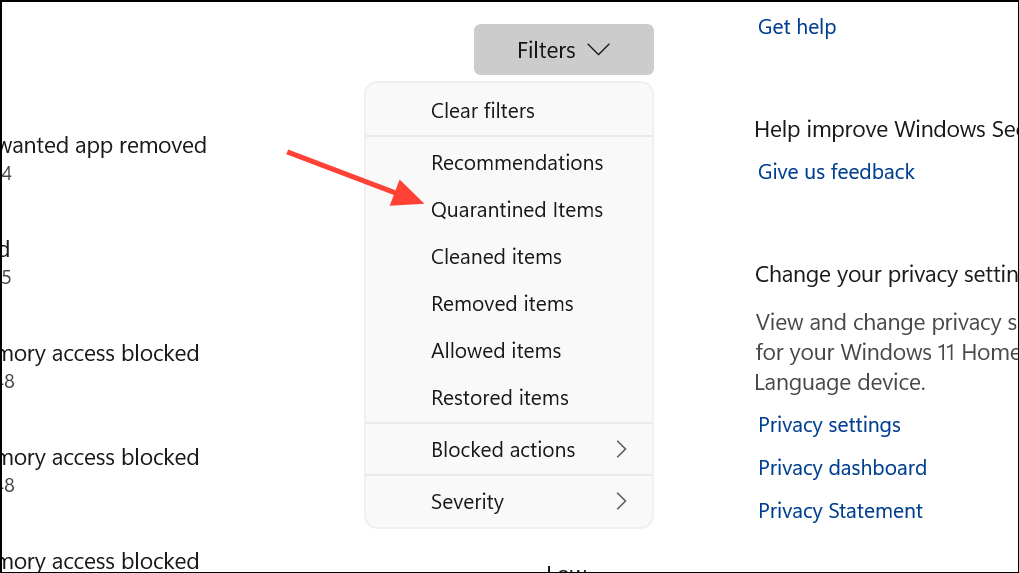
Step 3: Use the filter option to select Quarantined Items. This displays all files currently held in quarantine.
Step 4: Find the file you want to recover, click on it to expand details, then select Restore under the available actions. This moves the file back to its original location. If prompted by User Account Control (UAC), confirm your choice to proceed.

Restored files may be immediately re-quarantined if real-time protection is active and Defender still flags them as threats. If this occurs, temporarily disable real-time protection before restoring the file, and re-enable it afterwards to maintain security.
Restore Quarantined Files Using Command Prompt
When files do not appear in Protection History or the restore button is unavailable, the command line offers more control. This method is especially useful if files are missing from the UI or if Defender fails silently due to folder changes or permission issues.
Step 1: Open Command Prompt as an administrator. Press Win + X and select Terminal (Admin) or Command Prompt (Admin).

Step 2: Navigate to the Windows Defender directory by running:
cd "%ProgramFiles%\Windows Defender"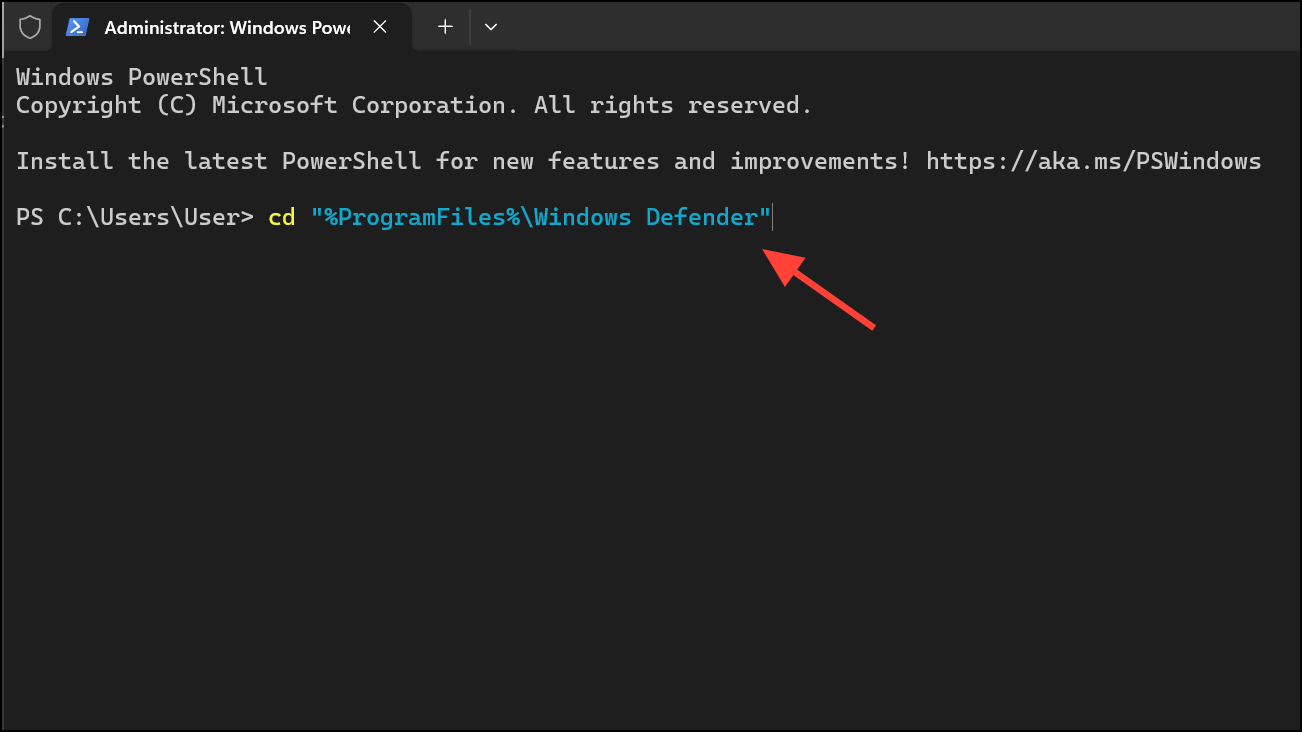
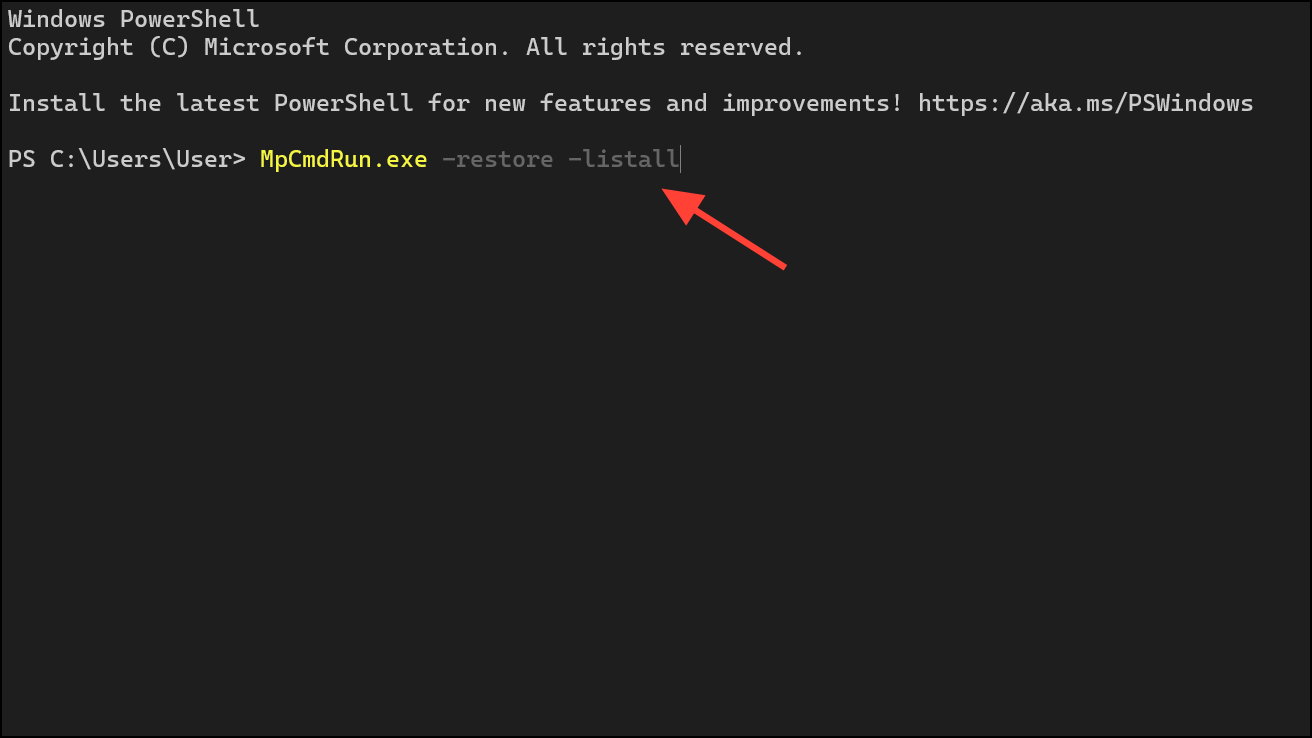
Step 3: List all quarantined items with:
MpCmdRun.exe -restore -listallThis command displays all files currently quarantined, along with their threat names. If the file does not appear in Protection History, it may still appear here.
Step 4: Restore a specific file by running:
MpCmdRun.exe -restore -name "ThreatName"Replace "ThreatName" with the actual threat name or identifier from the list. For files originally located in folders that have since been renamed or deleted, specify a new path using:
"%ProgramFiles%\Windows Defender\MpCmdRun.exe" -Restore -name "ThreatName" -Path "C:\RestoredFiles"This command restores the file to the specified directory.
If you encounter permissions errors, ensure you are running the command as an administrator. If the file is immediately re-quarantined, temporarily disable real-time protection before restoring and re-enable it afterwards.
Restore Quarantined Files Using PowerShell
PowerShell offers another way to interact with Defender’s quarantine, especially for advanced users or bulk operations.
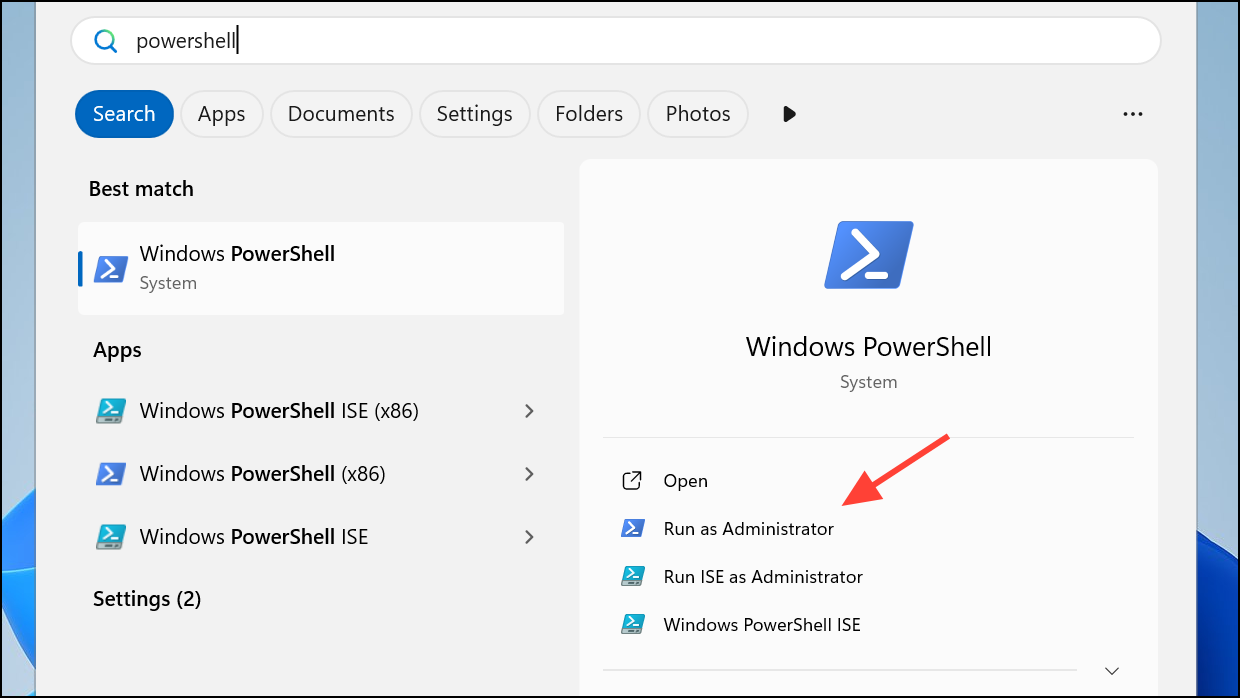
Step 1: Open PowerShell as an administrator from the Start menu by searching for it and selecting Run as administrator.
Step 2: To list all quarantined threats, use:
Get-MpThreatDetection | Where-Object { $_.ActionsTaken -match "Quarantine" } | Format-Table -AutoSize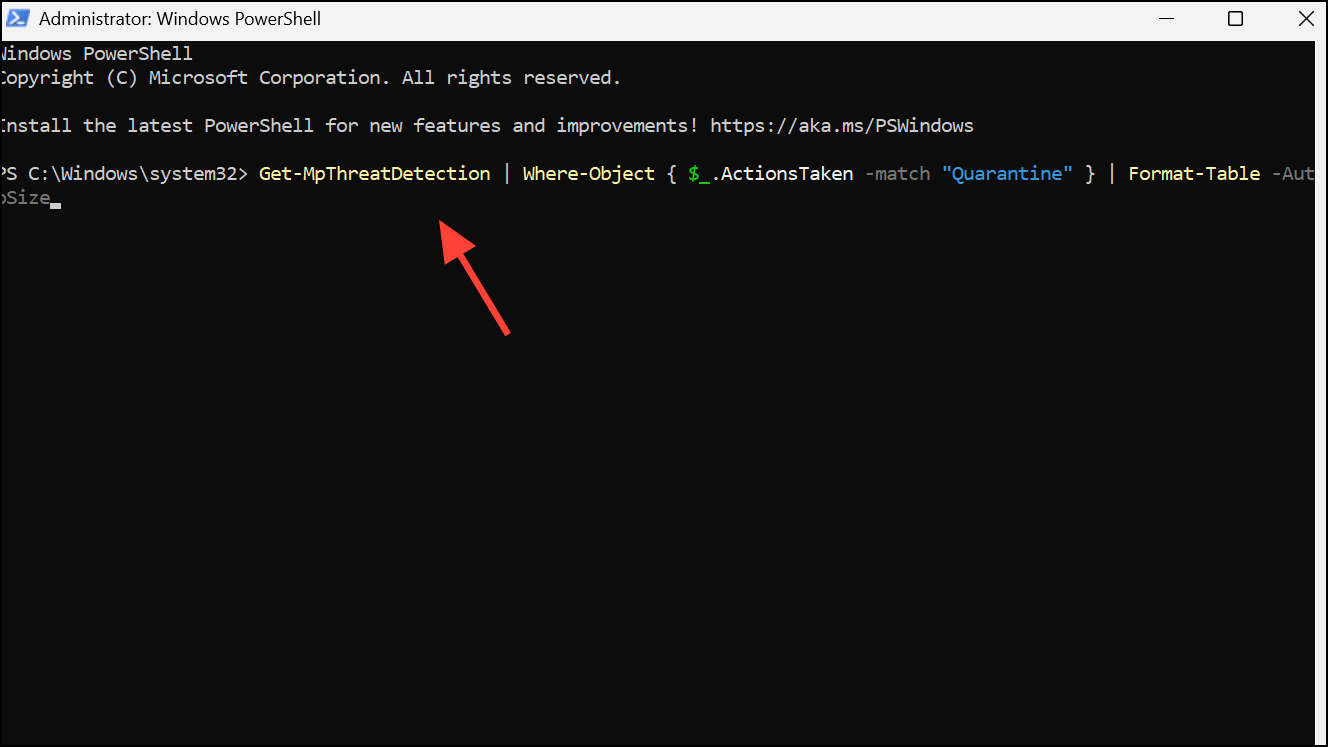
Step 3: Restore a specific threat using:
Restore-MpThreatDetection -Name "ThreatName"Replace "ThreatName" with the exact name from the previous step.
Download or Collect Quarantined Files (For IT Administrators)
In enterprise environments or with Microsoft Defender for Endpoint, administrators can use the Download or Collect File feature. This allows the quarantined file to be downloaded as a password-protected archive for further analysis or manual restoration. This option is typically available in Defender’s management portal and may require appropriate permissions.
Recover Deleted or Missing Files with Data Recovery Tools
If the above methods fail—such as when Defender has permanently deleted the file or the quarantine database is corrupted—specialized data recovery software provides another solution. Tools like MyRecover scan your drives for recoverable remnants of deleted files, even after quarantine purges.
Step 1: Download and install a data recovery tool (such as MyRecover) on a separate drive from where the lost file was originally stored. This prevents overwriting recoverable data.
Step 2: Launch the software and select the drive where the file was located before quarantine or deletion. Start a scan to search for recoverable files.
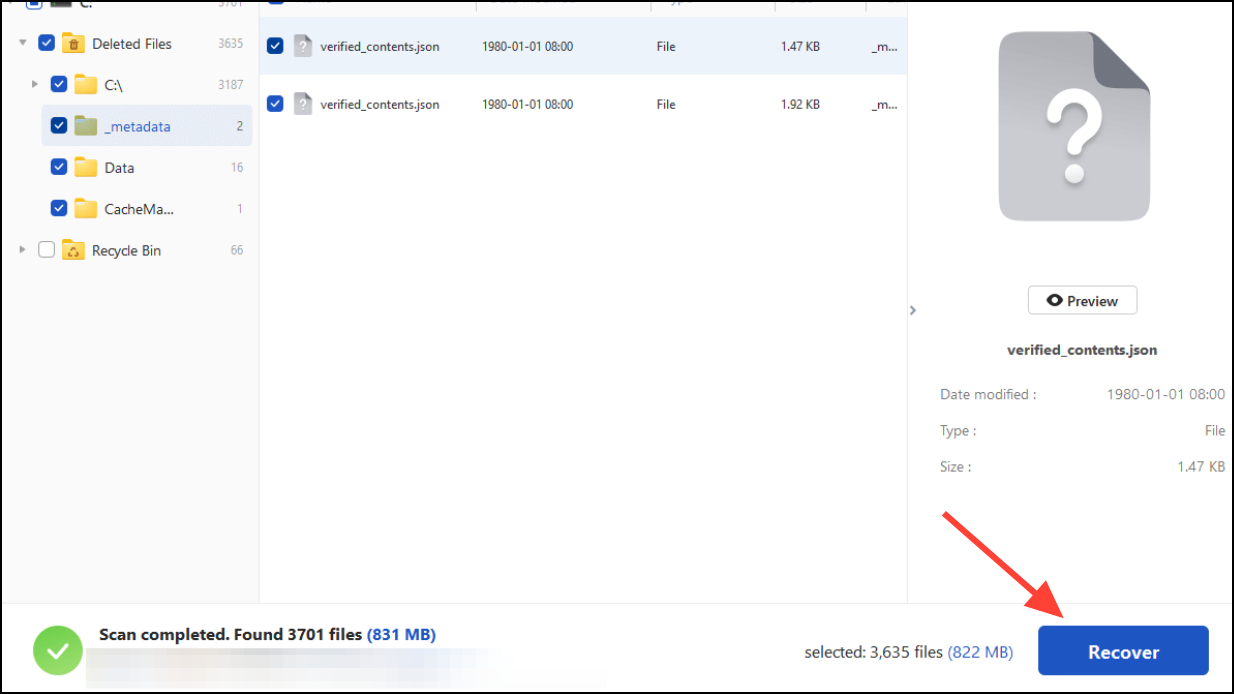
Step 3: Review scan results for the missing file. If not found in a quick scan, use the deep scan feature for a more thorough search.
Step 4: Select the file(s) you want to recover, and choose a secure location to save them. Avoid restoring to the original location to reduce the risk of overwriting other recoverable data.
Some advanced tools allow you to preview file contents before recovery, which can help confirm you are restoring the correct file, especially if filenames are lost or corrupted.
Restoring quarantined files in Windows Defender on Windows 11 is possible using built-in tools or command-line methods, and advanced recovery is available if files are deleted. Always verify the file’s safety before restoring and consider adding trusted files to Defender’s exclusions to prevent repeat quarantines.