
Changing a drive letter in Windows 11 can restore missing drives in File Explorer, resolve application path errors, or bring order to a cluttered storage setup. When drive letters are reassigned—intentionally or by accident—Windows may lose track of file paths, causing programs to malfunction or data to become temporarily inaccessible. Disk Management offers a direct method to revert or reassign drive letters, but some scenarios require extra care or alternative approaches to avoid data loss or system conflicts.
Reverting a Drive Letter Using Disk Management
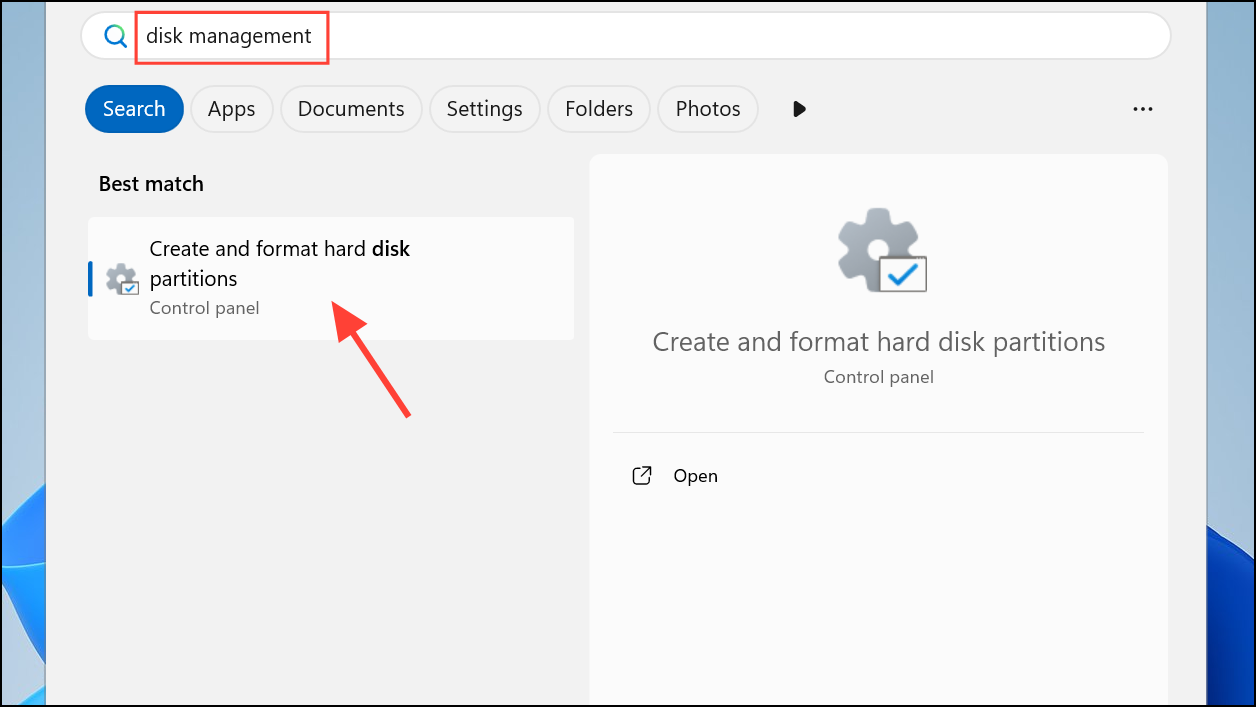
Step 1: Open Disk Management with administrative privileges. Click the Start button, type disk management, then select Create and format hard disk partitions from the results. If prompted, approve the User Account Control dialog to continue.
Step 2: In the Disk Management window, locate the drive whose letter you want to revert. Drives are listed by volume label and letter (for example, D:, E:, etc.) in the lower half of the window. Double-check the drive's contents or label to confirm you're selecting the correct one, especially if multiple drives are present.
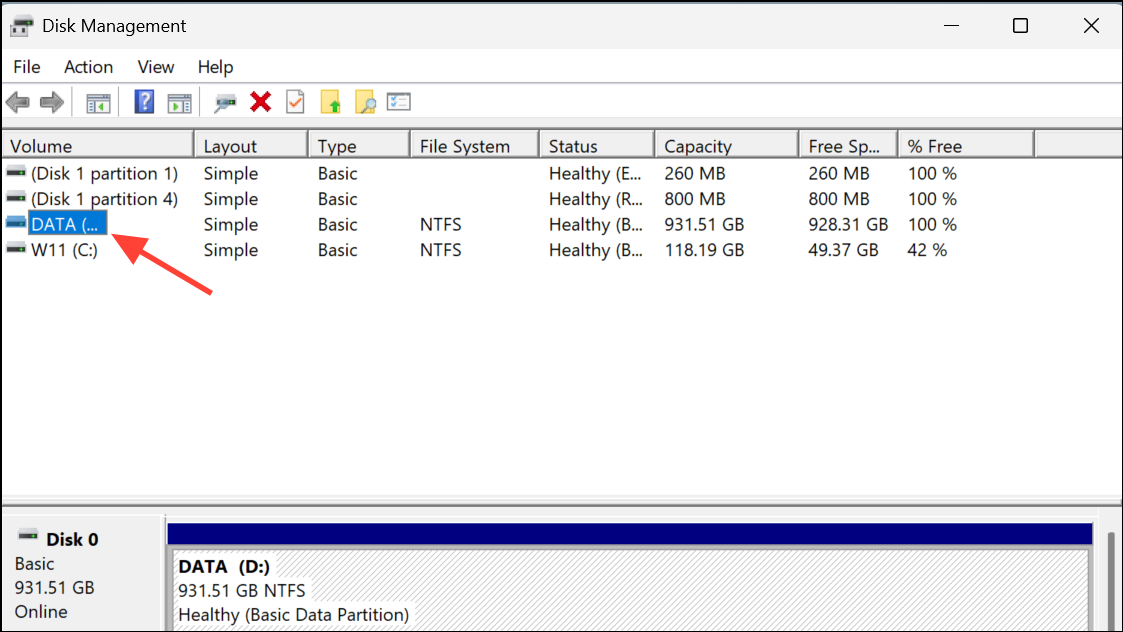
Step 3: Right-click the target volume and choose Change Drive Letter and Paths.... If this option is unavailable (grayed out), the partition might be a system, recovery, or EFI partition, or you might lack the necessary permissions. For accessible data drives, this menu should be active.

Step 4: In the dialog box, click Change to modify the existing letter, or Add if the drive currently has no letter assigned. Select the desired letter from the dropdown list—this could be the original letter you want to restore. Click OK to confirm.
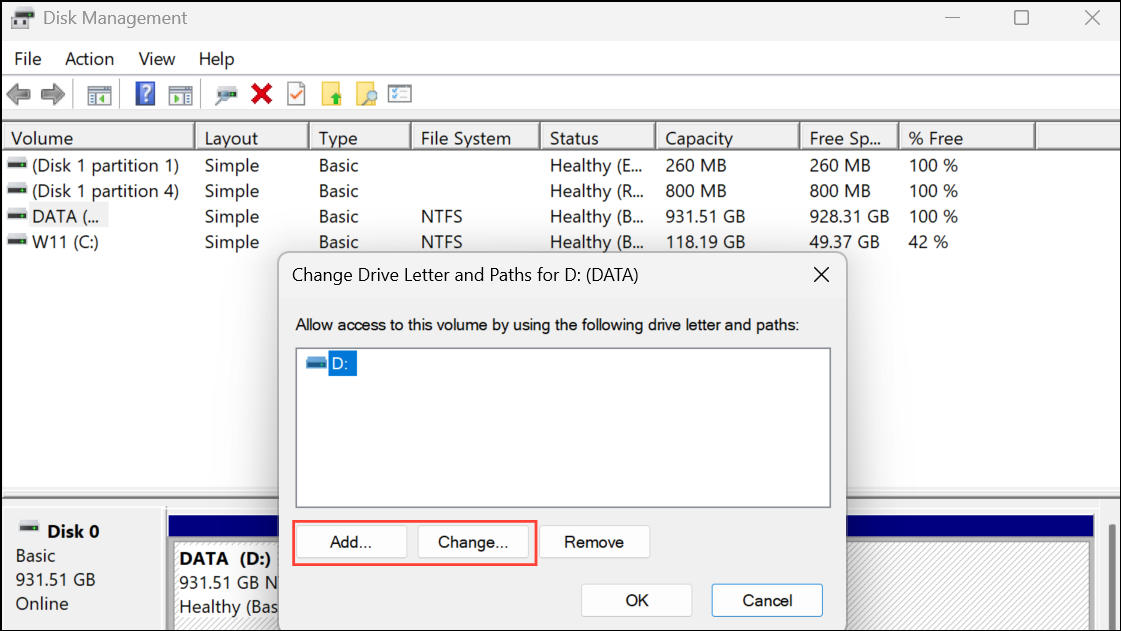
Step 5: Accept the confirmation dialog. Windows will warn that some programs relying on drive letters might not work correctly after the change. Click Yes to proceed. The drive letter change takes effect immediately, and the drive should now appear in File Explorer under the new (or restored) letter.
Changing drive letters is generally safe for data drives, but avoid changing the letter of the system drive (usually C:) or drives containing installed applications, as this can break system functionality or cause software to stop working.
Solving Drive Letter Issues When the Option Is Unavailable
At times, the Change Drive Letter and Paths option might be missing or inaccessible. This typically happens if:
- The partition is an EFI System, Recovery, or other protected partition.
- The drive is unallocated or not initialized.
- You lack administrative permissions.
If the drive is unallocated, right-click and select Initialize Disk and follow the prompts to prepare it for use. For permission issues, ensure you are logged in as an administrator or a member of the Backup Operators group. System and recovery partitions cannot have their letters changed.
Reverting Drive Letters When User Folders or Applications Break
If user folders or applications reference a specific drive letter (such as D: for Documents), changing the letter can disrupt access. For example, moving user folders to a new drive and updating its letter may cause Windows to lose track of their locations, resulting in errors or missing data. To resolve this:
Step 1: Move user folders temporarily back to the system drive (usually C:) using the folder properties dialog in Windows Explorer (Right-click > Properties > Location).
Step 2: Restart the system in Safe Mode to ensure no processes are locking the drive you want to modify. Safe Mode loads only essential drivers and services, freeing the drive for changes.
Step 3: Use Disk Management as described above to revert the drive letter to the desired value (such as changing F: back to D:).
Step 4: Move user folders or application data back to the original locations, updating paths as needed. After these steps, Windows and your programs should recognize the correct paths.
Restarting in Safe Mode is especially useful when open files or background processes prevent drive letter changes.
Assigning Persistent Drive Letters to Removable Drives
Assigning a specific letter to a USB drive or external disk can help maintain consistency in backup scripts or application paths. Windows 11 attempts to remember drive letters for unique devices, but if a different USB drive is inserted, the letter assignment may change. To improve persistence:
Step 1: With all relevant USB drives connected, open Disk Management and assign each one a unique letter using the steps above. Windows stores these assignments by device ID, not by USB port.
Step 2: For advanced scenarios or to automate letter assignments, consider third-party utilities such as USBDLM, which can assign drive letters based on device serial numbers or other criteria. This is particularly useful in environments with multiple removable drives that need consistent letters.
Reordering Drive Letters for Custom File Explorer Organization
Drive letters in File Explorer appear in alphabetical order. To group drives in a preferred sequence—such as having SSDs first, followed by HDDs, then optical and USB drives—change their letters accordingly. For example, assign D:, E:, and F: to HDDs, G: to your BD/DVD drive, and higher letters like R: or S: to USB devices. This approach streamlines navigation and keeps related drives together.
When reordering, change drive letters one at a time in Disk Management. If a drive letter cannot be assigned due to conflicts, temporarily assign unused letters to free up desired ones, then repeat the process in the correct sequence. Plug in all removable drives during the process to ensure assignments are retained.
Reverting or changing drive letters in Windows 11 restores missing drives, resolves path errors, and lets you organize storage to your preference. Use Disk Management for most cases, and Safe Mode or third-party tools for complex scenarios or persistent drive letter assignments.