
Establishing a Virtual Private Network (VPN) offers a secure and private way to connect to a remote network over the internet, making it appear as though you’re directly connected to a private network. This is particularly useful for accessing office networks remotely or protecting your data on public Wi-Fi networks. In this guide, we’ll walk through setting up an OpenVPN server on Ubuntu 20.04, covering everything from installing the necessary packages to configuring both the server and client.
Installation
To begin, you’ll need to install the OpenVPN package available in Ubuntu’s official repositories. This package includes both the server and client components.
sudo apt install openvpnOpenVPN uses SSL certificates to encrypt data between the server and clients. To manage these certificates, we’ll set up our own Certificate Authority (CA). For security reasons, it’s recommended to set up the CA on a separate machine from the OpenVPN server; this way, if the server is compromised, the CA’s private key remains secure.
We’ll use the ‘Easy-RSA’ tool to handle certificate generation and management. Install Easy-RSA on the CA machine, the OpenVPN server machine, and the client machine, as we’ll need to perform configurations on all three.
sudo apt install easy-rsaNow, let’s configure the Certificate Authority on the CA machine and prepare the OpenVPN server accordingly.
Certificate Authority setup
Initial setup on CA machine
make-cadir cert_authority && cd cert_authorityOpen the vars file in this directory. Uncomment lines 91-96, which contain configuration variables for organizational fields, and replace the sample values with your own information.
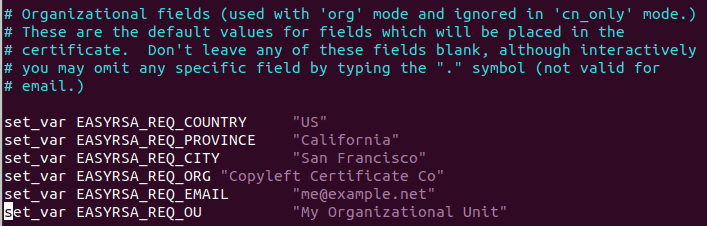
Save and exit the file. If you’re using vim, press Esc, type :wq, and press Enter.
./easyrsa init-pki./easyrsa build-ca
The CA key and certificate are now generated. Keep the CA key secure, as it’s used to sign server and client certificates.
Generating server key and certificate on the server machine
On the server machine, perform similar initial steps for Easy-RSA.
make-cadir cert_authority && cd cert_authorityEdit the vars file, updating the organizational fields as you did on the CA machine. Initialize the PKI:
./easyrsa init-pkinopass option allows OpenVPN to start without a password prompt../easyrsa gen-req server nopassWhen prompted for a common name, you can leave it blank to use ‘server’ by default.
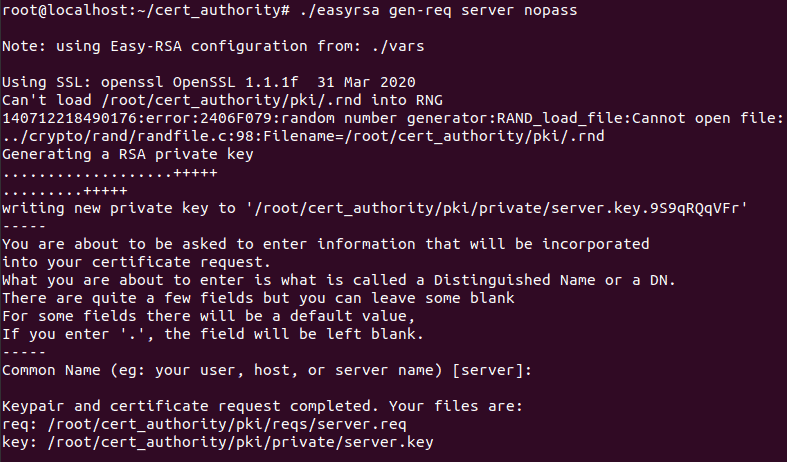
sudo mv pki/private/server.key /etc/openvpnscp pki/reqs/server.req user@CA_MACHINE_IP:/root
Replace user and CA_MACHINE_IP with your CA machine’s username and IP address.
Signing the server certificate on the CA machine
On the CA machine, ensure the server’s certificate request has been received.
cd cert_authority
./easyrsa import-req /root/server.req server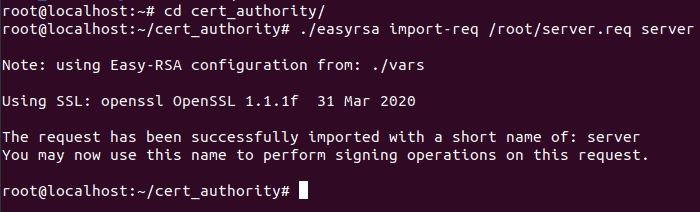
./easyrsa sign-req server server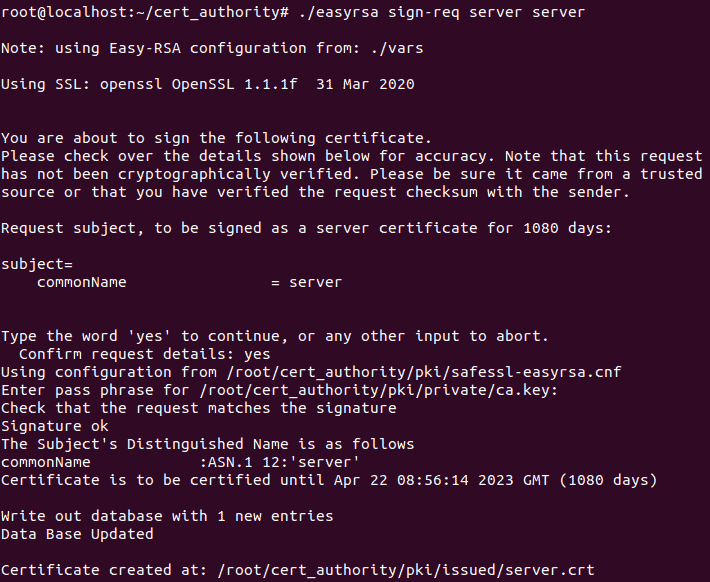
rm /root/server.req
scp pki/issued/server.crt root@SERVER_IP:/root
scp pki/ca.crt root@SERVER_IP:/root
Replace SERVER_IP with your server’s IP address.
Generating DH parameters
On the server machine, move the certificates to the OpenVPN directory.
sudo mv /root/server.crt /root/ca.crt /etc/openvpncd cert_authority
./easyrsa gen-dhsudo mv pki/dh.pem /etc/openvpnGenerating TLS authentication key
openvpn --genkey --secret tls_auth.keysudo mv tls_auth.key /etc/openvpnWith these steps, the server’s key configuration and Certificate Authority setup are complete.
OpenVPN server configuration
Next, we’ll configure the OpenVPN server using a sample configuration file provided by the OpenVPN package.
sudo cp /usr/share/doc/openvpn/examples/sample-config-files/server.conf.gz /etc/openvpn/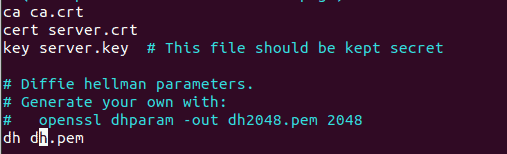
sudo gzip -d /etc/openvpn/server.conf.gzsudo vim /etc/openvpn/server.confUpdate the paths to match your key and certificate files. Since we used the default names, lines 78 can remain unchanged. On line 85, change the dh parameter file name to dh.pem to match the file we generated.
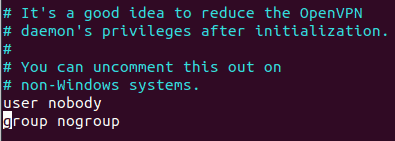
Uncomment lines 192, 274, and 275 by removing the leading semicolons to adjust server privileges and enable client traffic routing.
Save and exit the file.
sudo chown -R root:root /etc/openvpnNetworking and firewall setup
/etc/sysctl.conf. Uncomment the line net.ipv4.ip_forward=1 by removing the leading #.
Save and exit the file, then apply the changes:
sudo sysctl -p
Save and exit the file.
*nat
:POSTROUTING ACCEPT [0:0]
-A POSTROUTING -s 10.8.0.0/8 -o <interface> -j MASQUERADE
COMMIT
Replace <interface> with your network interface name (use ifconfig to find it).
sudo ufw allow openvpn
sudo ufw allow 1194
Reload UFW to apply the changes:
sudo ufw reloadsudo systemctl restart openvpn
sudo systemctl enable openvpnThe OpenVPN server is now configured and running.
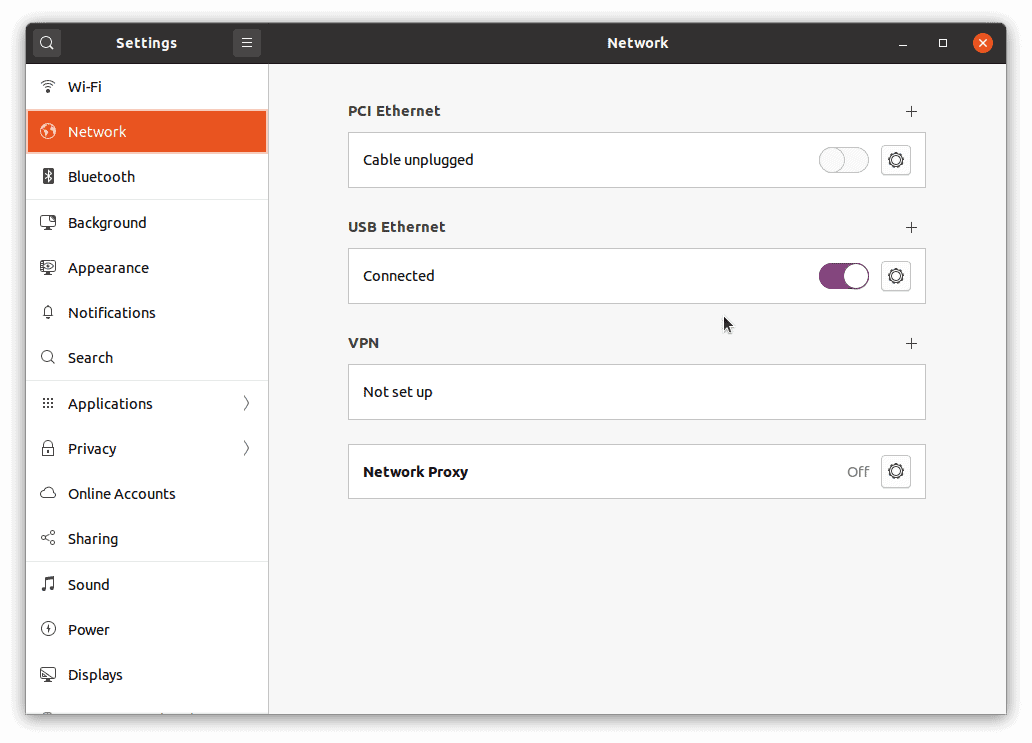
OpenVPN client configuration
To allow a client to connect, we’ll generate a key and certificate for the client on the server machine.
client1 with a unique identifier for your client):cd cert_authority
./easyrsa gen-req client1 nopassWhen prompted for a common name, you can use the default or enter a unique one.
scp pki/reqs/client1.req root@CA_MACHINE_IP:/rootcd cert_authority
./easyrsa import-req /root/client1.req client1
./easyrsa sign-req client client1Type yes when prompted and enter the CA key password.
scp pki/issued/client1.crt root@SERVER_IP:/root
rm /root/client1.reqmkdir ~/client-configs
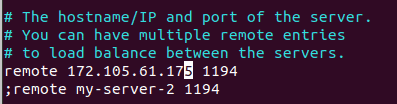
sudo mv ~/client1.crt ~/cert_authority/pki/private/client1.key ~/client-configscp /usr/share/doc/openvpn/examples/sample-config-files/client.conf ~/client-configsvim ~/client-configs/client.confUpdate the remote directive on line 42 with your server’s IP address or hostname.
Uncomment lines 61 and 62 to adjust privileges.

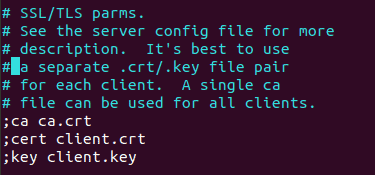
Comment out lines 88-90 and line 108 to embed certificates and keys directly in the configuration file.
At the end of the file, add these sections, inserting the actual contents of the corresponding files:
<ca>
# Paste the contents of ca.crt here
</ca>

<cert>
# Paste the contents of client1.crt here
</cert>

<key>
# Paste the contents of client1.key here
</key>

key-direction 1
<tls-auth>
# Paste the contents of tls_auth.key here
</tls-auth>
Save and exit the file, then rename it to have a .ovpn extension:
mv client.conf client1.ovpnscp ~/client-configs/client1.ovpn user@CLIENT_IP:/path/to/destination
sudo openvpn --config client1.ovpnAlternatively, import the configuration file using your system’s network manager.
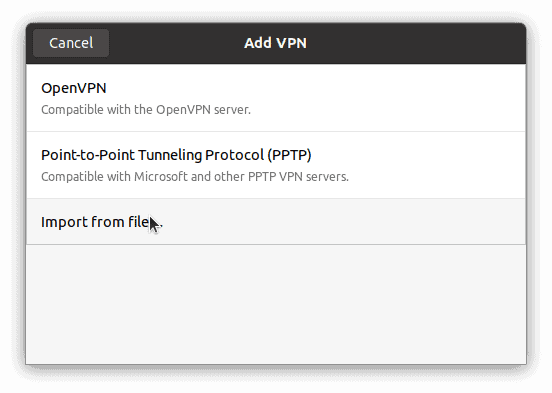
Click the ‘+’ button under ‘VPN’ and choose ‘Import from file…’. Select the client1.ovpn file.
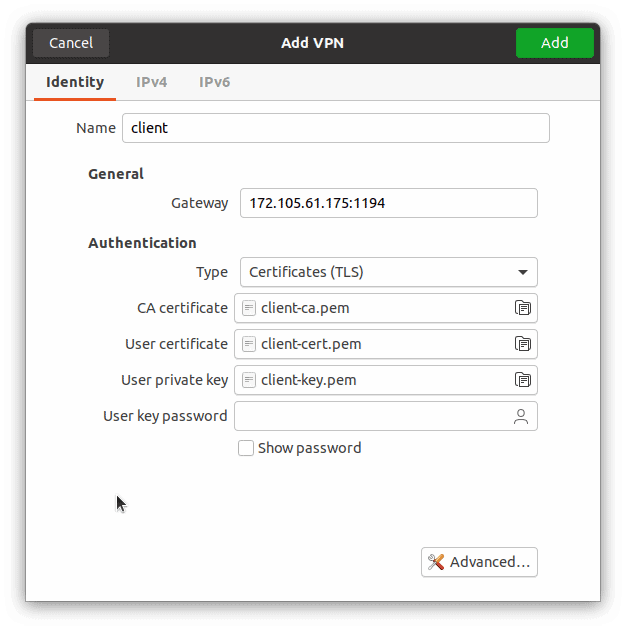
Click ‘Add’ to save the VPN connection.
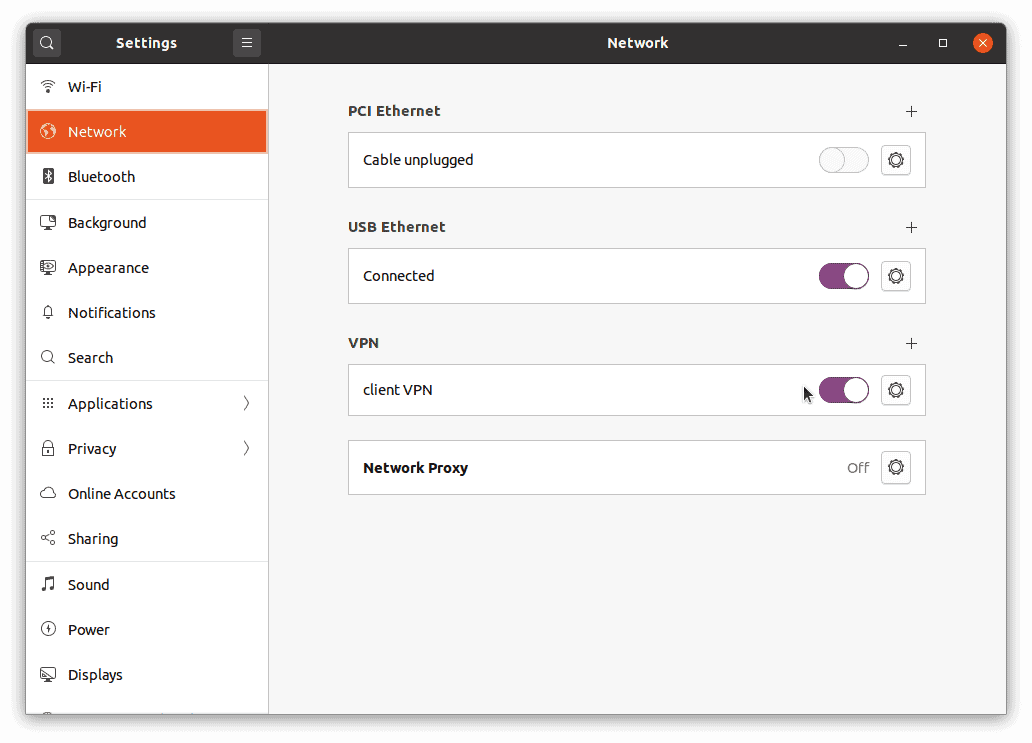
Toggle the VPN connection to ‘On’ to initiate the connection.
Once connected, verify that your traffic is routing through the VPN:
curl https://ipinfo.io/ipThe returned IP should match your server’s IP address.
By completing these steps, you’ve successfully set up an OpenVPN server on Ubuntu 20.04 and connected a client, ensuring secure access to your network over the internet.