
When a Windows 11 display starts flashing black, shimmering, or “spasming”, the cause is almost never mysterious. Nearly every case comes down to two things: a bad display driver or an app that doesn’t play nicely with the graphics stack.
The trick is to quickly work out which of those you’re dealing with, then apply the right fix instead of randomly changing settings.
First check: Is it the driver or an app?
Before changing anything else, use Task Manager as a reference point:
- Press
Ctrl + Alt + Deleteand choose Task Manager. If that menu is unusable, pressCtrl + Shift + Escinstead.
| What you see | Likely cause | Next section to use |
|---|---|---|
| Task Manager flickers or goes black along with the rest of the screen | Display driver problem | Fix the display driver |
| Task Manager stays stable, while the rest of the desktop flickers | Specific app or component misbehaving | Update/uninstall apps, or remove utilities |
Keep that observation in mind; it’s the main decision point for the rest of the troubleshooting.
Quick reset: Restart the graphics driver
Windows has a built-in keyboard shortcut to restart the graphics stack without rebooting:
- Press
Windows logo key + Ctrl + Shift + B.
The screen will briefly go black and you should hear a beep. If the flicker disappears and doesn’t return, you were likely dealing with a transient driver glitch.
If the problem comes back, move on to more permanent changes.
Fix screen flickering caused by the display driver
When Task Manager flickers along with everything else, the display driver is almost always involved. Updates, rollbacks, and clean reinstalls are the three main tools.
Option 1: Roll back a recent display driver update
Use this when the flicker started right after a Windows Update or driver update.
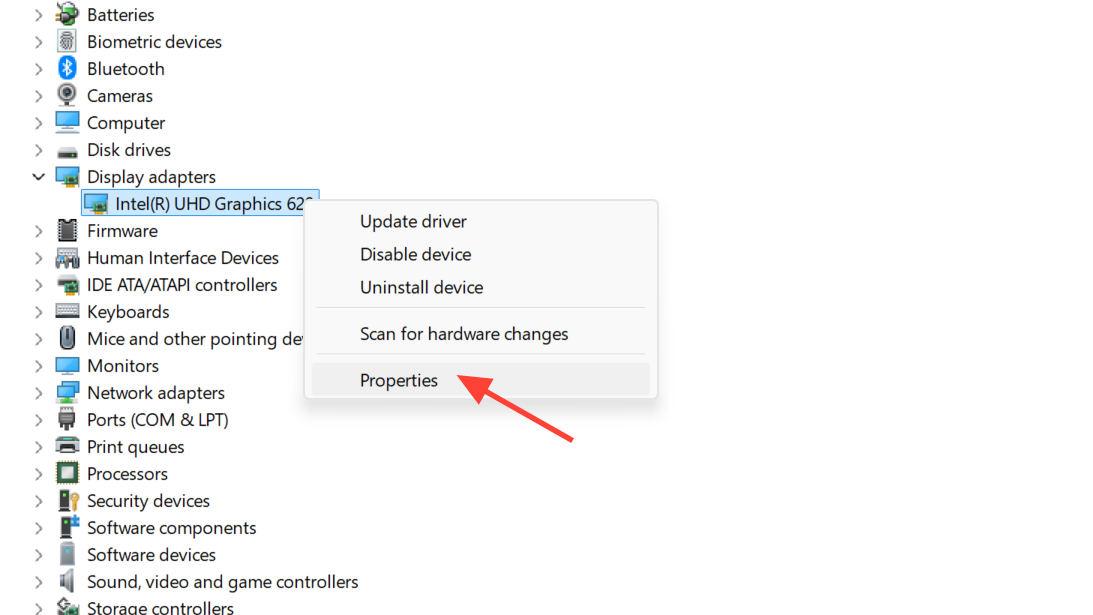
- Right-click the Start button and select Device Manager.
- Expand Display adapters.
- Right-click your display adapter (for example, Intel UHD Graphics, Intel Iris Xe, NVIDIA, AMD) and choose Properties.
- Open the Driver tab.
- Select Roll Back Driver, confirm with Yes, then restart.
If the Roll Back Driver button is greyed out, there is no previous driver stored, and you’ll need to update or reinstall instead.
Option 2: Update the display driver
If you’ve just installed Windows 11, reinstalled the OS, or are relying only on basic drivers, updating to a current vendor driver can remove flicker, black flashes, or color glitches.
The safest routes are:
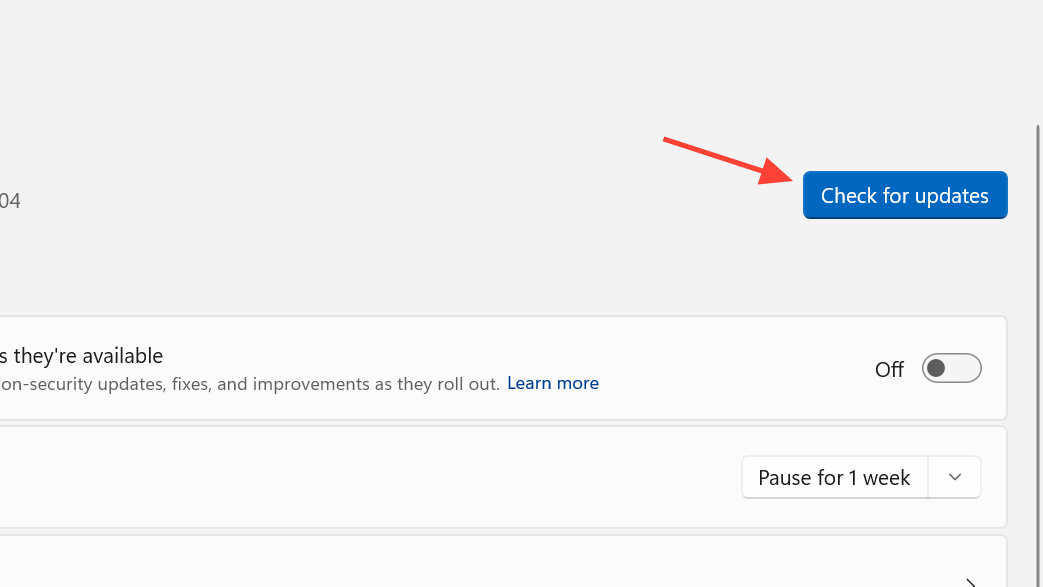
- Windows Update: In Settings > Windows Update, install all available updates, including optional display or hardware updates.
- PC maker support site: For laptops (Lenovo, HP, Dell, etc.) and branded desktops, get the graphics driver package built for your exact model from the OEM support page.
- GPU vendor: For discrete NVIDIA or AMD cards, or Intel integrated graphics, you can also use the vendor’s driver tool, such as Intel’s Driver & Support Assistant at intel.com.
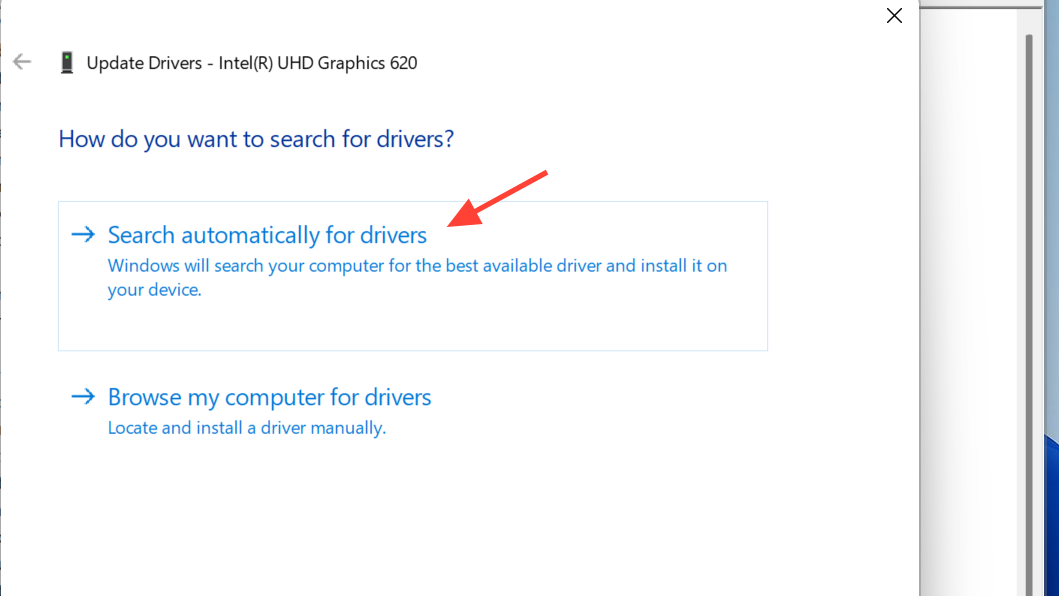
You can also trigger an update check inside Device Manager:
- Open Device Manager and expand Display adapters.
- Right-click your adapter and select Update driver.
- Choose Search automatically for drivers and follow the prompts.
After updating, restart and watch for any flicker over the next few minutes of normal use.
Option 3: Cleanly reinstall the display driver
If different driver versions all appear unstable, a clean reinstall removes corrupted driver files and forces Windows to rebuild the graphics stack.
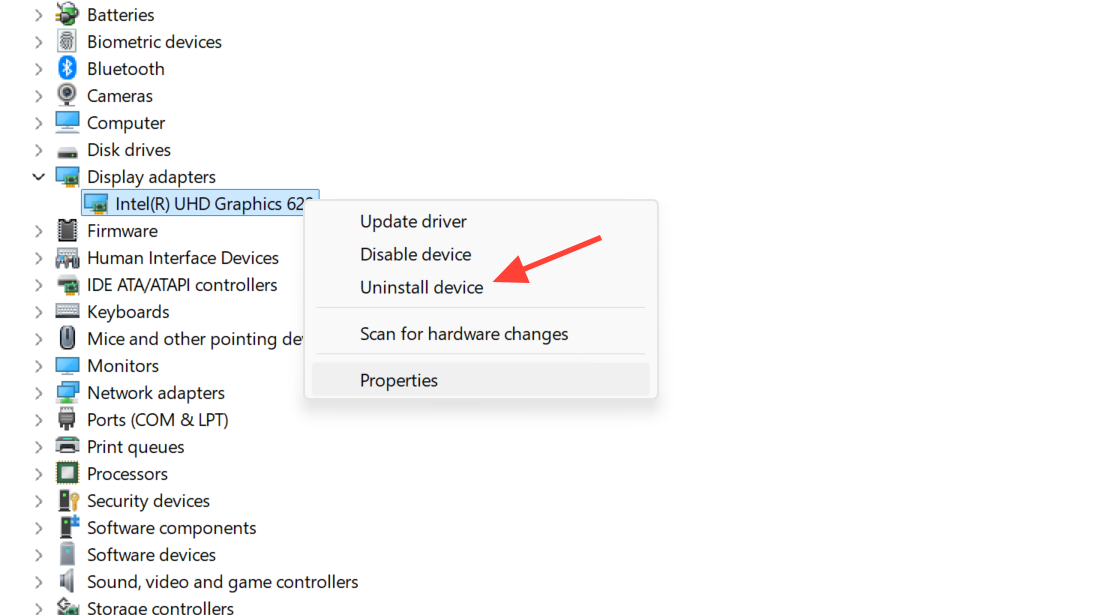
- Open Device Manager and expand Display adapters.
- Right-click the adapter and select Uninstall device.
- Check the option to remove or delete the driver software for this device (wording varies) and confirm.
- Restart the PC. Windows will attempt to reinstall a basic display driver automatically.
- Once you’re back at the desktop, install the latest recommended driver from your PC maker or GPU vendor.
On some systems (especially when removing stubborn OEM drivers), this process is more reliable when done in Safe Mode. If normal boot is too unstable to work with, start Windows in Safe Mode and repeat the uninstall steps there.
When the flicker appears only in games or 3D apps
Some Windows 11 systems, especially laptops with Intel Iris Xe graphics, handle older DirectX 9 games poorly. A common symptom is severe flashing or “strobe” effects as soon as a game launches, even though modern titles are fine.
There are several angles to treat that kind of problem.
| Scenario | Typical cause | What helps |
|---|---|---|
| Only one or two legacy games flicker; everything else is stable | Game engine not fully compatible with modern DirectX 12 drivers | Compatibility mode, disabling fullscreen optimizations, or using a translation layer (like dgVoodoo2 or DXVK) |
| Flicker started after a GPU driver update but only in 3D apps | Driver regression in specific DirectX versions or optimizations | Rolling back the driver or installing a slightly older vendor driver |
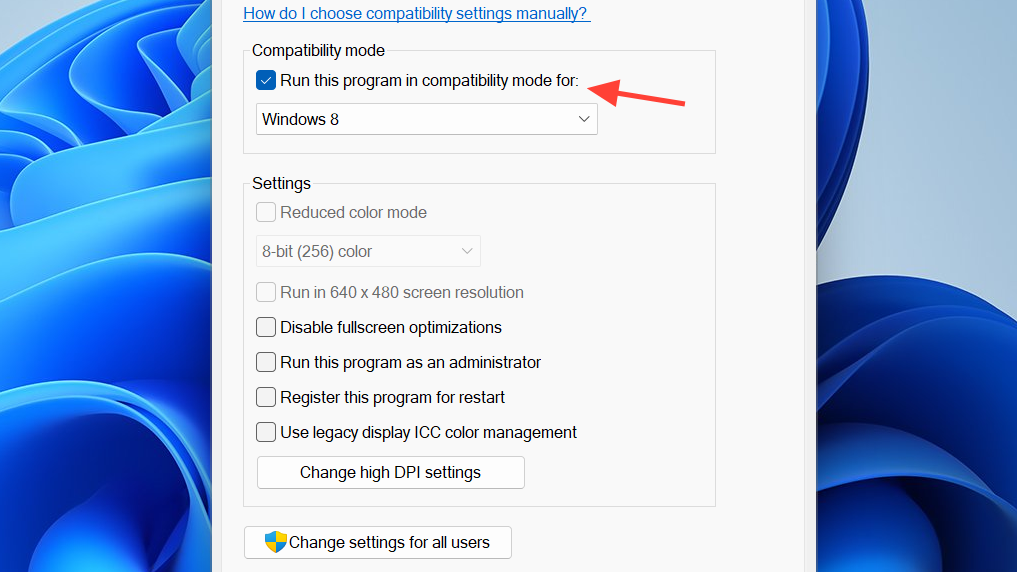
Toggle compatibility settings for problem games
Windows compatibility settings sometimes smooth out the interaction between older games and newer display drivers:
- Right-click the game executable or shortcut and select Properties.
- Open the Compatibility tab.
- Enable Run this program in compatibility mode for and try an older version, such as Windows 7 or Windows XP (Service Pack 3).
- Also, enable Disable fullscreen optimizations.
- Apply the changes and relaunch the game.
If that still doesn’t help, advanced users sometimes drop DirectX translation DLLs (for example, dgVoodoo2 or DXVK’s d3d9.dll) into the game folder to route DirectX 9 calls through newer APIs. This tends to be game-specific and is best approached only if you’re comfortable restoring files and troubleshooting crashes.
Fix screen flickering caused by apps or utilities
If Task Manager remains rock-solid while the rest of the screen flashes, you’re dealing with an app—often a shell tweak, display “optimizer”, or overlay utility—rather than the core graphics stack.
Update or remove incompatible apps
Start with the apps that affect the desktop or graphics directly:
- Taskbar and Start menu modifiers.
- Display calibration or “optimizer” tools (for example, OEM display optimizer utilities).
- Browser extensions or video acceleration helpers.
- Third‑party screen recorders, overlays, or monitoring widgets.
First, update them:
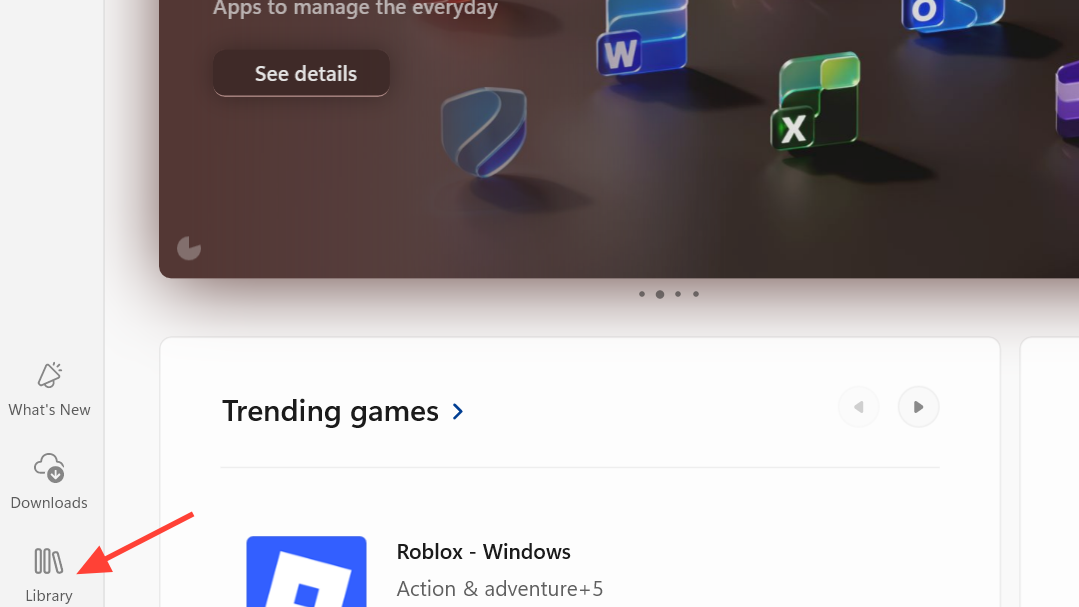
- For Microsoft Store apps, open Microsoft Store, go to Library, and install all updates.
- For traditional desktop apps, use each vendor’s built‑in updater or download the latest version from the official site.
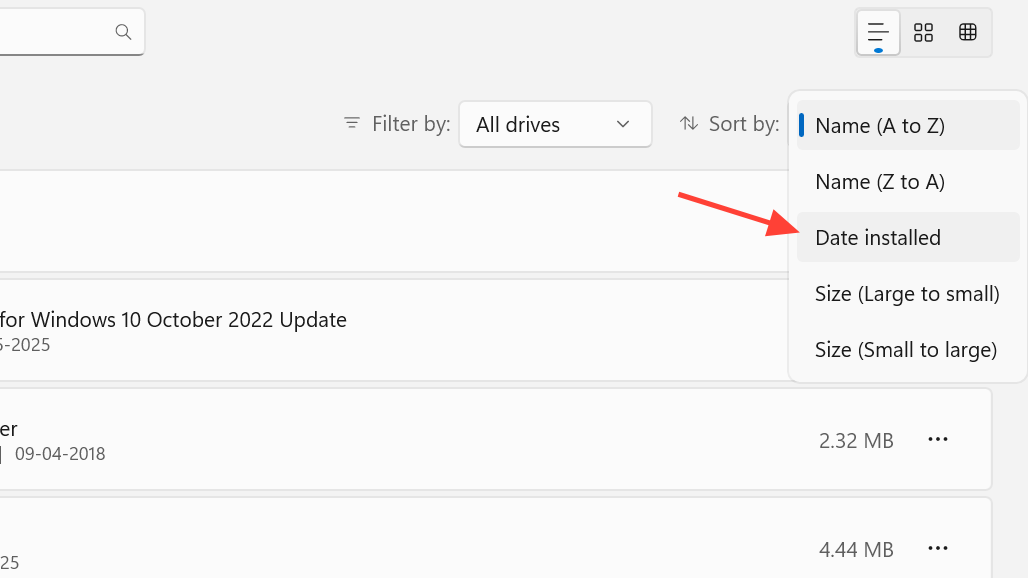
If flickering continues, start removing candidates:
- Open Settings > Apps > Installed apps (or Apps & features on some builds).
- Sort by Install date if possible.
- Uninstall anything added around the time the flickering began, especially system‑level utilities.
- Restart and test after each removal.
On some Lenovo laptops, for example, removing the OEM “display optimizer” and sticking to a specific Intel driver build stopped recurring black flashes. On other systems, uninstalling custom shell patches resolved desktop flicker immediately.
Adjust key display settings that often trigger flicker
Windows 11’s display pipeline is more complex than older releases: refresh rate, animations, wallpaper behavior, and hardware acceleration all interact with the graphics driver. Misconfigurations there can exaggerate or even trigger flickering.
Check cables and external monitors
If you’re using an external display:
- Power off the PC and monitor.
- Unplug and firmly reseat the cable (HDMI, DisplayPort, USB‑C, etc.).
- Try a different cable if there’s any doubt—it’s a common failure point.
For laptops flickering only on the built‑in panel, but not on an external monitor, the issue can still be driver‑related, but panel cabling or hardware starts to become more likely and may need vendor diagnostics.
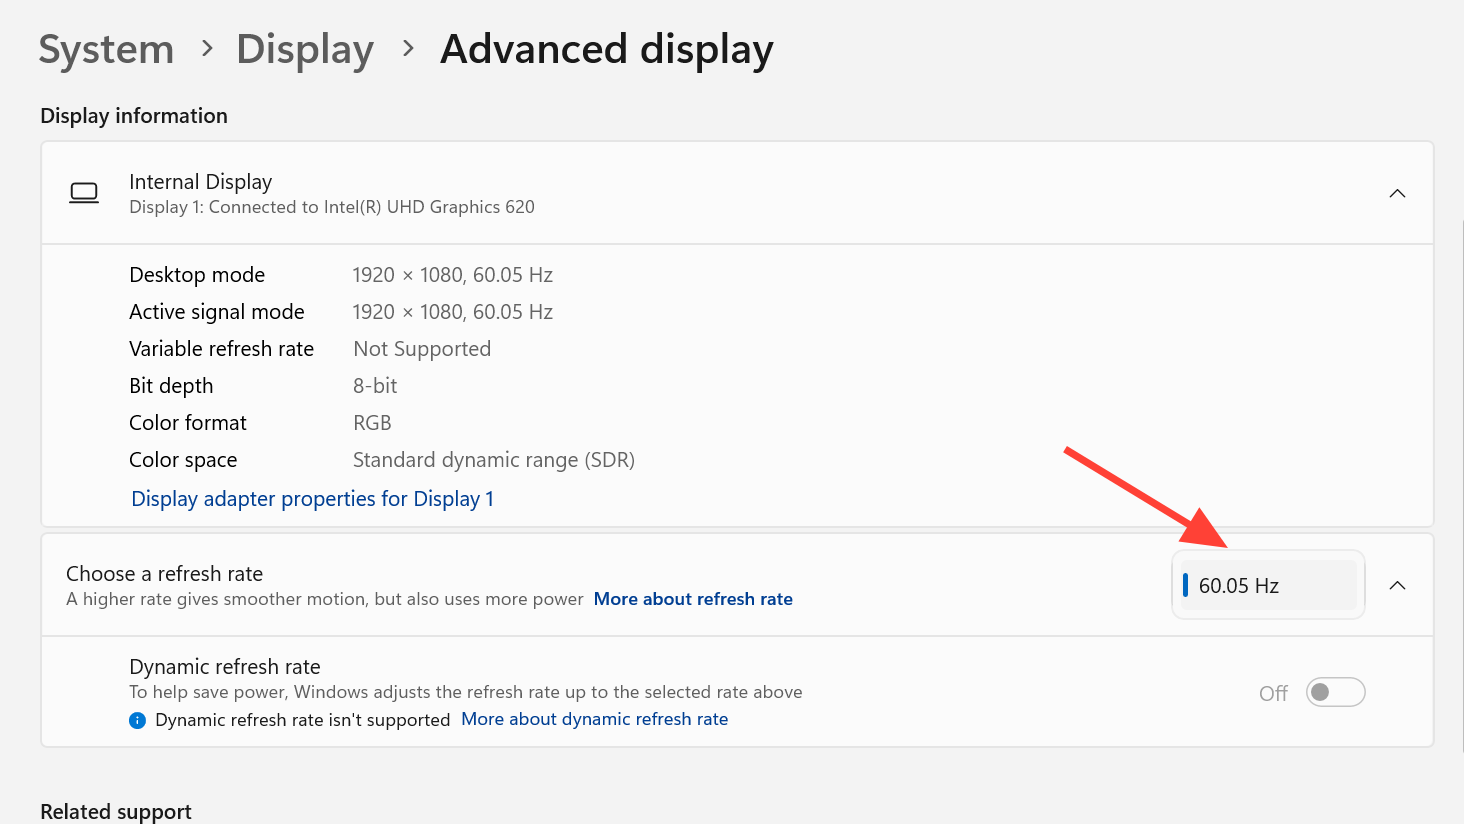
Set a stable refresh rate
Odd or unsupported refresh rates can cause intermittent blanking or shimmer, particularly after a system reinstall.
- Right-click the desktop and select Display settings.
- Scroll down and open Advanced display.
- Under Choose a refresh rate, select the recommended value.
If you have options like 48Hz and 60Hz, stick to the one marked as recommended. After changing the value, wait a few minutes to see if the behavior improves.
Change background and accent color behavior
Animated or auto‑changing backgrounds and accent colors have been linked to visible flicker on some configurations.
- Open Settings with
Windows + I. - Go to Personalization > Background and choose either Picture or Solid color. Avoid Slideshow while troubleshooting.
- Back under Personalization, open Colors.
- Set Accent color to Manual instead of automatically picking colors from your background.
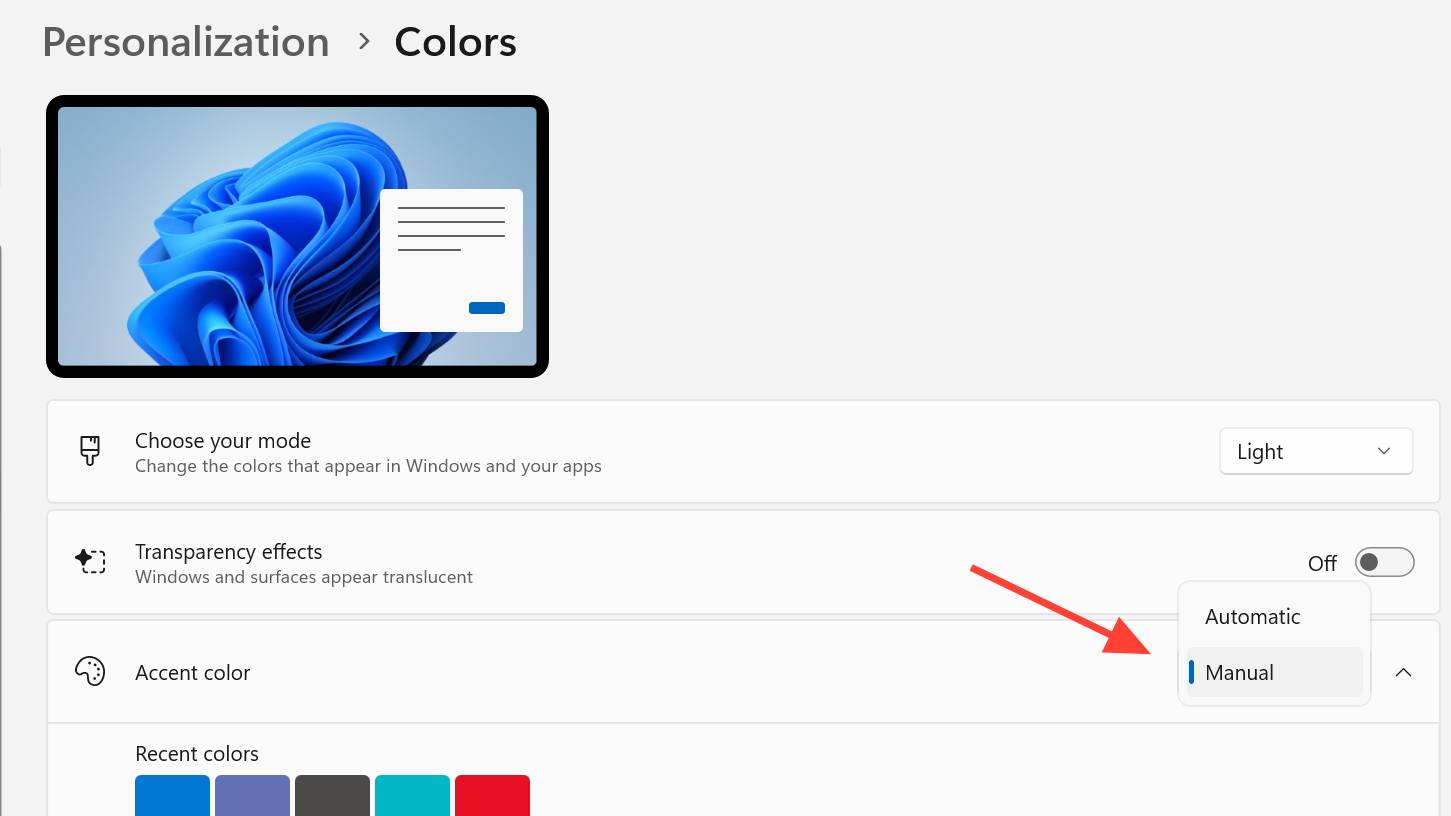
These changes reduce how often Windows repaints large parts of the desktop, which can smooth out subtle flicker or pulsing on sensitive panels.
Turn off animation effects
On some systems, window and UI animations trigger visible flashing, particularly after an OS upgrade.
- Press
Windows + Ito open Settings. - Go to Accessibility > Visual effects.
- Toggle Animation effects to Off.
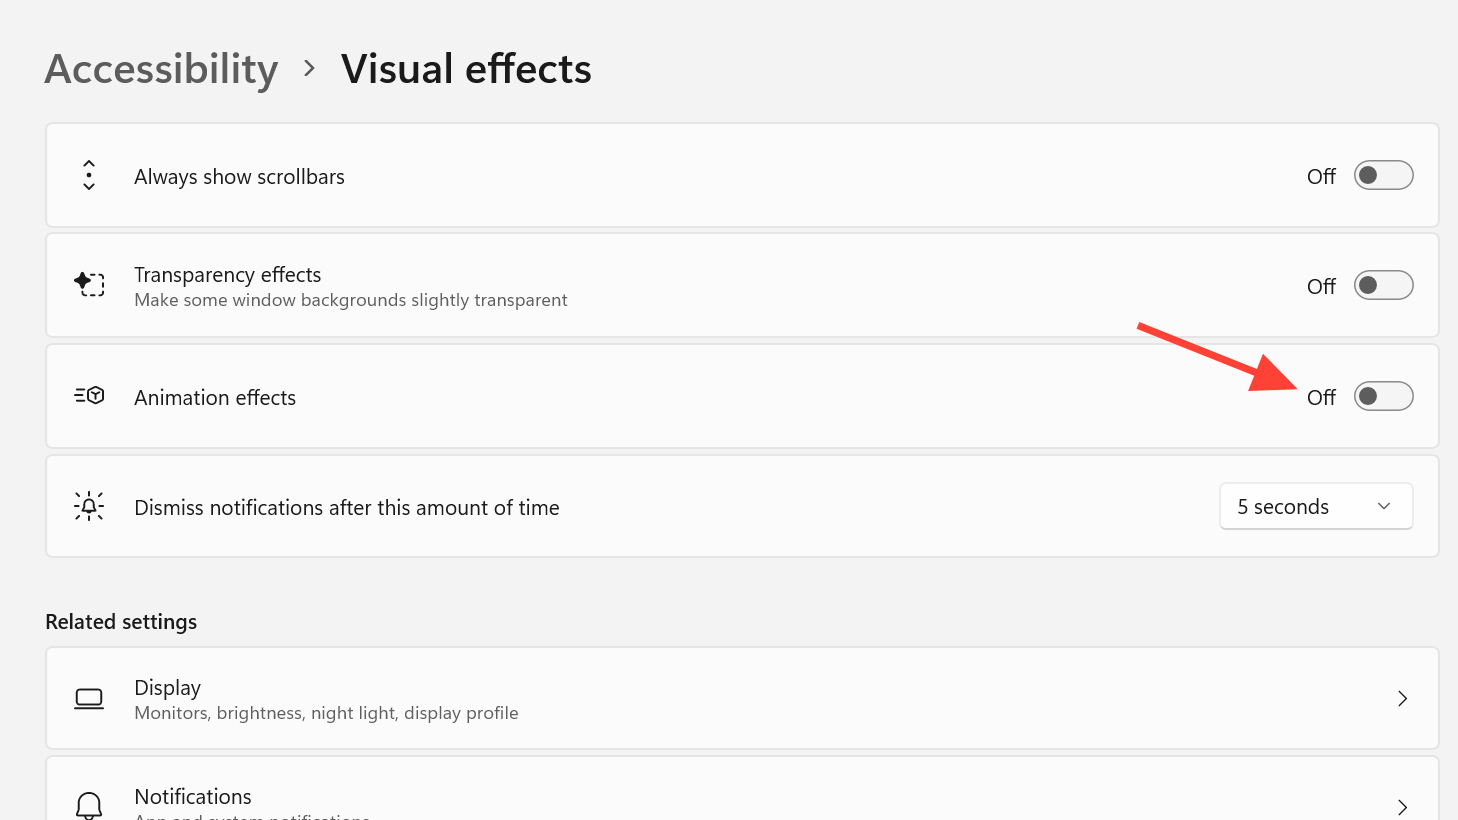
The desktop will feel snappier and more static. If the flicker eases or disappears, you can slowly re‑enable effects later to find a comfortable balance.
Disable hardware acceleration (system and browser)
Hardware acceleration hands more rendering work to the GPU for speed, but it also exercises edge cases in graphics drivers. If the flicker shows up mostly in browsers or specific apps, turning acceleration off can help.
System‑wide hardware acceleration toggle
Some Windows components honor a registry‑level hardware acceleration switch:
- Press
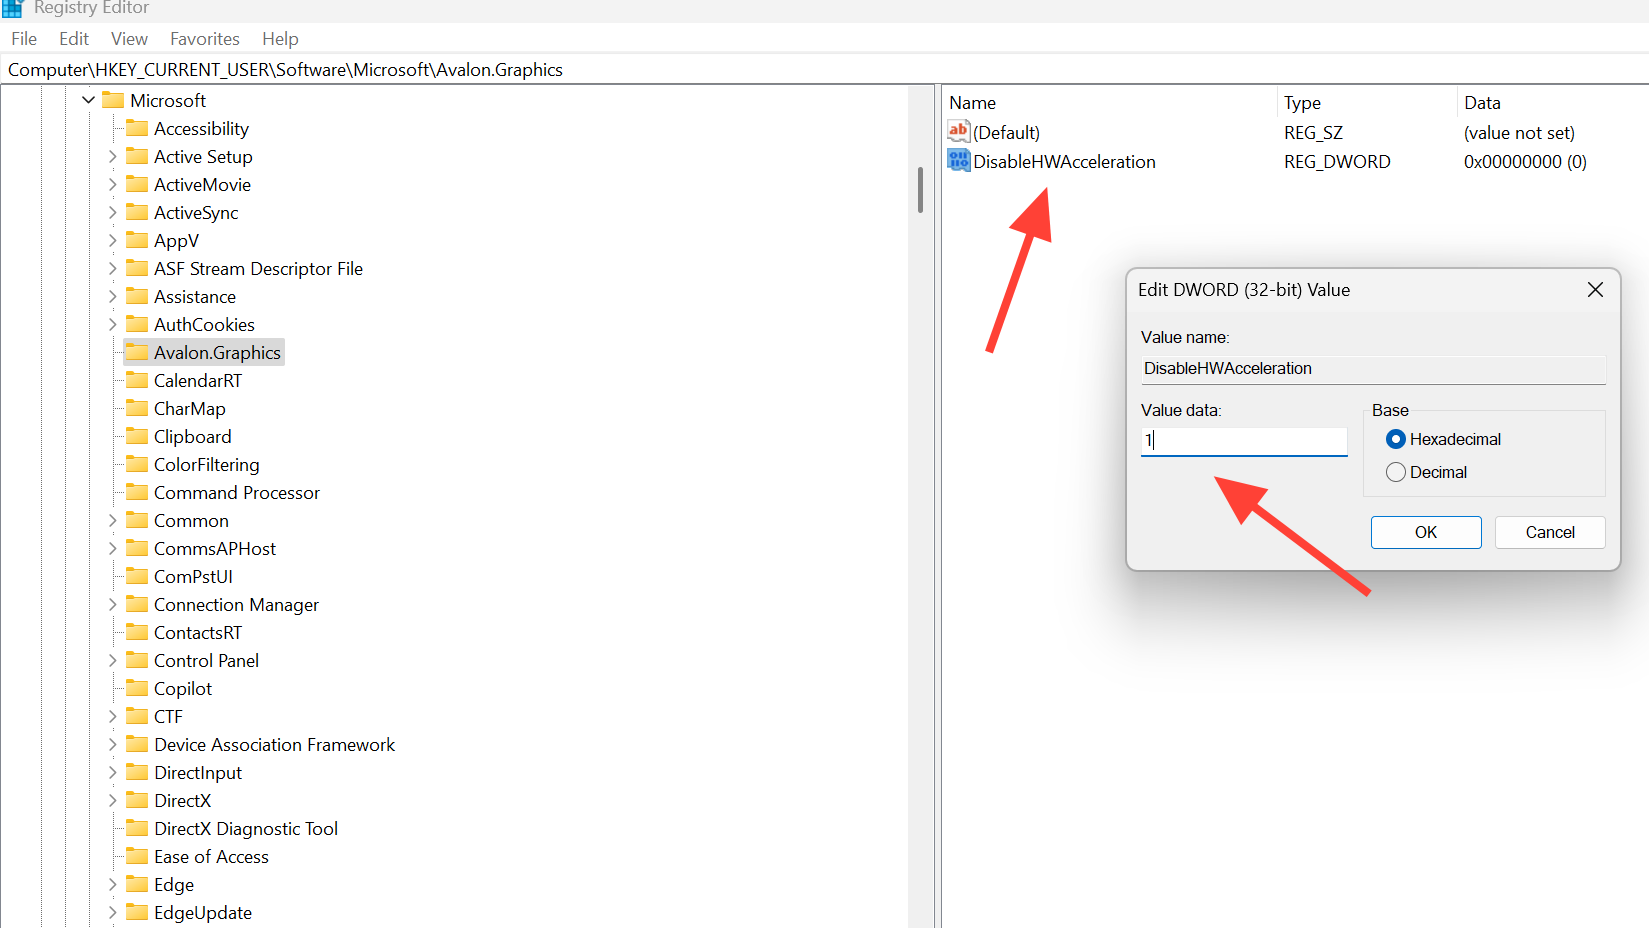
Windows + R, typeregedit, and press Enter. - Navigate to
HKEY_CURRENT_USER\SOFTWARE\Microsoft\Avalon.Graphics. - If a value named
DisableHWAccelerationexists, double‑click it and set Value data to1. If it doesn’t exist, create a new DWORD (32‑bit) value with that name and set it to1. - Restart Windows.
Changing the registry always deserves caution; if you’re not comfortable there, focus instead on app‑level acceleration toggles.
Disable hardware acceleration in your browser
Chrome‑style rendering glitches—flicker only when loading tabs, scrolling, or opening specific sites—often go away once the browser stops using GPU acceleration:
- In Google Chrome: open Settings, search for “hardware”, and turn off Use hardware acceleration when available, then restart the browser.
- Most Chromium‑based browsers expose a similar toggle in their system or performance settings.
If the flicker is truly limited to the browser, this change is often enough.
Repair system files when nothing else helps
Corrupted system files can cause unstable behavior even when drivers and apps look fine. Windows includes two tools that can repair its own components: DISM and System File Checker.
- Press
Windows + R, typecmd, then pressCtrl + Shift + Enterto open Command Prompt as administrator. - When both finish, restart and see whether overall stability improves.
After it completes, run System File Checker:
sfc /scannowRun the Deployment Image Servicing and Management command:
DISM.exe /Online /Cleanup-image /Restorehealth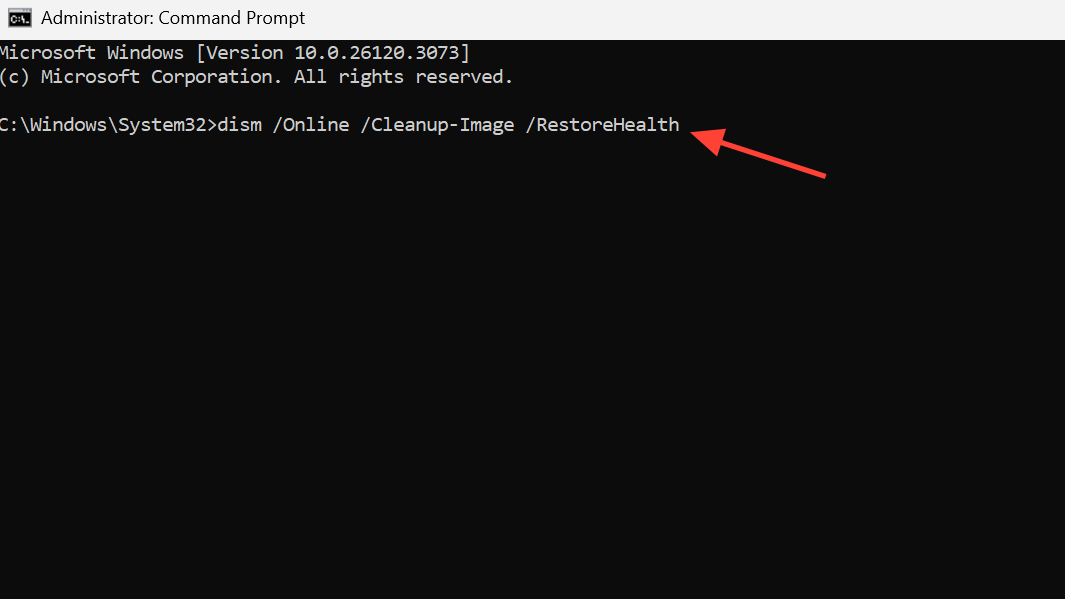
When it looks like software but might be hardware
There are a few patterns that suggest the problem may be physical:
| Symptom | Software vs hardware hint | Typical next step |
|---|---|---|
| Flicker only in Windows 11, not in firmware/BIOS screens or during boot logo | More likely software/driver | Keep focusing on drivers, apps, and settings |
| Flicker even in BIOS or vendor diagnostics, regardless of OS | More likely hardware (panel, cable, GPU) | Run OEM hardware diagnostics, contact support |
| External monitor is perfectly stable while built‑in panel flickers badly | Could be panel or cable; driver still involved but less likely sole cause | Use manufacturer’s display tests; consider service |
Most OEMs ship built‑in diagnostics you can start with a function key at boot (often F2, F10, or a dedicated diagnostics key). If those tests show flicker, it’s time to involve the hardware vendor rather than continuing to chase drivers.
Working through the driver, app, and display‑settings layers in this order resolves the majority of Windows 11 flicker scenarios: start by checking Task Manager behavior, reset and correct the graphics driver, strip out conflicting utilities, and only then move on to deeper configuration or hardware checks. Once the display is stable again, you can reintroduce effects and tools gradually until you reach a setup that looks good and stays solid.