
Snipping Tool activating unexpectedly on Windows 11 can disrupt workflows, especially if you rely on quick, uninterrupted screenshot capture or prefer using third-party tools. The Print Screen (PrtSc) key now often triggers Snipping Tool by default, changing the way screenshots are captured and saved. This behavior can interfere with established routines and even cause screenshots to be stored in locations like OneDrive or hidden system folders. Below are practical solutions to regain control over screenshot functionality and stop Snipping Tool from taking screenshots automatically.
Disable Snipping Tool Shortcut in Windows Settings
Step 1: Open the Windows Settings app by pressing Win + I on your keyboard. This shortcut launches the main Settings menu.
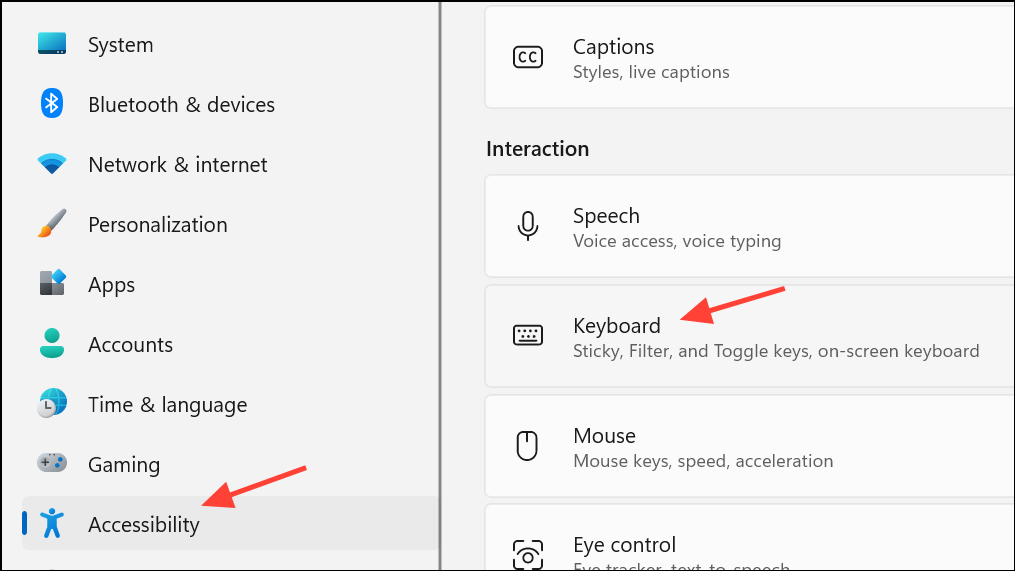
Step 2: Navigate to the Accessibility section, then select Keyboard from the sidebar. In some Windows 11 builds, this may appear under Ease of Access or simply as Keyboard within Settings.
Step 3: Find the option labeled Use the Print Screen key to open screen capture or similar wording. Toggle this setting to the Off position. This action restores the Print Screen key’s original behavior, allowing it to copy the entire screen to the clipboard instead of launching Snipping Tool.
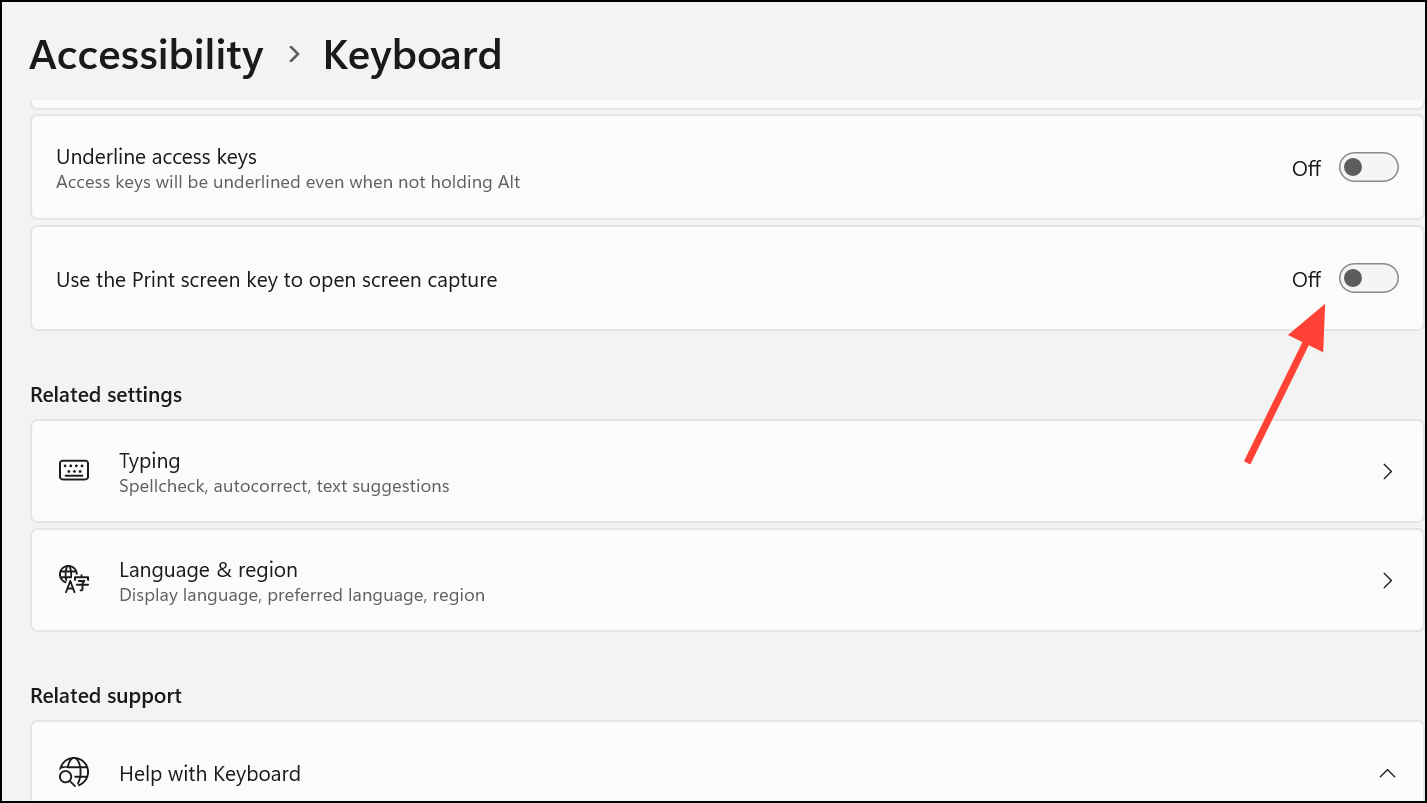
Disabling this option prevents Snipping Tool from intercepting the Print Screen key, which is especially useful if you want to use alternative screenshot utilities like ShareX, Greenshot, or Lightshot.
Turn Off OneDrive Screenshot Auto-Save
OneDrive can automatically save screenshots captured with the Print Screen key, which sometimes leads to confusion if screenshots are appearing in your OneDrive folder without your intent.
Step 1: Locate the OneDrive icon in your system tray (bottom-right corner of the taskbar). Right-click the icon to open its context menu.
Step 2: Select Settings from the menu, then go to the Backup tab.
Step 3: Find the option Save screenshots I capture to OneDrive and uncheck it. This stops OneDrive from automatically storing screenshots, ensuring screenshots are only saved locally or handled by your preferred tool.
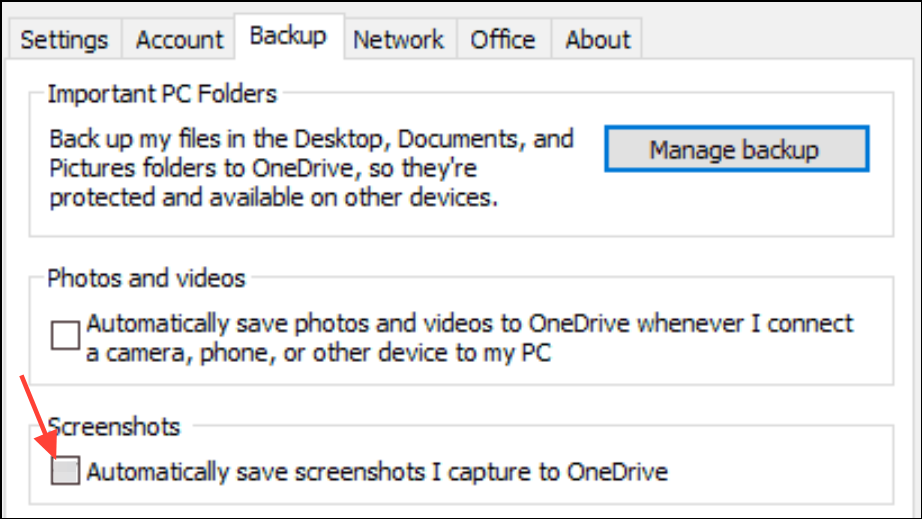
This step is essential if you notice screenshots appearing in your OneDrive folder even after changing Snipping Tool settings.
Modify Registry Settings to Disable Snipping Tool Shortcut
For users who need a more granular or automated approach—such as deploying settings across multiple devices—you can use the Windows Registry to control the Print Screen key’s behavior.
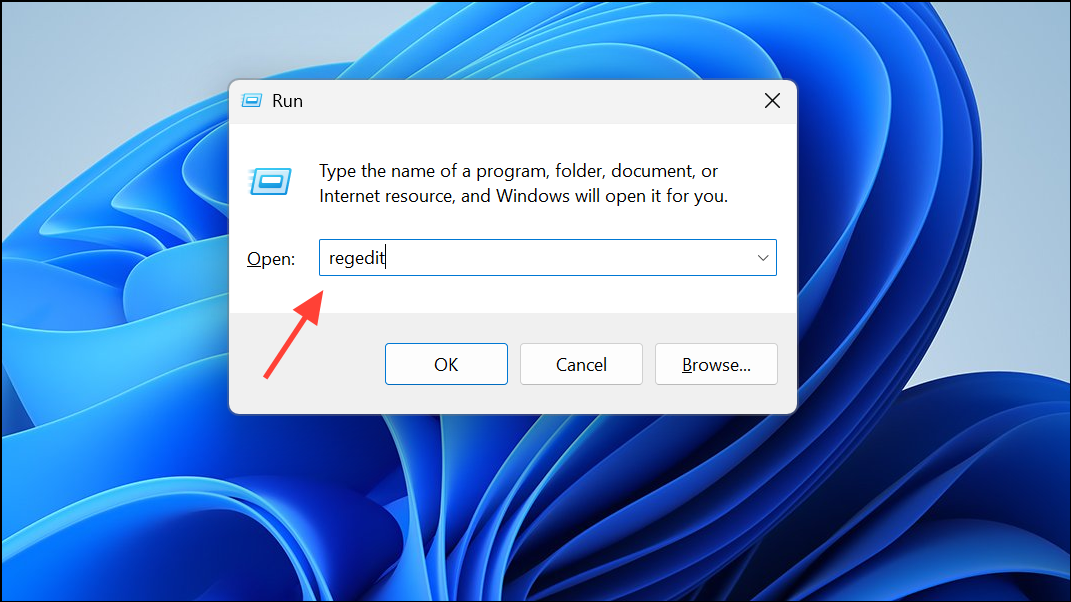
Step 1: Press Win + R to open the Run dialog, type regedit, and press Enter to launch the Registry Editor.
Step 2: Navigate to the following key:
HKEY_CURRENT_USER\Control Panel\Keyboard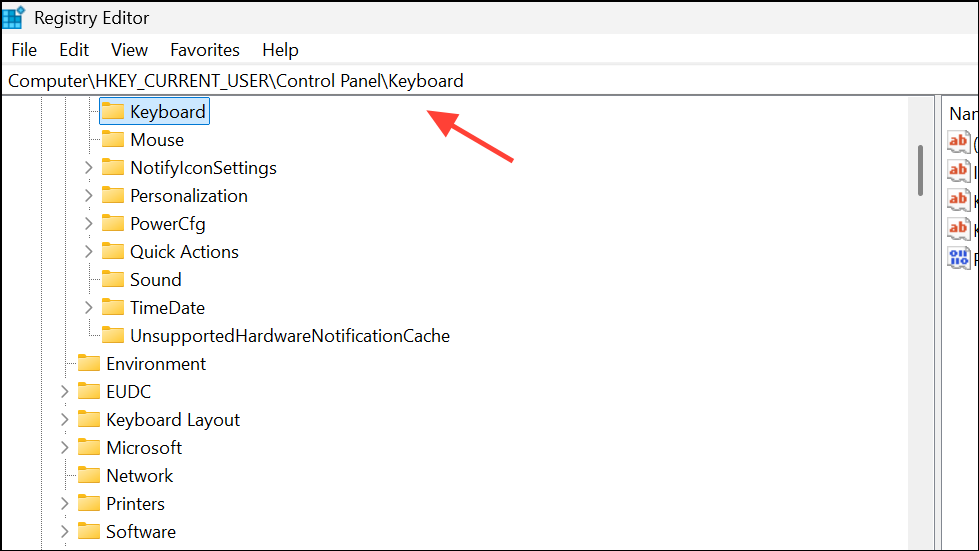
Step 3: Look for a value named PrintScreenKeyForSnippingEnabled. If it exists, double-click and set its value to 0. If it does not exist, right-click in the right pane, select New > DWORD (32-bit) Value, name it PrintScreenKeyForSnippingEnabled, and set its value to 0.
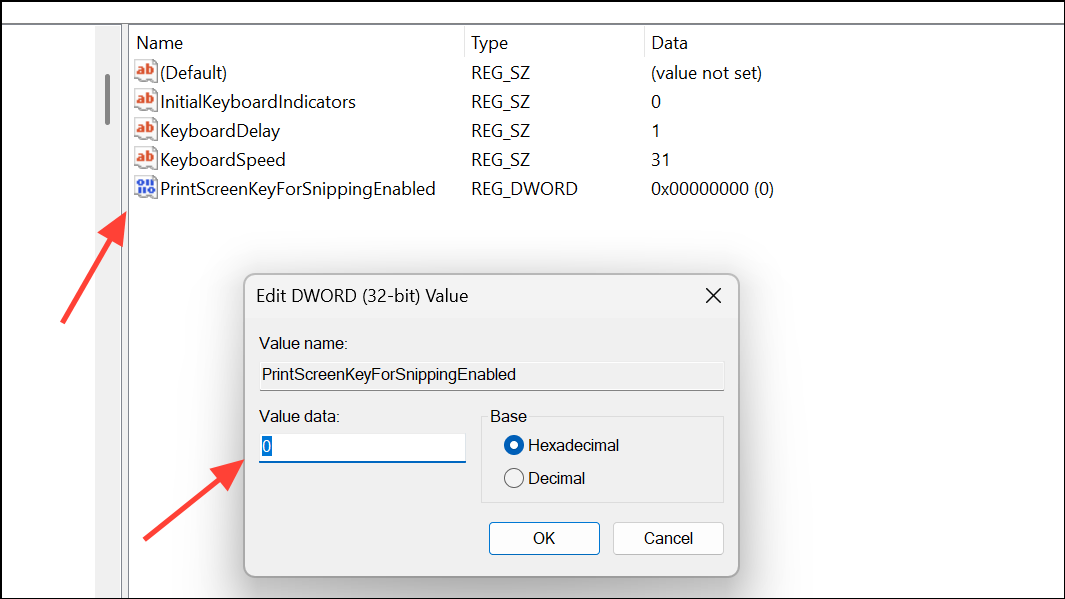
Step 4: Restart your computer for the changes to take effect. This registry change disables the Snipping Tool shortcut and restores traditional Print Screen functionality.
Check for Third-Party Software or Keyboard Utilities
Some keyboard manufacturers, such as Lenovo or Logitech, include software that can override default Windows key mappings. For example, Lenovo devices may remap the Print Screen key to Win+Shift+S, which always opens Snipping Tool. Similarly, Logitech’s Logi Options+ software can hijack the Print Screen key’s behavior.
- Review and adjust settings in your device’s utility software. For Lenovo, check the Lenovo Vantage app; for Logitech, open Logi Options+ and reassign the Print Screen key as needed.
- If the software does not allow disabling the shortcut, consider remapping the key using a tool like AutoHotKey. For example, you could remap
Win+Shift+Sback to the standard Print Screen function.
These steps are crucial if changing Windows settings does not resolve the issue, as hardware utilities can override system-level shortcuts.
Address Snipping Tool’s Temporary File Saving
Even with “Automatically save screenshots” turned off in Snipping Tool, the app may still store temporary copies in the user’s AppData folder. This cannot be fully disabled, but these files are typically purged after editing or closing Snipping Tool. If privacy is a concern, you can manually clear the folder at:
C:\Users\[username]\AppData\Local\Packages\Microsoft.ScreenSketch_8wekyb3d8bbwe\TempState\SnipsTo avoid lingering temporary files, copy the snip to another application (such as Paint) and close Snipping Tool promptly. If you need to avoid any file creation, consider using alternative screenshot utilities that do not generate temporary files in this way.
Disabling Snipping Tool’s automatic screenshot behavior on Windows 11 restores the workflow you’re used to and lets you use your preferred screenshot tool. If problems persist, double-check both Windows settings and any device-specific software that might override shortcut keys.