
When you think of crossplatform note-taking apps, Obsidian is right there at the top among the best options with Google Keep, OneNote, Notion, and others. It offers a lot of powerful features, like customization options, markdown, and backlinks while still being easy to use.
However, where it falls behind other options is its sync feature as you cannot sync your notes across different devices for free. If you want to sync your notes using the syncing service of the platform, you will have to pay for the feature. Thankfully, if you don't want to do that, you can rely on other services to sync your notes that are completely free to use. One of the best ones is the Remotely Save plugin, which you can use by following this guide.
Step 1: Installing and enabling the Remotely Save plugin
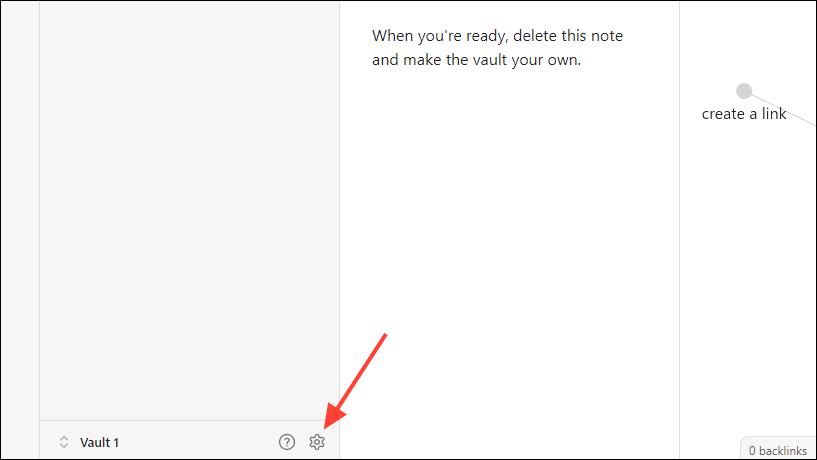
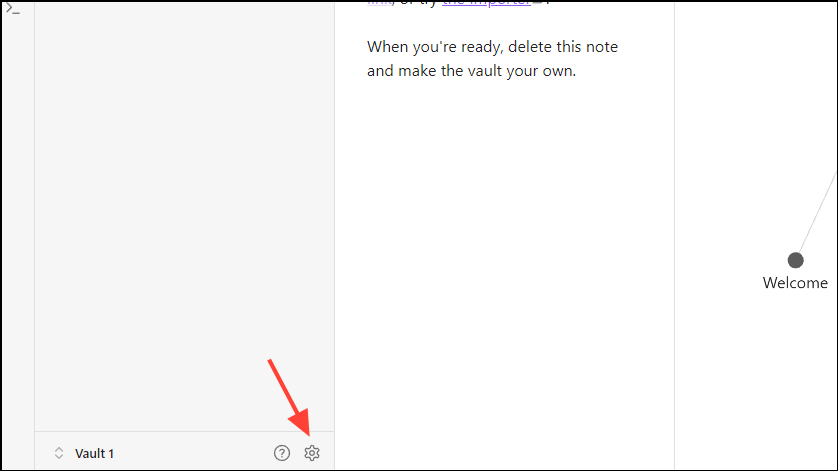
- To use the Remotely Save plugin, you will first need to add the plugin from the Obsidian Vault. Launch Obsidian and click the gear icon at the bottom.
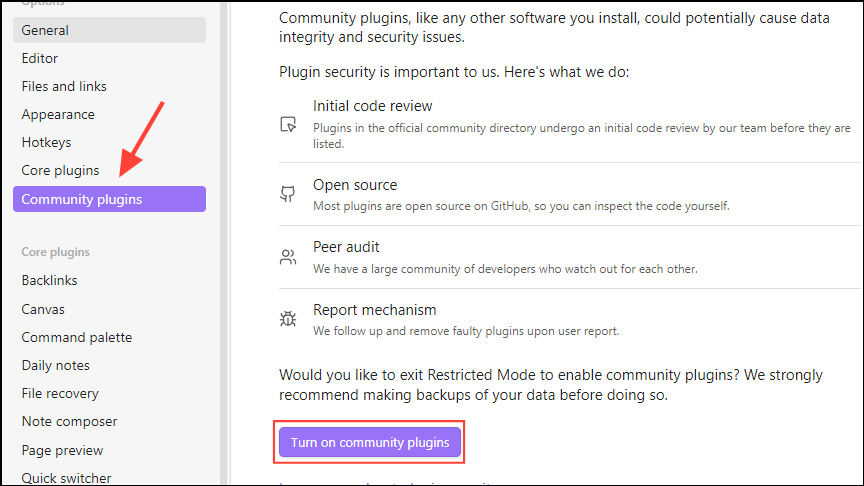
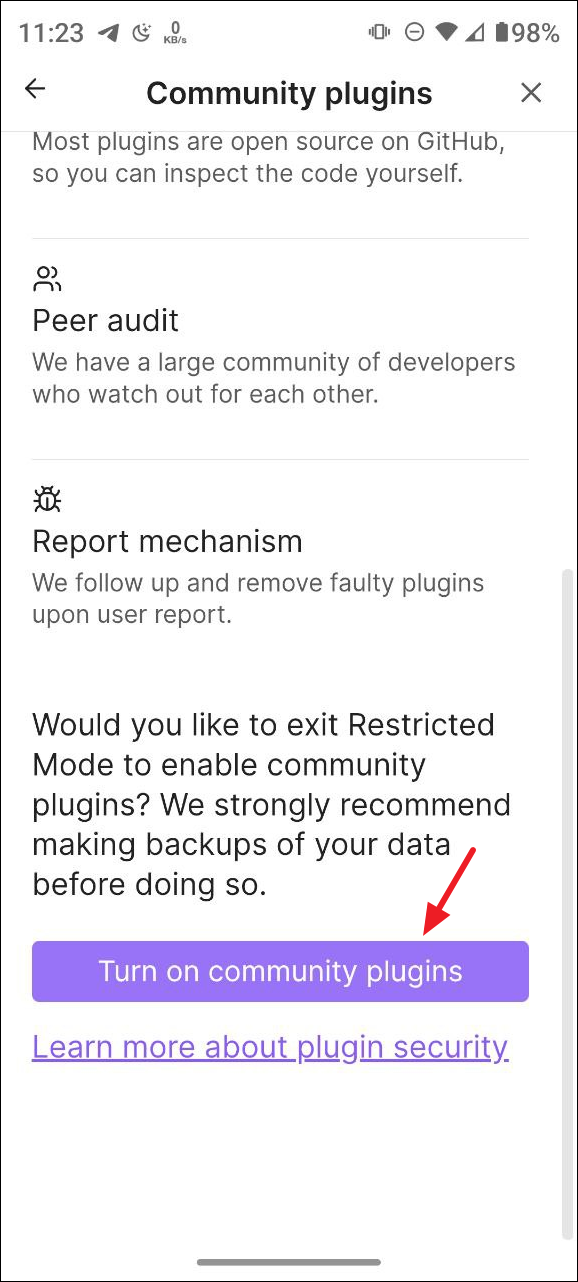
- Click on 'Community plugins' on the left before clicking on the 'Turn on community plugins' button. You can skip this step if you've already enabled it.
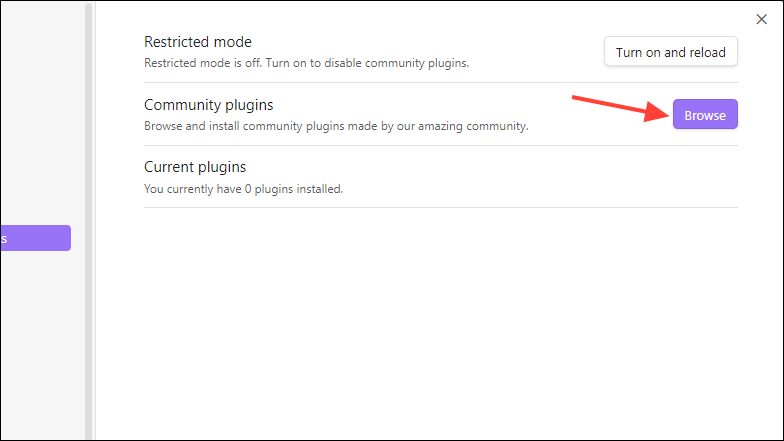
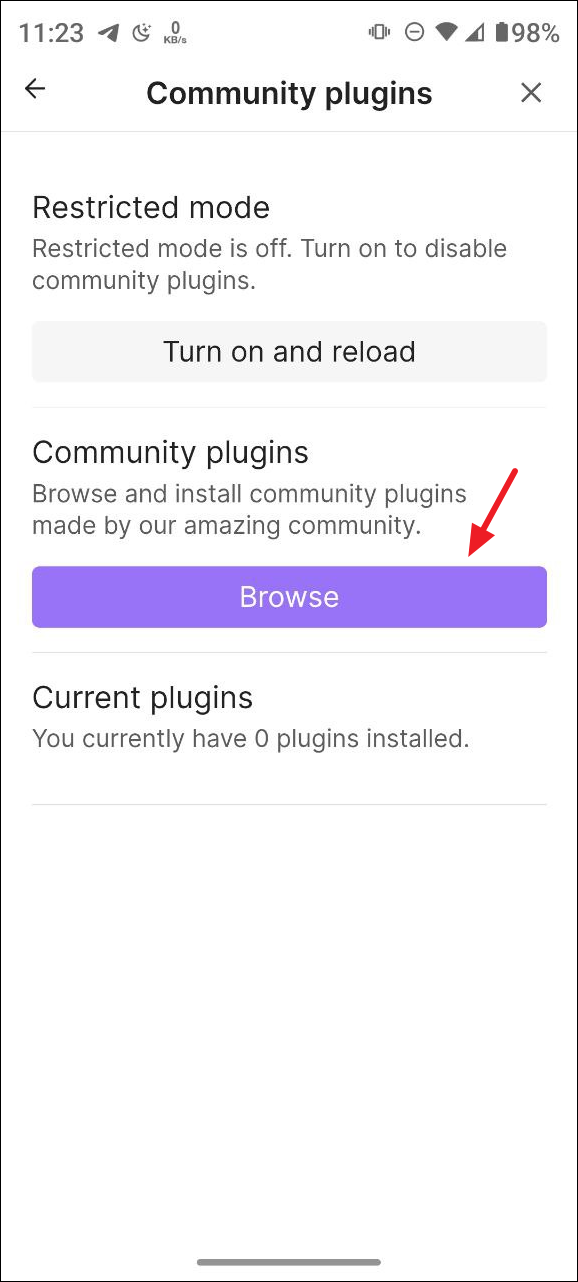
- Then click on the 'Browse' button on the right.
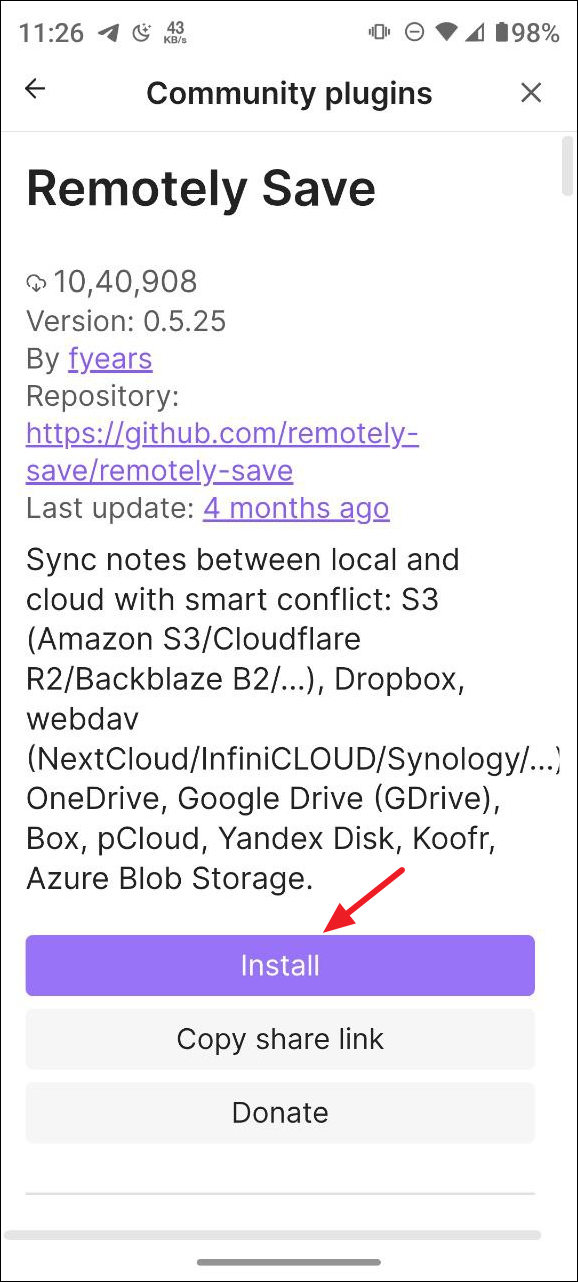
- Type
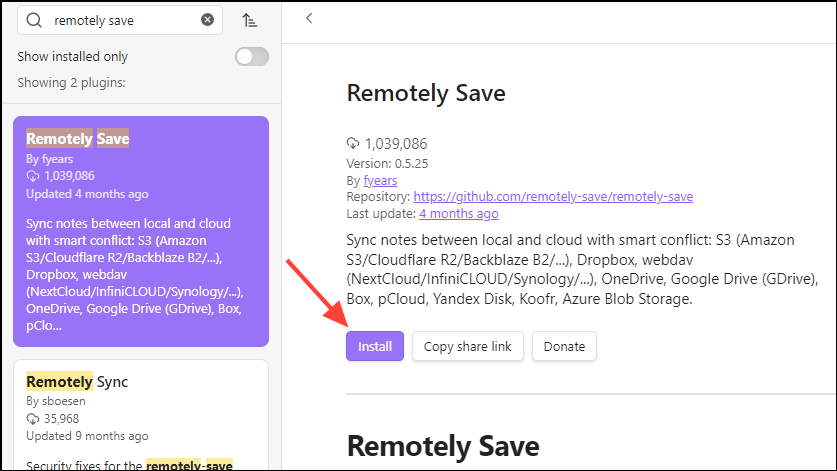
remotely savein the search bar and the plugin will appear.
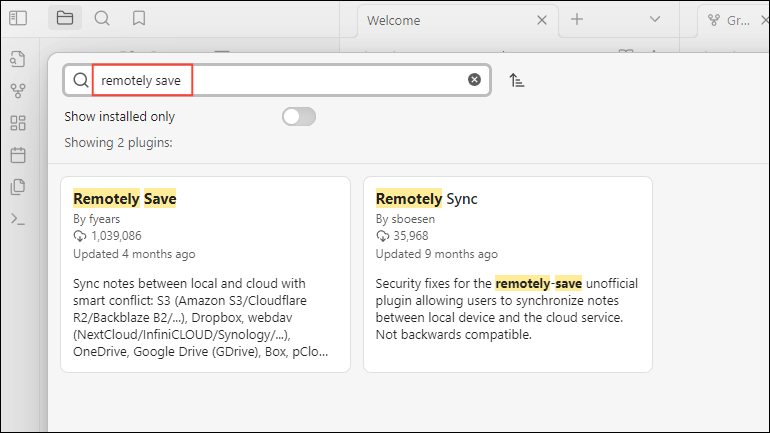
- Select the Remotely Save plugin when it appears in the search results and then click on the 'Install' button.
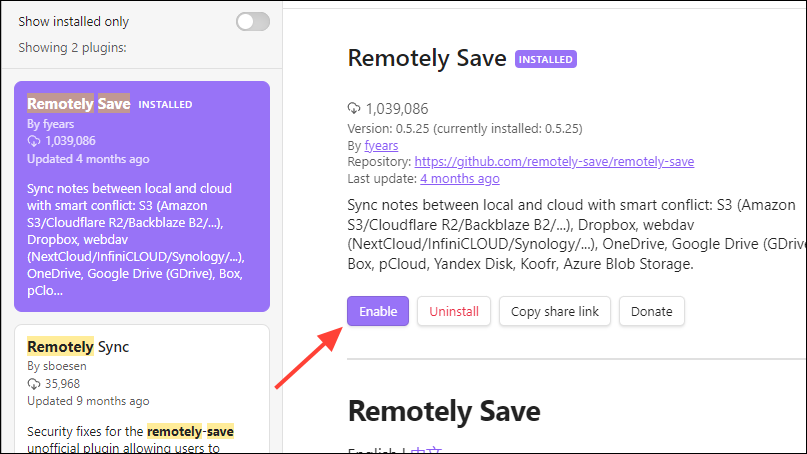
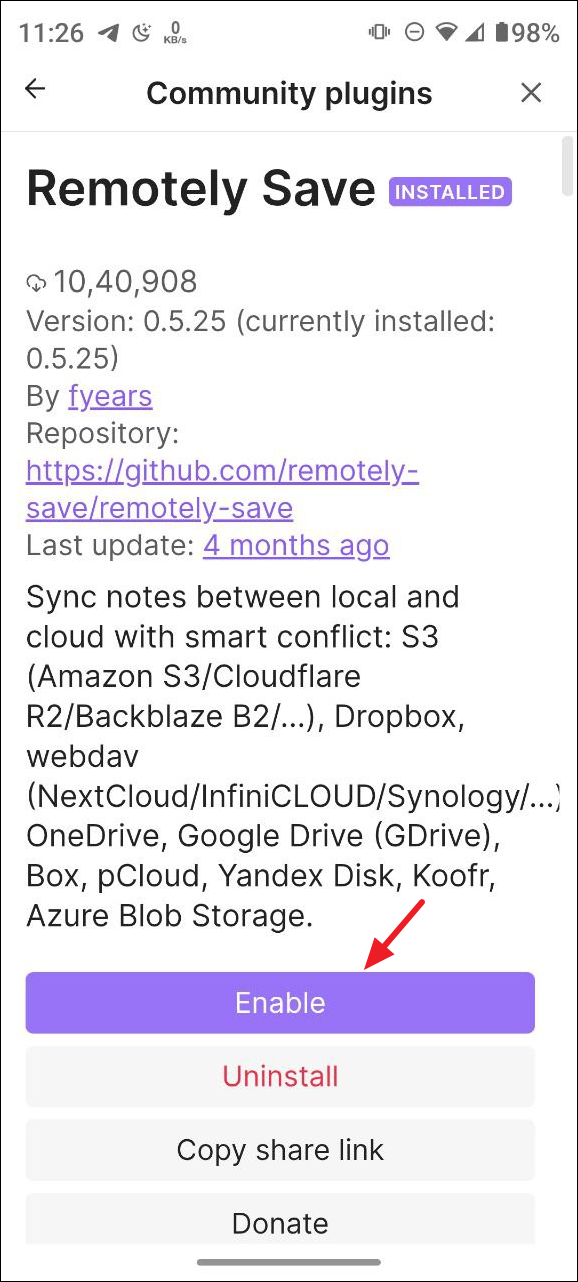
- Wait for a few seconds until the plugin is installed and then click on the 'Enable' button.
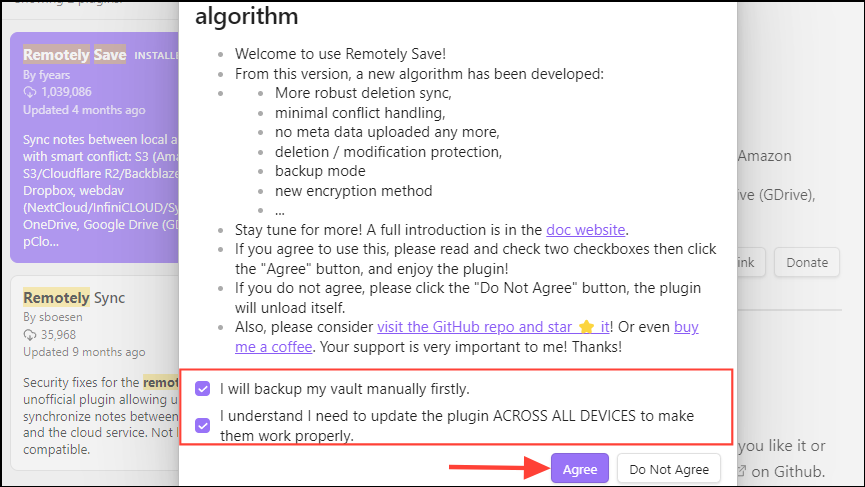
- A pop-up will appear informing you about the plugin. Click on the two checkboxes at the bottom so they are checked before clicking on the 'Agree' button.
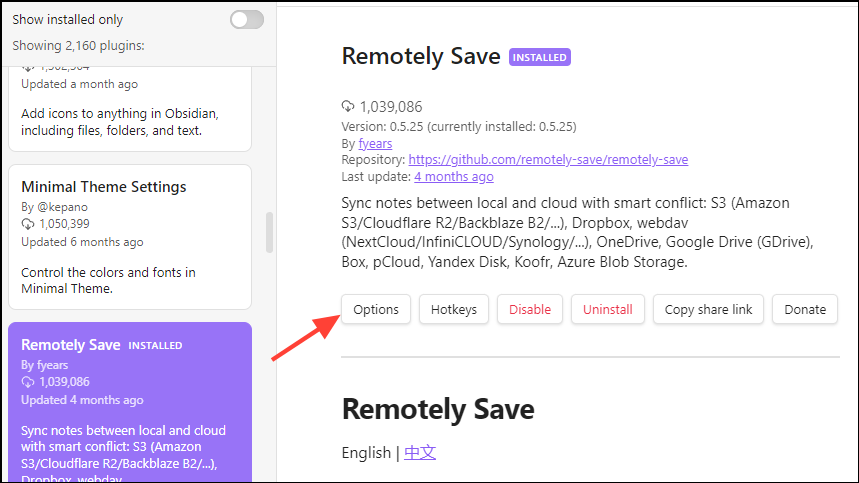
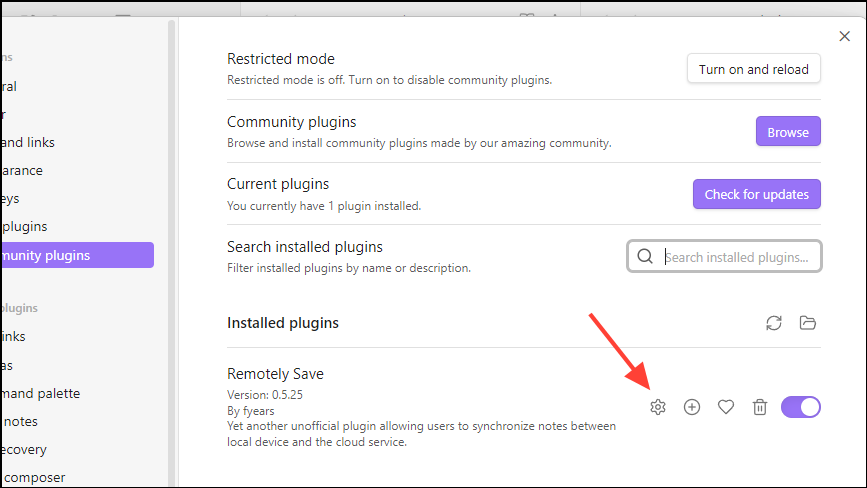
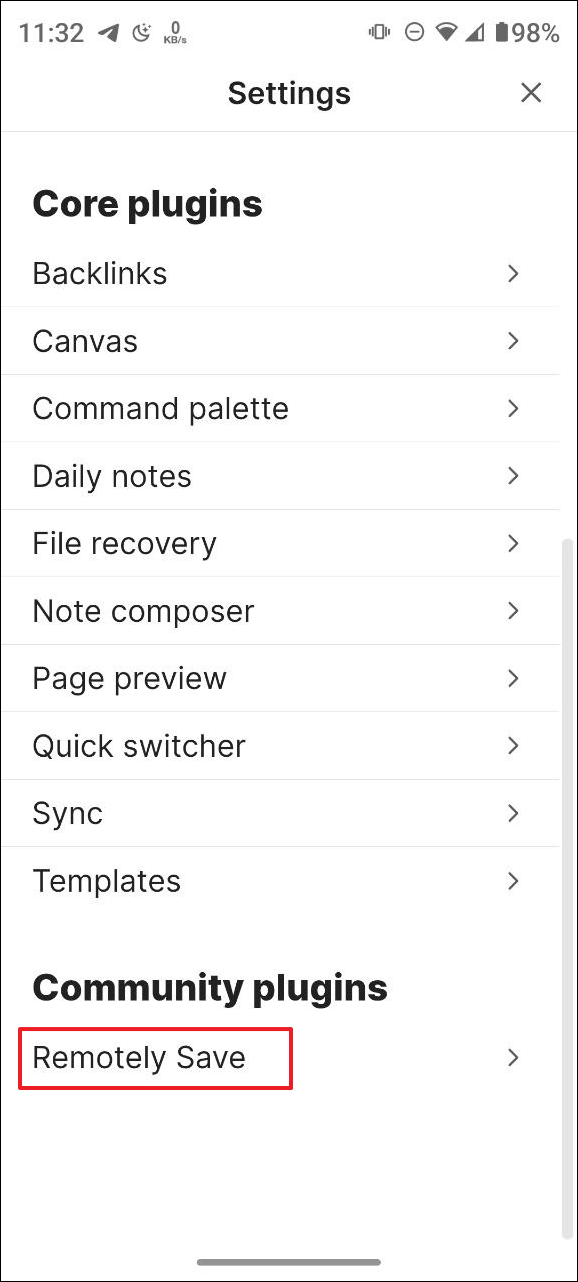
- Close the pop-up and you should now see the Remotely Save plugin appear in the 'Installed plugins' section.
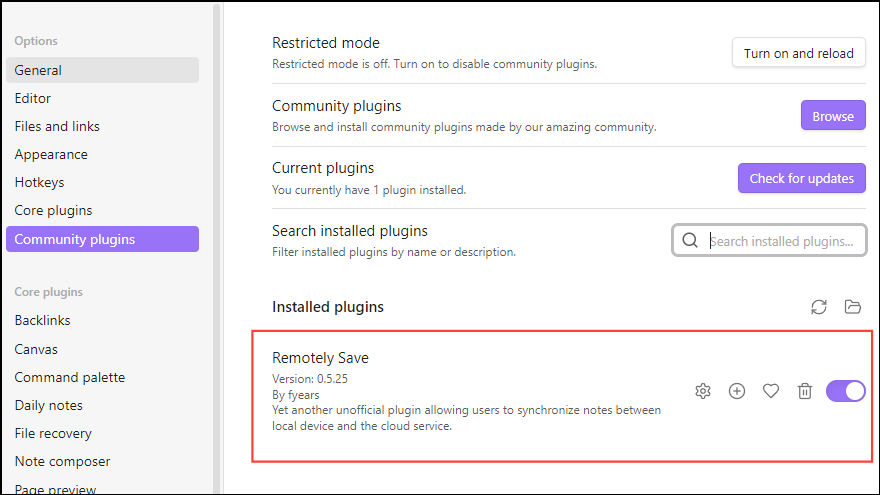
- Click on the Remotely Save plugin and then click on the 'Options' button.
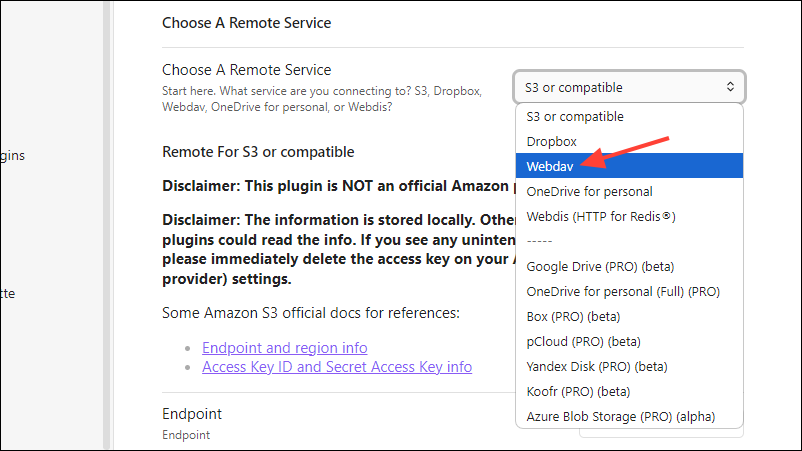
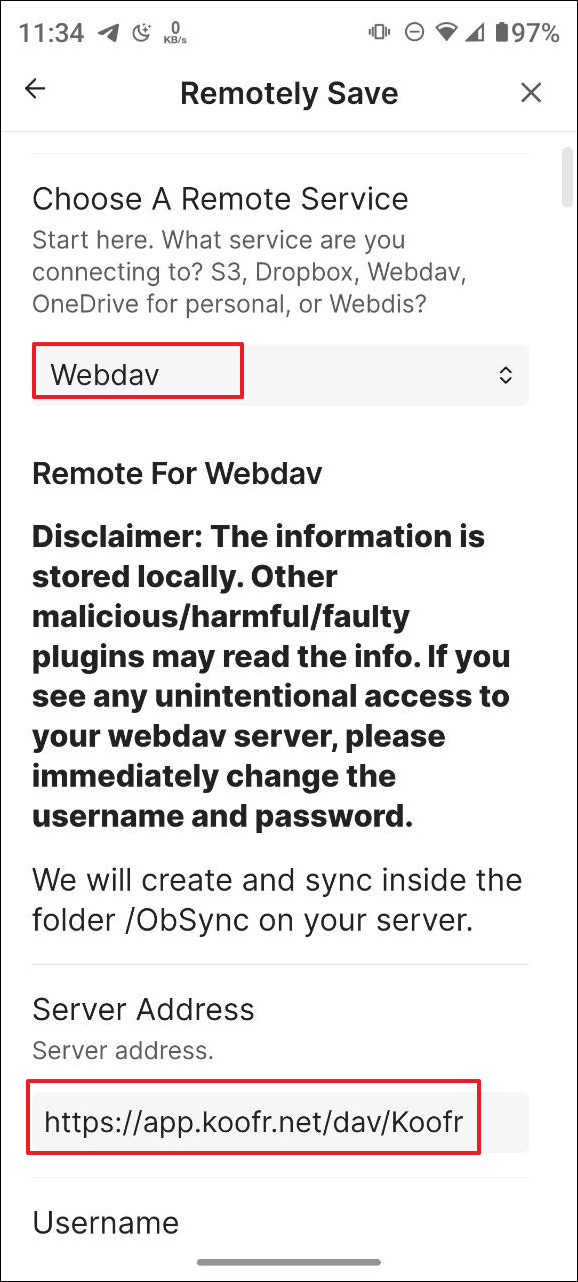
- Now, click on the dropdown menu on the right of 'Choose A Remote Service' and select 'Webdav'.
Step 2: Syncing Obsidian with a free cloud storage solution
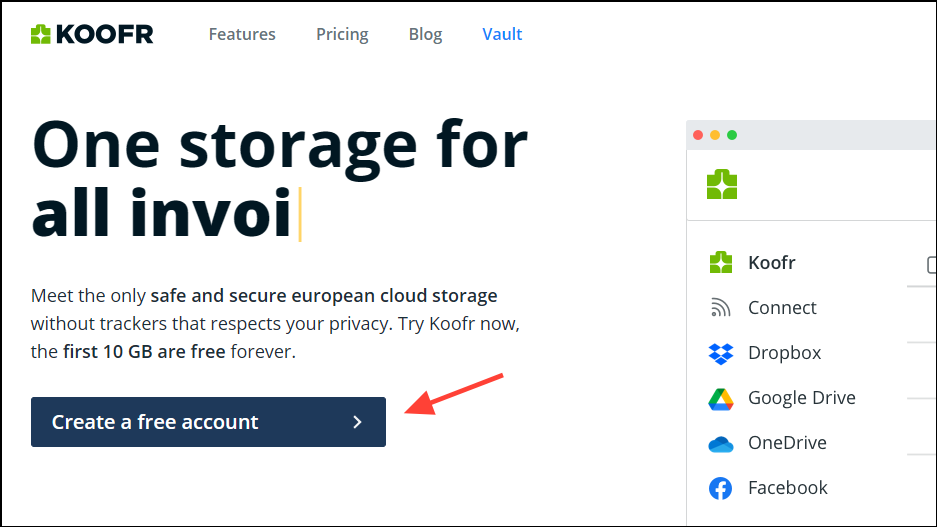
To be able to sync your Obsidian notes for free, you will need to rely on a cloud storage solution like Koofr. You can use other options, but Koofr is one of the safest options since it adheres to the GDPR.
- Visit koofr.eu and create an account on the platform.
- After signing up for an account on Koofr, click the ' Add+' button at the top.
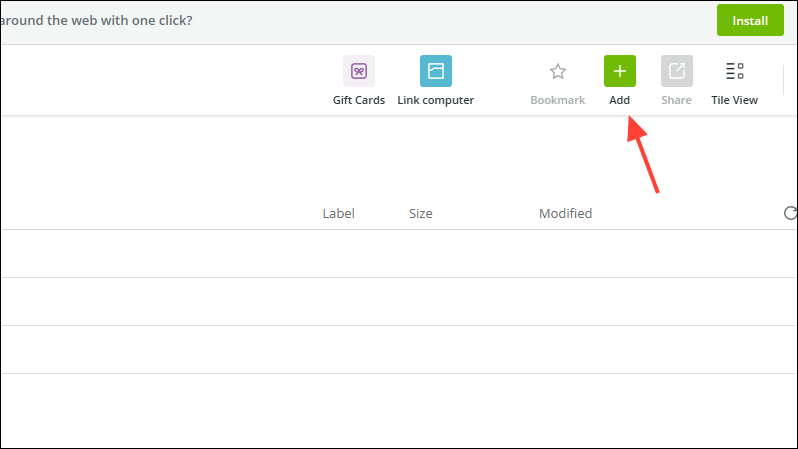
- Then click on 'Create folder'.

- Give the folder a name you can easily remember, like ObSync and click on the 'Create folder' button.

- After creating the folder, open it and click on your profile icon at the top right.

- Then click on 'Preferences' in the dropdown.

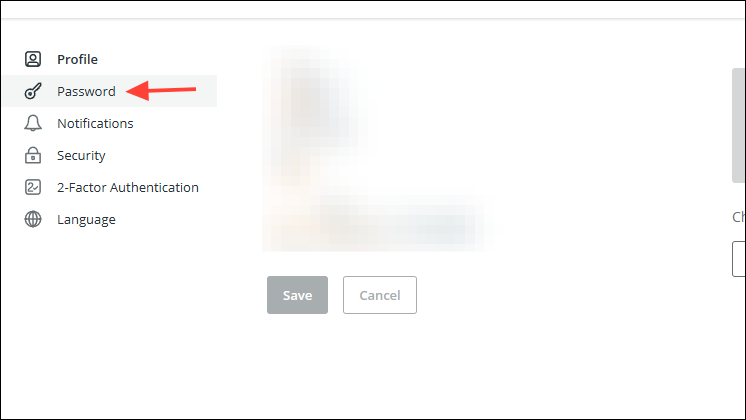
- On the Preferences page, click on 'Password' on the left.
- Scroll down to the 'App passwords' section and type the folder name in the 'Generate new password' field before clicking on the 'Generate' button.
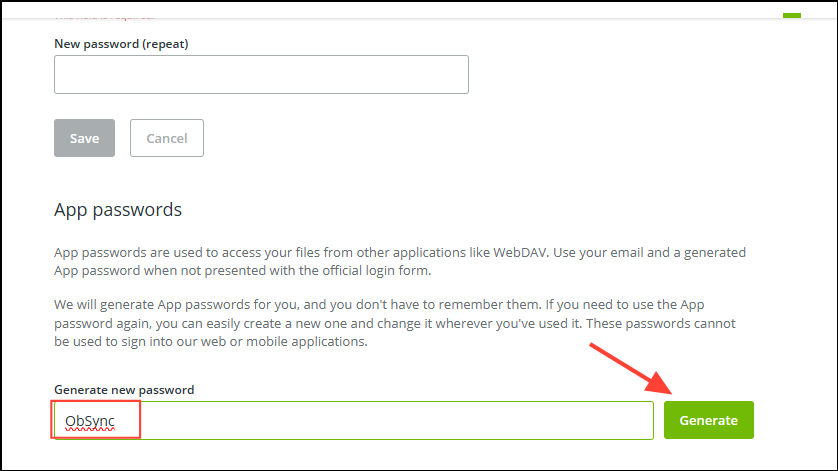
- Copy the password and keep it safe. Now, go back to Obsidian and click on the gear icon at the bottom to open the Settings page as before.
- Again, go to 'Community plugins' on the left and click on the gear icon in Remotely Save plugin section on the right.
- Enter
https://app.koofr.net/dav/Koofrin the 'Server Address' field, the email address you used to sign up on the Koofr website in the 'Username' field, and the password you generated on Koofr in the 'Password' field.

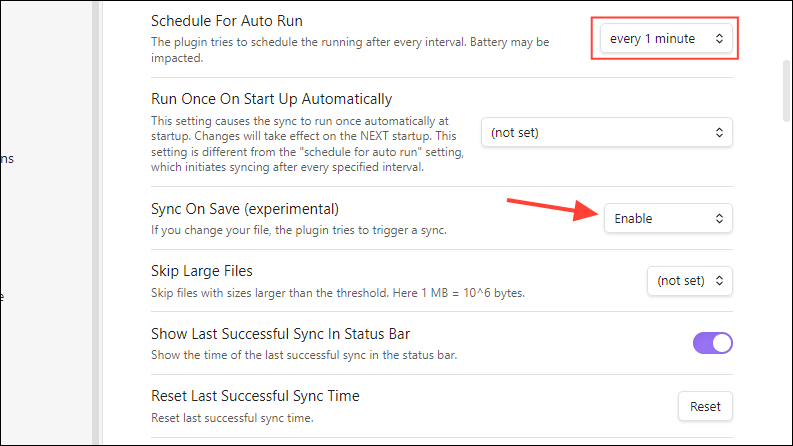
- If you want, you can also change other settings. For instance, you can change 'Schedule For Auto Run' to every one minute. Also, enable the 'Sync on Save' option and set the 'Abort Sync If Modification Above Percentage' to 100.
Step 3: Set up Obsidian on your other device
Now, you need to set up Obsidian on your smartphone.
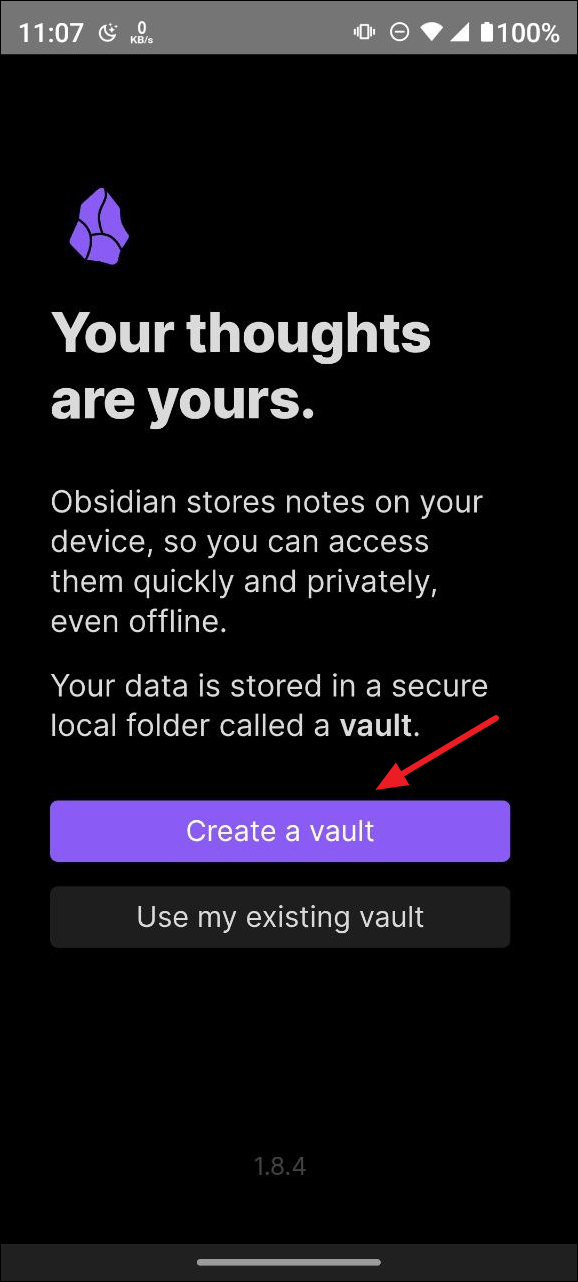
- Download the Obsidian app from the Play Store or App Store and tap on 'Create a vault'.
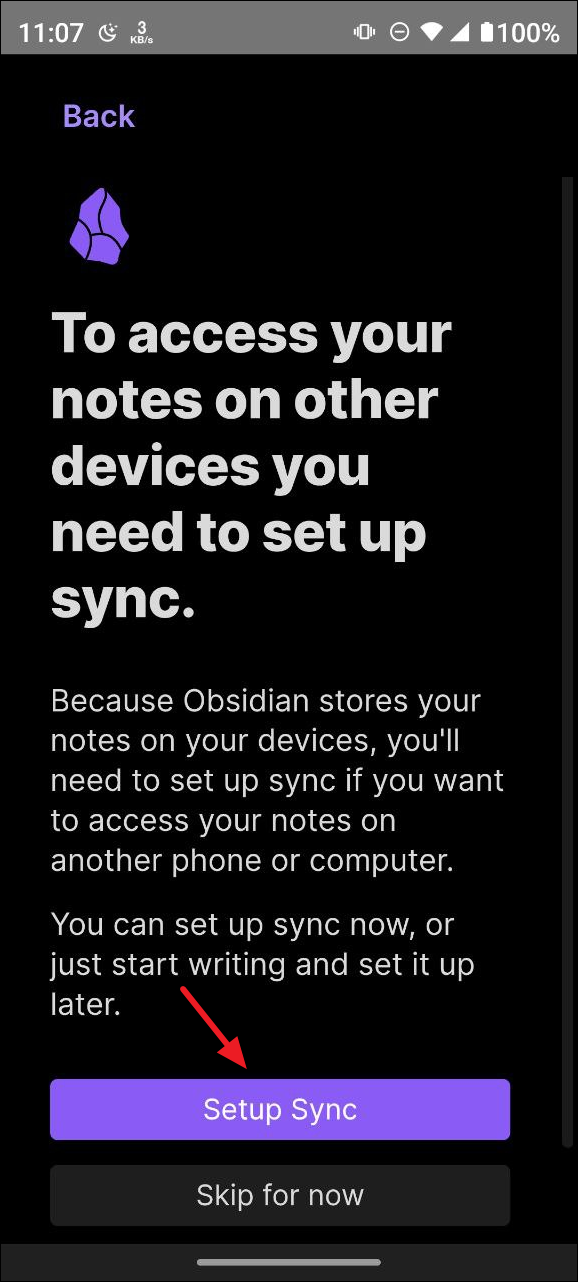
- Then tap on 'Setup Sync'.
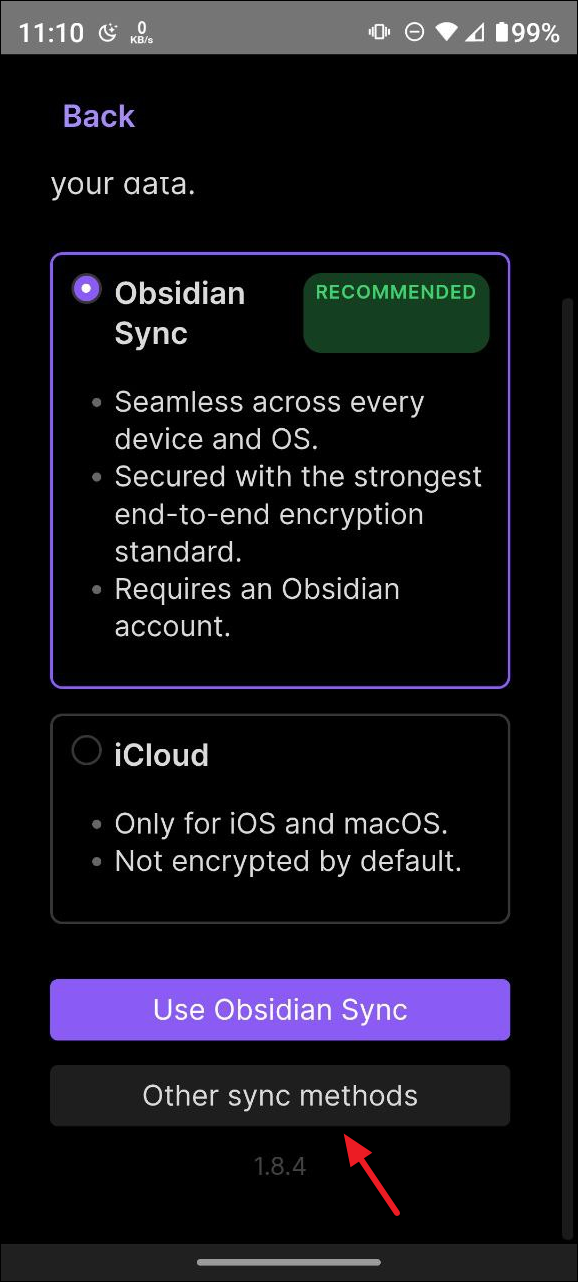
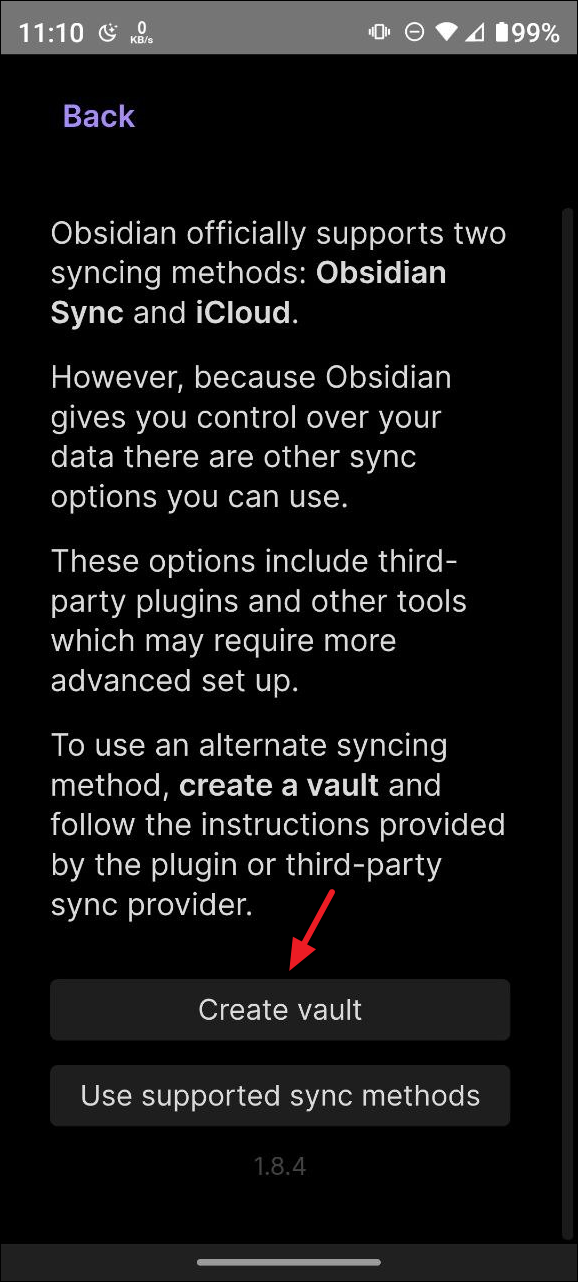
- On the next page, tap on 'Other sync methods'.
- Then tap on 'Create a vault'.
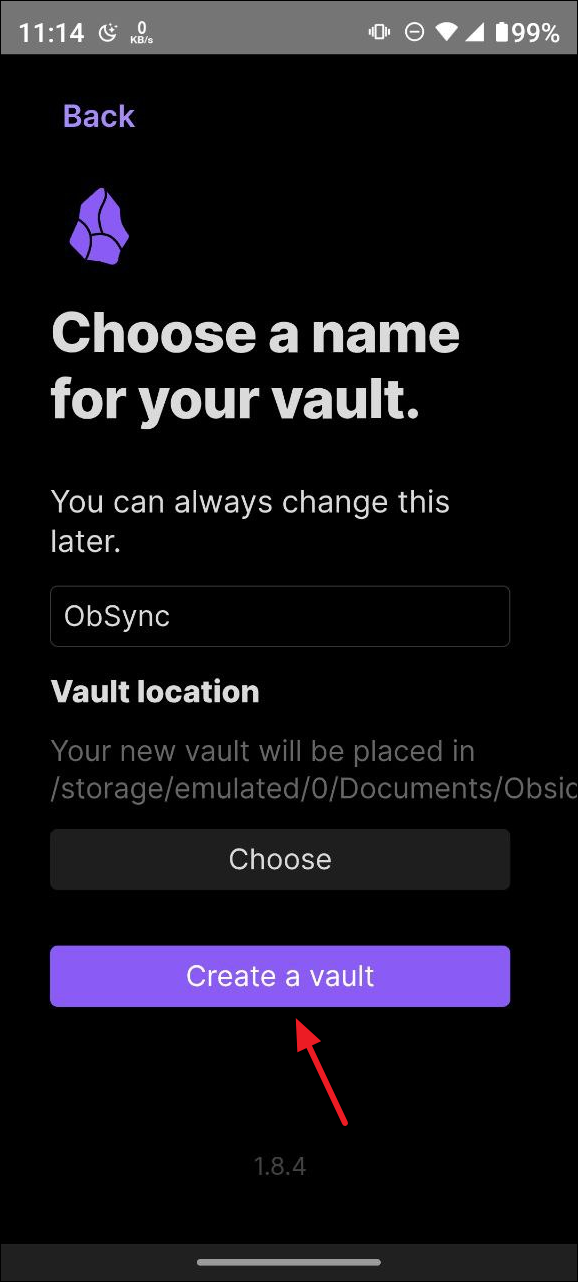
- Now, tap on the 'Choose' button and select where you want to create a vault before tapping on the 'Create a vault' button.
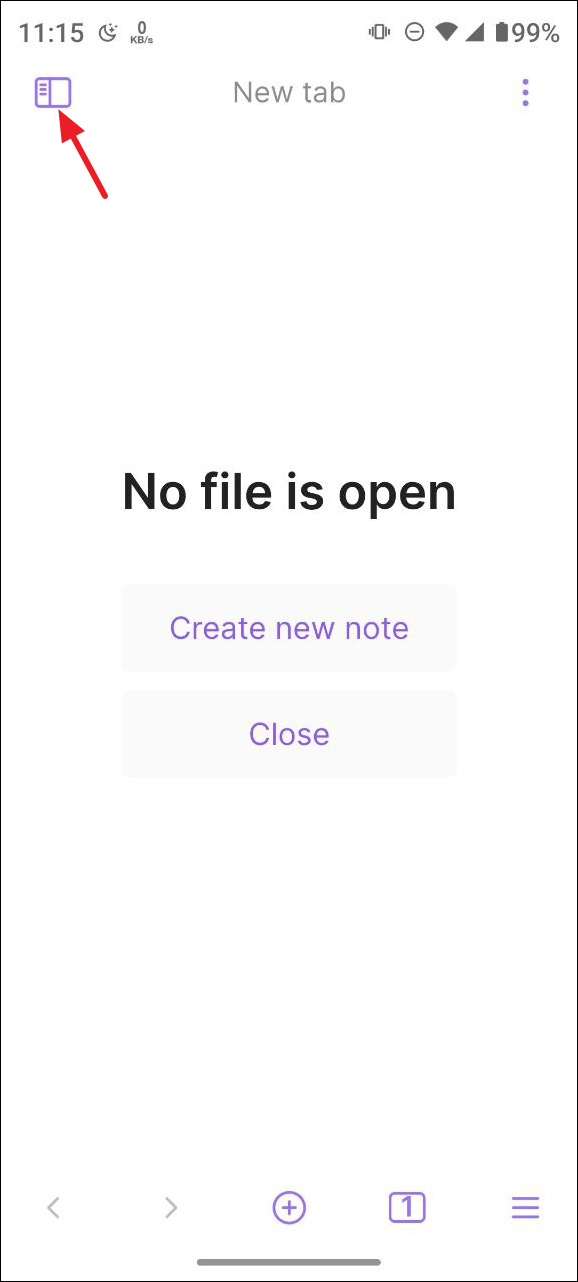
- The vault will open once it is created. Tap on the button on the top left.
- Tap on the gear icon to open the Settings page.
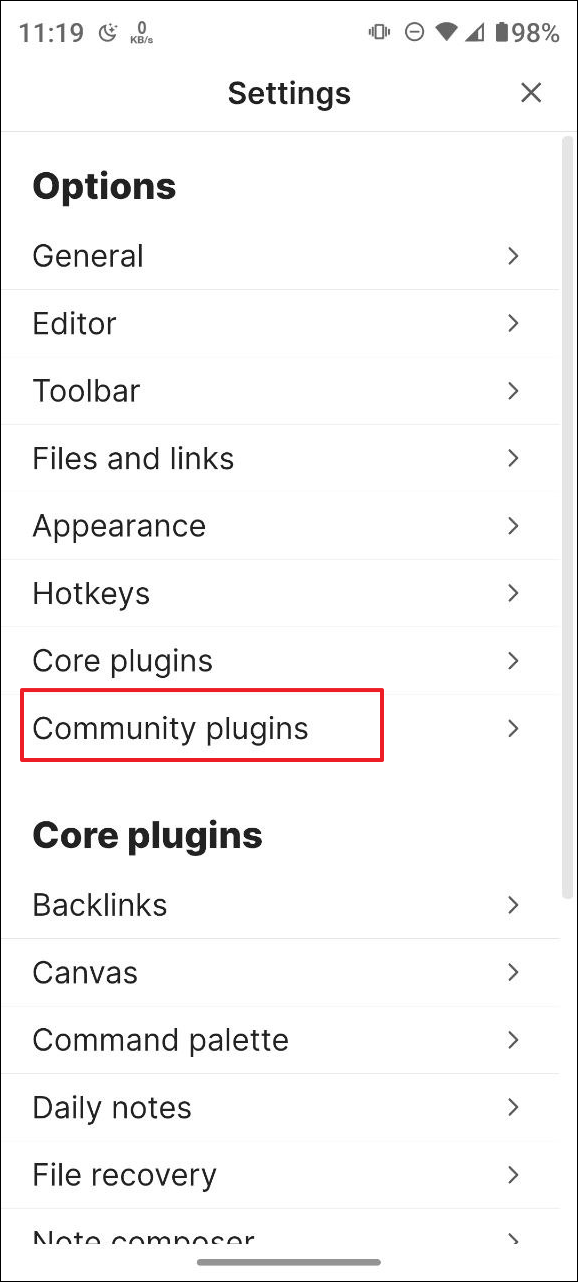
- Then tap on 'Community plugins'.

- Scroll down and tap on the 'Turn on community plugins' button.
- Then tap on the 'Browse' button.
- Search for the 'Remotely Save' plugin and tap on the 'Install' button after you find it.
- Once the plugin is installed, tap on the 'Enable' button. Make sure to check the two checkboxes just like you did on the web version on your computer.
- Now, return to the Settings page and scroll to the bottom. Tap on 'Remotely Save' under Community plugins.
- Change the settings to match those that you set earlier in the desktop version of Obsidian.
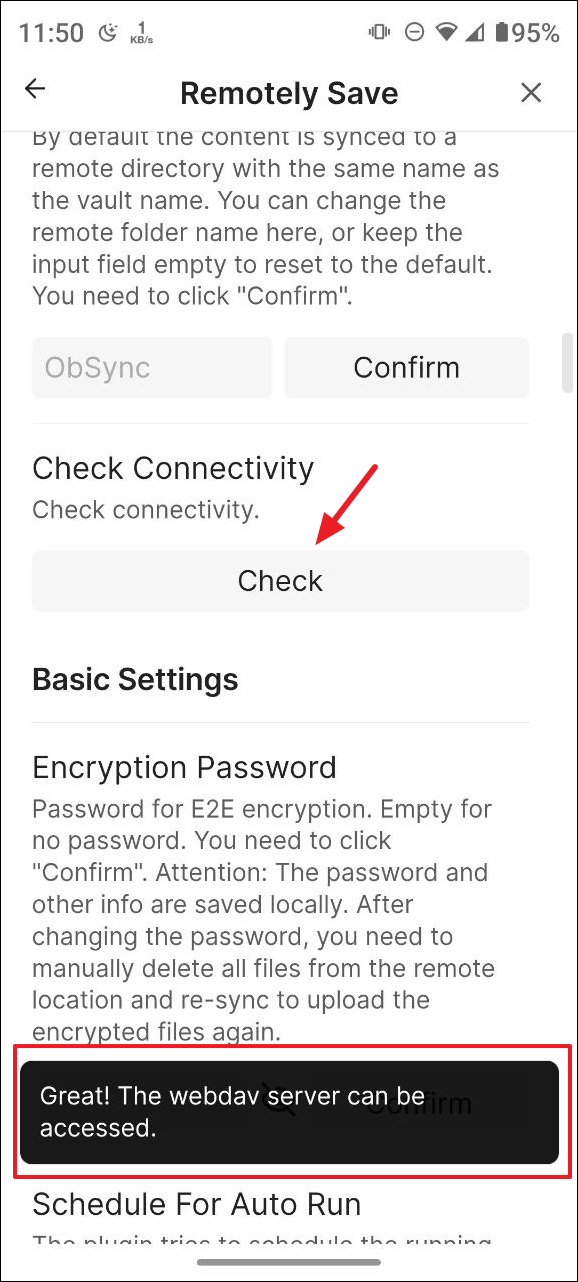
- Tap the 'Check' button under 'Check connectivity' to see whether the server is working. If it is, you will see a notification that the server can be accessed. Your Obsidian notes should now automatically sync between the two devices.
Things to know
- If you want to sync your Obsidian notes between multiple devices, you will need to repeat these steps for each device individually.
- This method does not rely on Obsidian's official servers for syncing user data, so you may experience sync delays of up to a minute at times.
- By using Koofr for syncing, you also get 10 GB of cloud storage for free, and can even increase it by getting a paid plan.
- Just keep in mind that this method involves sending your data to third parties. So, avoid storing sensitive data using Obsidian, like banking credentials and passwords. You can try alternatives like Joplin that offer self-hosting for securtiy and privacy.