
Apple's AirPods Pro 2 bring a symphony of features to your ears. But Adaptive Audio has definitely been the maestro that stole the spotlight. Now, Apple has finally released these features for a non-pro version as well, with the new AirPods 4 (ANC). These innovative features tailor the audio experience to your environment. With features such as Adaptive Mode, Personalized Volume, and Conversation Awareness under its umbrella, Adaptive Audio is truly impressive and takes personal listening to the next level.
How Does Adaptive Audio Work
This is what you can expect from each feature that falls under the umbrella of Adaptive Audio on AirPods Pro 2 and AirPods 4 (ANC).
Adaptive Mode
Adaptive Noise Control, or Adaptive Mode as it's confusingly called, includes a blend of Active Noise Cancellation and Transparency modes. When Adaptive Transparency mode was introduced with AirPods Pro 2, it was a game changer. Adaptive Noise Control takes this feature up a notch.
Adaptive Transparency mode minimizes any loud noises around you (over 85 dB), like power tools or sirens, so you can be aware of the world around you, but comfortably. Active Noise Cancellation completely counters external noise with anti-noise, canceling them before you hear them.
Adaptive Noise Control tailors the level of noise control based on your environment and the conditions around you by blending both these modes together. So, depending on your environment, it might cancel loud, unnecessary noises like a leaf blower, but important sounds that you need to be aware of, like a car horn or a siren, will only be reduced.
Personalized Volume
Personalized Volume learns your volume preferences over time and then uses this learning to adjust your media volume based on your environment.
Conversation Awareness
With this feature, your AirPods will automatically lower the media volume and enhance the voices in front of you if you start talking. With Conversation Awareness, AirPods still cancel out any unnecessary background noise while enhancing the voice of the people you're talking to. When the conversation ends, it automatically brings the volume back to your original setting.
Enable Adaptive Audio from iPhone
To enable adaptive audio for your AirPods, follow these steps.
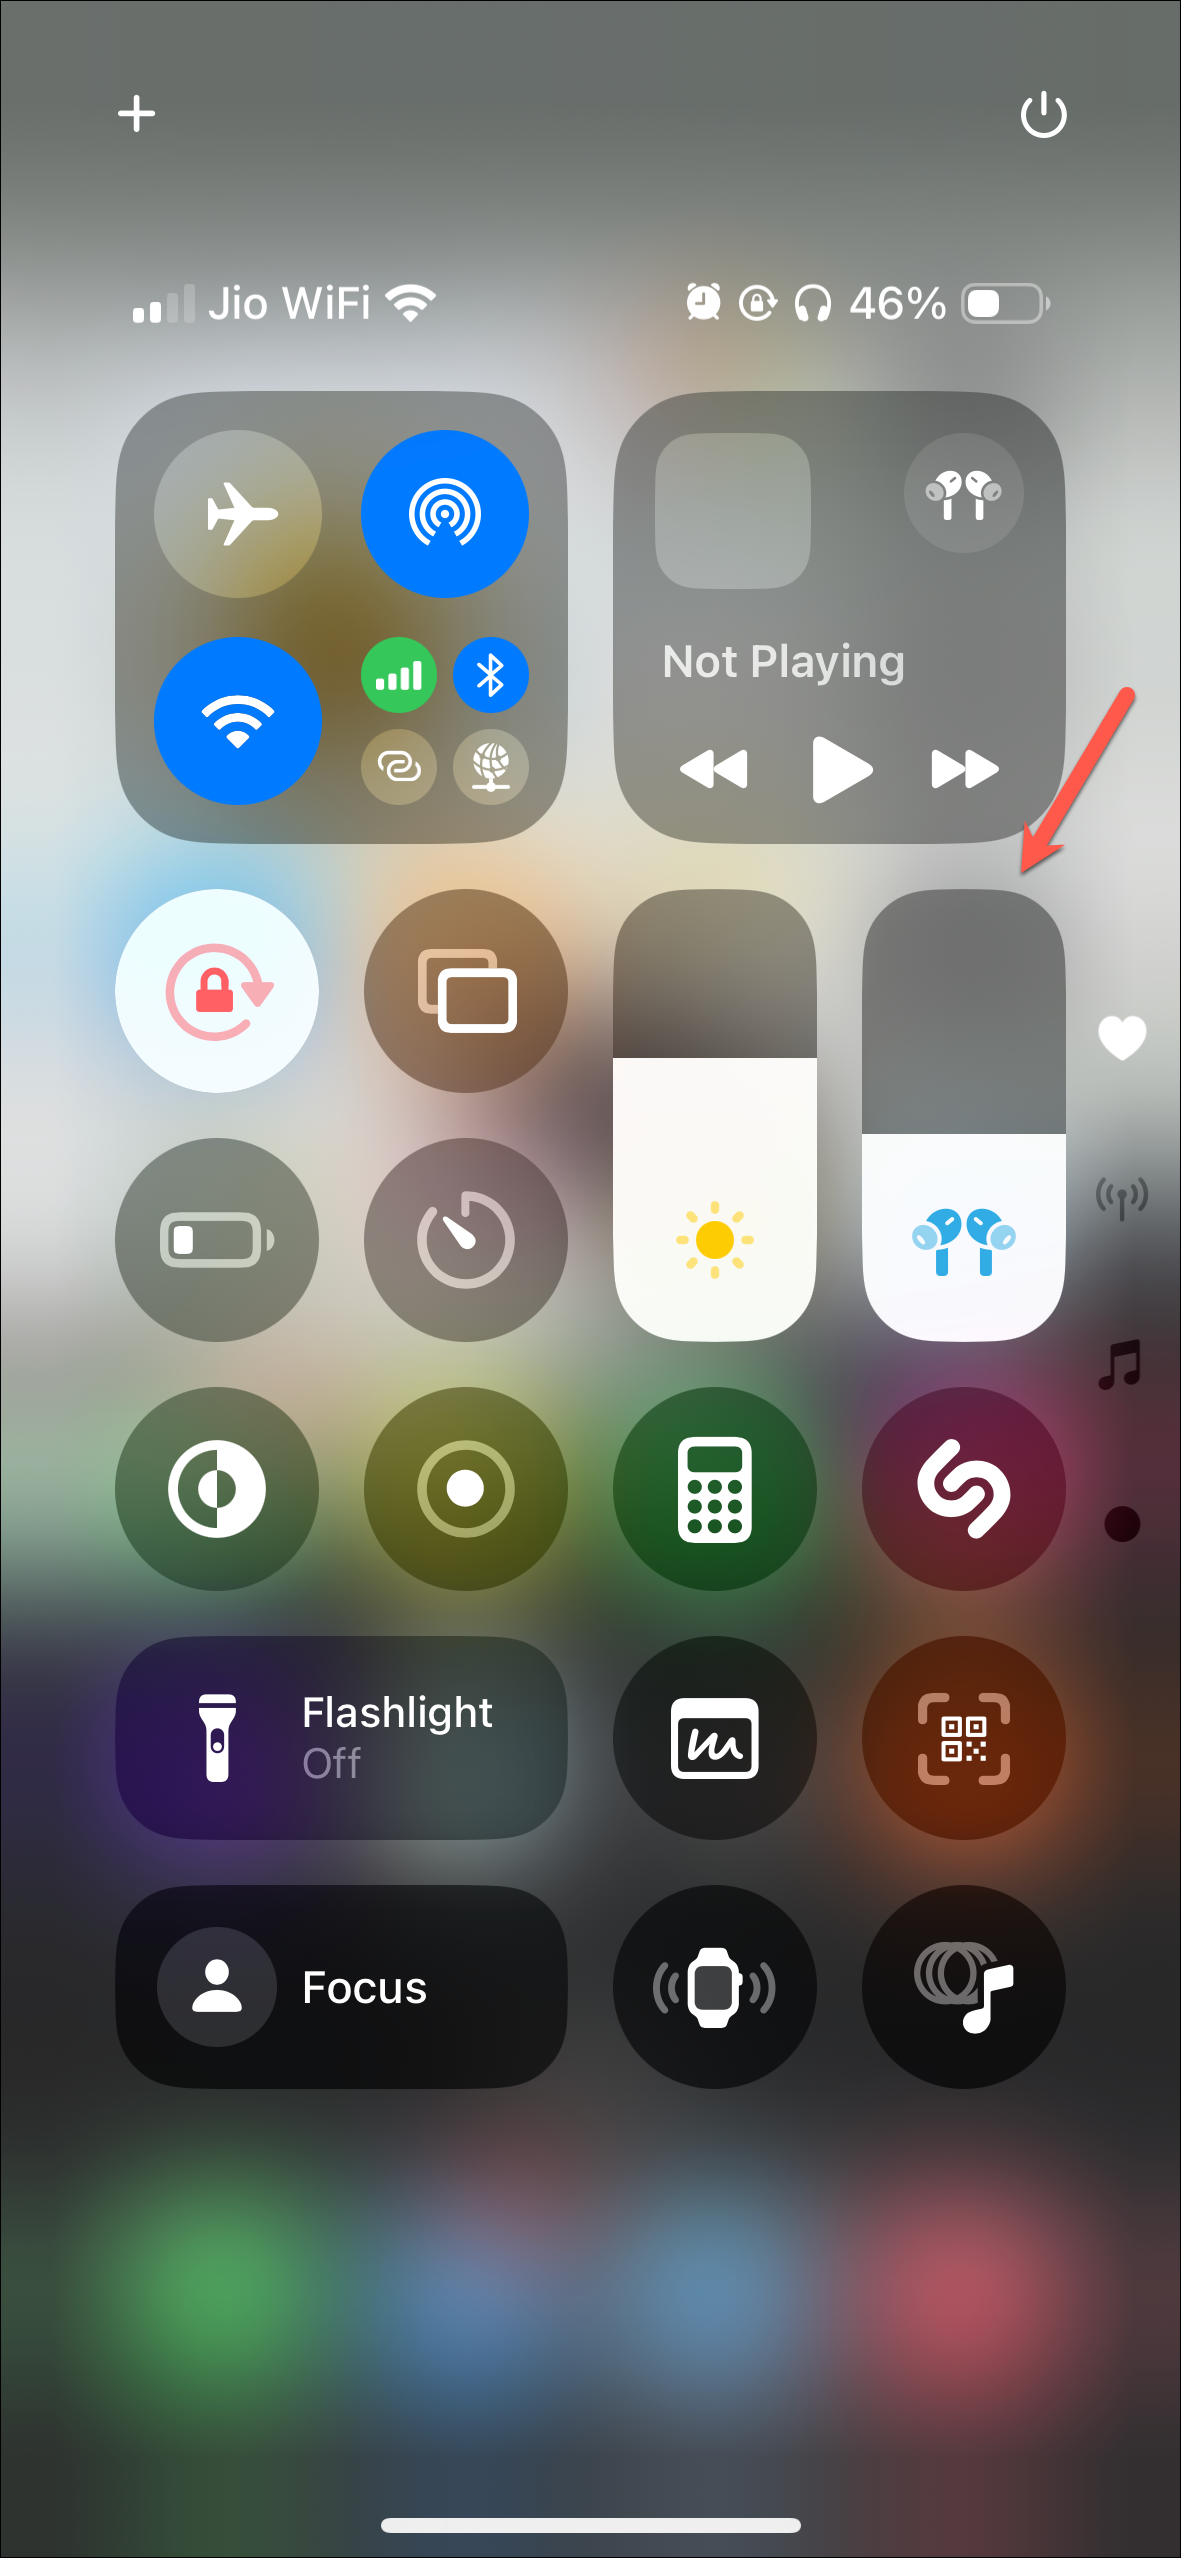
- Once your AirPods are in your ears, open the Control Center on your iPhone.
- Then, long-press the AirPods slider.
- AirPod-specific options will appear. Tap on the 'Noise Control' button.
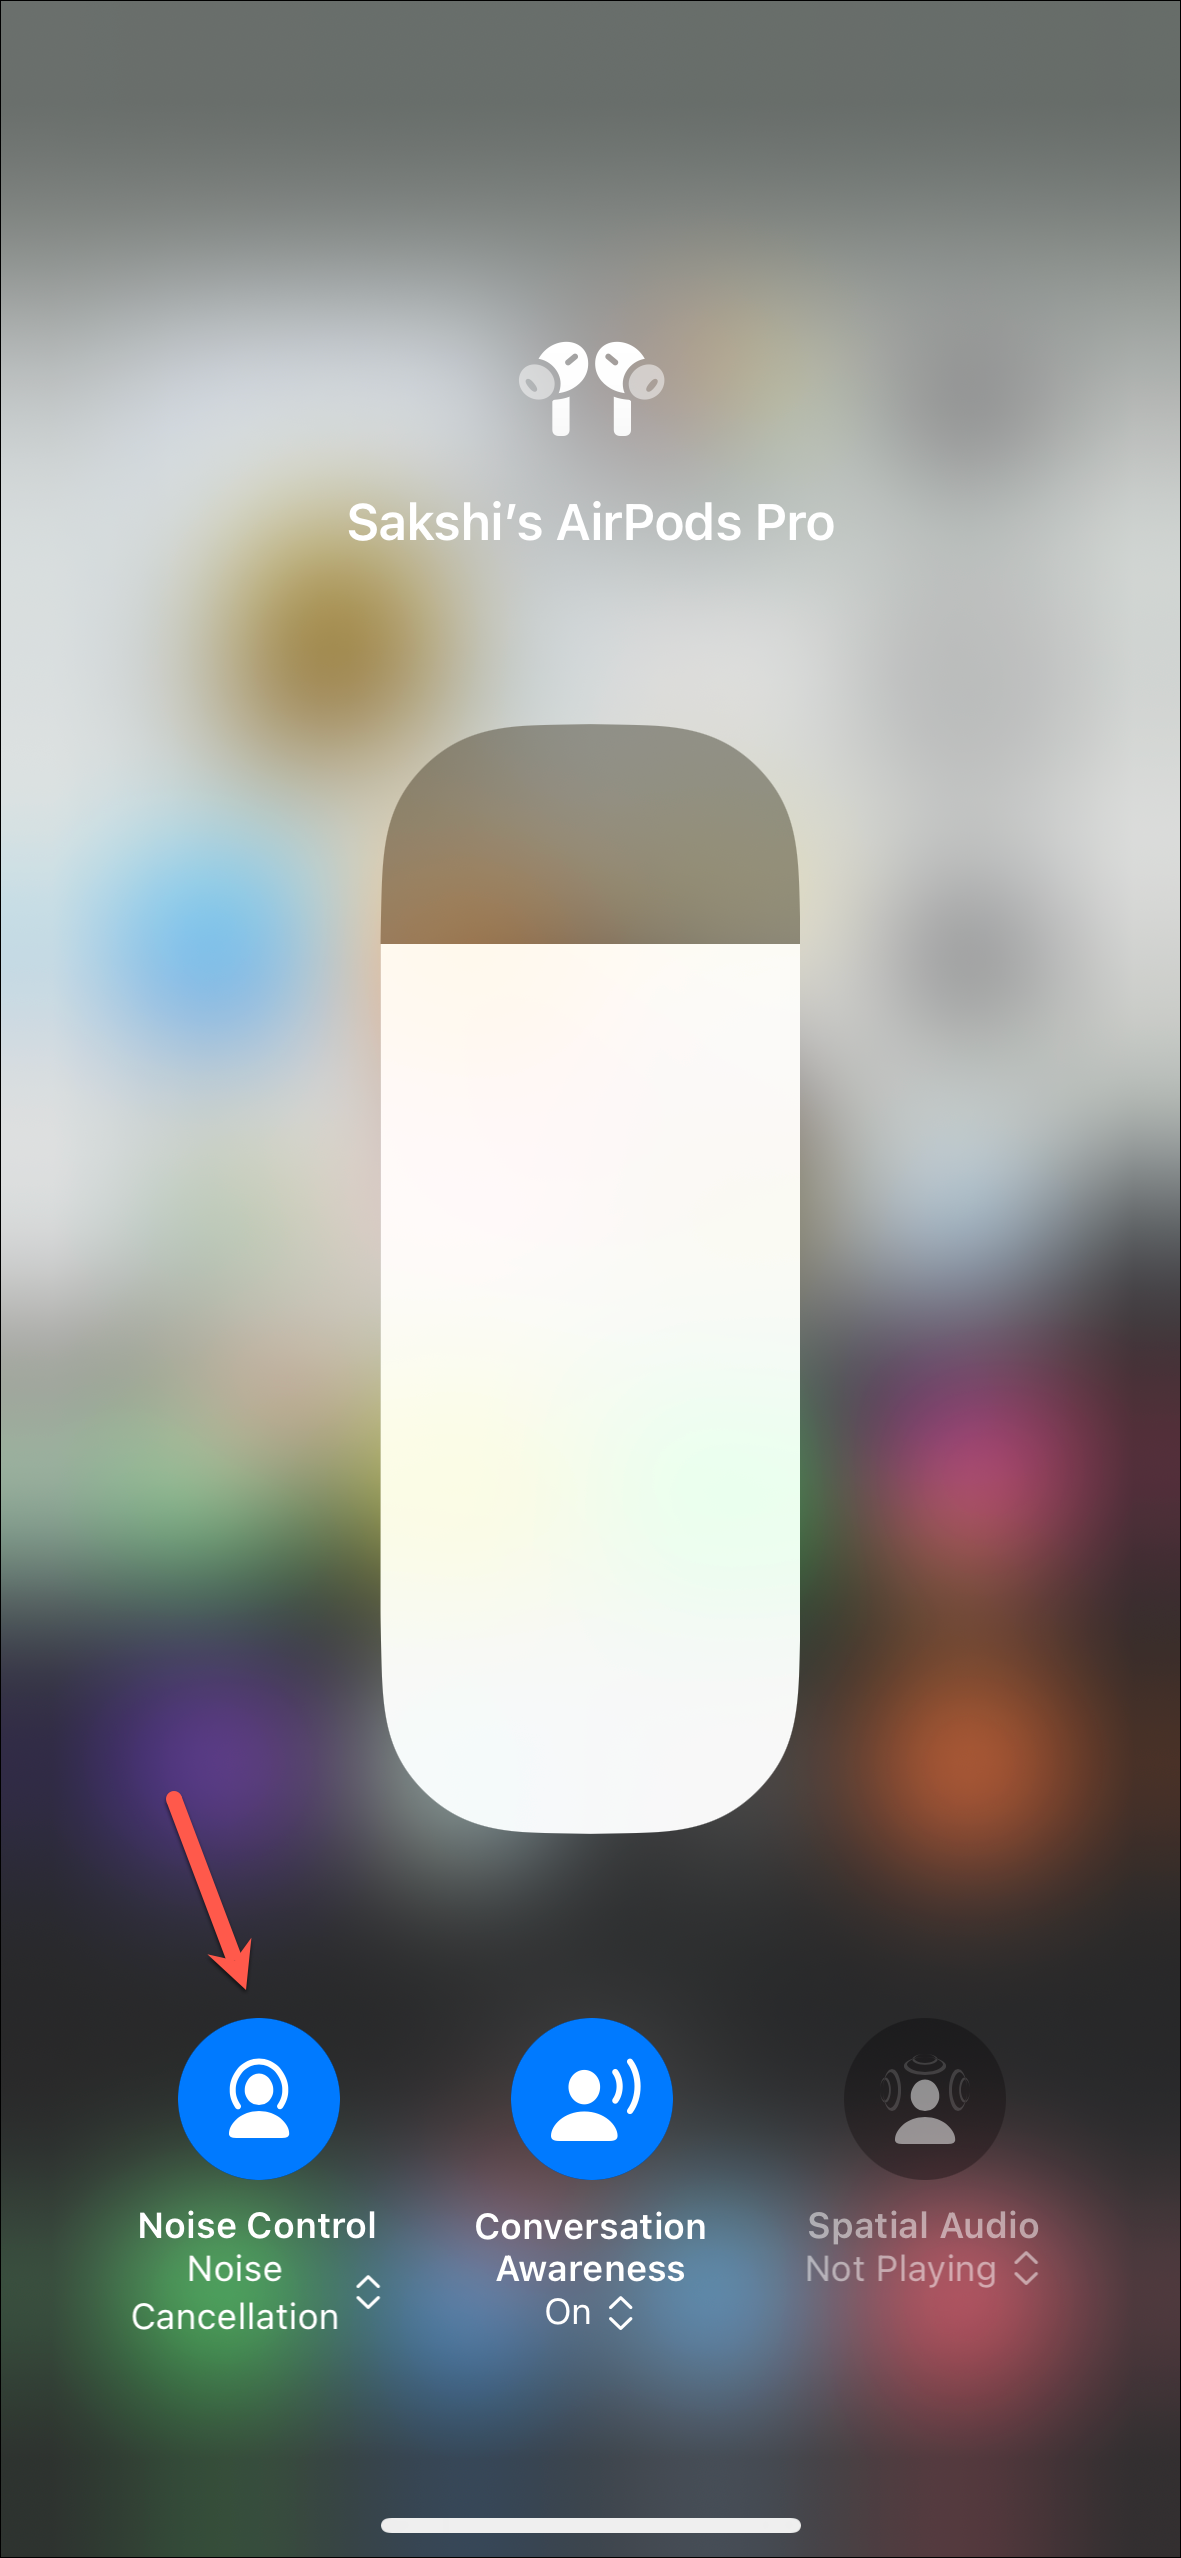
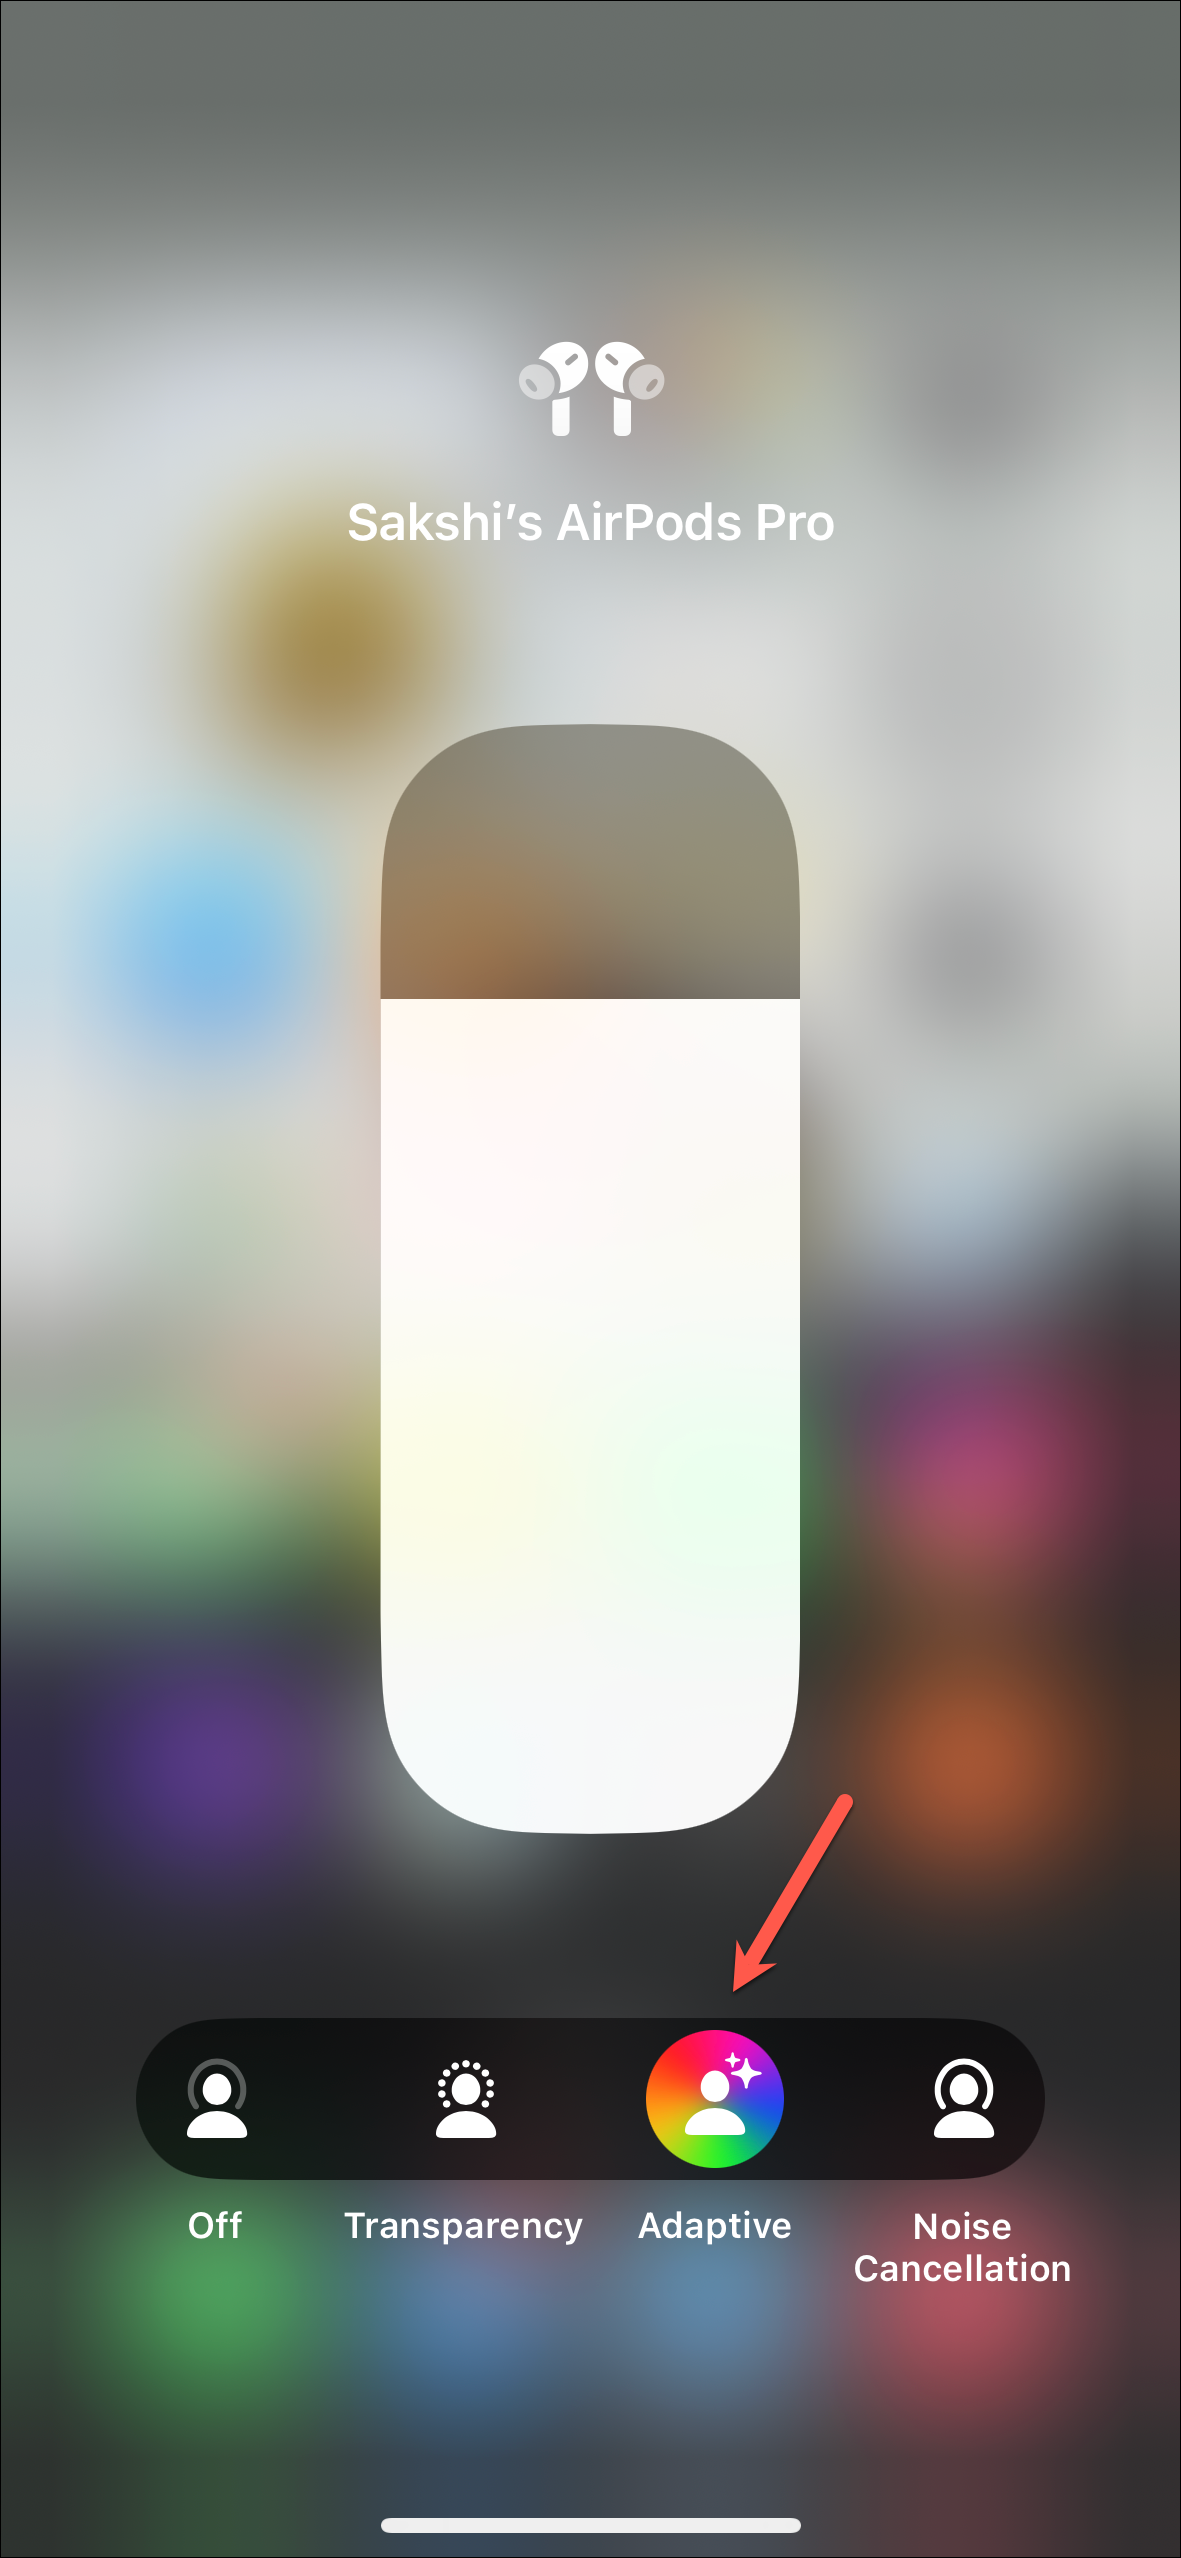
- Then, tap on the option for 'Adaptive' to turn it on.
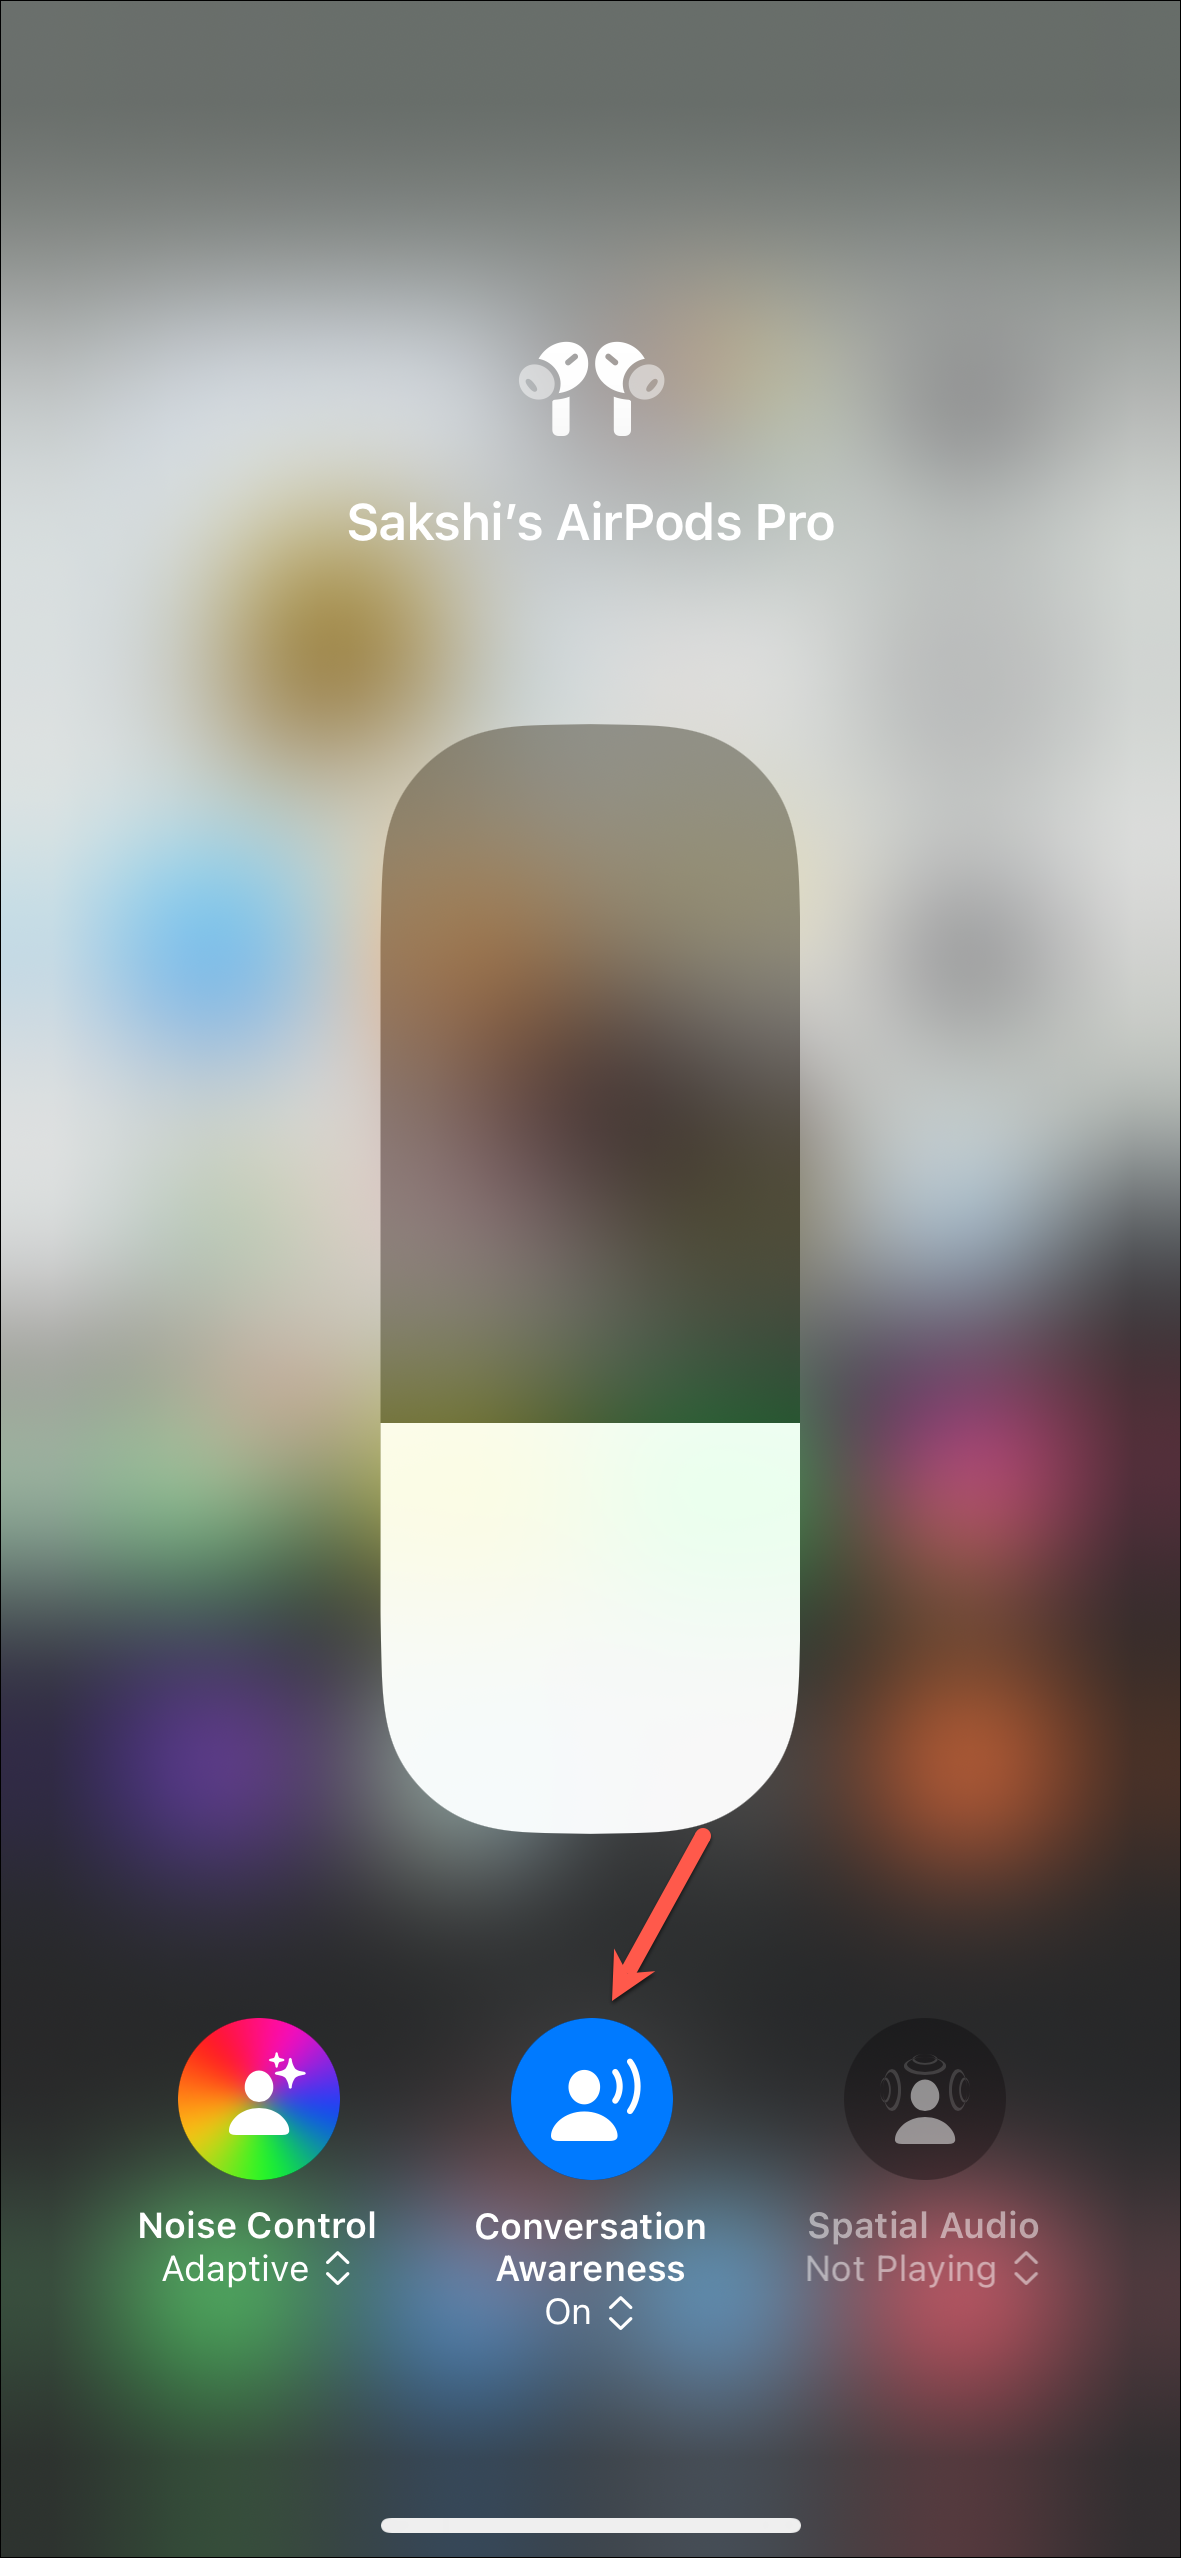
- To enable 'Conversation Awareness' return to the previous screen. Then, turn on the option for it.
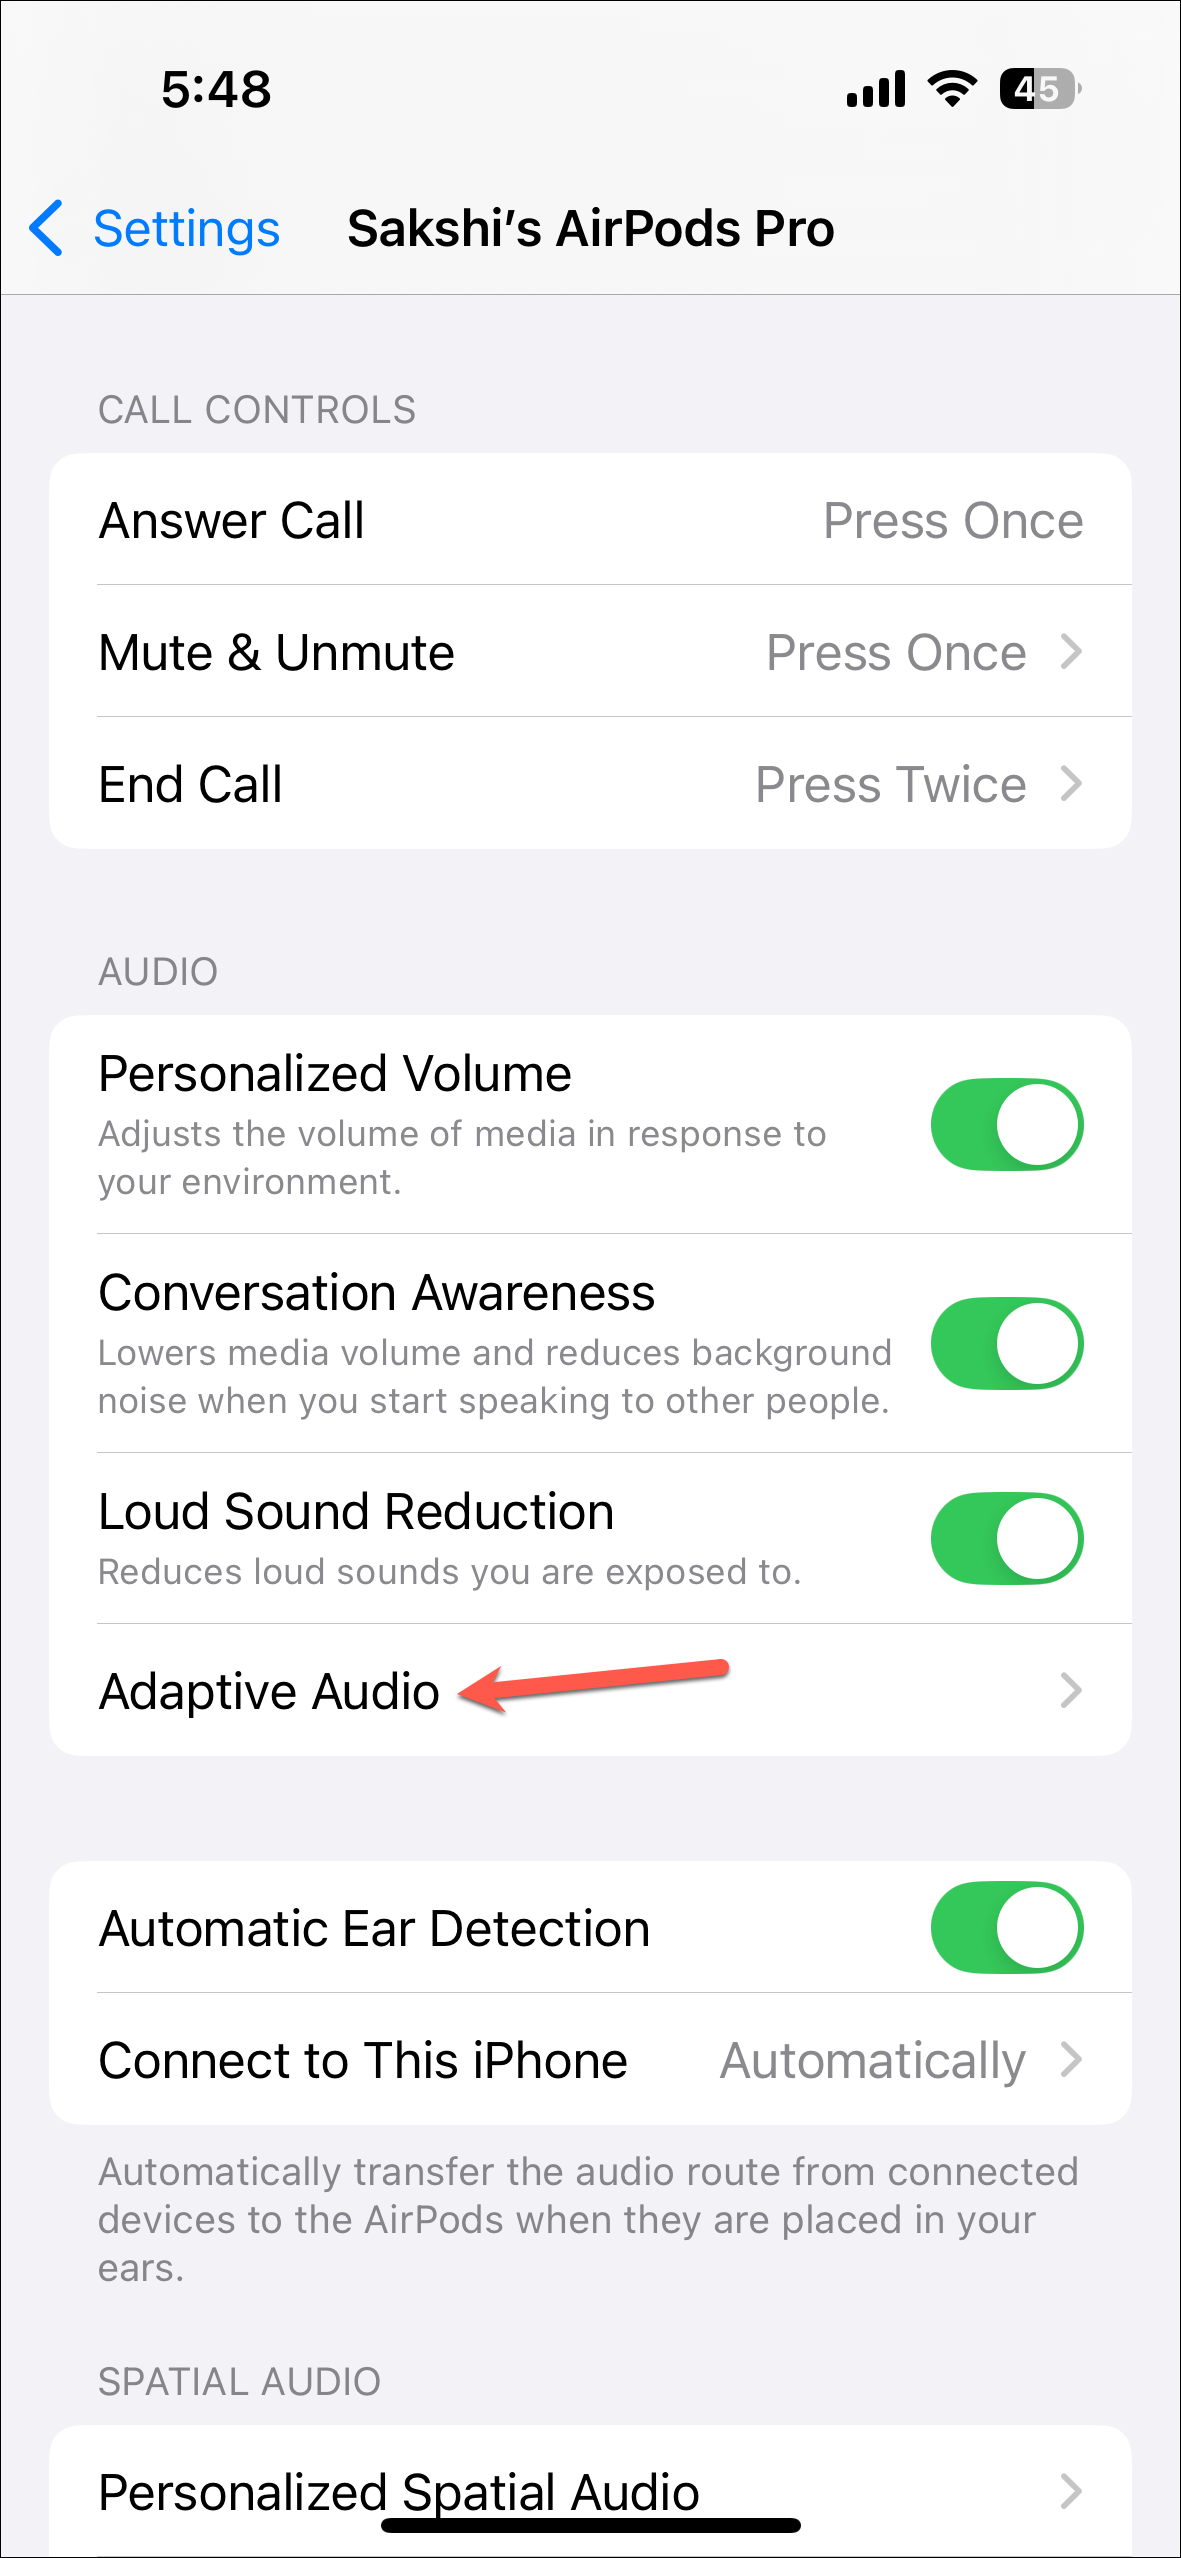
- You can also enable the Adaptive Audio settings from the Settings app.
- Open the Settings app and tap '[Your AirPods]' at the top.
- Tap 'Adaptive' under the 'Noise' section to enable Adaptive Mode.

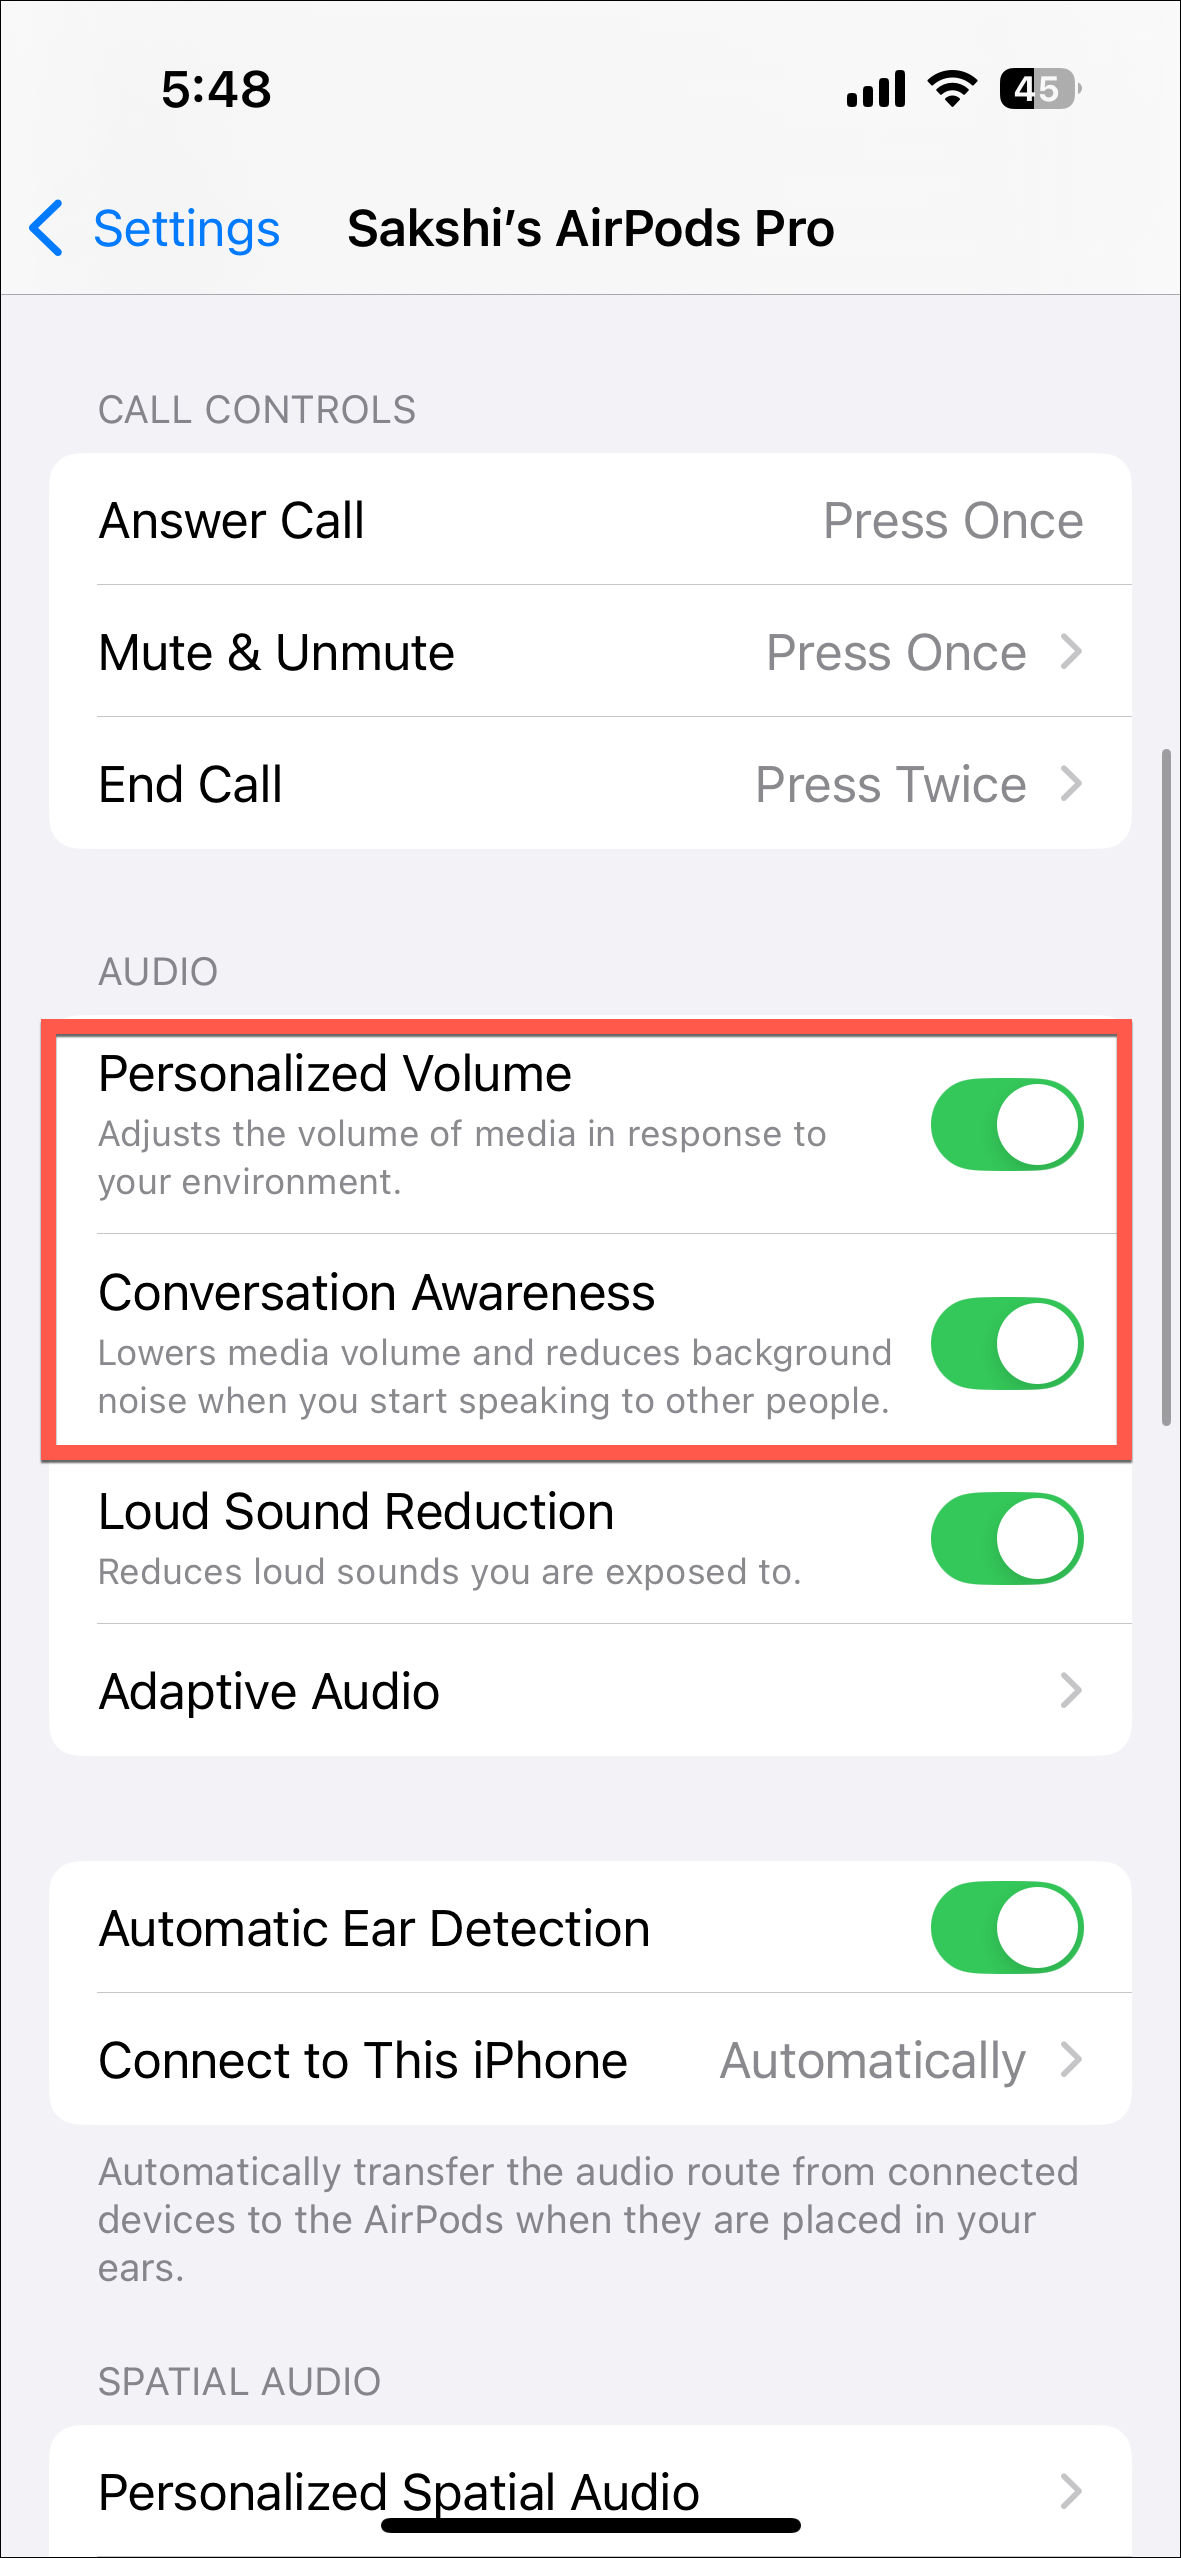
- For Conversation Awareness and Personalized Volume, scroll down, and in the 'Audio' section, enable the toggles for both.
Manage Adaptive Mode with AirPods Stem
You can also turn on/ off adaptive mode with the long press of the stem, but you'll first need to assign it.
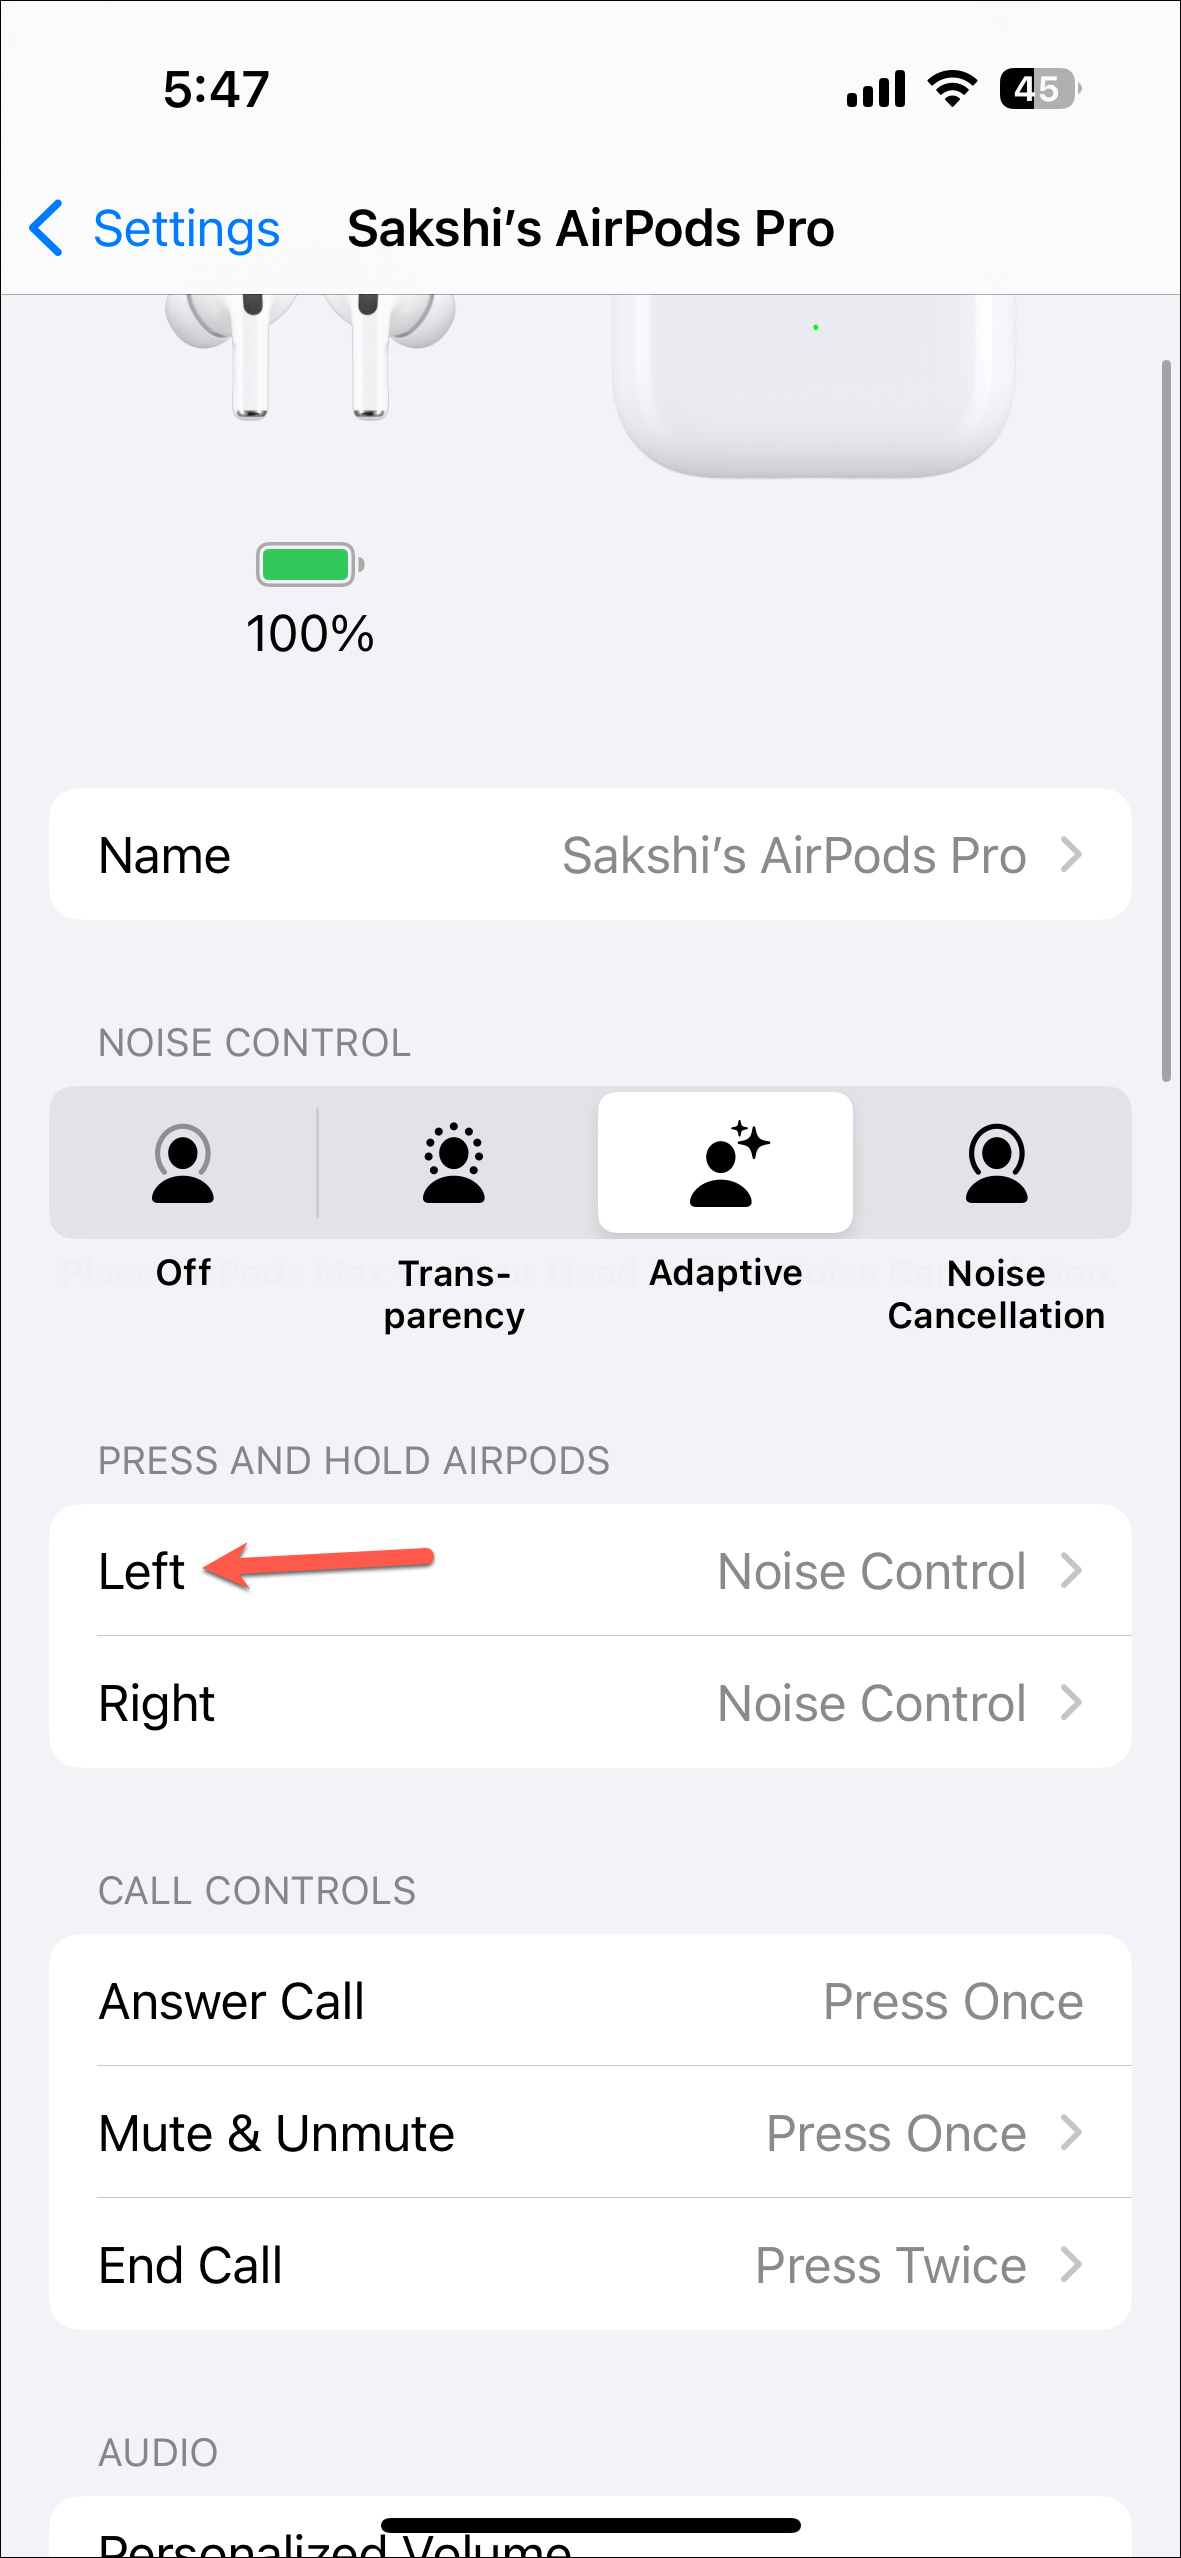
- Go to your AirPods from the Settings app.
- Then, tap 'Left' or 'Right' (your preference) under 'Press and Hold AirPods'.
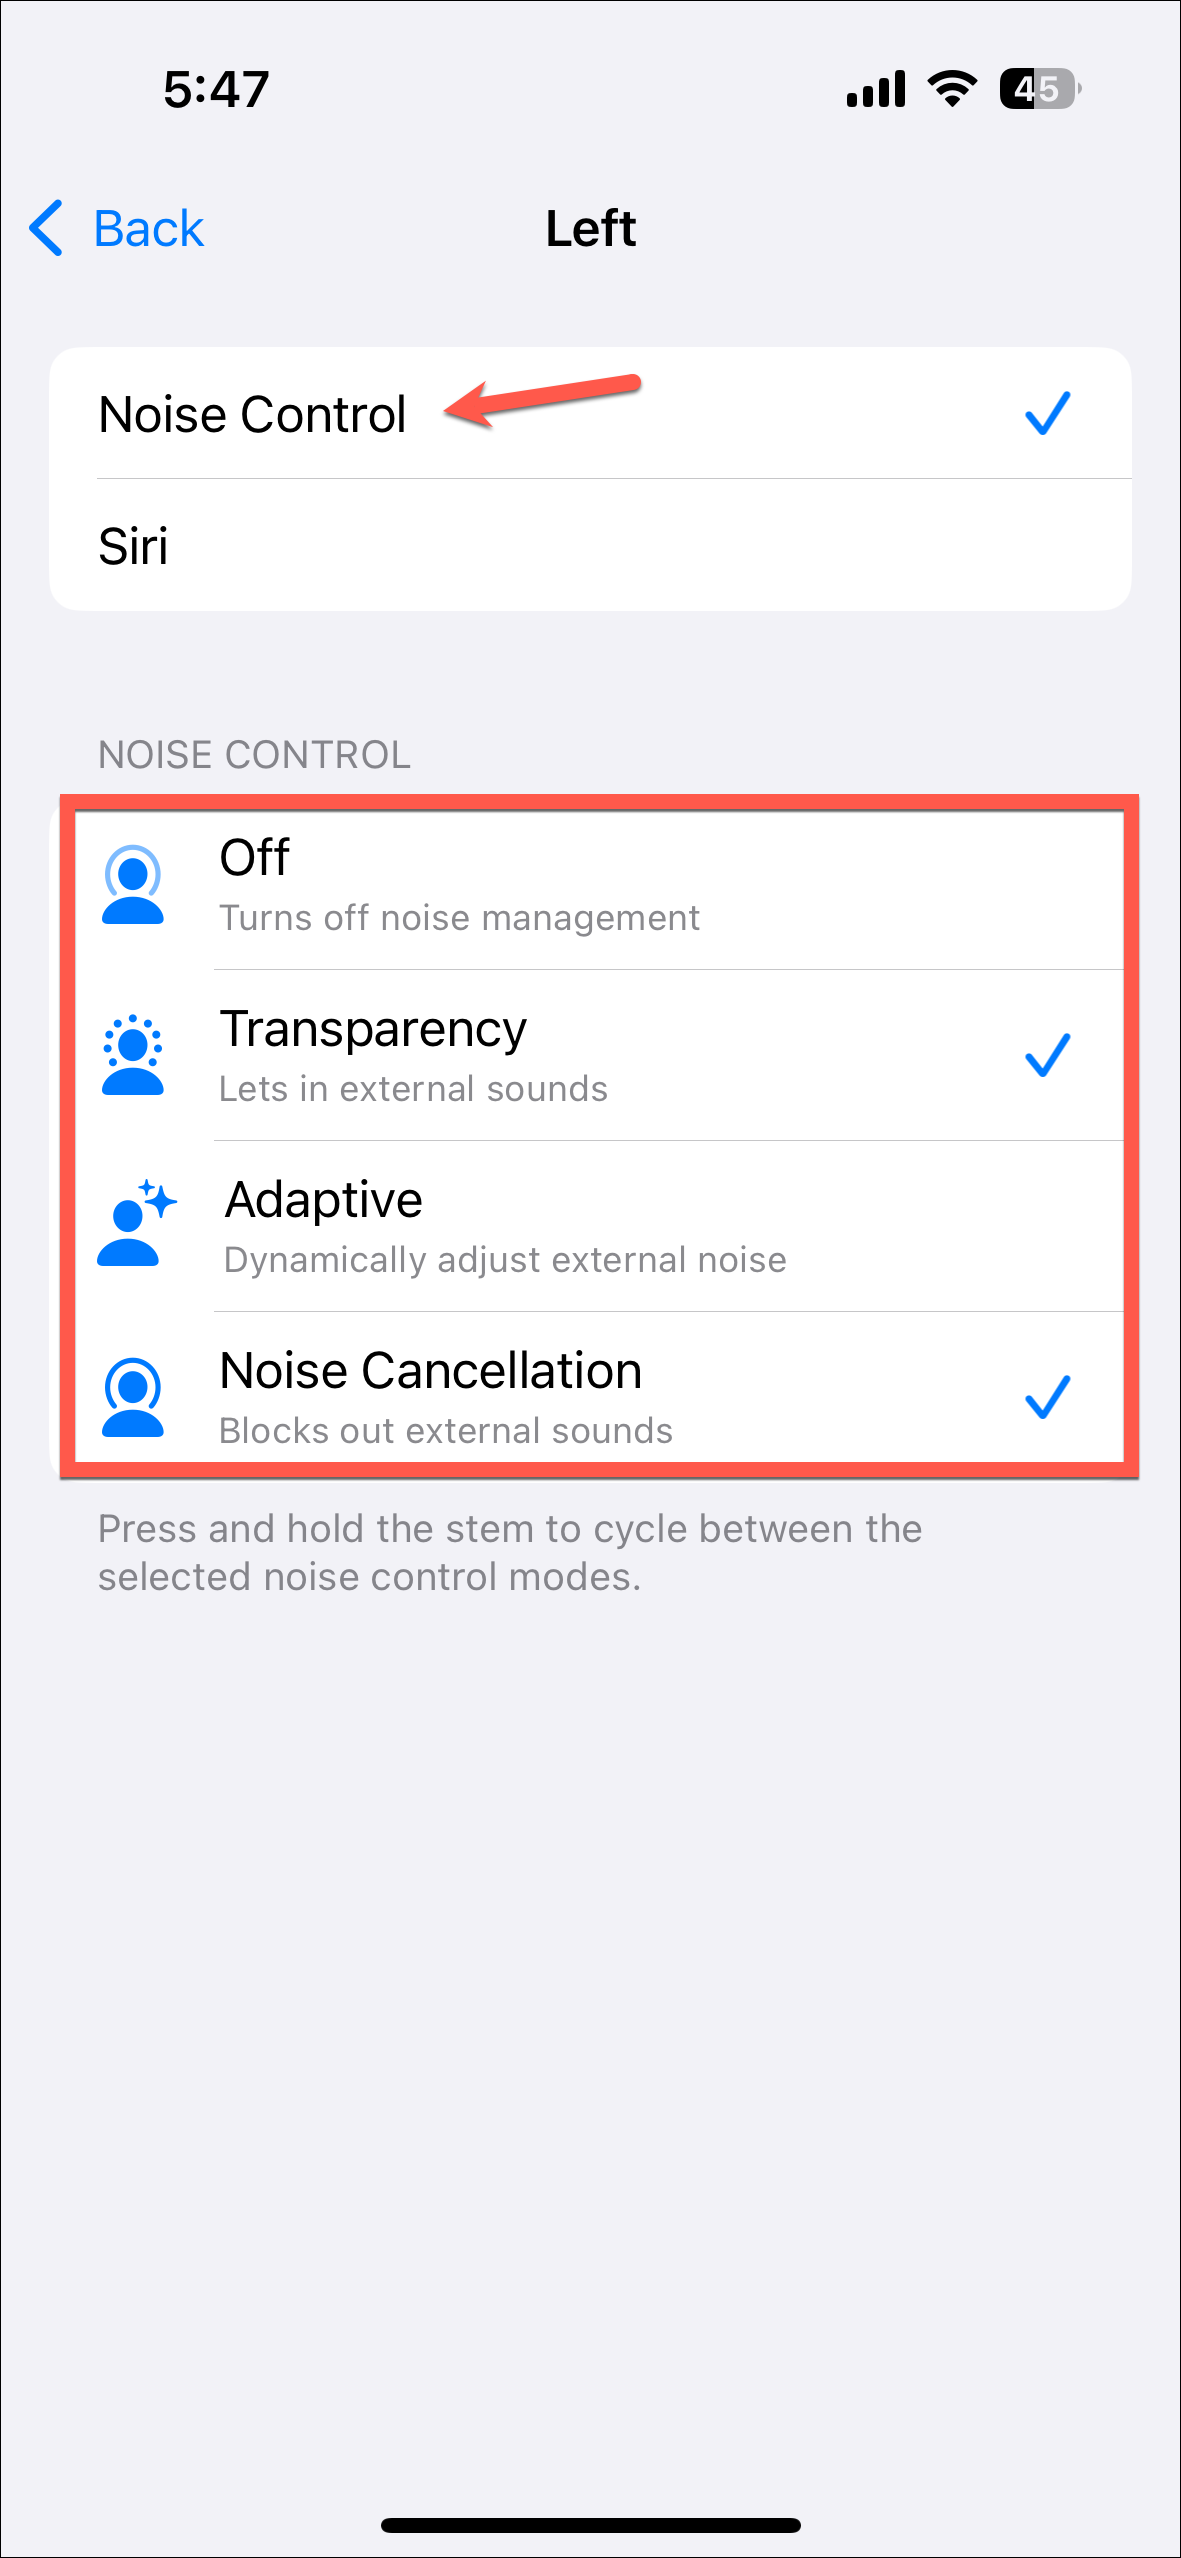
- Next, tap 'Noise Control' at the top to select it.
- Then, under 'Noise Control', select the modes that you want to cycle through with the long-press of the stem. You can choose between 'Transparency', 'Adaptive', 'Noise Cancellation', and 'Off'.
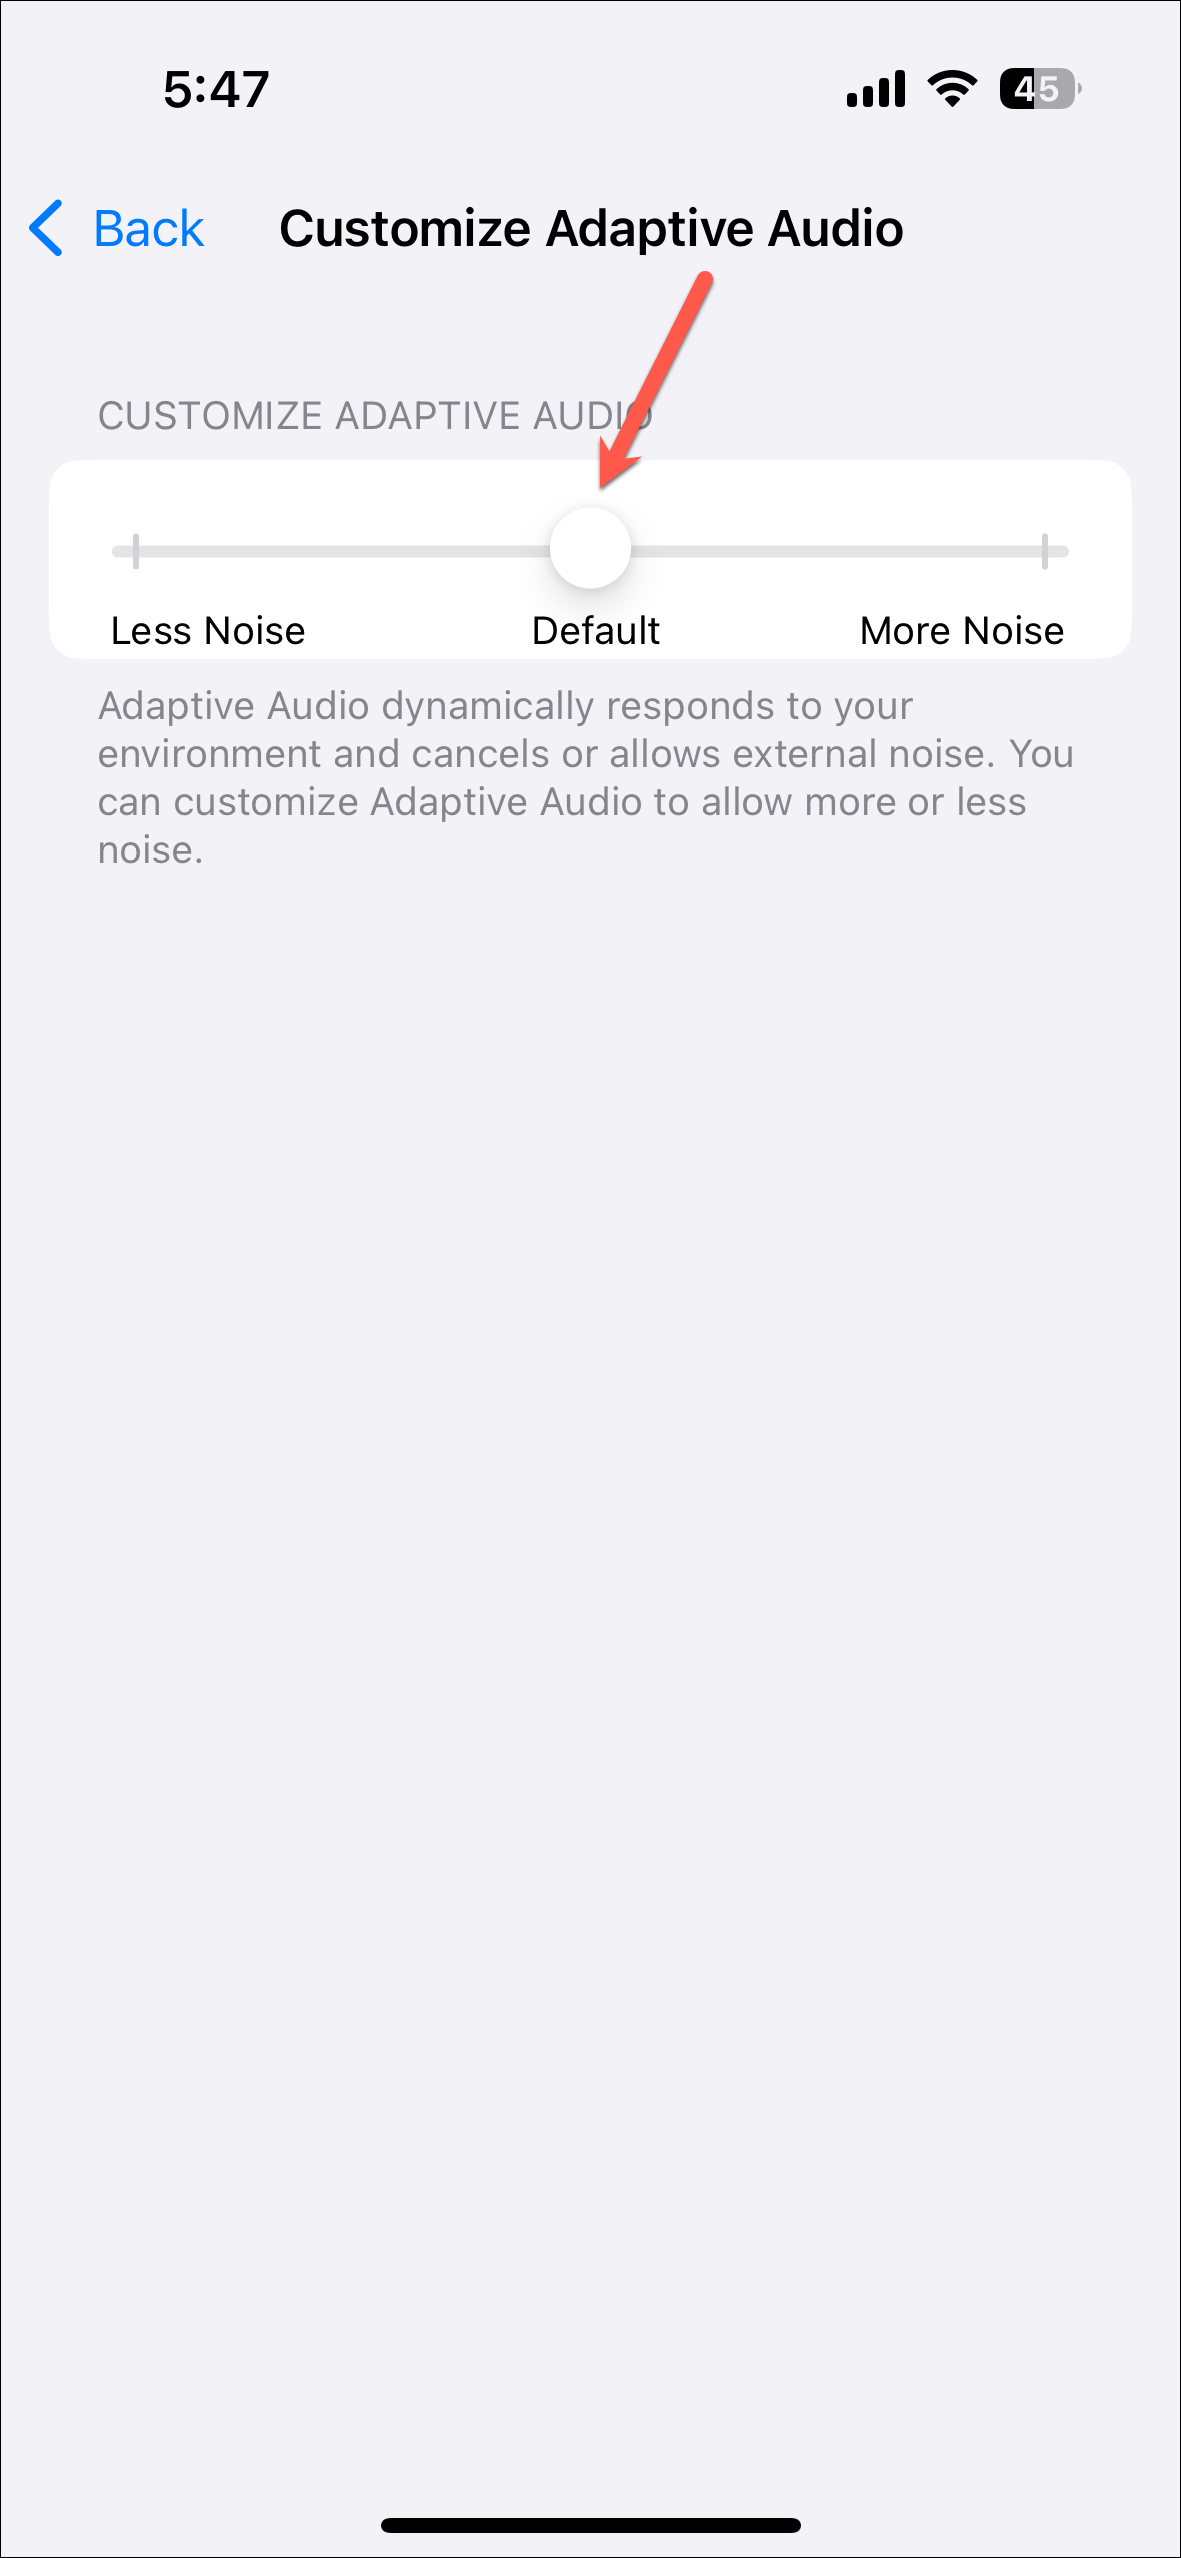
Customize Adaptive Mode
You can also customize Adaptive Mode according to your preferences.
- With your AirPods in your ears and Adaptive Mode enabled, go to your AirPods from the Settings.
- Then, tap on 'Adaptive Audio' under 'Audio'.
- Here, you can move the slider to the left or the right to customize the amount of ambient audio your AirPods will let in when they're in Transparency Mode.
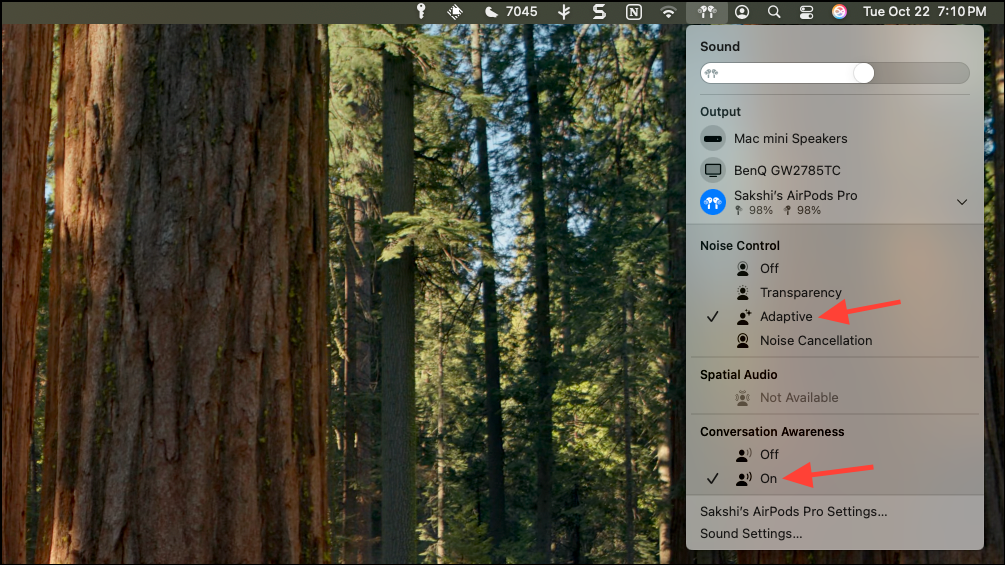
Enable Adaptive Audio from Mac
You can also enable Adaptive Audio features from your Mac.
- After connecting your AirPods to your Mac, click on the AirPods icon from the menu bar.
- Then, select 'Adaptive' under 'Noise Control' and 'On' under 'Conversation Awareness'.
- You can also enable these from the Settings app.
- Open the Settings app and go to your AirPods from the left.
- Then, select 'Adaptive' from the drop-down menu on the right of 'Noise Control'.
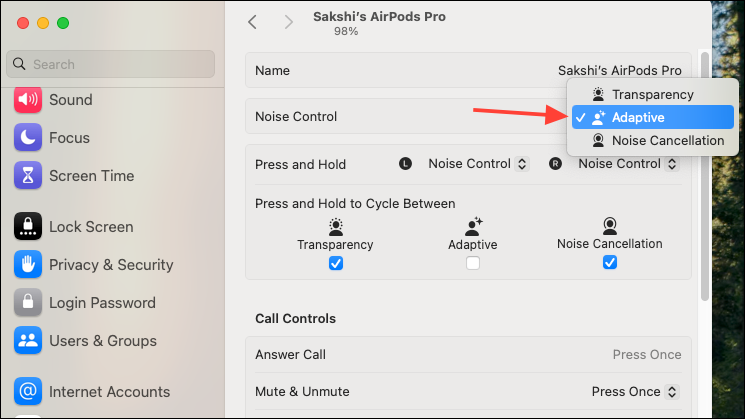
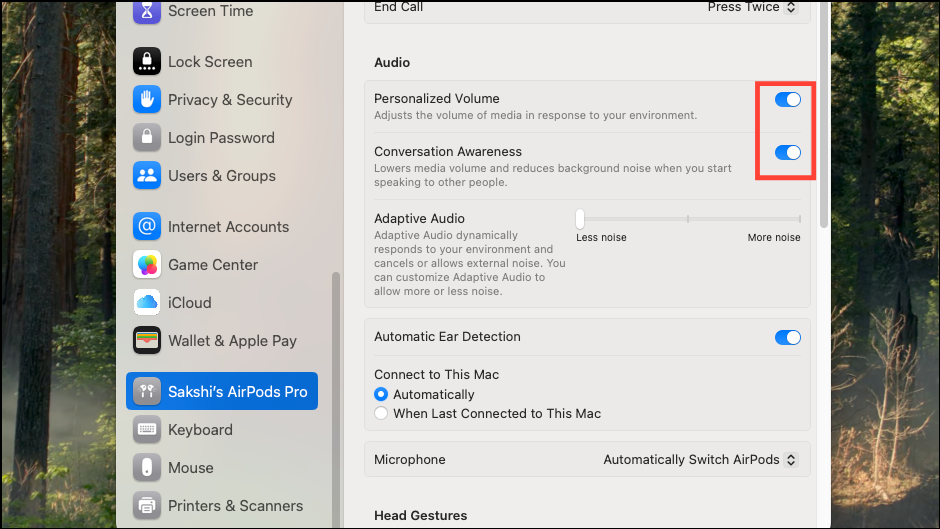
- To enable Personalized Volume and Conversation Awareness, scroll down and enable the toggles for both.
- Similar to the iPhone, you can also configure Noise Control settings to be changed from the AirPods stem from the Mac.
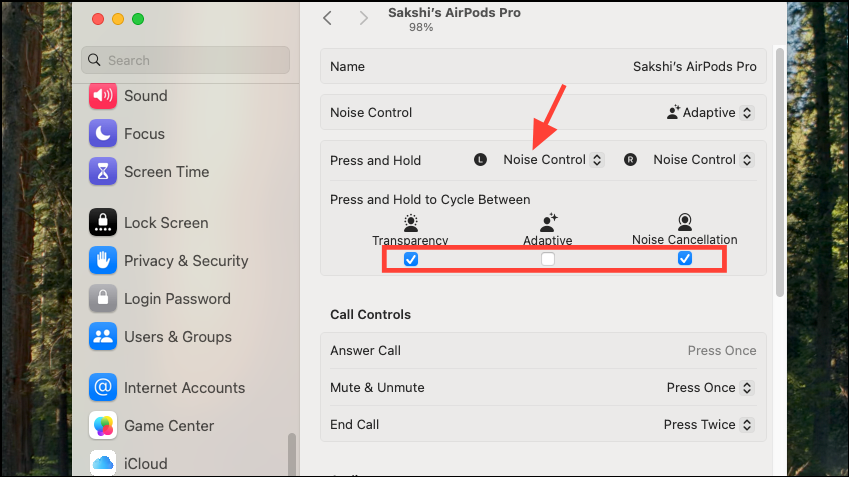
In AirPods Settings, select 'Noise Control' from the drop-down menu for Left or Right AirPod next to 'Press and Hold'. Then, select which settings you want to cycle between with the AirPods stem.
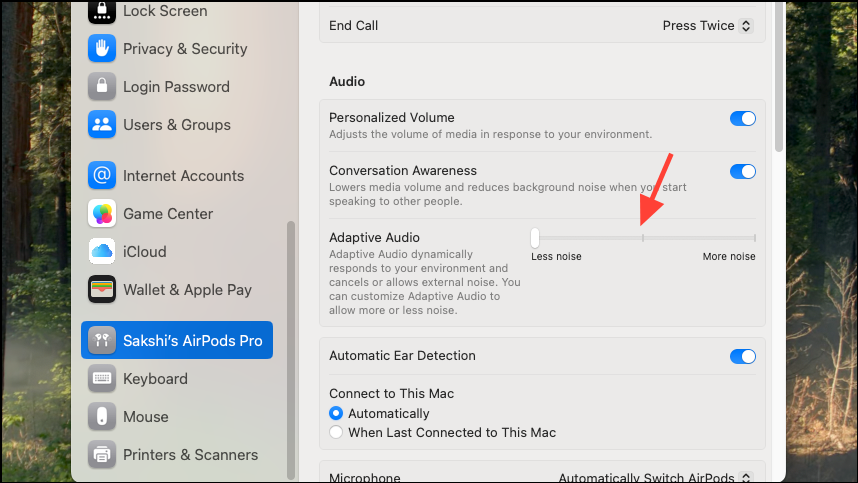
- To customize Adaptive Audio, scroll down and adjust the slider next to 'Adaptive Audio' under 'Audio'.
Things to Know
- For AirPods Pro 2 (both cases), the firmware version should be '6A301' or later to use Adaptive Audio. While it's an old update so it shouldn't be a problem, but if the firmware is not updated, you can force an update. To update your AirPods, connect them to your iOS or macOS device. Once they are connected, place them in the charging case and connect the case to a power source while keeping your iOS/ macOS device nearby. This should download and install the latest firmware update automatically over the air.
- When your AirPods switch from one device to another, the configured settings are carried over.
- You can also ask Siri to turn on Adaptive Audio or Personalized Volume after enabling it on your AirPods.