
It’s not uncommon to see Windows 10 updates messing up with people’s PCs. If you have installed the Windows 10 version 1909, November 2019 update on your PC, and you’re already experiencing issues with the update, then it’s a good idea to uninstall the update until Microsoft resolves the ongoing issues with it.
To get started, open Windows 10 Settings on your PC. Click the Start menu button on the task bar and then click the “Settings” gear icon.
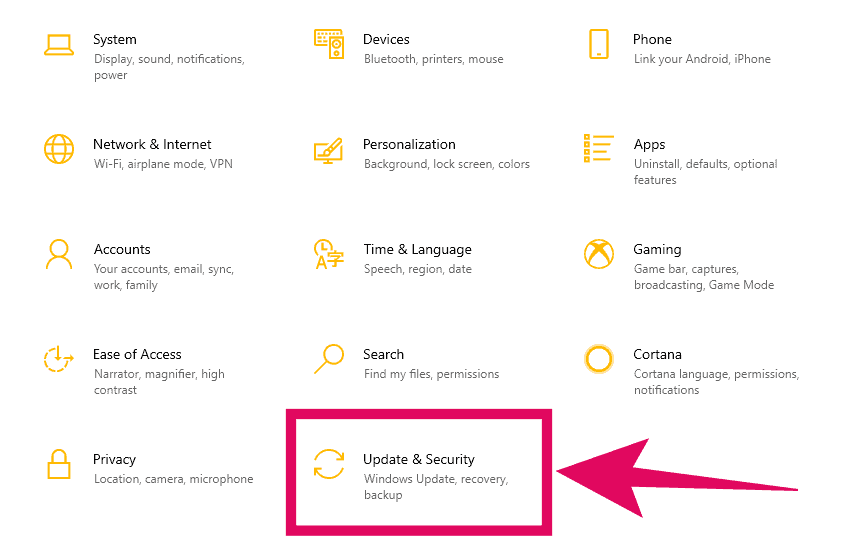
On the Windows 10 settings screen, scroll down a bit and click the Update & Security option.
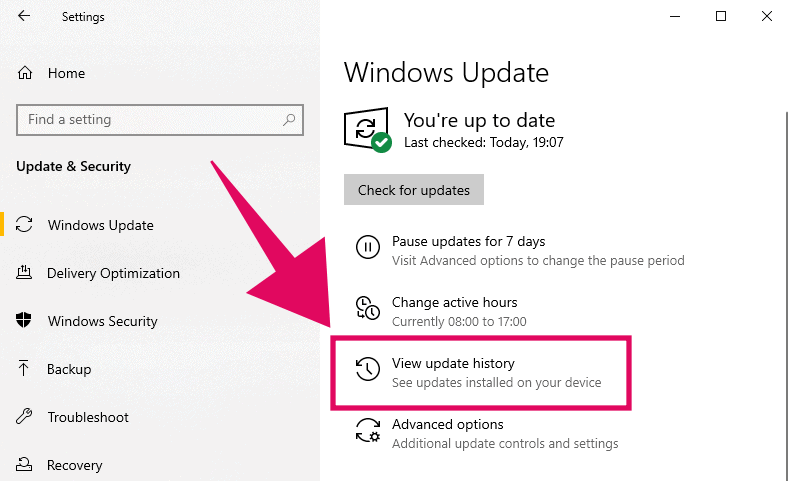
Click the View update history button on the Windows Update screen to get a list of all recently installed updates on your PC.
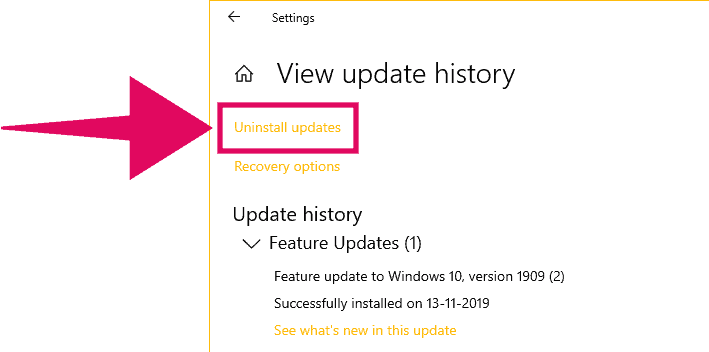
At the top of the update history screen, click the Uninstall updates button. This will open a control panel window where you uninstall Windows updates.
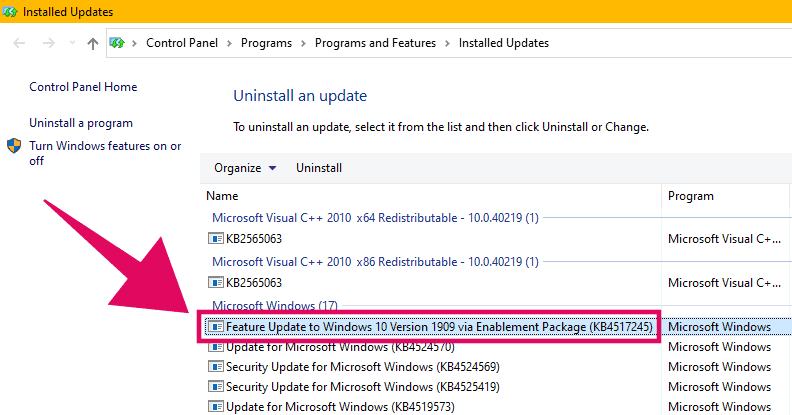
On the Control Panel screen, look for the “Feature Update to Windows 10 Version 1909 via Enablement Package (KB4517245)” record in the list of recently installed Microsoft Windows updates on your system.
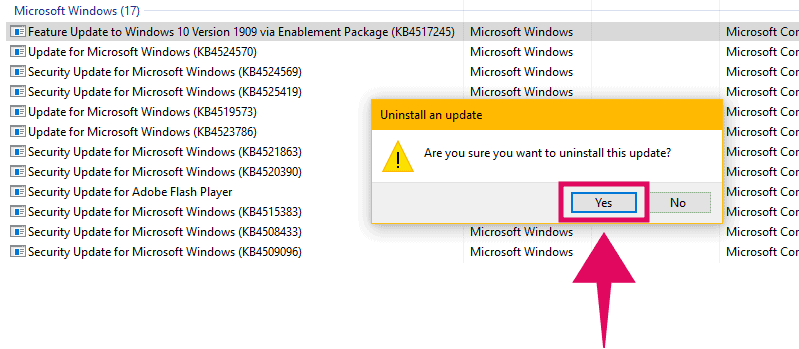
Double-click on the “Feature Update to Windows 10 Version 1909 via Enablement Package (KB4517245)” listing, then click Yes on the confirmation dialogue to uninstall Windows 10 November 2019 update.
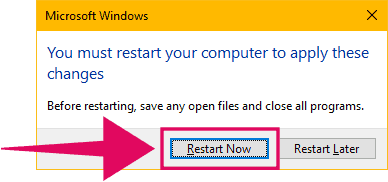
Your request to uninstall Windows version 1909 will process and soon after you’ll get a prompt to Restart your PC. Do it completely uninstall the update from your system.
Verify Windows 10 version after uninstalling update
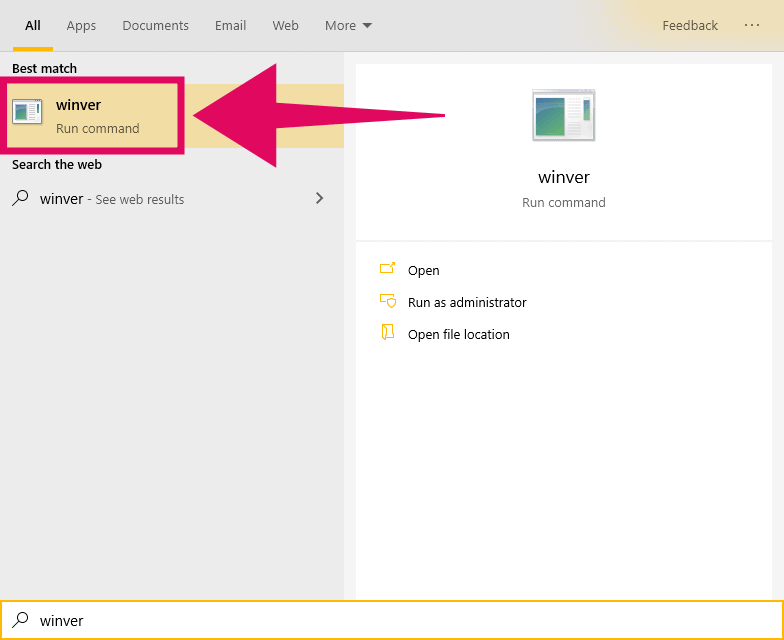
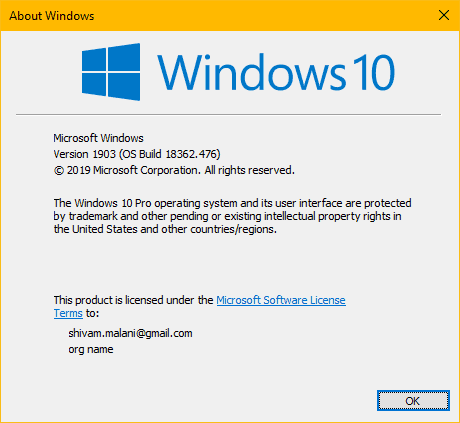
After restarting your PC, verify that Windows 10 version 1909 has been removed by running the winver command.
Open Start menu, and type winver in the start menu search. Then click on the winver command result to check your current Windows 10 version.
On the About Windows screen, you should either see the Windows 10 version 1903 with OS Build 18362.476, or whatever the previous Windows 10 build was installed on your PC.
🍻 Cheers!