
The Wing of Keres in Nod-Krai hides a small cluster of high-value chests, including a Luxurious Chest, behind a short chain of mechanics and combat encounters. Everything hinges on three objectives around the central island: purging an Evil Eye of Blightseep, powering a Nycalyx via Mandagora, and rescuing a Kuuhenki from Hilichurls. Once all three are complete, a final Moonlane sequence unlocks the big rewards.
Wing of Keres chest overview and rewards
The Wing of Keres puzzle cluster sits on and around the main island with the Wing of Keres Teleport Waypoint in Nod-Krai, added in Version 6.3 Luna IV. Completing the full set of mechanics around the area lets you open several Exquisite Chests, one Precious Chest, and one Luxurious Chest.
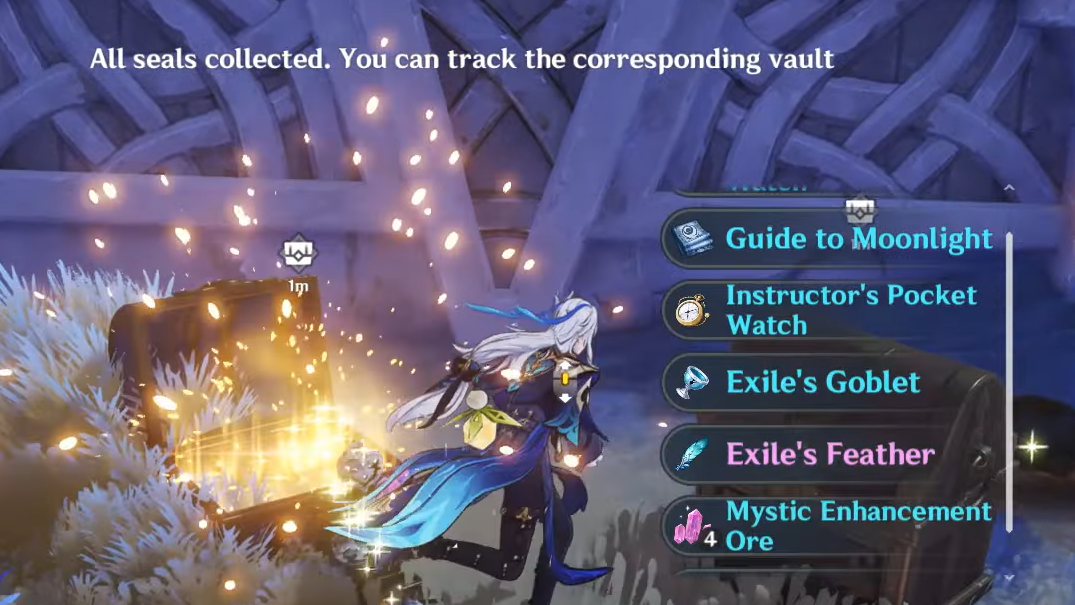
Alongside the usual artifacts, materials, and Mora, the chests can drop Primogems and may include an Irismoon Seal, which you can later use to unlock treasure vaults elsewhere in Nod-Krai. Finishing the overall puzzle also grants the achievement “The Mound in the Moonlight” for 5 additional Primogems. A buried Time Capsule nearby contains a letter from the Hyperboreans that adds lore on the Elysium Project and Seeds of Life, but is not needed for chest unlocks.
Wing of Keres puzzle structure
The Luxurious Chest only opens once three separate moon pillars around the main island are activated, and the central corruption has been cleared. To reach that state, you need to do the following in roughly this order:
- Purge the Evil Eye of Blightseep at the center of Wing of Keres using a Super Sharp Spirebloom.
- Energize the Nycalyx on a nearby peninsula by forming a Mandagora circuit with a Kuuvahki structure.
- Clear the Hilichurl camp on the northeastern island and free a trapped Kuuhenki.
Each side objective releases a Kuuhenki that returns to the central island via Moonlanes and activates a moon pillar there. Once all three Kuuhenki have returned and all pillars are lit, a Moonlane appears above the center of Wing of Keres. Riding that lane completes the sequence and unlocks the big chests.
Clear the Evil Eye of Blightseep at Wing of Keres
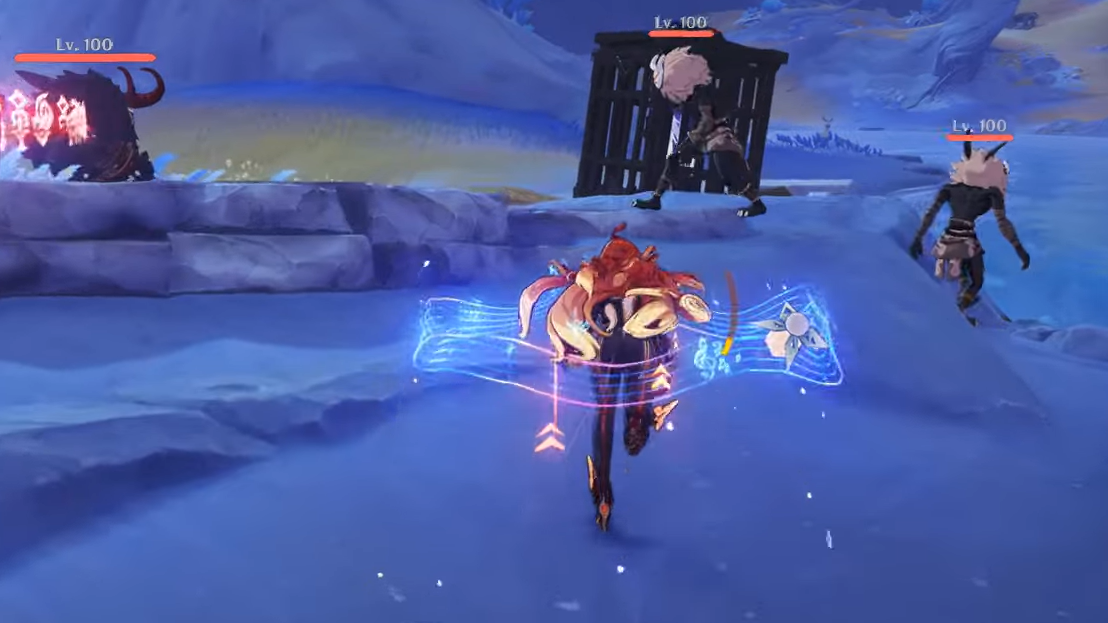
The central corruption and one of the Exquisite Chests are locked behind an Evil Eye of Blightseep encounter that uses the local plant mechanics.
Step 1: From the Wing of Keres Teleport Waypoint, move to the middle of the main island where the corruption and sealed chests sit. Look around for either Glimmerfruit or Mandagora that can be used to suffuse a nearby Super Sharp Spirebloom.
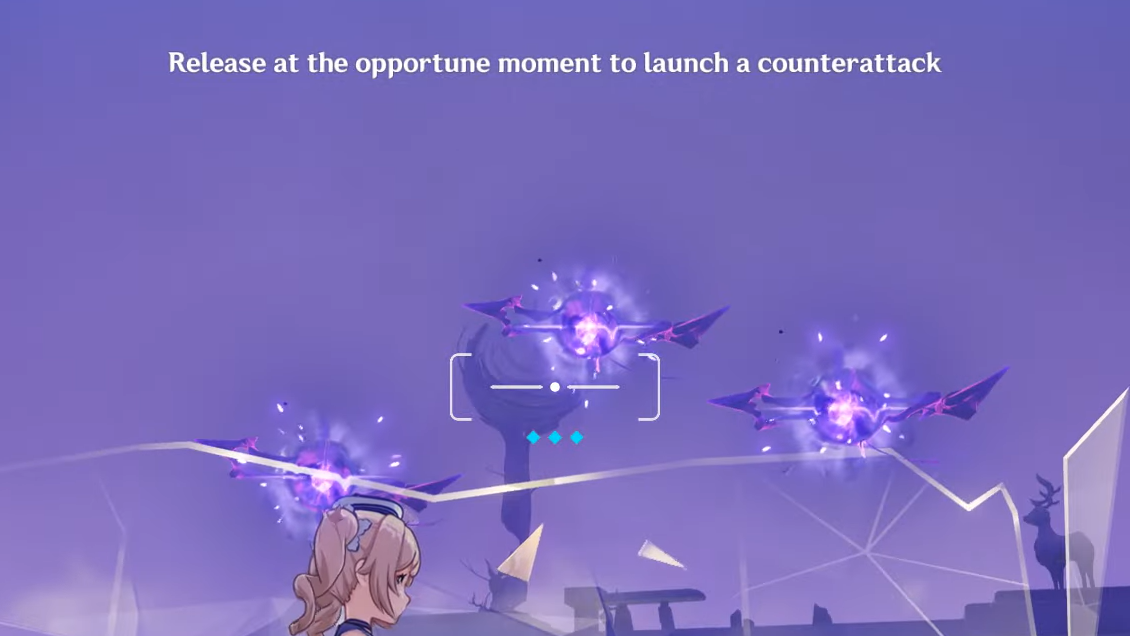
Step 2: Interact with the plant to suffuse the Spirebloom, then absorb its empowered fruit. This lets you fire a lightblade at the Evil Eye’s shield. When the Eye’s shield flashes, release the shot to perform a counterattack that breaks its defense efficiently.
Step 3: After defeating the first Eye, two more spawn in the air. With the Spirebloom buff still active, aim the lightblade between them so the line of fire passes through both targets in a single shot.
Step 4: Once those two are down, three additional Eyes appear above the two locked chests. If the Spirebloom buff has expired, return to the plant and absorb its fruit again. As before, try to line up your shots to clip more than one Eye at a time.
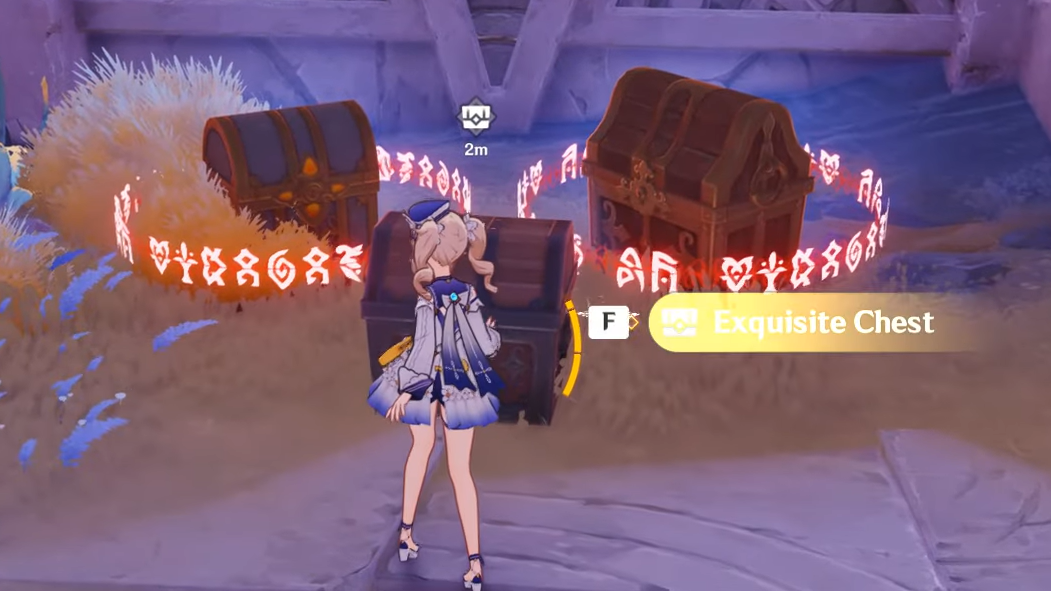
Step 5: When all Evil Eyes are destroyed, a short cutscene plays. The Abyssal Corruption around the central platform dissipates, and a new Exquisite Chest appears between the two existing locked chests.
Step 6: You can open this Exquisite Chest immediately, but the Luxurious Chest and other rewards remain sealed until the Nycalyx and Hilichurl objectives are also complete.
Energize the Nycalyx and release a Kuuhenki
The Nycalyx puzzle lives on a peninsula southeast of the central island and revolves around using Mandagora to carry energy between a triangular Kuuvahki structure and the Nycalyx.
Step 1: From the main Wing of Keres island, use the Moonlane located to the south to travel to the small peninsula southeast of the Teleport Waypoint.

Step 2: On arrival, pick up two Mandagora and throw them at the Lunar Conflux Barrier on your left side. Breaking this barrier reveals one more Mandagora, giving you enough to build a full circuit for the Nycalyx.
Step 3: (Optional) There is another Lunar Conflux Barrier close to the triangular Kuuvahki structure itself. Breaking this one yields only a small Mora chest and does not affect the main puzzle.
Step 4: Place or throw Mandagora to create a continuous energy line between the triangular Kuuvahki device and the Nycalyx. Once the connection is complete, the Nycalyx energizes and releases a Kuuhenki that starts flying back toward the main island.
Step 5: An Exquisite Chest appears near the Nycalyx as a reward for powering it. Open it, then use the local Moonlane to follow the Kuuhenki back to Wing of Keres. When the Kuuhenki returns, it activates one of the moon pillars around the central island.

Clear nearby Hilichurls and free the caged Kuuhenki
The second side objective focuses on combat. A Kuuhenki is locked in a cage on an island northeast of Wing of Keres, guarded by Hilichurls and a Mitachurl.
Step 1: Head to the small island northeast of the Wing of Keres Teleport Waypoint. Glide or use any available Moonlane routes to cross the gap.
Step 2: Once you land, defeat the Hilichurls and the Mitachurl that patrol near the shore and cage area. Clearing the enemies is required before interacting safely with the Kuuhenki.
Step 3: After combat, locate the Kuuhenki trapped inside a metal cage. Interact with it to unlock the cage. The freed Kuuhenki immediately opens a Moonlane that points back toward the main Wing of Keres island.
Step 4: An Exquisite Chest appears nearby once the Kuuhenki is freed. Open the chest, then use the summoned Moonlane to travel back while following the Kuuhenki.
Step 5: When the Kuuhenki reaches Wing of Keres, it lights another moon pillar around the central platform. Together with the Nycalyx Kuuhenki and the initial cleanse, you should now have all three Kuuhenki active.
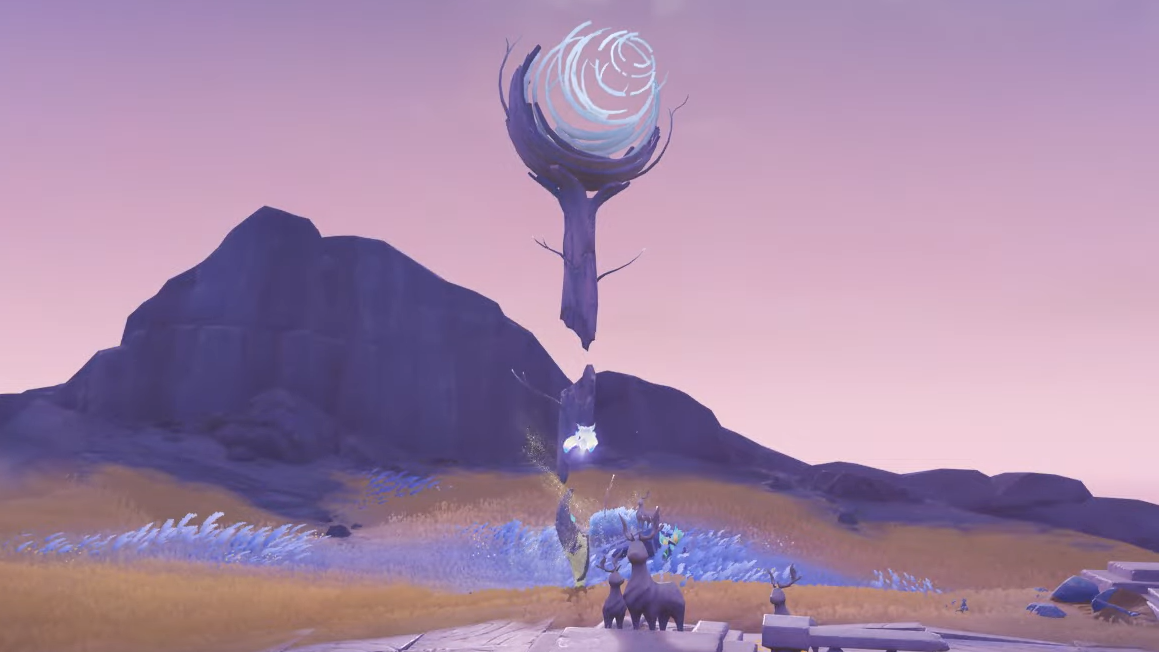
Ride the central Moonlane to unlock the Luxurious Chest
Once all Kuuhenki have returned and their associated pillars are active, the last step is automatic but easy to miss if you leave the area too quickly.
Step 1: Check the central island at Wing of Keres. After all three Kuuhenki are freed and their Moonlanes used, they converge and create a new Moonlane that hangs above the middle of the area, near the previously corrupted platform.
Step 2: Interact with or step into this Moonlane to begin a short ride. Let the sequence play out; there are no additional inputs or combat segments during this segment.

Step 3: When the ride ends and you are returned to the central platform, the previously locked chests, including the Luxurious Chest and any nearby Precious or Exquisite Chests, will be fully unlocked and ready to open.
Opening all available chests around the Wing of Keres and completing the associated actions in this area should also trigger the “The Mound in the Moonlight” achievement, adding a small but reliable Primogem bonus to the material haul.
With the Evil Eyes defeated, the Nycalyx energized, and the caged Kuuhenki freed and escorted back by Moonlane, the Wing of Keres puzzle cluster is fully cleared. If any pillar remains inactive or the central Moonlane does not appear, revisit the southeast Nycalyx peninsula and the northeastern Hilichurl island to confirm that each Exquisite Chest has been spawned and each Kuuhenki has been followed home.