
In a very short period, Figma has become one of the most used design tools in the world and there are several reasons for it. While tools like Adobe Illustrator need to be purchased and installed on your machine, you can run Figma in your web browser for free without needing to install anything. This also makes it suitable for a machine running macOS, Linux, and even ChromeOS, in addition to Windows.
Plus, Figma lets you collaborate with others on the same projects in real-time, which can save a lot of time. Finally, the tool is incredibly powerful, making it suitable for industry professionals as well as amateur hobbyists. So, if you want to learn how to use this fantastic design tool, check out this comprehensive guide.
What is Figma? Figma is an online collaborative design tool that lets you design apps, websites, and more from your browser. It is primarily used for user interface design, but can also be used for other purposes. The program can run on your web browser or your desktop and even offers limited offline functionality. Additionally, once you design your app or website, you can test it in the program itself and collect feedback, thanks to the Prototype tool. The best thing about Figma is that you do not need any coding knowledge or skill to use it, which makes it suitable for everyone.
Step 1: Setting up your Figma account
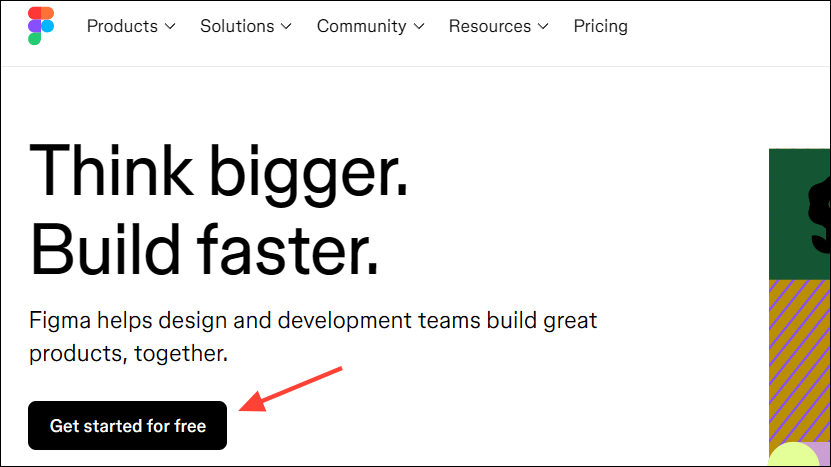
- Head to figma.com in your web browser and click on the 'Get started for free' button.
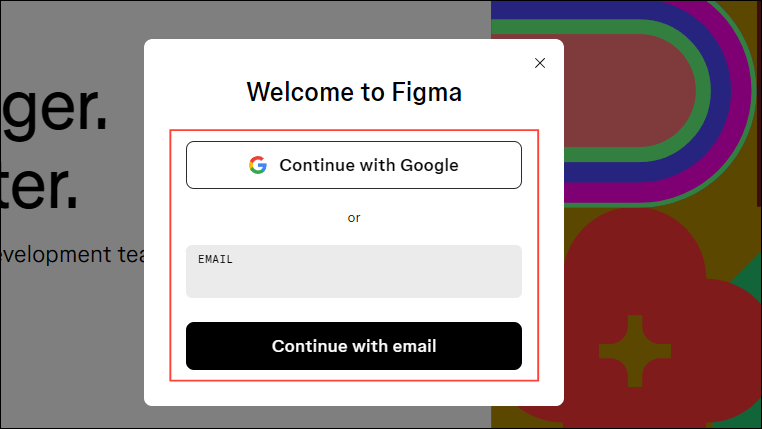
- You can then sign in to Figma using your Google account or email by clicking on your preferred option.
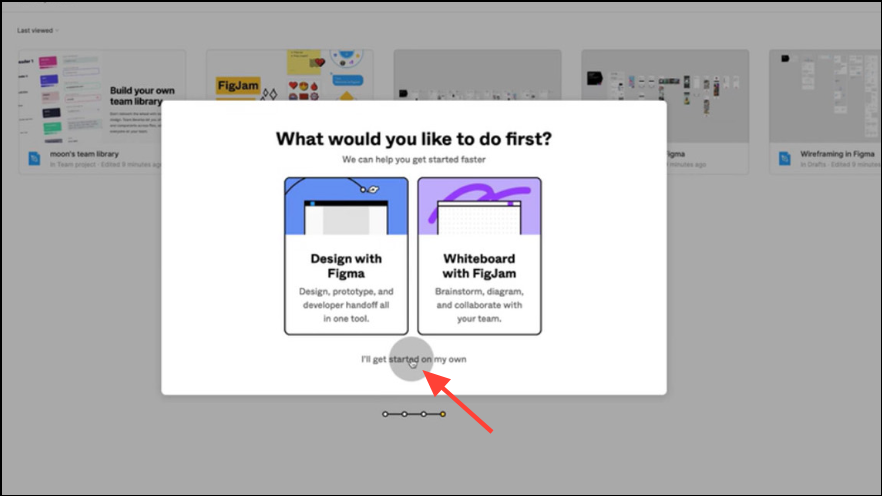
- Once you sign in to Figma, you will see another page where you can enter a few details to set up your account. Here, you can choose your plan and create a team name for collaboration. After you're done, you can choose between Figma and FigJam, Figma's whiteboarding tool. Click on 'I'll get started on my own'.
Step 2: Understanding and navigating the interface
Once you've created your account and signed in, you will see the main Figma dashboard.
- On the left, you will see all your drafts, projects, and trash.
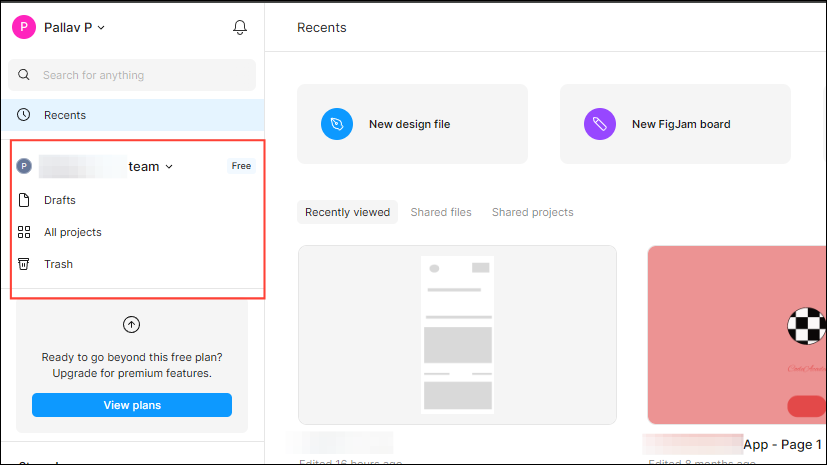
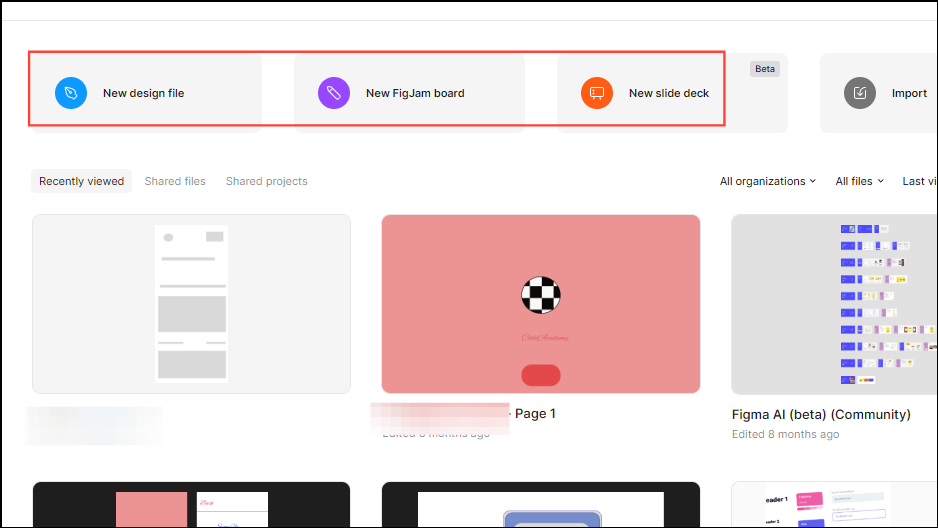
- You will also see options, such as 'New design file' and 'New FigJam board' in the center that will let you start new projects.
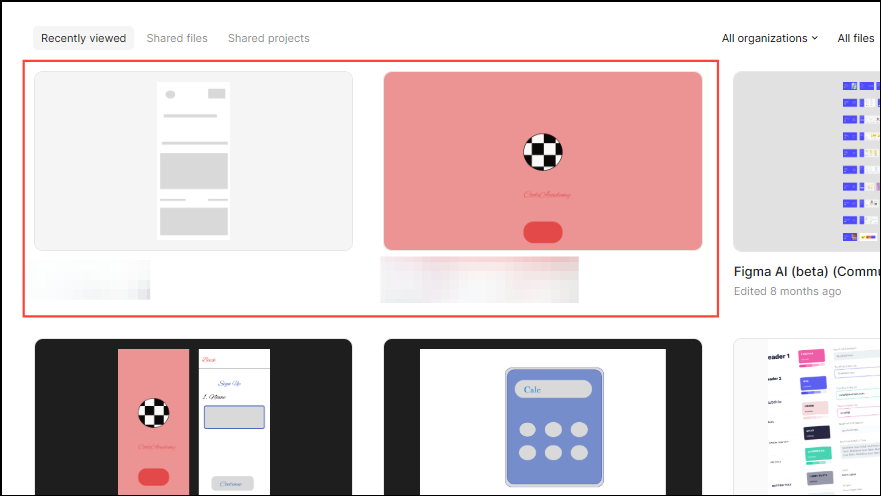
- Projects you have worked on and those from the Figma community will also appear here. You can open and resume working on any of these by clicking on them.
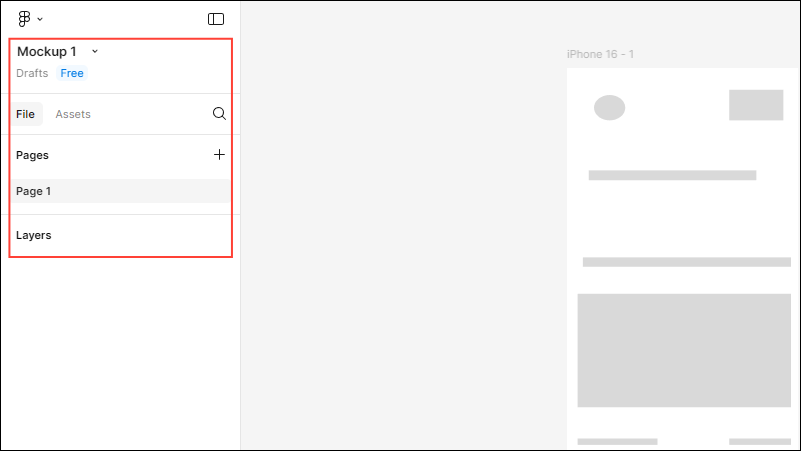
- When you select a project by clicking on it, the interface will change. A menu will appear on the left and include options like the Project Name, File, Pages, Layers, etc. Keep in mind that you can only create three pages in a project with the free plan.
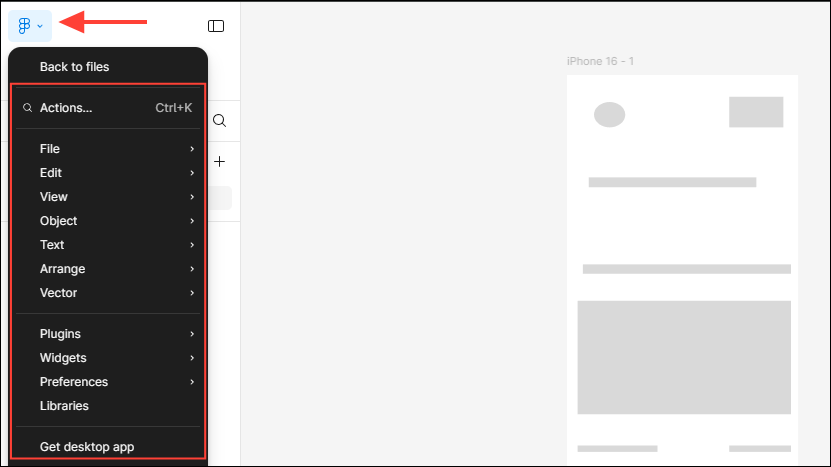
- You can also click the Figma button at the top to see more options.
- Another menu, called the Properties panel, appears on the right. When you select an object in your project, all its properties will appear here, allowing you to edit and change them easily as needed.
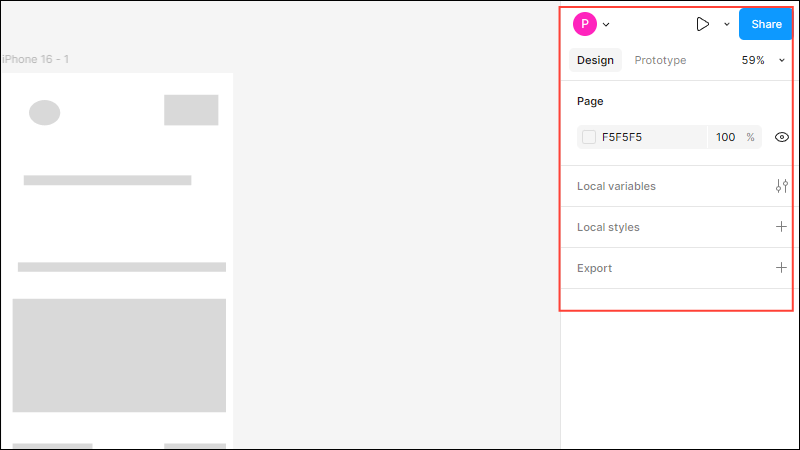
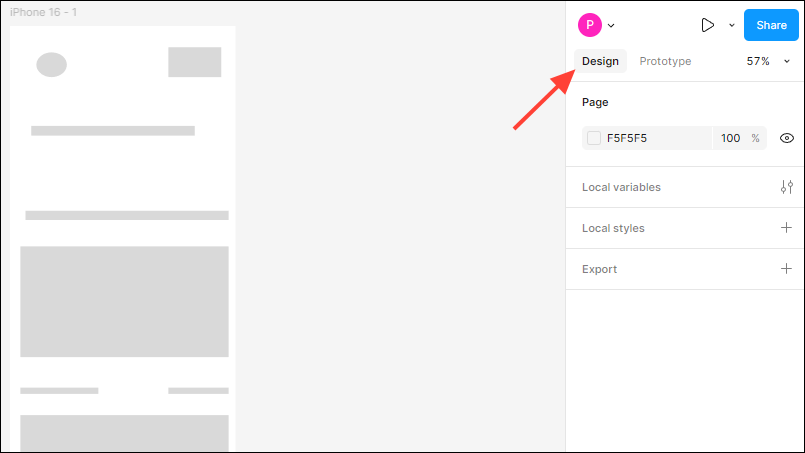
- By default, the 'Design' tab is active on this panel, which lets you view and change various properties of the elements you use in your project. For instance, you can change the styles of objects and the background color from the Design tab.
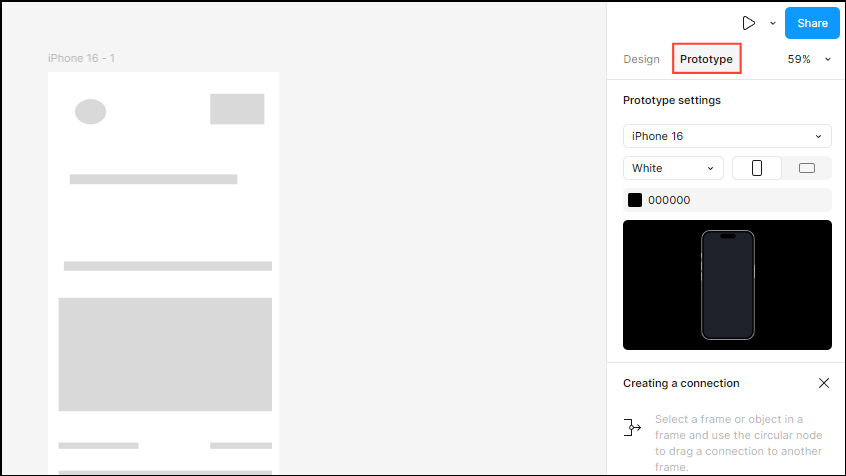
- Once you are done designing your website or app, you can click on the 'Prototype' tab to switch to it. This lets you create and view an interactive version of the website or app you are designing, helping you get a better idea of how users will experience it. You can link different pages of the app, decide how the user will move from one page to the next, what tapping or clicking various elements will do, etc.
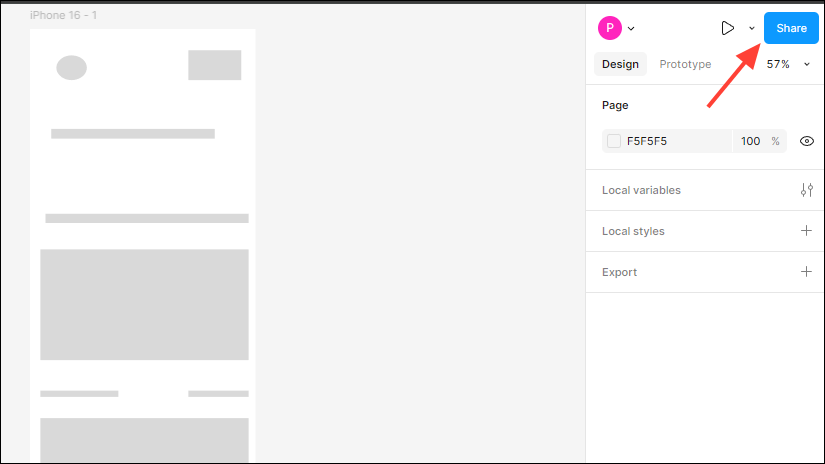
- To collaborate with others on the project, just click the 'Share' button on the top right. You can then choose whether to copy the link to the entire project, copy the prototype link, copy the Dev Mode link, or publish the project to the Figma community.
- At the bottom, you will find the Tools panel or the toolbar which contains the different tools you will use in your design projects.
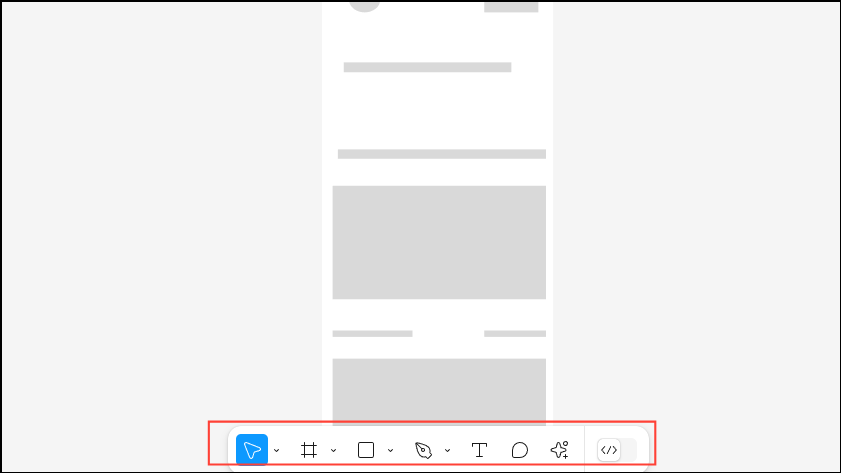
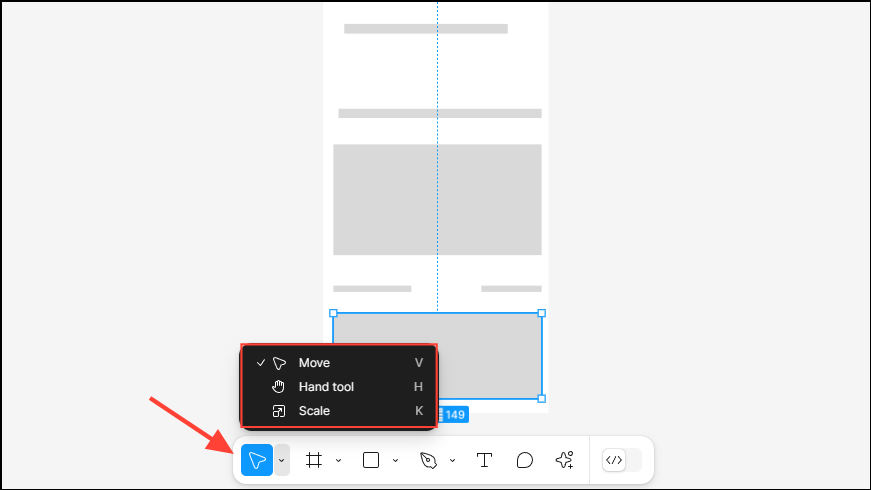
- Some of the tools have additional options which you can access by clicking on the dropdown button. For instance, the first tool is the 'Move' tool, which lets you move different elements in your design. When you click on it, you will also see the 'Hand' tool, for panning and the 'Scale' tool for adjusting the size of the elements.
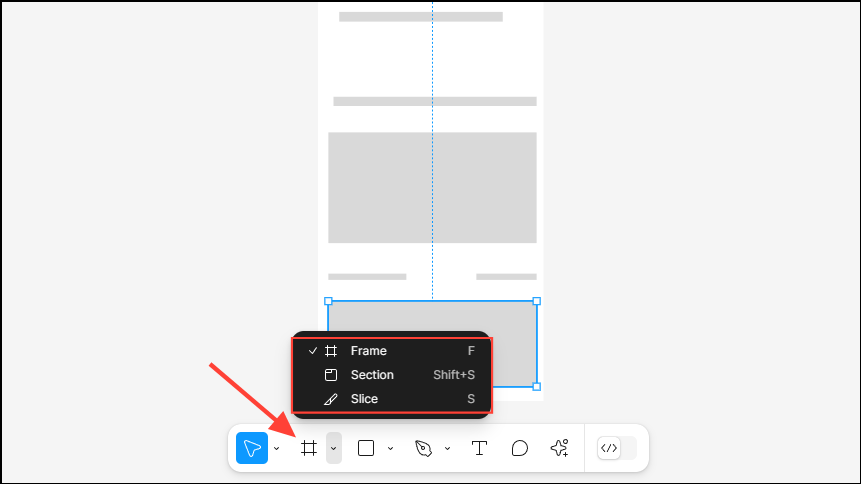
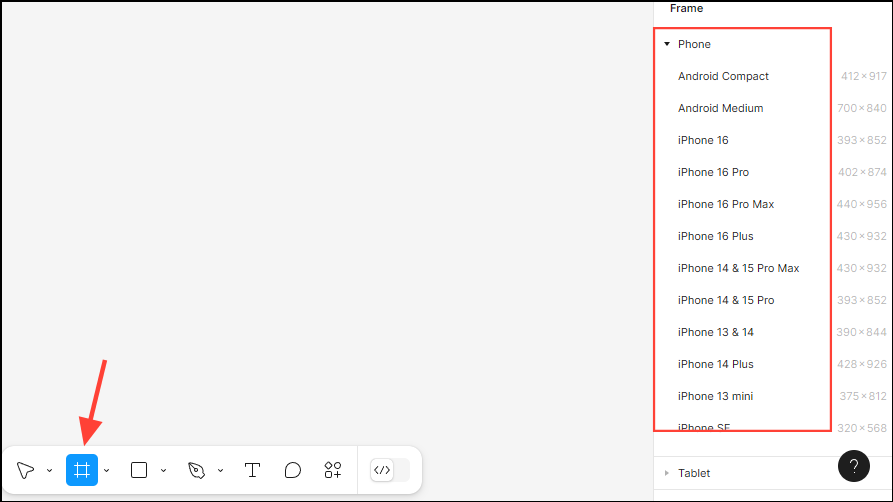
- Next is the 'Frame' tool, which you will use to create frames within which all other objects will be placed in a design. Additional tools here are the 'Section' tool for dividing the canvas into various sections and the 'Slice' tool for exporting specific sections of your design.
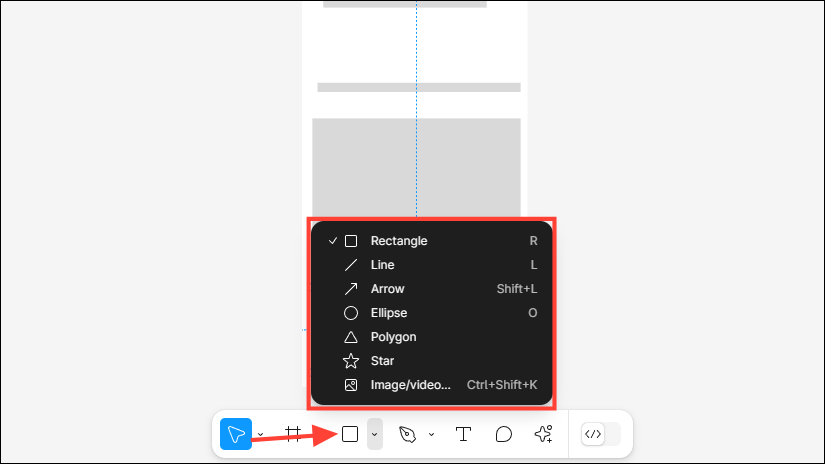
- The 'Shapes' tool is the third one from the left and lets you create various shapes, such as rectangles, lines, ellipses, etc. It also lets you insert images and videos in your design.
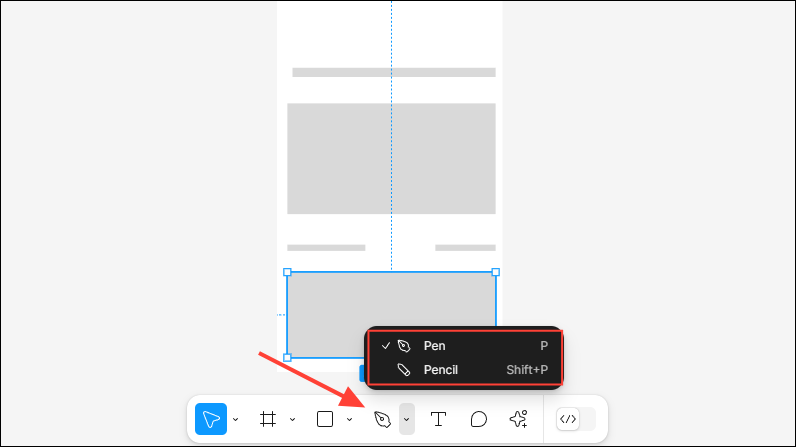
- Then there is the 'Pen' tool for creating vector designs in your project. You can also access the 'Pencil' tool from here which lets you sketch on the canvas, which can be handy when you want to annotate something.
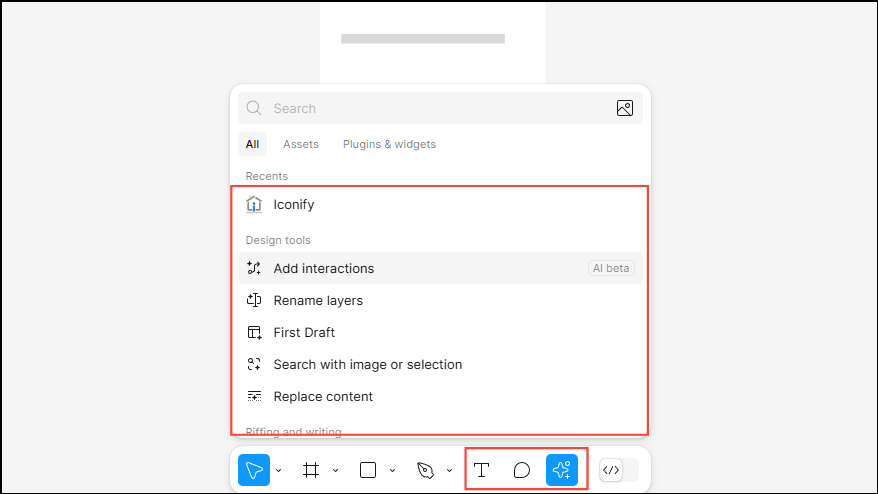
- The last three options tools do not have additional options. There is the 'Text' tool for adding text, the 'Comments' tool for commenting, and the 'Actions' tool. The Actions tool lets you define various steps and actions when you begin the prototyping stage after completing the designing stage.
Step 2: Creating a new design project
You can start a new project from Figma's dashboard.
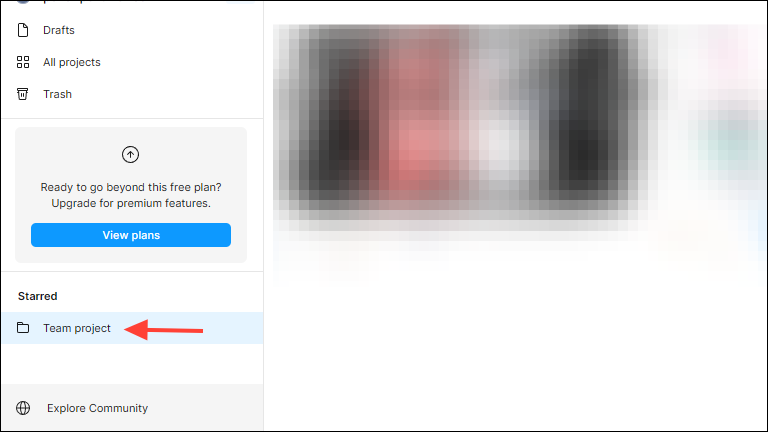
- Click on 'Team project' on the left.
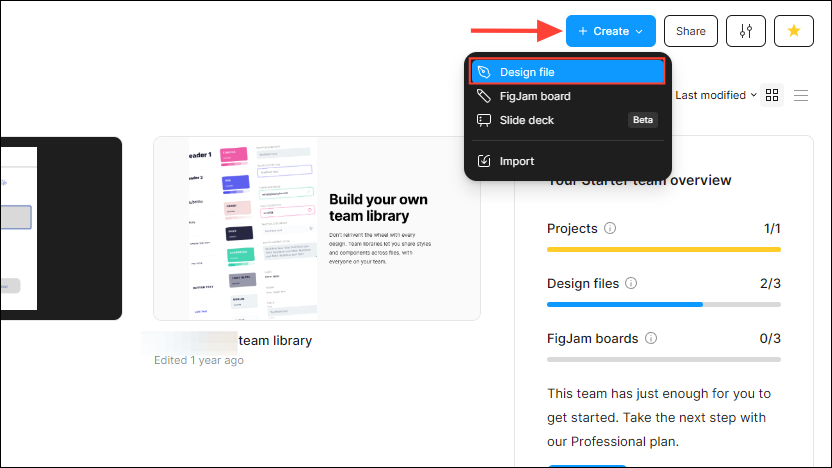
- Then click the 'Create' button at the top and select 'Design file' in the dropdown menu.
- A new design project will open on your screen. You can give it a name by typing it in the text box on the top left.

- The grey area is the canvas, which will serve as the background for your project. You can draw on it using the pencil tool, import images, add shapes and frames, and much more.
- In Figma, you need to use 'Frames' which serve as containers for all other elements you will use in a design project. Frames function just like an artboard in other design applications like Illustrator and Sketch. Click on the Frame tool on the Tools panel or use the
Fkey to select it. You can also use theAkey for the same purpose.

- To create a frame, click and drag on the canvas or choose from any of the preset frame sizes on the right side.
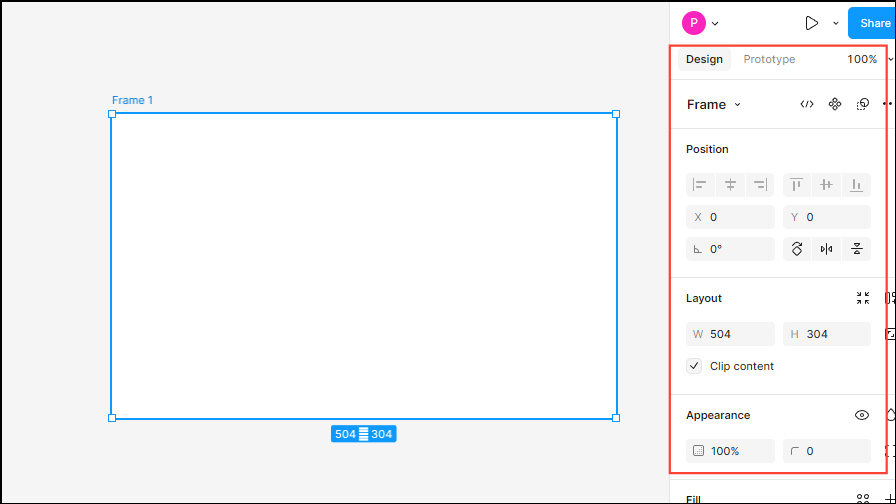
- When you create a frame, you will see various attributes for it on the right. Changing these will let you control how the frame appears.
- Projects can have multiple frames, which is why you may need to zoom in and out often while working. You can use the
Shift++shortcut to zoom in and theShift+-shortcut to zoom out.
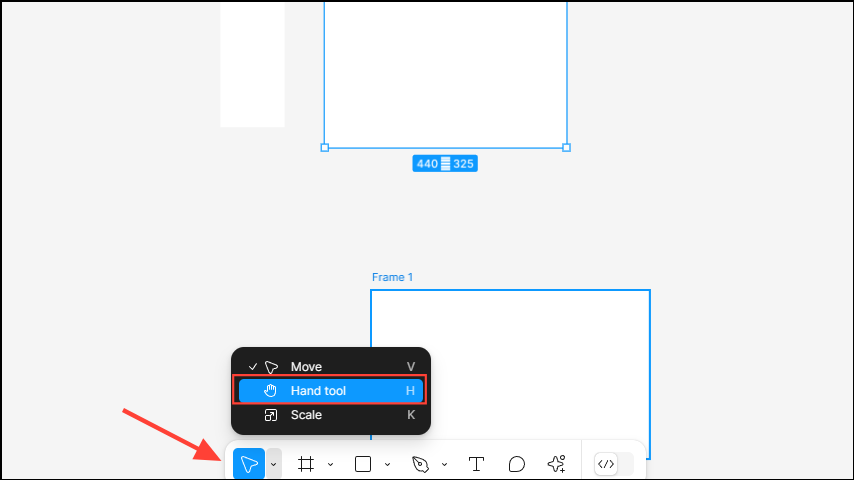
Shift + 1 and Shift + 2 shortcuts to zoom out and show the entire canvas and zoom in to the current selection respectively. Shift + N will zoom to the previous frame and N will zoom to the next frame. - You can move the canvas around using the hand tool, which can be handy when working with large files. Press and hold the
Spacebarand you will see the cursor change into a hand tool. Alternatively, click the cursor icon on the bottom toolbar and select the Hand Tool. You can then move the canvas around by clicking and dragging. On macOS, you use two fingers to drag on the trackpad.
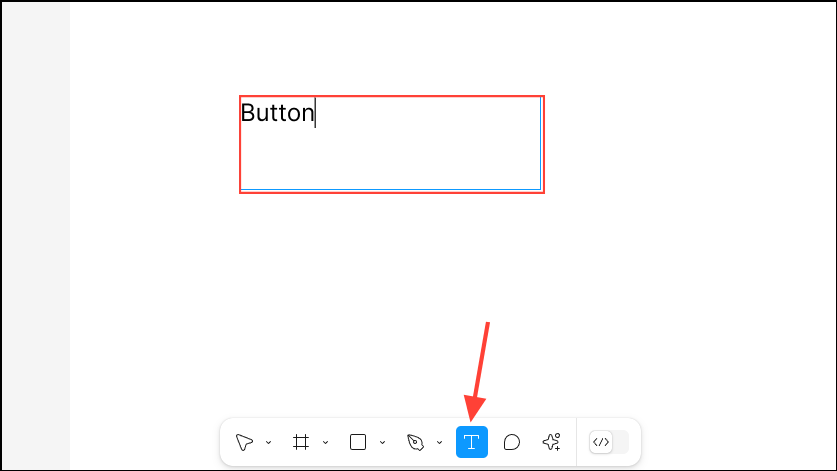
- To add text to your project, press
Tor click on the 'T' icon in the toolbar to select the Text tool and click inside your frame. Then type in the text you want to add. PressEscto exit the Text tool.
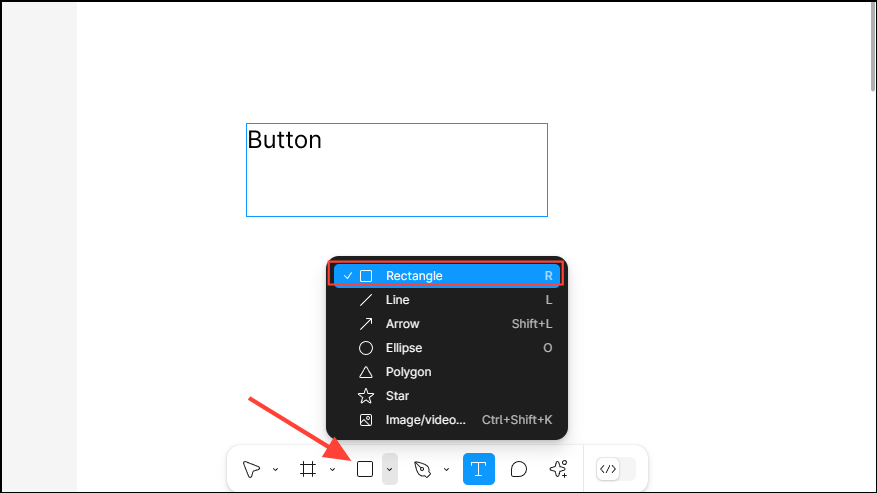
- You can create rectangles for buttons by using the
Rbutton or clicking the 'Shapes' tool and selecting the 'Rectangle' option. Then drag on the frame to create a rectangle.
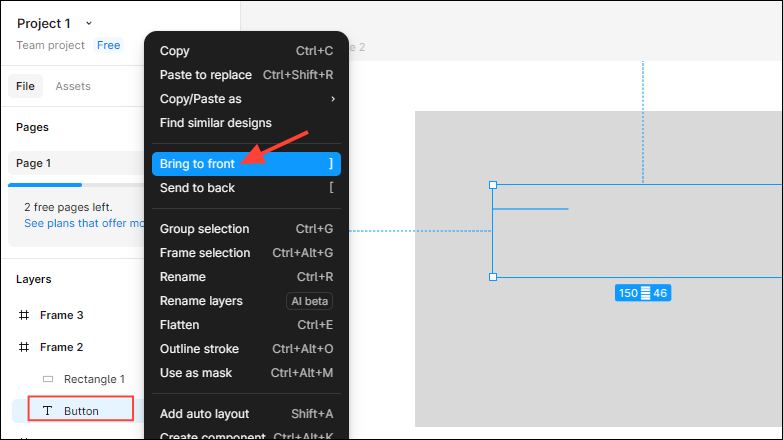
- When you create a rectangle, it will hide the text below. All the objects you create will appear as separate layers on the left. Right-click on the text layer or Ctrl-click on Mac and then click on 'Bring to front' to move it to the top.
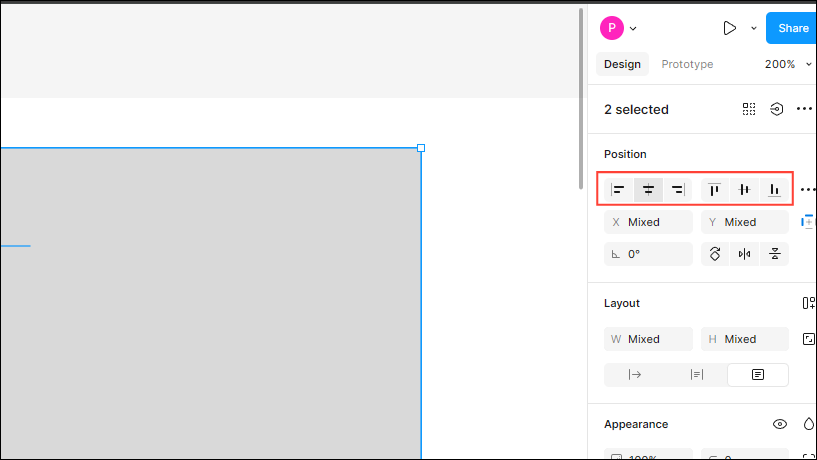
- Figma also lets you align different objects using various 'Align' commands. To do so, drag and select the various objects, like the text box and rectangle after hitting the
VorEscapekey. The Align commands appear on the right; click on any of the options, like 'Align horizontal centers' or 'Align vertical centers'.
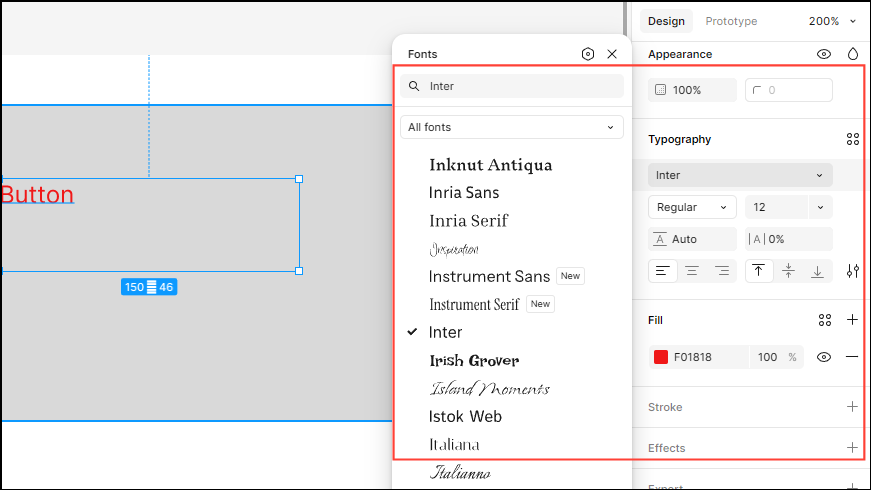
- To change the color of your text, scroll down the Properties panel on the right and click on the color swatch below 'Fill'. Then you can pick any color from the pop-up.
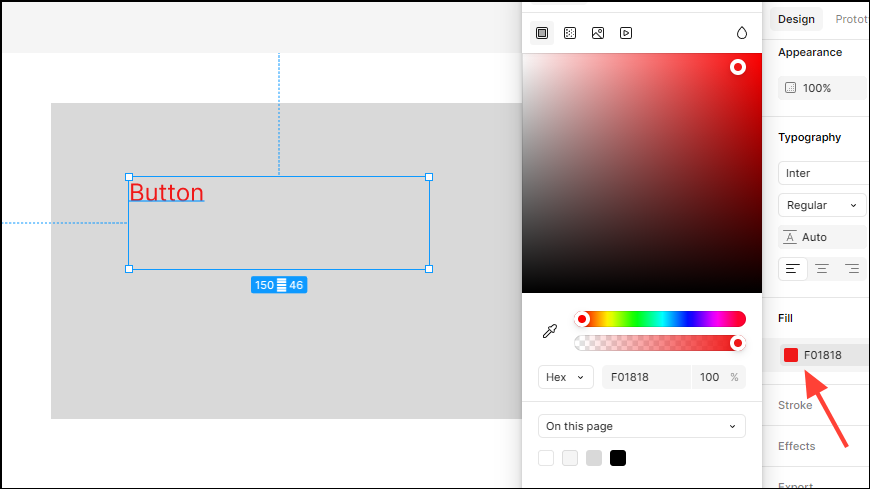
- You can also change the font, Font size, add font effects, and more for the different elements you use in your project from the Properties panel. Once you get familiar with these basics, you can start working on actual projects, like app and website design.
Things to know
- While Figma is an online collaborative design tool, you can use it offline in your browser as well as the desktop app. Any changes you make to your projects while using Figma offline will be stored locally and will take effect when you reconnect to the internet.
- You can expand Figma's capabilities as a design program by using plugins. Figma supports a lot of plugins that you can check out and install from the plugin library
- To collaborate on a project, you can simply share it with others using the 'Share' button. Figma lets you not only copy the link to the project, but even share prototype links, and Dev Mode links, and publish your project to the community.
- You can find several projects, and interact and learn from other Figma users from the Figma community. Community designs are freely available for all users to check out and you can also get other resources, like libraries, plugins, icon sets, and more.