
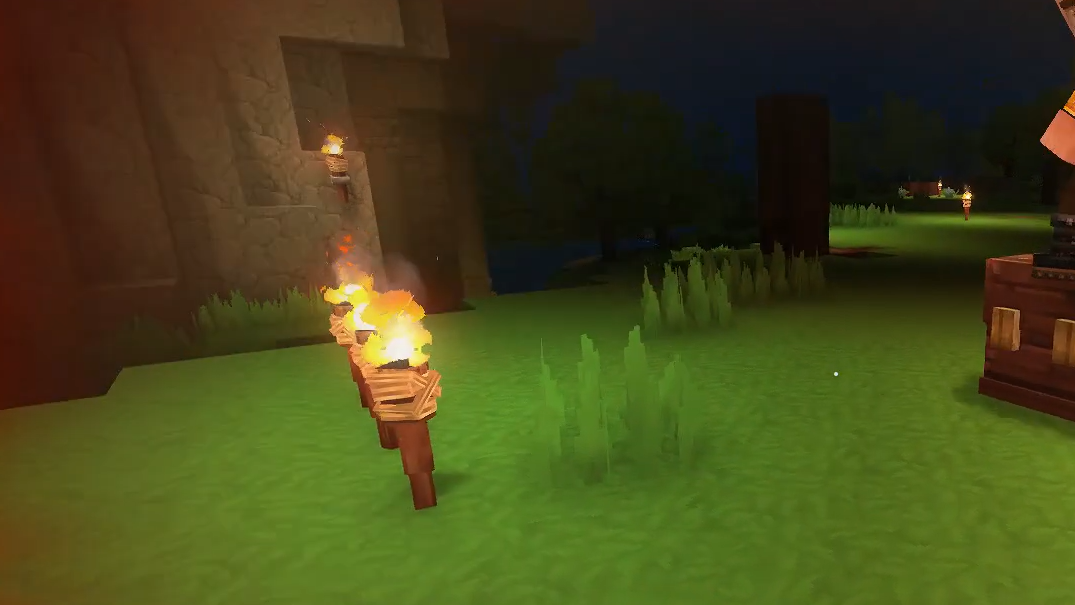
Nightfall in Hytale comes quickly. The moment you leave the safety of your spawn and start dipping into caves, a reliable light source stops being cosmetic and becomes basic survival gear. Torches are the first, cheapest answer to that problem.
Hytale leans on materials you can grab immediately in Zone 1, so you are not stuck hunting for coal before you can see anything. Crude Torches use plant fiber, tree sap, and sticks, and you can put them together directly from your inventory with Pocket Crafting.
Hytale torch types and basic behavior
Torches in Hytale are simple items with one job: emit light when they are held or placed. Wood torches are the early-game option, crafted entirely from basic natural resources.
Once crafted, a torch works in three main ways:
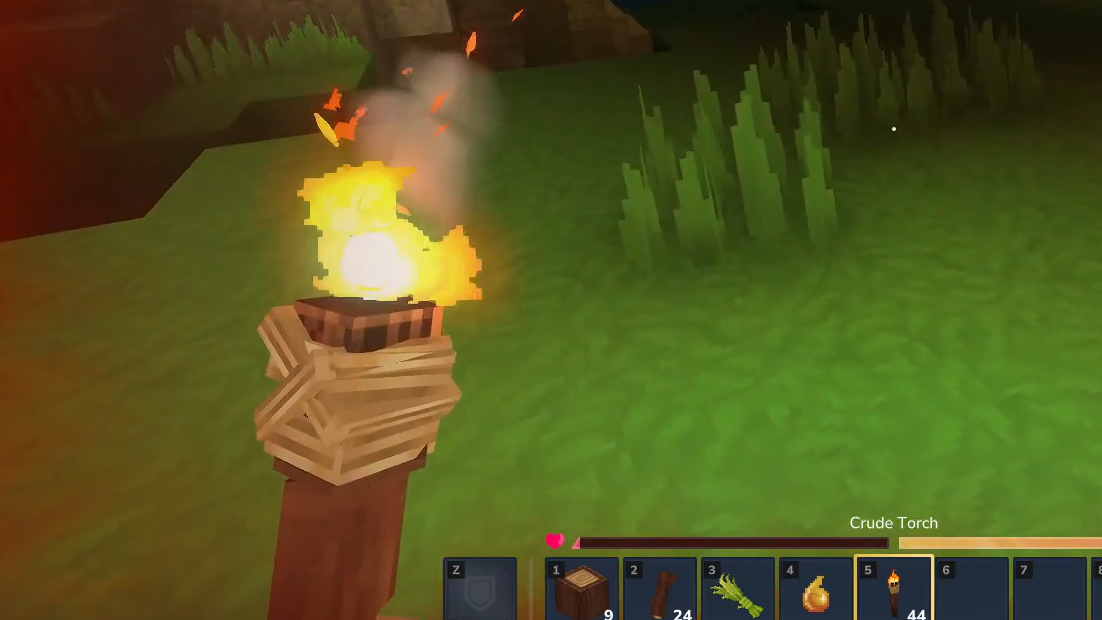
- Held in hand – equip a torch in a hotbar slot and select it to light the area immediately around your character.
- Placed in the world – place torches on the ground or mount them on walls to create semi-permanent light in bases, tunnels, and landmarks.
- Toggled on and off – interact with a placed torch using the default F key to switch it between lit and unlit states.
That combination makes torches useful both as a mobile lantern and as a way to mark where you have been while you explore.
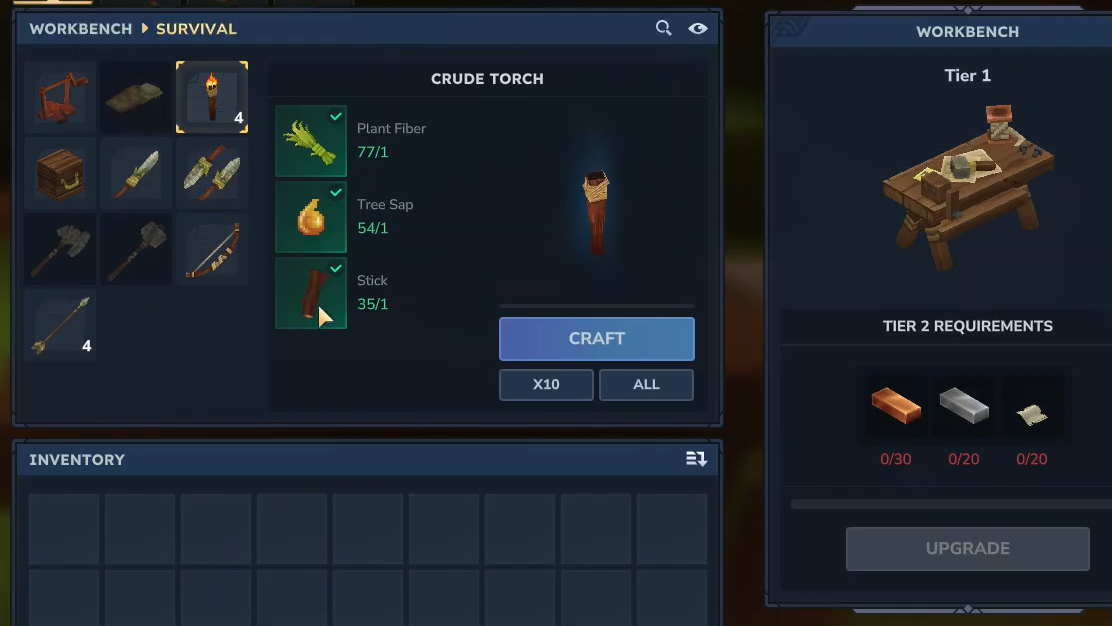
Crude Torch recipe and required materials
The first torch you can make in Survival mode is the Crude Torch, crafted directly from your Pocket Crafting menu. The recipe is intentionally light on requirements so you can assemble it on day one.
| Item | Quantity | How to obtain |
|---|---|---|
| Plant Fiber | 1 | Break bushes, shrubs, or tall grass in Zone 1. |
| Tree Sap | 1 | Chop down trees and loot the yellow/orange drops on the ground. |
| Stick | 1 | Pick up fallen branches from the forest floor. |
One set of these three ingredients produces 4 Crude Torches, which is an efficient trade early on. You get enough coverage for a first night outside and a short cave push without needing a huge stockpile of resources.
Prepare the tools you need for torch materials
Two of the three torch ingredients can be gathered with bare hands, but tree sap comes from chopping trees efficiently. That makes a basic toolset your real starting point.
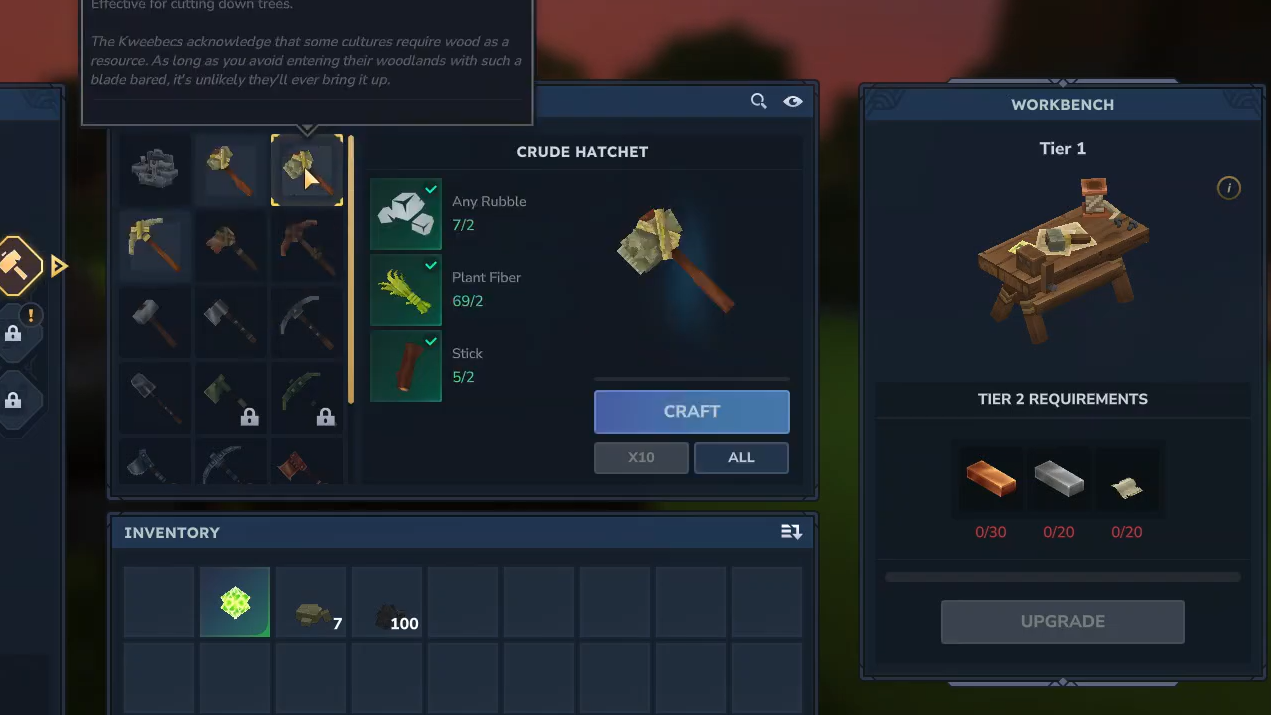
Crude Hatchet recipe (Workbench or Pocket Crafting, where applicable):
| Item | Quantity |
|---|---|
| Rubble (any) | 2 |
| Plant Fiber | 2 |
| Sticks | 2 |
The Crude Hatchet dramatically speeds up chopping trees, which in turn increases how much tree sap and wood you can pick up before nightfall.
Step 1: Craft a Crude Hatchet from the relevant recipe in your early crafting menu. Make sure you have rubble, extra plant fiber, and sticks before you start.
Step 2: Equip the hatchet on your hotbar and chop nearby trees around your spawn until you have both wood and visible tree sap drops.
Gathering plant fiber, tree sap, and sticks
Once you have a basic tool, you can run a quick material route in Zone 1 to collect enough components for several batches of torches.
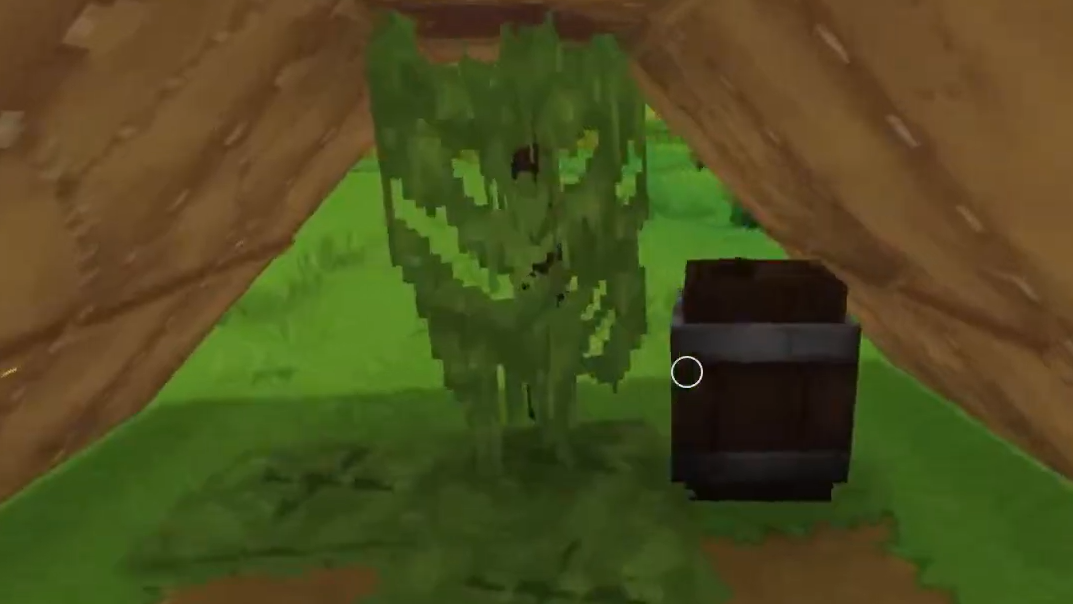
Step 1: For Plant Fiber, walk through areas with bushes, shrubs, and tall grass and break the foliage. You can punch them or use the Crude Hatchet; either way, the vegetation will drop plant fiber into the world for pickup.
Step 2: For Tree Sap, chop full trees using the Crude Hatchet. When the logs break, look for distinct yellow or orange droplets on the ground. These are separate from standard wood logs and need to be collected manually.
Step 3: For Sticks, scan the forest floor for fallen branches. Move close and press F to collect them directly into your inventory rather than breaking anything.
A reasonable early target is enough material for at least eight to twelve torches. That means 2–3 plant fibers, 2–3 tree sap, and 2–3 sticks as a starting baseline, which gives you 8–12 Crude Torches.
Crafting Crude Torches with Pocket Crafting
Crude Torches are made from your inventory Pocket Crafting menu, so you do not need a Workbench for this step. That is what makes them ideal for immediate, on-the-move lighting.
Step 1: Press TAB to open your inventory. Verify that at least one plant fiber, one tree sap, and one stick are visible in your inventory slots.
Step 2: Look at the Pocket Crafting panel in the same screen and locate the Crude Torch entry. The UI will show the recipe and how many times you can currently craft it with the materials you hold.
Step 3: Select the Crude Torch recipe and press the Craft button. One craft action consumes 1 plant fiber, 1 tree sap, and 1 stick and outputs 4 Crude Torches to your inventory.
Repeat the craft while you have spare materials. Torches stack, so it is practical to top up once you have enough sap and sticks from a logging run.
Making torches part of your early survival loop
Torches are more than a one-off craft; they define how you move through Hytale’s early zones, especially in caves and dense forests.
There is a wider Pocket Crafting ecosystem around them that shapes your first in-game day. Alongside Crude Torches, the Pocket Crafting menu can also assemble:
| Item | Key materials | Role in early survival |
|---|---|---|
| Campfire | 4 Sticks, 2 Rubble (any) | Static light and cooking point near your base or first shelter. |
| Crude Bedroll | 3 Plant Fiber, 2 Light Hide | Sleep and respawn convenience, often placed near lit areas. |
| Wooden Chest | 10 Tree Trunks (any) | Storage for spare torches, sap, and exploration gear. |
| Workbench | 4 Tree Trunks (any), 4 Stone (any) | Unlocks more advanced tools that feed resource gathering. |
Crafting torches fits naturally into a cycle where you gather wood and stone for a Workbench, sticks and rubble for a Campfire, and plant fibers for a Bedroll, all while securing enough sap for steady lighting.
How to place and toggle torches
Once you have a stack of torches, using them effectively is mostly about placement and simple controls.
Step 1: Drag a stack of torches into your hotbar and select that slot. Your character will show a torch ready in-hand.
Step 2: To place a torch, aim at a suitable block on the ground or a wall and use the standard place/interact input. The game allows both floor and wall placement, which is helpful for narrow tunnels or vertical shafts.
Step 3: To toggle a placed torch, walk up to it and press F (by default). The torch will switch between emitting light and being dark, while remaining in the world either way.
Because torches can be switched off without being destroyed, you can leave them in place as visual markers even when you do not need the light. That is useful for pathfinding in branching cave systems or large surface builds.
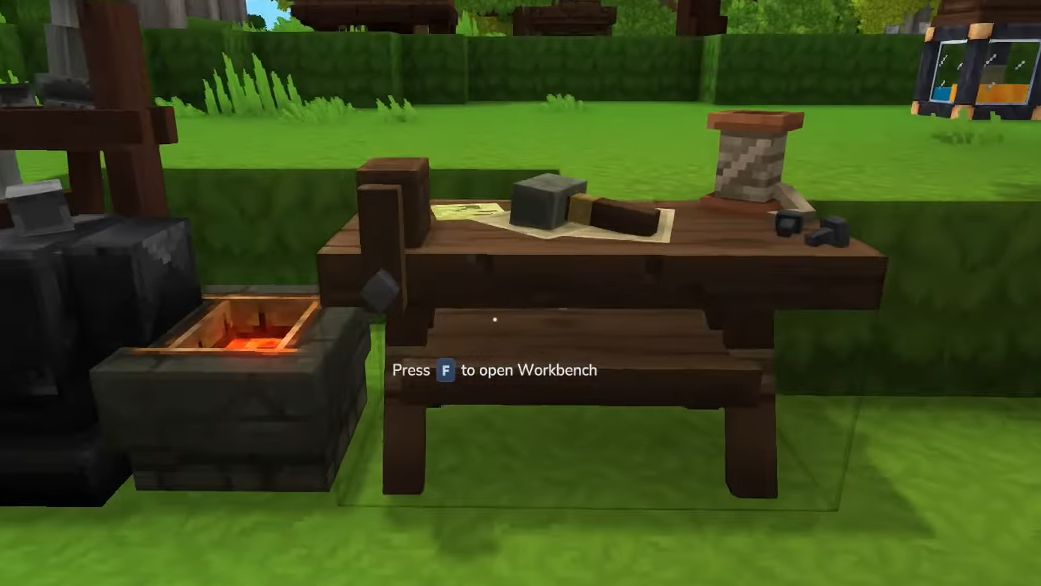
Using a Workbench to support long-term lighting
Torches are crafted from the Pocket Crafting menu, but the resources that feed into them scale up once you establish a Workbench. The Workbench itself is also a Pocket Crafting recipe.
Workbench recipe (Pocket Crafting):
| Item | Quantity |
|---|---|
| Tree Trunk (any) | 4 |
| Stone (any) | 4 |
Step 1: Gather enough tree trunks with your Crude Hatchet and mine stone with a basic pickaxe once you have one.
Step 2: Craft a Workbench from your Pocket Crafting menu, place it in a safe location, and interact with it to open its interface.
The Workbench opens up better tools such as Copper and Iron hatchets and pickaxes. Those tools pay off in faster logging and mining, which in practice means more tree sap and structural materials in less time. Even though the torch recipe itself does not change, your ability to maintain large, well-lit bases improves significantly with better tools.
Lighting strategy for exploration and caves
Torches become a kind of breadcrumb system when you move into caves or away from familiar landmarks. A few simple patterns make them more useful than simply spamming light on every surface.
Use them as:
- Path markers – place torches only on the right-hand wall as you enter a cave. Turning around and following torches on your left brings you back to the entrance.
- Room identifiers – cluster multiple torches at key intersections or around resource-rich nodes to mark them for later runs.
- Base perimeters – ring your first shelter or camp with torches so the safe area is visible from a distance, even in dense foliage.
Because you can toggle torches off, you can preserve the physical marker without the active light if you want a darker atmosphere or need to reduce visual noise in built-up areas.
Once you have a Crude Hatchet and a pocket full of plant fiber, sap, and sticks, torches stop being a scarce luxury and become a tool you can use liberally. That early move from darkness to controlled light is one of the main turning points in Hytale’s opening hours, and it all starts with understanding how simple Crude Torch recipes fit into your broader crafting and exploration loop.