
“GPU Crash dump Triggered,” random freezes, and LowLevelFatalError ... DecompressShaderWithOodleAndExtraLogging are the most common Mafia: The Old Country PC issues reported right now, often during cutscenes or shortly after shader compilation. The fixes below consolidate 2K’s guidance with solutions players have confirmed to work on RTX 40/50-series and modern AMD/Intel CPUs.
Start with graphics stack changes that remove known triggers (NVIDIA Smooth Motion, Windows HAGS, Frame Generation). If instability persists, move on to driver clean-installs or rollbacks, compatibility adjustments, and platform-specific steps for Intel 13th/14th Gen CPUs. Where appropriate, links point to official support pages.
Method 1: Turn off NVIDIA Smooth Motion and Windows HAGS
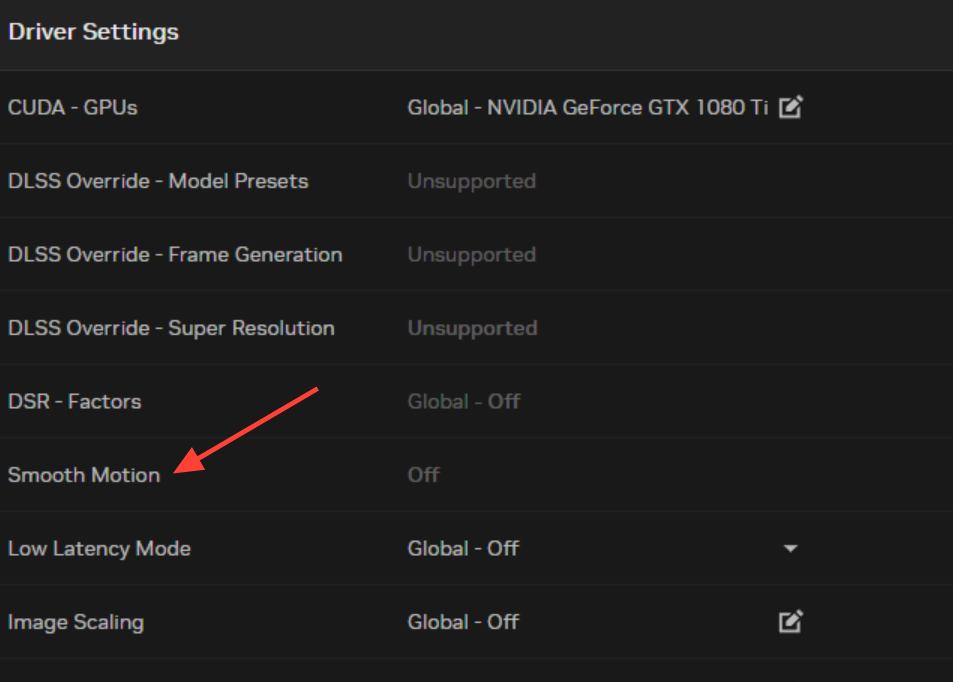
Step 1
Disable NVIDIA Smooth Motion in the NVIDIA App. Open the NVIDIA App, go to graphics or global features, and toggle Smooth Motion to Off. Multiple players reported that crashes stopped entirely once Smooth Motion was disabled; some also set the “DLSS Override” control to “Let the 3D application decide” in the same app as a precaution. You’re on track if Smooth Motion shows Off and no per-app override is forcing it back on.
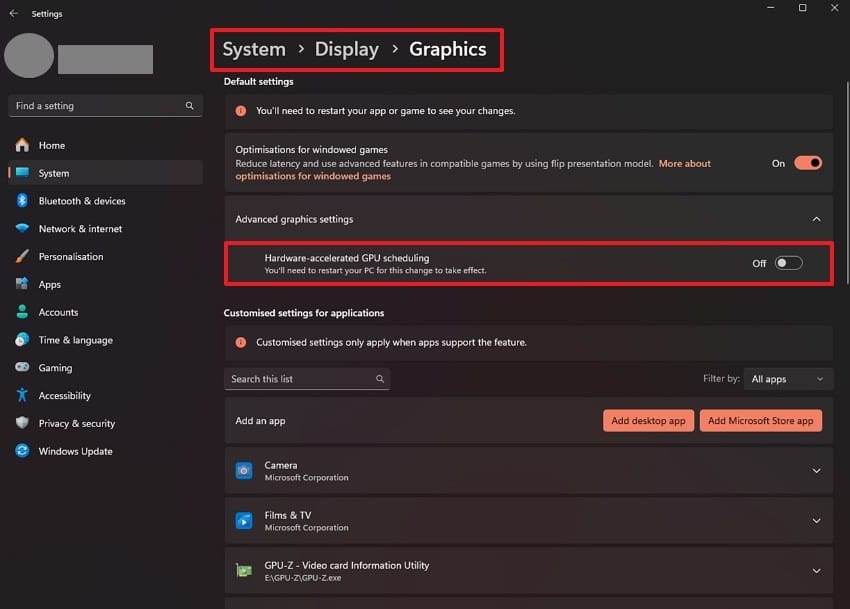
Step 2
Disable Hardware-Accelerated GPU Scheduling (HAGS) in Windows. Go to Settings > System > Display > Graphics > Default graphics settings and set Hardware-accelerated GPU scheduling to Off. Reports indicate HAGS interacts poorly with this game and Smooth Motion; with both off, stability improves in combat, traversal, and cutscenes. You’re on track if the toggle is Off and Windows prompts for a restart.
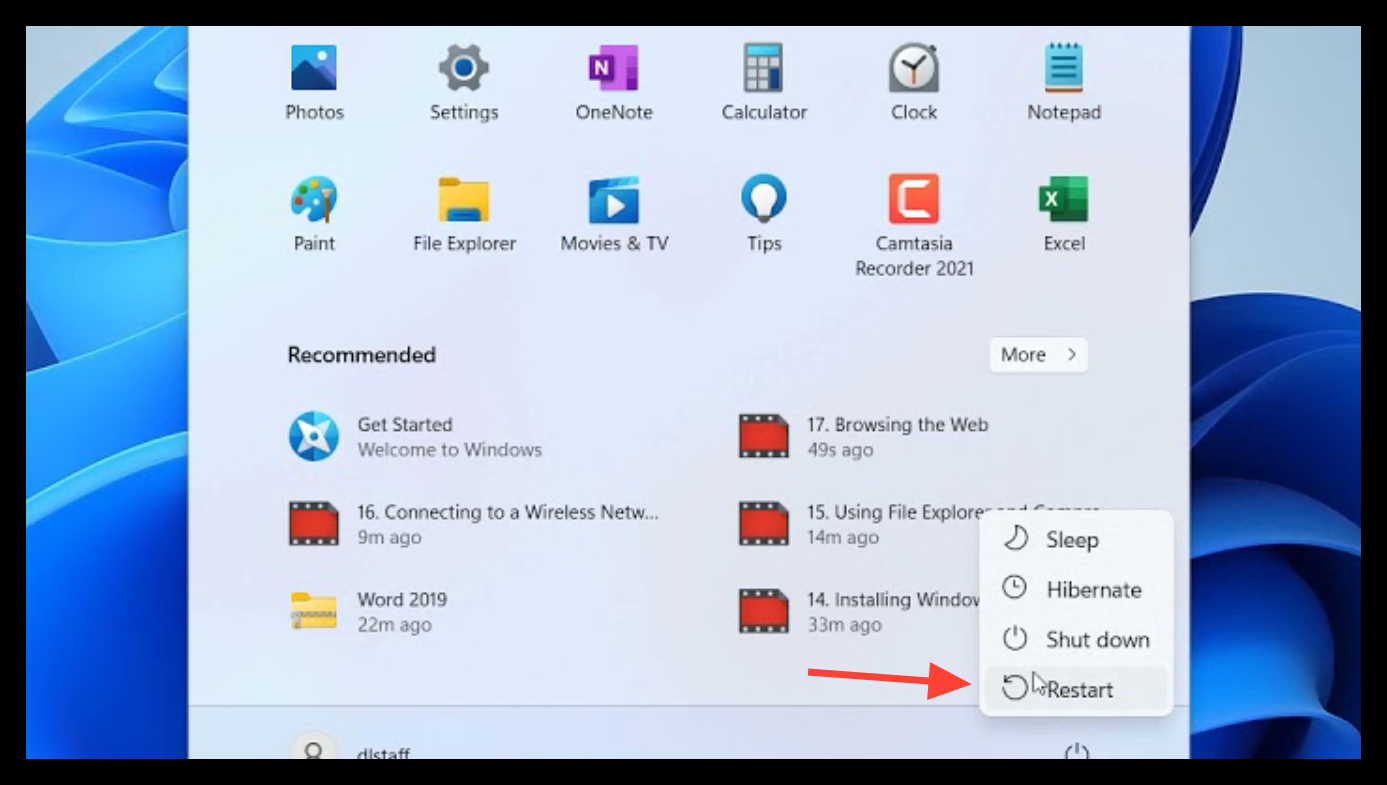
Step 3
Restart Windows to apply the graphics stack changes. HAGS and NVIDIA feature toggles sometimes require a reboot before the driver path and presentation pipeline fully refresh. After reboot, launch the game and try a previously problematic scene (e.g., a cutscene or an area that crashed within 5–10 minutes). You’re on track if you can pass the prior crash point without a GPU crash dump.
Method 2: Disable Frame Generation and use a stable upscaler
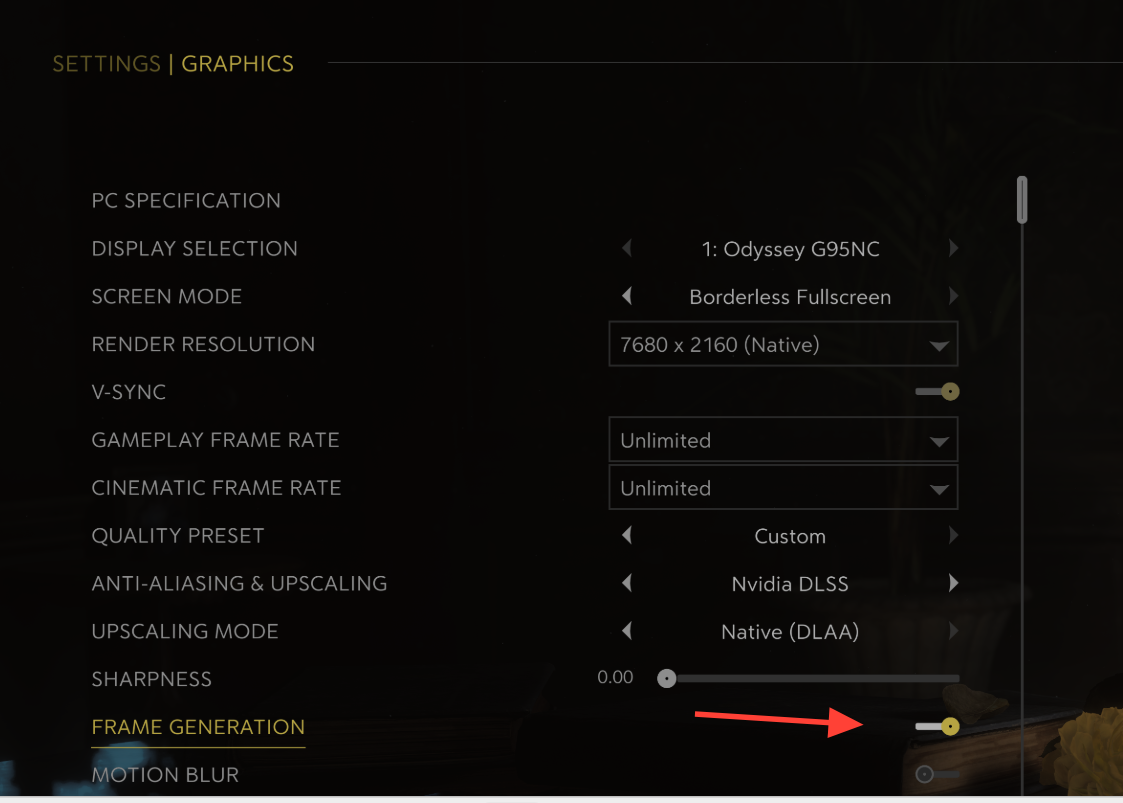
Step 1
Turn off Frame Generation in the in-game Graphics settings. 2K notes this feature can cause cutscene hitching, skips, or instability in the current build. Disabling it reduces intermittent stutter during cinematics and lowers the likelihood of “GPU Crash dump Triggered” during heavy post-processing. You’re on track if Frame Generation shows Off before you return to gameplay.
Step 2
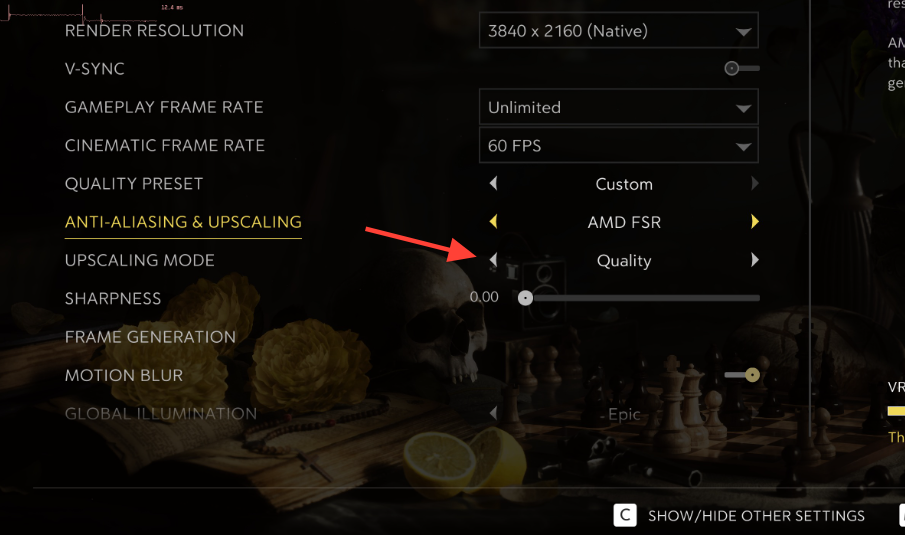
Switch from DLAA (Native) or Unreal TSR to DLSS “Quality” (or your vendor’s equivalent). Several players stopped recurring crashes by changing to DLSS Quality on NVIDIA hardware; others noted better stability after avoiding “Native/DLAA” modes. In Settings > Graphics, set Upscaling to DLSS and Upscaling Mode to Quality. You’re on track if the Graphics menu shows DLSS + Quality before you resume play.
Method 3: Clean‑install a stable GPU driver (or roll back)
Step 1
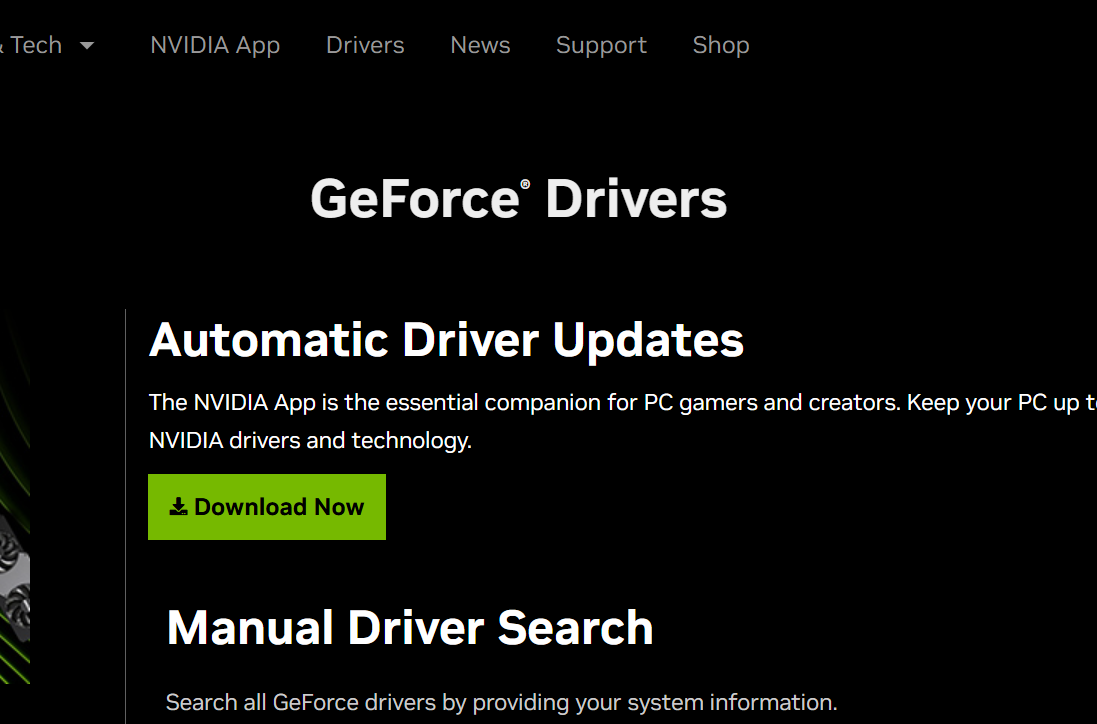
Download the correct, up-to-date GPU driver for your card. Use the vendor pages to get the latest WHQL release (or grab a recent stable version if you plan to roll back): NVIDIA, AMD, Intel. Avoid mixing beta toolchains during troubleshooting. You’re on track if you have the installer for your exact GPU model and OS.
Step 2
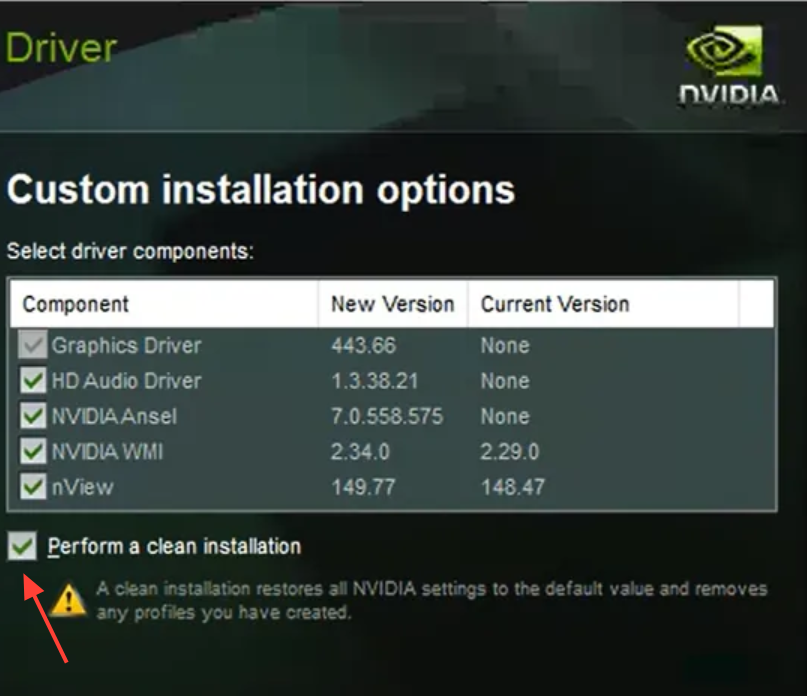
Perform a clean installation of the driver. During setup, choose the advanced or custom option and select “clean install” (wording varies by vendor) to reset profiles and caches. This removes remnants that can cause conflicts with Frame Generation, upscalers, or new game profiles. You’re on track if the installer confirms a fresh driver deployment and prompts to reboot.
Step 3
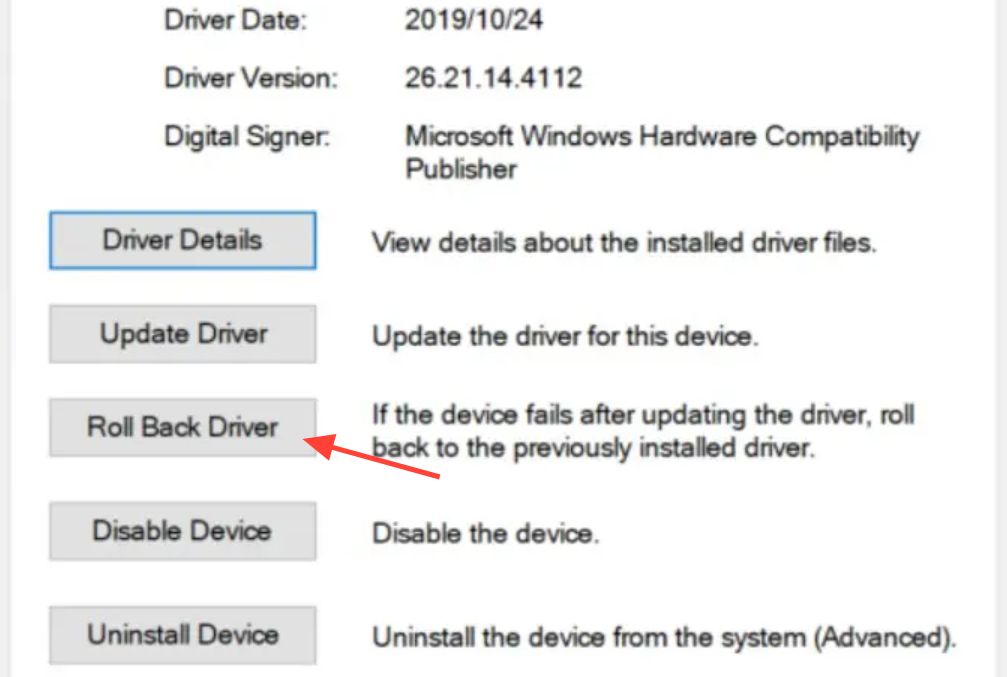
Roll back to a previous WHQL driver if issues persist. 2K Support has indicated that reverting helped some users, which aligns with player reports that an earlier mid‑year driver eliminated the crash loop. Install the prior stable package for your GPU, reboot, and retest the same scene. You’re on track if the crash frequency drops or disappears after the rollback.
Method 4: Run the game as Administrator and use Windows 8 compatibility
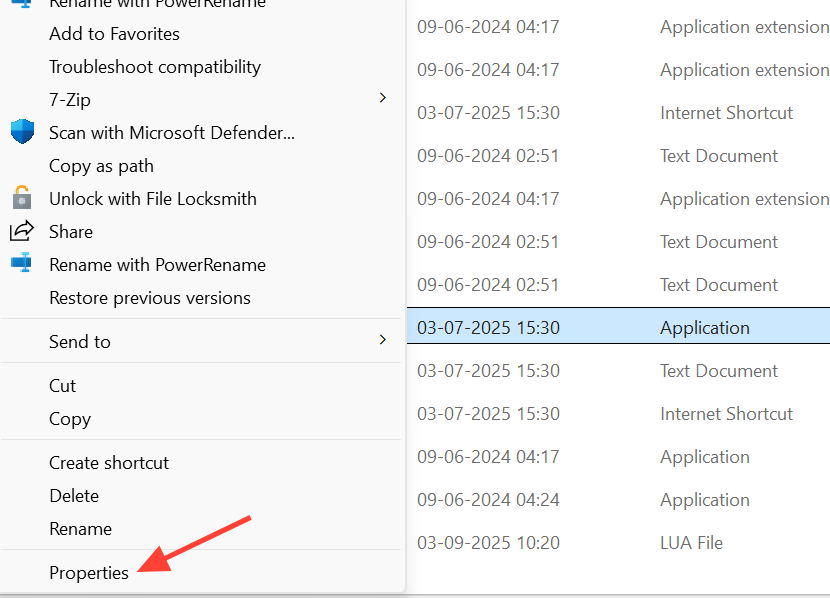
Step
Open file properties for the game executable. In Steam, right‑click the game > Manage > Browse local files, then go to ...\MafiaTheOldCountry\Binaries\Win64\. Right‑click MafiaTheOldCountry.exe and choose Properties. You’re on track if the Properties dialog is open on the Compatibility tab for this file.
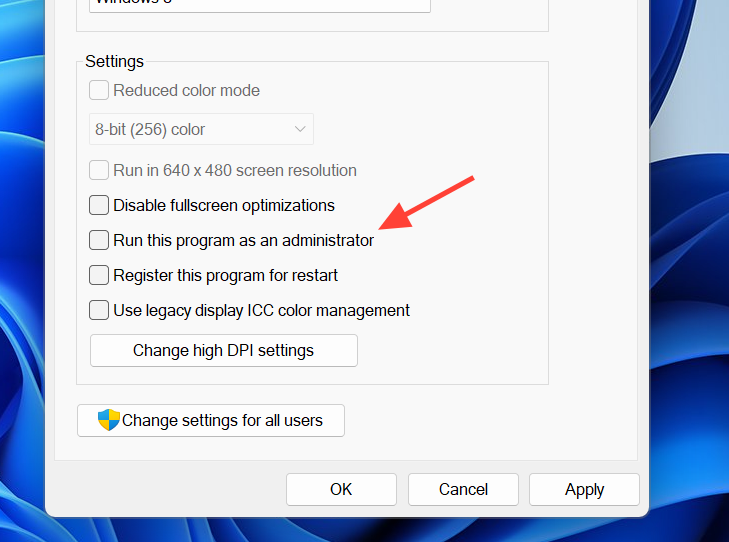
Step 2
Check “Run this program as an administrator.” This elevates I/O and reduces permission-related crashes at startup or during save writes. Several users reported the game ran for hours without crashing after enabling this alone. You’re on track if the checkbox is enabled and applied.
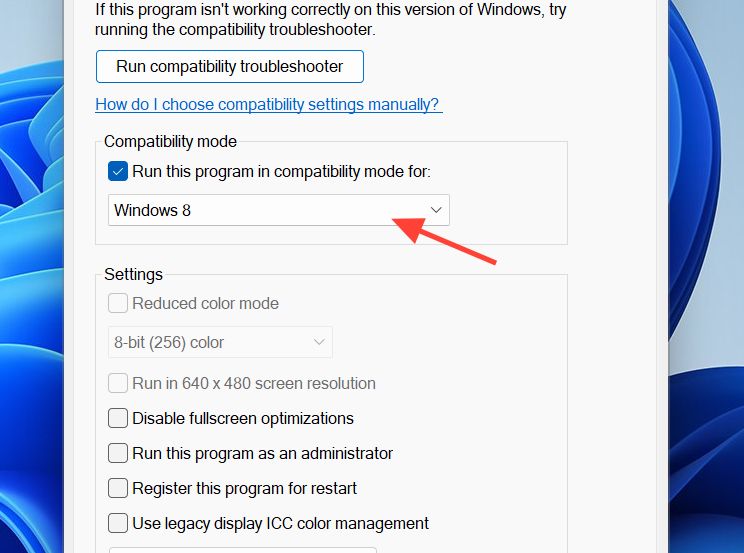
Step 3
Set “Compatibility mode” to Windows 8. Some players saw frequent crashes drop to occasional or disappear with this mode. It can slightly reduce performance on some systems, but it’s useful when stability is the priority. You’re on track if Windows 8 is selected under Compatibility mode.
Method 5: Verify and repair game files in Steam
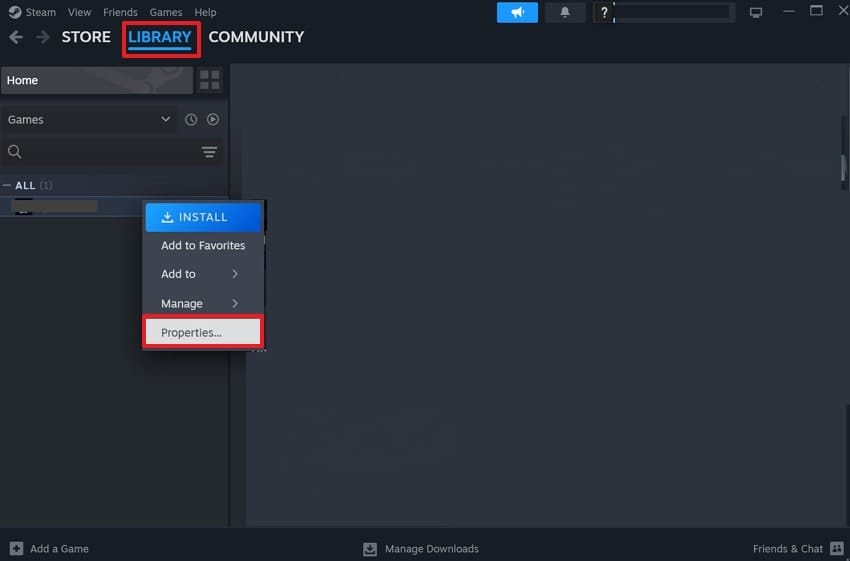
Step 1
Open the game’s Properties in Steam. In your Library, right‑click Mafia: The Old Country and select Properties…. This provides access to file integrity tools that fix missing or corrupted assets that often crash during area loads or cutscenes. You’re on track if the Properties window is open with side tabs visible.
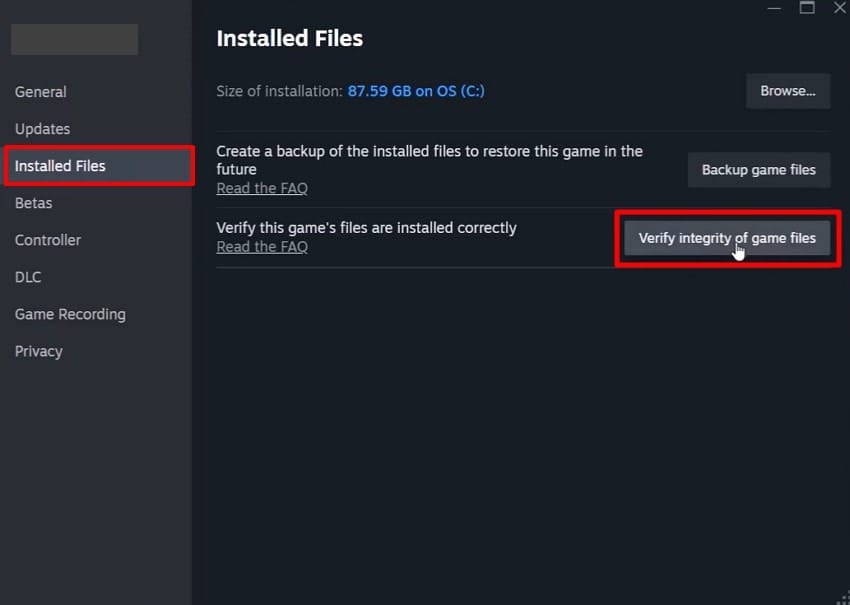
Step 2
Run “Verify integrity of game files.” Go to Installed Files and click Verify integrity. Steam will replace missing or damaged files, resolving crashes tied to bad shaders, archives, or cinematics. You’re on track if Steam completes a scan and shows files validated or reacquired.
Method 6: Fix first‑launch validation and one‑time black screen
Step 1
Ensure Steam is online for your very first launch. 2K states the first run requires online validation and patching; later sessions can be offline. Staying online for the first start prevents a stall at the splash screen and avoids repeated activation checks. You’re on track if the Steam client shows you as Online before launching.
Step 2
Temporarily disable network‑restricting tools (VPNs, strict firewalls) during that first start. These can block entitlement checks or patch delivery and present as a non‑responsive window. Reactivate them after you reach the main menu once. You’re on track if the game proceeds to the title screen without stalling.
Step 3
If you see a black screen on the first launch, wait 12–15 seconds. 2K notes this is a one‑time occurrence while the game initializes. Don’t alt‑tab or kill the process during this window. You’re on track if video appears after a short delay and remains stable thereafter.
Method 7: Address Intel 13th/14th Gen CPU instability and Oodle errors
Step 1
Review Intel’s guidance on 13th/14th Gen stability under load. Intel acknowledges intermittent instability on affected CPUs, which can surface as UE crashes or Oodle decompression failures during shader work. Follow their recommendations (microcode/BIOS updates and vendor guidance) before retesting. You’re on track if your motherboard is on current firmware and CPU defaults are applied.
Step 2
Test at stock CPU settings (no overclock or undervolt; consider disabling XMP). The Oodle decompression error text explicitly suggests CPU instability. Load motherboard defaults, save, reboot, and retest the same sequence that previously crashed. You’re on track if the error disappears or takes significantly longer to reproduce.
Method 8: Triage display features and heavy sequences (HDR, frame cap, efficiency mode)
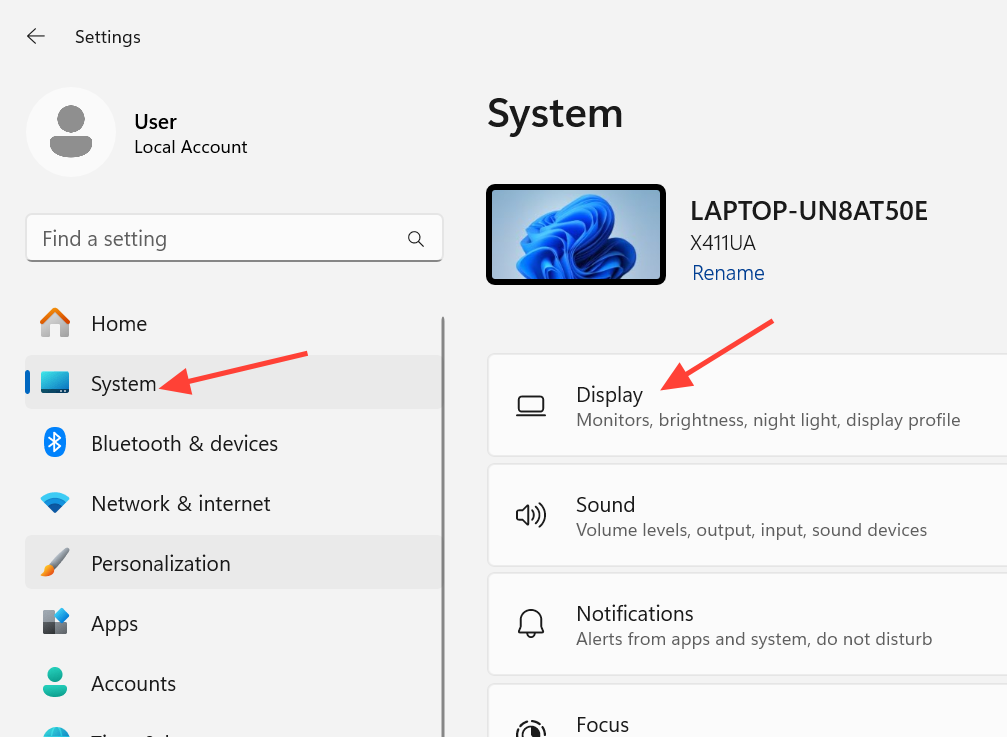
Step 1
Disable HDR at the OS level. Go to Settings > System > Display and toggle Use HDR Off for the affected monitor, then restart the game. Several players reported artifacts and crashes disappearing with HDR off. You’re on track if HDR is Off and the crash no longer occurs in the same scene.
Step 2
Set a 60 fps frame cap in the game’s Graphics menu. Heavy scenes and shader rewrites can spike GPU power/temperature; a cap smooths workloads and reduces transient failures that present as UE GPU dumps. You’re on track if the in‑game overlay or your monitor’s OSD shows a stable 60 fps without large spikes.
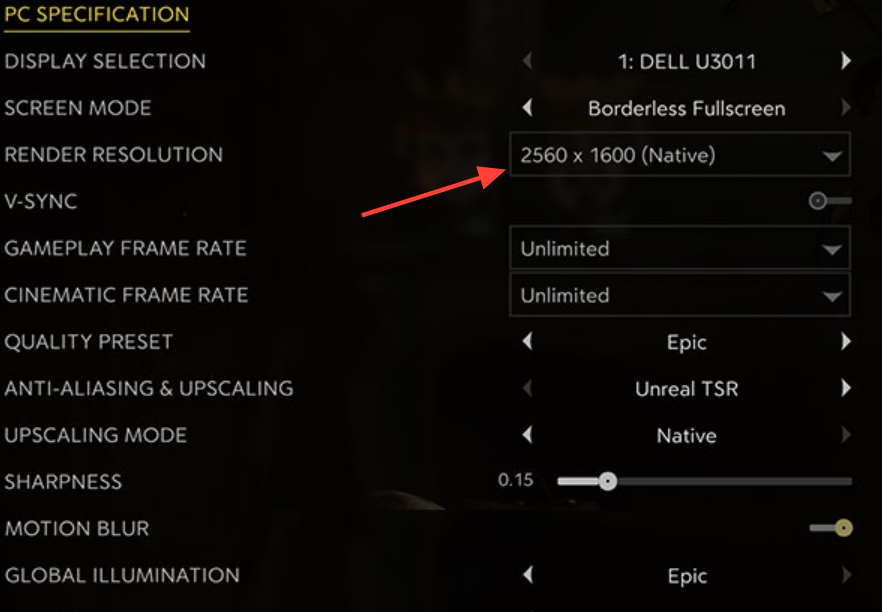
Step 3
Lower Render Resolution one notch (e.g., to 75–80%). 2K suggests adjusting Render Resolution to reduce GPU load without heavily impacting clarity, particularly at 4K. This helps avoid mid‑scene hangs when new assets stream in. You’re on track if GPU utilization drops and areas that previously stuttered now maintain frame pacing.
Step 4
Optionally run the game process in Windows “Efficiency mode.” Launch the game, open Task Manager > Details, right‑click the process, and choose Efficiency mode. Some users report hours of crash‑free play after enabling it, likely due to steadier CPU scheduling. You’re on track if Task Manager shows the process tagged as Efficiency mode.
Method 9: Expand NVIDIA shader cache capacity
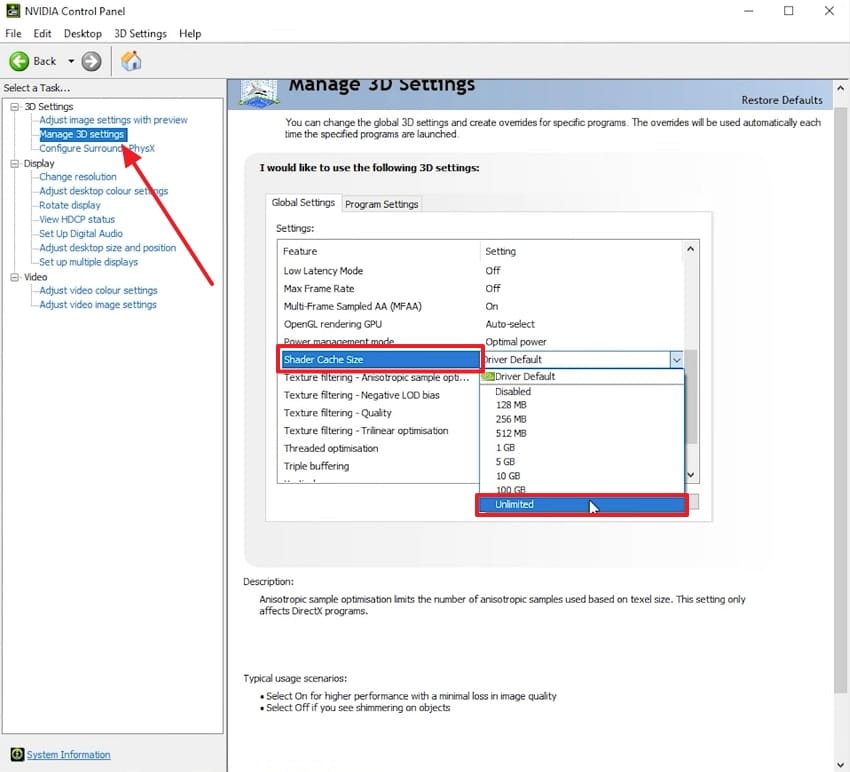
Step 1
Set Shader Cache Size to “Unlimited” in NVIDIA Control Panel. Open the Control Panel > Manage 3D settings > Global, then change Shader Cache Size to Unlimited. This reduces shader re‑compiles across scenes and helps prevent stalls that can escalate into crashes. You’re on track if the setting persists after Apply and a quick reboot.
Method 10: Capture diagnostics and contact 2K Support
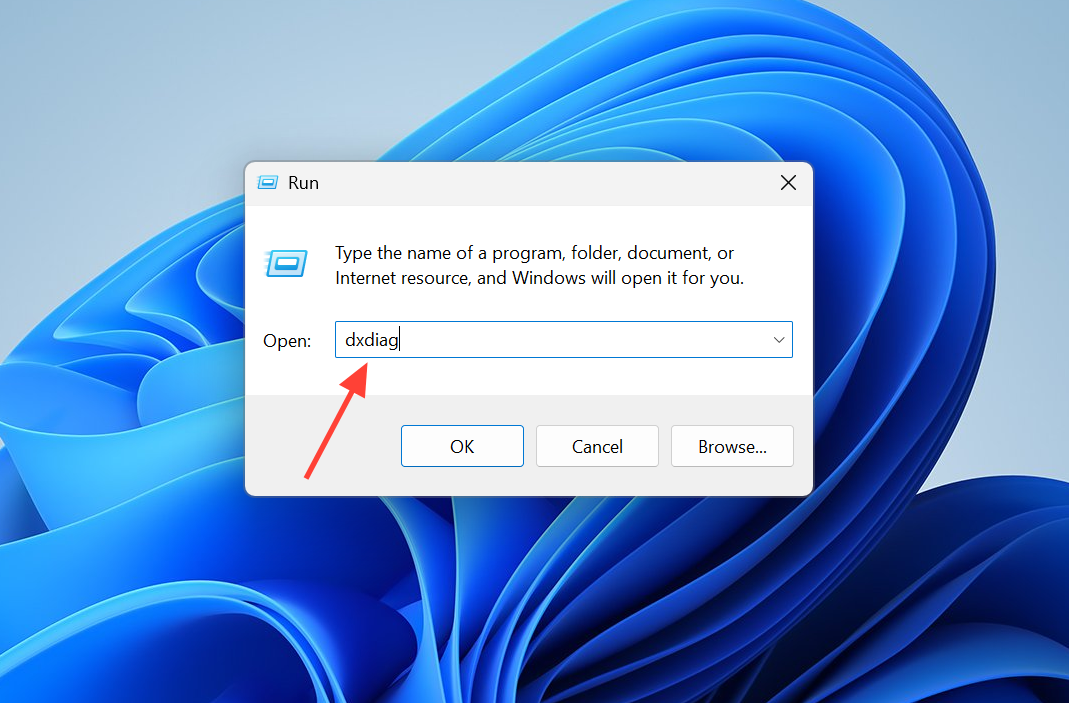
Step 1
Generate a DxDiag report to include with your ticket. Press Win then type dxdiag and run the command below to create a text file on your desktop. This captures driver versions, crash flags, and platform details that speed up triage.
// Run from Start > Run or a terminaldxdiag /64bit /t %USERPROFILE%\Desktop\DxDiag.txt
Step 2
Submit a support ticket to 2K with your DxDiag and crash details. Include your GPU/CPU/OS, driver version, whether Frame Generation/Smooth Motion/HAGS are off, and the exact error text (e.g., “GPU Crash dump Triggered,” “kernel32,” “ntdll,” or Oodle decompression). This ensures your case contributes to active investigations and hotfix targeting.
If you still see frequent crashes after completing the driver and settings steps, retest by reversing only one change at a time to pinpoint the trigger. This makes it easier to keep performance gains without reintroducing instability.